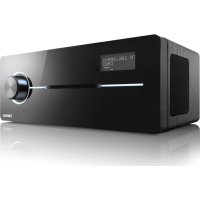
DR88 BT - Hi-fi system LENCO - Free user manual and instructions
Find the device manual for free DR88 BT LENCO in PDF.


| Product type | Hi-fi system |
| Brand | Lenco |
| Model | DR88 BT |
| Dimensions (W x H x D) | 351 x 136 x 214 mm |
| Weight | 3.3 kg |
| Main power supply | DC 18V / 3A mains adapter (input 100-240V AC) |
| Clock backup batteries | 2 AAA batteries (not included) |
| Remote control | CR2025 lithium battery included |
| Speaker power | 2 x 10 W (max.) + subwoofer 25 W (max.) |
| Power consumption | 1 W standby, 54 W max. |
| Disc player | CD, CD-R, CD-RW (Audio and MP3) |
| Radio | DAB / DAB+ and FM with RDS |
| Wireless connectivity | Bluetooth with NFC |
| Audio inputs | AUX-IN (3.5 mm), LINE-IN 1 and 2 (RCA) |
| Display | Backlit LCD |
| Additional functions | Clock, sleep timer, bass/treble settings, programmed playback, ID3, RDS |
| Operating temperature | 0 °C to +45 °C |
| Maintenance | Clean with a soft dry cloth; clean discs from center to edge |
| Safety | Do not expose to water or heat; do not open the casing (laser radiation); use the supplied adapter |
| Warranty | In accordance with European laws, support via dealer |
| Customer service | www.lenco.com, telephone support (see manual) |
Frequently Asked Questions - DR88 BT LENCO
User questions about DR88 BT LENCO
0 question about this device. Answer the ones you know or ask your own.
Ask a new question about this device
Download the instructions for your Hi-fi system in PDF format for free! Find your manual DR88 BT - LENCO and take your electronic device back in hand. On this page are published all the documents necessary for the use of your device. DR88 BT by LENCO.
USER MANUAL DR88 BT LENCO
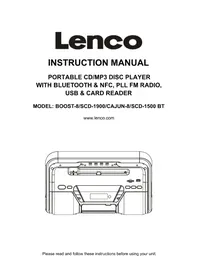
2.1 Audio system with Bluetooth, DAB+/NFC/CD
DR-88 BT
natural_image
Simple line drawing of a device with a rectangular element and a circular button, labeled 'Lenco' at the bottom (no text or symbols on the diagram itself)Instruction Manual
For information and support www.lenco.eu
Important Safety Instructions
When used in the directed manner, this unit has been designed and manufactured to ensure your personal safety. However, improper use can result in potential electrical shock or fire hazards. Please read all safety and operating instructions carefully before installation and use, and keep these instructions handy for future reference. Take special note of all warnings listed in these instructions and on the unit.
1. Water and Moisture
The unit should not be used near water. For example: near a bathtub, washbowl, kitchen sink, laundry tub, swimming pool or in a set basement.
2. Ventilation
The unit should be situated so that its location or position does not interfere with its proper ventilation. For example, it should not be situated on a bed, sofa, rug or similar surface that may block the ventilation openings. The ventilation should not be impeded by covering the ventilation openings with items, such as newspapers, table-cloths, curtains, etc. Also, it should not be placed in a built-in installation, such as a bookcase or cabinet, which may impede the flow of air through the ventilation openings.
3. Heat & Flame
The unit should be situated away from heat sources such as radiators, heat registers, stoves or other appliances (including amplifiers) that produce heat. No naked flame sources, such as lighted candles, should be placed on the apparatus.
4. Power Source
The unit should be connected to a power supply only of the type described in the operating instructions or as marked on the appliance.
Where the power adaptor is used as the disconnect device, the disconnect device shall remain readily operable.
5. Power Adaptor Wire Protection
The power adaptor wire should be routed so that they are not likely to be walked on or pinched by items placed upon or against them. It is always best to have a clear area from where the wire exits the unit to where the adaptor plugged into an AC outlet.
6. Cleaning
The unit should be cleaned only as recommended. See the section “Care and Maintenance” of this manual for cleaning instructions.
7. Object and Liquid Entry
Care should be taken so that objects do not fall and liquids are not spilled into any openings or vents located on the product. It shall not be exposed to dripping or splashing and that no objects filled with liquids, such as vases, shall be placed on the apparatus.
8. Attachments
Do not use attachments not recommended by the product manufacturer.
9. Lightning and Power Surge Protection
Unplug the unit from the wall outlet and disconnect the periods of time. This will prevent damage to the product due to lightning and power-line surges.
10. Overloading
Do not overload wall outlets, extension cords as this can result in a risk of fire of electric shock.
11. Damage Requiring Service
This unit should be serviced by qualified service personnel when:
A. The power supply cord or plug has been damaged.
B. Objects have fallen into or liquid has been spilled into the enclosure.
C. The unit has been exposed to rain.
D. The unit has been dropped or the enclosure damaged.
E. The unit exhibits a marked change in performance or does not operate normally.
12. Periods of Nonuse
If the unit is to be left unused for an extended period of time, such as a month or longer, the power cord should be unplugged from the unit to prevent damage or corrosion.
13. Servicing
The user should not attempt to service the unit beyond those methods described in the user's operating instructions. Service methods not covered in the operating instructions should be referred to qualified service personnel.
Warnings
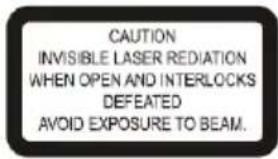
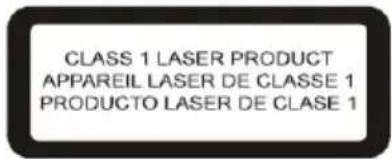
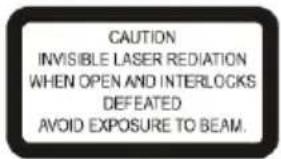
CLASS 1 LASER PRODUCT
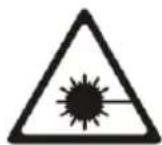
This product contains a low power laser device.
Follow the advice below for safe and appropriate operations.
ON PROTECTION AGAINST LASER ENERGY EXPOSURE
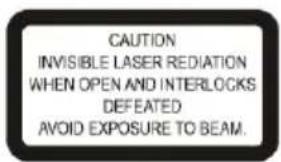
- As the laser beam used in this compact disc player is harmful to the eyes, do not attempt to disassemble the casing.
- Stop operation immediately if any liquid or solid object should fall into the cabinet.
- Do not touch the lens or poke at it. If you do, you may damage the lens and the player may not operate properly.
- Do not put anything in the safety slot. If you do, the laser diode will be ON when the CD door is still open.
- This unit employs a laser. The use of controls or adjustment or performance of procedures other than those specified here may result in exposure to hazardous radiation.
Features
Thank you for purchasing the CD DAB+ Radio with Bluetooth music system.
This model incorporates following features:
- Stream and playback Apple device (iPad /iPhone/iPod Touch) and Android OS smart phone songs through Bluetooth technology.
- NFC (Near Field Communication) function for easy Bluetooth connection
- CD player with playback of Audio CDs and MP3 songs
- ID3 technology displaying song title
- DAB / DAB+ receiver
- FM receiver with digital read out on LCD
- RDS function
- LCD Clock
- Sleep timer function
- LCD display with back-light
- Three different Audio inputs (LINE-IN / AUX-IN) for connecting external audio source/player.
- Built-in 2 High Fidelity Speakers
- Build-in Subwoofer for heavy bass effect
- With Bass and Treble settings
iPhone, iPad and iPod touch are trademarks of Apple Inc., registered in the U.S. and other countries. iPhone, iPad and iPod touch are not included.
Installation
Clock setting battery back-up
A backup battery compartment located at rear of the unit.
(1) Open the clock battery compartment lid.
(2) Follow the polarity diagram shown inside the compartment and install 2 x AAA (UM-4) batteries (not included).
(3) Close the clock battery compartment lid.
Remote Control
A battery compartment located at bottom of the remote control.
- For the first time usage, remove the insulation tag.
- To replace battery, slide out the battery holder then follow the polarity diagram shown on the holder and install a fresh CR2025 / DC 3V Lithium battery. Insert the battery holder back into the remote control bottom.
Installation
AC-DC Adaptor Connection
The unit can be powered by an external AC-DC Adaptor, required the output DC 18V 3000mA (included).
(1) Firmly and securely plug the adaptor's AC plug into AC main outlet.
(2) Connect the adaptor's DC output plug to the DC-in jack of the unit.
Warnings:
- Batteries shall not be exposed to excessive heat such as sunshine, fire or the like.
- Be sure that the batteries are installed correctly. Wrong polarity may damage the unit.
- Do not mix old and new batteries.
- Do not mix alkaline, standard (carbon-zinc) or rechargeable (nickel-cadmium) batteries.
- Only batteries of the same or equivalent type as recommend are to be used.
- If the unit is not to be used for an extended period of time, remove the battery.
- Do not dispose of batteries in fire, battery may explode or leak.
- Danger of explosion if battery is incorrectly replaced.
Your product contains batteries, which cannot be disposed with normal household waste. Please inform yourself about the local rules on separate collection of batteries because correct disposal helps to prevent negative consequences for the environmental and human health.
Use only the power supply listed in the user instructions.
Power supply adaptor: (For EU only) Manufacturer: KINGWALL Model no.: AS600-180-AE300
Description of Parts
Main Unit

Remote Control
Description of Parts
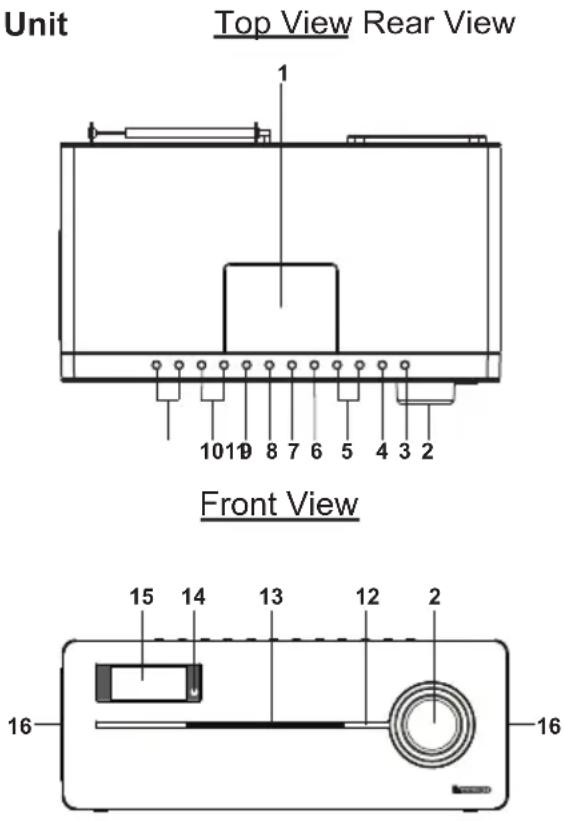
Main Unit
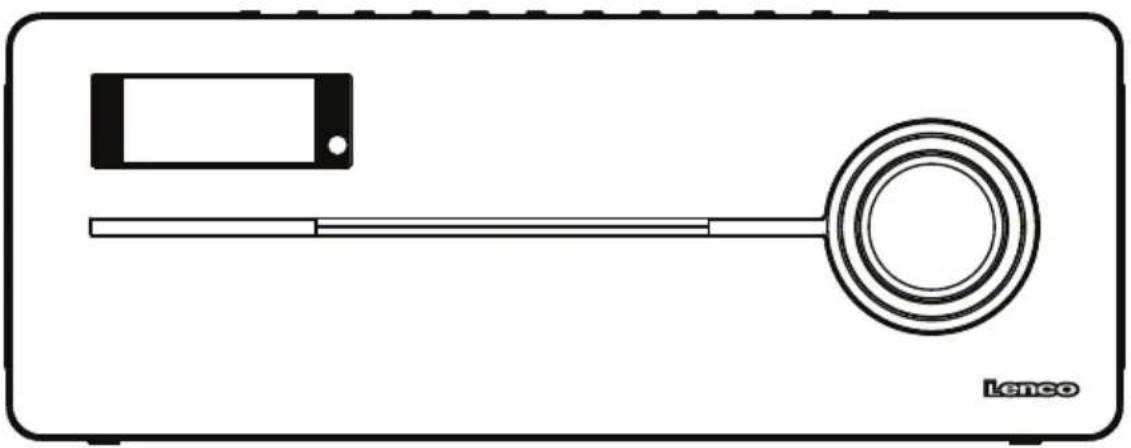
- NFC sensor --- The NFC (Near Field Communication) sensor located at top front of the unit.
- VOLUME knob --- Adjust volume level up or down.
- Button STANDBY ⏻ --- To turn the unit on and off.
- Button OPEN/CLOSE ▲--- Open / Close CD slot.
- Buttons TUN▶/ + and◀/- --- In DAB / FM tuner mode: Tune the FM radio frequency up/down; Select DAB channel.
In DAB / FM menu mode: Acts as navigation button.
In BT (Bluetooth) and CD mode: Press to skip tracks Forward / Backward.
In CD mode: Press and hold to perform high-speed search. - Button ENTER / ▶II --- Confirm DAB / FM radio settings selection; Bluetooth / CD Play/Pause function.
- Button MENU / ■ --- Select DAB and FM radio menu setting mode; Stop CD playback.
- Button LIGHT --- Turn LCD backlight and Power indicator ON / OFF.
- Button FUNCTION --- Select DAB/FM radio/BT(Bluetooth)/ AUX-IN/ LINE-IN1/ LINE-IN 2/ CD mode.
- Buttons TREBLE + / - --- Adjust Treble level.
- Buttons BASS + / - --- Adjust Bass level.
- Power Status indicator
- CD slot
- Remote Control Infrared receiver
- LCD display
- Speakers
- Subwoofer
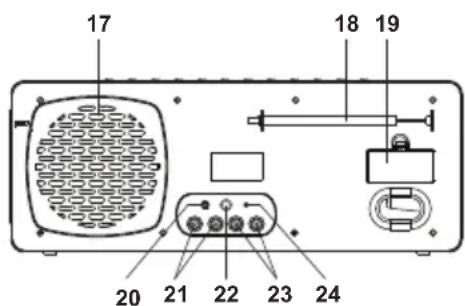
- Rod antenna
- Memory backup battery compartment
- AUX-IN jack --- Auxiliary audio signal input
- LINE-IN 2 jack --- Audio line2 input
- DC-in jack --- For the connection of external DC power supply
- LINE-IN 1 jack --- Audio line1 input
- RESET button --- For resetting the unit
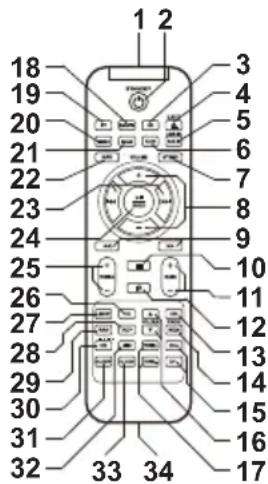
Remote Control
- Infrared Transmitter
- STANDBY ⏻ button
- Button CD --- Select CD mode.
- Button EJECT ▲ --- Open / Close CD slot.
- Button AUX IN / LINE-IN --- Select AUX-IN / LINE-IN 1 / LINE-IN 2 mode.
- Button RDS --- In DAB mode: Display DAB station information.
In FM radio mode: Display FM station RDS information. - Button ST/MO --- Select FM radio Stereo / Mono reception.
- Buttons VOLUME + / - --- Adjust volume level up or down.
- Buttons ◀/ ▶ --- In CD mode: Perform high-speed search.
- Button ■ --- Stop CD playback.
- Buttons BASS + / - --- Adjust Bass level.
- Button ✉ --- Volume mute on/off.
- Button ID3 --- In CD mode: Enable / Disable ID3 function.
- Button MEM / PROG --- Save DAB / FM radio preset station; Set CD program.
- Buttons CH + / - --- In DAB / FM radio mode: Select preset channel.
- Buttons FOLDER ▲ / ▼ --- In CD mode: Select MP3 song directory/folder.
- Buttons TUNE + / - --- In FM tuner mode: Tune the radio frequency up/down.
In FM menu mode: Act as navigation button. - Button DAB / FM --- Select DAB / FM mode.
- Button BT --- Select Bluetooth mode.
- Button MENU --- Select DAB and FM radio menu setting mode.
- Button SCAN --- In FM radio mode: Scan FM radio station.
- Button INFO --- In CD mode: Press to display clock.
- Buttons ◀◀/▶▶ --- In BT (Bluetooth) / CD mode: Skip tracks Backward / Forward.
In DAB menu mode: Act as navigation button. - Button TREBLE +/- --- Adjust Treble level.
-
Button 10+ --- In CD mode: Skip 10 MP3 songs.
-
Button ENTER /▶II --- Confirm DAB / FM settings selection; BT (Bluetooth) / CD Play/Pause function.
Description of Parts
-
Button LIGHT --- Turn the LCD backlight and Power indicator On / Off.
-
Button REP --- In CD mode: Select repeat playback one/all song(s).
-
Button RAN --- In CD mode: Select random playback songs.
-
Button INTRO / HR --- In Standby mode: Set clock hour.
In CD mode: Select INTRO playback.
-
Button SLEEP --- Select the time duration of the sleep timer.
-
Button MIN --- Set clock minute.
-
Button CLOCK --- In Standby mode: Set clock and 12/24 hour format.
-
Battery Compartment --- Located at the rear bottom of the remote control.
Bluetooth Operation
The unit playback mobile device (like, iPad/iPhone/iPod Touch, smart phone and Tablet) music through Bluetooth operation. It also incorporated NFC (Near Field Communication) function for easy connection with a mobile device which also has the NFC function.
Pairing / Connection
(A) NFC Bluetooth pairing / connection
- Press the STANDBY ⏻ button to turn on the unit
- Press the FUNCTION button from the main unit or the BT button from the remote control to select Bluetooth mode. The LCD will display "BT Pairing".
-
Unlock the mobile device (incorporated NFC function) then place it on top of the NFC sensor area.
-
The mobile device will pair and connect with this model automatically.
Note: The Bluetooth device name of this model: Lenco BT-9000
-
After successful connection, the LCD shows "BT LINK".
-
Now you can playback Bluetooth music, see section "Playback Bluetooth music" below.
(B) Manual Bluetooth pairing / connection
- Press the STANDBY ⏻ button to turn on the unit.
- Press the FUNCTION button from the main unit or the BT button from the remote control to select Bluetooth mode. The LCD will display "BT Pairing" and the unit will search nearby Bluetooth device.
- From the mobile device, turn on its Bluetooth function and it will also search for the nearby Bluetooth device as well.
- From the Bluetooth device list of your mobile device, tap on Bluetooth device name "Lenco BT-9000" of this model for the connection.
- Once the mobile device is connected with the unit, the LCD shows "BT LINK".
- Now you can playback Bluetooth music, see section "Playback Bluetooth music" below.
Note:
(a) When the unit is turned on from standby mode, in the Bluetooth mode it will automatically search and connect the device last connected, no need to re-scan and pair.
(b) For connecting other Bluetooth device, in the Bluetooth mode press and hold the BT button from the remote control. The unit will start to search nearby Bluetooth device and the LCD will show "BT Pairing" again. Implement steps (B)-3 to (B)-6 above.
Playback Bluetooth music
-
After Bluetooth communication link is set up, run the music player App from the mobile device then playback the mobile device music.
-
You may adjust both the volume control of your mobile device and the volume control of this unit to find the most desirable volume setting.
-
You may press:
(a) the▶II button to Play / Pause Bluetooth music.
(b) the ◀◀/▶◀ button to skip tracks backward / forward.
Energy Saving Note
In Bluetooth mode, if the Bluetooth communication link disconnected for around 10 minutes, the unit will go into standby mode automatically.
FM Radio Tuner Operation
Antenna
For the best radio reception, fully extend the rod antenna located at rear of the unit.
MENU Option
In the FM radio mode, the unit allows you to select following options.
-
Press the MENU button entering menu mode.
-
Two options, [Scan setting] and [Audio setting] can be set by pressing the ◀◀/▶▶buttons from the main unit or the TUNE +/- button from the remote control.
(a) Whilst [Scan setting] is displayed, press the ENTER button to confirm the selection.
- Then press main unit ◀◀/▶▶I buttons or remote control TUNE +/- buttons to display [All stations] or [Strong stations].
Note:
[All stations] ---- By default FM scan stops at any available station (All stations). This may result in poor quality audio from distant stations.
[Strong stations] ---- FM scan stops only at stations with good signal strength.
- Press the ENTER button to confirm the desired selection when [All stations] or [Strong stations] displayed.
(b) Whilst [Audio setting] displays, press the ENTER button to confirm selection.
- Then press main unit I ◀◀/▶▶1 buttons or remote control TUNE +/- buttons to display [Stereo] or [Forced mono].
Note:
[Stereo] ---- By default, all stereo stations are reproduced in stereo. For weak stations, this may result in poor quality audio. The audio quality can be improved using mono.
[Forced mono] ---- Reproduce mono audio only.
- Press the ENTER button to confirm the desired selection when [Stereo] or [Forced mono] displayed.
- You can press the MENU button to exit menu setting mode at any time.
Auto-scan and store Preset Stations
The unit allows you to store up to 20 FM stations for easy recall at any time.
- Press the STANDBY ⏻ button to turn on the unit, where the power status indicator light on.
- Press the FUNCTION button from the main unit or the DAB/FM button from the remote control to select FM radio mode.
- Press the SCAN button from the remote control until the frequency digits begin to change. The tuner will automatically scan for stations from low to high frequency and then store them in the preset location.
Note: After each auto-scan & store operation, it will overwrite the existing preset stations by overwriting and storing the new stations in their place.
- To recall the preset station, press the CH +/- buttons from the remote control then press the ENTER button to confirm selection.
FM Radio Tuning and manual store Preset Stations
- Press the STANDBY ⏻ button to turn on the unit, where the power status indicator light on.
- Press the FUNCTION button from the main unit or the DAB/FM button from the remote control to select FM radio mode.
FM Radio Tuning
- You can have following ways to tune to a desired station:
(a) Press the ◀◀/▶◀ buttons from the main unit or the TUNE +/- buttons from the remote control with 0.05MHz tuning step and tune to a desired radio station frequency figure.
(b) Press and hold the main unit |◀◀/▶▶| buttons or remote control TUNE +/- buttons and tune to a desired radio station frequency figure then release the button.
(c) For up-scan, press the main unit ▶ button or remote control TUNE + button once then press the SCAN button from the remote control and it will tune to the next higher radio station.
For down-scan, press the main unit ◀ button or remote control TUNE - button once then press the SCAN button from the remote control and it will tune to the next lower radio station.
Save preset station
- Press the MEM button from the remote control. The preset channel number appears on display and blinks.
- To select a desired preset station number, press the CH + / - buttons from the remote control.
Note: Each time the station number changed, it will display the current frequency or "Empty" of that preset station location.
- To confirm preset location, press the ENTER button and "Preset store" displays a while then returns to normal tuner mode. The newly tuned frequency will replace the frequency in the selected preset station location.
- Repeat steps 3 to 6 to store other stations, if apply.
Notes:
- There is a few seconds delay when programming, after this delay time, the unit will automatically switch back to normal tuner mode.
- You can overwrite a preset station by overwriting and storing the new frequency in its place.
FM Radio Tuner Operation
Recalling Preset Station
- Press the CH +/- buttons from the remote control. The preset channel number and frequency appear on display then press the ENTER button to confirm selection.
RDS function
The unit incorporated the RDS functions.
When the received radio station with RDS information, you may press the RDS button repeatedly from the remote control to display the RDS information.
DAB / DAB+ Tuner Operation
The unit is able to receive available DAB and DAB+ radio stations in your area.
Antenna
For the best radio reception, fully extend the rod antenna located at rear of the unit.
MENU Option
In the DAB mode, before listening to a DAB / DAB+ radio station, following section describes options which are available for your selection, if apply.
Navigation button
In the menu setting mode, you can make use of following navigation buttons to implement the option selection.
Button MENU --- Press to enter or exit menu mode.
Buttons|◀◀/▶▶| --- Press to select / display option item.
Button ENTER --- Press to confirm selection.
MENU Options
[Full scan] --- A full scan of DAB/DAB+ radio stations in your area. Once the scan is completed, the radio returns to play the previously-selected station or first station on the station list.
[Manual tune] --- Manual tune to a particular channel/frequency.
[DRC] --- Dynamic range compression (DRC), this function reduces the difference between the loudest and quietest audio being broadcast. Effectively, this makes quiet sounds comparatively louder and loud sounds comparatively quieter.
Note: DRC only works if it is enabled by the broadcaster for a specific station.
[Prune] --- This removes all invalid stations indicated in the station list with a “?” in front of the station name.
[System] --- Factory Reset Y/N option, select "Y" to initiate a factory reset.
Full scan operation
- Press the STANDBY ⏻ button to turn on the unit, where the power status indicator light on.
- Press the FUNCTION button from the main unit or DAB/FM button from the remote control to select DAB radio mode.
- Press the MENU button and the [Full scan] indicator displays.
- Press ENTER button to confirm selection. The unit starts scanning DAB / DAB+ stations around your area and the display will show "Scanning 0". Please wait for the completion of the scanning process.
- Once the scan is completed, the radio returns to play the previously-selected station or first station on the station list.
Manual tune operation
Before beginning a manual tune, you may first want to obtain the available DAB/DAB+ stations channel/frequency information for your area.
- In the DAB radio mode, press the MENU button entering menu setting mode.
- Press the ◀◀/▶▶buttons until [Manual tune] indicator displays.
- Press the ENTER button to confirm the selection.
- Press the ◀◀/▶◀buttons to display a particular channel/frequency.
- Press the ENTER button to tune to that channel/frequency.
- If stations are captured and display will show signal strength from "SG Str : 0" to "SG Str : xx", where xx is greater than zero.
- Press MENU button repeatedly to exit menu setting mode.
Save preset station
- Whilst a desired station is displayed, press the MEM button from the remote control. The preset channel number appears on display and blinks.
- To select a desired preset station number, press the CH + / - buttons from the remote control.
Note: Each time the station number changed, it will display the current station name or "Empty" of that preset stations location.
- To confirm preset location, press the ENTER button and "Preset store" displays a while then returns to normal DAB tuner mode. The new station will replace the last station in the selected preset station location.
DAB / DAB+ Tuner Operation
Notes: - There is a few seconds delay when programming, after this delay time, the unit will automatically switch back to normal tuner mode.
- You can overwrite a preset station by overwriting and storing the new station.
Recalling Preset Station
Press the CH +/- button from the remote control. The preset channel number and station names appear on display then press the ENTER button to confirm selection.
Change listening channel
-
Whilst listening to current channel, press the ◀◀/▶◀ button repeatedly until the desired channel name is displayed.
-
Press the ENTER button to confirm the selection.
Display DAB radio station information
If necessary, you may press the RDS button from the remote control to display current receiving DAB station's information.
Listening to CD Music
The CD player can playback CD/CD-R/CD-RW disc with Audio CD and MP3 format.
CD Playback
- Press the STANDBY ⏻ button to turn on the unit.
- Press the FUNCTION button from the main unit or the CD button from the remote control to select CD mode.
- Insert a CD with printed side facing up into the CD slot.
- Music playback will automatically start.
- For Audio CD format disc ---- The display will show the "CD" indicator and the track number (e.g. T001). For MP3 file format disc ---- The display will show the "MP3" indicator, Folder number (e.g. A01) and the track number (e.g. T001).
- Adjust the volume level by rotating the VOLUME knob from the main unit or press the VOLUME +/- button from the remote control.
- To skip to a desired CD track, press the ◀◀/▶▶buttons. If it is playing the MP3 song, you may press the FOLDER ▲ / ▼ buttons from the remote control to select the desired folder.
- To fast-rewind or forward within the currently playing track, press and hold either the I◀/▶▶ button from the main unit or the ◀/▶▶ button from the remote control.
- To pause CD playback, press the play/pause▶II button.
To resume playback, press the play/pause▶II button again. - To stop CD playback, press the STOP ■ button.
- To eject the CD, press the OPEN/CLOSE ▲ button.
CD Play Modes
Repeat Playback
- For Audio CD discs :
To repeat playback of one track, press the REP button once from the remote control. A repeat one indicator " ↩ "appears on the LCD.
To repeat playback of an entire CD, press the REP button until the repeat all “ALL” indicator appears on LCD.
- For MP3 discs:
To repeat playback of one track, press the REP button once from the remote control. A repeat one indicator " ⟶" appears on the LCD.
To repeat playback a directory, press the REP button twice. A repeat directory indicator “ → DIR” appears on LCD.
To repeat playback of an entire CD, press the REP button until the repeat all “ALL” indicator appears on LCD.
Random Playback
To playback CD tracks in random order, press the RAN button from the remote control.
The "RND" indicator appears on the LCD.
INTRO Playback
To playback the first ten seconds of each song, press the INTRO button from the remote control until "INTRO" indicator appears on LCD.
Cancel CD play mode
To cancel a CD play mode, press the STOP ■ button at any time.
Listening to CD Music
CD Program Playback
This feature allows you to program up to 20 tracks for Audio CD or 30 songs for MP3 CD in a desired order.
- With CD playback stopped, press the PROG button once from the remote control.
The LCD shows following indication:
"PGM" indicator
The program number (e.g. P01) blinks.
The Track number (e.g. T001)
The Directory (Folder) number (e.g. A01) ---- apply for MP3 disc only.
- To select a directory number, press the FOLDER ▲ /▼ button from the remote control (for MP3 disc only).
To select a track number, press the ◀◀ /▶▶ button.
-
When desired track number displayed, press the PROG button to confirm entry.
-
To program up to 20 Audio CD tracks or 30 MP3 CD songs, repeat steps 2 and 3 until all desired tracks are entered.
Or, to begin programmed playback, press the Play/Pause▶II button, the "PGM" indicator stays on the display.
- To cancel programmed playback, press the STOP ■ button twice.
Note:
- If you press the ◄◀/▶◀button during programmed playback, the unit will skip backward / forward to previous / next track in the program, which is not necessarily the previous / next track on the disc.
- The CD play modes function, “ 📊 ” repeat one track and “ ALL ” repeat all programmed track, work in the same manner as during normal CD playback (see CD Play Modes above).
ID3 Function
This function allows users to view the song information (if any) on the track (file) that they are playing.
To enable this function:
-
During CD-MP3 playback, press the ID3 button. The information (e.g. artist name, song title) saved on the track (file) will be shown on the LCD display.
-
To turn off the ID3 function, press the ID3 button again.
Note:
- Only applicable for recorded MP3 tracks (files) with ID3 tags.
- The unit supports ID3 tags in English characters only. It does not support any other languages.
Treble and Bass Settings
When the unit is powered on (in Bluetooth, Aux-IN, Line1, Line2, CD, DAB Radio or FM Radio mode), you can press the BASS + / - and TREBLE + / - buttons to adjust to the desired bass and Treble level.
Listening to External Audio Source
The unit provides three sets audio input connector (AUX-IN / LINE-IN 1 / LINE-IN 2).
You can connect to three different external audio sources.
- Connect an audio cable with 3.5mm stereo plug from an auxiliary audio device to the AUX IN jack of the unit. Also RCA type audio connector can be connected to the LINE-IN 1 and LINE-IN 2 audio input jacks.
- Press the STANDBY ⏻ button to turn on the unit.
- To select auxiliary audio input, press the FUNCTION button from the main unit or the button LINE-IN / AUX IN from the remote control. The "AUX-IN" / "LINE-IN 1" / "LINE-IN 2" indicator shows on display.
- Turn on the external auxiliary audio device.
- The volume can now be controlled through the unit.
Operate all other functions on the external device as usual.
Notes: Press the STANDBY ⏻ button to turn off the unit when you finish listening.
Don't forget to switch off the power of the external audio device as well.
Clock Setting
Auto-setting
The unit can auto-synchronize with the DAB radio station time information.
Each time a DAB station is received and its time information will be copied to this unit automatically which will overwrite current time setting on the unit.
Manual setting
When the unit is OFF (Standby mode):
Set 12/24 Hour format
- Press the CLOCK button from the remote control entering 12/24 hour format setting mode.
- Press the HR or MIN button from the remote control to select 12 or 24 hour display format.
Set Clock - Press the CLOCK button again entering time setting mode.
- Press the HR button from the remote control to set hour.
- Press the MIN button from the remote control to set minute.
Exit setting mode - To save all settings, press the CLOCK button or wait for a few seconds to exit the setting mode.
Sleep Timer Function
Sleep to timer
This feature allows you to fall asleep to the CD, radio or Bluetooth for up to 90 Minutes.
The unit shuts off automatically when the time expires.
- Press the STANDBY ⏻ button to turn the unit on.
- Either tune to the desired FM or DAB radio station in radio mode, playback CD song or playback Bluetooth music.
- To select the sleep timer to turn the unit off after 15, 30, 45, 60 or 90 minutes, press the SLEEP button (from the remote control) repeatedly. The display shows the "SLEEP" indicator. The unit plays for the selected length of time then automatically turns off.
- To check the remaining sleep time, press the SLEEP button (from the remote control) once.
To turn the unit off before the sleep timer counts down to zero, press the STANDBY ⏻ button at any time.
Notes:
- If you are falling asleep to music from an external device connected to the AUX-IN or LINE-IN input, the sleep timer will shut off the power to this system but it will not turn off the external device.
- If you activate the sleep timer while a CD is playing, the unit will only continue playing until the end of the disc then shut off automatically no matter the sleep timer setting. For example, if your CD is only 30 minutes long and 45 minutes sleep timer is selected, the unit will shut off approximately 3 minutes after the disc ends.
Care and Maintenance
- Do not subject the unit to excessive force, shock, dust or extreme temperature.
- Do not tamper the internal components of the unit.
- Clean your unit with a damp (never wet) cloth. Solvent or detergent should never be used.
- Avoid leaving your unit in direct sunlight or in hot, humid or dusty places.
- Keep your unit away from heating appliances and sources of electrical noise such as fluorescent lamps or motors.
If drop-outs or interruptions occur in the music during play, or if the disc fails to play at all, its bottom surface may require cleaning. Before playing, wipe the disc from the center outwards with a good soft clean cloth.

Resetting the Unit
If the unit experiences a power surge or electric shock, it is possible that the internal micro-controller may lock up and the unit will not respond to any commands from the panel controls.
- In this event, unplug and then reconnect the AC power plug into the wall outlet.
- Use a straightened paper clip, toothpick or similar objects to press the RESET button located at the rear of the main unit (see the below figure). The reset operation clears the system memory and all of your previous settings will be erased.
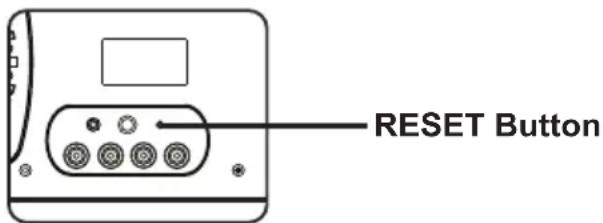
CAUTION: DO NOT USE SHARP, POINTED OBJECT TO PRESS THE RESET BUTTON.
IT MAY DAMAGE THE RESET SWITCH INSIDE THE UNIT.
Note:
- In case of malfunction due to electrostatic discharge (ESD), just reset the product to resume normal operation.
- The normal function of the product may be disturbed by Strong Electro Magnetic Interference. If so, simply reset the product to resume normal operation. In case the function could not resume, please use the product in other location.
Specifications
Power Adaptor Input AC 100-240V \~ 50/60Hz
Output
DC
18V
3000mA
Main unit supply power DC 18V 3000mA
Battery Back-up for clock / memory DC3V--- AAA (UM-4) type x 2 (not included)
Remote Control battery DC3V --- CR2025 x 1 Lithium battery
Speaker Output 10W+10W (Max.)
Subwoofer Output 25W (Max.)
Power consumption 1 W (Standby)
54 W (Max.)
Dimensions 351 x 136 x 214 mm
Weight 3300g
Operating Temperature 0 C \~ +45 C
and Humidity 70%
This product operates at 2400 - 2483.5 MHz and is designated only to be used inside a normal household environment. This product is suited for this purpose within all EU counties.
Products with the CE marking comply with the EMC Directive (2004/108/EC) and the Low Voltage Directive (2006/95/EC) issued by the Commission of the European Community.
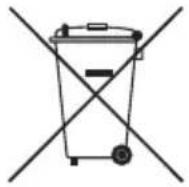
This symbol indicates that the relevant electrical product or battery should not be disposed of as general household waste in Europe. To ensure the correct waste treatment of the product and battery, please dispose them in accordance to any applicable local laws of requirement for disposal of electrical equipment or batteries. In so doing, you will help to conserve natural resources and improve standards of environmental protection in treatment and disposal of electrical waste (Waste Electrical and Electronic Equipment Directive).

®All rights reserved
THE SPECIFICATION AND EXTERNAL APPEARANCE OF THE SET ARE SUBJECT TO CHANGE WITHOUT PRIOR NOTICE.
Service and Support
For information: www.lenco.com
For support: http://lencosupport.zendesk.com
Lenco helpdesk:
Germany 0900-1520530 (Local charges)
The Netherlands 0900-23553626 (Local charges + 1ct p/min)
Belgium 02-6200115 (Local charges)
France 03-81484280 (Local charges)
The helpdesk is accessible from Monday till Friday from 9 AM till 6 PM.
When contacting Lenco, you will always be asked for the model and serial number of your product. The serial number can be found on the back of the device. Please write down the serial number below:
Model:
Serial number:
Lenco offers service and warranty in accordance to European law, which means that in case of repairs (both during and after the warranty period) you should contact your local dealer.
Important note: It is not possible to send products that need repairs to Lenco directly.
Important note: If this unit is opened or accessed by a non-official service center in any way, the warranty expires.
This device is not suitable for professional use. In case of professional use, all warranty obligations of the manufacturer will be voided.
Lenco
natural_image
Line drawing of a device with a rectangular component and a circular button, labeled 'Lenco' at the bottom (no text or symbols on the diagram itself)Handleiding
CLASS 1 LASER PRODUCT
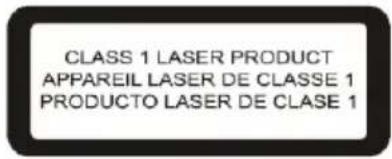
This product contains a low power laser device.
natural_image
Simple line drawing of a trash bin with crossed lines indicating no waste or plastic discharge (no text or symbols)natural_image
Line drawing of a device with a rectangular component and a circular button, labeled 'Lenco' at the bottom (no text or symbols on the diagram itself)CLASS 1 LASER PRODUCT
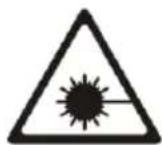
This product contains a low power laser device.
natural_image
Simple line drawing of a trash bin with crossed lines indicating no waste or discharge (no text or symbols)natural_image
Technical line drawing of a device with a rectangular component and a circular component, labeled 'Lenso' at the bottom (no text or symbols on the diagram itself)Bedienungsanleitung
CLASS 1 LASER PRODUCT
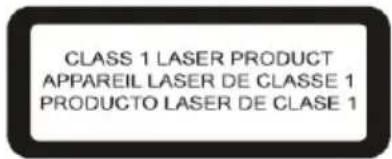
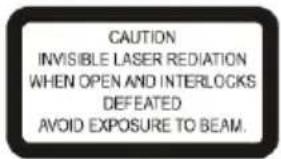
This product contains a low power laser device.
[Forced mono] --- Nur Wiedergabe in Mono.
natural_image
Line drawing of a device with a rectangular component and a circular button, labeled 'Lenco' at the bottom (no text or symbols on the diagram itself)CLASS 1 LASER PRODUCT
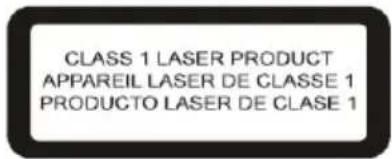
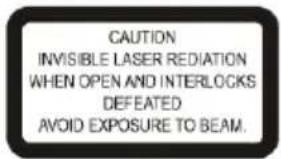
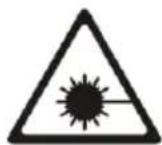
This product contains a low power laser device.
EC-Declaration of Conformity

marking
We, Manufacturer/Importer
(full address)
STL Group BV
Ankerkade 20
5928 PL Venlo NL
declare that the product
(description of the apparatus, system, installation to which it refers)
CD_DAB Radio with Bluetooth
Lenco model BT-9000
Is in conformity with
Council Directive 2004/108/EC (EMC Directive)
R&TTE Directive (1999/5/EC)
EN 300 328V1.8.1
(2012.06)
Compatibility and Radio spectrum Wide band Transmitter systems
in the 2.4 GHz ISM band and using spread spectrum modulation techniques
under article 3.2 of the R&TTE Directive
EN 62479:2010
Compliance of low power electronic and electrical equipment with the basic
restrictions related to human exposure to electromagnetic fields (10MHz-300GHz)
EN 301 489-1V1.9.2
ERM, EMC standard for radio equipment and services
(2011-09)
Part Common technical requirements
EN 301 489-17V2.2.1
ERM, EMC standard for radio equipment and services Part condition
(2012-09)
for 2.4GHz wideband transmission systems
and 5GHz high performance Rlan equipment
IEC 60065:2001(seventh ed.)
Safety requirements for mains operated electronic and related
+A1:2005+A2:2010
Apparatus for household and similar general use
EN 55013:10.2001
Sound and television broadcast receivers and associated equipment
+ A1:04.2003 +A2: 2006
Radio disturbance characteristics - Limits and methods of measurement
EN 55020:2007
Sound and television broadcast receivers and associated equipment -immunity
+A11:2011
Characteristics.- Limits and methods of measurement
EN 55022:2010
Information technology equipment – Radio disturbance
characteristics – Limits and methods of measurement
EN 55024:2010
Information technology equipment – Immunity
characteristics – Limits and methods of measurement
EN 61000-3-2:2006
Electromagnetic compatibility (EMC); Part 3: Limits; Section 2:
+A1:2009+A2:2009
Limits for harmonic current emissions (equipment input current ≤16 Ampere
EN 61000-3-3:2008
per phase)
Electromagnetic compatibility (EMC); Part 3: Limits; Section 3:
Limitation of voltage fluctuation and flicker in low-voltage supply systems for
Equipment with rated current ≤ 16 Ampere.
EN 300330-2V1.5.1
Short range Devices (SRD): Radio equipment in the frequency range
(2010-02)
9kHz to 25MHz and inductive loop systems in the frequency range 9KkHz
MHz
Manufacturer/Importer STL-group BV
Date:
May 27, 2014
Signature:
Name:
- Audio system with Bluetooth, DAB+/NFC/CD
- Important Safety Instructions
- Water and Moisture
- Ventilation
- Heat & Flame
- Power Source
- Power Adaptor Wire Protection
- Cleaning
- Object and Liquid Entry
- Attachments
- Lightning and Power Surge Protection
- Overloading
- Damage Requiring Service
- Periods of Nonuse
- Servicing
- Warnings
- CLASS 1 LASER PRODUCT
- ON PROTECTION AGAINST LASER ENERGY EXPOSURE
- Features
- Installation
- AC-DC Adaptor Connection
- Warnings:
- Description of Parts
- Main Unit
- Remote Control
- Bluetooth Operation
- Pairing / Connection
- Note:
- Playback Bluetooth music
- Energy Saving Note
- FM Radio Tuner Operation
- Antenna
- MENU Option
- Auto-scan and store Preset Stations
- FM Radio Tuning and manual store Preset Stations
- FM Radio Tuning
- Save preset station
- Notes:
- Recalling Preset Station
- RDS function
- DAB / DAB+ Tuner Operation
- Navigation button
- MENU Options
- Full scan operation
- Manual tune operation
- Change listening channel
- Display DAB radio station information
- Listening to CD Music
- CD Playback
- CD Play Modes
- Repeat Playback
- CD Program Playback
- ID3 Function
- Treble and Bass Settings
- Listening to External Audio Source
- Clock Setting
- Auto-setting
- Manual setting
- Sleep Timer Function
- Sleep to timer
- Care and Maintenance
- Resetting the Unit
- Specifications
- Service and Support
- Lenco helpdesk:
- Lenco
- Bedienungsanleitung
- EC-Declaration of Conformity
Brand : LENCO
Model : DR88 BT
Category : Hi-fi system