
AXP22 - Microwave Oven ACP - Free user manual and instructions
Find the device manual for free AXP22 ACP in PDF.
User questions about AXP22 ACP
0 question about this device. Answer the ones you know or ask your own.
Ask a new question about this device
Download the instructions for your Microwave Oven in PDF format for free! Find your manual AXP22 - ACP and take your electronic device back in hand. On this page are published all the documents necessary for the use of your device. AXP22 by ACP.
USER MANUAL AXP22 ACP
Keep these instructions for future
reference. If the equipment changes
ownership, be sure this manual
accompanies equipment. Please refer to the SAFETY INSTRUCTIONS for important safety information prior to using this oven.

TM PRESS
When contacting ACP, provide product information. Product information is located on oven serial plate. Record the following information:
Model Number:
Serial or S/N Number:
Date of installation:
Dealer's name and address:
Any questions or to locate an authorized ACP servicer, call ACP ComServ Service Support.
-
Inside the U.S.A. or Canada, call toll-free at 866-426-2621.
-
Outside the U.S.A. and Canada, call 319-368-8120.
-
Email: commercialservice@acpsolutions.com
Warranty service must be performed by an authorized ACP servicer. ACP also recommends contacting an authorized ACP servicer, or ACP ComServ Service Support if service is required after warranty expires.
Before using your oven, please take the time to read the Safety Instructions which shipped with the oven.

WARNING
To avoid risk of electrical shock or death, this oven must be grounded and plug must not be altered.
Grounding/Earthing Instructions
Oven MUST be grounded. Grounding reduces risk of electric shock by providing an escape wire for the electric current if an electrical short occurs. This oven is equipped with a cord having a grounding wire with a grounding plug. The plug must be plugged into an outlet that is properly installed and grounded.


Consult a qualified electrician or servicer if grounding instructions are not completely understood, or if doubt exists as to whether the oven is properly grounded.
Do not use an extension cord.
If the product power cord is too short, have a qualified electrician install a three-slot receptacle. This oven should be plugged into a separate circuit with the electrical rating as provided in product specifications. When the combination oven is on a circuit with other equipment, an increase in cooking times may be required and fuses can be blown.
External Equipotential Earthing Terminal (export only)
Equipment has secondary earthing terminal. Terminal provides external earthing connection used in addition to earthing prong on plug. Located on outside of oven back, terminal is marked with symbol shown below.

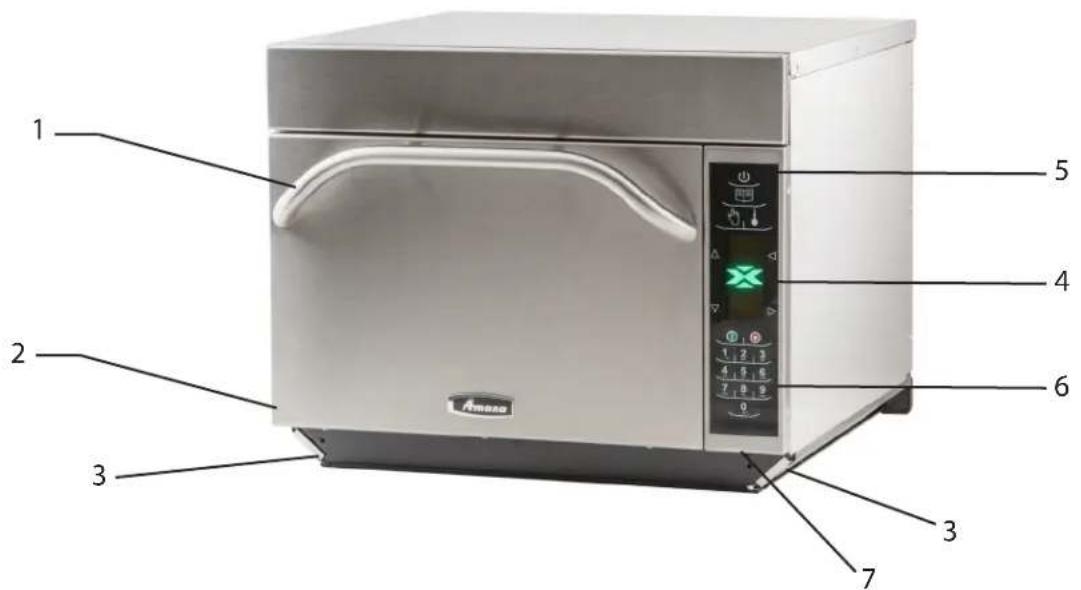
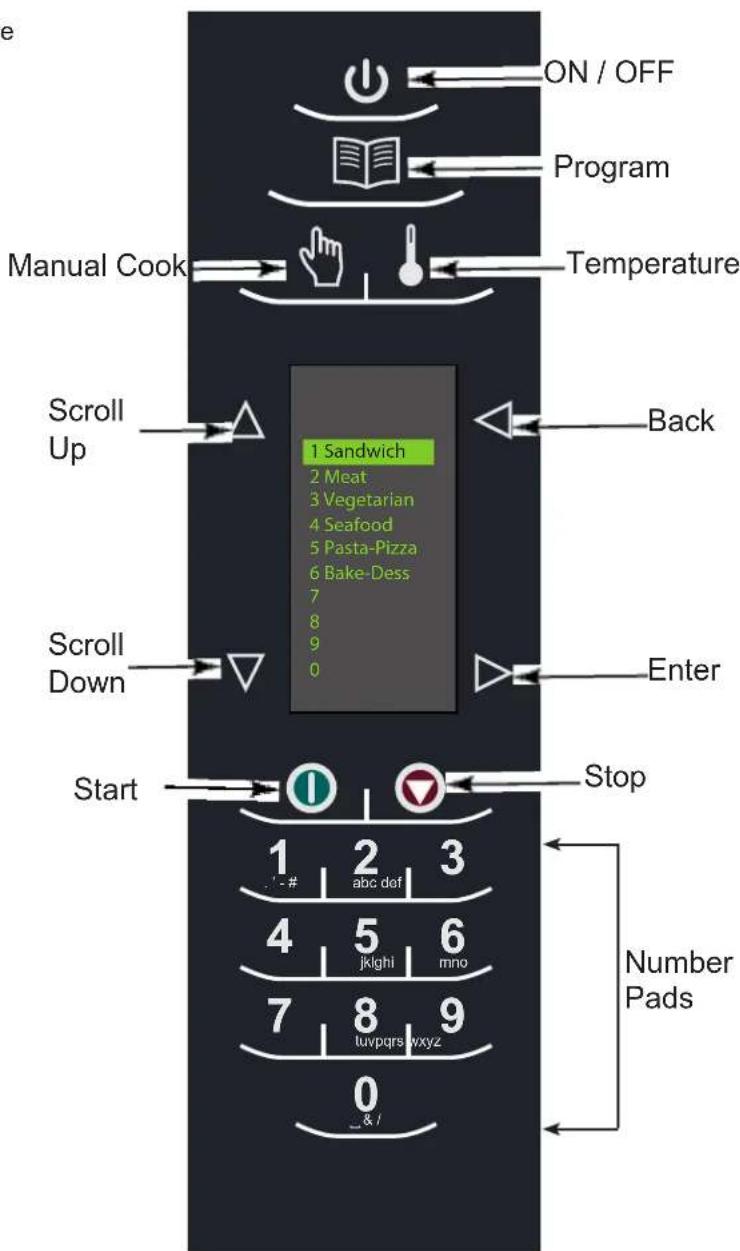
1 Door Handle
Ergonomically designed for one handed operation.
2 Unit Serial Number
Located on the lower left hand side and back of the oven.
3 Air Filters
The oven has two air filters. Each are located on the lower sides of the oven. To remove, simply slide out.
4 Display
Display provides user interface.
5 ON/OFF Pad
Use to turn on and shut oven off.
6 Keypad
Use for time input, programmed pads and data input.
7 USB Port / Protective Cover
The oven is equipped with an USB Data Port. Use with standard flash drives.
To program the oven using standard flash drive:
Oven must be in Off mode (Preheat must be OFF)
- Remove protective cover from bottom of keypad.
- Insert the flash drive into the slot located below the keypad.
- From Off, press and hold the "2" pad to go to "User Options".
- Go to Option #17 by pressing "Back r repeatedly pressing "Enter
- Select the desired operation by highlighting "Transfer card to oven" or "transfer oven to flash drive" with the Scroll Up or Scroll Down keypad.
*Important Note: After inserting flash drive in USB port wait at least 6 seconds before proceeding to Step 6.
-
Press the "Program" pad to begin the transfer (The screen will indicate "TRANSFERRING" and indicate "DONE" wait 15 seconds then transfer is complete.) *Important Note: If you do not wait 15 seconds when new upload is attempted the screen will indicate "NOT AXP CARD".
-
Remove flash drive and close the protective cover.
STEP 1 - Unpack Oven
- Inspect oven for damage such as dents in door or inside oven cavity.
- Report any dents or breakage to source of purchase immediately. Do not attempt to use oven if damaged.
- Remove all packing materials from oven interior.
- If oven has been stored in extremely cold area, wait a few hours before connecting power.
WARNING
Excessive Weight Hazard
Uses too or more people to move and haul all over.
Failure to do so can result in back or other Injury.
STEP 2 - Place Oven on Counter
- Recommended countertop surface depth is 26" (66 cm).
- Do not install oven next to or above source of heat, such as pizza oven or deep fat fryer. This could cause oven to operate improperly and could shorten life of electrical parts.
- Do not block or obstruct oven filters. Allow access for cleaning.
Install oven on level countertop surface. - Outlet should be located so that plug is accessible when oven is in place.
STEP 3 - Install Rack
Install oven rack
- Oven cavity must be cool to touch.
- Place rack in oven with rear guard positioned toward the . the back of the oven.
DO NOT cook food directly on floor of oven.
STEP 4 - Oven Operation
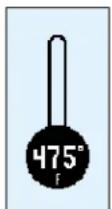
Preheating the Oven
This oven can be set to a preheat temperature between
200^ (95^) and 520^ (270^) .
- Oven must be plugged in.
- Press ON / OFF key


- The preheat temperature of the oven will appear in the display.
- PREHEATING icon will display until oven reaches preheat temperature. The menu screen will then appear.
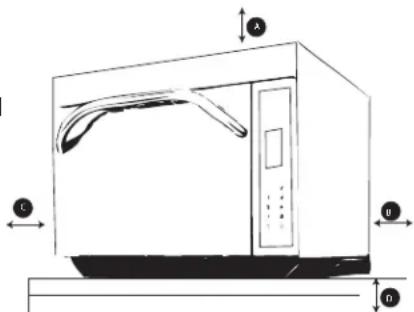
Oven Clearances
A-For North American (UL/CSA) models, allow at least 2^ 5.1 cm of clearance around top of oven.For International (50 Hz) models, allow at least 7^ 18 cm) of clearance around top of oven.Proper air flow around oven cools electrical components.With restricted air flow, oven may not operate properly and life of electrical parts is reduced.
B-Allow at least 2^ (5.1 cm) between air discharge on back of oven and back wall.
C-Allow at least 2^ (5.1 cm) of clearance around sides of oven.
D—Install combination oven so oven bottom is at least 3 feet (91.5 cm) above floor.
WARNING
To avoid risk of electrical shock or death, this oven must be grounded and plug must not be altered.
At the end of the day, turn the oven off by pressing the ON / OFF pad on the keypad.

The oven fan will continue to run to cool the oven. The oven Cooling Mode Icon appears and stays on until the oven temperature is below 200^ (95^) To avoid damage to the convection motor do not turn off power by unplugging the unit or shutting off the power breaker until the fan stops. The Oven Off Icon appears for 5 minutes until display goes blank.

COOKING TIPS
- Metal containers can be used in the AXP with a height no more than 2 inches. Different types of metal conduct heat at different speeds. Aluminum heats faster than stainless steel. Avoid using silicone pans and accessories.
-
Stage cooking aids in retaining the quality of frozen and delicate foods. Finishing baked goods at 0% Microwave, Fan and IR (Radiant) is a great way to get the added browning and crisping without over cooking.
-
Take advantage of the accessories:
a. Non-Stick Basket (SB10 or TB10): Aids in browning and crisping of food. Also makes cleaning up easier. Great for breaded products like chicken fingers, fries, mozzarella sticks, jalapeno poppers.
b. Baking Sheet (1/4 size): Great for foods that do not need directed heat from the radiant element, and for foods that may drip any grease or seasoning.
c. Oven Paddle (PA10): Aids in removal of sandwiches and pizza from Convection Express™ and AXP ovens.
d. Pizza Screen: Great browning and crisping for toasted sandwiches & pizzas, or any food that needs directed heat from the radiant element.
e. Ceramic Dish: Great for foods that need to be contained such as ready-to-serve foods, cut vegetables or soups.
f. Pizza Stone(ST10X): Aids in crisping and browning breads and pizzas.
g. Panini Grill Accessory (GR10): Aids in adding grill marks on a product.
- The most frequently used oven temperature is 520^ (270^) . Reduce the oven temperature if the product is cooked for an extended period of time.
- Line the sheet pan with parchment paper for easy removal of food after heating and cleaning.
- Muffin tins work great for individual cakes & brownies. Spray with cooking spray prior to cooking for easy removal of food after heating.
- Frequent cleaning prevents unnecessary buildup that may affect the oven performance.
- Use a cleaner such as ACP Oven Cleaner (CL10) & Oven Shield (SH10) or another cleaning product that does not contain ammonia, phosphates, chlorine, sodium hydroxide or potassium hydroxide as they can damage critical oven parts and may void the warranty on those parts.
- Items will be hot when finished cooking. Be sure to use oven mit, tongs or pizza paddle to safely remove items from the oven.
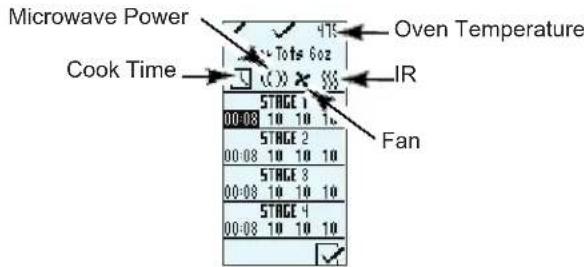
WHEN TO USE STAGE COOKING
Stage cooking enables you to use up to four different cooking cycles or stages to be used consecutively without repeated input from the user.
Example:
Egg Rolls(Frozen), Total Cook Time: 1:30
Temperature 520^
| Stage 1 | Stage 2 | ||
| Time | 1:00 | :30 | |
| Microwave | 100% | 90% | |
| Fan | 80% | 60% | |
| IR | 100% | 100% | |
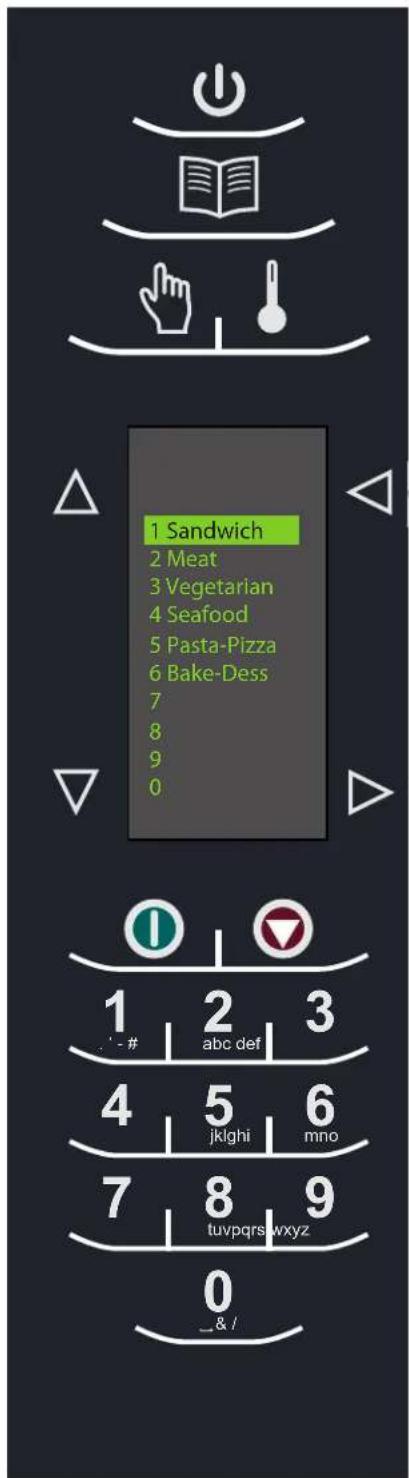
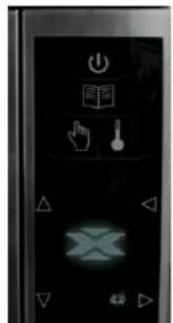
Touch Panel Symbol Description

ON/OFFKeypad
- Press to preheat oven or turn oven off. (Fan will continue to run if temperature is over 200^ / 95^)

TEMPERATURE Keypad
- Press to check set temperature.
- Press to change temperature.
- Press Number keypads to enter or change temperature.
- Press Enter to save.

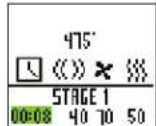
Menu Screen

PROGRAM Keypad
- Press to program new product or change existing programs.
- Press to start data key transfer.
- Press to change password.

EDIT
- Select to program new product or change existing programs.
DELETE
- Select to delete programs.
MANUAL COOK Keypad
- Press for manual cooking.

Touch Panel Symbol Description

SCROLL UP Keypad
- Press to change setting or move up to another setting.
- Press to move up to another highlighted area.

SCROLL DOWN Keypad
- Press to change setting or move down to another setting.
- Press to move down to another highlighted area.

BACK Keypad
- Press repeatedly to return to main menu.
- Press to go to previous screen.
- Press repeatedly to exit program mode.
- Press to erase a character.

ENTER Keypad
- Press to save a menu.
- Press to save a MANUAL COOK program.
- Press to go to next screen.
- Press to save a name.
- Press to confirm deletion of a menu item.

START Keypad
- Press to start cooking cycle.
- Press to save option in option mode.

STOP / RESET Keypad
- Press to stop cooking cycle.
- Press to exit option in option mode.
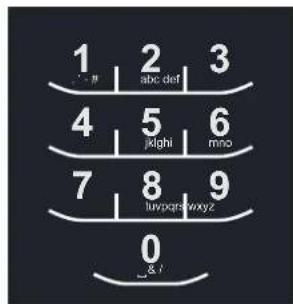
NUMBER Keypads
- Press to input temperature settings.
- Press to select menu items.
- Press to input names of menu items.
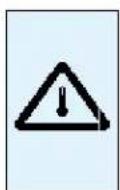
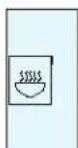
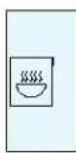
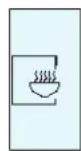
Preheat Temperature Warning Icon:
- Oven not up to temperature setpoint.
- Preheat temperature warning will flash when programing cook cycle until temperature setpoint is met.
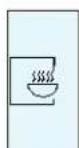
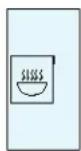
Oven Cooling Mode Icon:
- The oven fan will continue to run to cool the oven. The oven Cooling Mode Icon appears and stays on until the oven temperature is below 200^ (95^) .
- To avoid damage to the convection motor, do not turn off power by unplugging the unit or shutting off the power breaker until the fan stops.

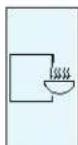
Oven Off Icon:
- The Oven Off Icon appears for 5 minutes then the display goes blank.

Oven Temperature Out of Range:
- When oven temperature is out of range of a cooking program set point. A line will be through that item or items preventing it from being selected. Place the oven in Program Mode to view temperature set point of that cooking program. If the temperature of the oven needs to be changed after reviewing temperature for the cooking program, exit programming mode and change oven temperature.
View Temperature

Program

EDIT
Change Oven Temperature

General User Instructions
The oven screen displays menu options. The keypad is used to navigate through onscreen menus.
The icons below will be used throughout this guide to indicate menu navigation.
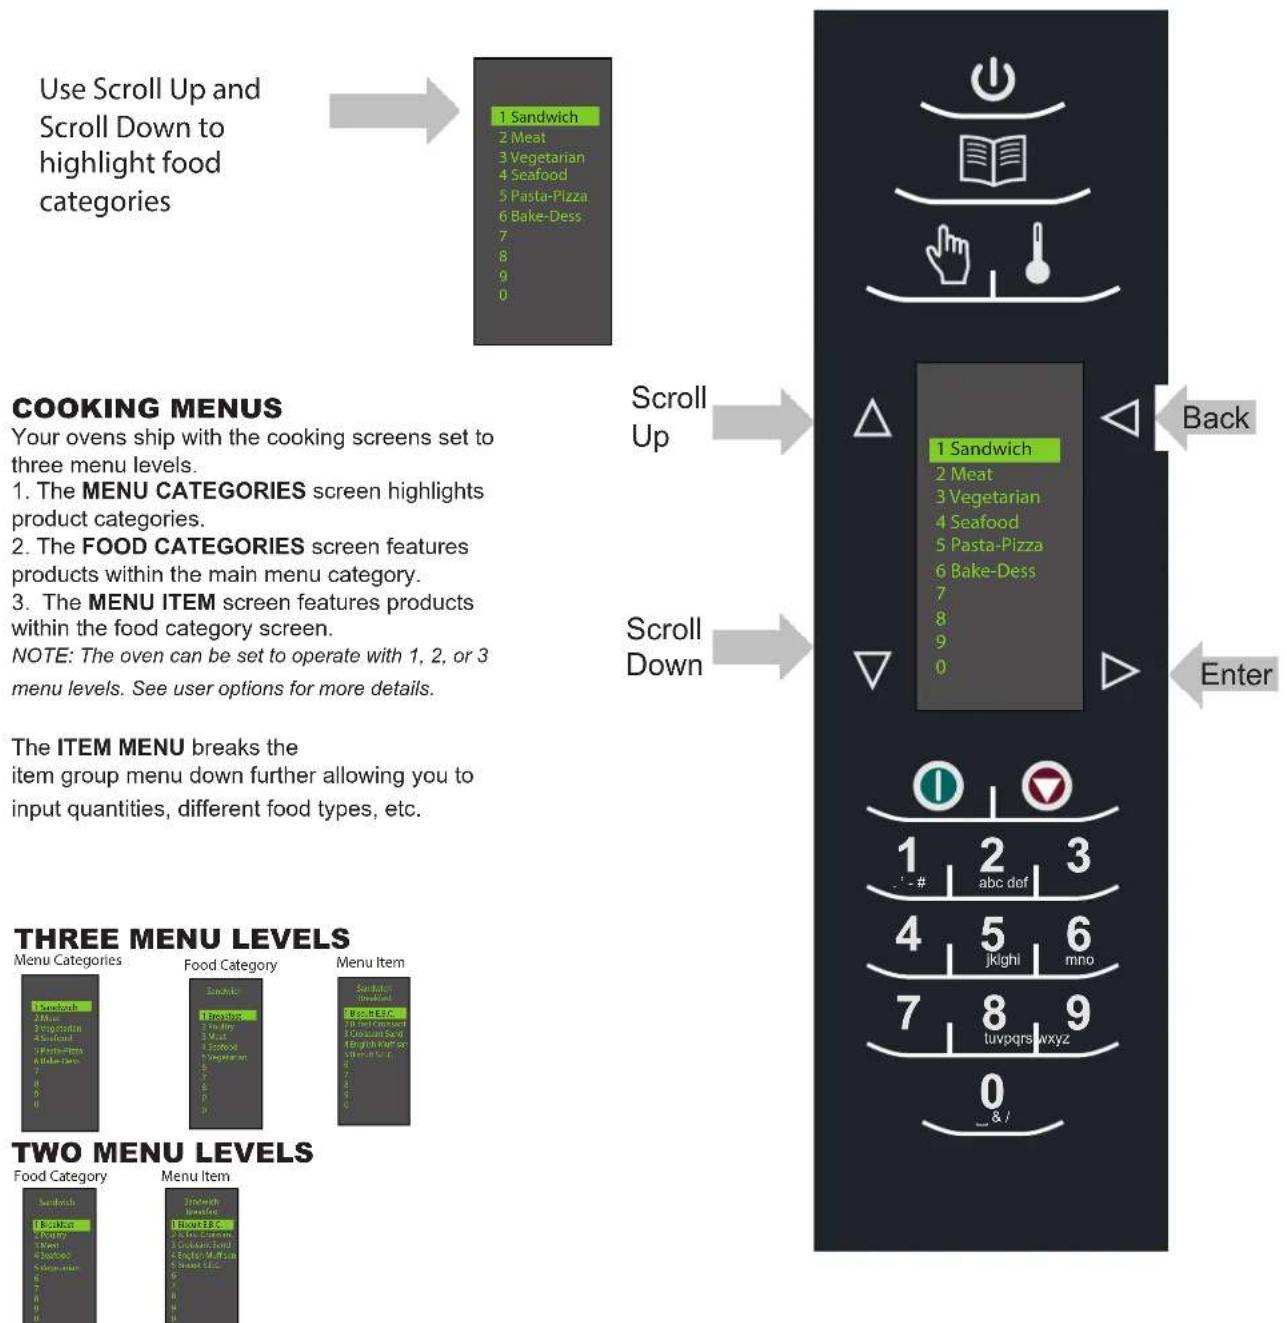

ONE MENU LEVEL Menu Item
MAIN COOKING MENU
Note: Menu Items may vary by model.
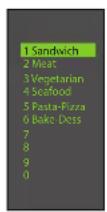
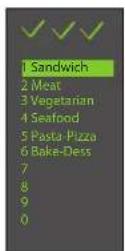
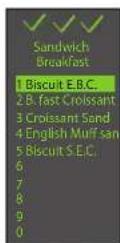
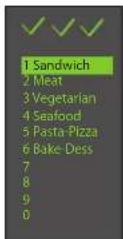
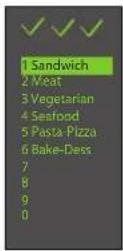
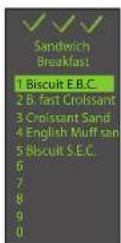
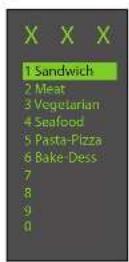
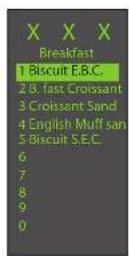
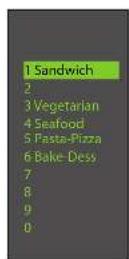
After the oven has preheated, the menu appears. The AXP high speed oven comes preprogrammed with several menu items to simplify cooking.
Examples of Preprogrammed Menu Items Include:
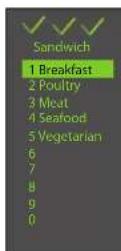
1. Sandwich
- Breakfast
- Poultry
-Meat
-Seafood - Vegetarian
2. Meat
- Poultry
-Beef
-Pork - Appetizers
- Breakfast
3. Vegetarian
- Breakfast
-Lunch - Vegetables
- Appetizers
- Potatoes
4. Seafood
-Fish
- Shellfish
-Misc
5. Pasta-Pizza
- Small/Large Pizza
-Pasta - Miscellaneous
6. Bakery-Desserts
Bread
- Desserts
- Snacks
- Breakfast
- Sweet
Cooking with Preprogrammed Pads
To cook food using preprogrammed menu items
Back
Enter
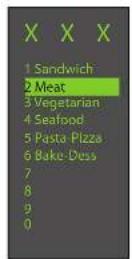
- After oven has preheated to the desired temperature, scroll or press number to choose desired food category from menu.
- Choose menu item group and press Enter to select.
- Highlight item you wish to cook.
Note: If there is a line though the menu item, then preheat temperature is different than menu item preset temperature. The control will not allow you to select that item.
- Open oven door, place food in oven and close door.
- Press Enter to start cooking process.
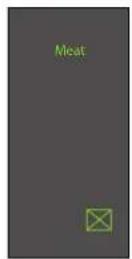
- At end of cooking cycle, oven beeps and displays animation at right:
1

2

:

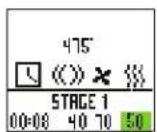
Using MANUAL COOK (Option 4 has to be set to allow manual cooking see page 18) Use Manual cooking when a specific entered time and cooking power levels are desired. It's very useful when you are experimenting with new food items. Maximum cook time is 100 minutes. Microwave, Fan and IR can be set to 11 different power levels between 0 - 100% with 10% increments.
- After oven has preheated to desired temperature (200 - 520^ / 95 - 270^) , press Manual Cook keypad.

-
Use Scroll Up and Scroll Down to move between cooking elements and time
-
For Stage 1, enter cooking time using the number pads (up to 100 minutes). Press Scroll Down keypad to move to the following cooking element.
- Enter desired microwave power (press 0 (for 0% ), 1 (10%) , press 5 (50%) ... and press 1 twice for full power (100%) . Press Scroll Down keypad to move to the following cooking element

- Input desired fan speed using number keypad.
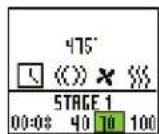
- Enter desired Infrared (IR) power (press 0 (for 0% ), 1 (10%) , press 5 (50%) ... and press 1 twice for full power (100%) .
-
Repeat steps 2-6 for each cooking stage, if more than one cooking stage is necessary.
-
Place food in oven.
-
Press Start keypad to begin cooking. The display counts down. The food category is displayed and the word Manual is in the display.
-
At end of cooking cycle, oven beeps and displays animation below:
- Remove food from oven.
Note: To interrupt cooking cycle, open door. To resume cooking, close door and press start.

How to Save A Manual Cook Program to the Menu
If you're satisfied with the cooking results achieved from manual cooking you can save the manual cook item.
- To save, press Enter ypad.
Note: Option 5 must be set to save after manual cook. (See page 18)
-
Highlight Menu Category by using Scroll Up Scroll Down ypad or create new Menu Category name. Press Enter ypad.
-
Highlight food category by using Scroll Up and Scroll Down 🇯epad to select open menu location.
-
In the Menu Item screen, highlight the location where you wish to add the new name.
-
When new location is highlighted Press Program keypad.
-
Use Number key pads to enter item name. Use Back ypad to delete any mistakes. This step needs to be repeated for each menu level. See user option 2 for text case options page 18.


-
Press Enter ypad when finished.
-
To exit Manual Cook mode, press Back ypad repeatedly to take you to the Main Menu screen.
ACCESSING THE PROGRAM MENU
- To access the PROGRAM mode, press
the Program pad.
- Then select Edit With Scroll Up or
Scroll Down om the screen.

- Press Enter en select the food category,food item to be programmed using the
Scroll Up Scroll Down kVad.
PROGRAM MENU OVERVIEW
PROGRAM Id a new menu item
ENTER save or go to next screen
BACK to previous screen
SCROLLUP SCROLLDOWN
EDIT Change an existing menu item
DELETE 区 Delete an existing menu item
EDITING OR ADDING MENU PROGRAM SETTINGS

- Press the Program pad.
- Highlight Edit with Scroll Up Scroll Down keypad.
- Press the Enter >ypad
- Use the Scroll Up Scroll Down pad to highlight Menu Category and/or Food Category where menu item to edit is saved. Press Enter ypad.
- At the Menu item screen, use Scroll Up Scroll
Down vepad to highlight the desired item to edit.
- Press the Enter keypad and cook settings will appear.
-
Use Scroll Up Scroll Down pad to Select Temperature, Time, Microwave%, Fan% and IR% setting. Use number keypads to enter the time, temperature or cooking powers. For MW, Fan or IR, press 0 for 0% , 1 for 10% . 9 for 90% or 1 twice for 100% .
-
When cook settings are complete press Enter > keypad.
- Press Back pad repeatedly to exit program mode.
EDITING OR ADDING NEW NAMES FOR MENU CATEGORY OR FOOD CATEGORY OR MENU ITEM
-
Press the Program pad.
-
Highlight Edit With Scroll Up or A roll Down keypad and press Enter pad.

- Using the Scroll Up Scroll Down ad to highlight location where new category or item will be placed. (In order to navigate to the following screen, Scroll Up and Scroll Down ypad to highlight desired menu and press Enter pad). For example:
I. Editing Name in Menu Category Screen
A. Highlight Item
B. go to Step 4

II. Editing Name in Food Category
A. Highlight desired Menu Category
B. Press Enter
C. Highlight desired Food Category

D. Go to Step 4
III. Editing / Adding Name in Menu Item
In order to add program settings, you must name your item first.
A. Highlight desired Menu Category
B. Press Enter
C. Highlight desired Food Category

D. Press Enter
E. Highlight desired Menu Item
F. Go to Step 4
-
Press the Program pad.
-
Enter name for category or item using keypad digits for letters, numbers and symbols. [For example: Press Keypad "2" three times for letter "c"]
When the correct letter is displayed, wait until cursor moves to the next space. If a correction is necessary, press back to erase one character at a time. See user option 2 for text case options (page 18).

- Press the Enter pad to save name and it will take you to the next screen. If you are adding or editing a menu item (last screen), after pressing enter will take you to the program setting screen.
- Press Back pad repeatedly to exit program mode.
| Keypad Press | Character Display |
| 1 | . ; , # , 1 |
| 2 | a, b, c, A, B, C, 2 |
| 3 | d, e, f, D, E, F, 3 |
| 4 | g, h, i, G, H, I, 4 |
| 5 | j, k, l, J, K, L, 5 |
| 6 | m, n, o, M, N, O, 6 |
| 7 | p, q, r, s, P, Q, R, S, 7 |
| 8 | t, u, v, T, U, V, 8 |
| 9 | w, x, y, z, W, X, Y, Z, 9 |
| 0 | _ , & , / , 0 |
DELETING A SINGLE MENU ITEM
- Press the Program pad.
- Highlight Delete th Scroll Up or roll Down keypad.

- Press the Enter pad.
- Using the Scroll Up Scroll Down k vad to highlight Menu Category and/or Food Category and/or Menu item where the single menu item to delete is saved. Press Program ypad after highlighting the desired menu item.


- Press the Enter pad to Confirm the deletion of the menu item..
- Name and program are deleted.
- Press Back pad repeatedly to exit program mode.
DELETING A WHOLE MENU CATEGORY OR FOOD CATEGORY
Deleting a whole menu category or food category will delete all the menu items underneath that group (up to 100 menus for any of the menu category and 10 menu items for the food category).
- Press the Program pad.
- Highlight Delete with Scroll Up o A roll Down keypad.
- Press the Enter l ypad.
- Using the Scroll Up Scroll Down kad to highlight Menu Category and/or Food Category to delete. Press Program pad after selecting menu or food category to delete.
- Press the Enter pad again to confirm the deletion of the menu item.
- Menu name and all programs in that category are deleted.
- Press Back ypad repeatedly to exit program mode.
This option is only available if the oven cavity temperature is less than 200^ .
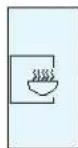
To access the MICROWAVE ONLY button, user option #15 (page 18) must be set to allow microwave only mode. The oven default does not have the MICROWAVE ONLY feature activated.
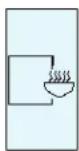
When user option MICROWAVE ONLY is on, the MICROWAVE ONLY icon appears in the bottom right corner of the display.

Microwave Only Icon
To cook a preprogrammed microwave only item follow these steps:
- Press the Enter epad.
- Use Scroll Up and Scroll Down kad to select desired item from the program menu or press the item number pad.
- Place food in oven.
- Press start keyboard to begin cooking.
- At end of cooking cycle, oven beeps and displays animation below:
- Remove food from oven.
ADDING MICROWAVE ONLY MENU ITEMS
- Press the Enter pad.
- Press the Program pad.
- Press the Enter >pad.
4.Use Scroll Up d Scroll Down k ad to select location for new item. - Press the Program pad.
- Enter name for category or item using keypad digits for letters, numbers and symbols. [For example: Press Keypad "2" three times for letter "c"]
When the correct letter is displayed, wait until cursor moves to the next space. If a correction is necessary, press back to erase one character at a time.
| Keypad Press | Character Display |
| 1 | , ,#, 1 |
| 2 | a, b, c, A, B, C, 2 |
| 3 | d, e, f, D, E, F, 3 |
| 4 | g, h, i, G, H, I, 4 |
| 5 | j, k, l, J, K, L, S |
| 6 | m, n, o, M, N, O, 6 |
| 7 | p, q, r, s, P, Q, R, S, 7 |
| 8 | t, u, v, T, U, V, 8 |
| 9 | w, x, y, z, W, X, Y, Z, 9 |
| 0 | , ,& , / , 0 |
- Press the Enter pad to save name.
- Enter Time using number keyboards.
- Use Scroll Down ypad to select microwave percentage.
-
Enter microwave percentage using number keyboards.
-
Use Scroll Downepad to select stage 2-4 if more than one cooking stage is necessary.
-
Repeat steps 6-8 if more than one cooking stage is required.
-
Press Enter save item.
- Press Back pad to exit program mode.
MICROWAVE COOKING
Microwave cooking uses high frequency energy waves to heat food. When cooking, microwave energy causes food molecules to move rapidly. This rapid movement between the food molecules creates heat, which cooks the food.
Stage cooking enables several different cooking cycles, or stages, to be used consecutively without repeated input from the user. Stage cooking can be set to defrost food initially, then cook it, and then keep the food warm until serving time. The total cooking time for all combined stages cannot exceed 100 minutes.
Care and Cleaning
Daily Cleaning Recommendations: Follow the recommendations below for proper maintenance of the AXP/MXP oven.
Please note: The use of caustic cleaning products or those containing ammonia, phosphates, chlorine, sodium or potassium hydroxide (lye) can damage critical oven parts. Do not use water pressure type cleaning systems. Use of unapproved cleaning agents will void the terms of the warranty.
Recommended Cleaning Supplies: damp towel, plastic scouring pad, ACP Oven Cleaner (Item CL10) and ACP Oven Shield Oven Protectant (Item SH10).

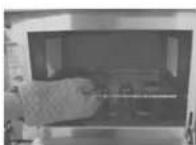
WARNING
Wear protective gloves and protective glasses when cleaning the oven. To prevent burns, handle utensils, accessories, and door with care. Allow oven, utensils, and accessories to cool before cleaning. Oven, utensils, and accessories become hot during operation.
I. For a new oven, before using it the first time:
When oven is clean, spray damp towel with ACP Oven Shield (SH10) and wipe all interior surfaces. Do not remove Oven shield. Turn oven on and pre-heat to start cooking.
II. DAILY CLEANING
- Shut oven off by pressing ON/OFF button. Open the door for cooling. The fan will run for a few minutes to cool the oven interior faster. Let the oven interior reach room temperature before cleaning.
Note: To accelerate cool down time of oven put a tray filled with ice in oven cavity. after shutting oven down.

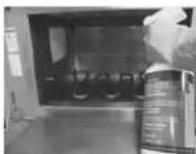
5. Clean Oven Interior
5A. Clean the oven door and interior using a plastic scouring pad on metal portions of oven. White ceramic covers on the both sides of the oven turn to a yellow tan color after usage. Gently clean the ceramic covers and red sealant, apply only gentle pressure while cleaning. If needed, repeat steps 4 and 5. 5B. Clean perforated area with damp towel sprayed with cleaner.
- Remove rack, pizza stone, and other accessories from the cavity when it's cooled
6. Wipe Oven Interior
Using a damp clean towel, wipe the oven interior, rinse towel and wring dry, repeat 2-3 times to remove remaining oven cleaner and particles from the oven.
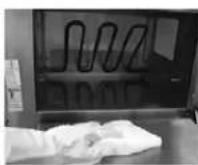
3. Lift Bottom Element
If element is warm, use insulated gloves, oven mitt or tongs to lift the element. Remove baked on particles using a scraper.

7. Spray Oven Shield
When oven is clean, spray a thin layer of ACP Oven Shield (CL10) on all interior surfaces. Place rack back in oven. Do not remove Oven Shield.
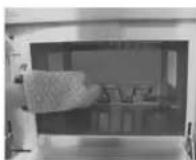
4. Spray Oven Interior
Wear rubber gloves and safety glasses. Spray oven door, sides and floor with ACP Oven Cleaner (CL10). Avoid spraying into perforations. Allow cleaner to soak for 2 minutes.
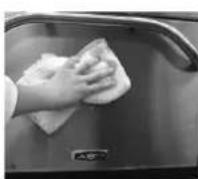
8. Clean Oven Exterior
Clean exterior door and other surfaces with a clean cloth, sponge or nylon pad using a mild detergent and warm water solution.
III. WEEKLY CLEANING
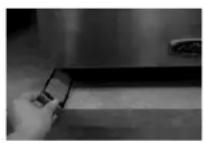
1. Clean Air Filter
Remove the air filters located on each side of the oven at the base.
Wash filter in a mild detergent solution made with warm water.
Rinse and dry thoroughly.
Replace filters by sliding back into the side locations.
Attention: Included with the oven is a "Best Practices" cleaning poster.
Please display the cleaning poster in a prominent location close to the oven.
Best Practices:
Clean oven daily.
Use non-caustic cleaner.
Remove food from oven at end of cycle.
Use only accessories that are both high temperature oven-safe and microwave-safe.
Wash rack with warm, soapy water and air dry.
Clean pizza stone by using a plastic scraper to remove baked on particles.
Sides of metal cookware should be no more than 1 1/2'' (3.8 cm) tall.
Place cookware in center of oven rack, not touching oven sides.
DO NOT:
DO NOT use caustic cleaning products or those containing ammonia, phosphates, chlorine, sodium or potassium hydroxide (lye).
DO NOT use a water-pressure type cleaning system.
DO NOT cook foods with plastic wrap on them.
DO NOT use abrasive scouring pads to clean ceramic side covers and the red sealant surrounding each cover.
DO NOT wash or immerse pizza stone.
DO NOT operate oven without a load (empty) in microwave mode.
Any chemical questions please refer to Chemco's MSDS' for ACP Oven Cleaner and ACP Oven Shield Protectant or contact ACP, Inc. ComServ Customer Service.

866-426-2621
email: commercialservice@acpsolutions.com
User Options
There are several options you can change to customize the operation of the oven for your business. The table below shows these options; the factory setting is shown in bold type.
- Oven must be off. To turn oven off, press ON/OFF ad.
- Press and hold "2" keypad until option screen appears.
- Choose option by pressing Enter keypad then use Scroll Up and Scroll Down keypad to select option to highlight desired option.
- Press Start keyboard to save and press Stop / Reset to exit options mode.
- Option 6, if "Password Needed" is highlighted press Program keypad to view or edit password.
| Options# | Setting Name | Options |
| 01 | Digit Entry | Single digit entry |
| Double digit entry | ||
| 02 | Text Case | Caps |
| Lower case | ||
| Mixed | ||
| 03 | Menu Setting | 01=10 items |
| 02=100 items | ||
| 03=360 items | ||
| 04 | (Manual) Cook | Manual cooking allowed |
| Manual cooking not allowed | ||
| 05 | (Manual) Save | Save after manual cook |
| Do not save after manual cook | ||
| 06 | Program Password | Password needed |
| Changes to programs allowed | ||
| 07 | Door Reset | Opening door resets timer |
| Opening door pauses cook cycle | ||
| 08 | Keyboard Activation | Off |
| 30 Seconds | ||
| 60 Seconds | ||
| 120 Seconds | ||
| 09 | Keybeep Keybeep | On |
| Off | ||
| 10 | Keybeep Keybeep Volume | Low |
| Medium | ||
| High | ||
| 11 | End Of Cycle Beep | Three beeps once |
| Three beeps repeating | ||
| Continuous until door is opened | ||
| 12 | Preheat Warning | Warn if oven not at temp |
| Off | ||
| 13 | Temperature Scale | Temperatures are displayed in °F for 60Hz models |
| Temperatures are displayed in °C for 50Hz models | ||
| 14 | Clean Filter Reminder | Off |
| Displays every 7 days | ||
| Displays every 30 days | ||
| Displays every 90 days | ||
| 15 | (Microwave) Only | Allow microwave only mode |
| No microwave only mode | ||
| 16 | Auto Off | Disable |
| 2 Hours | ||
| 4 Hours | ||
| 8 Hours | ||
| 17 | Data Transfer | Begin Transfer: Card to Oven. Press Program Keypad |
| Begin Transfer: Oven to Card Press Program Keypad |
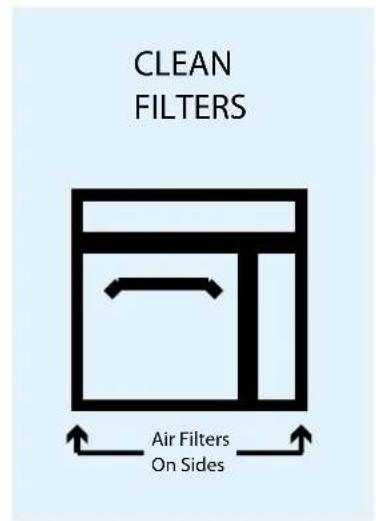
CLEAN FILTER
When this message displays, clean the air filter thoroughly. Cleaning the air filter will not shut off the message. The message will automatically stop displaying after 24 hours.
Depending on microwave use and environmental conditions, the filter may need to be cleaned more or less frequently. Once the frequency is determined, set the option for the appropriate time frame.
Air filter and vents must be cleaned regularly to prevent overheating of the oven. Refer to Owner's Manual for complete cleaning instructions.
Note: Refer to page 3 for Data Transfer instructions (Option 17)
WARNING
To avoid electrical shock which can cause severe personal injury or death, do not remove outer case at any time.
Only an authorized servicer should remove outer case.
This is a Class A product. In a domestic environment this product may cause radio interference in which case the
user may be required to take adequate measures.
| Problem | Possible Cause |
| Oven does not operate | Confirm oven is plugged in. Confirm oven is connected to a grounded circuit. Check fuse or breaker. |
| Oven operates intermittently | Check air filters and discharge air vents |
| If oven does not accept entries when pad is pressed | Make sure oven is preheated. Open and close door, press pad again. |
| Oven fan turns on while oven is not preheating or cooking | Normal operation |
| When I turn the oven OFF, the display is still lit. | Normal operation |
| Clean Filter displays | This is normal and will appear for 24 hours. |
| Frozen oven display Oven display needs to reset. Unplug oven. Wait 5 seconds. Plug back in. | |
-Fish (Poisson)
- Shellfish (Crustaces)
- Miscellaneous (Divers)

CLEAN FILTER (NETTOYER FiltRE)
CLEAN FILTERS
Premere Anything to do?
Premere Anything to do?
Premere Anything to taste per:
Premere Anything to taste per:
commercialservice@acpsolutions.com