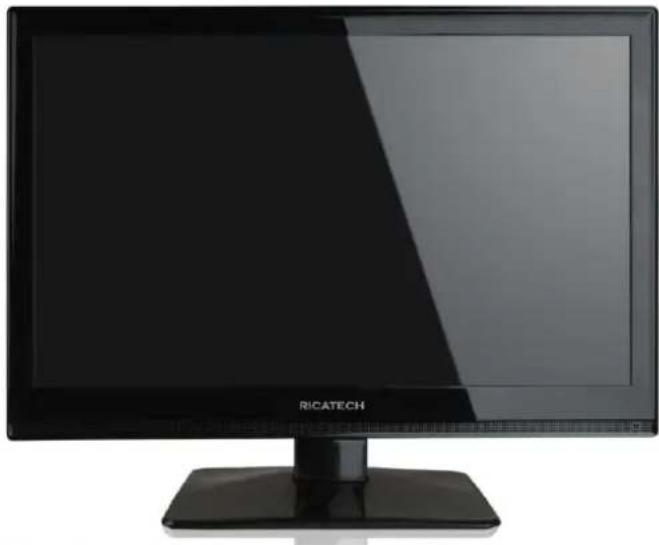
RLEDTV24 - TV Ricatech - Free user manual and instructions
Find the device manual for free RLEDTV24 Ricatech in PDF.

| Product type | 24-inch LCD TV |
| Brand | Ricatech |
| Model | RLEDTV24 |
| Screen size | 24 inches (approx. 60 cm) |
| Screen resolution | Full HD 1920 × 1080 pixels |
| Power supply | 100-240 V, 50/60 Hz |
| Connectivity | HDMI, VGA, USB, SCART, YPbPr (component), antenna input, headphone jack, CI slot |
| Main functions | DTV (TNT), Teletext, EPG, PVR recording via USB, USB media player (video, music, photos), parental control |
| PC compatibility | Resolutions up to 1920×1080 (VGA, SVGA, XGA, WXGA) |
| Supported USB formats | FAT/FAT32, MPG video, MP3 audio, JPG photos |
| CI function | Optional CI module for pay channels |
| Picture settings | Picture modes (Custom, Standard, etc.), brightness, contrast, color, sharpness, tint, color temperature |
| Sound settings | Sound modes, bass, treble, balance, automatic volume control (AVC) |
| OSD menu languages | Multilingual (French, English, German, etc.) |
| Sleep timer | Yes, adjustable (SLEEP) |
| Remote control | Included with number keys, navigation, and special functions |
| Safety | Do not open the casing, risk of electric shock. Ventilation required. Do not expose to moisture. |
| Maintenance | Clean the screen with a soft, dry cloth. Do not use chemical products. |
| Repairability | No user-serviceable parts. Contact authorized after-sales service. |
| Consumer service | Email: support@ricatech.com, Tel: +32 3 3265694, Website: www.ricatech.com |
Frequently Asked Questions - RLEDTV24 Ricatech
User questions about RLEDTV24 Ricatech
0 question about this device. Answer the ones you know or ask your own.
Ask a new question about this device
Download the instructions for your TV in PDF format for free! Find your manual RLEDTV24 - Ricatech and take your electronic device back in hand. On this page are published all the documents necessary for the use of your device. RLEDTV24 by Ricatech.
USER MANUAL RLEDTV24 Ricatech
text_image
RICATECH®RLEDTV24
natural_image
Black RICATECH monitor with a blank screen and stand (no visible text or symbols on the screen)USER MANUAL
GEBRUIKERSHANDLEIDING
MODE D'EMPLOI
BEDIENUNGSANLEITUNG
Contents
- Introduction
- Warning
- Caution
- Main Unit Description
- Remote Control
- OSD basic adjustment
- DTV Features
- CI Operation
- USB Features
- PVR Operation
- Specifications
- Trouble Shooting
Introduction
Thank you very much for your purchase of our product of LCD TV. It serves as a normal color TV and PC monitor. To enjoy your set to the full from the very beginning, read this manual carefully and keep it handy for ready reference.
INSTALLATION
① Locate the receiver in the room where direct light does not strike the screen. Total darkness or a reflection on the picture screen can cause eyestrain. Soft and indirect lighting is recommended for comfortable viewing.
② Allow enough space between the receiver and the wall to permit ventilation.
③ Avoid excessively warm locations to prevent possible damage to the cabinet or premature component failure.
④ This TV receiver can be connected to AC100-240V 50/60HZ.
⑤ Do not install the receiver in a location near heat sources such as radiator, air ducts, direct sunlight, or in a place somewhere like close compartment and close area. Do not cover the ventilation openings when using the set.
⑥ The indicator light will last about 30 seconds to go out after cutting off the electricity, during this period, you cannot repower it on until the indicator light goes out, thanks a lot for your attention!
Warning

CAUTION RISK OF ELECTRIC SHOCK DO NOT OPEN

CAUTION: TO AVOID THE RISK OF ELECTRIC SHOCK. DO NOT REMOVE COVER (OR BACK). NO USER- SERVICEABLE PARTS INSIDE. REFER SERVICING TO QUALIFIED SERVICE PERSONNEL.

This symbol is intended to alert the user to avoid the risk of electric shock, do not disassemble this equipment by anyone except a qualified service personnel.

This symbol is intended to alert the user to the presence of important operation and maintenance instructions in the literature accompanying the equipment.
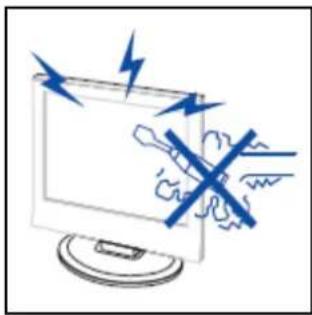
Caution
natural_image
Illustration of a computer monitor with a crossed-out hand and lightning bolts, symbolizing electrical hazard (no text or symbols present)
High voltages are used in the operation of this product. Do not remove the back cabinet from your set. Refer servicing to qualified service personnel.
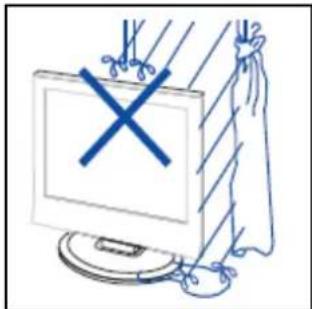
natural_image
Simple line drawing of a computer monitor with a blue X mark and a hanging fabric item (no text or symbols)
To prevent fire or electrical shock hazard, Do not expose the main unit to moisture.
natural_image
Illustration of a computer monitor with a blue X symbol and fireworks above it, no text or symbols present.
Do not drop or push objects into the television cabinet slots or openings. Never spill any kind of liquid on the television receiver.
natural_image
Illustration of a computer monitor with a 'X' symbol and wavy roof, no text or labels present
Avoid exposing the main unit to direct sunlight and other source of the heat. Do not stand the television receiver directly on other produces which give off heat. E. g. video cassette players, Audio amplifiers. Do not block the ventilation holes in the back cover. Ventilation is essential to prevent failure of electrical component. Do not squash power supply cord under the main unit.
Caution
text_image
Cartoon illustration showing a person using a computer with a 'X' symbol, surrounded by floating clouds and steam.
Caution
Never stand on, lean on, push suddenly the product or its stand. You should pay special attention to children.
natural_image
Illustration of a computer monitor with a blue X mark and a blue lightning bolt, positioned above a table (no text or symbols)
Caution
Do not place the main unit on an unstable cart stand, shelf or table. Serious injury to an individual, and damage to the television, may result if it should fall.
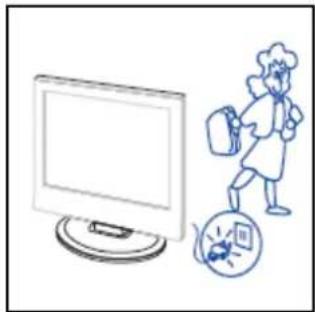
natural_image
Illustration of a computer monitor and a cartoon character with a bug, next to a circular icon (no text or symbols)
Caution
When the product is not used for an extended period of time, it is advisable to disconnect the AC power cord from the AC outlet.
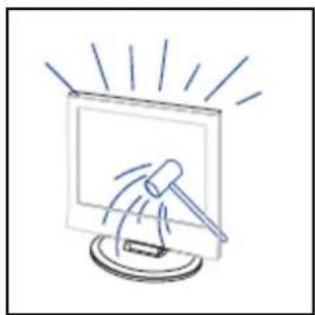
natural_image
Simple line drawing of a hammer striking a computer monitor with radiating lines (no text or symbols)
Caution
The LCD panel used in this product is made of glass. Therefore, it can break when the product is dropped or applied with impact. Be careful not to be injured by broken glass pieces in case the LCD panel breaks.
Main unit description
Control Panel Button Function
VOL+ : Volume up.
VOL- : Volume down.
CH+ : TV channel up.
CH- : TV channel down.
MENU : Press to select the main menu.
TV/AV : Select the input signal.
POWER : Switch on when at standby mode or enter the standby mode.
TV Terminal Connections

text_image
1 2 3 4 5 6 7 8 9 10 11- USB input terminal.
- HDMI input terminal.
- VGA input terminal of simulation signal of PC.
- PC AUDIO terminal.
- SCART input terminal.
- HEADPHONE output terminal.
- Component (YPbPr/YUV) input terminal.
- Video input terminal.
- AUDIO input terminal.
- ATV antenna/close circuit TV network port or DTV antenna port.
- CI input terminal. (optional)
Power Input Configuration

AC
POWER
Optional Configuration as below:
Connect the USB to the USB jack on the set.
NOTE
- It is only 500 mA MAX of DC current output when you connect with USB jack.
● To ensure the Mobile HD works well, you should use other power supply for the Mobile HD. And do not use the USB jack in the same time.
- It supports Mobile HD by connecting with USB jack. The partitions of the Mobile HD can't be more than 4 partitions. The max partition is 2TB. It supports FAT/FAT32 document. The max FAT document is 4GB and the max FAT32 document is 2TB.

text_image
USBRemote control
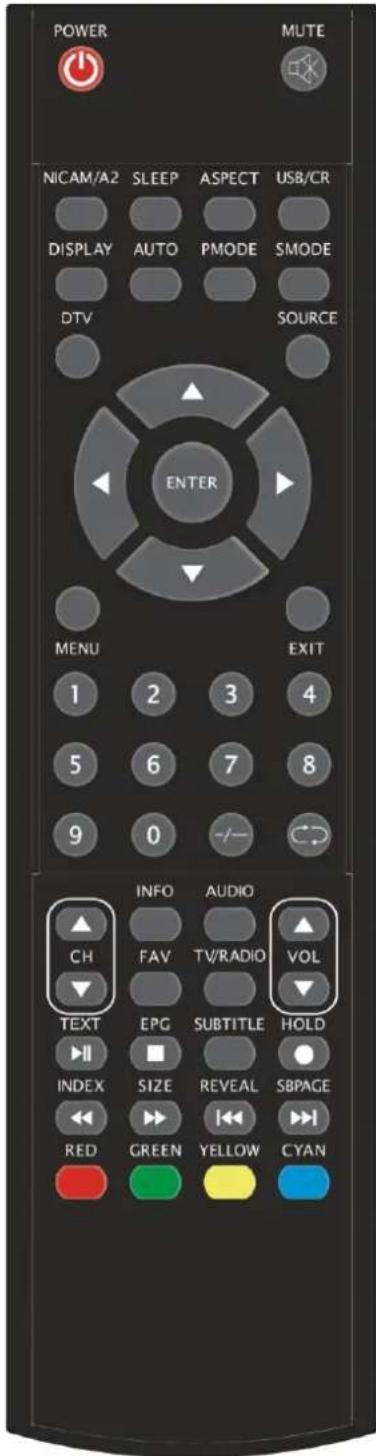
text_image
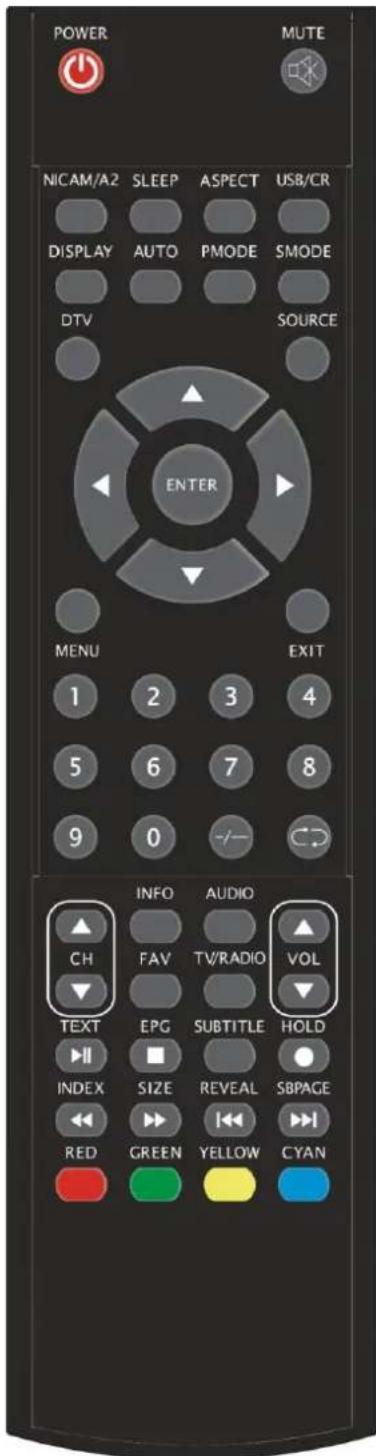
POWER NICAM/A2 SLEEP ASPECT USB/CR DISPLAY AUTO PMODE SMODE DTV SOURCE ENTER MENU EXIT 1 2 3 4 5 6 7 8 9 0 -/- INFO AUDIO CH FAV TV/RADIO VOL TEXT EPG SUBTITLE HOLD INDEX SIZE REVEAL SBPAGE RED GREEN YELLOW CYANPOWER: Press this button to switch on the TV when at standby mode or enter standby mode.
MUTE: Press this button to mute or restore sound.
NICAM/A2: In the TV condition, press this key to select the stereo mode.
SLEEP: Set the sleep timer.
ASPECT: Press to select the different picture size.
USB/CR: Press to select the MEDIA mode
DISPLAY: Display TV information on the LCD TV screen such as channel and channel label.
AUTO: Press to adjust the picture automatically in PC mode, freeze the picture in DTV mode
PMODE: Select picture mode.
SMODE: Select sound mode.
DTV: Press to enter the DTV channel.
SOURCE: Press to open signal source.
ENTER: Enter the selected option or perform the selected operation or display the list of "Channel Grouping" in DTV mode.
MENU: Press this button to enter the main menu for various optional adjustable setting.
EXIT: Exit the OSD (On-screen display).
0-9: Select and switch to a channel using 0 - 9.
-/-: Switch the program digit.
: Switch back and front between the current and previous channels.
CH-/CH+: Change the channel up and down.
VOL-/VOL+: Adjust the volume.
INFO: Display some information of current program in DTV mode or display the process of record in the MEDIA mode.
(Used for models with DTV function only)
AUDIO: Press to select the DTV audio.
(Used for models with DTV function only)
FAV: Switch Favourite List when customer have settled Favourite channel
(Used for models with DTV function only)
text_image
POWER NICAM/A2 SLEEP ASPECT USB/CR DISPLAY AUTO PMODE SMODE DTV SOURCE ENTER MENU EXIT 1 2 3 4 5 6 7 8 9 0 -/- CD INFO AUDIO CH FAV TV/RADIO VOL TEXT EPG SUBTITLE HOLD INDEX SIZE REVEAL SBPAGE RED GREEN YELLOW CYANTV/RADIO: Switch between DTV program and radio program (only audio but not image).
(Used for models with DTV function only)
EPG: Enter electronic program guide.
(Used for models with DTV function only)
☐: Stop playing the MEDIA or stop to record.
(Used for models with MEDIA function only)
SUBTITLE: Open or close subtitle.
(Used for models with DTV function only)
TEXT: Press to enter or eixt the Teletext mode.
(Used for European region only)
: Press to start playing the MEDIA or pause
(Used for models with MEDIA function only)
HOLD: Freeze a multi-page passage on screen in Teletext mode. (Used for European region only)
: Start to record.
INDEX: Press this button to go to the index page in Teletext (Used for European region only)
: Press to play backward.
(Used for models with MEDIA function only)
SIZE: Display the top, bottom or all of page to read easily in Teletext mode.
(Used for European region only)
: Press to play forward.
(Used for models with MEDIA function only)
REVEAL: Press this button to reveal the hidden information in Teletext page. Press again to hide the information.
(Used for European region only)
: Skip to previous chapter
(Used for models with MEDIA function only)
SUBPAGE: Carry out the function of SUBCODE in the text while enter the text display mode.
(Used for European region only)
: Skip to next chapter
(Used for models with USB/CR function only)
RED, GREEN, YELLOW, BLUE: Correpond to the different colored subjects.
OSD basic adjustment
Installation Guide
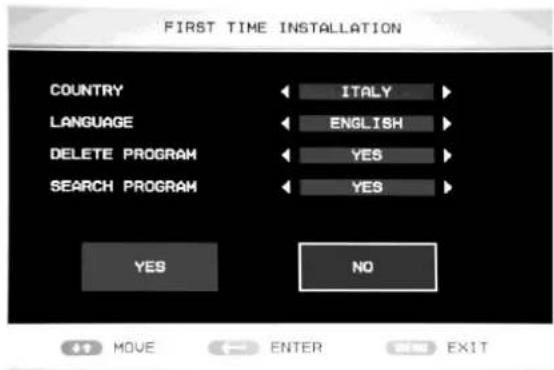
If this is the first time you are turning on the TV and there are no programs in the TV memory, the "first time Installation" menu will appear on the screen.
a: Press “▲/▼” button to select “COUNTRY” and press the “◀/▶” button to select the local country ;
b: Press “▲/▼” button to select
“LANGUAGE” menu and press the “◀/▶”
button to select the local language.
c: Press “▲/▼” button to select “DELETE PROGRAM”, then press the “◀/▶” button to select “YES” or “NO”.
d: Press “▲/▼” button to select “SEARCH to select “YES” or “NO”.
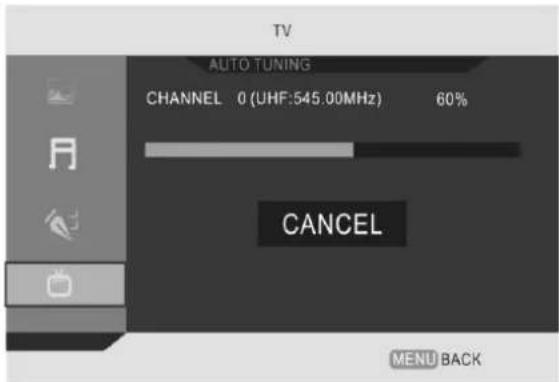
Press the “◀/▶” button to select “YES”, then press “ENTER” button to “AUTO TUNING”.
Press the “◀/▶” button to select “NO”, then press “ENTER” button to After setting the items next time
text_image
FIRST TIME INSTALLATION COUNTRY LANGUAGE DELETE PROGRAM SEARCH PROGRAM ITALY ENGLISH YES YES YES NO MOVE ENTER EXITPROGRAM", then press the "◀/▶" button
text_image
TV AUTO TUNING CHANNEL 0 (UHF:545.00MHz) 60% CANCEL MENU BACK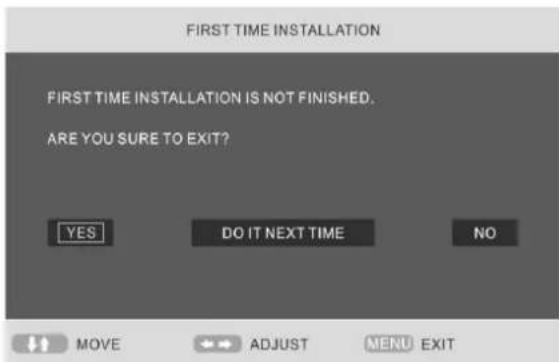
text_image
FIRST TIME INSTALLATION FIRST TIME INSTALLATION IS NOT FINISHED. ARE YOU SURE TO EXIT? YES DO IT NEXT TIME NO MOVE ADJUST MENU EXITPicture
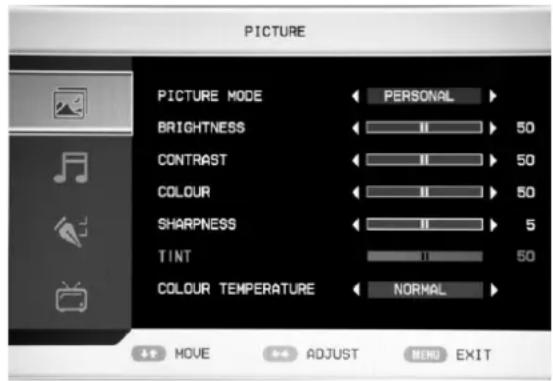
You can select the type of picture, which best corresponds to your viewing.
- Press the “MENU” button to enter the OSD menu. Then press “▲/▼” button to select the “PICTURE” menu. Enter the “PICTURE” menu by pressing “▶” button.
- Press “▲/▼” button to select “PICTURE MODE” and press the “◀/▶” button to select the picture mode
- Press “▲/▼” button to select “BRIGHTNESS” and press the “◀/▶”
button to enter brightness adjustment menu to adjust brightness.
- Press “▲/▼” button to select “CONTRAST” and press the “◀/▶” button to enter contrast adjustment menu to adjust contrast.
- Press “▲/▼” button to select “COLOUR” and press the “◀/▶” button to enter color adjustment menu to adjust saturation.
- Press “▲/▼” button to select “SHARPNESS” and press the “◀/▶” button to enter sharpness adjustment menu to adjust sharpness.
- Press “▲/▼” button to select “TINT” and press the “◀/▶” button to enter hue adjustment menu to adjust hue.
Note: The item hue is only for NTSC
- Press “▲/▼” button to select “COLOUR TEMPERATURE” menu and press the “◀/▶” button to select the colour temperature.
text_image
PICTURE PICTURE MODE ← PERSONAL ► BRIGHTNESS ← II → 50 CONTRAST ← II → 50 COLOUR ← II → 50 SHARPNESS ← II → 5 TINT ← II → 50 COLOUR TEMPERATURE ← NORMAL ► MOVE ADJUST MENU EXITSound
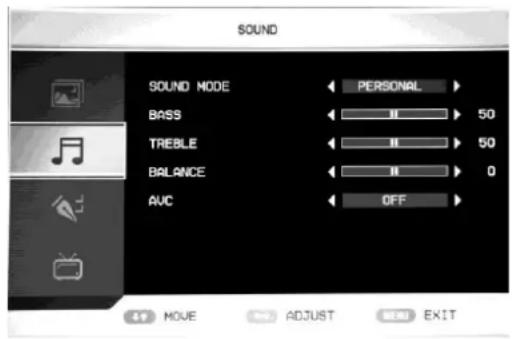
You can select the type of sound, which best corresponds to your listening.
- Press the “MENU” button to enter the OSD menu. Then press “▲/▼” button to select the “SOUND” menu. Enter the “SOUND” menu by pressing “▶” button.
- Press “▲/▼” button to select “SOUND MODE” and press the “◀/▶” button to select the sound mode.
- Press “▲/▼” button to select “BASS” and press the “◀/▶” button to enter bass adjustment menu to adjust bass.
- Press “▲/▼” button to select “TREBLE” and press the “◀/▶” button to enter treble adjustment menu to adjust treble.
- Press “▲/▼” button to select “BALANCE” and press the “◀/▶” button to enter balance adjustment menu to adjust balance.
- Press “▲/▼” button to select “AVC” and press the “◀/▶” button to select the auto volume control function “ON” or “OFF”.
text_image
SOUND SOUND MODE ← PERSONAL > BASS ← 50 TREBLE ← 50 BALANCE ← 0 AUC ← OFF > 47 MOVE ADJUST END EXITFUNCTION
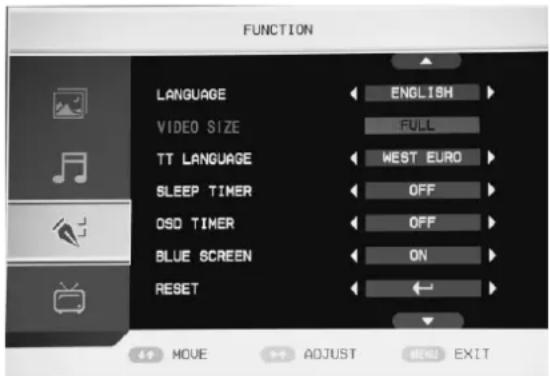
You can make the desired adjustment in the TV mode.
- Press the “MENU” button to enter the OSD menu. Then press “▲/▼” button to select the “FUNCTION” menu. Enter the “FUNCTION” menu by pressing “▶” button.
- Press “▲/▼” button to select “LANGUAGE” menu and press the
“◀/▶” button to select the OSD language which you desire.
text_image
FUNCTION LANGUAGE ENGLISH VIDEO SIZE FULL TT LANGUAGE WEST EURO SLEEP TIMER OFF OSD TIMER OFF BLUE SCREEN ON RESET MOVE ADJUST MENU EXIT- Press “▲/▼” button to select “VIDEO SIZE” menu and press the “◀/▶” button to select the size which you desire.
- Press “▲/▼” button to select “TT LANGUAGE” menu and press the “◀/▶” button to select the local TELETEXT LANGUAGE.
- Press “▲/▼” button to select “SLEEP TIME” and press the “◀/▶” button to select how long the time you want the TV enter the standby mode from now on
- Press “▲/▼” button to select “OSD TIME” and press the “◀/▶” button to select the time how
long you want OSD display.
- Press “▲/▼” button to select “BLUE SCREEN” and press the “◀/▶” button to select the blue
background "ON" or "OFF".
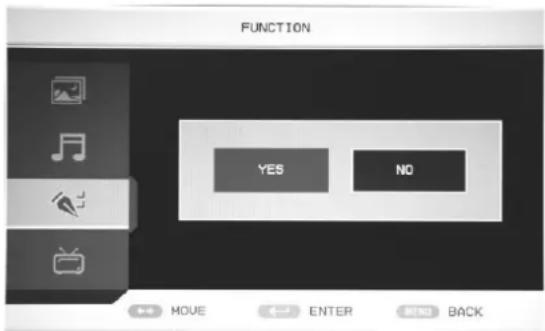
8. Press “▲/▼” button to select “RESET”, then press “ENTER” button to enter. Press the “◀/▶” button to select “YES” or “NO”. Press “ENTER” button to confirm.
9. Press“▲/▼”button to select “INSTALLATION”, then press “ENTER” button to enter “first time Installation” menu.
text_image
FUNCTION YES NO MOVE ENTER MENU BACKTV
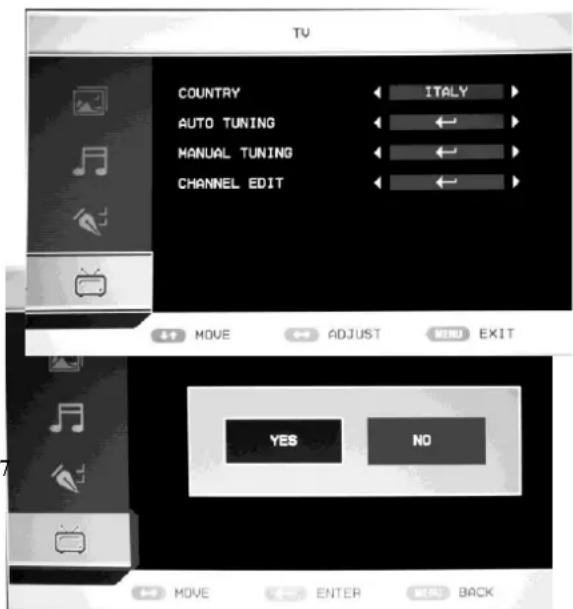
- Press the “MENU” button to enter the OSD menu. Then press “▲/▼” button to select the “TV” menu. Enter the “TV” menu by pressing “▶” button.
- Press “▲/▼” button to select “COUNTRY” and press the “◀/▶” button to select the local country.
text_image
TV COUNTRY ITALY AUTO TUNING MANUAL TUNING CHANNEL EDIT 41 MOVE ADJUST MENU EXIT YES NO MOVE ENTER BACK- Press “▲/▼” button to select “AUTO TUNING”, Press the “ENTER” button to enter. Press “◀/▶” button to select “YES” or “NO”. Press “ENTER” button to confirm.
- Press “▲/▼” button to select “MANUAL TUNING”, Press the “ENTER” button to enter. Press “◀/▶” button to select “YES” or “NO”. Press “ENTER” button to confirm.
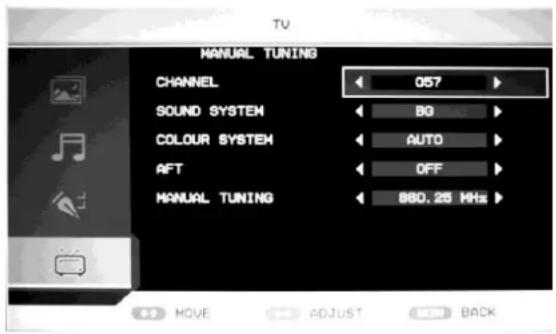
a. CHANNEL
Press “▲/▼” button to select “CHANNEL” and press the “◀/▶” button to select the different channels.
b. SOUND SYSTEM
Press “▲/▼” button to select “SOUND SYSTEM” and press the “◀/▶” button to select the local sound system.
text_image
MANUAL TUNING CHANNEL 057 SOUND SYSTEM BO COLOUR SYSTEM AUTO AFT OFF MANUAL TUNING 880.26 MHz MOVE ADJUST BACKc. COLOR SYSTEM
Press “▲/▼” button to select “COLOR SYSTEM” and press the “◀/▶” button to select the local color system.
d. AFT (auto fine tune)
Press “▲/▼” button to select “AFT” and press the “◀/▶” button to select “ON” or “OFF”.
e. MANUAL TUNING
Press “▲/▼” button to select “MANUAL TUNING” and press the “◀/▶” button to adjust the channel’s frequency.
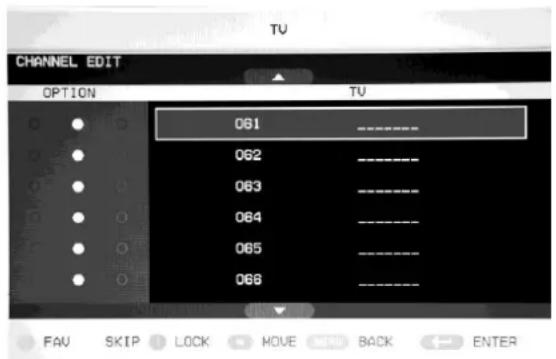
- Press “▲/▼” button to select “CHANNEL EDIT”, Press the “ENTER” button to enter
a. Press “▲/▼” button to select the channel which you favored, and press “GREEN” button to pitch on.
b. Press “▲/▼” button to select the channel and press “YELLOW” button to skip the channel which you want to.
c. Press “▲/▼” button to select the channel which you want to lock and press “CYAN” button to pitch on.
d. Press “▲/▼” button to select the channel in the list, press “ENTER” button to enter the rename channel’s window.
Input channel name at “____”, press “▲/▼◀/▶” button to select “letter”,
text_image
CHANNEL EDIT OPTION 061 062 063 064 065 066 TUV FAV SKIP LOCK MOVE BACK ENTER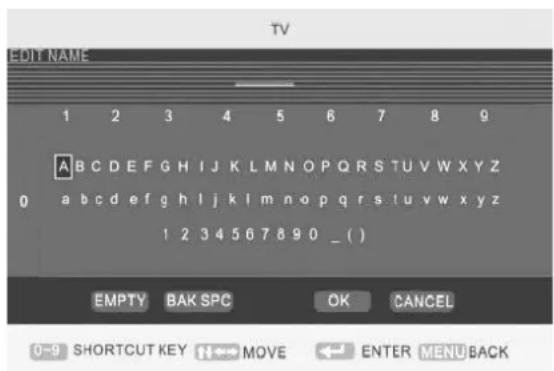
text_image
TV EDIT NAME 1 2 3 4 5 6 7 8 9 A B C D E F G H I J K L M N O P Q R S T U V W X Y Z 0 a b c d e f g h l j k l m n o p q r s t u v w x y z 1 2 3 4 5 6 7 8 9 0 _ ( ) EMPTY BAK SPC OK CANCEL 0~9 SHORTCUT KEY N←→ MOVE ←→ ENTER MENU BACK“number”, “_”, “(”, “)”, “EMPTY” or “BAK SPC”, and press “ENTER” button to confirm.
Press “▲/▼ ◀/▶” button to select “OK” to save and return to the previous menu.
Press “▲/▼ ◀/▶” button to select “CANCEL” to exit and return to the previous menu.
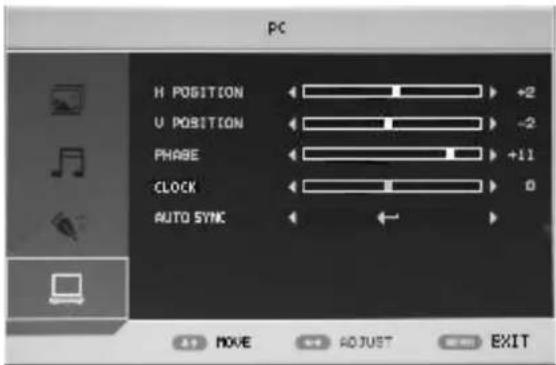
PC ( In PC mode )
-
Press the "MENU" button to enter the OSD menu. Then press "▲/▼" button to select the "PC" menu. Enter the "PC" menu by pressing "▶" button.
-
Press “▲/▼” button to select “H POSITION” menu and press the “◀/▶” button to enter “H Position” adjustment menu to adjust “H Position”.
-
Press "▲/▼" button to select "V
text_image
PC H POSITION ← → +2 U POSITION ← → -2 PHASE ← → +11 CLOCK ← → 0 AUTO SYNC ← ← +1 MOVE ↑ ↑ ADJUST EXITPOSITION" and press the "◀/▶" button to enter "V Position" adjustment menu to adjust "V Position".
-
Press “▲/▼” button to select “PHASE” and press the “◀/▶” button to enter Phase adjustment menu to adjust phase.
-
Press “▲/▼” button to select “CLOCK” and press the “◀/▶” button to enter clock adjustment menu to adjust clock.
-
Press “▲/▼” button to select “AUTO SYNC” menu, Press the “ENTER” button to do auto adjustment.
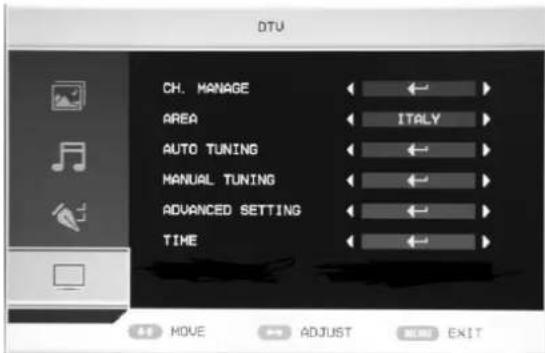
DTV ( In DTV mode )
-
Press the “MENU” button to enter the OSD menu. Then press “▲/▼” button to select the “DTV” menu when the current signal source is in DTV. Enter the “DTV” menu by pressing “▶” button.
-
Press “▲/▼” button to select “CH.MANAGE” and press the “ENTER” button to enter.
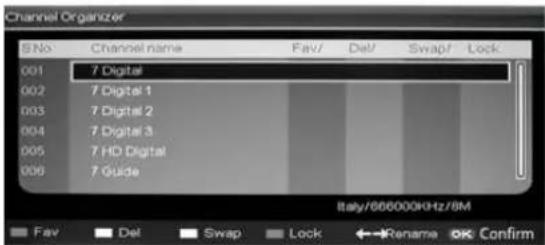
a. CH.ORGN
Press “▲/▼” button to select “CH.ORGN”, Press the “ENTER” button to enter. Press “▲/▼” button to select the
text_image
DTU CH. MANAGE AREA AUTO TUNING MANUAL TUNING ADVANCED SETTING TIME MOVE ADJUST EXIT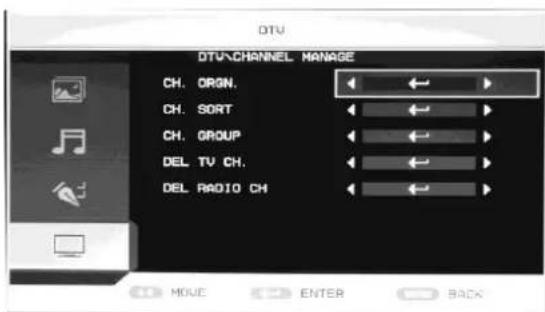
text_image
DTU DTV\CHANNEL MANAGE CH. ORGN. CH. SORT CH. GROUP DEL TV CH. DEL RADIO CH MOVE ENTER BACKchannel.
1). Press "RED" button to set the channel for favourite channels.
2). Press "GREEN" button to delete the channel.
3). Press "YELLOW" button to skip the channel when you select the "LCN" function for
“ON”. Press “YELLOW” button to swap the channel when you select the “LCN” function for “OFF”.
4) Press "CYAN" button to lock the channel and the default password is "0000". Press "ENTER" button to save.
*The administrator password is "8888".
5) Press “◀/▶” button to rename the channel
b. CH.SORT
Press “▲/▼” button to select “CH.SORT”, Press the “ENTER” button to see the channel’s sort.
c. CH.GROUP
Press “▲/▼” button to select “CH.GROUP”, Press the “ENTER” button to
CHANNEL.GROUPING window
The left side of CHANNEL.GROUPING window lists index number and program name. Besides, the “FAVOURITE” lable and “GROUP NUMBER” are also listed. All programs can be grouped as: 1 None; 2 News; 3 Science; 4 Sports; 5 Movie; 6 kids; 7 Music and 8 Fashion .User can move cursor to the program and press the number button to set the group number. Press "EXIT" button to exit. Press "ENTER" button to save the setting. When the setting is successful, "Successfully updated..." will be displayed on the screen.
text_image
Channel Organizer S.No Channel name Fav/ Del/ Swap/ Lock 001 7 Digital 002 7 Digital 1 003 7 Digital 2 004 7 Digital 3 005 7 HD Digital 006 7 Guide Italy/666000kHz/8M Fav Del Swap Lock ←Rename OK Confirm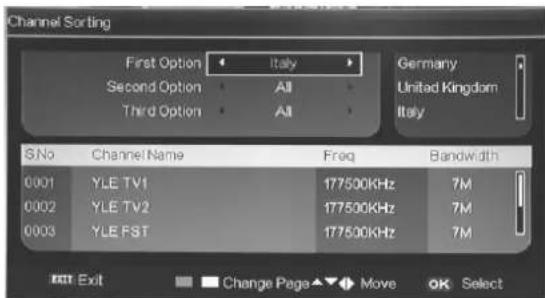
text_image
Channel Sorting First Option Italy Germany Second Option All United Kingdom Third Option All Italy S.No Channel Name Freq Bandwidth 0001 YLE TV1 177500KHz 7M 0002 YLE TV2 177500KHz 7M 0003 YLE FST 177500KHz 7M Exit Change Page Move OK Select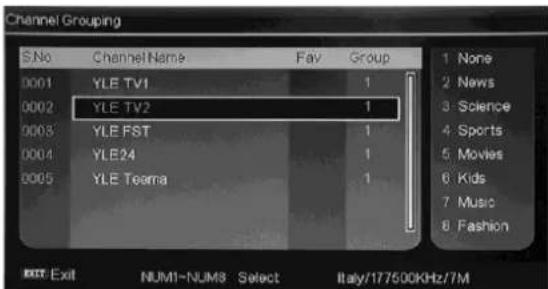
text_image
Channel Grouping S.No Channel Name Fav Group 0001 YLE TV1 1 0002 YLE TV2 1 0003 YLE FST 1 0004 YLE24 1 0005 YLE Teema 1 1 None 2 News 3 Science 4 Sports 5 Movies 6 Kids 7 Music 8 Fashion Exit Exit NUM1-NUM3 Select Italy/177500KHz/7Md. DEL TV CH.
Press “▲/▼” button to select “DEL TV CH”, Press the “ENTER” button to enter. Press “◀/▶” button to select “YES” or “NO”, press “ENTER” button to delete all TV channels when select “YES”, press “ENTER” button to return back to the previous menu when select “NO”.
e. DEL RADIO CH.
Press “▲/▼” button to select “DEL RADIO CH”, Press the “ENTER” button to enter. Press “◀/▶” button to select “YES” or “NO”,

text_image
Message Delete all TV Channels? Yes No
text_image
Message Delete all Radio Channels? Yes Nopress "ENTER" button to delete all radio channels when select "YES", press "ENTER" button to return back to the previous menu when select "NO".
-
Press “▲/▼” button to select “AREA” menu and press the “◀/▶” button to select the local country.
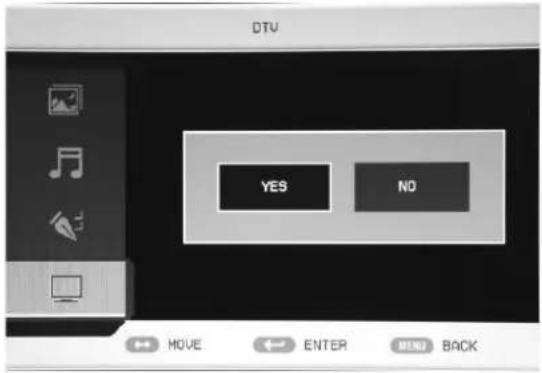
-
Press “▲/▼” button to select “AUTO SEARCH” and press the “ENTER” button to enter. Press “▲/▼/◄/►” button to select “YES” or “NO”, press “ENTER” button to do auto search when select “YES”, press “ENTER” button to return back to the previous menu when select “NO”. Press “▲/▼/◄/►” button to select “LCN” and press the “◄/►” button to select the function on or off.
-
Press “▲/▼” button to select “MANUAL TUNING”, Press the “ENTER” button to enter. Press “◀/▶” button to select “YES” or “NO”.
-
Press “▲/▼” button to select “ADVANCED SETTING”, Press the “ENTER” button to enter.
a. AUDIO
Press “▲/▼” button to select “AUDIO” and press the “◀/▶” button to select the local country audio
text_image
DTV YES NO MOVE ENTER MENU BACK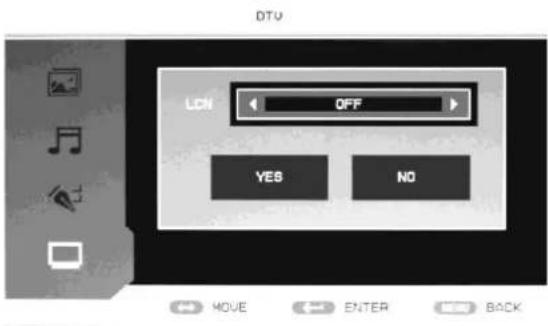
text_image
DTU LCN OFF YES NO MOVE ENTER BACK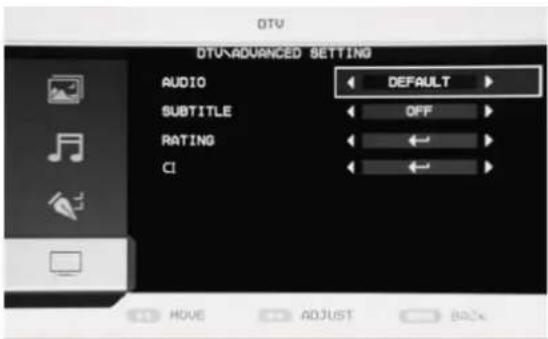
text_image
DTU DTU-ADVANCED SETTING AUDIO DEFAULT SUBTITLE OFF RATING CI MOVE ADJUST Backb. SUBTITLE
Press “▲/▼” button to select “SUBTITLE” and press the “◀/▶” button to select the local country subtitle
c. RATING
When user want to change or set the rating of program, first need to input the correct password. Press the “◀/▶” button to exit/enter the rating option and press the “▲/▼” button to select the rating .The default password is “0000”. The administrator password is “8888”.

text_image
System Setup Parental Rating OFF OFF 4 6 6 7 8 9 Exit Exit Move Select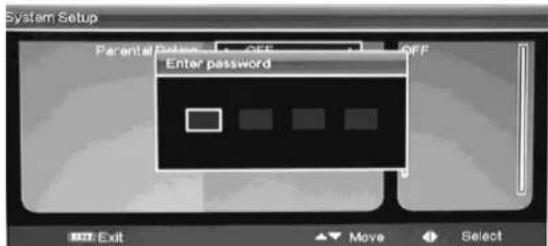
text_image
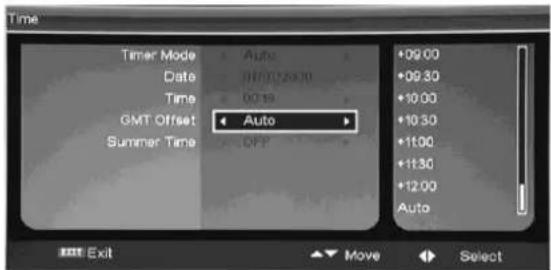
System Setup Parental Password: OFF Enter password Exit Move Select- Press “▲/▼” button to select “TIME”, Press the “ENTER” button to enter.
d. CI
Press “▲/▼” button to select “CI” and press the “ENTER” button to enter.
text_image
Time Timer Mode Auto Date 01/07/2010 Time 00:18 GMT Offset Auto Summer Time OFF +09.00 +09.30 +10.00 +10.30 +11.00 +11.30 +12.00 Auto Exit Move SelectDTV Features
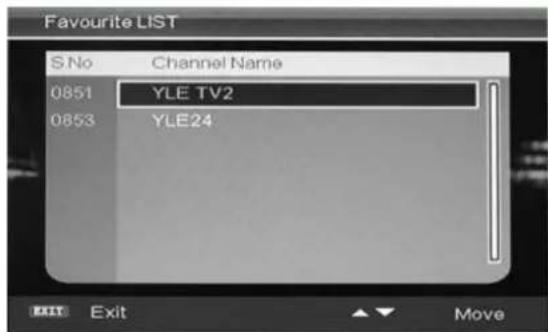
Favourite List
When the source is selected to DTV, users can enter "FAVOURITE LIST" by pressing "FAV" button. The "Favourite LIST" window is illustrated as follow:
text_image
Favourite LIST S.No Channel Name 0851 YLE TV2 0853 YLE24 EXIT Exit MoveProgram Information
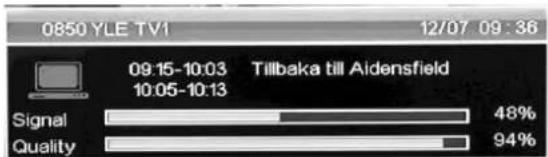
When the source is selected as DTV, you can press “INFO” button to display the channel’s information. Press “INFO” button twice to display the channel’s detail information. The “PROGRAM INFORMATION” window is illustrated as follow.
Audio
When the source is selected as DTV, users can enter “Multi audio” by pressing “AUDIO” button. The “Multi audio” window is illustrated as follow:
Press “◀/▶” button to select “Stereo” → “Left” → “Right”. Press “EXIT” button to exit the window and save the setting.
Electronic Program Guide (EPG)
text_image
0850 YLE TV1 12/07 09:36 09.15-10.03 Tillbaka till Aidensfield 10.05-10.13 Signal 48% Quality 94%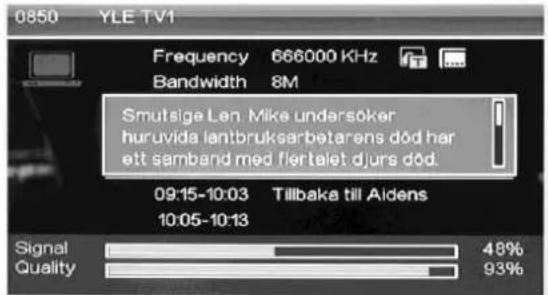
text_image
0850 YLE TV1 Frequency 666000 KHz Bandwidth 8M Smutsige Len: Mike undersøker huruvida lantbruksarbetarens død har ett samband med flertalet djurs død. 09:15-10:03 Tillbaka till Aldens 10:05-10:13 Signal 48% Quality 93%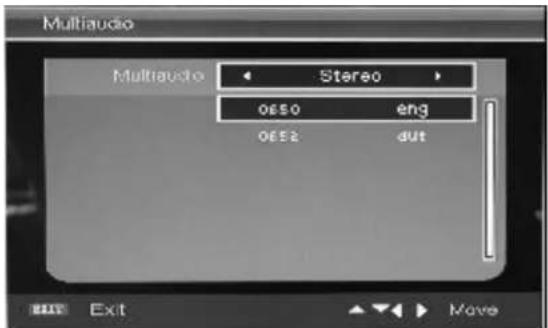
text_image
Multiaudio Multiaudio Stereo oesso eng oesso dut Exit MoveElectronic Program Guide provides program information which will be broadcasted now or in the future. The system will display “EPG” window by pressing “EPG” button. DATE and TIME information is displayed on the top-right of the window. The left side contains all channels. The right side contains the programs in the channel. The selected program is also displayed on the bottom-left of the window.
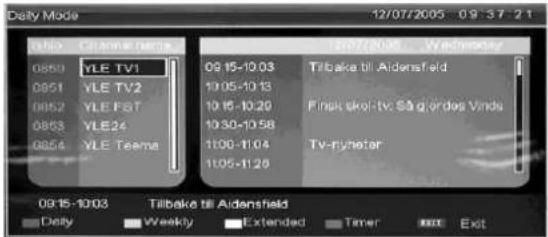
Daily Mode
The “RED” button enables the “DAILY MODE”, the program guide is listed and sorted by daily time.
Weekly Mode:
The “GREEN” button enables the “WEEKLY MODE”, the program guide is listed and sorted by weekly time.
text_image
Daily Mode 12/07/2005 09:37:21 08:50 YLE TV1 08:51 YLE TV2 08:52 YLE FST 08:53 YLE24 08:54 YLE Teams 09:15-10:03 10:05-10:13 10:16-10:20 10:30-10:58 11:00-11:04 11:05-11:28 Tilbake till Aldensfield Finish skor tv: Så gjördes Vinds Tv-riyheter 09:15-10:03 Tilbake till Aldensfield Daily Weekly Extended Timer Exit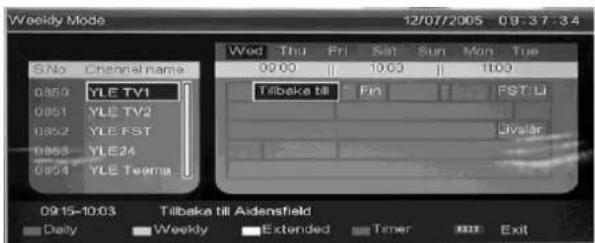
text_image
Weekly Mode 12/07/2005 09:37:34 S.No Channel name 0850 YLE TV1 0851 YLE TV2 0852 YLE FST 0853 YLE 24 0854 YLE Teeng Wed Thu Fri Sat Sun Mon Tue 09:00 10:00 11:00 Tilbaka till Fin FST: Li Live Star 0915-10:03 Tilbaka till Aidensfield Daily Weekly Extended Timer ExitExtend Mode:
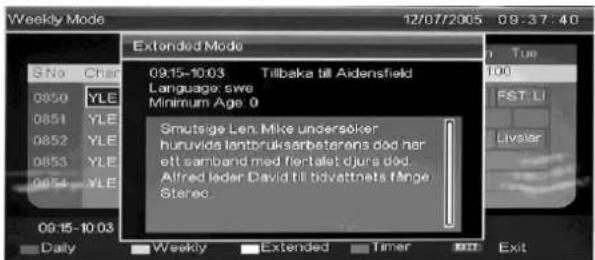
The "YELLOW" button enables the "EXTEND MODE", the program guide window contains detailed information about
text_image
Weekly Mode 12/07/2005 09:37:40 S.No Char 0850 YLE 0851 YLE 0852 YLE 0853 YLE 0854 YLE 09:15-10:03 Extended Mode 09:15-10:03 Tilbaka till Aidensfield Language: swe Minimum Age: 0 Smutsige Len, Mike undersøker huruvids lantbruksarbeterans død her elt samband med fertlalet djurs død. Alfred Ieder David till bivattnets fange Stered Daily Weekly Extended Timer Exitthe program.
“EPG” is used for enter or closing the “EPG” window.
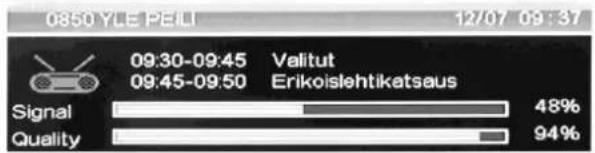
DTV / Radio Switch
"TV / RADIO" button is used for switch DTV program and radio.
text_image
0850 YLE PELI 12/07 09:37 09:30-09:45 Velutut 09:45-09:50 Erikoislehtikatsaus Signal 48% Quality 94%Subtitle
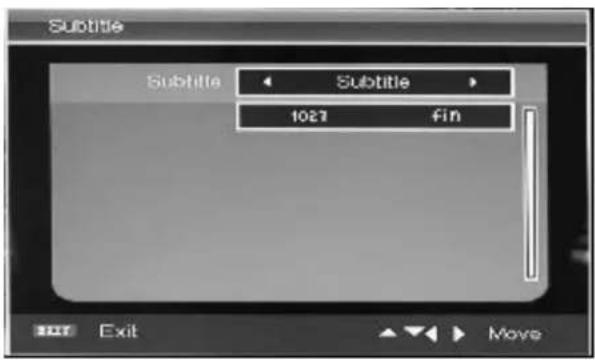
When the source is selected as DTV, users can enter subtitle by pressing "SUBTITLE" button. The subtitle window is illustrated as follow:
The “Subtitle” language can be turned ON/OFF by pressing the “◀/▶” button.
text_image
Subtitle Subtitle 1027 fin Exit MoveCI Operation (Optional)
-
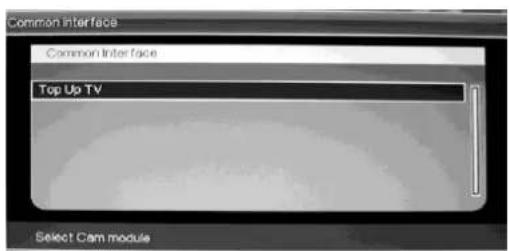
When you enter the CI status, the window is illustrated as followed:
-
Press "ENTER" button to enter.
text_image
Common Interface Common Interface Top Up TV Select Cam module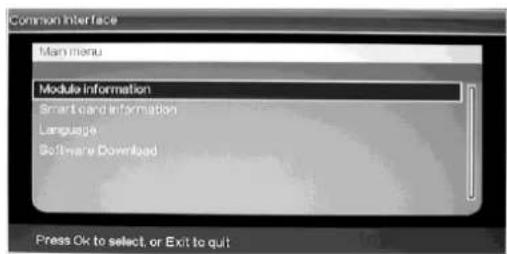
text_image
Common Interface Main menu Module information Smart card information Language Software Download Press Ok to select or Exit to quit-
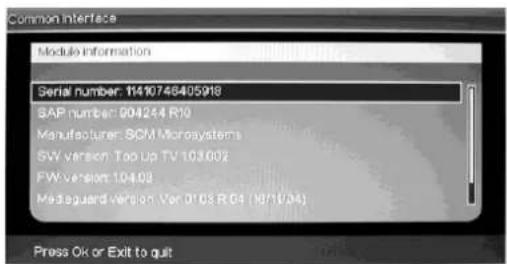
Press “▲/▼” button to select “Module information” and press the “ENTER” button to display the module’s information. Press “MENU” button to return the previous menu. Press “EXIT” button to exit.
-
Press “▲/▼” button to select “Smart card information” and press the “ENTER” button to display the information.
-
Press “▲/▼” button to select “Language” and press the “▲/▼” button to select.
-
Press “▲/▼” button to select “Software Download” and press the “ENTER” button to enter. Press “▲/▼” button to select “Yes” or “No” and press the “ENTER” button to confirm.
Note: The pic is provided for reference only since the info displayed will be different according to different CI card

text_image
Common Interface Module information Serial number: 11410748405918 GAP number: 904244 R10 Manufacturer: SEM Microsystems SW version: Top Up TV 103.602 FW version: 104.03 Measquared version: Var 01.03 R04 (16/11/04) Press Ok or Exit to quit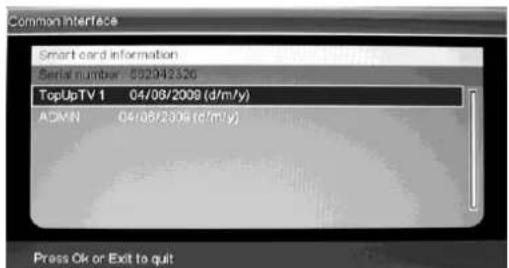
text_image
Common Interface Smart card information Serial number: 052942326 TopUpTV 1 04/08/2009 (d/m/y) ADMIN 04/08/2009 (c/m/y) Press Ok or Exit to quit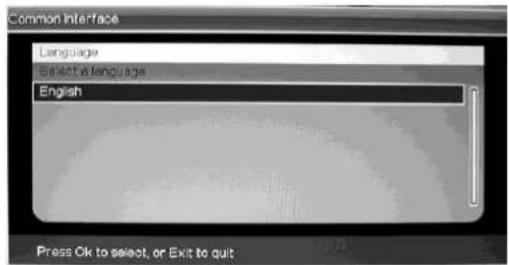
text_image
Common Interface Language Select a Language English Press Ok to select, or Exit to quit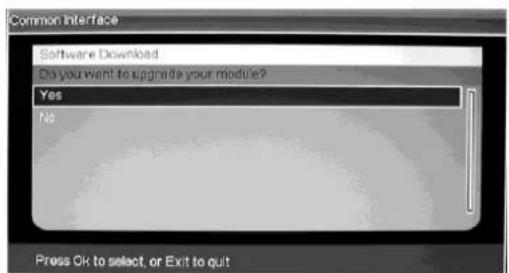
text_image
Common Interface Software Download Do you want to upgrade your module? Yes No Press Ok to select, or Exit to quitMEDIA Features
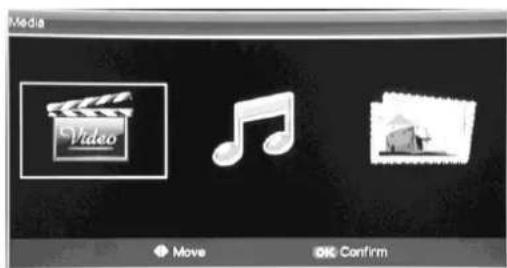
- Press the "SOURCE" button to spring the "SOURCE" menu. Press "▲/▼" button to select "MEDIA" and press the "ENTER" button to enter.
a. Press the “◀/▶” button to select “” and press the “ENTER” button to enter.
text_image
Media Video Move OK Confirm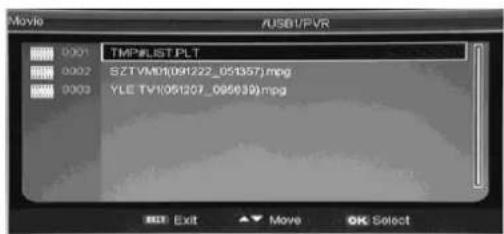
text_image
Movie AUSBUPVR 0001 TMP#LIST PLT 0002 SZTVM0(091222_051357)mpg 0003 YLE TV(051207_095639)mpg Exit Move OK SelectPress“▲/▼”button to select the file which store the video. And press “▶” button to select subfolder or picture file as you played.
b. Press the “◀/▶” button to select “” and press the “ENTER” button to enter.
Press“▲/▼”button to select the file which store the Music. And press “▶” button to select subfolder or picture file as you played.

text_image
Music /USB/USB/MP3 0001 amazing grace.mp3 0002 Big Big World.mp3 0003 If you.mp3 0004 MP3.mp3.mp3 0005 Right Here Waiting&A its _mp3 0006 yesterday once more.mp3 0007 you are not alone.mp3 0008 kD50.mp3 EXIT Exit ▼ Move OK Selectc. Press the “◀/▶” button to select “ [ ] ” and press the “ENTER” button to enter.
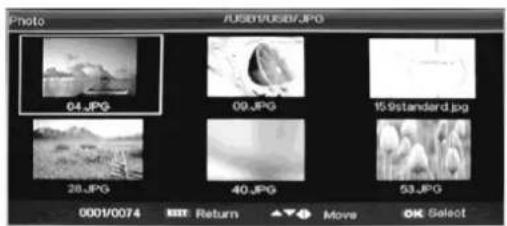
Press“▲/▼”button to select the file which store the photo. And press “▶” button to select subfolder or picture file as you played.
text_image
Photo 7USD1/USB1/JPG 04.JPG 09.JPG 15.9standard.jpg 28.JPG 40.JPG 53.JPG 0001/0074 Return Move OK SelectNote: The pics about function are provided for reference only which will be in accordance with exact circumstances.
PVR Opration (Optional)
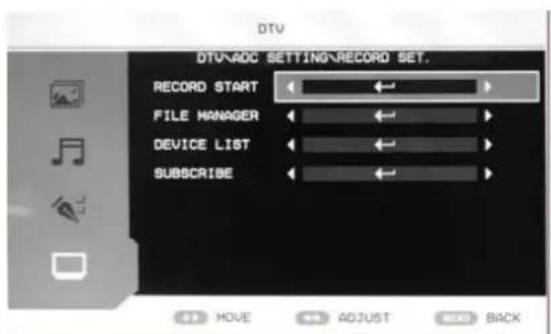
Press direct to record menu
(1) RECORD START
Press “▲/▼” button to select “RECORD START” and press the “ENTER” button to start
record., then Press again to stop record
(2) FILE MANAGER
Press “▲/▼” button to select “FILE
text_image
DTV DTV\ADC SETTING\RECORD SET. RECORD START FILE MANAGER DEVICE LIST SUBSCRIBE MOVE ADJUST BACK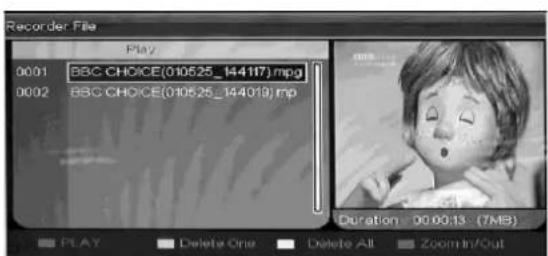
text_image
Recorder File Play 0001 BBC CHOICE(010525_144117) mpg 0002 BBC CHOICE(010525_144019) mp Duration 00:00:13 (7MB) PLAY Delete One Delete All Zoom In/OutMANAGER" and press the "ENTER" button to enter. Press "▲/▼" button to select the record. Press "RED" button to play. Press "GREEN" button to delete one record which you select. Press "YELLOW" button to delete all records. Press "CYAN" button to zoom in or zoom out the picture.
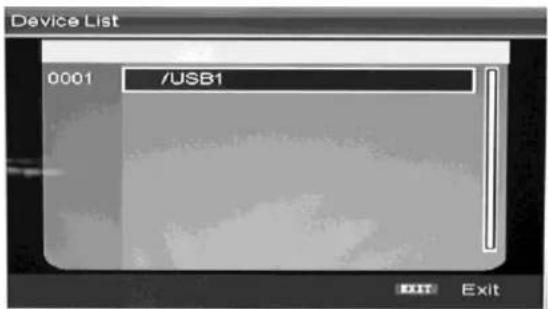
(3) DEVICE LIST
Press “▲/▼” button to select “DEVICE LIST” and press the “ENTER” button to display the list of device.
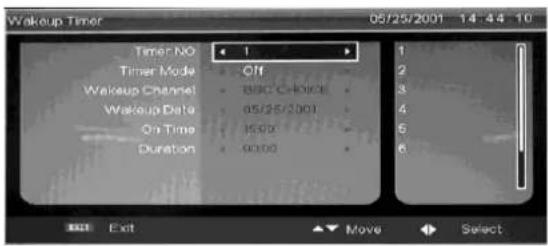
(4) SUBSCRIBE
Press “▲/▼” button to select “SUBSCRIBE” and press the “ENTER” button to enter. Press
text_image
Device List 0001 /USB1 EXIT Exit“▲/▼” button to select “Timer NO” and press the “▶” button to move cursor to the right side of
the window. Press “▲/▼” button to select the number and press “ENTER” button to confirm.
Press “▲/▼” button to select “Timer Mode” and press the “◀/▶” button to select the timer mode such as Off, Once, Daily, Weekly.
text_image
Wakeup Timer 05/25/2001 14:44:10 Timer NO 1 Timer Mode Off Wakeup Channel BDC C-Noise Wakeup Data 05/25/2001 On Time I500 Duration 9000 Exit Move SelectSpecifications
RGB INPUT
| Model | Resolution | Horizontal Frequency (KHz) | Vertical Frequency (HZ) |
| DOS | 720x400 | 31.5 | 70 |
| VGA | 640x480 | 31.5 | 60 |
| SVGA | 800x600 | 37.9 | 60 |
| XGA | 1024x768 | 48.4 | 60 |
| WXGA | 1920 x 1080 | 67.5 | 60 |
HDMI INPUT
| Model | Resolution | Horizontal Frequency (KHz) | Vertical Frequency (HZ) |
| VGA | 640 x 480 | 31.47 | 59.94 |
| 480i | 720 x480i | 15.73 | 59.94/60 |
| 576i | 720 x 576i | 15.63 | 50 |
| 480p | 720 x480p | 31.47 | 59.94/60 |
| 576p | 720 x 576p | 31.26 | 50 |
| 720p | 1280 x 720p | 37.50 | 50 |
| 44.96 | 59.94/60 | ||
| 1080i | 1920 x 1080i | 28.13 | 50 |
| 33.75 | 59.94/60 | ||
| 1080p | 1920 x 1080p | 56.25 | 50 |
| 67.5 | 59.94/60 |
COMPONENT VIDEO (YPbPr) INPUT
| Model | Resolution | Horizontal Frequency (KHz) | Vertical Frequency (HZ) |
| 480i | 720 x 480i | 15.73 | 59.94/60 |
| 576i | 720 x 576i | 15.63 | 50 |
| 480p | 720 x 480p | 31.47 | 59.94/60 |
| 576p | 720 x 576p | 31.26 | 50 |
| 720p | 1280 x 720p | 37.50 | 50 |
| 44.96 | 59.94/60 | ||
| 1080i | 1920 x 1080i | 28.13 | 50 |
| 33.75 | 59.94/60 | ||
| 1080p | 1920 x 1080p | 56.2567.5 | 5059.94/60 |
Trouble Shooting
Before consulting service personnel, check the following chart for a possible cause of the trouble you are experiencing and for a solution.
| PROBLEM | SOLUTION |
| TV will not turn on | ●Make sure the power cord is plugged in.●The batteries in the remote control may be exhausted replace the batteries. |
| No picture, no sound | ●Check the interface cable between TV and antenna/cable TV.●Press the power button on the remote.●Press the SOURCE button the remote, then press the “▲/▼” button repeatedly to select the TV source. |
| Poor picture, sound OK | ●Check the interface cable between TV and antenna/cable TV.●Try another channel, the station may have broadcast difficulties.●Adjust the brightness/contrast in the Video menu. |
| Audio noise | ●Move any infrared equipment away from the TV. |
The TFT LCD panel uses a panel consisting of sub pixels which requires sophisticated technology to produce. However, there may be few bright or dark pixels on the screen. These pixels will have no impact on the performance of the product.
CUSTOMER SUPPORT
You can contact the Ricatech customer service when you have a question or a problem with your Ricatech product. You can contact us by telephone and email.
For customer support by email, please sent a email to support@ricatech.com Please make sure that you mention the model number and serial number of the product, mention your name & address and describe your question or problem clearly.
Telephone
For customer support by telephone, please dial +32 3 3265694. One of our service staff will be ready to serve you.
For full procedure please visit the website of Ricatech at: www.ricatech.com
Inhoudsopgave
natural_image
Illustration of a computer monitor with a crossed-out hand and lightning bolts, symbolizing electrical hazard (no text or symbols present)
natural_image
Simple line drawing of a computer monitor with a blue X mark and a hanging curtain beside it (no text or symbols)
natural_image
Illustration of a computer monitor with a blue X symbol and decorative stars above it (no text or symbols present)
natural_image
Simple line drawing of a roof with steam rising, marked with a blue 'X' symbol (no text or labels)
text_image
Cartoon illustration showing a person holding a computer monitor with a blue 'X' symbol, indicating cancellation or error.
natural_image
Illustration of a computer monitor with a blue X mark and a blue lightning bolt, placed on a table (no text or symbols)
natural_image
Illustration of a person standing next to a computer monitor and a circular icon with a bug (no text or symbols)
natural_image
Simple line drawing of a hammer striking a surface on a computer monitor (no text or symbols)
RED, GREEN, YELLOW, CYAN (ROOD, GROEN,
text_image
COUNTRY AUTO TUNING MANUAL TUNING CHANNEL EDIT ITALY ADJUST EXIT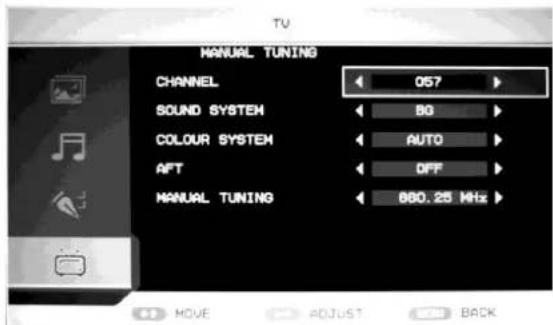
text_image
MANUAL TUNING CHANNEL 057 SOUND SYSTEM BG COLOUR SYSTEM AUTO AFT DFF MANUAL TUNING 860.25 MHz MOVE ADJUST BACKc. COLOUR SYSTEM (KLEURSYSTEEM)
text_image
Channel Sorting First Option Italy Germany Second Option All United Kingdom Third Option All Italy S.No Channel Name Freq Bandwidth 0001 YLE TV1 177500KHz 7M 0002 YLE TV2 177500KHz 7M 0003 YLE FST 177500KHz 7M Exit Change Page Move OK Selecttext_image
Message Delete all TV Channels? Yes Notext_image
Message Delete all Radio Channels? Yes Notext_image
System Setup Parental Password: 10 OFF Enter password Exit Move Select
text_image
System Setup Parental Rating OFF OFF 4 5 6 7 8 9 Exit Move Selecttext_image
Common Interface Common Interface Top Up TV Select Cam moduletext_image
Common Interface Main menu Module information Smart card information Language Software Download Press Ok to select, or Exit to quittext_image
Common Interface Module information Serial number: 11410746405918 SAP number: 904244 R10 Manufacturer: SCM Microsystems SW version: Top Up TV 1031002 FW version: 10402 Mediaguard version: Van D163 R D5 (16'11/94) Press OK or Exit to quittext_image
Common Interface Smart card information Serial number: 502942326 TopUpTV 1 04/08/2009 (d/m/y) ADMIN 04/08/2009 (d/m/y) Press Ok or Exit to quittext_image
Common Interface Language Select a language English Press Ok to select, or Exit to quittext_image
Common Interface Software Download Do you want to upgrade your module? Yes No Press Ok to select, or Exit to quittext_image
Media Video Move Confirmtext_image
Music /USER/USER/MP3 0001 amazing grace.mp3 0002 Big Big World.mp3 0003 It's you.mp3 0004 MPSkmaDef.mp3 0005 Right hiera WaitingdkA'18.mp3 0006 yesterday once more.mp3 0007 you are not else.mp3 0008 kQ60v.mp3 EXIT Exit ▼ Move OK Selecttext_image
Device List 0001 /USB1 EXIT Exit(4) AANMELDEN
Druk op de “▲/▼” knop om “SUBSCRIBE”
text_image
Wakeup Timer 05/25/2001 14:44:10 Timer NO 1 Timer Mode Off Wakeup Channel BBQ CHOICE Wakeup Date 05/25/2001 On Time 15:00 Duration 00:00 Exit Move Selectnatural_image
Illustration of a computer monitor with a crossed-out arrow and lightning bolts, symbolizing anti-smoking or anti-physical action (no text present)
natural_image
Illustration of a computer monitor with a blue X mark and a hanging curtain beside it (no text or symbols)
natural_image
Illustration of a computer monitor with a blue X symbol and a flower above it, no text or symbols present.
natural_image
Simple line drawing of a cartoon character with steam rising above a box and cross symbol (no text or labels)
natural_image
Cartoon illustration of a person holding a computer monitor with a blue X symbol (no text or symbols present)
natural_image
Illustration of a computer monitor with a blue X symbol and a lightning bolt, placed on a desk (no text or symbols present)
natural_image
Illustration of a person standing next to a computer monitor and a bug, with no visible text or symbols.
natural_image
Simple line drawing of a hammer striking a computer monitor with radiating lines (no text or symbols)
CH- : TV channel down.
text_image
FIRST TIME INSTALLATION COUNTRY LANGUAGE DELETE PROGRAM SEARCH PROGRAM ITALY ENGLISH YES YES YES NO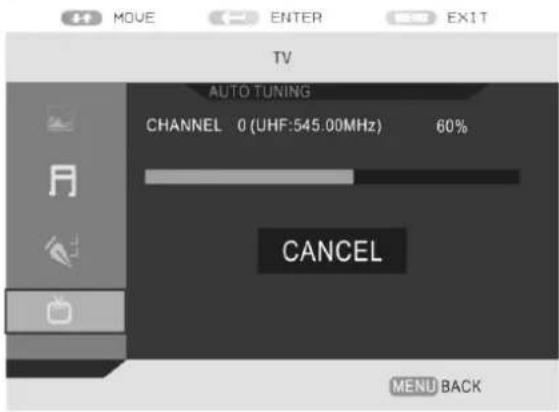
text_image
TV AUTO TUNING CHANNEL 0 (UHF:545.00MHz) 60% CANCEL MENU BACKtext_image
Channel Sorting First Option Italy Germany Second Option All United Kingdom Third Option All Italy S.No Channel Name Freq Bandwidth 0001 YLE TV1 177500KHz 7M 0002 YLE TV2 177500KHz 7M 0003 YLE FST 177500KHz 7M Exit Exit Change Page Move OK Selectc. GROUPE CH.
text_image
Message Delete all TV Channels? Yes Notext_image
Message Delete all Radio Channels? Yes Notext_image
System Setup Parental Password: 1 OFF Enter password Exit Move Select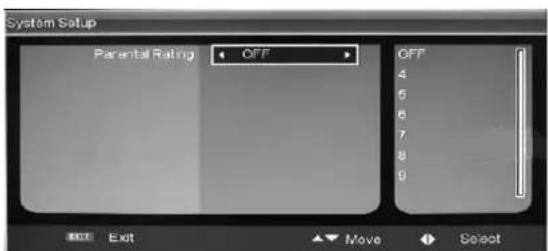
text_image
System Setup Parental Rating OFF OFF 4 5 6 7 8 9 Exit Move Selectd. CI
text_image
Common Interface Common Interface Top Up TV Select Cam moduletext_image
Common Interface Main menu Module information Smart card information Language Software Downloaded Press Ok to select, or Exit to quittext_image
Common Interface Module information Serial number: 11410748405918 SAP number: 904244 R16 Manufacturer: SCM Microsystems SW version: Top Up TV 1031002 FW version: 104103 Megaguard version: Var 01'03 R04 (R0'10/04) Press Ok or Exit to quittext_image
Common Interface Smart card information Serial number: 062942320 TopUpTV 1 04/06/2009 (d/m/y) ADMIN 04/06/2009 (d/m/y) Press Ok or Exit to quittext_image
Common Interface Language select a language English Press Ok to select, or Exit to quittext_image
Common Interface Software Download Do you want to upgrade your module? Yes No Press Ok to select or Exit to quitFonctions MÉDIA
text_image
Media Video Move OK Confirmtext_image
Device List 0001 /USB1 EXIT Exit(4) PARTAGER
natural_image
Illustration of a computer monitor with a crossed-out hand and lightning bolts, symbolizing electrical hazard (no text or symbols present)
natural_image
Simple line drawing of a computer monitor with a blue X mark and a hanging curtain (no text or symbols)
natural_image
Illustration of a computer monitor with a 'X' symbol and decorative stars above it (no text or symbols present)
natural_image
Simple line drawing of a steaming box with a cross symbol inside, placed on a base (no text or labels)
Vorsicht
text_image
Cartoon illustration showing a person holding a computer monitor with a blue 'X' symbol, surrounded by floating flowers and steam.
natural_image
Illustration of a computer monitor with a blue X mark and a blue lightning bolt, no text or symbols present.
Vorsicht
natural_image
Illustration of a person standing next to a computer monitor and a small icon with a bug (no text or symbols)
natural_image
Simple line drawing of a hammer striking a surface on a computer monitor (no text or symbols)
text_image
COUNTRY AUTO TUNING MANUAL TUNING CHANNEL EDIT ITALY ← ← ← ← → MOVUE ADJUST MENU EXIT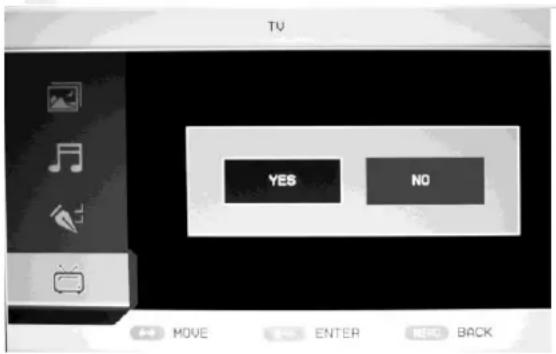
text_image
TV YES NO MOVE ENTER BACKtext_image
Channel Sorting First Option Italy Germany Second Option All United Kingdom Third Option All Italy S.No Channel Name Freq Bandwidth 0001 YLE TV1 177500KHz 7M 0002 YLE TV2 177500KHz 7M 0003 YLE FST 177500KHz 7M Exit Change Page Move OK Selectc. K.GRUP
text_image
Message Delete all TV Channels? Yes Notext_image
Message Delete all Radio Channels? Yes Notext_image
System Setup Parental Period: 1 OFF 2 OFF Enter password Exit Move Select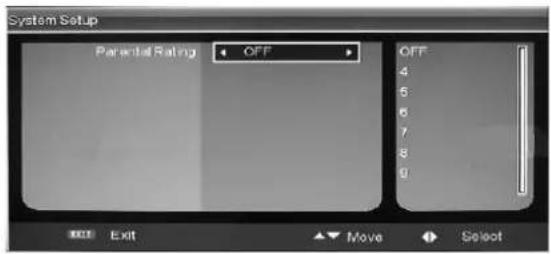
text_image
System Setup Parental Rating OFF OFF 4 5 6 7 8 9 Exit Move Selectd. CI
text_image
Common Interface Common Interface Top Up TV Select Cam module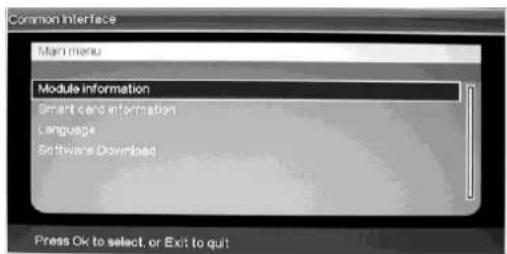
text_image
Common Interface Main menu Module information Smart card information Language Software Downloads Press Ok to select, or Exit to quit