
Toronto II - TV SEG - Free user manual and instructions
Find the device manual for free Toronto II SEG in PDF.
User questions about Toronto II SEG
0 question about this device. Answer the ones you know or ask your own.
Ask a new question about this device
Download the instructions for your TV in PDF format for free! Find your manual Toronto II - SEG and take your electronic device back in hand. On this page are published all the documents necessary for the use of your device. Toronto II by SEG.
USER MANUAL Toronto II SEG
text_image
SODA MOUNTAIN 100% 100%LED-Anzeige
text_image
Front view of a remote control with labeled buttons and navigation iconsFernbedienung

Netzkabel
text_image
SEG® small electronic device 18.5°Benutzerhandbuch

Kurzanleitung
Anschlüsse
text_image
out COAX RF Headphone out Audio in R L VIDEO rP b SCART VGA PC-IN HDMI P Y Common Interfacetext_image
Source OKtext_image
Input Source DTV TV SCART AV YPBPR VGA HDMI EXIT Quit OK SelectMenüs bedienen
text_image
PICTURE Picture Mode User Contrast 50 Brightness 50 Color 50 Sharpness 50 Tint 0 OK Quit END Back OK Select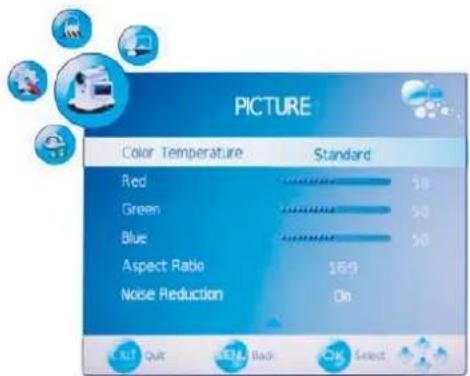
text_image
PICTURE Color Temperature Standard Red $10 Green $20 Blue $30 Aspect Ratio $69 Noise Reduction On Exit Quit Back OK SelectAlthough the LCD screen is made with high-precision technology and 99.99% or more of the pixels are effective, black dots may appear or bright points of light (red, blue or green) may appear constantly on the LCD screen and is not a malfunction.
Safety Precautions
- Caution 1.
- Safety Information 2
Getting Started
- Names of each part(Front View) / Accessories 3
- Names of each part(Back View).4
- Remote control.5
Basic Use
- Powering the LCD TV / Selecting input source....8
Application
- Customizing TV SETTINGS 10
- Customizing the PICTURE Settings 12
- Customizing the SOUND Settings 13
- Customizing the SETUP Settings 14
- Customizing the EXTRAS Settings 15
• DVD operation 16 - Disc care 20
Maintenance and Service
- Trouble shooting 21
- Specifications 22

Caution

The lightening flash with arrowhead symbol, within an equilateral triangle is intended to alert the user to the presence of un-insulated "dangerous voltage" within the products enclosure that may be of sufficient magnitude to constitute a risk of electric shock to the persons.

The exclamation point within an equilateral triangle is intend to alert the user to the presence of important operating and maintenance (servicing) instructions in the literature accompanying the appliance.

Correct disposal of this Product
"Correct Disposal of Product"
Produced after 13 August 2005. Waste electrical should not be disposed of with household waste. Please recycle where facilities exist. Check with your local authority or retailer for recycling advice.
On 1st July 2007, The Waste Electrical and Electronic Equipment (WEEE) Regulations were implemented in the UK in order to reduce the quantity of electronic waste being sent to landfill and thereby protect our environment.

This appliance complies with European Safety and Electrical directives
Caution: Suffocation Notice.
Packaging materials are no toys, please keep away from children. Plastic bags can cause suffocation when pulled over the head.

Safety Information
To ensure reliable and safe operation of this equipment, please read carefully all the instructions in this user guide, especially the safety information below.
Electrical safety
- The TV set should only be connected to a mains supply which matches that stated on the label on the mains adaptor - To prevent overload, don't share the same mains supply socket with too many other items of equipment.
- Do not place any connecting wires where they may be stepped on or tripped over.
- Do not place heavy items, which may damage the leads, on them.
- Hold the Mains plug, not the wires, when removing from a socket.
- During a thunderstorm or while leaving the TV for long periods, disconnect the aerial (if outdoor) and mains adaptor from the supply.
- Do not allow water or moisture to enter the TV or mains adaptor. Do NOT use in wet or moist areas such as Bathrooms, steamy kitchens or near swimming pools.
- Pull the plug out immediately, and seek professional help if:
- the mains plug or cable is damaged
- liquid is spilt onto the set, or if it is accidentally exposed to water or moisture
- anything accidentally penetrates the ventilation slots
- the set doesn't work normally.
- Do NOT remove the safety covers. There are no user serviceable parts inside. You may invalidate the warranty. Qualified personnel must only service this apparatus.
- To avoid battery leakage, remove exhausted batteries from the remote control handset, or when not using for a long period.
- Do NOT break open or throw exhausted batteries on a fire.
Physical safety
- Do NOT block ventilation slots in the back cover. You may place the TV in a cabinet, but ensure at least 5cm (2") clearance all around.
- Do NOT tap or shake the TV screen, you may damage the internal circuits. Take good care of the remote control, do not drop.
- To clean the TV use a soft dry cloth. Do NOT use solvents or petrol based fluids. For stubborn stains, you may use a damp soft cloth with dilute detergent.
Names of each part
Front View
text_image
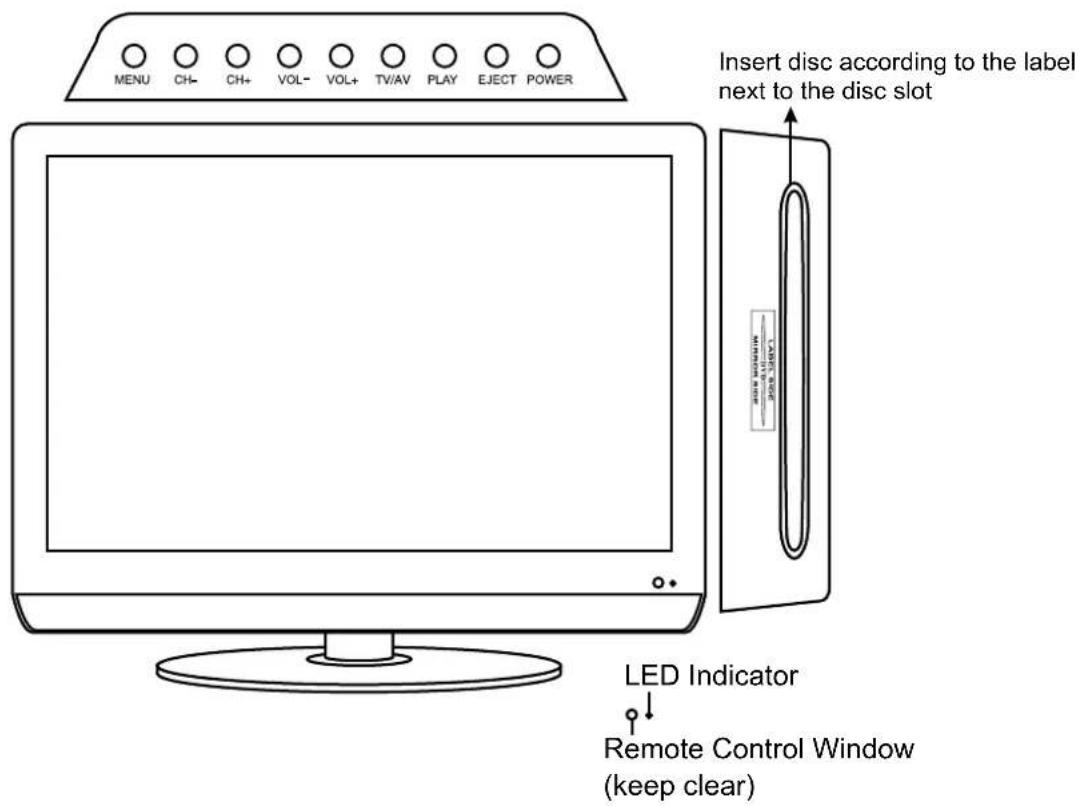
MENU CH- CH+ VOL- VOL+ TV/AV PLAY EJECT POWER Insert disc according to the label next to the disc slot LED Indicator Remote Control Window (keep clear)Accessories
natural_image
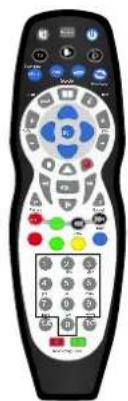
Front view of a black remote control with various colored buttons and ports (no readable text or symbols)Remote Control
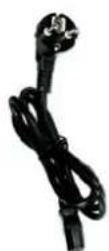
Power cable

Batteries for Remote Control
User Guide
Quick Start Guide
Connections
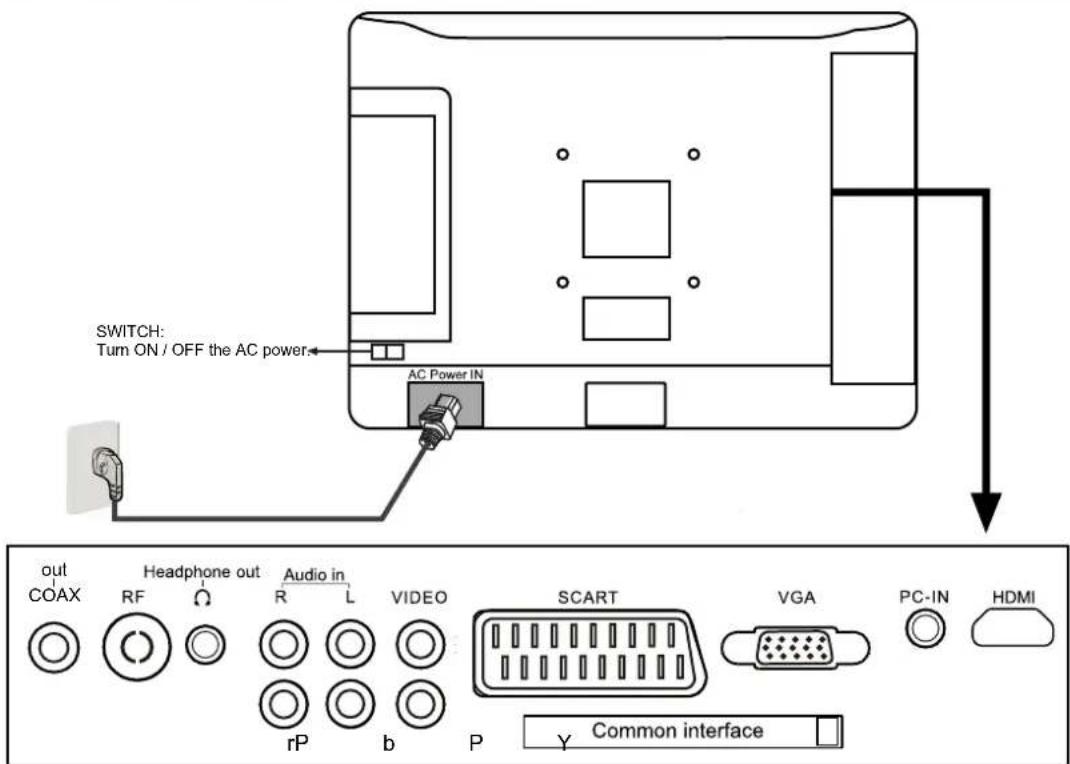
text_image
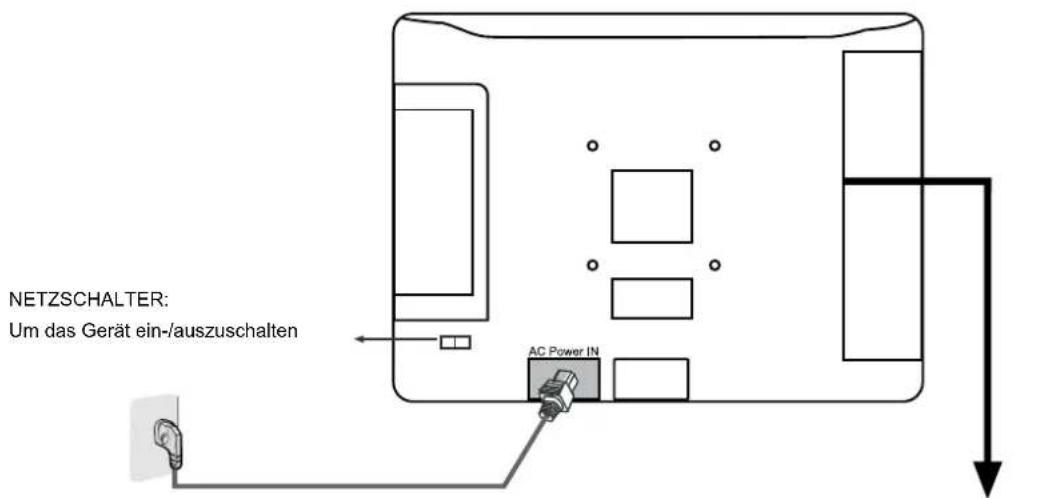
SWITCH: Turn ON / OFF the AC power AC Power IN out COAX Headphone out RF Audio in Ω R L VIDEO rP b SCART VGA PC-IN HDMI Y Common interface| Name Function Description | |
| AC POWER IN | Connect to power supply 100 - 240V AC 50/60HZ |
| SWITCH | Turn on/off the AC power |
| COAX out | Output to Audio amplifier |
| RF | Connectto Aerial, Tuner input 75 Ohm Coaxial Socket. |
| Ω Headphone | Connect headphone |
| (AUDIO)L/R IN | Audio signal input for AV |
| VIDEO | Connect to the Video output of external equipment |
| SCART | Connect to the scart input / output of external equipment |
| VGA IN | Connect to the PC VGA output to display PC graphics |
| PC Audio IN | PC audio input |
| HDMI | Connect to the HDMI socket of your DVD or Satellite Box |
| YPbPr | Connect to the YPbPr output on external equipment. |
| Common Interface | CI slot ( Pay as you view card slot ) |
Wall Mounting
The TV is provided with mounting holes for a VESA 100mm approved wall mounting bracket (NOT SUPPLIED). Remove the screws holding the base to the base bracket and lift the base away (do not remove the base mounting bracket). Mount the VESA bracket using 4 x M4x 10 Iso metric threaded screws (not supplied). Do not use screws longer than 10 mm, damage will occur to the internal parts. Fit the wall bracket securely following the manufacturers instructions.
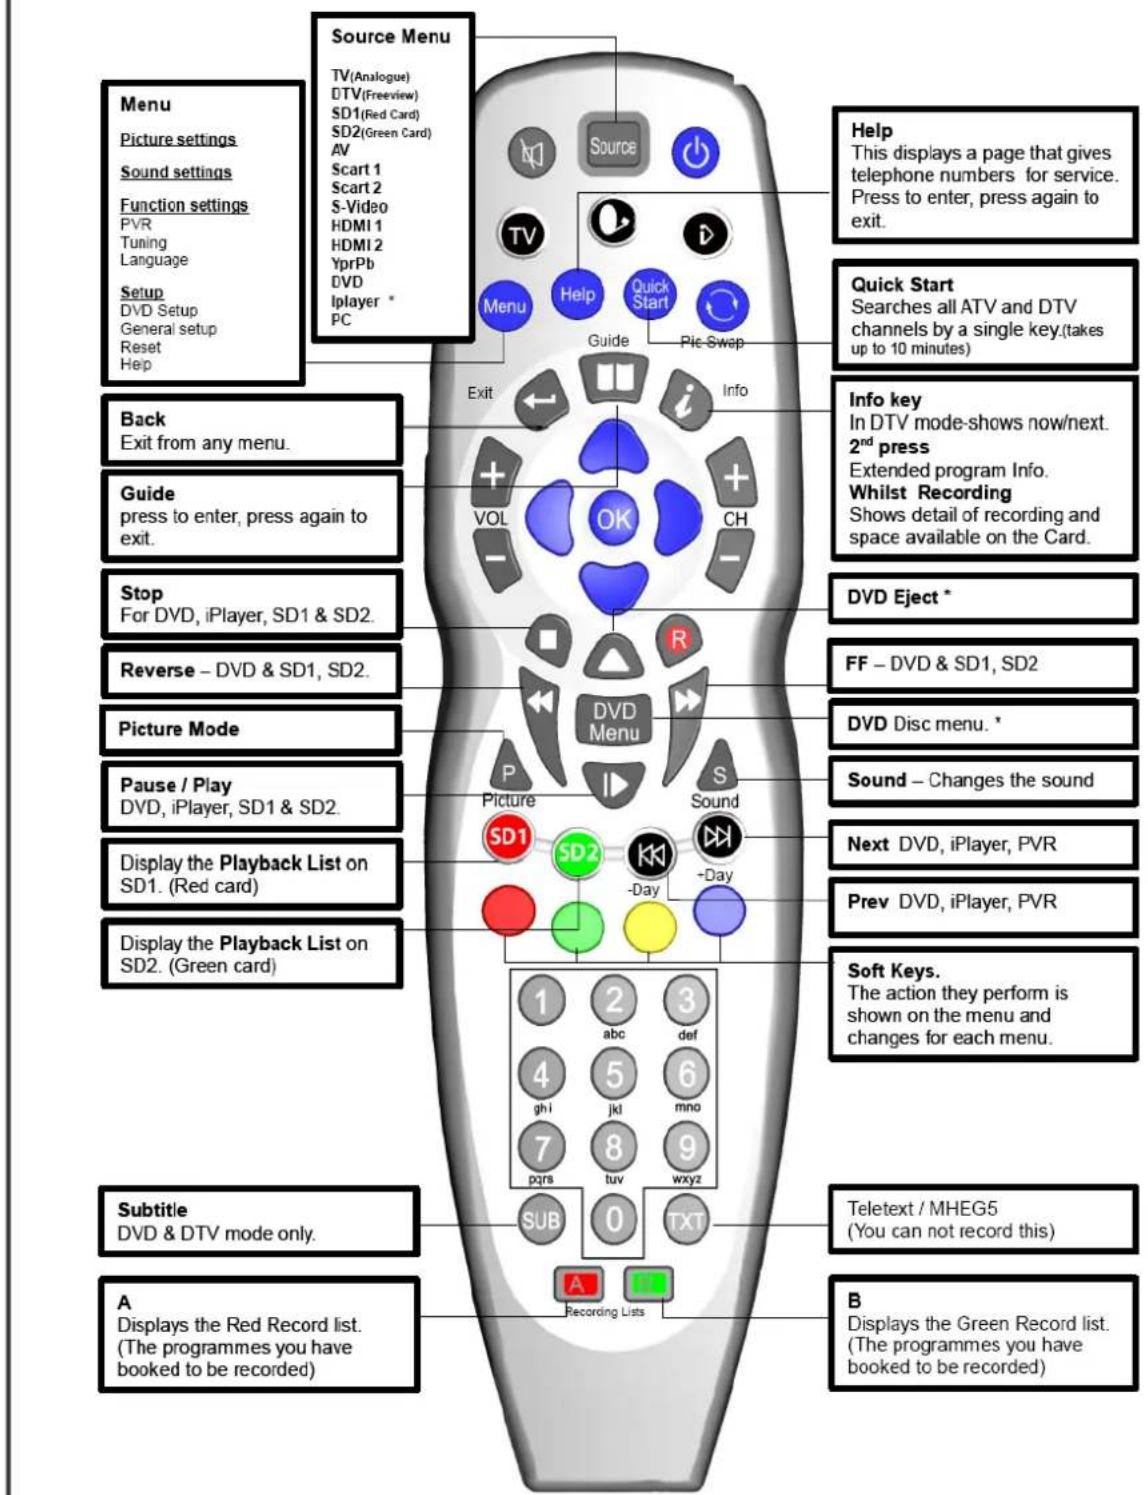
Remote Control
● Functions of remote control buttons
Depending on the model of your television, some buttons will have no function

text_image
Only used on TVs with Internet Player. In this mode the remote does not control the TV. Press tv to control the TV again. If you have set the remote to work a satellite receiver, the remote controls only the Satellite Receiver and not the TV when you press o . Press tv to control the TV again. Used on TVs with DVD or PVR Used on TVs with PVR or Internet player 1 2 3 4 5 6 ghi jkl mno 7 8 9 pqrs tuv wxyz SUB 0 TXT Recording Lists A Used on TVs with PVR or Internet PlayerRemote Control
text_image
Menu Picture settings Sound settings Function settings PVR Tuning Language Setup DVD Setup General setup Reset Hep Source Menu TV(Analogue) DTV(Freeview) SD1(Red Card) SD2(Green Card) AV Scart 1 Scart 2 S-Video HDMI 1 HDMI 2 YprPb DVD Iplayer * PC Exit Guide Pic Swap Help This displays a page that gives telephone numbers for service. Press to enter, press again to exit. Quick Start Searches all ATV and DTV channels by a single key(takes up to 10 minutes) Back Exit from any menu. Guide press to enter, press again to exit. Stop For DVD, iPlayer, SD1 & SD2. Reverse – DVD & SD1, SD2. Picture Mode Pause / Play DVD, iPlayer, SD1 & SD2. Display the Playback List on SD1. (Red card) Display the Playback List on SD2. (Green card) Subtitle DVD & DTV mode only. A Displays the Red Record list. (The programmes you have booked to be recorded) Back Exit from any menu. Guide press to enter, press again to exit. Stop For DVD, iPlayer, SD1 & SD2. Reverse – DVD & SD1, SD2. Picture Mode Pause / Play DVD, iPlayer, SD1 & SD2. Display the Playback List on SD1. (Red card) Display the Playback List on SD2. (Green card) Audio Sound DV Disc menu. * Sound – Changes the sound Next DVD, iPlayer, PVR Prev DVD, iPlayer, PVR Soft Keys. The action they perform is shown on the menu and changes for each menu. Teletext / MHEG5 (You can not record this) B Displays the Green Record list. (The programmes you have booked to be recorded)Remote Control
text_image
Source TV Menu Help Quick Start Guide Pic Swap Exit Info + VOL - OK CH - R DVD Menu P Picture S Sound SD1 SD2 -Day +Day -1 abc 3 daf 4 ghi 5 jxi 6 mno 7 pors 8 tvv 9 wxyz SUB 0 TXT A Recording Lists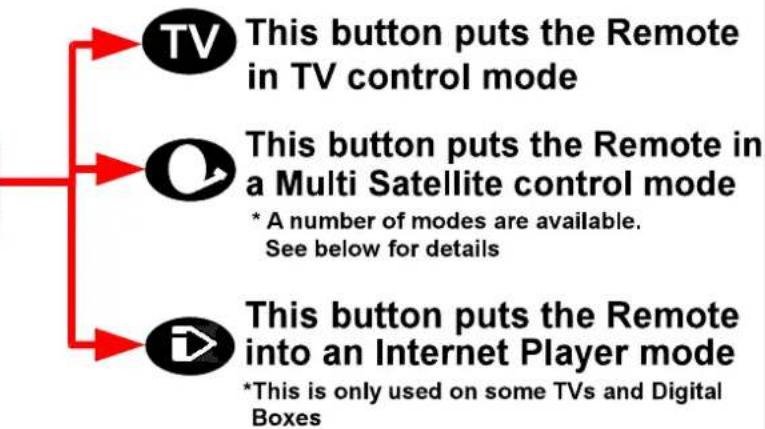
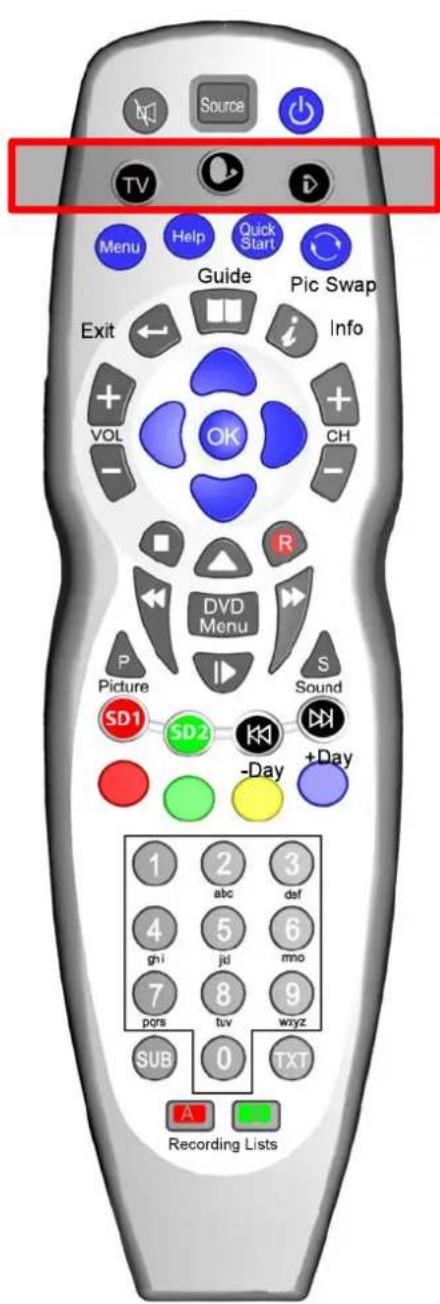
flowchart
graph TD
    A["TV"] --> B["This button puts the Remote in TV control mode"]
    C["Q"] --> D["This button puts the Remote in a Multi Satellite control mode\n* A number of modes are available.\nSee below for details"]
    E["TV"] --> F["This button puts the Remote into an Internet Player mode\n*This is only used on some TVs and Digital Boxes"]
To Set the Multi-Satellite Mode button
The Sat button Q is programmable in the remote and can be set as follows:
To set the button if you have no Satellite Receiver: Press 📋 and at the same time press 0
If you have a Satellite Receiver with Recorder (Known as "Plus" type) Press ⬆ and at the same time press 1
If you have a Satellite Receiver with High Definition (Known as "HD" type) Press Ⓐ and at the same time press 2
If you have a normal Digital Satellite Receiver (Known as "Digital" type) Press ⬆ and at the same time press 3
If you want to use this button to switch on the DVD Player * Press 📋 and at the same time press 4 * DVD Player only fitted on certain models.
∅ + 0 \~ NO SAT RECEIVER
Q + 1 \~ SAT +
+2\~SAT HD
+3\~SAT DIGITAL
Powering the LCD TV
Power On / Off the LCD TV
Power Switch On / Off

Press the power switch to setting - and the standby indicator will light red.
To turn on the LCD TV
Press the power button on the LCD TV or the indicator will light green.

button on the remote control, the standby
To turn off the LCD TV
Press the power button on the LCD TV or the indicator will light red.

button on the remote control, the standby
To turn the LCD TV off completely press the power switch to setting ☐ and the standby indicator light will extinguish.
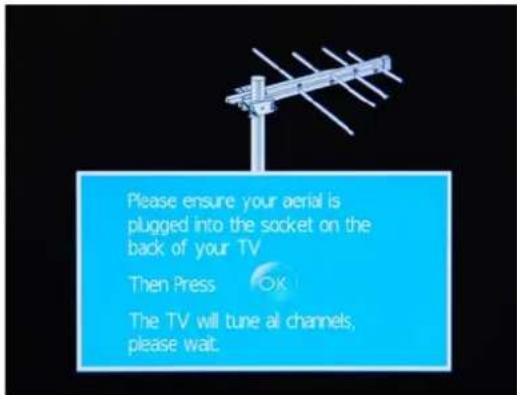
When you initially turn on the LCD TV you will see the first time installation menu as below:
Ensure that the aerial is plugged in to the TV, Make sure your Remote is in TV mode (by pressing TV button), switch on the TV by pressing ⏻ . You will see the first time installation menu.
Press the OK button on the remote control to start the tuning procedure. This process will find all available ATV and DTV channels and store them.
By pressing the Quick Start button the first time installation can be recalled at any time.
text_image
Please ensure your aerial is plugged into the socket on the back of your TV Then Press OK The TV will tune all channels; please wait.Selecting Input Source
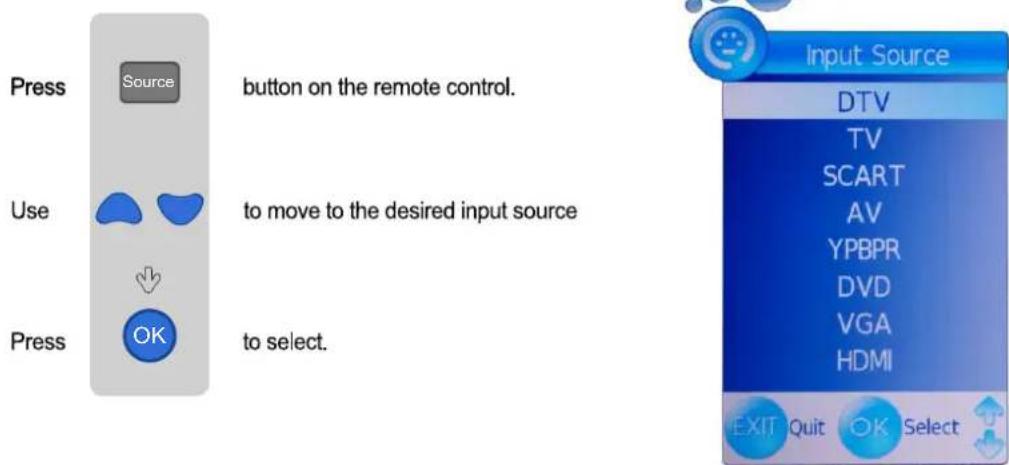
You can select the input source menu by pressing the Source button on the remote control or the TV / AV button on the LCD TV.
text_image
Press Source button on the remote control. Use to move to the desired input source Press OK to select. Input Source DTV TV SCART AV YPBPR DVD VGA HDMI EXIT Quit OK SelectOperating the Menu
- Turn the LCD TV on
- Press the MENU button on the Remote Control.
- Use the ◀ and ▶ buttons to navigate through the menu.
- Press the EXIT button to exit the Menu.
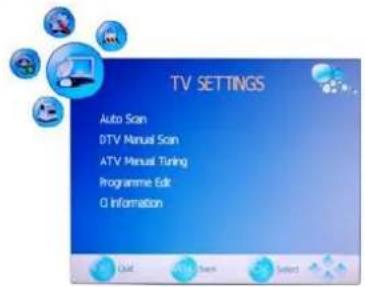
TV SETTINGS MENU
Allows you to search channels and set up a variety of channel options. (Select TV source)
text_image
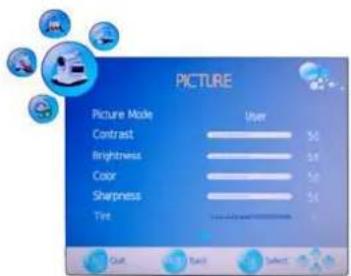
TV SETTINGS Auto Scan DTV Manual Scan ATV Manual Tuning Programme Edit CI InformationPICTURE MENU:
Allows you to make adjustments to your picture settings.
(select TV source for example)
text_image
PICTURE Picture Mode User Contrast 56 Brightness 54 Color 56 Sharpness 54 Tire Quit Back SelectSOUND MENU:
Allows you to customize the sound options and effects.
(Select TV source for example)
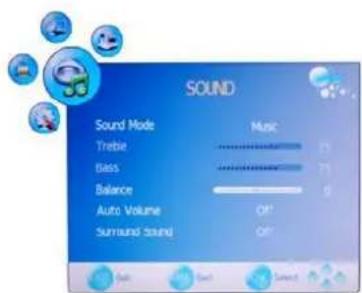
text_image
SOUND Sound Mode Music Treble 75 Bass 75 Balance 0 Auto Volume Off Surround Sound OffSETUP MENU:
Allows you to setup a variety of setup options.
(Select TV source)
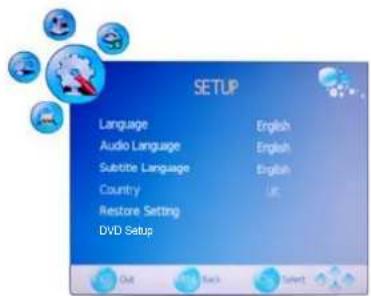
text_image
SETUP Language English Audio Language English Subtitle Language English Country UK Restore Setting DVD Setup Out Back SelectEXTRAS MENU:
Allows you to set up a variety of lock/time and setup options.
(Select TV source)
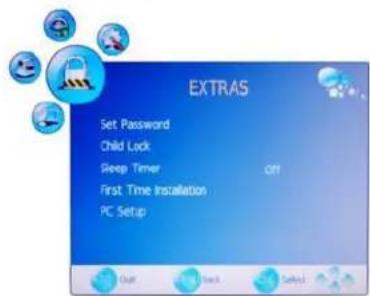
text_image
EXTRAS Set Password Child Lock: Sleep Timer First Time Installation PC Setup Quit Back HelpNote: Use the left right up down navigation buttons to select the required options in the menus.
Customizing the TV Settings
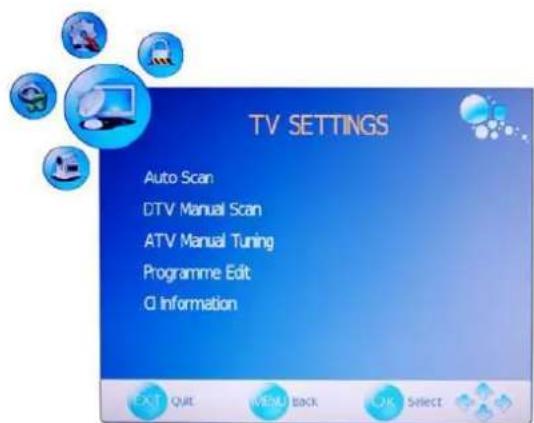
text_image
TV SETTINGS Auto Scan DTV Manual Scan ATV Manual Tuning Programme Edit CI InformationUse the ◀ and ▶ buttons to select the TV SETTINGS menu(as the picture above), press ▼ button to enter the menu.
The TV SETTINGS menu includes the following options :
Auto Scan
Press ◀ and ▶ buttons to select the Country, and press ▼ and ▲ buttons to select "Start", and press OK button to start auto tuning.
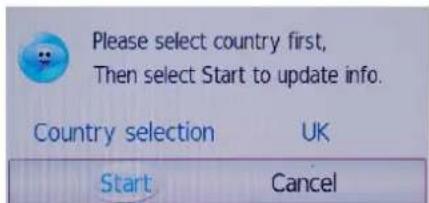
text_image
Please select country first, Then select Start to update info. Country selection UK Start CancelDTV Manual Scan
Press ▶ button to enter the submenu. Press ◀ or ▶ button to select a channel and press OK button to start search.
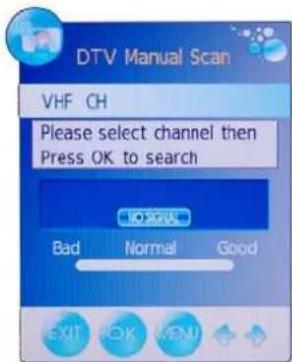
text_image
DTV Manual Scan VHF CH Please select channel then Press OK to search NORMAL Bad Normal Good EXIT OK MENCustomizing the TV Settings
ATV Manual Tuning
Press ▶ button to enter the submenu.
Storage To
Select a position to store the program.
Current CH
Select a program you want to tune.
Search
Press ◀ and ▶ buttons to manual search.
Fine-Tune
Press ◀ and ▶ buttons to fine-tune.
Skip
Select "Yes" to skip the program when you scan the programs by CH+/-
Frequency
Display the current channel's frequency.
Press RED button to save all the setups you have changed.

text_image
ATV Manual Tuning Storage To 1 System BG/DK/I Current QH 1 Search Fine-Tune Skip Yes Frequency 444.00 MHz EXIT SAVEProgram Edit: Press ▶ button to enter the submenu as the following picture.
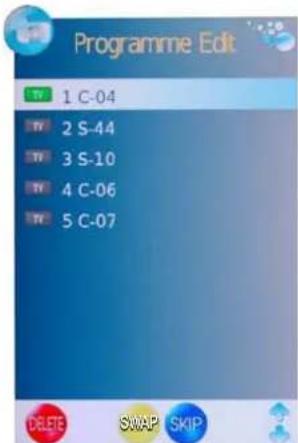
text_image
Programme Edit TV 1 C-04 TV 2 S-44 TV 3 S-10 TV 4 C-06 TV 5 C-07 DELETE SWAP SKIPDelete: Select a channel and press the red button on the remote control, Delete will appear on the right of the program edit menu next to the channel you have chosen. Press the red button again to confirm the delete, the channel will be deleted. However if you decide not to continue to delete press the menu button to quit.
SWAP: Select a program, and press YELLOW button, then you can use ▼ and ▲ buttons to change the position of the program, press YELLOW again to confirm the change. Press menu to exit and it will automatically save the current set.
Skip: Select a channel and press the blue button to label the channel, as long as the channel has a skip label it will be skipped when searching through the channels with the CH+/- buttons.
Note: The function MOVE can not be used in DTV mode.
CI Information
Please contact your "pay perview" provider who can supply a viewing card and cam unit with instructions for their use.

text_image
Please insert CI ModuleCustomizing the PICTURE Settings
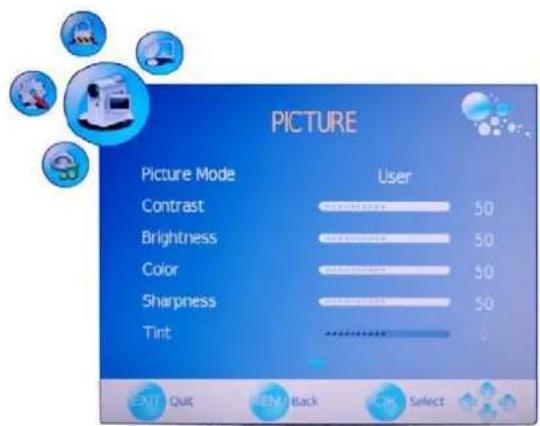
text_image
PICTURE Picture Mode User Contrast 50 Brightness 50 Color 50 Sharpness 50 Tint 0 EXIT Quit END Back OK Select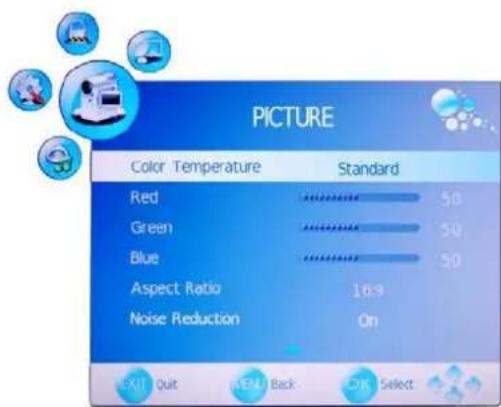
text_image
PICTURE Color Temperature Standard Red 50 Green 50 Blue 50 Aspect Ratio 16.9 Noise Reduction On EXIT Quit MENU Back OK SelectUse the ◀ and ▶ buttons to select the PICTURE menu(as the picture above), press ▼ button to enter the menu.
The PICTURE menu includes the following options :
| Picture Mode | Choose from Standard, Dynamic, User and Mild. |
| Note: Contrast, Brightness and Colour are only available and can get adjusted for the user in the Picture Mode Settings. | |
| Contrast Controls the difference between the brightest and darkest regions of the picture. | |
| Brightness Controls the overall brightness of the picture | |
| Colour Control the colour. | |
| Sharpness | Increase this setting to see crisp edges in the picture; decrease it for soft edges . |
| Tint Controls the tint ( NTSC mode only). | |
| Colour Temperature | Choose from Standard, Cool, User and Warm. |
| Note: Red, Green and Blue are only available for the user in Colour Temperature Mode. | |
| Red | Controls the red colour of the picture. |
| Grenn | Controls the green colour of the picture. |
| Blue | Controls the blue colour of the picture. |
| Aspect Ratio | Choose from Auto, 4:3, 16:9, Zoom1 and Zoom2. |
| Noise Reduction | Reduce any interference noise by selecting “ON”. |
Customizing the SOUND Settings
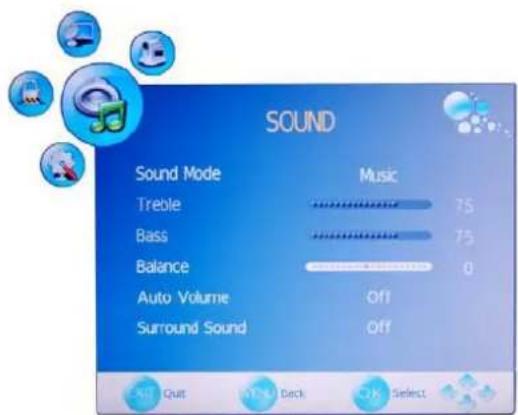
text_image
SOUND Sound Mode Music Treble 75 Bass 75 Balance 0 Auto Volume Off Surround Sound OffUse the ◀ and ▶ buttons to select the SOUND menu(as the picture above), press ▼ button to enter the menu.
The SOUND menu includes the following options :
| Sound Mode | Allows you to select among: Standard, Music, Movie, Sports and User. |
| Treble(Can be adjusted when the sound mode is User)Controls the relative intensity of higher pitched sounds. | |
| Bass(Can be adjusted when the sound mode is User)Controls the relative intensity of lower pitched sounds. | |
| Balance To adjust the balance of the left and right sound track, or turn off the volume of the left and right sound track. | |
| Auto Volume | Control the volume of the program automatically when you turn on the function by selecting “On”. |
| Surround Sound | Turn on/off the surround sound function by selecting “on”/“off”. |
Customizing the SETUP Settings

text_image
SETUP Language English Audio Language English Subtitle Language English Country UK Restore Setting DVD Setup EXIT Quit OK Back OK SelectUse the ◀ and ▶ buttons to select the OPTION menu(as the picture above), press ▼ button to enter the menu.
The SETUP menu includes the following options:
| Language | Allows you to select menu language. |
| Audio Language (can be selected in DTV mode) Allows you to select audio language. | |
| Subtitle Language (can be selected in DTV mode) Allows you to select subtitle language. | |
| Country | Defaulted to Germany. |
| Reset Setting | Press ▶ button to restore factory default. |
| DVD Setup | Press ▶ button to enter the DVD Setup menu in DVD mode. |
Customizing the EXTRAS Settings
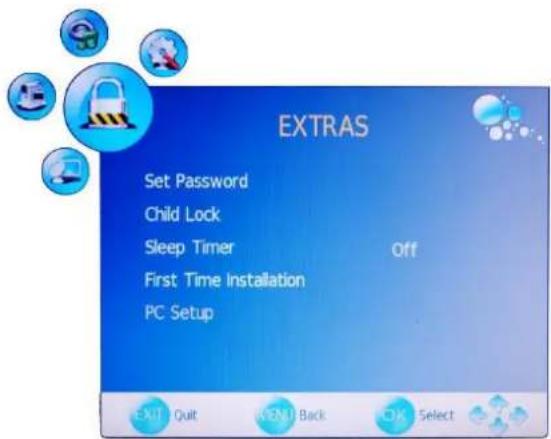
text_image
EXTRAS Set Password Child Lock Sleep Timer Off First Time Installation PC Setup EXIT Quit MENU Back OK SelectUse the ◀ and ▶ buttons to select the EXTRAS menu(as the picture above), press ▼ button to enter the menu.
The EXTRAS menu includes the following options :
| Set Password | Set pin code. The default is 0000. If the Pin code has been changed you must enter the present code.New : Enter the new password.Confirm: Enter the new password and press OK to complete the change. |
| Child Lock | Lock the channel, you have to enter the code to view the channel. Use ▲/▼ button to select the channel, and press the green button on the remote control to set, and there will be a “ ”on the channel, press the green button again to cancel. |
| Sleep Timer | Allows you to setup the sleep timer among: 10min, 20min, 30min, 60min, 90min, 120min, 180min, 240min and off. |
First Time Installation
* Please ensure that the aerial is connected to the connector labelled "RF" on the rear of the TV. Press "OK" to start the tuning process.
* You can select "Language"(OSD display language), When you have selected, press ◀/▶ buttons to select "OK".
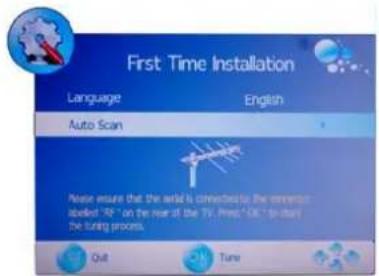
text_image
First Time Installation Language English Auto Scan Please ensure that the serial is connected to the current labeled "RF" on the rear of the TV. Press: 10x10" to clean the timing process. Quit TunePC Setup(only in VGA mode)
Press ▶ button to enter the submenu to adjust the picture of the screen.
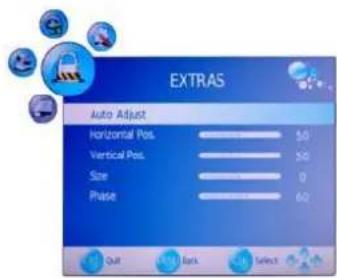
text_image
EXTRAS Auto Adjust Horizontal Pos. 50 Vertical Pos. 30 Size 0 Phase 60 Out Back SelectDVD Operation
Turn on your TV then use the SOURCE Button on the remote control or the TV/AV button on the TV to select DVD mode. If there is no disc in the DVD players the screen will show "NO DISC".
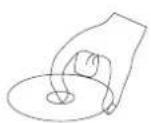
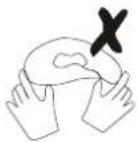
Place a disc
Insert a disc as instructed by the label next to the disc slot.
Do not touch the playing surface.
Hold the disc around the outside with your fingers and place the disc into the slot. The player will automatically draw the disc into the player.
To "Eject" the disc, press the "▲ / Eject" button on the TV or on the remote control.
Play
The contents of each disc vary, as to how the disc was authored and what features are included. Some discs start playing as soon as they have been read, some need "Play" selecting in the Menu. Different play modes are offered, such as Menu Play, Sequence Play and other modes.
Using the INFO Feature
-
Compatible with DVD, SVCD, VCD, CD, HD-CD, WMA, Digital Audio disc discs.
-
Loading and playing DVDs (two pages)
- Press INFO button once to show the first page:
- "Disc Type, Title */ * (the playing title / total titles), Chapter */ * (the playing chapter / total chapters), Elapsed Time of the Disc".
- Press the button again to show the second page:
- "Language */* (the serial number of playing language / the amount of optional languages) or Off, Language Type, Audio Type, Subtitle */ * (the serial number of playing subtitle /the amount of optional subtitles) or Off, Angle */ * (the serial number of playing angle / the amount of optional angles) or Off".
- Press the button for the third time, the info menu fades out.
- Loading and playing SVCD discs (two pages)
- Press INFO button once to show the first page:
- "Disc Type, Track * / * (the playing track / total tracks), Mute, PBC, Repeat Mode, Elapsed Time of the Playing Track".
- Press the button again to show the second page:
- "Language */ * (the serial number of playing language/ the amount of optional languages) or Off, Language Type, Audio Type, Subtitle */ * (the serial number of playing subtitle / the amount of optional subtitles) or Off".
- Press the button for the third time, the info menu fades out.
- Loading and playing VCD
- Press INFO button once to show the first page:
- "Disc Type, Track * / * (the playing track / total tracks), Mute, PBC, Repeat Mode, Elapsed Time of the Playing Track".
- Press the button again, the info menu fades out.
- Loading and playing CD, HD-CD, WMA, Digital Audio / JPEG discs
- Press INFO button once to show the first page:
- "Disc Type, Track * / * (the playing track / total tracks), Mute, Repeat Mode, Elapsed Time of the Playing Track".
- Press the button again, the info menu fades out.
Subtitles
-
Compatible with DVD, SVCD discs.
-
Press the Subtitle button on the remote once, and the subtitle info banner appears
-
When a DVD or SVCD is recorded with subtitles, you can use the Subtitle feature to view the subtitles on-screen. By default, subtitles are off. The info banner will display Subtitle Off.
-
To display subtitles, press the Subtitle button again. The default language with its responding serial number will be displayed in the info banner and subtitles will be displayed in that language. There are 8 supported subtitles: Chinese, English, Japanese, French, Spanish, Portuguese, Germany and Latin. With each consecutive press of the Subtitle button, the subtitle switches.
For example, "Language Icon: [1 English DTS 6CH] or [Off]" (the availability of the subtitles are disc-dependent). To turn subtitles off, press the Subtitle button until Subtitle Off is displayed.
DVD Operation
Digital Audio Disc
- Compatible with Digital Audio discs
- The player will search the disc directory automatically and display the contents on screen.
- The player will then start to play the first track, of the selected directory.
- To change directories use the direction buttons.
DVD System Operation
System operation will define the setting of the set; these definitions will be stored until you change them again.
General Steps of Setup Menu
- Pause or Stop the player. Press MENU button on the remote control and select SETUP menu as below, then select Dvd Setup item, press ▶ button to enter the DVD main menu as below.
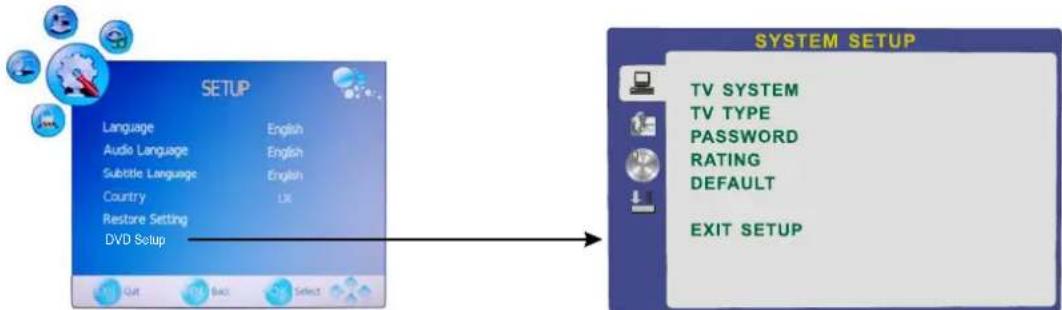
text_image
SETUP Language English Audio Language English Subtitle Language English Country LIE Restore Setting DVD Setup OUT Back Select SYSTEM SETUP TV SYSTEM TV TYPE PASSWORD RATING DEFAULT EXIT SETUP- Press the ▲/▼ buttons to select the Icon of the desired section, e.g. "TV System" and press ▶ button to open that section.
- Press ▲/▼ to select the desired feature and again press ▶ button to open that section.
- Press ▲/▼ to select the desired feature and then press "OK" to select the new setting.
5 To exit the menu, press ▼ to select EXIT SETUP and then press "OK" When launching the setup routine, the pressing of the following buttons will turn off the setup menu, while the choices that have been changed will be saved.
Menu specification
1. SYSTEM SETUP
The system setup options are illustrated below:
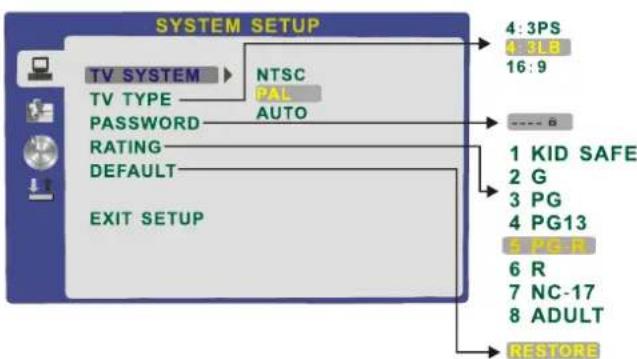
text_image
SYSTEM SETUP TV SYSTEM TV TYPE PASSWORD RATING DEFAULT EXIT SETUP NTSC PAL AUTO 4:3PS 4:3LB 16:9 ---- B 1 KID SAFE 2 G 3 PG 4 PG13 5 PG-R 6 R 7 NC-17 8 ADULT RESTOREDVD Operation
TV SYSTEM
According to the Color system of your TV, select proper TV TYPE.
PASSWORD
The password option is initialized as locked. You cannot set the ratings limit or change the password.
To enable these features you must unlock the Password. The default password is "0000". Using the ▲/▼ button, move the highlight to "PASSWORD" enters "0000" ▶ You will see the
padlock symbol open. You may now change the RATING or put in a new password number.
If the Lock symbol is BLUE you must press the ▶ button to enter the lock field, the lock symbol will change to YELLOW, you may now enter a new 4 digit number. Please remember or write down the new Password and keep safe.
RATING
The Rating feature is a rating limit feature, like movie ratings. This helps you to control what DVD the family watches. There are 8 levels of selection, from KIDS SAFE to ADULT. Adult is the "play all" selection.
2. LANGUAGE SETUP
The language setup options are illustrated below:
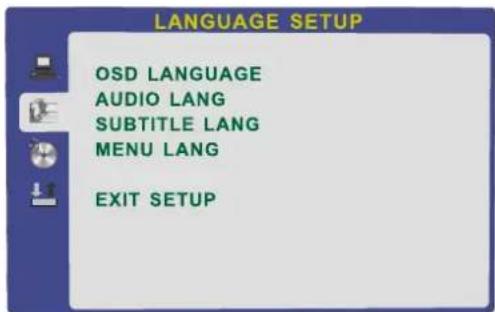
text_image
LANGUAGE SETUP OSD LANGUAGE AUDIO LANG SUBTITLE LANG MENU LANG EXIT SETUP- OSD LANGUAGE: The OSD will display in the language you choose.
- AUDIO LANG: If the disc you are playing has the language you choose, it will output audio in that language.
- SUBTITLE LANG: If the disc you are playing has the language you require you may select this either in the Menu or using the "SUBTITLE" button on the Remote control. You may also switch this OFF.
- MENU LANG: If the disc you are playing has the language you require you may select this.
3. AUDIO SETUP
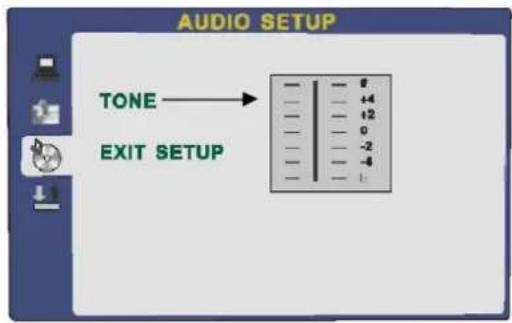
text_image
AUDIO SETUP TONE → EXIT SETUP-TONE: Use the ▲/▼ button to move the scroll and adjust the tone.
DVD Operation
4. DIGITAL SETUP
The video setup options are illustrated below:
- DYNAMIC RANGE: Use the ▲/▼ button to move the scroll and adjust the dynamic range.
- DUAL MONO: Choose the mode of the audio output.
- There are four modes: STEREO, MONO L, MONO R, MIX MONO.
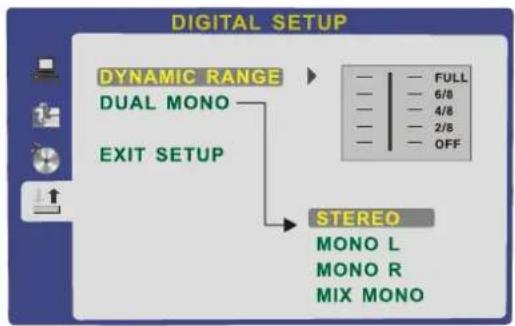
text_image
DIGITAL SETUP DYNAMIC RANGE DUAL MONO EXIT SETUP STEREO MONO L MONO R MIX MONODisc Care
Disc Care
About Disc Terms
Title
Generally, pictures or music compressed on a DVD are divided into several sections, "title".
Chapter
The smaller section unit of picture or music in a DVD under the title, usually one title is comprised of one or more chapters and each of them is numbered for easy searching, but some discs may not have a recording chapter.
Track
A segment of picture or music on a CD, Each track is numbered for searching.
Care of Disc
Video disc contains high-density compressed data that needs proper handling.
-
Hold the disc with fingers by outer edge and/or the center spindle hole. Do not touch the discs surface.
-
Do not bend or press the disc.

- Do not expose the disc to direct sunlight or heating sources, Stere discs in cabinet vertically, and in dry condition.
Prevent exposure to:
Direct sunlight
Heat or exhaust from a heating device
Extreme humidity
Clean the disc surface with a soft, dry cleaning cloth, Wipe the disc surface gently and radically from center toward the outer edge.
Do not apply thinner, alcohol, chemical solvent, or sprays when cleaning. Such cleaning fluids will permanently damage the disc surface.
Trouble shooting
- Do not use other functions that are not mentioned in this user's manual.
- In case a problem occurs with your LCD TV, please take the following steps first.
- If you still have the problem, turn the power off and contact your dealer or an authorized service center.
| Problem | Action |
| No power to TV. | Check all connections. |
| The screen appears too slowly after the power is turned on. | This problem occurs for a brief time in the process of image elimination processing in order to hide temporary screen noise that occurs when the power is turned on. But if the screen does not come after 1 minute contact your dealer or an authorized service center. |
| Screen is too bright or too dark. | Perform brightness adjustment or Contrast adjustment. |
| Screen is too large or too small. | Adjust the screen size. |
| Stripes appear on the screen and it shakes. | Stop using wireless telephones, hair driers and electric drills. |
| Screen appears, Voice is not heard | 1. Press the "MUTE"button.2. Increase the sound level by pressing volume adjustment button.3. Check if sound terminal of external input is connected properly.If the sound still does not work and the other channels are the same after you have done as the above, contact your dealer or an authorized service center. |
| Remote control does not work | 1. Check if main power is On.2. Check that the batteries of the remote controller were loaded properly.3. Check to see if any obstacle exists between the LCD TV and the remote control , then remove it, if any.4. If the batteries have no power, replace them with two new batteries.5. Ensure the remote control is in TV mode by pressing the TV button. |
- This LCD TV is for household use and registered as harmless on electromagnetic waves.
• Therefore, you can use it in every location as well as residential areas.
Specifications
TV
TV System
PAL, BG/DK/I
Screen size 19"(diagonal)
Resolution 1366x768 pixels
Aerial input 75
Ω (unbalanced)
Audio output power
2×3 W
AC 100-240V 50/60Hz 60WPower Consumption
<1WStandby Power Consumption
4.70 KgWeight
Remotecontrol
Type
infrared
Control distance
5m
Control angle
30° (horizontal)
Batteries
2 x 1.5 V, size AA
Dimensions
60 x 204 x 32mm
Weight
140 g (without battery)
This product fulfils the following EU regulations:
• EN55013: 2001+A1:2003+A2:2006
• EN55020: 2007
• EN61000-3-2: 2006
• EN61000-3-3:1995+A1:2001+A2:2005
• EN55022:2006(CLASS-A)
• EN55024:1998+A1:2001+A2:2003
• EN60065: 2002+A1:2006
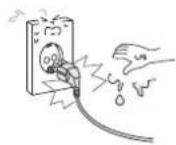
Do not touch the power plug with wet hands.
- Doing so may result in electric shock.
Do not use a damaged power cord or plug or a loose outlet.
- Doing so may result in fire or electric shock.
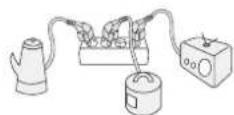
Do not plug several devices into the same outlet.
- Doing so may cause the outlet to overheat and start a fire.
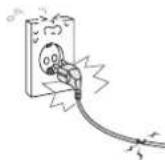
Insert the power plug fully into the outlet.
• A loose or improperly inserted power plug may result in fire.

Do not bend the power cord excessively or place heavy objects on it.
- Doing so may result in fire or electric shock.
Be sure to ground the unit.
- Failing to do so may lead to electric shock when a short circuit or overload occurs. If necessary, install a ground fault circuit breaker. Never ground to a telephone line, lightning rod, or metal gas pipe. (Doing so may result in fire, electric shock, or other hazards.)
Do not place containers with liquids such as flower vases, soft drink cans, or medicine bottles or small metallic objects on top of the unit.
- If liquid enters the unit or any metal object falls into the unit, it may result in short-circuit, fire, or electric shock.
Do not place the unit where it is exposed to rain, excessive moisture or grease.
- Doing so may result in fire, electric shock, malfunction, or deformation.
Do not use or store flammable or combustible materials near the unit.
- Doing so may result in fire or explosion.
Do not place the unit on an unstable surface, such as a wobbly stand or sloped table, or on any surface whose area is smaller than the bottom area of the unit.
- If a child climbs on the unit, it could topple and fall onto the child, resulting in serious injury to the child or damage to the unit. Place the unit on a flat stable surface.
Do not place a burning candle, burning anti-mosquito incense, or lighted cigarette on top of the unit. Do not place the unit near any heat source such as a fireplace or space heater.
- Doing so poses a serious risk of fire.
Do not place the unit in a poorly ventilated enclosure, such as a cabinet.
- Doing so poses a serious risk of fire.
Do not run power cords near heat-producing appliances such as radiators, stoves, or irons.
• The excessive heat could melt the insulation and expose live wires, resulting in fire or electric shock.
Install the antenna away from high-voltage power lines and communication cables and make sure it is installed securely.
- If the antenna touches a power line, contact with the antenna could result in fire, electric shock, serious injury, or death.
Disconnect the power cord from the wall outlet during an electrical storm.
• Not doing so may result in fire or electric shock.
Do not insert any metal objects, such as a screwdriver, paper clip, or bent wire into the ventilation openings or A/V terminals.
- Doing so poses a serious risk of fire or electric shock.
Do not allow children to climb or hang on the unit.
• The unit could topple over onto a child and result in serious injury.
Never disassemble or modify the unit in any way. Do not attempt to service the unit yourself.
- Doing so may result in fire or electric shock. If the unit requires repair, contact the service center.
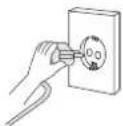
When disconnecting the power cord from an AC outlet, always grasp it by the plug.
- Pulling on the cord can damage the internal wire and may result in fire.
Always unplug the unit before cleaning.
• Not doing so may result in fire or electric shock.
The purpose of these precautions is to ensure user safety and prevent property damage.
Be sure to read and observe all safety precautions.

Install the unit at an adequate distance from the wall to ensure sufficient ventilation.
• If the temperature inside the unit rises, it may result in fire.

Do not cover the unit with a tablecloth, curtain, or other material.
• If the temperature inside the unit rises, it may result in fire.
Be sure to place the unit on a level surface.
⚠️Warnings
Form a drip loop where the coaxial antenna cable enters your building to prevent rainwater from traveling along the cable and coming in contact with the antenna input terminal.
- If rainwater finds its way inside the unit, it may result in fire or electric shock.

The following precautions are divided into "Warnings" and "Cautions".
⚠ Warning : Ignoring this precaution may result in death or serious injury.
Caution: Ignoring this precaution may result in injury or property damage.
When not using the unit for long periods of time, disconnect the power cord from the wall outlet.
- Dust could accumulate over time on the unit and cause it to generate heat and ignite, or deteriorate insulation, which in turn may result in an electrical fire.
When moving the unit, be sure to turn off the unit and unplug the power cord from the wall outlet.
- Moving the unit with the power cord connected to the outlet may cause damage to the cord, resulting in fire or electric shock.
If you notice any unusual odors or smoke around the unit, immediately disconnect the unit from the outlet and contact the service center.
- Failure to do so may result in fire or electric shock.
⚠ Warnings
When removing the batteries from the remote control, make sure children do not swallow them. Keep the batteries out of the reach of infants and children.
• If a child has swallowed a battery, seek medical attention immediately.
Always use two or more people to lift or move the unit.
- If the unit is dropped, it could be damaged or otherwise cause injury.
Wipe off any moisture, dirt, or dust on the power plug pins with a clean dry cloth.
- Failure to do so may result in fire or electric shock.

It is advisable to clean the interior of the unit at least once a year. Contact the store of purchase or service center for information.
- Continuing to use the unit without cleaning off the dust build-up inside it may result in fire or electric shock.
Always turn off the unit and unplug the power cord when cleaning the unit. Use a soft dry cloth to clean the unit.
- Never clean with industrial strength polish, wax, benzene, paint thinner, air freshener, lubricant, detergent, or other such chemicals. Also, do not clean with a damp cloth.
_
| _
一
1
_
| _
一
1
Écran LCD
text_image
Front view of a remote control with labeled buttons and navigation iconsTélécommande
text_image
Source TV Menu Help Quick Start Guide Pic Swap Exit Info VOL OK CH - R DVD Menu P Picture S Sound SD1 SD2 -Day +Day -Color 1 2 3 abs def 4 5 6 gni jki mmc 7 8 9 pgns luv wxyz SUB 0 TXT Recording Lists
text_image
Please ensure your aerial is plugged into the socket on the back of your TV Then Press OK The TV will tune all channels. please wait.text_image
Source OKtext_image
Input Source DTV TV SCART AV YPBPR VGA HDMI EXIT Quit OK SelectUtilisation du menu
text_image
IMAGE Mode Image Standard Current: 10 Latency: 3.0 Crash: 1.0 Diffusion: 1.0 Sensor: 2 Out Refuse SelectMENU SON :
text_image
PICTURE Picture Mode User Contrast 50 Brightness 50 Color 50 Sharpness 50 Tint 0 OK Quit END Back OK Select
text_image
PICTURE Color Temperature Standard Red $10 Green $20 Blue $30 Aspect Ratio $69 Noise Reduction On Exit Quit Back OK Selecttext_image
EXTRAS Upgrade Auto Pass Horizontal 50 Exit Vertical 50 Take 0 Please 60 OK Cancel SelectRATING (Classification)
natural_image
Front view of a black remote control with various colored buttons and dials (no readable text or symbols)Telecomando
text_image
Source TV Menu Help Quick Start Guide Pic Swap Exit Info VOL CH - R DVD Menu P Picture S Sound SD1 SD2 -Day +Day -1 2 3 4 5 6 gn1 jki mmc 7 8 9 pgns luv wayz SUB 0 TXT Recording Lists
text_image
Please ensure your aerial is plugged into the socket on the back of your TV Then Press OK The TV will tune all channels. please wait.text_image
Source OKtext_image
Input Source DTV TV SCART AV YPBPR VGA HDMI EXIT Quit OK Selecttext_image
SUND Audio Audio Standard Size 10 Size 10 Banc 0 Volume Auto Sperta Audio Support Isperto End Indents OKMENU IMMAGINE:
text_image
tele- 1 C-21 2 C-22 3 C-23 4 C-24 5 C-25 Pulse source: Blue SMAPInformazioni CI
text_image
PICTURE Picture Mode User Contrast 50 Brightness 50 Color 50 Sharpness 50 Tint 0 OK Quit Blend Back OK Select
text_image
PICTURE Color Temperature Standard Red 10 Green 80 Blue 50 Aspect Ratio $69 Noise Reduction On OK Out Back OK Selecttext_image
EXTRAS Regular Auto Preoperative Rate 50 Respiratory 50 Cortisolary 6 Face 60Funzionamento DVD
1. SYSTEM SETUP (IMPOSTAZIONE SISTEMA)
3. AUDIO SETUP (IMPOSTAZIONE AUDIO)
4. DIGITAL SETUP (IMPOSTAZIONE DIGITALE):
service@schmid-electronics.de
service@schmid-electronics.de