
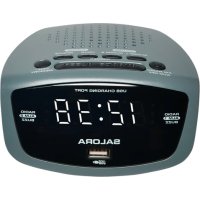
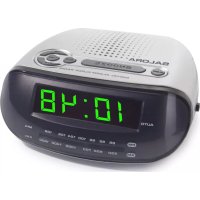
CR650DIG - Alarm Clock SALORA - Free user manual and instructions
Find the device manual for free CR650DIG SALORA in PDF.

| Product type | Radio alarm clock with 3.5 inch digital photo frame |
| Dimensions (W x H x D) | 100 x 86 x 50 mm |
| Net weight | 0.13 kg |
| Power supply | AC/DC adapter 5V, 1A |
| FM band | 87.5 - 108 MHz |
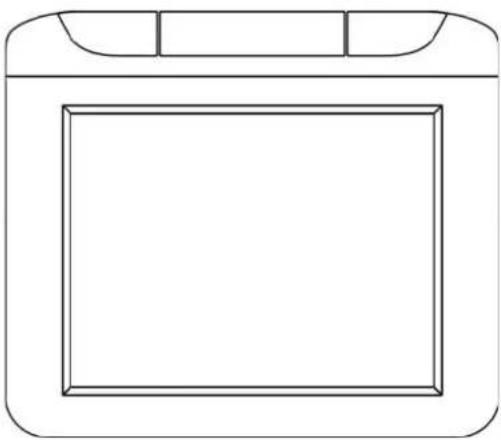
| Display | 3.5 inch LCD screen, 4:3 aspect ratio |
| Supported memory cards | SD/MMC/MS up to 2 GB |
| Main functions | Clock, FM radio, dual alarm, calendar, photo slideshow, music player, sleep timer |
| Clock settings | 12/24 hour, analog/digital, color inversion |
| Alarm | 2 independent alarms, choice of radio/music/ringtone, snooze 5 minutes |
| Sleep timer | Automatic shutdown of sound and backlight after chosen duration |
| Operating temperature | 5°C to 35°C |
| Maintenance | Unplug during prolonged non-use. Clean with a dry cloth. Do not expose to water or moisture. |
| Safety | Do not block ventilation openings. Keep a minimum distance of 10 cm around the device. Do not place any flame source or liquid on the device. |
| Spare parts and repairability | Power adapter included. For any repair, contact a qualified technician. Do not open the casing. |
| General information | User manual included. Recycle according to WEEE directive. |
Frequently Asked Questions - CR650DIG SALORA
User questions about CR650DIG SALORA
0 question about this device. Answer the ones you know or ask your own.
Ask a new question about this device
Download the instructions for your Alarm Clock in PDF format for free! Find your manual CR650DIG - SALORA and take your electronic device back in hand. On this page are published all the documents necessary for the use of your device. CR650DIG by SALORA.
USER MANUAL CR650DIG SALORA
CR-650DIG 3.5” Photo Clock Radio
Instruction Manual
TABLE OF CONTENTS
TABLE OF CONTENTS 1
SAFETY PRECAUTION 2
PACKAGE CONTENTS 2
FEATURES 2
TECHNICAL SPECIFICATION 3
INSTALLATION AND MAINTENANCE 3
- Powering the System Indoors 3
- Unit View 4
3.Sleep Timer. 4 - Operation of the Unit 4
4.1Clock 4
4.2 Radio 5
4.3 Alarm 6
4.4 Calendar 7
4.5 Photo 8
4.6 Music 9
4.7 Setting 9
DISCLAIMER 10
RECYCLING. 11
SAFETY PRECAUTION
- Keep away from water or moisture and dusty areas.
- Ambient Temperature 0 35^ C . Never store in hot and very cold areas.
- Be carefully to keep it without dropping it or strong impact.
- Do not try to open the case alone without technical support.
- Connect the AC adapter to the DC IN jack and to power outlet.
- Only use attachments/accessories specified by the manufacturer.
- When left unused for a long period of time, the unit should be unplugged from the household AC outlet.
- Only use the adaptor provided with the product.
- This adapter is for indoor use only.
- The AC/DC adaptor is used as the disconnect device. It shall remain readily operable and should not be obstructed during intended use. To be completely disconnected the apparatus from supply mains, the AC/DC adaptor of the apparatus shall be disconnected from the mains socket outlet completely. The socket-outlet shall be installed near the equipment and shall be easily accessible.
- The ventilation should not be impeded by covering the ventilation openings with items such as newspaper, table-cloths, curtains etc.
- The minimum distances around the apparatus for sufficient ventilation is 10cm .
- The apparatus should be used in moderate climate.
- No naked flame sources such as lighted candles should be placed on the apparatus.
- The apparatus shall not be exposed to dripping or splashing and that no objects filled with liquids, such as vases, shall be placed on the apparatus.
PACKAGE CONTENTS
1 x 3.5" Main Unit
1 x Instruction Manual
1 x AC / DC Adapter
FEATURES
The 3.5" product combines alarm, clock, audio, calendar, radio and photo functions. The unit applies the latest state of the art electronics and is designed for use with SD/MMC/MS memory cards.
TECHNICAL SPECIFICATION
- Panel size: 3.5 Inch
- Aspect Ratio: 4:3
- Included AC/DC Adapter: 5V, 1A
- Operating temperature: 41 95^ F, 5 35^ C
Memory Card Supported: SD/MMC/MS "not larger than 2GB"
Weight: 0.13 kg - Dimensions (W x H x D): 3.94 x 3.38 x 1.97 inches (100 x 86 x 50 mm)
FM Band: 87.5 - 108 MHz
INSTALLATION AND MAINTENANCE
1. Powering the System Indoors
Plug one end of the AC/DC adaptor into the DC IN 5V jack on the back of the player, then plug the other end into the 100 240V AC power plug. Wait for about 3 seconds, picture or clock appears on the screen.
NOTE:
- Unplug the apparatus when not using it for a long time.
- Main plug is used as the disconnect device, it shall remain readily operable and should not be obstructed during intended use. To be completely disconnected the apparatus from supply mains, the main plug of the apparatus shall be disconnected from the mains socket outlet completely.
2. Unit View
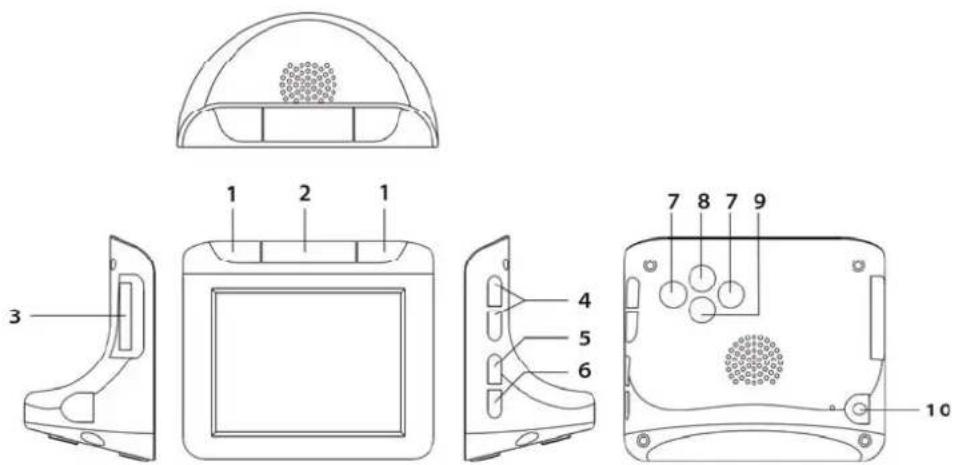
- ALARM 1/ALARM 2: Press to set, valid or invalid the alarms, repeat alarm.
- SNOOZE/ BRIGHTNESS CONTROL: Repeat alarm in several minutes interval. / Press to turn ON/OFF the backlight.
- SD/MS/MMC: SD/MS/MMC card reader.
- VOL +/-: Adjust the volume of the unit.
- FM/CLOCK: Press to exchange between radio and clock.
- SLEEP: Sets, activates or deactivates the sleep function.
- LEFT/RIGHT: Navigate on the screen.
- MODE: Press to display the icons of main function.
- SET: Setting some menus.
- DC Jack: Connect to the AC to DC adapter.
3. Sleep Timer
The unit has a built-in sleep timer which enables the unit to automatically turn off the sound and backlight after a set period of time. Press the SLEEP button repeatedly until the time you desire displayed, then after the set period of time, the sound and backlight will shut off.
4. Operation of the Unit
4.1 Clock
You have three methods to enter the Clock interface:
- When the unit is power on, clock appears automatically on the screen.
- Press the MODE button on the back of the unit; several icons appear at the bottom of the screen.

Press LEFT or RIGHT button to highlight the Clock icon and press MODE button to display the Clock interface.
- Press the FM/CLOCK button on the unit one or several times to display the Clock interface.
Changing the Display Mode of the Clock
On the Clock screen, press SET button on the back of the unit, a menu appears on the screen, press LEFT or RIGHT button to select the option on the screen, then press SET button to confirm your selection.
The menu is:
Back: Choose it to return the Clock screen.
Analog Clock/ Digital Clock: Choose it to change the display mode of the Clock (Analog/Digital).
Color Inverse: Choose it to exchange the color of the background and user interface.
Setting the Clock
- Press the MODE button on the back of the unit.
- Press LEFT or RIGHT button to highlight the Setting icon, and press MODE button to enter the Setting menu.
- Press LEFT or RIGHT button to highlight the 'Time' option.
- Press SET button, the Hour is around by a rectangle, then press LEFT or RIGHT button to change the digit.
- After setting the Hour, press SET, LEFT and RIGHT buttons to set the Minute and Second.
- After your setting, press SET button till the color of 'Time' option changes to yellow, that means you have exit the time setting.
- Use the LEFT/RIGHT buttons to highlight the 'Time Format', and press SET, LEFT and RIGHT buttons to select the time display format you desire.
4.2 Radio
Press the MODE button on the back of the unit; several icons appear at the bottom of the screen.

Press LEFT or RIGHT button to highlight the Radio icon, and press MODE button to start the Radio. Or you can press the FM/CLOCK button to start the Radio. For the first searching, a picture appears on the screen:

Press the LEFT/RIGHT to highlight the Yes option and press SET button, the player begins to scan and will store the channels automatically.
Setting your Radio
On the Radio screen, press SET button on the back of the unit, a menu appears on the screen, press LEFT or RIGHT button to select the option on the screen, then press SET button to confirm your selection.
The menu is:
Back: Choose it to return the Radio screen.
Manual Scan/ Pre-stored Channel/ Step: Choose it and use LEFT or RIGHT button to search channels manually./ Press LEFT or RIGHT button to enter the prestored channel./ Fine- tuning by pressing the LEFT or RIGHT button.
Full Scan: Choose it, the unit starts to search and save channels automatically. You can press MODE button to interrupt the scan.
Save as Alarm Channel: Choose one channel as the alarm ringing.
4.3 Alarm
Press the MODE button on the back of the unit; several icons appear at the bottom of the screen.

Press LEFT or RIGHT button to highlight the Alarm icon , and press MODE button to display the Alarm interface.
Two Methods to Set the Alarms
Method 1
- Press LEFT or RIGHT button to choose the Alarm 1/Alarm 2.
- Press SET button on the back of the unit, a menu appears on the screen, press LEFT or RIGHT button to select the option on the screen, then press SET button to confirm your selection.
The menu is:
Back: Choose it to return the Alarm interface.
Valid: Choose it, the alarm you choose is valid, meanwhile and the color of its icon on the right top of the screen changes to yellow.
Invalid: Choose it, the alarm you choose is invalid, meanwhile and the color of its icon on the right top of the screen changes to gray.
Method 2
- Press ALARM 1/ALARM 2 button on the top of the unit, the setting menu appears on the screen.
- Press LEFT or RIGHT button to slide the cursor up and down on the screen, then make the cursor stop on the option you desire and press SET button, the option turns to red, then press LEFT or RIGHT button to set it.
- After your setting, press SET button to confirm it, and press ALARM 1/ALARM 2 to exit the setting menu screen.
The menu is:
ON/OFF: Setting the alarm on or off.
-- AM: Use SET button to choose Hour or Minute, press LEFT or RIGHT button to change the digits.
Working day/Every day: Setting the alarm to work on working day/Every day.
Radio on/Music/Buzzer: Setting the ringing type of alarm.
Note: If you want to choose a radio channel as the alarm ringing, you should set a channel as alarm firstly on the Radio interface, see the part "Save as Alarm Channel", then choose the "Radio on" option.
The music is which one has been written to the flash, not the music on your memory card.
When your alarm is ringing, press SNOOZE/Alarm 1/Alarm 2 buttons to pause the ringing, and your alarm ring will repeat in 5 minutes interval; Press other buttons except SNOOZE /Alarm 1/Alarm 2 button to stop the alarm absolutely.
4.4 Calendar
Press the MODE button on the back of the unit; several icons appear at the bottom of the screen.

Press LEFT or RIGHT button to highlight the Calendar icon, and press MODE button to display the Calendar interface.
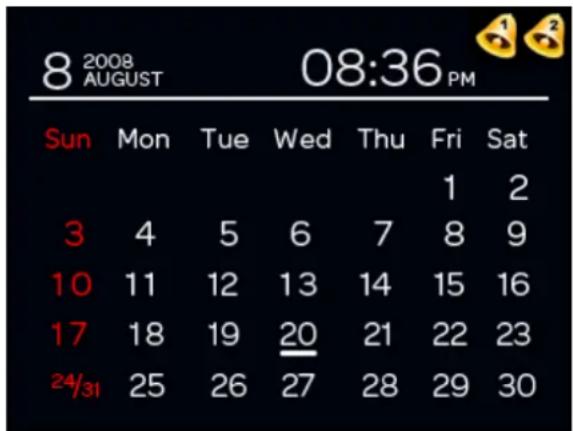
Press LEFT or RIGHT button to view the calendar.
Setting the Date
- Press the MODE button on the back of the unit.
- Press LEFT or RIGHT button to highlight the Setting icon , and press MODE button to enter the Setting menu.
- Press LEFT or RIGHT button to highlight the Date option.
- Press SET button, depending on the chosen DATE format, adjust digits at the first position highlighted by the box by pressing LEFT/RIGHT button.
- After setting the position, press SET and the box will highlight the next position Press LEFT and RIGHT buttons to set the digits.
- Repeat the process to set the 'YY' for Year.
- After your setting, press SET button till the color of Date option changes to yellow, that means you have exit the Date setting.
- Use the LEFT/RIGHT buttons to highlight the Date Format, and press SET, LEFT and RIGHT buttons to select the date display format you desire.
On the Calendar screen, press SET button on the back of the unit, a menu appears on the screen, press LEFT or RIGHT button to select the option on the screen, then press SET button to confirm your selection.
The menu is:
Back: Choose it to return to the Calendar interface.
Color Inverse: Choose it to exchange the color of the background and user interface.
4.5 Photo
Insert your card to the SD/MS/MMC slot, Press the MODE button on the back of the unit; several icons appear at the bottom of the screen.

Press LEFT or RIGHT button to highlight the Photo icon , and press MODE button to start slideshow photos.
During the photos slideshow, press SET button on the back of the unit, a menu appears on the screen, press LEFT or RIGHT button to select the option on the screen, then press SET button to confirm your selection.
The menu is:
Back: Choose this to return to the Photo interface.
Previous File: Choose this to enter the previous photo.
Next File: Choose this to enter the next photo.
View photo manually (Slide show): View the photos manually or let the slide show run.
Save as Start up Photo: Choose this option to set a photo as start-up photo, when the unit is powered on, this photo will appear first on the screen.
Delete: Choose this and a warning "This file will be deleted, are you sure?" will appear on the screen. Press the LEFT or RIGHT button to choose the YES, and
pressing the SET button will delete the photo. You can also delete the photos on your card.
Copy to flash: Choose this and a warning "This file will be copied to Memory, are you sure?" appears on the screen. Use LEFT or RIGHT button to choose YES and pressing the SET button will copy the photo to the memory.
4.6 Music
Insert your card to the SD/MS/MMC slot, press the MODE button on the back of the unit; several icons will appear at the bottom of the screen.

Press LEFT or RIGHT button to highlight the Music icon, and press MODE button, the songs on the card start playback automatically. Press LEFT or RIGHT button to choose another song. Press Vol +/- button on the player to adjust the volume of the player.
On the Music screen, press SET button on the back of the unit, a menu appears on the screen, press LEFT or RIGHT button to select the option on the screen, then press SET button to confirm your selection.
The menu is:
Back: Choose this to return to the Music interface.
Play (Pause): Choose this to play/pause the song.
Stop: Choose this to stop playback of the song.
4.7 Setting
- Press the MODE button on the back of the unit; several icons will appear at the bottom of the screen.

- Press LEFT or RIGHT button to highlight the Photo icon, and press MODE button to display the Setting menu.
- Press LEFT or RIGHT button to highlight the menu option.
- Press SET button, the color of the option turns to red.
- Press LEFT or RIGHT button to set this option.
- After your setting, press SET button till the color of the option changes to yellow, which means you have returned to the setting menu.
The menu is:
Slideshow Effect: Select the slideshow effect. (All/ Reel/ 3D Circle/ Wave/ Open door/ Drop/ Block flip)
Slideshow Interval: Select the slideshow interval time. (3 Seconds/ 10 Seconds/ 30 Seconds/ 1 Minute)
Slideshow with Music: Set slide show with Mp3 or not. (Mp3 in card/ None)
Date Format: Set the date display format. (MM/DD/YY, DD/MM/YY)
Time Format: Set the time display format. (12/24 Hours)
Date: Month-Day-Year/ Day-Month-Year
Time: Hour: Minute: Second
Reset Setting: Restore to the factory default settings. (Yes/No)
Firmware Version
Select Different OSD Languages
- Go to RESET setting. Use the LEFT/RIGHT button to choose YES.
- Press SET button.
- Pop up question will ask user to confirm choice if YES.
- Use the LEFT/RIGHT button to choose YES.
- Press SET button.
- Pop up message 'Please wait' will appear.
- The unit will reset for a while then the screen will show the national flags of the different OSD languages available for the user's choice.
- Use the LEFT, RIGHT and SET button to choose the language you desire as the On Screen Display language.

DISCLAIMER
Updates to hardware components are made regularly. Therefore some of the instruction, specifications and pictures in this documentation may differ slightly from your particular situation. All item described in this guide for illustration purposes only and may not apply to particular situation. No legal right or entitlements may be obtained from the description made in this manual
This product bears the selective sorting symbol for waste electrical and electronic equipment (WEEE).
This means that this product must be handled pursuant to European Directive 2002/96/EC in order to be recycled or dismantled to minimize its impact on the environment.
For further information, please contact your local or regional authorities.
Electronic products not included in the selective sorting process are potentially dangerous for the environment and human heath due to the presence of hazardous substances.
Net weight: 130g
SALORA
CR-650DIG
3.5" Foto Klok Radio
Handleiding
INHOUDSTABEL
INHoudstABEL 1
VEILIGHEIDSVOORZORGEN 2
INHOUD VERPAKKING 2
KENMERKEN 2
MISE AU REBUT DU PRODUIT 12
PRECAUTIONS DE SECURITE
MISE AU REBUT DU PRODUIT


- TABLE OF CONTENTS
- SAFETY PRECAUTION
- PACKAGE CONTENTS
- FEATURES
- TECHNICAL SPECIFICATION
- INSTALLATION AND MAINTENANCE
- Powering the System Indoors
- NOTE:
- Unit View
- Sleep Timer
- Operation of the Unit
- Clock
- Changing the Display Mode of the Clock
- Setting the Clock
- Radio
- Setting your Radio
- Alarm
- Two Methods to Set the Alarms
- Method 1
- Method 2
- Calendar
- Setting the Date
- Photo
- Music
- Setting
- Select Different OSD Languages
- DISCLAIMER
- SALORA
- INHOUDSTABEL
- PRECAUTIONS DE SECURITE
- MISE AU REBUT DU PRODUIT
Brand : SALORA
Model : CR650DIG
Category : Alarm Clock