TK385MT - Radio MT Logic - Free user manual and instructions
Find the device manual for free TK385MT MT Logic in PDF.
User questions about TK385MT MT Logic
0 question about this device. Answer the ones you know or ask your own.
Ask a new question about this device
Download the instructions for your Radio in PDF format for free! Find your manual TK385MT - MT Logic and take your electronic device back in hand. On this page are published all the documents necessary for the use of your device. TK385MT by MT Logic.
USER MANUAL TK385MT MT Logic
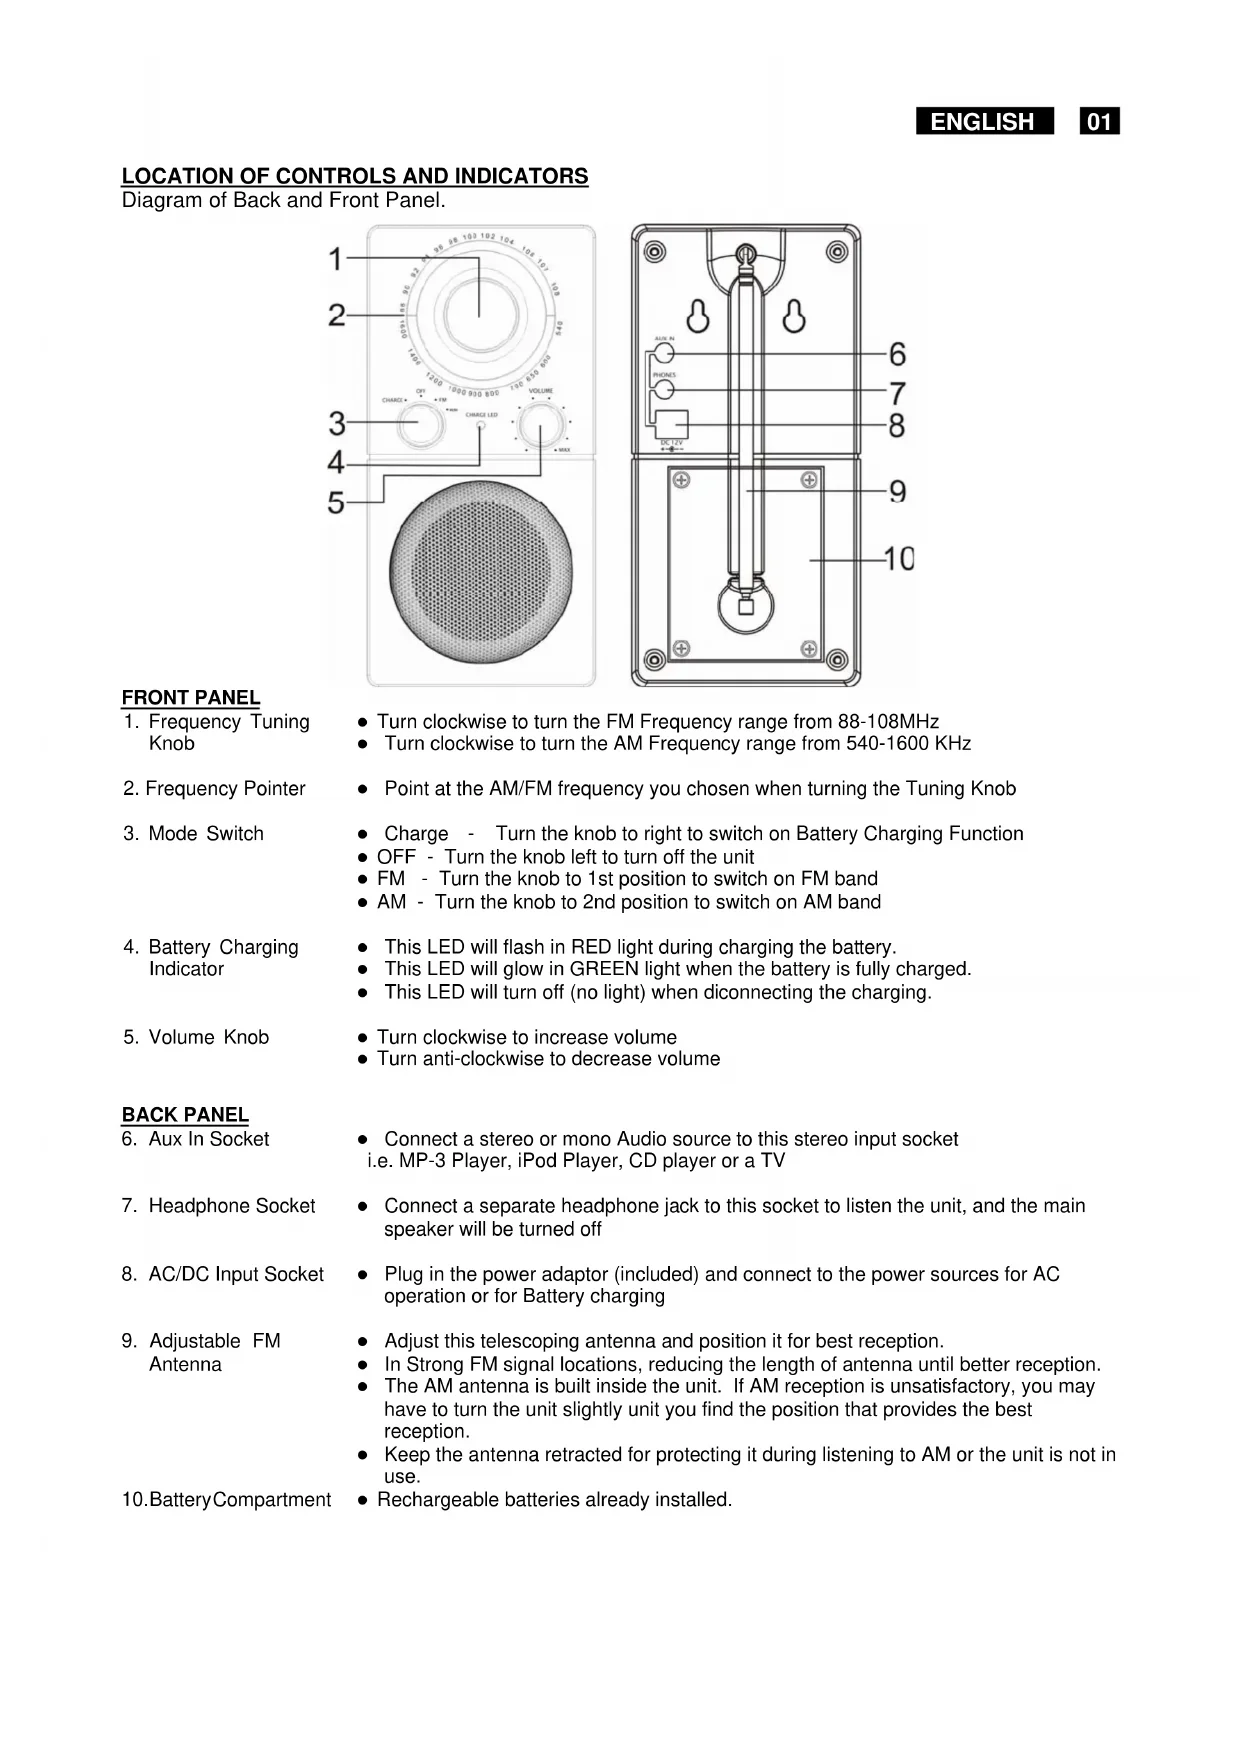
LOCATION OF CONTROLS AND INDICATORS
Diagram of Back and Front Panel.
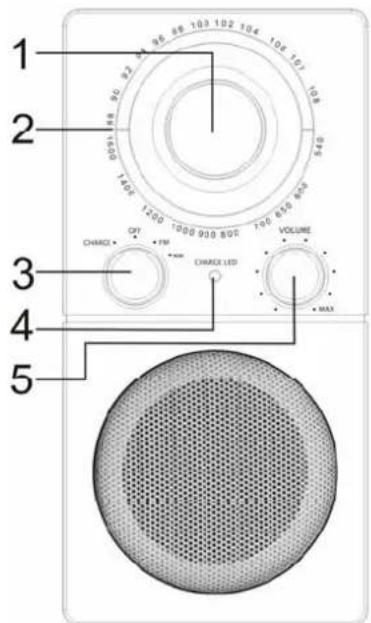
FRONT PANEL
-
Frequency Tuning Knob
-
Turn clockwise to turn the FM Frequency range from 88-108MHz
-
Frequency Pointer
-
Turn clockwise to turn the AM Frequency range from 540-1600 KHz
-
Mode Switch
-
Point at the AM/FM frequency you chosen when turning the Tuning Knob
-
Battery Charging Indicator
-
Charge - Turn the knob to right to switch on Battery Charging Function
OFF - Turn the knob left to turn off the unit
FM - Turn the knob to 1st position to switch on FM band
-
AM - Turn the knob to 2nd position to switch on AM band
-
Volume Knob
-
This LED will flash in RED light during charging the battery.
-
This LED will glow in GREEN light when the battery is fully charged.
-
This LED will turn off (no light) when disconnecting the charging.
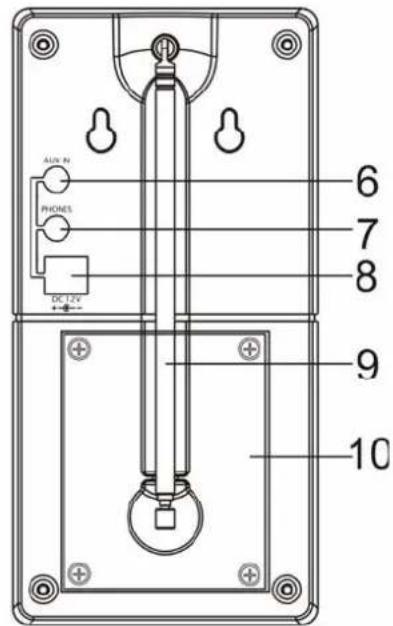
BACK PANEL
-
Aux In Socket
-
Turn clockwise to increase volume
-
Turn anti-clockwise to decrease volume
-
Headphone Socket
-
Connect a stereo or mono Audio source to this stereo input socket i.e. MP-3 Player, iPod Player, CD player or a TV
-
Connect a separate headphone jack to this socket to listen the unit, and the main speaker will be turned off
-
AC/DC Input Socket
-
Plug in the power adaptor (included) and connect to the power sources for AC operation or for Battery charging
-
Adjustable FM Antenna
-
Adjust this telescoping antenna and position it for best reception.
-
In Strong FM signal locations, reducing the length of antenna until better reception.
-
The AM antenna is built inside the unit. If AM reception is unsatisfactory, you may have to turn the unit slightly unit you find the position that provides the best reception.
-
Keep the antenna retracted for protecting it during listening to AM or the unit is not in use.
-
Battery Compartment
-
Rechargeable batteries already installed.
OPERATING INSTRUCTIONS
Make sure the AC power supply available by plugging the power adaptor(included) into the AC/DC Input socket at the back of the unit and then connecting to AC 230V~50Hz house.
- Or, make sure the batteries are fully charged before having the DC operation.
- Disconnect the power adaptor from the main socket when not using the unit.
- Power on the unit by turning the Mode Switch to right at FM/AM.
- The BLUE backlight around the Frequency Dial Ring will glow at the same time.
- Select FM or AM band by turning the Mode Switch.
- Adjust the desired station as follows: Turn the frequency tuning knob in clockwise to select the best reception and stop on the station.
- Adjust the volume control as desired by volume knob.
-
If want to listen to Audio source, e.g. CD player or MP3 player
Make sure the Audio source is properly connected to the AUX IN Socket at the back of the unit.
At this moment, this unit will be automatically turned to the AUX mode.
The radio boardcast will be automatically turned off. -
Adjust the volume control as desired by volume knob.
- If want to listen to the radio, unplug the audio source connection from the AUX IN Socket.
- Turn the Mode Switch to OFF when finish listening.
RECHARGABLE BATTERIES (BUILT - IN)
This unit was built-in with rechargeable batteries.
-
Turn off the unit and plug in the power adaptor(included) to the AC/DC input socket at the back of the unit.
Red LED will flash
Green LED will glow after full charging -
Unplug it when green LED glows.
LED will turn off
After fully charging (Min. 16 hours), the unit can be operated for approximately 8 hours by DC at 50% volume output.
- Note that the radio reception becomes weak or the sound preformance of the unit is distorted, then the batteries require recharging.
IMPORTANT SAFETY INSTRUCTIONS
CARE OF THE RADIO SET
If the radio set becomes dusty wipe it with a soft dust cloth. Do no use any wax, polish sprays, or abrasive cleaners on the set.
REPLACEMENT PARTS / BATTERY
When replacement parts / battery are required, be sure the service technician has used replacement parts specified by the manufacturer or have the same characteristics as the original part. Unauthorized substitutions may be result in fire, electric shock or other harzards.
Caution
Never allow any water or other liquid to get inside the unit while cleaning.
The radio shall not be exposed to dripping or splashing and that no objects filled with liquids, such as vases, shall be placed on the radio.
CONDENSATION OCCURS:
- When bringing the unit from outdoors into a warm room, or if it is in a cold room which is heated quickly.
In the summer, if the unit is moved suddenly from an air-conditioned room or car to a hot or humid location.
This unit may not operate properly if condensation develops. Should condensation occur, wait for one to two hours (to allow the internal parts to adjust to the surrounding temperature) before using the unit.
Do not attempt to service this product yourself; refer all servicing to qualified service personnel.
Ventilation warning: "The normal ventilation of the product shall not be impeded for intended use."
Continuous improvements are being made to our equipment both in quality and performance, thus we reserve the right to alter specifications without notice.
ESD Remark:
In case of malfunction due to electrostatic discharge just reset the product (reconnect of power source may be required) to resume normal operation.
Instructions on Environment Protection
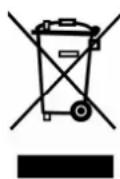
Do not dispose of this product in the usual household garbage at the end of its life cycle; hand it over at a collection point for the recycling of electrical and electronic appliance. The symbol on the product, the instructions for use or the packing will inform about the methods for disposal.
The materials are recyclable as mentioned in its marking. By recycling, material recycling or other forms of re-utilization of old appliances, you are making an important contribution to protect our environment.
Please inquire at the community administration for the authorized disposal location.