
MAG570 - Microwave Oven Pelgrim - Free user manual and instructions
Find the device manual for free MAG570 Pelgrim in PDF.

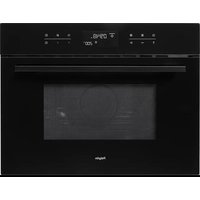
| Product type | Combination microwave oven |
| Brand | Pelgrim |
| Model | MAG570 |
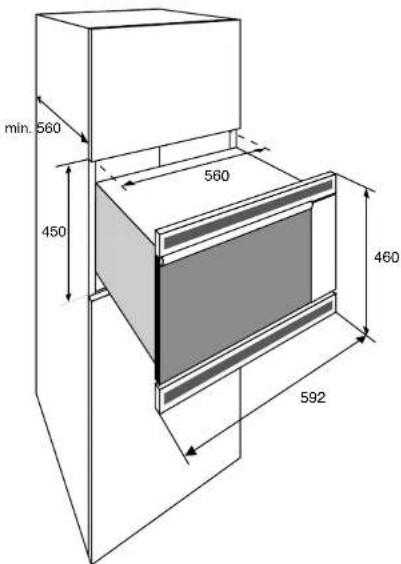
| Dimensions (H x W x D) | 460 x 592 x 550 mm |
| Power supply | 230 V / 50 Hz |
| Total power | 3600 W |
| Main functions | Microwave, Grill, Turbo grill, Pulsated hot air, Combination (microwave + grill/hot air), Defrosting, Cooking with core temperature probe, Chain cooking, Keep warm, Direct Start |
| Included accessories | Roasting dish, Glass drip tray, Reversible grid, Defrosting grid, Core temperature probe, Cover for core temperature probe contact |
| Installation type | Built-in |
| Safety | Door lock, mandatory grounding, automatic limitation of microwave power after 1 hour |
| Maintenance | Cleaning with soapy water, do not use corrosive products, clean accessories regularly, do not immerse the probe |
| Warranty | 5 years parts, 1 year labor and travel |
| After-sales service | Pelgrim S.A. Belgium, Tel.: (053) 80 62 08 |
| Electrical connection | 230 V / 50 Hz, mandatory grounding |
Frequently Asked Questions - MAG570 Pelgrim
User questions about MAG570 Pelgrim
0 question about this device. Answer the ones you know or ask your own.
Ask a new question about this device
Download the instructions for your Microwave Oven in PDF format for free! Find your manual MAG570 - Pelgrim and take your electronic device back in hand. On this page are published all the documents necessary for the use of your device. MAG570 by Pelgrim.
USER MANUAL MAG570 Pelgrim
Grill of turbogrill + magnetron
Table of contentsDescription of the appliance
30 Introduction/For your safety
32 Before you begin
34 Programming clock time
35 One more thing...
35 Preheating
36 "Direct start" the microwave
37 Defrosting heating and cooking
38 Grilling
40 Baking and roasting with the hot air circulation function
42 Fast baking and roasting with the combi-functions
44 Roasting with the 'culisensor'
46 Cooking in phases
47 Keeping food warm once it has been prepared
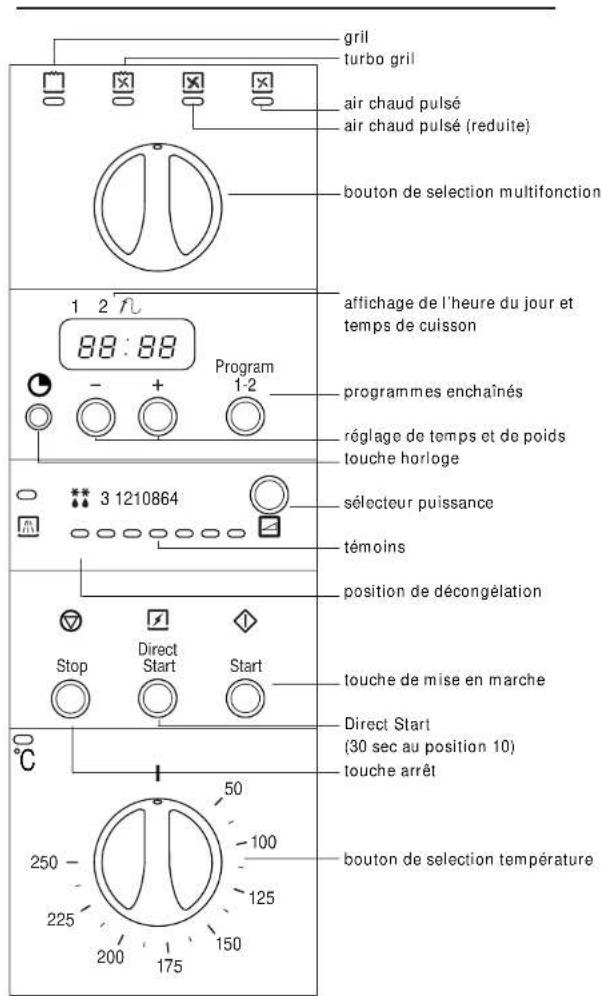
48 Operating the appliance manually
49 Microwave tips
50 Accessories
51 Looking after your appliance
51 Technical specifications
52 Installation Instructions
55 Disposing of the packaging of the appliance
55 Certificate of Guarantee
Introduction
303030
- Reading through these instructions for use will rapidly inform you of all of the possibilities that this appliance has to offer you. You will find information regarding your safety and the maintenance of the appliance. And you will also find tips regarding the environment and advice on how to save energy.
- Keep these instructions for use in a safe place, together with the installation instructions. A possible future owner of this appliance will be glad you did.
In the packaging you will find a rubber strip to cover the culisensor contact.
Happy cooking!
For your safety
31303
Before using the oven: Read carefully through the instructions for use and the certificate of guarantee.
- Check that the oven is not damaged and that the oven door closes properly. The microwave can only be switched on if the door is fully closed.
- Remove all accessories from the oven.
- Remove all protective cardboard from the oven and also the protective cover of the baking tray.
Do not heat whole eggs (with or without shell) in the microwave.
On account of the increased pressure during heating, liquids in airtight packaging can only be heated if a couple of openings have first been made in the package.
If you wish to boil liquid (such as water) put a plastic spoon in the cup. It can happen that the liquid boils without you seeing any movement. Once the cup is removed from the oven the liquid can start to boil rapidly and spatter out of the cup, with the risk that you burn your hand.
It is advisable to consult your microwave cookbook for cooking times and settings. If foods are heated for too long or on too high a setting, there is the possibility that (parts of) the dish will dry out.
If you wish to add alcohol to a dish, do so after heating.
- Remove any metal sealing strips from plastic bags and use bowls and dishes which are microwave proof.
323232 Before you begin
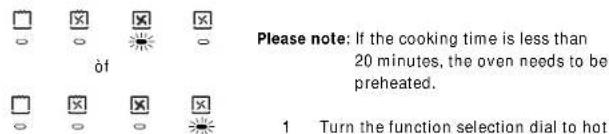
During the production process protective materials are used to protect the various components from damp and dirt. Before the oven is used these must be burnt off. Heat the oven with the hot air circulation and switch the grill on to maximum setting for 30 minutes.
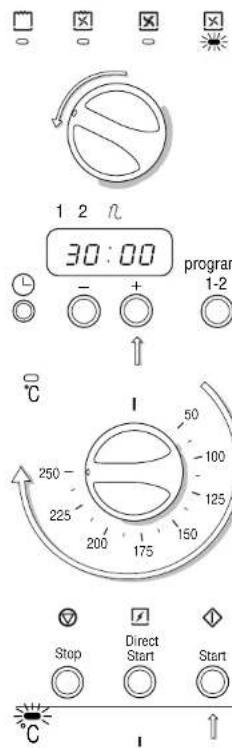
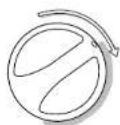
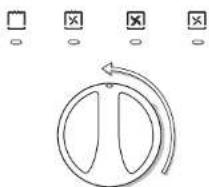
1 Turn the function selection dial to hot air circulation.
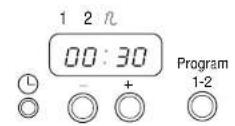
2 Programme the timer for 30 minutes.
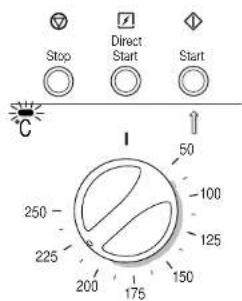
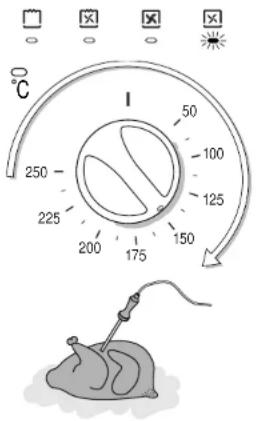
3 Turn the temperature selection dial to 250^
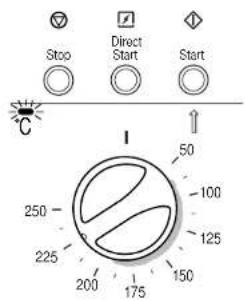
4 Press the start button to start the oven. The temperature indicator light will light up. Once the oven has reached the set temperature the temperature indicator light will go out.
Before you begin


5 Once the programmed time has elapsed you will hear a signal and the hot air circulation will stop.
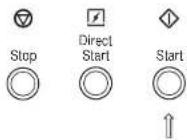
6 Press the stop button.
7 Turn the function selection dial to the grill function.
8 Programme the timer, set the temperature and press the start button. Once the programmed time has elapsed, press the stop button and turn the function selection dial back to its original setting (see above).
Please note: The oven is will now be extremely hot. Open the door and allow the oven to cool.
During use the oven becomes hot. Please pay close attention to small children.
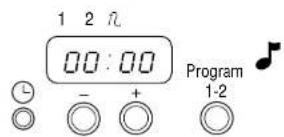
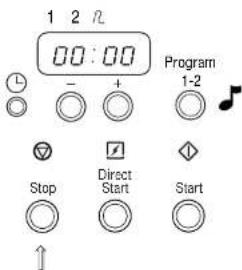
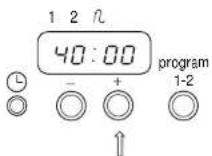
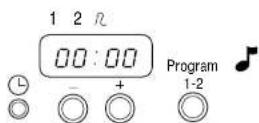
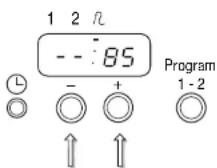
The display can be programmed to show clock time. (If the display is not programmed to show clock time the display will remain empty until a cooking or baking time is programmed).
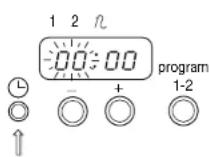
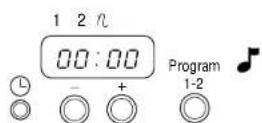
1 Press the button for programming clock time.
The two left-hand digits will begin to flash.
2 Enter the correct hour.
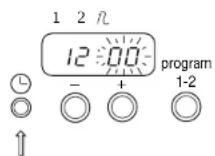
3 Press the button for programming clock time a second time.
4 Enter the correct number of minutes.
5 Press the button for programming clock time a third time. Clock time has now been programmed.

If you wish to know the time while an oven function with a programmed cooking or baking time is running press the button for programming clock time. The display will show clock time for approximately three seconds.
If the display has been programmed to show clock time and you wish to return to an empty display, press the button for programming clock time and then press the stop button. The display is now empty.
One more thing...
If you wish to check how cooking is proceeding:
1 Open the door. The indication on the display will begin to flash.
2 To continue cooking close the door and press the start button (if you are using the direct start function press the direct start button again).
3 If you wish to stop cooking remove the dish from the oven, press the stop button and return all dials to their original settings.
Preheating
Ensure that the oven is empty when preheating the oven. Only preheat the oven if cooking times are shorter than 20 minutes and if the combi-functions are to be used.
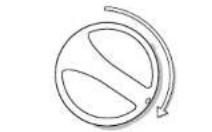
1 Turn the function selection dial to the required function.
2 Turn the temperature selection dial to the required temperature.
3 Press the start button to start the oven. The temperature indicator light will light up. Once the oven has reached the set temperature the temperature indicator light will go out.
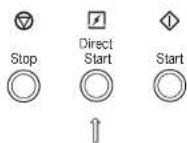
The microwave has a direct start button which can be used to heat dishes with a high liquid content, such as soup or tea, very rapidly.
1 Place the dish/beverage in the oven and close the door.
2 Press the direct start button.

You can increase the cooking time in increments of 30 seconds (up to a maximum of 5 minutes) by repeatedly pressing the direct start button.
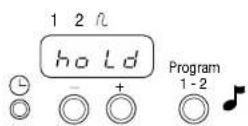
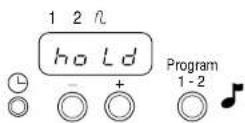
3 Once the programmed time has elapsed you will hear a signal and the display will show "hold". The microwave will then switch to the lowest setting to keep the food/beverage warm.
4 Press the stop button.

1 Place the dish in the oven and close the door.
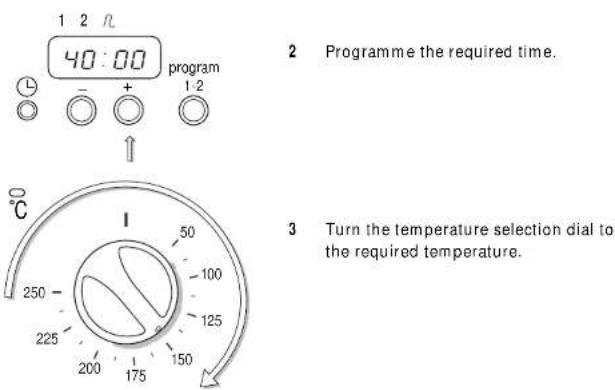
2 Programme the required time.
3 Select the required power setting.
Defrosting
If you wish to defrost a dish rapidly, select a low setting or the defrost setting. When defrosting larger portions stop defrosting while the middle of the food is still frozen and leave for approximately 15 minutes.
Heating
Meals can be heated directly on the plate. For heating select the highest power setting.
Cooking
Select a higher or lower power setting depending on the type of dish being prepared. (See the accompanying cookbook).
4 Press the start button to start the microwave.
5 Once the programmed time has elapsed you will hear a signal and the microwave will switch off.
6 Press the stop button.
Grilling gives dishes a crunchy golden crust. Use the grill for snacks and smaller portions and the turbo grill for larger portions.
1 Turn the function selection dial to grill turbo grill.
2 Programme the required time.
3 Turn the temperature selection dial to the required temperature.
4 Press the start button to start the oven. The temperature indicator light will light up. Once the oven has reached the set temperature the temperature indicator light will go out.

5 Once the programmed time has elapsed you will hear a signal and the grill element will switch off.

6 Press the stop button and return the function selection dial to its original setting. All of the indicator lights will go out.
Time and temperature setting can be adjusted at any time.
When baking a tart or a cake it is best to use the hot air function This function is also suitable for roasting meal or poultry or for baking fish. Two roasts can be set in the oven, one on top of the other. For the preparation of critical dishes, such as a souffle, use the half volume hot air circulation function

4 Press the start button to start the oven. The temperature indicator light will light up. Once the oven has reached the set temperature the temperature indicator light will go out.
5 Once the programmed time has elapsed you will hear a signal and the hot air circulation will switch off.

6 Press the stop button and return the function selection dial to its original setting. All of the indicator lights will go out.
Time and temperature setting can be adjusted at any time.
424242 Fast baking and roasting with the combi-functions


Grill or turbo grill + microwave
This combination is suitable for roasting or baking larger cuts of meat, half a large chicken or a whole small chicken, whole fish and dishes au gratin.
Hot air circulation + microwave
This combination is used to bake fruit tarts, bread or dishes au gratin (dishes which normally require a longer cooking time).
1 Turn the function selection dial to one of the oven functions.
2 Programme the required time.
3 Select the required power setting.
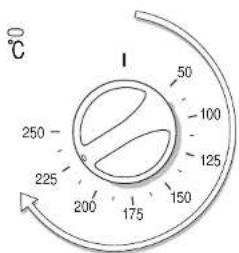
4 Turn the temperature selection dial to the required temperature.
Fast baking and roasting with the combi-functions
5 Press the start button to start the oven and the microwave.
The temperature indicator light will light up. Once the oven has reached the set temperature the temperature indicator light will go out.
6 Once the programmed time has elapsed you will hear a signal and the grill element and the microwave will switch off.
7 Press the stop button and return the function selection dial to its original setting. All of the indicator lights will go out.
The microwave will not run for more than an hour on the full power setting. After an hour it will automatically drop to power setting 5. Time and power setting can be adjusted at any time.
The culisensor allows you to determine the temperature at the centre of a roast.
Position the culisensor in such a way that the point is inserted into the deepest part of the roast, and not touching bone or fatty parts. The point of the culisensor must not touch the sides or the base of the oven.
The culisensor may not be used when cooking sweets or jam or any other dishes which need to simmer or boil for long periods.
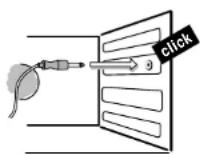
The connection point for the culisensor is covered with a rubber stopper which must first be removed. This rubber stopper should be replaced whenever the culisensor is not in use. (This is to prevent soiling).
1 Turn the function selection dial to one of the oven functions.
2 Turn the temperature selection dial to the required temperature.
3 Insert the culisensor in the roast and place the roast in the oven.
4 Insert the plug of the culisensor in the connection point and close the door. The display will show the temperature (set to 65^ ) and the culisensor indicator light will flash.
Roasting with the 'culisensor'
Temperature and power setting can be adjusted at any time.
5 Programme the required temperature for the cullisensor (between 35 and 95^) using the buttons to programme the time.
6 Press the start button.
7 Once the centre of the roast has reached the required temperature you will hear a signal and the oven will switch off. The display will indicate the temperature of the roast.
8 Press the stop button and turn the function selection dial back to its original setting. Replace the rubber stopper over the connection point.
Do not use water to clean the culisensor. Clean the culisensor with a clean cloth (damp or dry). Do not switch the oven on if the culisensor is loose in the oven as this can damage the culisensor.
| type of meat | oven temperature | core temperature | result | |
| veal▲ | veal ricanteau | 150 °C | 77 °C | cooked |
| brisket of veal | 150 °C | 77 °C | cooked | |
| stuffed brisket of veal | 150 °C | 77 °C | cooked | |
| beef▲ | tenderloin | 200 °C | 35 °C | red |
| roast beef | 225 °C | 45 °C | red | |
| sirloin | 150 °C | 70 °C | pink | |
| T-bone steak | 150 °C | 77 °C | cooked | |
| rump | 150 °C | 65 °C | pink | |
| pork▲ | pork ricanteau | 150 °C | 77 °C | cooked |
| pork sirloin | 150 °C | 77 °C | cooked | |
| braised pork | 150 °C | 82 °C | cooked | |
| lamb▲ | leg of lamb | 150 °C | 70 °C | pink |
| leg of lamb | 150 °C | 80 °C | cooked | |
| rolled lamb | 150 °C | 80 °C | cooked | |
| shoulder of lamb | 150 °C | 80 °C | cooked | |
| game▲ | hare | 95 °C | stew | |
| rabbit | 95 °C | stew |
poultry 82°C cooked
If you wish to check or change the details of both phases before the process begins:
If you want the cooking process to start sometime later, you can use the first phase for this purpose. In this case programme only the time in the first phase.
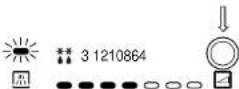
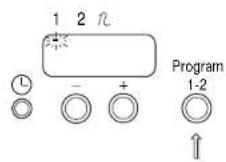
1 Press the button for cooking in phases. The first indicator light will flash.
2 Programme the first phase (defrosting, for example).
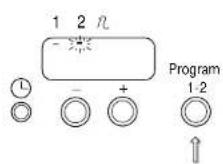
3 Press the button for cooking in phases a second time. The second indicator light will flash.
4 Programme the second phase (cooking, for example). You can programme two functions at random one after another.
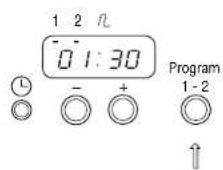
5 Press the button for cooking in phases a third time. The display will now show the details of the first phase programmed.
6 Press the start button to begin the process.
7 Once the first phase is complete you will hear a signal and the oven will automatically start the second phase.
1 Press the start button.
2 The display will now show the details of the first phase programmed. You can now check (or change) the programme.
3 Press the start button a second time.
4 The display will now show the details of the second phase programmed. You can now check (or change) the programme.
5 Press the start button a third time in order to confirm all instructions.
1 Turn the function selection dial to the required function.
2 Turn the temperature selection dial to the required temperature.
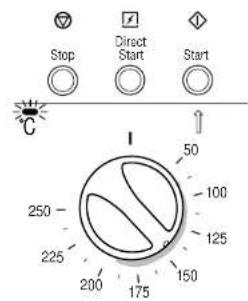
3 Press the direct start button (rather than the start button) to start the oven.
4 Once the programmed time has elapsed you will hear a signal and the display will show "hold". The microwave will then switch to the lowest setting for a period of 20 minutes. After 20 minutes the microwave will switch off.
If you wish to determine when the cooking is to stop yourself you can do so by operating the appliance manually.
1 Turn the function selection dial to the oven function required.
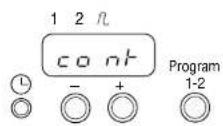
2 Press the start button. The display will show the word "cont" (continuous).
3 You can now determine when cooking is to stop yourself. If you forget to do so, the oven will automatically switch off after a period of 9 hours and 59 minutes.
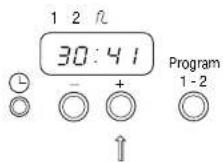
4 To see how long the oven has been running press the ^+ button and the display will show the length of time that the oven has been on for approximately 3 seconds. If you hold the ^+ button in the display will continue to show the time until you release the button again.
Tips for using the microwave:
- Do not use the microwave to dry paper, cloth or any other inflammable material. Do not deep fry and do not allow foods to overcook.
- If something catches fire in the oven, keep the oven door closed, switch the microwave off and remove the plug from the socket.
- Never start the microwave when there is nothing in the oven.
This can damage the oven.
1 Baking tray. Suitable for roasting and baking dough without a baking tin. The baking tray can be used with the hot air circulation function and the grill.
2 Glass drip tray: Ideal for catching cooking juices. Prevents stains. The drip tray can be cleaned in the dishwasher. The glass drip tray can be used with the hot air circulation function, the (turbo) grill and the microwave.
3 Reversible oven shelf: Suitable for baking with baking tins and grilling. Do not push the shelf against the back wall of the oven because this can cause sparks. The oven shelf can be used with the hot air circulation function, the (turbo) grill and the combi-functions. (The oven shelf cannot be used with the microwave.)
4 Defrosting grid: To be placed in the glass drip tray when defrosting to prevent foods from standing in their own moisture. The defrosting grid can only be used with the microwave.
5 Culisensor: The culisensor allows you to determine the temperature at the centre of a roast. Position the culisensor in such a way that the point is inserted into the deepest part of the roast, and not touching bone or fatty parts. The point of the culisensor must not touch the sides or the base of the oven.
Looking after your appliance
When baking and roasting keep the oven as clean as possible; use the drip tray when grilling and do not allow food remains to gather around the door.
Clean the inside and the outside of the oven on a regular basis using washing up liquid and dry the oven thoroughly with a soft cloth. You can remove the dials by pulling them towards you. Do not use any chemical or abrasive cleaning agents. Also clean the oven accessories on a regular basis using washing up liquid and a brush. Dry the oven accessories thoroughly with a soft cloth.
The grill element can be folded down so that it can be cleaned more easily. Press the grill element upwards and then to the right. Then push it downwards.
The oven may not be used while the grill is folded down
Check the seal of the door regularly for damage. If there is any damage the oven may not be used until the damage has been repaired.
Technical specifications
- Type number: MAG 570
- Power supply: 230 V / 50 Hz
-Connection rating:3600W - Dimensions (h x w x d): 460 x 592 x 550
This appliance complies with the regulations regarding radio interference set out in the directive 76/889/EEG.
general
National regulations always must be observed.
electrical connections
This appliance should be connected to a three-pin plug with a 13 amp fuse in accordance with UK safely standards.
earthing Instructions
This appliance should be connected to an AC 230 V 50 Hz household mains supply. The unit should be earthed at all times and under no circumstances should it be connected to a DC power supply.
WARNING: This appliance must be earhed.
IMPORTANT: The wires in the mains lead are coloured in accordance with the following code:
Green and yellow = E or Blue = N or Black Brown = L or Red
If the colours of the wires in the mains lead of this appliance may not correspond with the coloured markings identifying the terminals in your plug, proceed as follows:
The green and yellow wire must be connected to the terminal which is marked with the letter E, the symbol or coloured green or green and yellow.
The blue wire must be connected to the terminal which is marked with the letter N or coloured black.
The brown wire must be connected to the terminal which is marked with the letter L or coloured red.
This appliance must be protected by a 13 amp fuse if a (BS 1363) plug is used. If any other type of plug is used, a 15 amp fuse must be fitted either in the plug, or on the distribution board.
installation instructions
installation dimensions
To ensure the oven is built-in correctly in the kitchen, the cabinet should be level and true.
installation instructions
building in
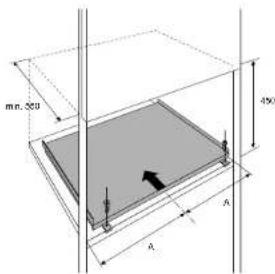
1 Position the holes for fixing the support.
2 Drill the holes.
3 Mount the micro-wave support using the chip board screws supplied.
Put the plug into the socket and slide the appliance into the housing.
Fix the appliance.
Disposing of the packaging of the appliance
The packaging of the appliance is recyclable and includes the following materials:
cardboard;
polythene foil (PE);
-hard foam CFC-free polystyrene (PS);
polypropylene bands around the box.
indexdescription du four
Pelgrim gives a 5 year guarantee on the appliance, provided it is professionally installed by a qualified fitter in accordance with the installation instructions.
Pelgrim is obliged for the period of 5 year from purchase date to replace parts free of charge.
For the period of 1 year from purchase date no charges will be made for housecalls or labour. This guarantee covers all defects caused by manufacturing faults or defective parts.
When service is required, purchase receipt and guarantee certificate must be presented.
Defects caused by incorrect installation are not covered by this guarantee.
Name and adress of fitter:
Purchase date:


- Grill of turbogrill + magnetron
- Table of contentsDescription of the appliance
- Introduction
- 303030
- For your safety
- 31303
- Before you begin
- Before you begin
- One more thing...
- Preheating
- Defrosting
- Heating
- Cooking
- Fast baking and roasting with the combi-functions
- Grill or turbo grill + microwave
- Hot air circulation + microwave
- Fast baking and roasting with the combi-functions
- Roasting with the 'culisensor'
- Looking after your appliance
- Technical specifications
- general
- electrical connections
- earthing Instructions
- installation instructions
- installation dimensions
- building in
- Disposing of the packaging of the appliance
- indexdescription du four
Brand : Pelgrim
Model : MAG570
Category : Microwave Oven