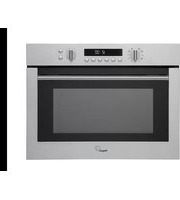
MAC696RVS - Microwave Oven Pelgrim - Free user manual and instructions
Find the device manual for free MAC696RVS Pelgrim in PDF.


| Product Type | Microwave Oven with Convection |
| Brand | Pelgrim |
| Model | MAC696RVS |
| Installation Type | Built-in |
| Net Capacity | 42 L |
| Dimensions (H x W x D) | 455 x 595 x 568 mm |
| Net Weight | 32 kg |
| Power Supply | 230 V / 50 Hz |
| Microwave Power | 900 W |
| Grill Power | 1100 W |
| Convection Power | 1500 W |
| Functions | Microwave, Grill, Convection, Combination, Defrost, Keep Warm, Auto Menus |
| Control Type | Electronic with Touch Controls |
| Display | LED Digital Display |
| Interior Light | Yes |
| Door Features | Stainless Steel, Drop-Down Hinge |
| Cleaning | Easy-clean enamel interior, removable side racks |
| Safety Features | Child Lock, Overheat Protection |
| Spare Parts Availability | Genuine Pelgrim parts available online |
| Repairability Index | 6.5 / 10 (estimated) |
| Energy Efficiency Class | A+ |
| Included Accessories | Glass turntable, roll ring, grill rack, instruction manual |
Frequently Asked Questions - MAC696RVS Pelgrim
User questions about MAC696RVS Pelgrim
0 question about this device. Answer the ones you know or ask your own.
Ask a new question about this device
Download the instructions for your Microwave Oven in PDF format for free! Find your manual MAC696RVS - Pelgrim and take your electronic device back in hand. On this page are published all the documents necessary for the use of your device. MAC696RVS by Pelgrim.
USER MANUAL MAC696RVS Pelgrim
natural_image
Close-up of a kitchen oven control panel with digital display and rotary knob (no visible text or symbols)MAC696RVS
MAC696MAT
Handleiding
Oven
Instructions for use
Oven
NL Handleiding NL 3 - NL 53
EN Instructions for use EN 3 - EN 53
natural_image
Simple line drawing of a rectangular tray or container (no text or symbols)natural_image
Simple line drawing of a rectangular tray or container (no text or symbols)natural_image
Line drawing of a cooking pot with lid and side handles (no text or symbols)natural_image
Circular device knob with arrow indicating refresh or update function (no text or symbols)natural_image
Two-step diagram showing a circular button with rotational arrows and a hand cursor clicking a 'START' button (no text or symbols beyond the icon)natural_image
Digital display showing 3:89' and a rotary knob with bidirectional arrows (no text or symbols)natural_image
Gray circular icon with arrow and control symbols, no readable text or numbers presentnatural_image
Digital display showing time reading with control knob and circular buttons (no text or symbols)4 Druk op START.
Opmerking
natural_image
Top-down schematic of a double boiler or oven with internal structure and fan (no text or symbols)natural_image
Top-down architectural diagram of a double boiler or stove with no visible text or symbolsnatural_image
Technical line drawing of a traditional Chinese double-chamber oven or stove with decorative railings and a central circular vent (no text or symbols)natural_image
Two circular icons with arrows indicating rotation and cycle, no text or symbols presentnatural_image
Two technical diagrams showing a rotary knob and a digital clock interface with a finger pointing to the button (no text or symbols present)natural_image
Icon of a camera lens with a circular button and arrow, surrounded by small icons (no text or symbols)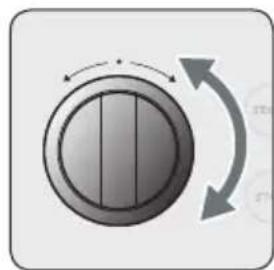
natural_image
Circular button with directional arrows indicating rotation or refresh (no text or symbols)flowchart
graph TD
    A["Start"] --> B["Stop"]
    B --> C["Reverse"]
    C --> D["Control knob with vertical division"]
natural_image
Two circular mechanical components with directional arrows indicating rotation and cycle (no text or symbols)natural_image
Circular device icon with arrow indicating refresh or move (no text or symbols)natural_image
Digital display showing time reading of 0:88, with a rotary knob and circular arrows indicating rotation (no text or symbols)natural_image
Digital display showing 18:00 with clock, mouse icon, and circular dial with bidirectional arrows (no text or symbols)natural_image
Technical line drawing of a mechanical or architectural component with no visible text or symbolsflowchart
graph TD
    A["Start"] --> B["Stop"]
    B --> C["Delete"]
    C --> D["Return to Start"]
natural_image
Digital display with time and clock icons, featuring a rotary knob and bidirectional arrows (no text or symbols)natural_image
Digital timer and rotary knob icon with circular arrows indicating refresh or move (no text or symbols)natural_image
Top-down schematic of a microwave oven with internal fan and cooling unit (no text or symbols)natural_image
Illustration of a hand pressing a button on a digital timer (no text or symbols)flowchart
graph TD
    A["Control Panel"] --> B["Directional Clicker"]
    B --> C["Speed Indicator 1:50kV, 2:30P"]
    C --> D["Speed Indicator 2:70kV, 3:50P"]
natural_image
Simple diagram showing a circular button with vertical stripes and a hand cursor clicking the button (no text or symbols)5 Druk op START.
Opmerking
natural_image
Circular icon with arrow and circular design, no text or symbols presentnatural_image
Circular device with directional arrows indicating rotation or refresh (no text or symbols)natural_image
Digital display showing 3:88' and control knob with circular arrows indicating rotation (no text or symbols)natural_image
Circular dial indicator with arrow and droplet symbol, no readable text or labelsnatural_image
Digital display showing 18:00 with clock and rotary knob icons (no text or symbols)natural_image
Simple line drawing of a pot with arrows indicating flow or movement (no text or symbols)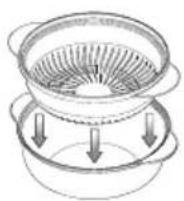
+

natural_image
Illustration showing a circular vent with rotation arrow and a kitchen oven with lid (no text or symbols)flowchart
graph TD
    A["Start: Washing Machine"] --> B["Step 1: Washer is pouring fan into refrigerator"]
    B --> C["Step 2: Washer moves down, drops to door with rotation arrow"]
    C --> D["Step 3: Washer lights down, hold up hand near door"]
    D --> E["Step 4: Washer finishes window, holds hand near door"]
Belangrijk
natural_image
Circular dial indicator with control knob and surrounding icons (no text or symbols)▶ De oven veroorzaakt storingen in radio's of televisies.
natural_image
Symbol of a trash bin with crossed lines indicating no waste or discharge (no text or labels)The oven functions 5
The accessories 6
Using this user manual....6
Setting the clock 7
Setting the energy saving setting 8
The heating possibilities....9
How a microwave oven works .... 11
Using the microwave function 12
Using the oven functions 22
Setting a preparation time 28
Setting an end time....29
Postponing a preparation time 30
Using the combi functions 31
Using the automatic menu settings 35
Using the steamer basket 43
Using the Aqua Clean setting....46
Deactivating the beeping noise 47
The child-proof lock 48
Cleaning the microwave oven....49
Storing and repairing the microwave oven....49
Solving problems 50
Error codes....51
Technical specifications 52
Disposal of appliance and packaging. 53

- Off setting
- Microwave setting
- Oven function 'hot air'
- Oven function 'grill'
- Oven function 'large grill'
- Oven function 'grill with fan'
- Defrost setting
- Aqua clean function
- Vegetable menu setting
- Automatic preparation
- Combi function ‘microwave with hot air’
- Combi function ‘microwave with grill’
- Setting selector knob
- Display
- Oven light button
- Clock button
- +30 sec button
- Preparation time button
- End time button
- Select button
- Function selector knob
- Start button
- Stop/cancel button

Note
- A baking tray or grill rack + ceramic baking can be slid into the different levels in the oven.
• Level 1 is the lowest level in the oven and level 5 is the highest level.
• Level 1 is used mainly for the microwave function using the ceramic baking plate.
• Levels 4 and 5 are used mainly for the grill functions. - Consult the preparation guidelines in this user manual to determine the correct level for your dishes.
The following accessories are supplied with your microwave oven:

natural_image
Simple line drawing of a rectangular tray or container (no text or symbols)1 Ceramic baking tray (use with microwave setting)

natural_image
Simple line drawing of a rectangular tray or container (no text or symbols)2 Baking tray (do NOT use with microwave setting)
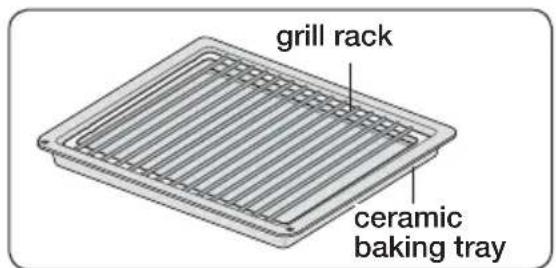
3 Grill rack for ceramic baking tray (use with quick menu and grill setting)
natural_image
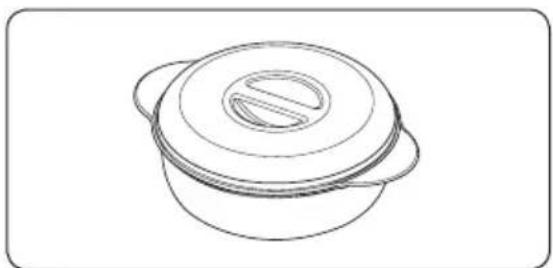
Line drawing of a cooking pot with lid and side handles (no text or symbols)4 Steamer basket Use the plastic steamer basket to prepare dishes with steam.
Note
Consult the preparation guidelines in this user manual to determine the correct accessories for your dishes.
USING THIS USER MANUAL
Thank you for buying an Pelgrim microwave oven.
The user manual contains important information about the use and maintenance of your new microwave oven. The installation instructions are supplied separately.

Read the separate safety instructions before using the appliance!
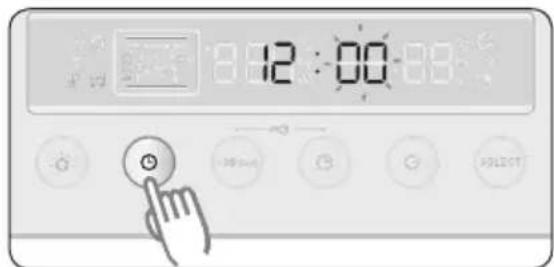
When you connect the appliance to the mains electricity for the first time, the display lights up. After three seconds the clock symbol and '12:00' flash on the display. Set the clock to the correct time.
Setting the clock


flowchart
graph TD
    A["Start"] --> B["Stop"]
    B --> C["OK"]
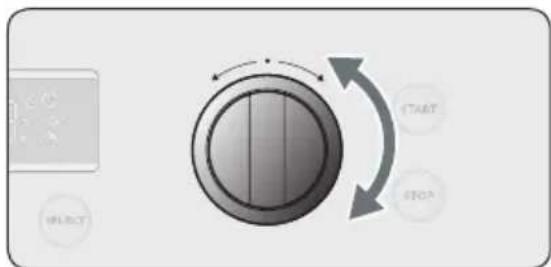
1 Press CLOCK. '12' starts flashing. Turn the FUNCTION SELECTOR KNOB to set the hour.
flowchart
graph TD
    A["Start"] --> B["Stop"]
    B --> C["Interrupt"]
    style A fill:#f9f,stroke:#333
    style C fill:#bbf,stroke:#333
3 Press CLOCK again. '00' starts flashing.
4 Turn the FUNCTION SELECTOR KNOB to set the minutes.

5 Press CLOCK again. The clock is set in 5 seconds.
Note
If you press a button, the setting starts to flash. You can now change the setting. You can only change the setting if it is flashing. If it stops flashing, you must press the button again so that the setting starts flashing again.
The oven has an energy-saving setting (Eco setting). The oven display is switched off in this setting.
Stand-by setting
If the oven is not used for 10 minutes, it switches automatically to the stand-by setting (default).
ECO setting
The display (time indication) is switched off in the ECO setting.

1 Press and hold END TIME for 3 seconds. The oven switches to the ECO setting and the display shows nothing.
2 Open the door or press a button if you want to go to the stand-by setting. The current time is shown on the display and the oven is ready for use.
The following list shows the different heating possibilities and oven settings which are available. Use the preparation guidelines on the following pages to determine the correct mode and setting for your recipes.
MICROWAVE MODE
 | Microwaves are used for preparing and defrosting dishes. Dishes are prepared quickly and efficiently without the colour or form of the dish being affected. You set the power and preparation time manually for the different dishes. |
OVEN FUNCTIONS
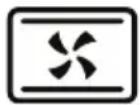 | Hot air settingThe fan distributes the heat from the top and bottom heating elements through the oven. The heat is distributed evenly in the oven. This setting is suitable for traditional baking and roasting. Recommended temperature: 180 °C |
 | Grill settingThe grill element heats the dish. The grill setting is particularly suitable for grilling smaller quantities, such as baguette, fish fillets or for giving an oven dish a gratin finish. Put the dish in the middle of the grill rack + ceramic baking, because the element is in the middle of the oven.Recommended temperature: 180 °C |
 | Large grill settingThe grill element and the top element heat the dish. The large grill setting is suitable for grilling steak, sausages and toasted sandwiches.Recommended temperature: 220 °C |
 | Grill + fan settingThe fan distributes the heat from the grill and the top heating element. You can use this setting for grilling meat and fish. Recommended temperature: 220 °C |
AUTOMATIC FUNCTIONS
 | Defrost settingSelect from 5 preset defrost settings. The fan is switched on with a low temperature during defrosting. Turn the food over during defrosting. You only have to choose the programme and the weight to start defrosting. |
  | Aqua cleanThe hot steam makes the interior of the oven wet, so you can clean the oven easily. The Aqua Clean programme takes 15 minutes.Vegetable menu settingSelect from 10 preset ‘vegetable menu settings’. Preparation time and power are chosen automatically. You only have to choose the programme and the weight to start the preparation process. |
 | Automatic menu settingSelect from 10 preset automatic preparation settings. The time and temperature are set automatically. You only have to choose the programme and the weight to start the preparation process. |
MICROWAVE COMBI FUNCTIONS
 | Microwave + hot airThis function is suitable for all types of meat and poultry, but also for casseroles, au gratin casseroles, roast beef, biscuit dough and light fruitcakes, tarts and crumble desserts. |
 | Microwave + grillThis function is suitable for all types of prepared dishes which have to be warmed up and browned (e.g. baked pasta) and dishes which need a short preparation time for a brown crust.This setting can also be used for thick portions for which a brown, crunchy crust is tasty (e.g. chicken drumsticks). |
Microwaves are high-frequency electromagnetic waves. The energy makes it possible to cook or warm up dishes without affecting the form or colour.
You can use your microwave for the following:
- Microwave setting
- Combi functions
Preparation principle

- The microwaves which the microwave generates are spread evenly by a distribution system. This cooks the dish evenly.
- The microwaves are absorbed to a depth of approximately 2.5 cm by the dish. Cooking then continues, because the heat is spread in the dish.
- The preparation times vary and depend on the dish you use and the properties of the food:
• Quantity and density
- Moisture content
- Starting temperature (whether or not it is cooled)
Important
The dish is cooked from the inside out by means of heat distribution. The cooking continues even when you take the dish from the oven.
Standing times in recipes and in this book must therefore be adhered to, in order to ensure
• Even heating into the middle of the dish;
• Equal temperatures in all parts of the dish.
When the microwave is used, microwaves penetrate the dish. These waves are attracted and absorbed by water, fat and sugar in the dish. The microwaves make the molecules in the dish move faster. The fast movement of these molecules causes friction and the dish is warmed up by the heat which this releases.
IMPORTANT: use the ceramic baking tray on level 1.
Microwave mode

natural_image
Circular device knob with arrow indicating refresh or update function (no text or symbols)1 Turn the SETTING SELECTOR KNOB to the microwave setting. The DISPLAY shows the time and the power.

natural_image
Two-step diagram showing a circular button with rotational arrows and a hand cursor clicking a 'START' button (no text or symbols beyond the icon)2 Turn the FUNCTION SELECTOR KNOB to set the preparation time you want. If you do not want to change the power, press START to start the preparation.

natural_image
Digital display showing 3:89' and a rotary knob with bidirectional arrows (no text or symbols)3 If you want to change the power, press SELECT and turn the FUNCTION SELECTOR KNOB to the level you want. Consult the preparation guidelines for guidelines on the correct preparation times and power.

4 Press START to start the preparation.
Guidelines for the microwave power
| POWER PERCENTAGE(%) | OUTPUT POWER(W) | NOTE |
| MAXIMUM 100 800 For warming up liquids. | ||
| HIGH 83 700 | For warming up and preparing dishes. | |
| MEDIUM HIGH 67 600 | For warming up and preparing dishes. | |
| MEDIUM 50 450 | For preparing meat and warming up delicate dishes. | |
| MEDIUM LOW 33 300 | ||
| DEFROST 20 180 | For defrosting and continued cooking. | |
| LOW 11 100 | For defrosting delicate dishes. |
Guidelines for microwave cookware
Cookware that you use for the microwave setting may not block the microwaves. Metals such as stainless steel, aluminium and copper reflect microwaves. For that reason, do not use metal cookware. Cookware which is designated as microwave-safe can be used safely. For more information about suitable cookware, consult the following guidelines and always use the ceramic baking tray on level 1 if you use the microwave setting.
| COOKWARE MICROWAVE-SAFE | REMARKS | |
| Aluminium foil | X | Can be used in small quantities to prevent certain parts of the dish from overcooking. Arcing can occur if the foil is too close to the oven wall or if too much foil is used. |
| Porcelain and earthenware | Porcelain, earthenware, glazed earthenware and ivory porcelain are usually suitable, unless they have a metal edge. | |
| Disposable crockery made from polyester or cardboard | Frozen meals are sometimes packaged in disposable crockery. | |
| Fast food packagingPolystyrene cupsPaper bags or newspaperRecycled paper or metal edges | × × | Can be used to warm up dishes.Polystyrene can melt if it overheats.Can catch fire.Can cause arcing. |
| GlasswareOven dishesFine glasswareGlass jars | Can be used, unless it has a metal edge.Can be used to warm up dishes or liquids. Thin glass can break or shatter with sudden heating.The lid must be removed. Only suitable for warming up. | |
| MetalDishesMetal strips for freezer bags | ✕✕ | Can cause arcing or fire. |
| PaperPlates, cups, serviettes and kitchen paperRecycled paper | ✕√✕ | For short preparation times and warming up. For absorbing excess moisture.Can cause arcing. |
| PlasticTraysCling filmFreezer bags | ✕√✕✕/✕ | Especially heat-resistant thermoplastic material. Other types of plastic can warp or discolour at high temperatures. Do not use melamine plastic.Can be used to hold moisture. Do not touch the food. Be careful when you remove the film; hot steam can escape.Only if boil-proof or ovenproof. Must not be airtight. If necessary, prick it with a fork. |
| Waxed or baking paper | ✕√ | Can be used to hold moisture and prevent splashes. |
Note
Sparks in the microwave are also called arcing.
√: Recommended
√X: Careful
X: Unsafe
General preparation guidelines for the microwave function
Dishes suitable for preparation in the microwave
Various kinds of dishes can be prepared in the microwave, such as fresh or frozen vegetables, fruit, pasta, rice, grains, beans, fish and meat. You can also prepare sauce, custard, soup, steamed pudding, fruit preserves and chutney in a microwave.
Cover during preparation
Dishes should be covered for the preparation, because the water evaporates and the steam contributes to the preparation process. There are various ways to cover dishes, for example with a ceramic plate, a plastic lid or microwave-proof cling film.
Standing times
It is important after preparation that the dish is allowed to stand the recommended time so that the temperature can spread evenly in the dish.
General preparation guidelines for frozen vegetables
Use a suitable glass Pyrex dish with lid. Keep it covered during the minimum time (see the table).
Continue the preparation for the desired result. Stir two times during preparation and one more time after preparation. After preparation, add salt, herbs or butter. Keep the dish covered during the standing time.
| Dish Portion | (g) | Power (P) | Time (min.) | Standing time (min.) | Instructions |
| Spinach 150 600 5 - 6 2 | -3 Add 1 | 5 ml | (1 tablespoon) of cold water. | ||
| Broccoli 300 600 8 - 9 2 | -3 Add 30 ml | (2 tablespoons) of cold water. | |||
| Peas 300 600 7 - 8 2 - 3 | Add 15 ml | (1 tablespoon) of cold water. | |||
| Green beans 300 600 712 - 812 | 2 - 3 | Add 30 ml | (2 tablespoons) of cold water. | ||
| Mixed vegetables (carrots/peas/sweetcorn) | 300 600 7 - 8 2 - 3 Add 15 ml | (1 tablespoon) of cold water. | |||
| Mixed vegetables (Chinese vegetable mix) | 300 600 712 - 812 | 2 - 3 | Add 15 ml | (1 tablespoon) of cold water. | |
Preparation guidelines for fresh vegetables
Use a suitable glass Pyrex dish with lid. Add 30 - 45 ml (2 - 3 tablespoons) of cold water for every 250 g, unless a different amount of water is recommended (see the table). Keep it covered during the minimum time (see the table). Continue the preparation for the desired result. Stir once during the preparation and one more time after preparation. After preparation, add salt, herbs or butter. Keep covered during the standing time of 3 minutes.
Tip: cut fresh vegetables into pieces of equal size. The smaller the pieces, the shorter the preparation time.
Note: All fresh vegetables should be prepared at full power (800 W).
| Dish Portion | (g) | Time(min.) | Standing time(min.) | Instructions |
| Broccoli 250 | 500 | 4 - 55 - 6 | 3 Make sure the florets are of equal size. Point the stalks to the middle. | |
| Brusselsprouts | 250 5 - | 6 3 Add | 60 - 75 ml (5 - 6 tablespoons)of water. | |
| Carrots 250 5 - | 6 3 Cut the | carrots into slices of equal size. | ||
| Cauliflower 250 | 500 | 5 - 67 - 8 | 3 Make sure the florets are of equal size. Cut large florets in half. Point the stalks to the middle. | |
| Courgette 250 3 - | 4 3 Cut | the courgette into slices. Add | ||
| Aubergine 250 3 - | 4 3 Cut | the aubergine into thin | ||
| Leek 250 3 - 4 3 Cut the leek into thick rings. | ||||
| Mushrooms 125 | 250 | 1 - 22 - 3 | 3 For preparation, use small mushrooms whole, and cut larger mushrooms into slices. Do not add water. Sprinkle with lemon juice.Season with pepper and salt.Drain before serving. | |
| Onions 250 4 - | 5 3 Cut the | onions into rings or half | ||
| Capsicum 250 4 - | 5 3 Cut | the capsicum into small strips. | ||
| Potatoes | 250 | 4 - 5 | 3 Weigh the peeled potatoes and cut them in half (or in four pieces) for pieces of equal size. | |
| 500 | 7 - 8 | |||
| Swede | 250 5 - | 6 3 Cut the swede into cubes. | ||
Preparation guidelines for rice and pasta
Rice Use a large, glass Pyrex dish with lid. (Take into consideration that rice doubles in volume during the preparation.) Keep covered during the preparation. Stir after the preparation and before the standing time. Add salt or herbs and butter. The rice may not have absorbed all the water after the preparation is completed.
Pasta Use a large, glass Pyrex dish. Add boiling water and a pinch of salt and stir it all thoroughly. Do not cover during the preparation. Stir several times during and after the preparation. Cover during the standing time and then drain well.
| Dish Portion | (g) | Power (W) | Time (min.) | Standing time (min.) | Instructions |
| White rice (parboiled) | 250375 | 800 | 17 - 1818 - 20 | 5 | Add 500 ml of cold water.Add 750 ml of cold water. |
| Brown rice (parboiled) | 250375 | 800 | 20 - 2222 - 24 | 5 | Add 500 ml of cold water.Add 750 ml of cold water. |
| Mixed rice (rice + wild rice) | 250 800 | 17 - 19 | 5 Add 500 | ml of cold water. | |
| Mixed grains (rice + grain) | 250 800 | 18 - 20 | 5 Add 400 | ml of cold water. | |
| Pasta 250 800 10 - 11 5 | Add 1000 ml of warm water. |
WARMING UP
The microwave oven only needs a fraction of the time a traditional oven requires to warm up dishes.
Dividing and covering
Avoid warming up large pieces of food. They may become overcooked and dry out before they are warm enough inside. Warming up smaller pieces works better. If you cover dishes during the warming up, you prevent them from drying out.
Power settings
Different power settings can be used to warm up dishes. In general it is advisable to use a low power for delicate dishes or dishes which heat up fast, such as fruit pie.
Stirring
For best results, stir dishes thoroughly or turn them over during the warming up. If possible, stir one more time before serving. Stirring is particularly important if you are warming up liquids.
Warming up and standing times
If you are warming up dishes for the first time, it is useful to note down the time required, so that you can consult this in the future. Avoid overheating. If you are not sure about the preparation time, it is better to use a short time. In that case you can always add extra time if you need it. Always make sure that warmed up dishes are heated thoroughly.
Let dishes stand for a short while after warming up to ensure that the temperature is evenly distributed. The recommended standing time after warming up is 2 - 4 minutes.
Warming up liquids
Take care when warming up liquids. Prevent splashes and possible burning by putting a spoon or glass stirrer in the drink. Stir during and definitely after the warming up. After the warming up, let stand for at least 20 seconds to ensure that the temperature is evenly distributed.
Warming up baby food
Baby food
Take care when warming up baby food. Put the food in a deep ceramic plate. Cover it with a plastic lid. After warming up, stir it thoroughly. Let stand for 2 to 3 minutes before use. Stir it again and check the temperature.
The recommended usage temperature is 30 - 40 °C.
Baby milk
Pour milk into a sterilised glass bottle. Warm the bottle up without covering it. Never warm up a baby bottle with the teat on it. The bottle can explode if it overheats. Shake the bottle well before the standing time, and shake it again before use. Always check the temperature of the baby food or milk before you feed your baby.
The recommended usage temperature is 37^ C.
Warming up baby food and milk
Use the power and times in this table as a guideline for warming up.
| Dish Portion Power | (W) | Time Standing time (min.) | Instructions | |
| Baby food (vegetables + meat) | 190 g 600 W | 30 - 40 sec. | 2 - 3 Spoon the contents into a deep ceramic plate. Keep covered during the preparation. Stir the dish thoroughly after preparation. Let it stand for 2-3 minutes. Stir it thoroughly before use and check the temperature carefully. | |
| Baby cereal (grains + milk + fruit) | 190 g 600 W | 20 - 30 sec. | 2 - 3 Spoon the contents into a deep ceramic plate. Keep covered during the preparation. Stir the dish thoroughly after preparation. Let it stand for 2-3 minutes. Stir it thoroughly before use and check the temperature carefully. | |
| Baby milk | 100 ml 200 ml | 300 W | 30 - 40 sec. 50 sec. to 1 min. | 2 - 3 Stir or shake the content thoroughly and pour it into a sterilised glass bottle. Put the bottle in the middle of the ceramic baking tray. Do not cover during the preparation. Shake the bottle thoroughly and allow it to stand for at least 3 minutes. Shake the content thoroughly before use and check the temperature carefully. |
Warming up liquids and food
Use the power and times in this table as a guideline for warming up.
| Dish Portion Power | (W) | Time Standing time (min.) | Instructions | |
| Beverages | 250 ml(1 mug)500 ml(2 mugs) | 800 W | 112 - 2 2-3 | Pour the beverage into a ceramic mug and warm up the beverage without covering the mug. Put the mug in the middle of the ceramic baking tray. Stir the content carefully before and after the standing time. |
| Soup (cooled) | 250 g 8 | 00 W 3-4 2-3 | Pour the food into a deep ceramic plate. Cover it with a plastic lid. After warming up, stir it thoroughly. Stir one more time before serving. | |
| Casserole (cooled) | 350 g 6 | 00 W 5-6 2-3 | Pour the food into a deep ceramic plate. Cover it with a plastic lid. After warming up, stir it thoroughly. Stir one more time before serving. | |
| Pasta with sauce (cooled) | 350 g 6 | 00 W 5-6 2-3 | Pour the food into a deep ceramic plate. Cover it with a plastic lid. After warming up, stir it thoroughly. Stir one more time before serving. | |
| Complete meal (cooled) | 350 g450 g | 600 W | 5-66-7 | 3 Scoop 2-3 cooled dishes on to a ceramic plate. Cover the whole with cling film. |
Defrosting
Microwaves are excellent for defrosting frozen dishes. Microwaves ensure that frozen dishes are gradually defrosted in a short time. This can be a great advantage if you receive unexpected guests. Frozen poultry must be fully defrosted before preparation. Remove any metal strips and take the product out of the packaging to allow moisture to drain off. Put the frozen dish on a plate and do not cover it. Turn it over halfway through and drain any moisture. Remove any organs as soon as possible. Check the dish now and then to ensure that it does not become too warm. If smaller, thinner parts of the frozen dish become warm, you can protect them by wrapping them in small pieces of aluminium foil. If the poultry becomes warm on the outside, press STOP/CANCEL and let it stand for 20 minutes before continuing. Let fish, meat and poultry stand to defrost further. The standing time for full defrosting depends on the amount of food you want to defrost. Consult the table on the next page.
Tip: Flat dishes defrost faster than thick ones, and small quantities take less time than larger ones. Take this into consideration when you freeze the dish and defrost it.
Consult the following table for defrosting frozen dishes (-18/-20 °C).
Frozen dishes should be defrosted at the defrosting power (180 W).
Put the dish on the ceramic baking tray and slide it on to level 1 in the microwave.
| Dish Portion | (g) | Time(min.) | Standing time(min.) | Instructions |
| Meat | ||||
| Minced beef | 250 | 6 - 7 | 15 - 30 Put | the meat on a ceramic plate. |
| 500 | 8 - 12 | Wrap thinner pieces in aluminiumfoil. Turn the meat over halfwaythrough the defrosting time. | ||
| Pork chops | 250 | 7 - 8 | ||
| Poultry | ||||
| 500(2pieces) | 12 - 14 | 15 - 60 Put | chicken pieces skin down andwhole chickens with the breastdown on a ceramic plate. Wrapthinner pieces such as the wingsand ends in aluminium foil. Turnthe food over halfway through thedefrosting time. | |
| Chicken pieces | ||||
| Whole chicken | 1200 | 28 - 32 | ||
| Fish | ||||
| Fish fillets | 200 | 6 - 7 | 10 - 25 Put | frozen fish in the middle of aceramic plate. Put thinner piecesunder the thicker pieces. Wrap thenarrow ends of the fillets and thetail of the whole fish in aluminiumfoil. Turn the food over halfwaythrough the defrosting time. |
| Entire fish | 400 | 11 - 13 | ||
| Fruit | ||||
| Berries 300 6 - 7 | 5 - 10 Distribute the fruit on a large, flat,round glass dish. | |||
| Bread | ||||
| Bread rolls(each approx.50 g) | 2 pieces4 pieces | 1 - 112 212 - 3 | bread rolls in a circle or placethe bread horizontally on kitchenpaper on the ceramic baking tray.Turn the food over halfway throughthe defrosting time. | |
| Toastedbread/toastedsandwich | 250500 | 4 - 412 7 - 9 | ||
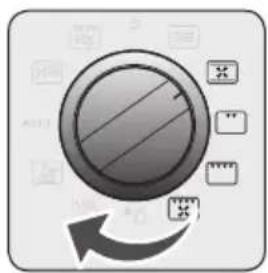
Select from 4 oven functions. Consult the preparation guidelines to determine the correct oven function.
Selecting oven function

natural_image
Gray circular icon with a curved arrow and small icons, no readable text or symbols present.1 Turn the SETTING SELECTOR KNOB to the desired oven function.
 | Hot air |  |
 | Grill |  |
 | Large grill | 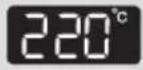 |
 | Grill + Hot air | 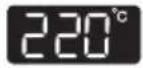 |
natural_image
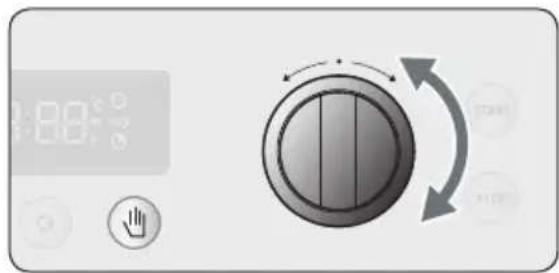
Digital display showing time reading with control knob and circular buttons (no text or symbols)2 If you want to change the temperature, press SELECT and turn the FUNCTION SELECTOR KNOB to the temperature you want.
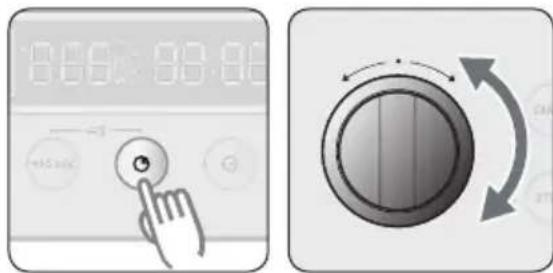
3 If you want to change the preparation time, press PREPARATION TIME and turn the FUNCTION SELECTOR KNOB to the preparation time you want.
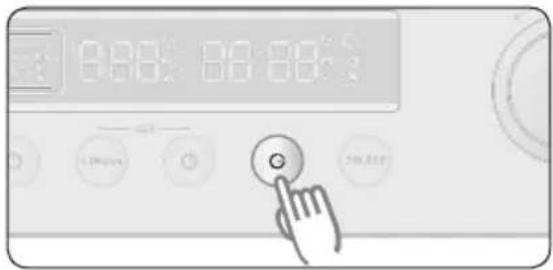
4 Press START.
Note
1) During the preparation you can change the preparation time and the temperature.
2) If you use the oven setting, the operation of the heating elements is interrupted regularly to regulate the temperature.
Hot air
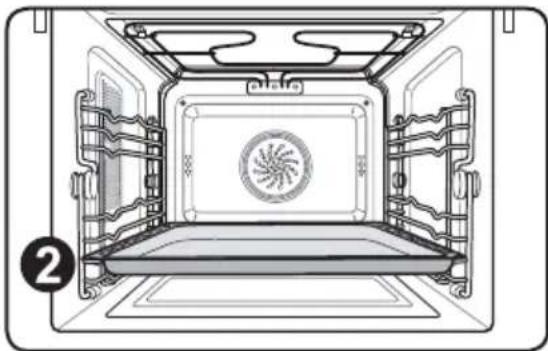
In this setting the top and bottom heating elements and the fan are activated. The heat is distributed evenly in the oven. This setting is suitable for large amounts of food which need heat supply, such as large au gratins and pies.
natural_image
Top-down architectural diagram of a double boiler or stove interior showing structural beams and central fan (no text or symbols)The baking tray or the grill rack + ceramic baking is usually placed on level 2.
* Temperature setting: 40 - 230 °C.
* Use oven crockery that is resistant to a temperature of 250 °C.
Cooking table
The temperatures and cooking times in this table are guidelines.
We recommend you preheat the oven if you use the intensive function.
| Dish Level Accessories | Temperature (°C) Time (min.) | |
| Lasagne 2 kg | 2 Grill rack + Ceramic baking tray | 180 0:20 - 0:25 |
| Vegetable gratin 2 kg | 2 Grill rack + Ceramic baking tray | 170 0:40 - 0:50 |
| Potato gratin 2 kg | 2 Grill rack + Ceramic baking tray | 170 0:50 - 1:00 |
| Roast beef / 2 kg medium | 2 Grill rack + Ceramic baking tray | 160 1:30 - 1:40 |
| Whole duck / 2 kg | 2 Grill rack + Ceramic baking tray | 180 1:30 - 1:40 |
| 2 whole chickens / each 1.2 kg | 2 Grill rack + Ceramic baking tray | 180 1:30 - 1:40 |
Please note
You do not have to turn the food over, but if you do this halfway through, you have a better result.
Grill
This function is for grilling smaller quantities of flat dishes such as steaks, schnitzels, fish and toast. Put the dishes in the middle on the rack. Only the top heating element is turned on.

For grilling, use the grill rack + ceramic baking on level 4 and the baking tray on level 3.
* Temperature setting: 180 °C.
Grill Table
The temperatures and cooking times in this table are guidelines.
| Dish Level Accessories | Temperature (°C) | Time (min.) | |
| Melting Camembert(2 - 4 each 75 g)Do not pre-heat the oven | 4 Grill | rack+ ceramicbaking tray | 200 9 - 11 |
| Frozen baguette with filling(mozzarella and tomato orham and cheese) | 4 Grill | rack+ Ceramicbaking tray | 200 14 - 16 |
| Fish fingers, frozen(300 - 450 g)Do not pre-heat the oven | 4 Grill | rack+ ceramicbaking tray | 200 15 - 20 |
| Fish burger, frozen(300 - 450 g)Do not pre-heat the oven | 3 Baking tray | 180 23 - 27 | |
| Pizza, frozen (300 - 400 g)Do not pre-heat the oven | 4 Grill | rack+ Ceramicbaking tray | 170 15 - 18 |
Large grill
The maxi grill is highly suited for grilling larger quantities of flat dishes such as steak, schnitzel and fish. The maxi grill is also suitable for making toast. Both top heating elements and the grill element are turned on when you select this oven function. It is recommended you preheat the oven when you use the maxi grill.

natural_image
Top-down schematic of a traditional Chinese oven or stove with decorative panels and a central circular emblem (no text or symbols)For grilling, use the grill rack + ceramic baking on level 4.
* Temperature setting: from 150 - 230 °C.
* Use oven crockery that can withstand temperatures of 230 °C.
Grill Table
The temperatures and cooking times in this table are guidelines.
| Dish Level Accessories | Temperature (°C) Time (min.) | ||
| Sausages (thick)5 - 8 pieces | 4 Grill rack + Ceramicbaking tray | 180 5 - 7 | turn over5 - 7 |
| Sausages (thin)8 - 10 pieces | 4 Grill rack + Ceramicbaking tray | 180 4 - 5 | turn over4 - 5 |
| Toast 5 - 10 pieces 4 Grill rack + | Ceramicbaking tray | 230 1 - 2 | turn over1 - 2 |
| Toasted sandwiches4 - 6 pieces | 4 Grill rack + Ceramicbaking tray | 200 4 - 8 | |
| Filled pancake(350 - 450 g) | 4 Baking tray 200 20 - 25 | ||
| Steak (400 - 800 g) 4 Grill rack + | Ceramicbaking tray | 230 7 - 8 | turn over6 - 7 |
Grill + fan
The grill element and the fan in the back of the oven are turned on. The fan circulates the hot air. It is best to preheat the oven before placing dishes in the oven.

natural_image
Technical line drawing of a mechanical or architectural component with no visible text or symbolsFor grilling, the grill rack + ceramic baking or the baking tray are usually placed on level 4.
* Temperature setting: 150 - 230 °C
* Make sure the glass dishes you use can withstand temperatures of 40 - 250 °C.
Cooking guidelines
Use the temperatures and times in this table as a guideline for grilling. Set a grilling temperature of 170-220 °C and preheat the oven for 5 minutes.
| Dish Rack | level | Time (minutes) | Accessories | Temperature (°C) |
| Sausages 250-350g 4 7 - 9 | Grill rack + ceramic baking | 200 | ||
| Potato segments 4 pieces 4 | 20 - 23 | Grill rack + ceramic baking | 210 | |
| Frozen oven fries 400-500g | 4 11 | - 15 Baking tray | 220 | |
| Frozen potato rissoles 6-8 ea | 4 18 | - 22 Baking tray | 210 | |
| Frozen chicken nuggets 400-500g | 4 9 | - 13 Baking tray | 220 | |
| Salmon steak 400-500g 4 | 2 - 15 | Grill rack + ceramic baking / baking tray | 220 | |
| Fish fillet 300-400g 4 12 - 15 | Grill rack + ceramic baking / baking tray | 180 | ||
| Entire fish 300-400g 4 10 - 13 | Grill rack + ceramic baking / baking tray | 180 | ||
| Chicken pieces 400-500g 4 | 27 - 32 | Grill rack + ceramic baking / baking tray | 180 | |
Note
Preheating is recommended.
If you open the door during cooking, the oven will stop. Close the door and press Start to start the oven again.
When you set a preparation time, you can have the oven switch off automatically once the set time has expired.
Setting the preparation time

natural_image
Two identical diagrams showing a circular device with internal components and directional arrows, no text or symbols present.1 Select the function you want (and if desired, set the temperature).
2 Press PREPARATION TIME.
natural_image
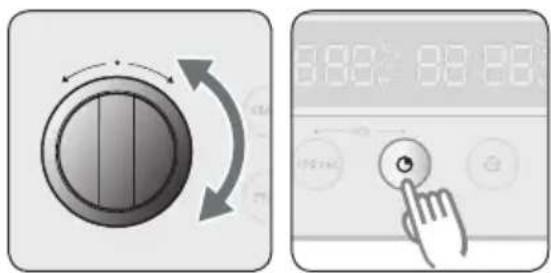
Two technical diagrams: one showing a rotary knob with bidirectional arrows, the other showing a hand pressing a circular button (no text or symbols)3 Turn the FUNCTION SELECTOR KNOB to set the preparation time you want and press PREPARATION TIME to set the end time for the preparation.

4 Press START. The oven switches on immediately.
Note
1) When the set time has expired you will hear a beep. '0:00' flashes on the display and the oven switches off automatically. The current time appears on the display.
2) You can set the programmed preparation time again as shown above.
3) If you want to cancel the programmed preparation time, press PREPARATION TIME and use the FUNCTION SELECTOR KNOB to set the time to zero.
When you set an end time, you can have the oven switch off automatically at the set time.
Setting the end time
natural_image
Icon of a camera with a circular lens and directional arrow, surrounded by small icons (no text or symbols)
natural_image
Circular button with directional arrows indicating rotation or refresh (no text or symbols)1 Select the function you want (and if desired, set the temperature).
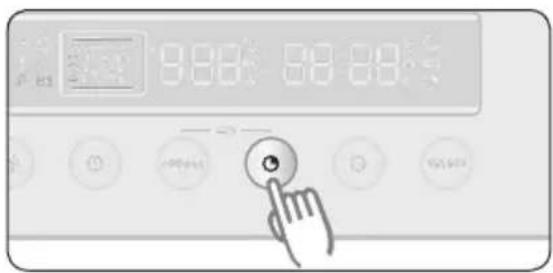
2 Press END TIME. The current time flashes on the DISPLAY.
natural_image
Circular dial indicator with arrow and control buttons, no text or symbols present3 Turn the FUNCTION SELECTOR KNOB to the end time (14:00) you want.

4 Press END TIME again.
Example The desired time is 14:00 o'clock.
Example The current time is 13:00 o'clock. The desired end time is 14:00 o'clock.

natural_image
Simple diagram showing a circular button labeled 'START' and a hand cursor clicking a button (no text or symbols beyond the button)5 Press START to start the preparation. The preparation time '1:00' is shown. The oven switches on immediately.
Note
1) The time display shows the remaining time. Once the set time has expired, you hear a beep. '0:00' flashes on the display and the oven switches off automatically. The current time appears on the display.
2) During the preparation you can change the preset preparation time and the temperature for better results. Press PREPARATION TIME and change the time with the FUNCTION SELECTOR KNOB.
3) You can set the end time again as shown above. If you want to cancel the programmed preparation time, press END TIME and set the time to the current time.
When you set a preparation time and an end time, you can have the oven switch on and off automatically at the set times.
Example with the hot air setting: Current time: 12:00 o'clock / Preparation time: 2 hours End time: You want the preparation to end at 18:00 o'clock
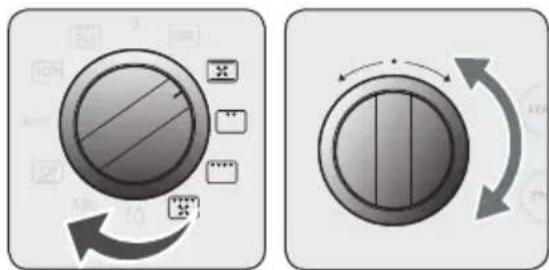
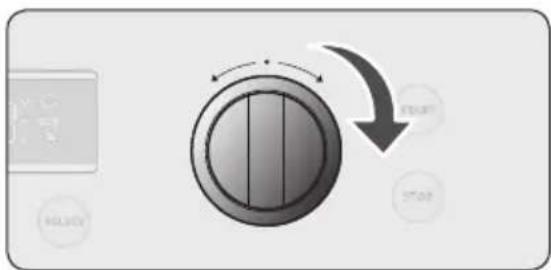
natural_image
Two circular control knob diagrams with rotation arrows, no text or symbols present1 Select the function you want and if desired, set the temperature.
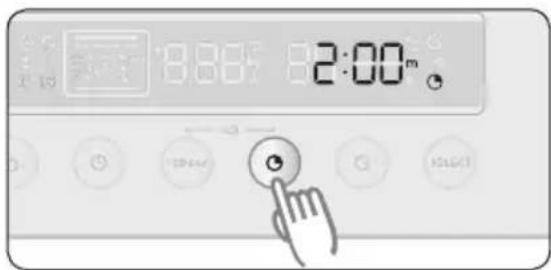
2 Press PREPARATION TIME and turn the FUNCTION SELECTOR KNOB to the desired preparation time (2 hours).

3 Press END TIME.
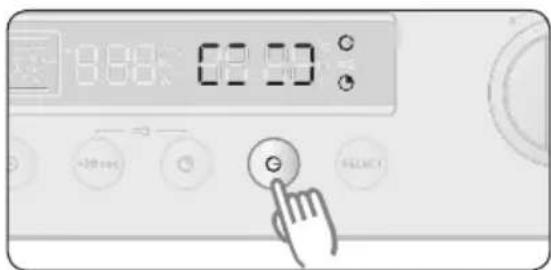
4 Press END TIME.
The preparation time is added to the current time and '14:00' is displayed.
Turn the FUNCTION SELECTOR KNOB to set the end time (18:00) you want.
The display shows a figure which indicates that the postpone function has been activated.
The oven starts automatically at the set time (16:00) and the preparation time is shown.
Note
- The preparation time and the end time can be changed before the set time.
- Please note! Do not leave the dish too long in the oven; the food could spoil.
Microwave + grill
This setting combines the radiant heat from the grill and the fast preparation through the microwave.
The preparation time is shortened and the result is a browned, crispy layer.
This function is suitable for all kinds of prepared food which has to be warmed up and browned (e.g. baked pasta) and dishes which require a short preparation time for a brown crust. This setting can also be used for thick portions for which a brown, crunchy crust is tasty (e.g. chicken drumsticks).
If you want to brown both sides of the food, turn it over halfway through the preparation.
Selecting the microwave + grill function

natural_image
Icon of a rotary knob with an arrow, no text or symbols present1 Turn the SETTING SELECTOR KNOB to the microwave + grill setting.

flowchart
graph TD
    A["Start"] --> B{Control knob}
    B --> C["Stop"]
    C --> D["Return to circular knob"]
    D --> E["Continue"]
    style A fill:#f9f,stroke:#333
    style B fill:#ccc,stroke:#333
    style C fill:#fff,stroke:#333
    style D fill:#fff,stroke:#333
    style E fill:#fff,stroke:#333
2 Turn the FUNCTION SELECTOR KNOB to set the preparation time you want.
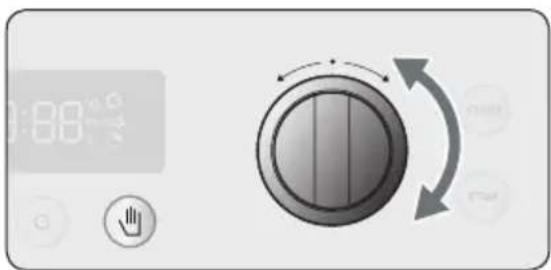
natural_image
Digital display showing time reading of 18:00 with control knob and circular dial indicator (no text or symbols)3 If you want to change the power, press SELECT and turn the FUNCTION SELECTOR KNOB to the level you want.

natural_image
Digital display showing 18:00 with clock and control knob, accompanied by a circular dial with bidirectional arrows (no text or symbols)4 If you want to change the temperature, press SELECT again and turn the FUNCTION SELECTOR KNOB to the level you want.

5 Press START to start the preparation.
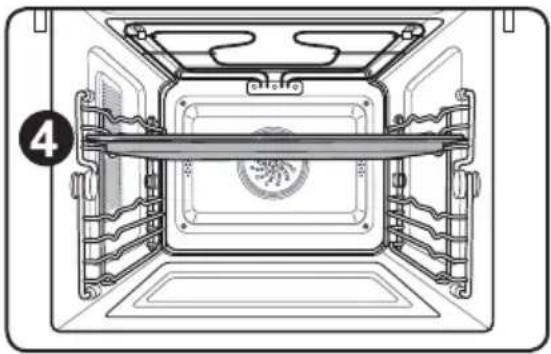
natural_image
Technical line drawing of a mechanical or architectural component with no visible text or symbolsFor the grill + microwave setting, the ceramic baking tray is usually placed with the grill rack on level 3 and 4.
* Microwave power: 100 - 600 W
* Temperature setting: 40 - 200 °C
* Make sure the glass dishes you use can withstand temperatures of 40 - 250 °C.
Cooking guidelines
Take the temperatures and times in this table as a guideline for cooking.
Preheating is not necessary.
| Dish Level Power | (W) | Temperature (°C) | Time 1st(min.) | Time 2nd(min.) | Accessories |
| Fried potatoes400-500g | 4 450 | 200 12 - 14 - | Ceramicbaking tray | ||
| Grilled tomatoes3 each | 4 180 | 170 7 - 9 - | Ceramicbaking traywith grill rack | ||
| Vegetable gratin450-600g | 3 450 | 180 15 - 18 - | Ceramicbaking traywith grill rack | ||
| Grilled fish each1 piece | 4 300 | 180 06 - 08 | 06 - 08 | Ceramicbaking traywith grill rack | |
| Chicken pieces400-500g | 4 300 | 180 10 - 13 | 10 - 13 | Ceramicbaking traywith grill rack |
Microwave + hot air
In this setting, the microwave function is combined with hot air. This reduces the preparation time and dishes obtain a brown, crispy layer. This function is suitable for all types of meat and poultry, but also for casseroles, au gratin casseroles, roast beef, biscuit dough and light fruitcakes, tarts and crumble desserts.
Selecting the microwave + hot air function

1 Turn the SETTING SELECTOR KNOB to the microwave + hot air setting.
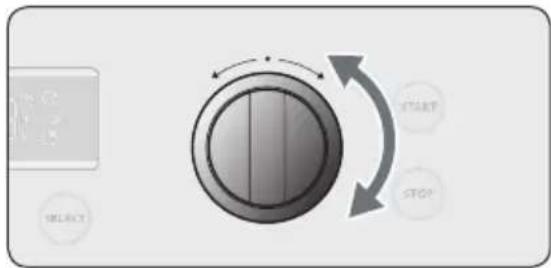
flowchart
graph TD
    A["Start"] --> B["Stop"]
    B --> C["Delete"]
    C --> D["Return to Start"]
2 Turn the FUNCTION SELECTOR KNOB to set the preparation time you want.

natural_image
Digital display with time and clock icons, featuring a rotary knob and bidirectional arrows (no text or symbols)3 If you want to change the power, press SELECT and turn the FUNCTION SELECTOR KNOB to the level you want.
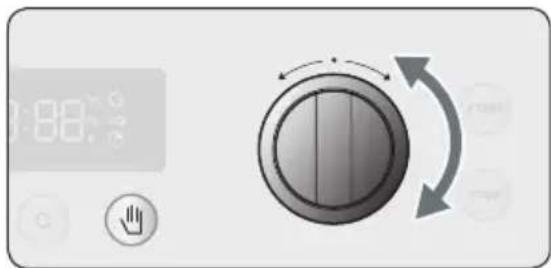
natural_image
Digital display showing 1:88 and control buttons with a rotary knob and circular arrows (no text or symbols)4 If you want to change the temperature, press SELECT again and turn the FUNCTION SELECTOR KNOB to the level you want.

natural_image
Simple diagram showing a circular button labeled 'START' and a hand cursor icon pointing to it (no text or symbols beyond the 'START')5 Press START to start the preparation.

natural_image
Top-down technical diagram of an oven with internal structure and fan (no text or symbols)For the microwave + hot air setting, the ceramic baking tray is usually placed with the grill rack on level 3.
* Microwave power: 100 - 600 W
* Temperature setting: 40 - 200 °C
* Make sure the glass dishes you use can withstand temperatures of 40 - 250 °C.
Cooking guidelines
Take the temperatures and times in this table as a guideline for cooking.
Preheating is not necessary.
| Dish Level Power | (W) | Temperature (°C) | Time 1 ^st (min.) | Time 2 ^nd (min.) | Accessories |
| Whole chicken, 1.2 kg | 3 300 180 25 - | 27 15 - 18 | Ceramic baking tray with grill rack | ||
| Roast beef/ lamb (medium) 450-700g | 3 300 180 17 - | 20 17 - 20 | Ceramic baking tray with grill rack | ||
| Frozen lasagne/ pasta gratin 450-500g | 3 450 180 18 - | 22 - | Ceramic baking tray with grill rack | ||
| Potato gratin 500-600g | 3 450 190 20 - | 25 - | Ceramic baking tray with grill rack | ||
| Fresh fruit flan 3 | 100 170 40 - 45 | Ceramic baking tray |
The automatic menu settings offer you 25 pre-programmed settings (10 for automatic preparation, 10 for the vegetable menu setting and 5 for automatic defrosting) for handy preparation of your favourite dishes. The preparation time and power are set automatically. Select one of the 25 settings, enter the weight and start the preparation.
Automatic preparation
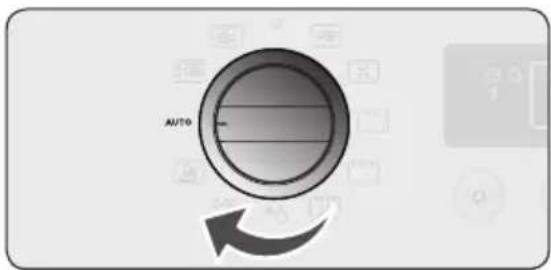
1 Turn the SETTING SELECTOR KNOB to the AUTOMATIC PREPARATION setting.
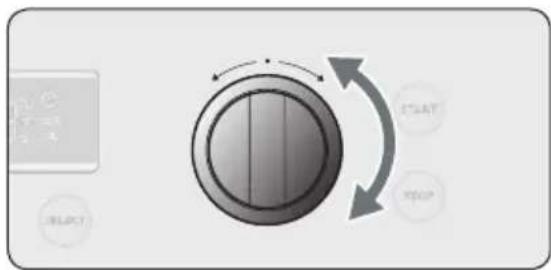
flowchart
graph TD
    A["SELECT"] --> B["ISAT"]
    B --> C["STOP"]
    C --> D["Return Loop"]
    D --> E["Return Loop"]
    E --> F["Return Loop"]
    F --> G["Return Loop"]
2 Turn the FUNCTION SELECTOR KNOB to choose an automatic preparation function.
- Consult the tables for a description of the 25 automatic menu settings.

3 Press SELECT to change the weight. Turn the FUNCTION SELECTOR KNOB to set the desired weight.
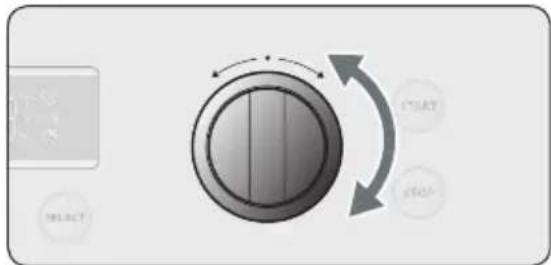
flowchart
graph TD
    A["Start"] --> B["CHANGE"]
    B --> C["Continue"]
    C --> D["Adjust"]
    D --> E["End"]

natural_image
Simple diagram showing a switch button and a hand cursor icon (no text or symbols)5 Press START.
Note
- Some automatic menus require no further action. Other menus require the dish to be turned over. The oven gives a signal to indicate this.
- The set oven temperature and the preparation time are displayed when the automatic menu is active.
- The temperatures and times cannot be changed during the preparation.
Guidelines for automatic preparation
The following table shows you 10 automatic programmes for warming up, cooking, roasting and baking. The quantities, standing times and corresponding recommendations are given. These automatic programmes contain special, useful preparation settings.
| No. | Dish Weight | (kg) | Accessories Level Instructions | ||
| A:01 | Complete meal | 0.3 - 0.350.4 - 0.45 | Ceramic baking tray | 1 | Put the food on a ceramic baking tray and cover the food with cling film. This programme is suitable for meals which consist of 3 dishes (e.g. meat with sauce, vegetables and potatoes, rice or pasta). Let the meal stand for 3 minutes after cooking. |
| A:02 | Frozen pizza | 0.3-0.350.4-0.45 | Grill rack + ceramic baking tray | 2 | Put the frozen pizza on the grill rack with the ceramic baking tray and place it in the oven. |
| A:03 | Frozen lasagne | 0.4-0.450.6-0.65 | Grill rack + ceramic baking tray | 2 | Put the frozen lasagne in a suitable glass Pyrex dish or on the grill rack with the ceramic baking tray. Let it stand for 2 to 3 minutes after warming up. |
| A:04 | Whole chicken | 1.1-1.151.2-1.25 | Grill rack + ceramic baking tray | 2 | Mix olive oil or butter with pepper and salt. Rub this thoroughly into the chicken on the inside and the outside. Put the chicken with the breast downwards on the grill rack with the ceramic baking tray in the oven. Turn the chicken over when the oven gives a signal, and press START. Let the meal stand for 3 minutes after preparation. |
| A:05 | Chicken pieces | 0.6-0.70.9-1.0 | Grill rack + ceramic baking tray | 4 | Mix olive oil or butter with pepper and salt. Rub this thoroughly into the chicken pieces. Put the chicken pieces with the skin side down on the grill rack with ceramic baking tray in the oven. Turn the chicken pieces over when the oven gives a signal, and press START. Let the meal stand for 3 minutes after preparation. |
| No. | Dish Weight | (kg) | Accessories | Level Instructions | |
| A:06 | Roast lamb | 0.8-0.91.1-1.2 | Grill + ceramic baking tray | 3 | Put the marinated lamb roast on the grill rack with ceramic baking tray in the oven. Turn the lamb roast over when the oven gives a signal, and press START. |
| A:07 | Frozen oven fries | 0.3-0.40.45-0.5 | Baking tray 3 | Distribute the frozen oven fries on a metal baking tray. | |
| A:08 | Baked potato halves | 0.4-0.50.6-0.7 | Grill + ceramic baking tray | 4 | Cut potatoes lengthwise and sprinkle salt on the flat side. Put them flat side up on the grill rack with ceramic baking tray. Let the meal stand for 3 minutes after preparation. |
| A:09 | Apple pie 1.2-1.4 Baking tray 2 | Prepare the apple pie in a spring form and put it on the baking tray. The weight includes apples, etc. | |||
| A:10 | Cake 0.7-0.8 Baking tray 3 | Put the cake form (25 cm) with cake mix lengthwise (with respect to the door) on the baking tray in the oven. | |||
Vegetable menu setting
The vegetable menu settings offer you 10 pre-programmed settings for handy preparation of your vegetables. The preparation time and power are set automatically. Select one of the 10 settings, enter the weight and start the preparation. Put the vegetables in the steamer basket on the ceramic baking tray on level 1 in the oven.
Selecting the vegetables menu setting function

natural_image
Circular icon with arrow and checkmark, no readable text or symbols1 Turn the SETTING SELECTOR KNOB to the VEGETABLES MENU setting.

natural_image
Circular mechanical component with rotational arrows indicating motion, no text or symbols present2 Turn the FUNCTION SELECTOR KNOB to set the vegetable setting you want.
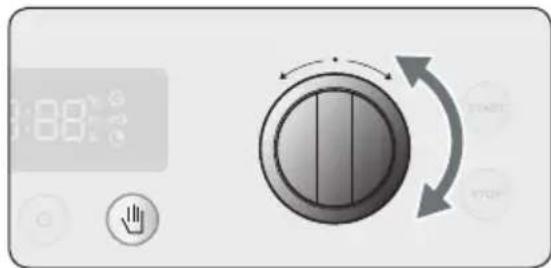
natural_image
Digital display showing 3:88' and a rotary knob with bidirectional arrows (no text or symbols)3 If you want to change the weight, press SELECT and turn the FUNCTION SELECTOR KNOB to the weight you want.
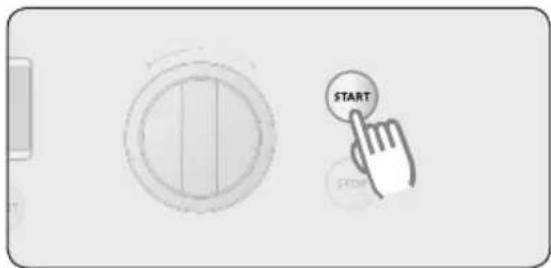
4 Press START to start the preparation.
If you do not select a weight, a weight is set automatically after 5 seconds.
Vegetable menu setting table
Take this table as a guideline for the preparation. Preheating is not necessary.
| No. | Dish Portion | (kg) | Accessories | Level Instructions |
| U:01 | Broccoli florets | 0.2-0.30.3-0.4 | Ceramic baking tray + Steamer basket | 1 Rinse the broccoli, clean it and put it in the steamer basket. Add 2 tablespoons (for 0.2-0.3 kg) or 3 to 4 tablespoons (for 0.3-0.4 kg) of water. Put the steamer basket with lid in the middle of the ceramic baking tray. Stir well after preparation. |
| U:02 | Cauliflower florets | 0.2-0.30.3-0.4 | Ceramic baking tray + Steamer basket | 1 Rinse the cauliflower, clean it and put it in the steamer basket. Add 2 tablespoons (for 0.2-0.3 kg) or 3 to 4 tablespoons (for 0.3-0.4 kg) of water. Put the steamer basket with lid in the middle of the ceramic baking tray. Stir well after preparation. |
| U:03 | Sliced carrots 0.2- | 0.30.4-0.5 | Ceramic baking tray + Steamer basket | 1 Rinse the carrots, clean them and put them in the steamer basket. Add 2 tablespoons (for 0.2-0.3 kg) or 3 to 4 tablespoons (for 0.4-0.5 kg) of water. Put the steamer basket with lid in the middle of the ceramic baking tray. Stir well after preparation. |
| U:04 | Potatoes in skin | 0.3-0.40.7-0.8 | Ceramic baking tray + Steamer basket | 1 Rinse the potatoes and clean them. Rub the potatoes with olive oil and prick the skin with a fork. Put them in the steamer basket on the ceramic baking tray, and let the dish stand another 3-5 minutes after preparation. |
| U:05 | Peeled potatoes | 0.4-0.50.7-0.8 | Ceramic baking tray + Steamer basket | 1 Rinse the potatoes and clean them. Cut them in half and put them in the steamer basket with the lid. Add 1-2 tablespoons of water. Stir well after preparation. For large quantities, also stir thoroughly halfway through the preparation process. Let the dish stand another 3-5 minutes after preparation. |
| U:06 | Courgette 0.2-0.3 | 0.3-0.4 | Ceramic baking tray + Steamer basket | 1 Cut the courgette into slices. Add 2 tablespoons of water or a knob of butter. Put them in the steamer basket with the lid. Cook them with the lid on in the steamer basket until they are al dente. |
| U:07 | Sliced aubergine | 0.1-0.20.3-0.4 | Ceramic baking tray + Steamer basket | 1 Cut the aubergine into thin slices and sprinkle 1 tablespoon of lemon juice over them. Put them in the steamer basket with the lid. Stir well after preparation. |
| U:08 | Sliced onion 0.2-0.3 | 0.4-0.5 | Ceramic baking tray + Steamer basket | 1 Cut the onions into rings or half rings. Add only 1 tablespoon of cold water. Put them in the steamer basket with the lid. Stir well after preparation. |
| U:09 | Mixed vegetables | 0.2-0.30.4-0.5 | Ceramic baking tray + Steamer basket | 1 Rinse the mixed vegetables and clean them. Put the vegetables in the bowl with lid. Add 1 tablespoon (for 0.2-0.3 kg) or 3 to 4 tablespoons (for 0.4-0.5 kg) of water. Put the steamer basket with lid in the middle of the ceramic baking tray. Stir well after preparation. |
| U:10 | White rice 0.2-0.3 | Ceramic baking tray + Steamer basket | 1 Use the steamer basket with lid (take note! the water volume of rice doubles during preparation). Cook the rice with the lid on the steamer basket. After preparation, drain off the excess water. Add salt, herbs and butter, stir the rice and let it stand for a moment. |
Defrost setting
These programmes use only microwaves. Remove all packaging before defrosting. Put meat, poultry and fish on the ceramic baking tray.
Selecting the defrost setting
natural_image
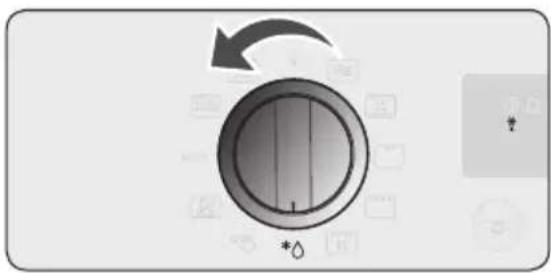
Circular dial indicator with arrow and droplet symbol, no readable text or labels1 Turn the SETTING SELECTOR KNOB to the DEFROST setting.
flowchart
graph TD
    A["Start"] --> B["Control knob"]
    B --> C["END"]
    B --> D["STOP"]
    C --> E["Feedback Loop"]
    D --> E
    E --> F["End"]
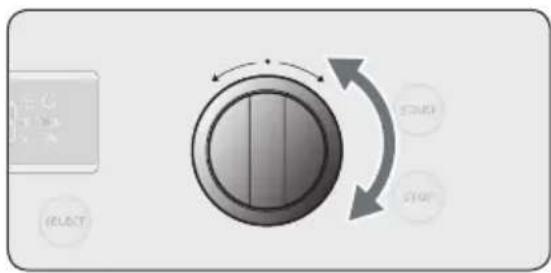
2 Turn the FUNCTION SELECTOR KNOB to set the defrost setting you want.

natural_image
Digital display showing time reading and control knob with circular dial and bidirectional arrows (no text or symbols)3 If you want to change the weight, press SELECT and turn the FUNCTION SELECTOR KNOB to the weight you want.

4 Press START to start the preparation.
If you do not select a weight, a weight is set automatically after 5 seconds.
Guidelines for the automatic defrost setting
The following table shows you the different programmes for automatic defrosting, quantities, standing times and the corresponding recommendations.
| No. | Dish Weight(kg) | Accessories | Level Standing time(min.) | Instructions | |
| d:01 | Meat 0.2 - | 1.5 | Ceramic baking tray | 1 20 - 60 | Wrap the edges with aluminium foil. Turn the meat over when the oven gives a signal.This programme is suitable for beef, lamb, pork, steaks, chops and mince. |
| d:02 | Poultry 0.2 | - 1.5 | Ceramic baking tray | 1 20 - 60 | Wrap the ends of drumsticks and wings with aluminium foil.Turn the poultry over when the oven gives a signal.This programme is suitable for whole chickens and chicken pieces. |
| d:03 | Fish 0.2 - | 1.5 | Ceramic baking tray | 1 20 - 60 | Wrap the tail of a whole fish in aluminium foil. Turn the fish over when the oven gives a signal. This programme is suitable for whole fish and fish fillets. |
| d:04 | Bread/cake | 0.1 - 0.8 | Ceramic baking tray | 1 10 - 30 | Put the bread on a piece of kitchen paper and turn it over when the oven gives a signal. Put the cake on the ceramic baking tray and if possible, turn it over when the oven gives a signal.(The oven stops working when you open the door.) This programme is suitable for all kinds of bread (sliced or whole loaves), yeast pastry, biscuit, cheesecake and puff pastry, but also for bread rolls and baguettes. Place bread rolls in a circle. It is not suitable for crumbly pastry, fruit/cream pie and cakes with a chocolate layer. |
| d:05 | Fruit 0.1 - | 0.6 | Ceramic baking tray | 1 5 - 15 | Divide the frozen fruit evenly on the ceramic baking tray. This programme is suitable for fruit such as raspberries and mixed berries. |
Important! The defrost setting uses microwaves to warm up dishes. When you use this setting, you must carefully follow the guidelines for cookware and other precautions for safe use of the microwave.
The steamer basket is based on the principle of cooking with steam and has been designed for fast, healthy cooking in your Pelgrim microwave.
This accessory is ideal for preparing rice, pasta, vegetables, etc. in record time, while preserving their nutritional values.
The steamer basket has three components:


bowl basket lid
All components are resistant to temperatures of -10 ^ to 130 ^ .
Suitable for storing in a freezer. Can be used separately or in combination.
Use
- Do not use:
To prepare dishes with a high sugar or fat content.
On a grill setting or on a hob. - Before first use, wash the basket thoroughly in soapy water.
- Consult the steaming table for preparation times.
Maintenance
- The steamer basket can be cleaned in a dishwasher.
- When washing by hand, use warm water with detergent. Do not use abrasives.
- Some dishes (such as dishes with tomato) can discolour the plastic.
Defrosting
- Put frozen dishes in the steamer basket without using the lid. The moisture remains at the bottom of the bowl and does not affect the dish.
Steaming table
The following table has guidelines for preparing various dishes using the steamer basket. The quantities, power, preparation time and corresponding recommendations are given.
| Dish Weight(g) | Power(W) | Cooking time(min.) | Accessories | Recommendation | |
| Artichokes | 300(1-2 pieces) | 800 5-6 | Steam basket | Rinse the artichokes and clean them. Put the basket in the bowl and put the artichokes in the basket. Add 1 tablespoon of lemon juice. Put the lid on. Let it stand for 1-2 minutes after preparation. | |
| Fresh vegetables | 300 800 | 4-5 Steam basket | Clean the vegetables, cut them into equal pieces. Weigh the vegetables (for example broccoli, cauliflower, carrots or capsicum). Put the basket in the bowl and put the vegetables in the basket. Add 2 tablespoons of water. Put the lid on. Stir well after preparation and let stand for 1-2 minutes. | ||
| Frozen vegetables | 300 600 | 8-9 Steam basket | Put the basket in the bowl and put the vegetables in the basket. Add 1 tablespoon of water. Put the lid on. Let it stand for 1-2 minutes after preparation. | ||
| Rice 250 800 | 15-18 Bowl with lid | Put the rice in the bowl. Add 500 ml of cold water. Put the lid on. After preparation, let white rice stand for 5 minutes and unpolished rice stand for 10 minutes. | |||
| Potatoes in skin | 500 800 | 7-8 Bowl with lid | Rinse the potatoes, weigh them and put them in the bowl. Add 3 tablespoons of water. Put the lid on. Let stand for 2-3 minutes after preparation. | ||
| Stew (cooled) | 400 600 | 5.5-6.5 Bowl with lid | Put the stew in the bowl. Put the lid on. Stir well after preparation and let stand for 1-2 minutes. | ||
| Dish Weight(g) | Power(W) | Cooking time(min.) | Accessories | Recommendation |
| Soup(cooled) | 400 800 | 3-4 Bowl with lid | Put the soup in the bowl.Put the lid on. Stir well after preparation and let stand for 1-2 minutes. | |
| Soup(frozen) | 400 800 | 8-10 Bowl with lid | Put the frozen soup in the bowl.Put the lid on. Stir well after preparation and let stand for 2-3 minutes. | |
| Frozen yeast/Bun with jam filling | 400 400 | 8-10 Bowl with lid | Moisten the top of the bun. Put 1-2 frozen buns next to each other in the bowl. Put the lid on. Let stand for 2-3 minutes after preparation. | |
| Stewed fruit 250 800 3-4 Bowl with lid | After peeling, weigh the fresh fruit (for example apples, pears, apricots, mangos or pineapple). Clean the fruit, cut it into equal pieces or cubes. Put the fruit stew in the bowl.Add 1-2 tablespoons of water and 1-2 tablespoons of sugar. Put the lid on. Let stand for 2-3 minutes after preparation. |

natural_image
Simple line drawing of a pot with arrows indicating flow or movement (no text or symbols)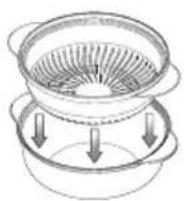
+

bowl with lid Steam basket
Please note!
• The lid can become very hot during use!
- Use oven mitts when handling the steamer basket after preparation of the dish.
With the Aqua Clean setting you can clean your oven quickly (15 minutes).

natural_image
Illustration showing a circular device with an arrow and a kitchen appliance inside, alongside its close-up view of the oven (no text or symbols)1 Turn the SETTING SELECTOR KNOB to the Aqua Clean setting.
Pour approximately 100 ml water in the bottom of the empty oven.

2 Press START. The oven starts automatically.
▶ After 15 minutes the oven stops automatically. Wipe out the oven with a dry cloth.

flowchart
graph TD
    A["Initial Washing Machine"] --> B["Add jar to mark the washing box"]
    B --> C["Ordering to clean fabric"]
    C --> D["Ordering to remove fabric"]
    D --> E["Final Washing Machine"]
Important
- Use this function only when the oven has cooled down fully to room temperature.
- Do NOT use distilled water.
- Do NOT use high-pressure cleaners or steam cleaners to clean the microwave oven.

natural_image
Close-up of a circular dial indicator with control buttons and icons, no readable text or symbols present.1 Turn the SETTING SELECTOR KNOB to the 'OFF' setting.
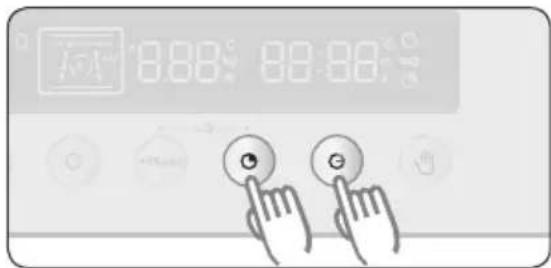
2 If you want to deactivate the beeping noise, press PREPARATION TIME and END TIME simultaneously and keep them pressed for 1 second.

3 If you want to activate the beeping noise again, press PREPARATION TIME and END TIME simultaneously and keep them pressed for 1 second again.
With the child-proof lock of the oven you can lock the control panel to prevent unintended use of the oven.
Locking the oven
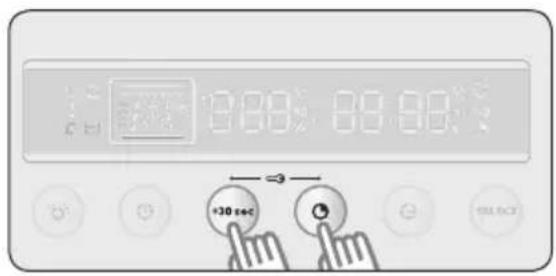
1 Press +30 sec (quick start) and PREPARATION TIME simultaneously and keep them pressed for 1 second.

2 The display shows a lock symbol, which means that all functions are locked.
Unlocking the oven

1 Press +30 sec (quick start) and PREPARATION TIME simultaneously and keep them pressed for 1 second.
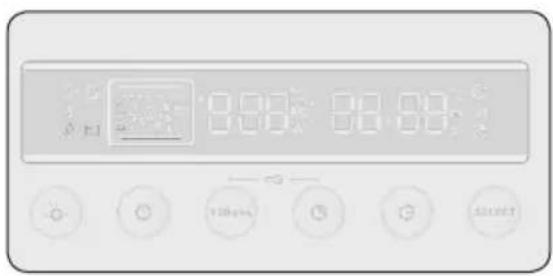
2 The lock symbol disappears from the display, which means that all functions are unlocked.
Clean the oven regularly to prevent fat and leftover food from accumulating, especially on the surfaces of the interior and the exterior, the door and the seal.
- Clean the exterior surfaces with a soft cloth and warm water with soap. Wipe afterwards with a clean, damp cloth and dry the surfaces.
- Remove splashes and stains on the interior surfaces with a cloth with soap. Wipe afterwards with a clean, damp cloth and dry the surfaces.
- To remove stubborn leftover food and odours, put a mug with diluted lemon juice at the bottom of the empty oven. Heat the juice for ten minutes at maximum power.
- Wipe the interior with a damp cloth.
Important
• Take care that NO water enters the vents.
- NEVER use abrasive cleaning materials or chemical solvents.
- ALWAYS ensure that the seal of the door is clean. This prevents accumulation of dirt and allows you to close the door properly.
STORING AND REPAIRING THE MICROWAVE OVEN
Repairs must be performed only by a qualified service technician. If maintenance is required, pull the plug from the socket and contact the Pelgrim customer service.
Have the following information at hand when you call:
- The model number and serial number (you can find them on the inside of the oven door or oven edge)
• Guarantee information
• A clear description of the problem
Choose a clean, dry place if you have to store the oven temporarily, since dust and moisture can damage the appliance.
Try the solutions below if you have problems with your oven. You might save yourself the time and effort of an unnecessary phone call to the customer service.
▶ The food is not cooked.
- Check whether the timer has been set and you have pressed START.
- Close the door properly.
- Check whether a fuse has blown and whether a circuit breaker has been activated.
▶ Food is overcooked or undercooked.
- Check whether the correct preparation time has been set.
- Check whether the correct power has been set.
▶ There is arcing in the oven.
• Make sure you use the correct cookware (without metal edges).
- Check whether forks or other metal utensils have been placed in the oven.
- Make sure when you use aluminium foil that it does not come too close to the walls.
The oven causes disturbances in radios or televisions.
- When it is operating, the oven can cause minor disturbance to televisions or radios. To limit this effect, do not install the oven in the vicinity of televisions, radios and antennas.
▶ If there are electronic interruptions, the display is reset.
- Pull the plug from the socket and put it back in again. Set the time again.
▶ There is condensation on the interior of the oven.
• This is normal. Wipe the oven clean after use.
▶ The fan keeps working after the oven is switched off.
- This is normal. The cooling fan can run for a maximum of three minutes after the oven has stopped.
▶ An air flow can be felt at the door and the exterior of the appliance.
- This is normal.
▶ Light reflects on the door and the exterior of the appliance.
- This is normal.
▶ Steam escapes from the door or the vents.
- This is normal.
▶ When the oven is working, and particularly in the defrost setting, click sounds can be heard.
- This is normal.
| Error code General functions | |
 | ERROR TEMPERATURE SENSOR OPENThis error occurs if there is a faulty sensor, incorrect connections, a faulty PCB and if the A/D value detected by MICOM is lower than 10. |
 | ERROR TEMPERATURE SENSOR SHORTThis error occurs if there is a faulty sensor, incorrect connections, a faulty PCB and if the A/D value detected by MICOM is higher than 252. |
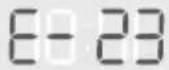 | TARGET TEMPERATURE TEMPERATURE SENSORThis error occurs if the preheating was not completed and the temperature in the oven is lower than 120 °C for 30 minutes. |
 | ERROR ABNORMAL TEMPERATURE DETECTIONThis error occurs if the temperature in the oven is higher than 250 °C for 10 minutes. |
 | ERROR ABNORMAL TEMPERATURE DETECTION MICROWAVEThis error occurs if the temperature in the oven in the microwave setting is higher than 210 °C. |
 | ERROR BUTTON SHORTThis error occurs if you press and hold a button for longer than 60 seconds.This error may occur if water gets into the control panel or if dust particles stick on theTOUCH PANEL. |
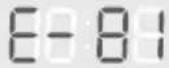 | ERROR NAK SIGNALThe NAK signal is given if it takes longer than 10 seconds to switch on the appliance. |
 | COMMUNICATION ERRORThis error occurs if there is no communication between the main PCB and the sub PCB for longer than 10 seconds. |
 | ERROR EEPROM OPENThis error occurs if something goes wrong in the EEPROM communication when you are setting the power. |
 | ERROR EEPROM READ & WRITEEeprom is not used. |
If one of these errors occurs, contact the Pelgrim customer service.
| Model MAC696RVS/MAC696MAT | |
| Power source 230 V ~ 50 Hz | |
| Energy consumptionMaximum powerMicrowave settingGrill settingHot air setting | 3000 W1650 W2500 W2500 W |
| Output power 100 W/800 W (IEC - 705) | |
| Nominal frequency 2450 MHz | |
| Microwave OM75P (21) | |
| Cooling method Engine cooling fan | |
| DimensionsAppliance dimensions:Built-in dimensions: | 595 x 454 x 570 mm (w x h x d)555 x 445 x 548.8 mm (w x h x d) |
| Volume 50 l | |
| WeightNetShipping | 38.3 kg45.5 kg |
The packaging of the appliance can be recycled and may be made from:
- cardboard
- paper
• polyethylene wrap (PE)
• CFC-free polystyrene (hard PS foam)
• polypropylene tape (PP)
Dispose of these materials in a responsible manner in accordance with legal provisions.

natural_image
Symbol of a trash bin with crossed lines indicating no waste or discharge (no text or labels)The product is marked with a crossed-out dustbin symbol to remind you to dispose of it separately. This prevents any potential negative impact on the environment and on health. This means that at the end of its working life, the product must be taken to a special centre for separated waste collection or to the supplier.
Separate processing ensures that the materials from which this appliance are made can be recovered, which means considerable savings in power and raw materials.
CE
Declaration of conformity
We declare that our products comply with the relevant European directives, standards and regulations as well as all requirements referred to in the standards.

When contacting the service department, have the complete type number to hand.
You will find the addresses and phone numbers of the service organisation on the guarantee card.


- Opmerking
- Belangrijk
- Note
- USING THIS USER MANUAL
- Setting the clock
- Stand-by setting
- ECO setting
- You can use your microwave for the following:
- Preparation principle
- Important
- Microwave mode
- Guidelines for microwave cookware
- General preparation guidelines for the microwave function
- Dishes suitable for preparation in the microwave
- Cover during preparation
- Standing times
- General preparation guidelines for frozen vegetables
- Preparation guidelines for fresh vegetables
- Preparation guidelines for rice and pasta
- WARMING UP
- Dividing and covering
- Power settings
- Stirring
- Warming up and standing times
- Warming up liquids
- Warming up baby food
- Baby food
- Baby milk
- Warming up baby food and milk
- Warming up liquids and food
- Defrosting
- Hot air
- Cooking table
- Please note
- Grill
- Grill Table
- Large grill
- Grill + fan
- Cooking guidelines
- Microwave + grill
- Selecting the microwave + grill function
- Microwave + hot air
- Selecting the microwave + hot air function
- Automatic preparation
- Guidelines for automatic preparation
- Vegetable menu setting
- Selecting the vegetables menu setting function
- Vegetable menu setting table
- Defrost setting
- Selecting the defrost setting
- Guidelines for the automatic defrost setting
- The steamer basket has three components:
- bowl basket lid
- Use
- Maintenance
- Steaming table
- bowl with lid Steam basket
- Please note!
- Locking the oven
- Unlocking the oven
- STORING AND REPAIRING THE MICROWAVE OVEN
- Declaration of conformity
Brand : Pelgrim
Model : MAC696RVS
Category : Microwave Oven