
Steamium DW9035 - Iron ROWENTA - Free user manual and instructions
Find the device manual for free Steamium DW9035 ROWENTA in PDF.

| Product type | Iron |
| Brand | Rowenta |
| Model | Steamium DW9035 |
| Power supply | 220-240 V |
| Soleplate type | High-precision tip |
| Autosteam function | Automatically adjusts steam and temperature according to fabric |
| Steamforce technology | Pump injecting 30% more steam into the heart of the fibers |
| Steam burst | Powerful, with 4-second intervals between each press |
| Vertical steam burst | To de-wrinkle hanging garments and curtains (from the • setting) |
| Spray | Moistens stubborn creases |
| Anti-drip system | Prevents water leaks if temperature is too low |
| Automatic shut-off | 8 minutes on the heel, 30 seconds flat or on its side |
| Anti-scale system | Fixed anti-scale cartridge integrated into the tank (non-replaceable) |
| Self-cleaning | Expels dirt and scale particles; recommended every 2 weeks |
| Maintenance | Clean with a damp cloth; do not use descaling agents or abrasive products |
| Safety | Automatic shut-off, must be plugged into a grounded outlet |
| Use | Household use only |
| Spare parts | Replace only at an Authorized Service Center |
| Manual available | 45 pages, free download in PDF format |
Frequently Asked Questions - Steamium DW9035 ROWENTA
User questions about Steamium DW9035 ROWENTA
0 question about this device. Answer the ones you know or ask your own.
Ask a new question about this device
Download the instructions for your Iron in PDF format for free! Find your manual Steamium DW9035 - ROWENTA and take your electronic device back in hand. On this page are published all the documents necessary for the use of your device. Steamium DW9035 by ROWENTA.
USER MANUAL Steamium DW9035 ROWENTA
natural_image
Exterior view of a Rowenta steam iron with visible brand and model (no text or symbols on body)GB
D
F
NL
1
E
P
GR
RUS
UA
1
[ ]
www.rowenta.com
JPM & Associés • marketing-design-communication • 02/2009
(*) Depending on model - je nach Modell - Selon modèle - al naar gelang het model - a seconda del modello - según el modelo - consoante modelo - ανάλογα με το μοντέλο - в зависимости от модели -залежно від моделі
natural_image
Diagram of a biological structure with internal membrane and curved arrow indicating rotation (no text or labels)fig.1
natural_image
Hand holding a plug inserted into a wall socket, with a downward arrow indicating a drop (no text or symbols present)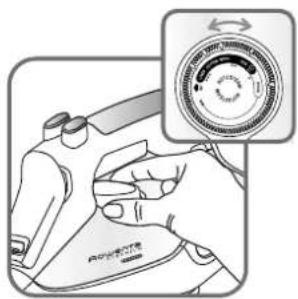
fig.3fig.2
natural_image
Line drawing of a hand holding a small object with an arrow indicating direction (no text or symbols)fig.4
natural_image
Illustration of a shoe being poured into a container with a 'MAX' label (no text or symbols on the main diagram)fig.5
natural_image
Hand holding a plug inserted into a wall socket, with an arrow indicating direction (no text or symbols)fig.6

fig.7 fig.8 fig.9
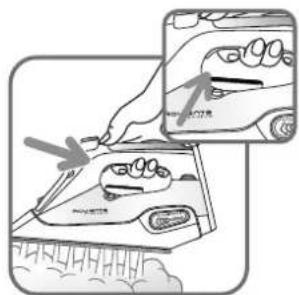
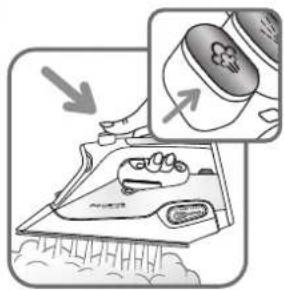
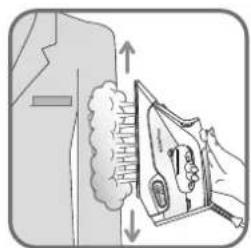
fig.10 fig.11 fig.12
natural_image
Illustration of a hand using an iron on a machine, with arrows indicating motion (no text or symbols)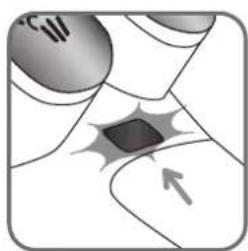
natural_image
Illustration of a hand holding a small object with a starburst effect, no text or symbols present
natural_image
Illustration of a hand washing a sink with a faucet (no text or symbols)fig.13
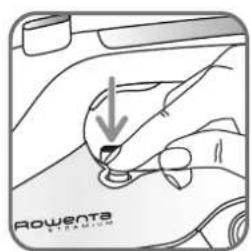
fig.14 fig.15
SAFETY INSTRUCTIONS
This appliance complies with the technical rules and standards for safety currently in force (Electromagnetic Compatibility, Low Voltage, Environment).
This appliance is not designed to be used by people (including children) with a physical, sensory or mental impairment, or people without knowledge or experience, unless they are supervised or given prior instructions concerning the use of the appliance by someone responsible for their safe Children must be supervised to ensure that they do not play with the appliance.
Caution, before plugging in your iron, check that your mains voltage corresponds to the voltage indicated on the information panel on the iron. Connecting to the wrong voltage may cause irreversible damage to the iron and will invalidate the guarantee.
This iron must always be plugged into an earthed socket. If using a mains extension lead, ensure that it is correctly rated. If you use an extension lead, check that it is adapted to the power indicator on the information panel on the iron.
If the electrical cord becomes damaged, it must be immediately replaced by an Approved Service Centre to avoid any danger.
The appliance should not be used if it has fallen, if it has obvious damage, if it leaks or or function abnormally. Never dismantle your appliance: have it inspected by an Approved Service Centre, so as to avoid any danger.
Never immerse your iron in water!
Do not unplug your appliance by pulling on the cord. Always unplug your appliance: before filling or rinsing the the water tank, before cleaning it, after each use.
Never leave the appliance unattended when it is connected to a power source; if it has not cooled down for approximately 1 hour.
Your appliance gives off steam, which may cause burns. Take care especially when you are ironi on a corner of your ironing board. For best results we recommend that you use a mesh type iron board to enable the steam to pass through the fabric and avoid steam venting sideways. Never direct the steam towards people or animals.
Your iron should be used and placed on a flat, stable, heat-resistant surface. When you put your onto its iron rest, make sure that the surface on which you put it is stable.
This product has been designed for domestic use only. Any commercial use, inappropriate use of failure to comply with the instructions, the manufacturer accepts no responsibility and the guarantee will not apply.

ENVIRONMENT PROTECTION FIRST!
① Your appliance contains valuable materials which can be recovered or recycled.
Leave it at a local civic waste collection point.
Keep these instructions
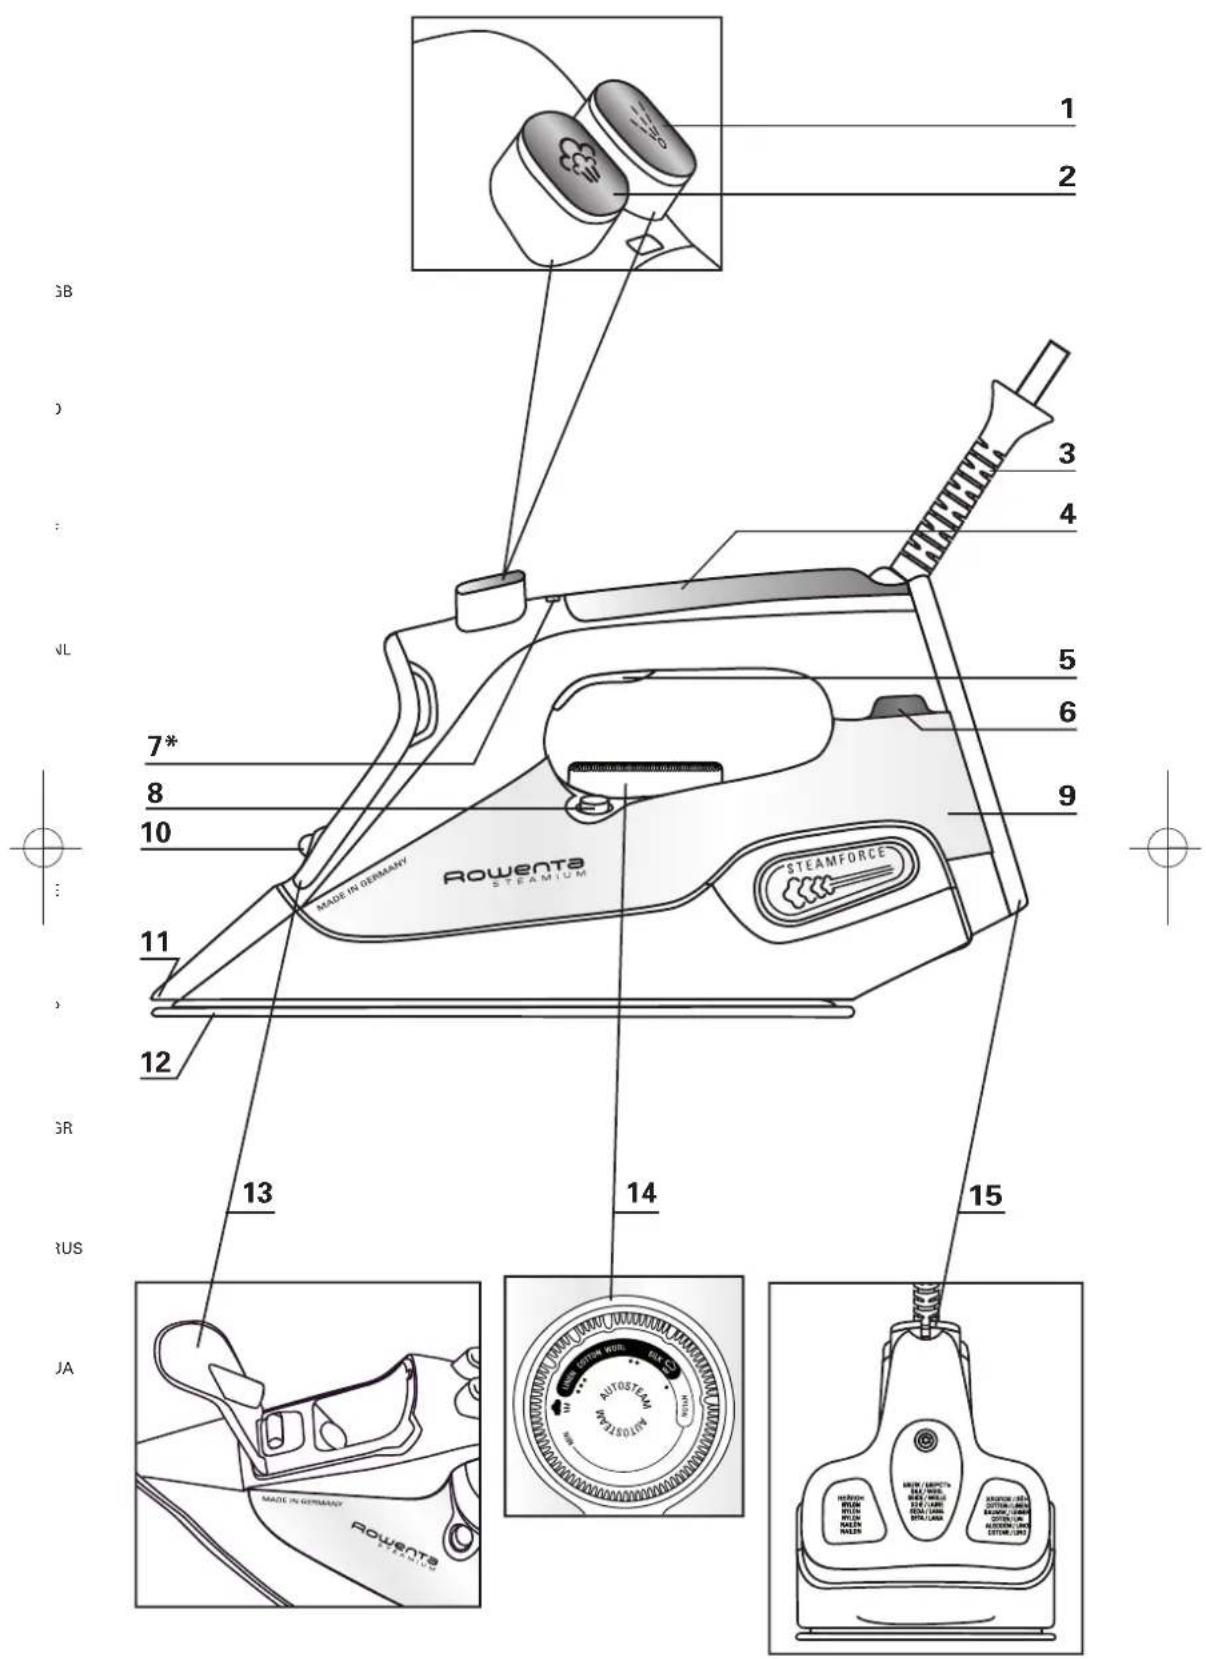
DESCRIPTION
-
Spray button
-
Shot of steam button
-
Cord
-
Handle
-
Auto Steam trigger
-
Thermostat indicator
-
Auto off*
-
Self clean button
-
Water tank
-
Spray
-
High precision tip
-
Soleplate
-
Filling inlet
-
Temperature control dial
-
Rear Cover
BEFORE USE
IMPORTANT Before doing anything else, remove the soleplate protector fig.1 Warning! Before using your iron with the steam function for the first time, we recommend that you operate the steam in a horizontal position for a few moments, away from your linen, i.e. press the Shot of Steam button a few times. During the first few uses, a harmless odour and a small amount of smoke may be no. This has no effect on the use of the iron and will cease quickly.
WHAT WATER MAY BE USED?
Your iron has been designed to operate using untreated tap water. If in doubt, check with your local water authority. However, if your water is very hard, you can mix 50% untreated tap water with 50% distilled or demineralised water.
IMPORTANT Heat concentrates the elements contained in water during evaporation. The types of water listed below contain organic waste or mineral elements that can cause spitting, brown staining or premature wear of the appliance:
(*) Depending on model
water from tumble dryers, scented or softened water, water from refrigerators, batteries or air conditioners, pure distilled or demineralised water or rain water shou not be used in your iron. Also do not use boiling, or bottled mineral water.
USE
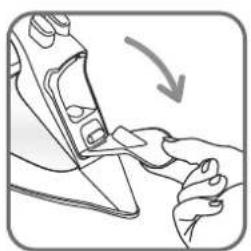
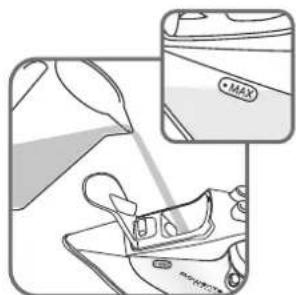
1 • Filling the water tank
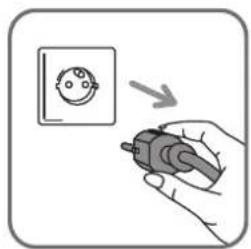
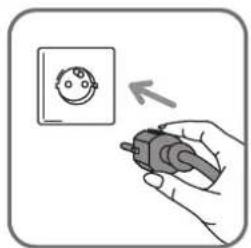
- Before filling the water tank, unplug the iron fig.2.
- Set the temperature control dial fig.3 on position (Min.)
- Open the filling inlet fig.4. Fill in water up to the Max. mark. fig.5. Close the filler inlet and return the iron to the horizontal position.
- You can plug in your iron fig.6.
2 • Setting the temperature
Your iron is equipped with the Autosteam Electronic Control function, it automatically adjusts the steam amount and the temperature based on the selected fabric for optimum results.
GB
Select the fabric to be ironed on the thermostat dial. For perfect results, an optimum position for each fabric has been pre-defined. This position is marked on the dial and also represented with a louder "click" sound. You can also set your iron based on the international temperature measurements · , ·s , ·s . Ensure your thermostat dial is positioned on these settings.
When your iron reaches the required temperature, the thermostat indicator turns off fig.7. You can start ironing.
| FABRIC THERMOSTAT | THERMOSTAT INDICATION | IRONING LABEL | ||
 | Nylon (Synthetic fibres, e.g. viscose, polyester) | 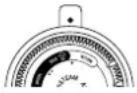 | NYLON |  |
| silk | 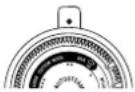 | SILK |  | |
| wool WOOL | 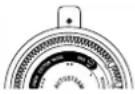 |  | ||
| cotton | 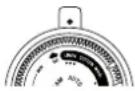 | COTTON |  | |
| linen LINEN | 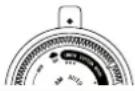 |  | ||
IMPORTANT The iron takes longer to cool down than to heat up. We recommend that you start with fabrics to be ironed at a low temperature. For mixed fabrics setemperature for the most delicate fabric.
TIP Always spray starch onto the reverse side of the fabric to be ironed.
3 • Dry ironing
Set the temperature to suit the type of material without pushing the autosteam trigger and shot of steam button.
4 • Steam ironing (Autosteam & Steamforce)
Your iron is equipped with the Autosteam function. The steam quantity and the temperature will adjust automatically to the selected fabric. To get continuous steam squeeze the autosteam trigger fig.8.
Your iron is equipped with a pump called Steamforce Technology which pushes 30 % more steam into the heart of the fibres. The pump may cause a slight noise. This is not a technical fault! A few seconds are necessary to produce or to stop the steam.
5 • Shot of steam
Press the shot of steam button to generate a powerful jet of steam fig.9.
IMPORTANT Leave an interval of a few seconds between each shot and wait until the flow of steam has finished before standing the iron on its heel.
6 • Vertical shot of steam (from temperature setting (••) upwards)
Hold the iron vertically and press the shot of steam button to remove creases from suits, jackets, skirts, hanging curtains etc. fig.10.
IMPORTANT Never direct the steam at persons or animals!
TIP Hold the iron 10 to 20 centimetres away from the garment to avoid burning delicate fabrics.
7 • Spray
Press the spray button to dampen difficult creases fig.11.
8 • Anti-Drip system *
It prevents water escaping from the soleplate when the temperature is too low.
9 • Auto Off function*
- For your safety, the electronic system cuts off the power and the auto off indicator light flashes fig.12 when:
- The iron remains motionless for more than 8 minutes on its heel.
- The iron remains flat or on its side for more than 30 seconds.
- To restart the iron, just move it gently until the warning light stops flashing.
AFTER USE
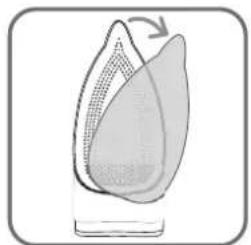
10 • Emptying
Unplug the iron. fig.2 Pour away remaining water fig.13.
Set the temperature control dial fig.3 on position Min.
11 • Storing
Allow the appliance to cool down before storing the iron standing on its heel.
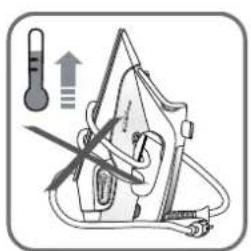
IMPORTANT Do not wind the cord around the hot soleplate fig.15.
Never store your iron placed down on the soleplate.
MAINTENANCE AND CLEANING
IMPORTANT Unplug and allow the iron to fully cool down before maintenance and cleaning.
12 • Anti-scale system
Your iron contains an anti-scale cartridge to reduce scale deposits.
This considerably prolongs the operational life of your iron.
The anti-scale cartridge is an integral part of the water tank and does not need to be replaced.
13 • Cleaning the iron
When the appliance has cooled down, wipe it down with a damp cloth or sponge, as required.
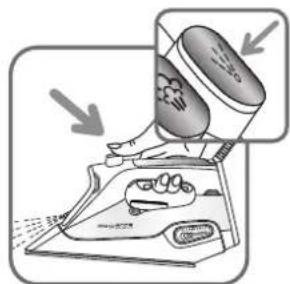
14 • Self Clean (prolongs the life of the iron)
IMPORTANT Do not use sharp or abrasive cleaning agents or objects to clean the soleplate and other parts of the iron.
WARNING : Do not use descaling agents even if advertised for steam irons. They will permanently damage your iron.
The Self Clean function flushes dirt and scale particles out of the steam chamber. Fill the water tank with untreated tap water up to the max mark and heat the iron to the ·s temperature. Unplug the iron and hold it over a sink horizontally. Push the self clean button for 1 minute fig.14: steam will now begin to build up. After a few seconds water will emerge from the soleplate, rinsing dirt and scale particles out of the steam chamber.
Plug in the iron and allow the iron to heat up again. Wait until the remaining water has evaporated. Unplug from the mains and allow the iron to fully cool down.
When cool, the soleplate can be wiped with a damp cloth.
TIP Use the Self Clean function approx. every 2 weeks. If the water is very hard, clean the iron weekly.
(*) Depending on model
PROBLEMS
| Problem Cause Solution | ||
| The iron is plugged in, but the soleplate of the iron remains cold. | No mains supply. Check that | the mains plug is properly inserted or try plugging the iron into a different socket. |
| Temperature control set too low. | Set the temperature control to a higher temperature. | |
| The automatic electronic shut off is active.* | Move your iron. | |
| Thermostat control light goes on and off | This is normal. When the thermostat control light goes on and off the iron is heating up. | |
| None or too little steam is being emitted. | Temperature control set too low. | Turn the temperature control to be required setting |
| Not enough water in the water tank. | Squeeze the auto steam trigger Turn the steam control to the required setting area. Fill the water tank. | |
| Anti-Drip* is active (§ “USE”). | Wait for the soleplate to reach the correct temperature. | |
| Brown streaks come through the holes in the soleplate and stain the fabric. | Residues in the steam chamber or on the soleplate. | Use the Self Clean function then clean your iron. |
| Use of chemical descaling agents, perfumed or scented additives. | Do not add any descaling agents, perfumed, or scented additives to the water in the water tank.Use the Self Clean function and clean your iron if you have used the above. | |
| Fabric fibres have accumulated in the holes of the soleplate and are burning. | Clean the soleplate with a non-metallic sponge. | |
| Your linen is not rinsed sufficiently or you have ironed a new garment before washing it. | Ensure linen is rinsed thoroughly. | |
| Use of starch. Always spray starch onto the reverse side of the fabric to be ironed and clean your iron soleplate afterwards. | ||
| Pure distilled /demineralised or softened water is being used. | Only use untreated tap water or mix half tap water with half distilled/demineralised water. Use the Self Clean function and clean your iron. | |
| Iron is leaking. Overuse of shot | ot of steam button. | Allow more time between each shot. |
| Soleplate temperature too low. | Set the temperature control to a higher temperature. | |
Helpline:
If you have any product problems or queries, please contact our Customer Relations Team first for expert help and advice:
0845 602 1454 - UK
(01) 677 4003 - Ireland
or consult our website - www.rowenta.co.uk
Subject to modifications!
(*) Depending on model
FÜR IHRE SICHERHEIT
BESCHRIJVING VAN HET APPARAAT
(No text)
(No text)
广力云智慧零售收银系统
[Non-Text]
[Non-Text]
[Non-Text]
[Non-Text]
[Non-Text]
[Non-Text]
[Non-Text]
[Non-Text]
[Non-Text]
[Non-Text]
[Non-Text]
[Non-Text]
[Non-Text]
[Non-Text]
[Non-Text]
[Non-Text]
[Non-Text]
[Non-Text]
[Non-Text]
[Non-Text]
[Non-Text]
[Non-Text]
[Non-Text]
[Non-Text]
[Non-Text]
[Non-Text]
[Non-Text]
[Non-Text]
[Non-Text]
[Non-Text]
[Non-Text]
[Non-Text]
[Non-Text]
[Non-Text]
[Non-Text]
[Non-Text]
[Non-Text]
[Non-Text]
[Non-Text]
[Non-Text]
[Non-Text]
[Non-Text]
[Non-Text]
[Non-Text]
[Non-Text]
[Non-Text]
[Non-Text]
[Non-Text]
[Non-Text]
[Non-Text]
[Non-Text]
[Non-Text]
[Non-Text]
[Non-Text]
[Non-Text]
[Non-Text]
[Non-Text]
[Non-Text]
[Non-Text]
[Non-Text]
[Non-Text]
[Non-Text]
[Non-Text]
[Non-Text]
[Non-Text]
[Non-Text]
[Non-Text]
[Non-Text]
[Non-Text]
[Non-Text]
[Non-Text]
[Non-Text]
[Non-Text]
[Non-Text]
[Non-Text]
[Non-Text]
[Non-Text]
[Non-Text]
[Non-Text]
[Non-Text]
[Non-Text]
[Non-Text]
[Non-Text]
[Non-Text]
[Non-Text]
[Non-Text]
[Non-Text]
[Non-Text]
[Non-Text]
[Non-Text]
[Non-Text]
[Non-Text]
[Non-Text]
[Non-Text]
[Non-Text]
[Non-Text]
[Non-Text]
The Ground Truth image displays a single, solid horizontal line. According to Rule 2 (UNDERSCORE & LINE RULES), this is a stylistic or background line, not a placeholder underscore. Therefore, the OCR result must ignore it and output nothing or only meaningful text. The provided OCR content is "____", which consists of four underscores. This is an incorrect interpretation of the line as a placeholder, violating the rule that stylistic lines must be ignored. The OCR has hallucinated placeholder underscores where none exist in the GT. Hence, the OCR result is inconsistent with the Ground Truth.
1
|
|
|
|
|
中
(1)
(十)
(1)
中
|
|
|
|
|
1
(1)
广力云智慧零售收银系统
[Non-Text]
[Non-Text]
[Non-Text]
[Non-Text]
[Non-Text]
[Non-Text]
[Non-Text]
[Non-Text]
[Non-Text]
[Non-Text]
[Non-Text]
[Non-Text]
[Non-Text]
[Non-Text]
[Non-Text]
[Non-Text]
[Non-Text]
[Non-Text]
[Non-Text]
[Non-Text]
[Non-Text]
[Non-Text]
[Non-Text]
[Non-Text]
[Non-Text]
[Non-Text]
[Non-Text]
[Non-Text]
[Non-Text]
[Non-Text]
[Non-Text]
[Non-Text]
[Non-Text]
[Non-Text]
[Non-Text]
[Non-Text]
[Non-Text]
[Non-Text]
[Non-Text]
[Non-Text]
[Non-Text]
[Non-Text]
[Non-Text]
[Non-Text]
[Non-Text]
[Non-Text]
[Non-Text]
[Non-Text]
[Non-Text]
[Non-Text]
[Non-Text]
[Non-Text]
[Non-Text]
[Non-Text]
[Non-Text]
[Non-Text]
[Non-Text]
[Non-Text]
[Non-Text]
[Non-Text]
[Non-Text]
[Non-Text]
[Non-Text]
[Non-Text]
[Non-Text]
[Non-Text]
[Non-Text]
[Non-Text]
[Non-Text]
[Non-Text]
[Non-Text]
[Non-Text]
[Non-Text]
[Non-Text]
[Non-Text]
[Non-Text]
[Non-Text]
[Non-Text]
[Non-Text]
[Non-Text]
[Non-Text]
[Non-Text]
[Non-Text]
[Non-Text]
[Non-Text]
[Non-Text]
[Non-Text]
[Non-Text]
[Non-Text]
[Non-Text]
[Non-Text]
[Non-Text]
[Non-Text]
[Non-Text]
[Non-Text]
[Non-Text]
[Non-Text]
[EMPTY]
[Non-Text]
[Non-Text]
[Non-Text]
[Non-Text]
[Non-Text]
[Non-Text]
[Non-Text]
[Non-Text]
[Non-Text]
[Non-Text]
[Non-Text]
[Non-Text]
[Non-Text]
[Non-Text]
[Non-Text]
[Non-Text]
[Non-Text]
[Non-Text]
[Non-Text]
[Non-Text]
[Non-Text]
[Non-Text]
[Non-Text]
[Non-Text]
[Non-Text]
[Non-Text]
[Non-Text]
[Non-Text]
[Non-Text]
[Non-Text]
[Non-Text]
[Non-Text]
[Non-Text]
[Non-Text]