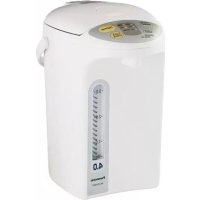
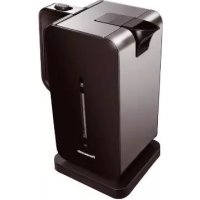
NCEH40PC - Kettle PANASONIC - Free user manual and instructions
Find the device manual for free NCEH40PC PANASONIC in PDF.


| Product type | Electric thermal kettle |
| Brand | Panasonic |
| Model | NC-EH40P (NCEH40PC) |
| Rated capacity | 4.0 L (4.2 qt) |
| Power supply | 120 V AC |
| Power consumption | 700 W |
| Average power consumption in keep warm | at 208°F: 49 Wh at 190°F: 43 Wh at 180°F: 35 Wh at 140°F: 23 Wh |
| Dimensions (H x W x D) | 32.4 cm x 21.7 cm x 28.7 cm |
| Weight (with cord) | 2.1 kg (4.6 lb) |
| Inner coating | Charcoal and carbon non-stick |
| Main functions | Boiling, keep warm (4 settings: 208/190/180/140°F), 6-hour timer, reboil, electric spout |
| Keep warm temperatures | 208°F (98°C), 190°F (90°C), 180°F (82°C), 140°F (60°C) |
| Chlorine reduction function | Yes (extends boiling by about 6 minutes) |
| Overheating protection | Yes (automatic stop if tank is empty) |
| Child safety | Automatic spout lock after 10 seconds |
| Swivel base | 360° |
| Replaceable parts | Rubber gasket (APH65-480), Metal filter (APB97-480-0U) |
| Descaling | Citric acid (model SAN-80N) every 2-3 months |
| Routine maintenance | Clean with a damp cloth, do not immerse |
Frequently Asked Questions - NCEH40PC PANASONIC
User questions about NCEH40PC PANASONIC
0 question about this device. Answer the ones you know or ask your own.
Ask a new question about this device
Download the instructions for your Kettle in PDF format for free! Find your manual NCEH40PC - PANASONIC and take your electronic device back in hand. On this page are published all the documents necessary for the use of your device. NCEH40PC by PANASONIC.
USER MANUAL NCEH40PC PANASONIC
Operating Instructions
使用說明書
natural_image
Line drawing of a rice cooker with digital display and control panel (no text or symbols)Thank you for purchasing the electric thermo pot, NC-EH40P / NC-EH30P / NC-EH22P. Please read these instructions carefully before using this product and save this manual for future use. This product is intended for household use only.
Safety Precautions 11-13
Part Names and Handling Instructions 14-15
How to Use 16-17
Convenient use methods 18-19
Daily Maintenance 20-21
Troubleshooting....22
Replacement of Parts 23
Specifications 23
目錄
When using electrical appliances, basic safety precautions should always be followed, including the following:
- Read all instructions.
- Do not touch hot surfaces, especially the steam vent. Use handles or knobs.
- To protect against fire, electric shock and personal injury, do not immerse cord, plugs, or Thermo Pot in water or other liquid.
Do not splash water or other liquid over them.
- Do not pour water directly from the tap.
- Do not put the unit in a sink or allow it to get wet.
-
Do not turn the unit upside down when the bottom is wet.
-
Close supervision is necessary when any appliance is used by or near children.
-
Do not allow children and persons unfamiliar with the appliance to use it.
Do not leave the unit within the reach of infants. -
You must pay special attention to prevent infants from putting the body plug into their mouths.
-
Unplug from outlet when not in use and before cleaning. Allow to cool before putting on or taking off parts, and before cleaning the appliance.
- When unplugging, pull by the power plug - not the cord.
-
Do not operate any appliance with a damaged cord or plug or after the appliance malfunctions, or has been damaged in any manner. Return appliance to the nearest authorized service center for examination, repair or adjustment.
-
Never disassemble, repair, or modify the unit.
-
If the supply cord is damaged, it must be replaced by a special cord available from the manufacturer or its service agent.
-
The use of accessory attachments not recommended by the appliance manufacturer may result in fire, electric shock or personal injury.
- Do not use outdoors.
- Do not let cord hang over edge of table or counter, or touch hot surfaces.
- Do not place on or near a hot gas or electric burner, or in a heated oven. Do not place on unstable surfaces or surfaces that can be affected by heat, or near walls or furniture.
- Extreme caution must be used when moving an appliance containing hot liquids.
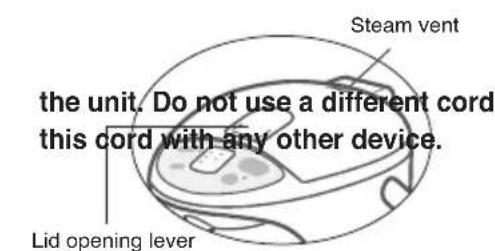
- When carrying the unit, do not touch the lid opening lever.
- Always attach plug to appliance first, then plug cord into the wall outlet.
- Make sure the power plug is correctly inserted in to the wall outlet when in use.
- Do not connect or disconnect the power plug or the body plug with wet hands.
-
Use a single outlet that matches the power rating of the unit.
-
Clean dust from the power plug or the body plug regularly.
-
Use a single outlet that matches the power rating of the unit.
- Clean dust from the power plug or the body plug regularly.
- A build-up of dust on the plug will attract condensation, which could cause cable damage resulting in fire. Remove the plugs and clean them with a dry cloth.
leak through the dispensing spout and the steam vent, causing burns, if the unit falls over or is tilted.
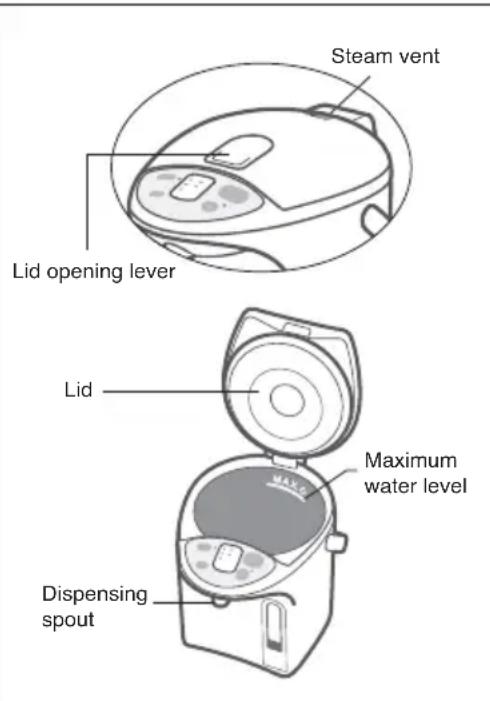
Lid
the lid is attached.
Dispensing spout
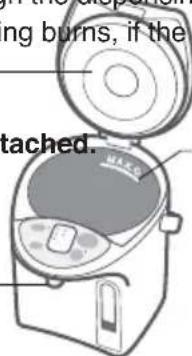
Maximum water level
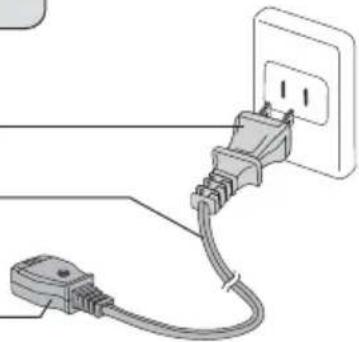
Power cord
Power plug* —— anything other than water which may spurt out and Cord cause burns. The water tube may also get clogged, the inner container may burn or corrode, and the fluororesin insulating coating may peel off. Body plug
*The shape of plug differs according to region.
- Do not allow small metal parts near the body plug.
- Only use the power cord designed specifically for
nd do not use
- Do not let the unit fall over.
Do not lift, tilt, or shake the unit or carry it by the lid. Even when the dispense key is locked, hot water may
- Close the lid securely, and not by force.
-
Do not throw away the remaining hot water while
-
When opening the lid, keep hands away from the steam.
- Do not open the lid or dispense hot water while boiling.
- Do not pour in water above maximum water level.
- Do not block the steam vent.
- Do not rotate the unit while dispensing hot water.
- Do not use appliance for other than intended use.
- Do not use to store ice.
a potential source of electric shock and
- Do not heat tea bags, te
SAVE THESE INSTRUCTIONS
Note:
A. A short cord is provided to reduce the risk of entanglement or tripping over a longer cord.
B. Extension cords are available and may be used if care is exercised in their use.
C. If extension cord is used,
1) the marked electrical rating of the extension cord should be at least as great as the electrical rating of the appliance, and
2) the cord should be arranged so that it will not drape over the countertop or tabletop where it can be pulled on by children or tripped over unintentionally.
D. This appliance has a polarized plug (one blade is wider than the other). As a safety feature, this plug will fit in a polarized outlet only one way. If the plug does not fit fully in the outlet, reverse the plug. If it still does not fit, contact a qualified electrician.
Do not modify the plug in any way.
重要的安全措施
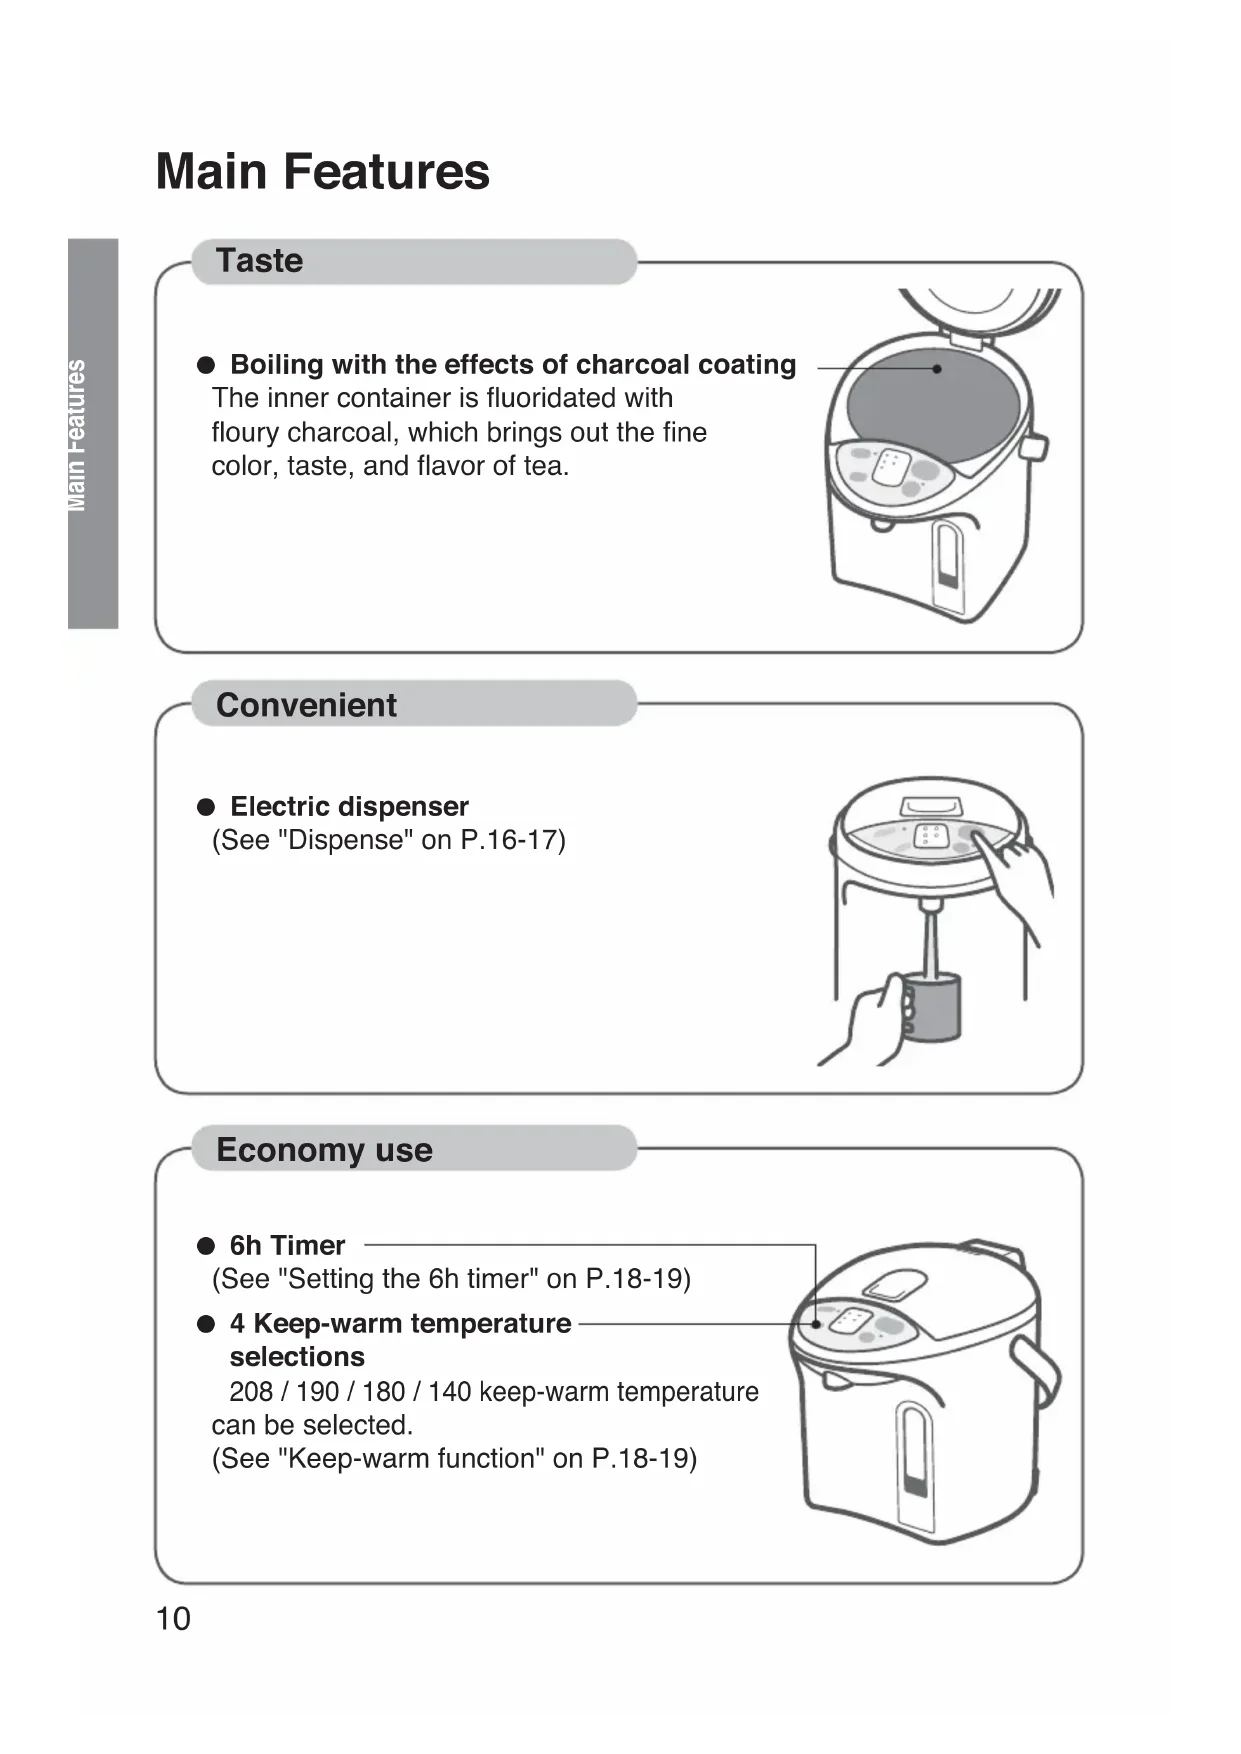
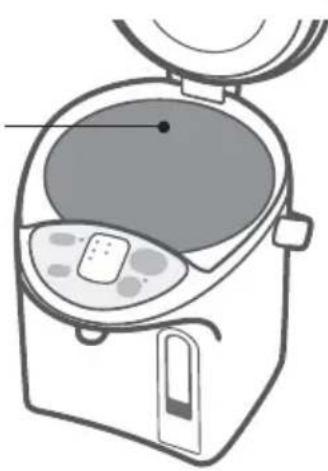
● Boiling with the effects of charcoal coating The inner container is fluoridated with floury charcoal, which brings out the fine color, taste, and flavor of tea.
natural_image
Line drawing of a kitchen appliance with a lid and side panel (no text or symbols)Convenient
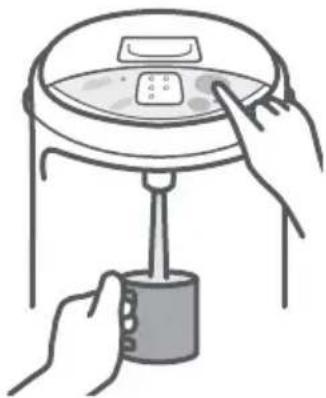
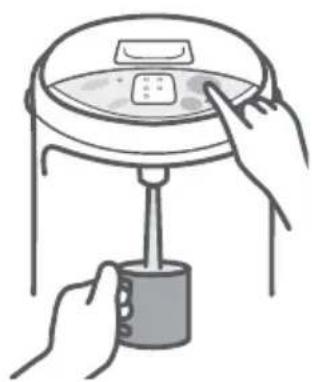
● Electric dispenser (See "Dispense" on P.16-17)
natural_image
Illustration of hands using a water dispenser to press a cup (no text or symbols present)Economy use
- 6h Timer (See "Setting the 6h timer" on P.18-19)
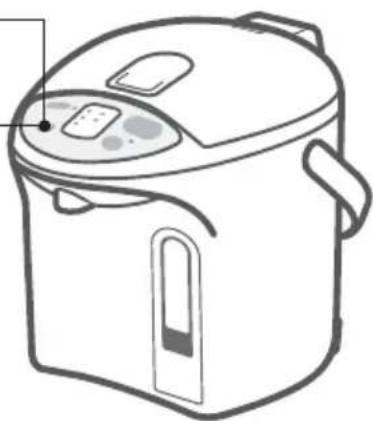
● 4 Keep-warm temperature selections 208 / 190 / 180 / 140 keep-warm temperature can be selected. (See "Keep-warm function" on P.18-19)
natural_image
Line drawing of a rice cooker with control panel and side door (no text or symbols)For your safety and in order to prevent property damage and the danger to users and others, please read the following instructions.
■ The signals indicate harm and damage when the product is used improperly.

WARNING
Indicating "it may cause severe injuries and death."

CAUTION
Indicating "the user may get injured or the product may cause property damage."
■ The symbols indicate specified items that must be followed.

This symbol indicates prohibition. This symbol indicates mandatory.

WARNING
To Prevent Burns

This appliance is not intended for use by persons (including children) with reduced physical, sensory or mental capabilities, or lack of experience and knowledge, unless they have been given supervision or instruction concerning use of the appliance by a person responsible for their safety.
Children should be supervised to ensure that they do not play with the appliance.
Do not let the unit fall over. Do not lift, tilt or shake the unit or carry it by the lid.
Even when the dispense key is locked, hot water may leak through the dispensing spout and the steam vent, causing burns, if the unit falls over or is tilted.
Do not pour in water above the maximum water level indication line. If the appliance is overfilled, boiling water may be ejected.
Hot water can spill causing burns.
Do not close the lid by force.
Hot water can spill causing burns.
Do not boil anything other than water.
Do not heat tea bags, tea leaves, milk, alcohol or anything other than water which may cause it to spurt out hot liquid or steam and cause burns.
The water tube may also get clogged, the inner container may burn or corrode, and the fluoro-resin insulating coating may peel off.
Do not block the steam vent.
Hot water can overflow causing burns.
Do not throw away the remaining hot water while the lid is attached.
If the lid comes off, hot water may splash causing burns.
Do not touch the steam vent.
This may cause burns. Take special care to prevent infants from touching the steam vent.
Close the lid securely.
If the unit topples, hot water may spill out causing burns.


WARNING
Power Cord
Never do anything that might cause damage to the cord, power plug or body plug,
such as damage them, modify them, place hot objects near to them, bend them, twist them, stretch them, place heavy objects on them, or bundle them together.
If the unit is used when damaged, electrical short circuit or fire may result.
- If the supply cord is damaged, it must be replaced by a special cord available from the manufacturer or its service agent.
Do not connect or disconnect the power plug or the body plug with wet hands.
This may result in electric shock.
Power cord
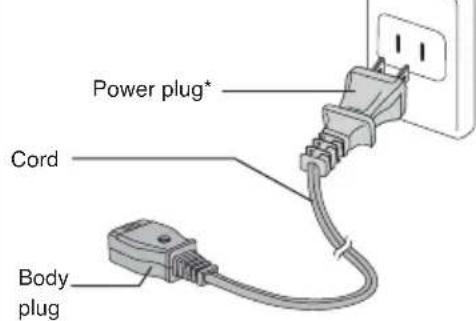
*The shape of plug differs according to region.

Make sure the power plug is correctly inserted into the wall outlet.
If the plug is inserted improperly it may cause electric shock or generate heat resulting in fire.
- Do not use a damaged plug or a connection in a loose outlet.
Clean dust from the power plug or the body plug regularly.
A build-up of dust on the plug will attract condensation, which could cause cable damage and the deterioration of insulation resulting in fire.
- Remove the plugs and clean them with a dry cloth.
Use a single outlet that matches the power rating of the unit.
Heat generated when plugging in multiple appliances into one outlet may result in fire.
During use
Do not immerse the unit in water or splash water over it.
- Do not supply water directly from the tap or place the unit in a sink where the bottom may get wet.
- Do not turn the unit upside down when the bottom is wet. It may cause a short circuit and may result in electric shock, and if water overflows from the pot and it enters the electrical parts built into the main unit, it may cause malfunction.
Never disassemble, repair or modify the unit.
Any attempt to do so may cause the unit to operate abnormally and may result in fire or injury.
- If in need of repair (except for the replacement parts), please contact an authorized Service Center.
Do not use to store ice.
Condensation will occur, creating a potential source of electric shock and malfunction.

CAUTION
To Prevent Burns

Do not place the unit on unstable surfaces.
The appliance may topple over causing burns.
Do not open the lid or dispense hot water while boiling.
Splashing hot water or steam may cause burns.
Do not rotate the unit while dispensing hot water.
Splashing hot water may cause burns.
Do not touch the hot parts of the unit during use or shortly after use.
This may cause burns.

When carrying the unit, do not touch the lid opening lever.
The lid may open causing burns and other injury.
Wait until the unit is cooled down before maintenance.
A hot appliance may cause burns.
- When disposing hot water, be careful not to get burned.
When opening or closing the lid, keep hands away from the steam.
Steam can cause burns.
Power Cord

Do not use other than the power cord designed specifically for the unit.
Do not use a different cord and do not use this cord with any other device.
It may cause malfunction or fire.

When the unit is not in use, unplug the power plug from the wall outlet.
Deteriorating insulation may result in electric shock and/or fire.
When unplugging the unit, pull by the power plug - not the cord.
Electric shock and short circuit may result in fire.
During use

Do not use the unit on surfaces that retain heat for a long time.
The unit may get discolored or break up.
Do not place near walls or furniture.
Steam and heat could damage walls and furniture, causing a change in color and shape.
Part Names and Handling Instructions
Operation panel
If the protective film is still covering the surface of the operation panel, peel it off before using the operation panel.
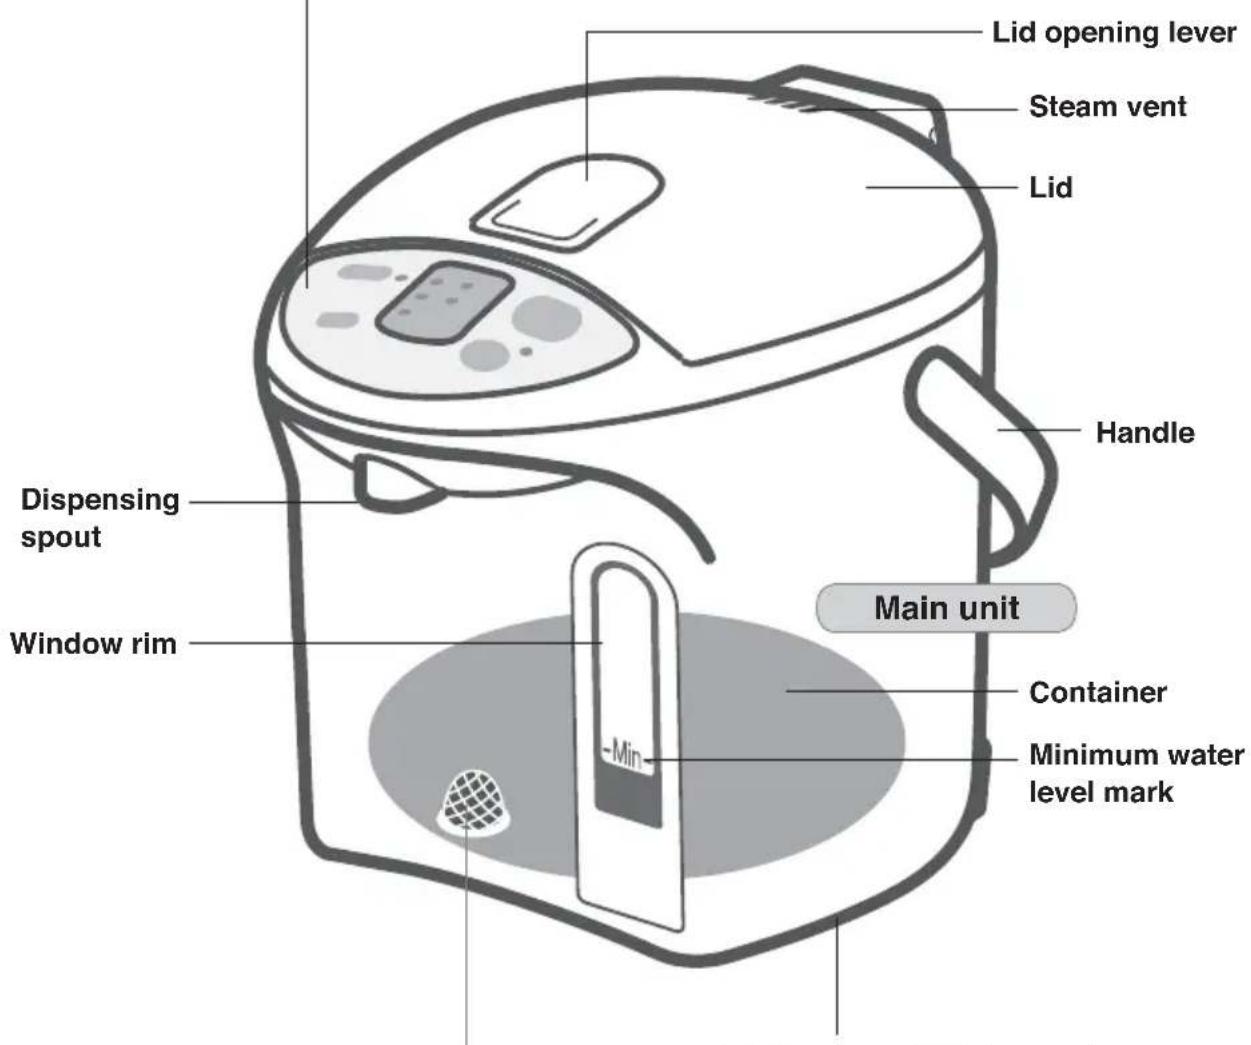
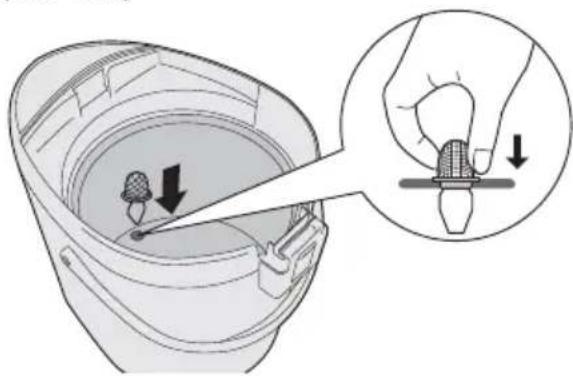
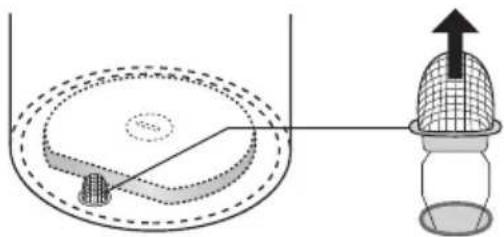
Mesh filter
(Replaceable part)
It may have come off from the bottom of the container. Push it completely into the correct position. (See P.20)
natural_image
Illustration of a bucket with a hand holding a light bulb, showing a hand holding the bulb and a hand holding the bulb inside (no text or symbols present)Rotating base (360 degrees)
When rotating the pot, do not allow the cord to wind around the unit.
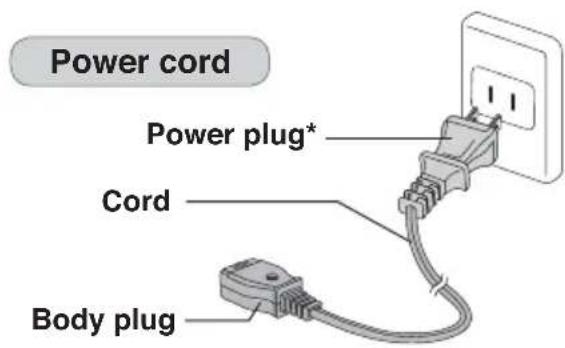
*The shape of plug differs according to region.
How to Open/Remove
To open, press the depression in the opening lever, and lift the lid.
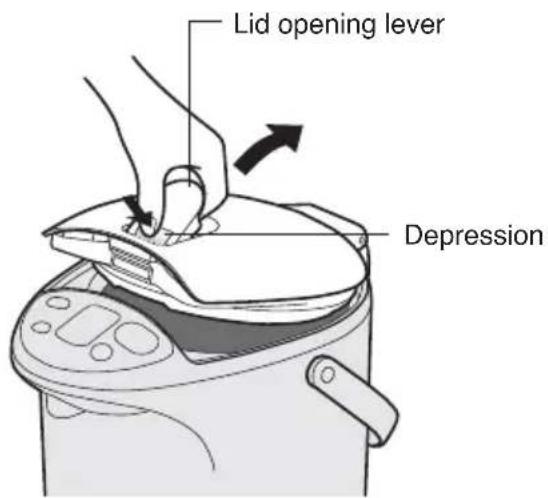
To close
Press down on the lid until it clicks.
To remove, push on the lid release lever, hold the lid opening lever, and pull the lid out and up diagonally.
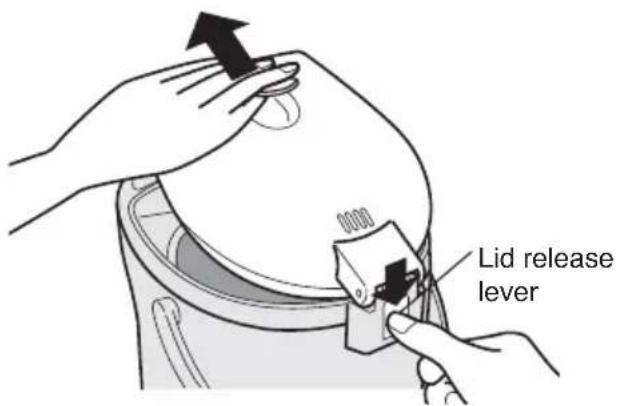
To attach
Insert the lid at an angle.
Overheating Protection
If an empty container is heated, the overheat safety function (which prevents an empty container from being heated) will be activated. The power will be shut off automatically to prevent the problems that may occur due to overheating.
Overheating, the display shows LEDs flashing alternately
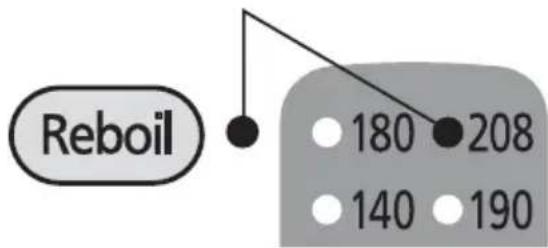
Cause
• Less than the minimum water level in the container was boiled.
• After water is added, the lid might be left open.
How to cancel the display
Pour water into the container, and press the Reboil key.
Notice
If an empty container is heated, an odor will be emitted and the container may be discolored.
How to Use
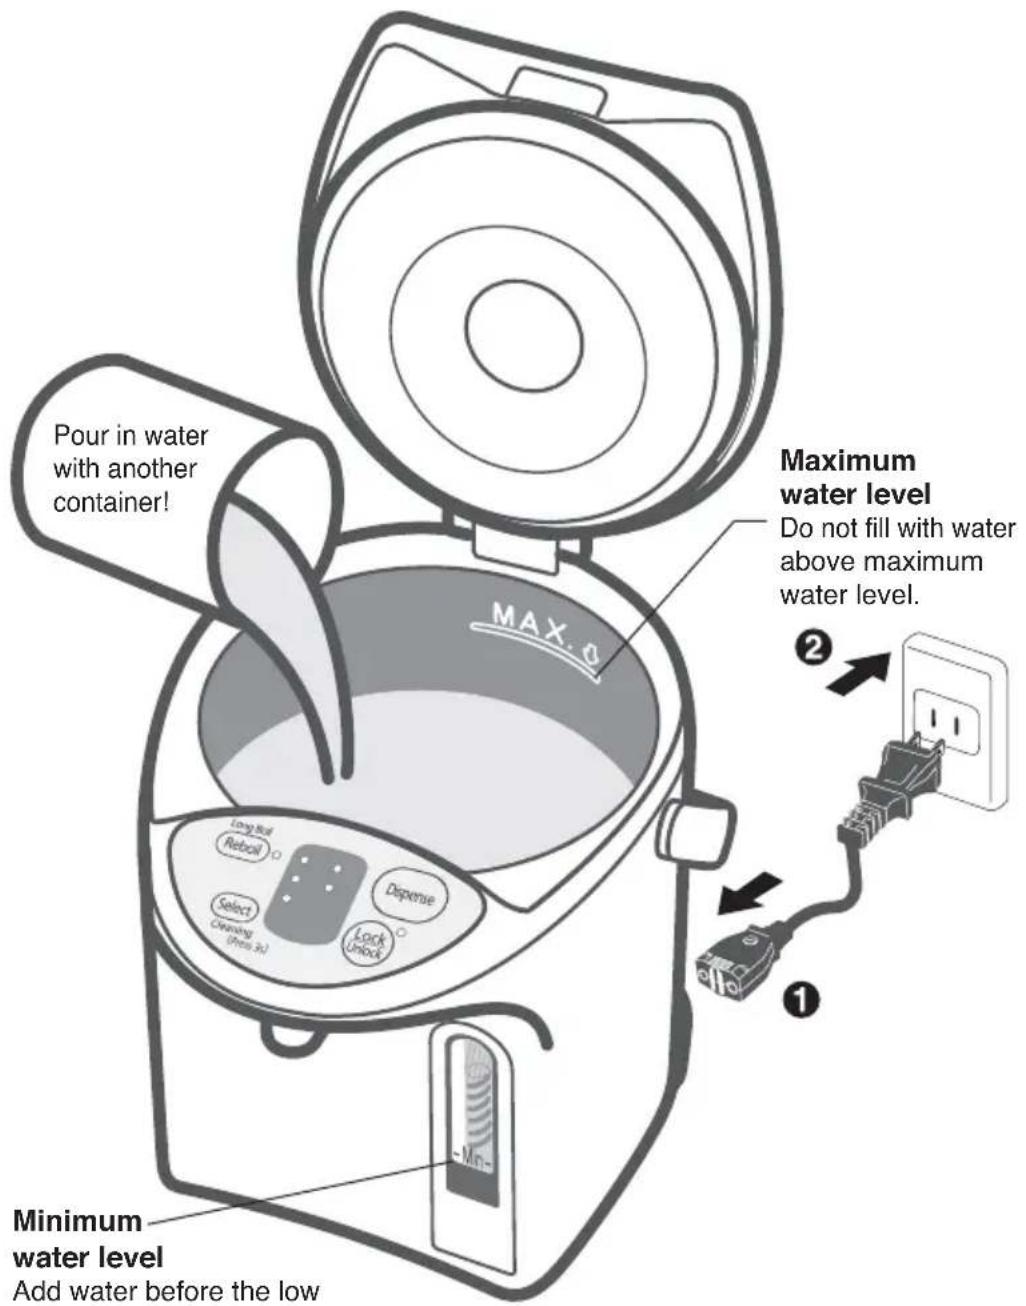
Boiling water
Dispense
(Electric dispenser)
Before you use this pot for the first time
Boil water in it to clean the thermo pot container and the sections through which the hot water is dispensed.
1 Boil some water.
2 Dispense the hot water.
3 Empty the container via "DRAIN" mark. (See P.17)
To reduce the chlorine in the water (Long Boil)
Press key to make the indicator light flash.
(Press one time while water is being boiled, and press twice while water is being kept warm.)
Extends the boiling time by about 6 minutes to reduce the chlorine in the water.
- Press key again to boil.
Pour in water with another container. Close the lid securely.
Securely plug the body plug horizontally into the body.
Plug into wall outlet. (1 → 2)
Water starts boiling automatically.

After the water has been boiled, the following will be indicated.

The boiled water will be kept warm at approx. 190^ F ( 90^ C) automatically.
LED Flashing LED Flashing LED Lit
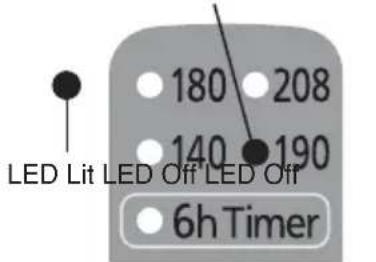
LED LED LED
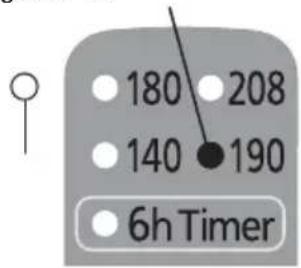

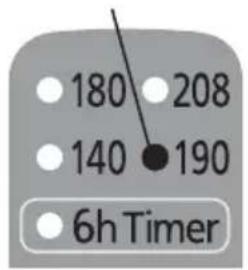
• The indication is estimated water temperature.
Time required to boil water (approx.)
NC-EH40P: 35 min. / NC-EH30P: 27 min. / NC-EH22P: 20 min. (Amount of water: Maximum Water / Room temperature: 68°F (20°C))
Press the

to release lock. The indicator light beside the key will be lit.

Press Key and dispense the hot water.
The "Dispense" key will be re-locked automatically in 10 seconds after you stop dispensing hot water.

When the unit is not in use
Unplug, and remove the lid. Pour out any remaining hot water slowly via
the DRAKN
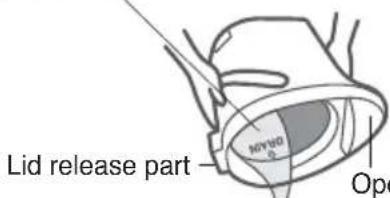
Operation panel
Cautions
- Do not pour out water too quickly. (If water splashes over lid release part or operation panel, it may cause a malfunction.)
- Do not leave water standing in the container. (It may cause the container to corrode or smell.)
Convenient use methods
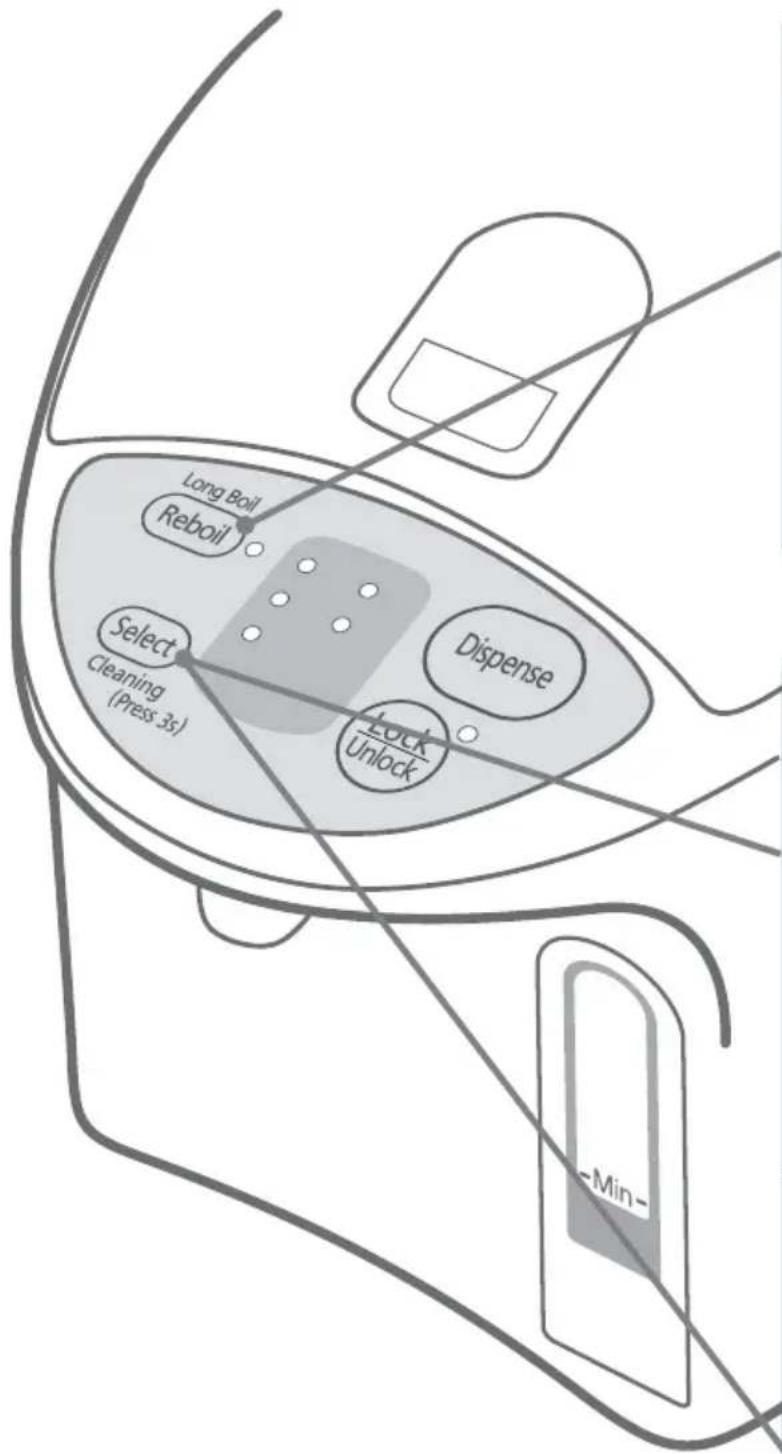
Notice
- The keep-warm temperature or the timer can be set while the water is being boiled or being kept warm.
- After power is restored in the event of a power failure, the keep-warm temperature will be automatically set to 190, even if the timer or the "208", 180" or "140" keep-warm function was previously selected.
Reboil
- It is ideal to use boiling water for making coffee / tea / instant cup noodles etc.
Keep-warm Function
- It is ideal to use 180 keep-warm for making green tea.
- It is ideal to use 140 keep-warm for preparing milk for a baby. Be sure to leave milk to cool down or mix it with cool boiled water before giving it to a baby
When the unit will not be used for a short time, such as when you go out for a day...
Setting the 6h timer
- While setting the timer, the electrification of heater stops
Press the


to reboil water that is being kept warm.
After a few minutes, water will be boiled.
- The keep-warm temperature setting is left unchanged.
(After boiled)
Time required for the reboil procedure
From 208 keep-warm : approx. 2.5-4 min.
From 190 keep-warm:approx.4-6.5min.
From 180 keep-warm: approx. 6-12 min.
From 140 keep-warm: approx. 9-17.5 min.
(Amount of water: Maximum Room temperature: 68^ F ( 20^ C))
Press the

key.





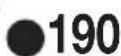

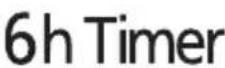
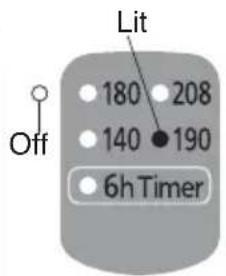
Each time the key is pressed, " ● mark will shift to the next choice and change the keep-warm temperature or set the timer.
Flashing
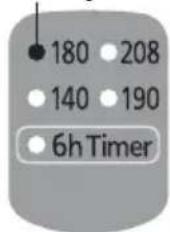
(When selecting 180 keep-warm)
Time required to reach the setting keep-warm temperature
190→208keep-warm : approx.
:keep-warm:approx.0.5-1 hour
Keep-warm: approx. 3.5-4.5 hours
Amount of water: Maximum
Room temperature: 68°F (20 °C)
Previous keep-warm setting: 190

After a short time, water will be kept warm at the settled temperature (The lamp will be lit).
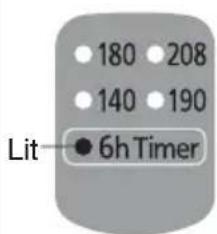

6 hours later, timer will go off and water starts boiling
When the water is brought up to boiling temperature, it will be kept warm at 190^ F ( 90^ C).
Daily Maintenance
Before cleaning, be sure to disconnect the plug from outlet, dispense water and allow to cool the unit.
Main unit and lid
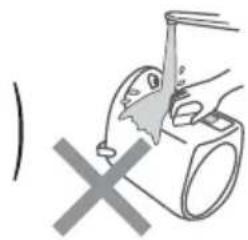
Clean with a damp, well-wrung cloth.
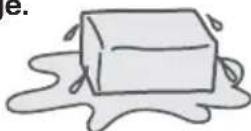
- Do not wet or soak the main unit in water. If water enters the main unit from the bottom or from the dispensing spout, it can also get into the electrical components in the main unit and may cause a malfunction.
- Do not use detergents. (They may leave an odor.) - Do not use benzine or thinner. (They may damage the surface.)
natural_image
Illustration of a hand using a showerhead to clean water, with a cross symbol indicating no text or symbols.Inner container
Clean with a wet sponge.
- Do not use polishing powder, a scrub brush or a nylon brush.
They may damage the fluororesin finish of the inner container.
About "Scale"
While you are using this unit, minerals contained in the water (like calcium) can get stuck on the inner container or on the mesh filter. This is called "scale", and it is harmless.
- Milky-white gritty surface (caused by calcium)
- White or glittering floating material (crystals of minerals)
- Discoloration in the finish like dark brown, gray, or green areas (metallic ion made on the fluororesin cover
These are not discoloration or corrosion of the inner container itself, nor are they flakes from the fluororesin covering.

Clean the inner container using citric acid. (See P.21)
Mesh filter
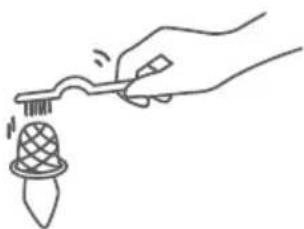
Clean the filter with a brush.
When filter is clogged, water does not flow smoothly.
* After cleaning the filter, be sure to reattach it to the inner container.
natural_image
Line drawing of a hand using a tool to apply a small object to a conical object (no text or symbols present)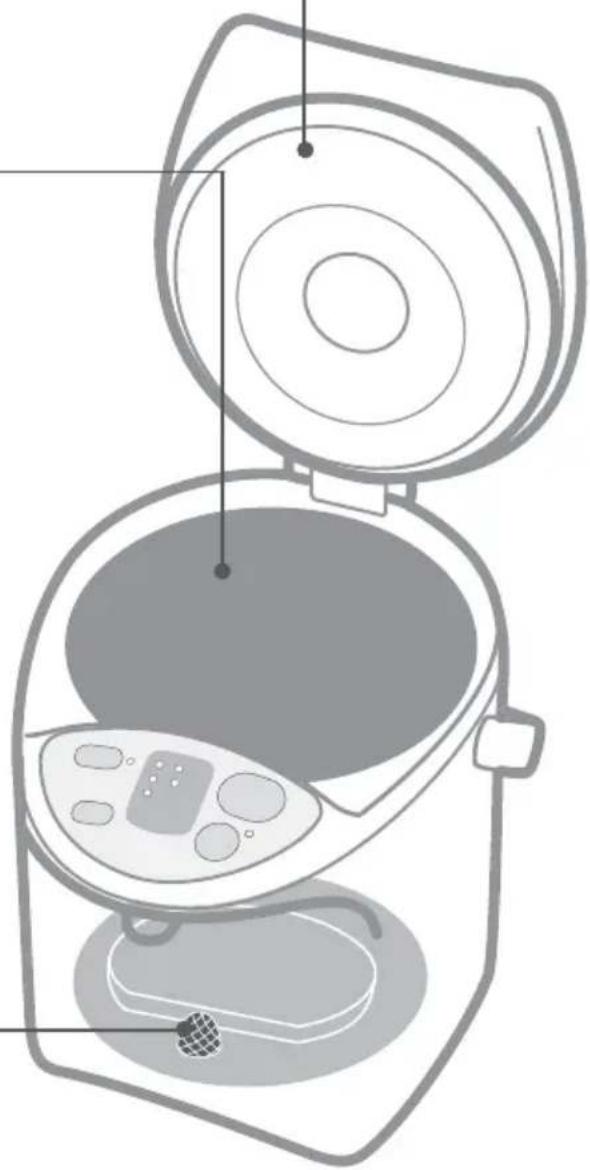
natural_image
Diagram of a kitchen appliance with open lid and internal components (no text or labels)When storing the unit
- Dry it thoroughly.
- Put it into a plastic bag and seal the bag.
1 Make sure that the mesh filter is attached to the container.
2 Put citric acid in the inner container.
- Amount of citric acid to be used at one time: 80 g (two packages) or seven level tablespoons.
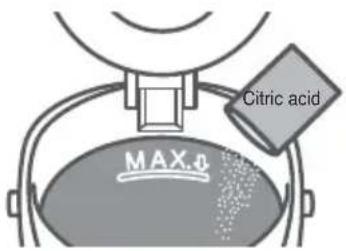
The citric acid is available from an authorized dealer. (Model No: SAN-80N)
* Follow the directions for cleaning printed on the citric acid package.
* Since the citric acid used for cleaning is a food additive, it is harmless to humans.
3 Add water to the maximum water level mark, and mix the citric acid and water well. Close the lid.
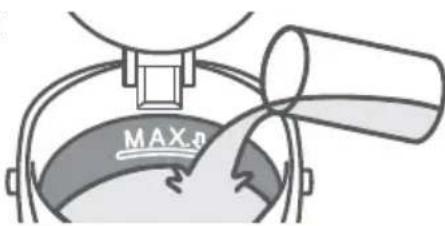
4 Connect the plug immediately after stirring and press the key more than 3 seconds.
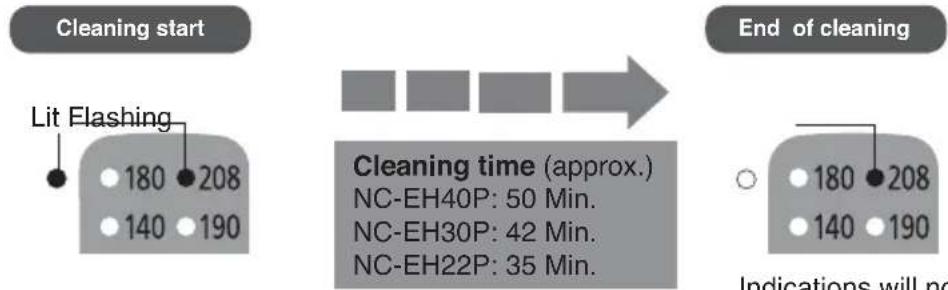
5 Dispense some water, then unplug, remove the lid and throw away the hot water via the "DRAIN" mark.
6 Refill with water and boil it to remove the smell of the citric acid or lemons. Then throw the hot water away in the same way as in step 5.
- To remove any discoloration from the area above the maximum water level, rub the inside lightly with a wet sponge.
- If the discoloration cannot be removed by rubbing, clean the inner container several times using citric acid or lemons.
Cautions
• Use only our citric acid to clean this thermo pot.
- Do not fill with water above maximum water level.
- Fill the container only with tap water (do not fill with hot water). Hot water may spout out causing burns.
Troubleshooting
Before calling a service supplier, please check the following possible causes/soluting.
If... Causes
White or glittering flakes floating in the hot water.
Boiling sounds become louder.
Hot water has odors of chlorine.
Hot water has an unpleasant odor.
Hot water comes out by itself.
Hot water does not flow out smoothly.
The indicator lights flash alternaterly.
Hot water does not dispense.
Possible cause
- The cause of this is "scale". (See P.20) It is not flakes of fluororesin.
* Water with a large content of minerals in it such as mineral water or ionised water, is more likely to cause a scale or white layer in the hot water.
- When "scale" adhered, boiling sounds become louder.
- Odors of chlorine remain depending on the amount of chlorine in tap water.
- When the unit is new, resin used in the manufacturing process may give off a mild odor.
- If the unit is placed on surfaces such as a vinyl sheet, the odor may be carried over into the water.
- Water has been added above maximum water level.
- The mesh filter may be clogged with "scale". (See P.20)
● Overheating protection has been activated (See P.15)
- The indicator lights may flash alternately by adding boiling water or due to the way the water is supplied.
- When the inner container is cleaned with citric acid, citric acid may have built up on the bottom.
- The automatic lock has been engaged.
- Clean the inner container with a wet sponge. (See P.20)
- If the “scale” still remains, clean with citric acid. (See P.21)
- Press the “Reboil” key to reduce the chiorine. (See P.16)
- Lower the water level.
- Clean the filter with a brush.
- If the "scale" cannot be removed, replace the filter. (See P.23)
- Add water and press the "Reboil" key.
- Press the "Reboil" key.
- Disconnect the plug, and stir the citric acid well to disperse.
- Press the "Lock/Unlock" key.
- If the problem is not fixed after checking the above possible causes, or if you still think something is wrong, disconnect the body plug from the unit. Wait at least 10 seconds and then re-connect the plug.
- The semi-transparent inner part inside the lid may become yellowish. This does not affect operation of the unit.
- The ratting noise in the lid is made by small ball-shaped components which prevent water from flooding out if the unit topples over.
- If the room temperature is very high, the outside of the main unit may reach about 131^ (55°C).
The unit does not turn on.
- You poured in water directly from a tap.
- You put the unit on the sink.
- You turned the unit upside down with its bottom wet.
- You washed the unit water.
- It is broken if the electric components are taken in water. Contact the stores where you purchased for repair.
Replacement of Parts
Rubber gasket set
Replace gaskets if they crack, lose their pliancy or, for any other reasons which allow steam to escape from between the container and the lid
Mesh filter
Replace the filter, if foreign materials which clogging the filter cannot be removed, even after scrubbing with a cleaning brush, etc.
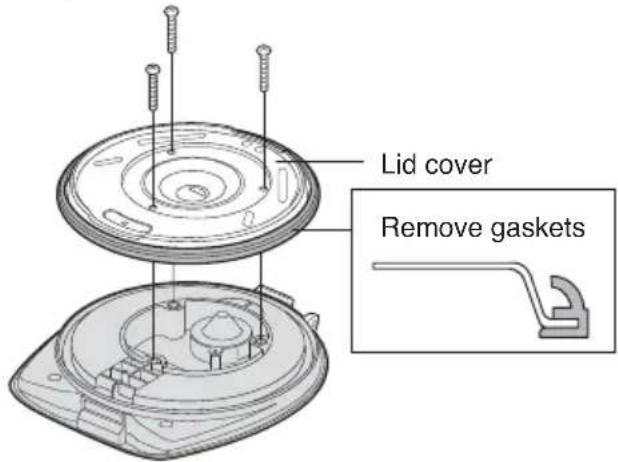
Remove lid, unscrew 3 tapping screws and remove the lid cover.
Exchange the gaskets and then place the lid cover back and secure with the tapping screws.
natural_image
Diagram showing a container with internal components and an upward arrow, no text or symbols presentThe filter can be removed by pulling firmly on it.
Consumable parts are available from an authorized dealer.
| Part name Part No. |
| Rubber gasket set APH65-480 |
| Mesh filter APB97-480-0U |
Specifications
| Model No. NC-EH40P NC-EH30P NC-EH22P | |||||
| Power supply 120 V a.c. | |||||
| Power consumption 700 W | |||||
| Average power consumption in keeping warm (approx.) (Amount of water: maximum Room temperature68°F (20°C)) | at 208 49 Wh 45 Wh 40 Wh | ||||
| at 190 43 Wh 39 Wh 33 Wh | |||||
| at 180 35 Wh 31 Wh 27 Wh | |||||
| at 140 23 Wh 21 Wh 18 Wh | |||||
| Dimensions (when the handle is tilted) | Height (approx.) | 12.8 in (32.4 cm) | 10.8 in (27.5 cm) | 9.4 in (23.8 cm) | |
| Width (approx.) | 8.5 in (21.7 cm) | 8.5 in (21.7 cm) | 8.5 in (21.7 cm) | ||
| Depth (approx.) | 11.3 in (28.7 cm) | 11.3 in (28.7 cm) | 11.3 in (28.7 cm) | ||
| Weight (including power cord) (approx.) | 4.6 lb (2.1 kg) | 4.4 lb (2.0 kg) | 4.2 lb (1.9 kg) | ||
| Rated capacity (approx.) | 4.2 qt (4.0 L) | 3.2 qt (3.0 L) | 2.3 qt (2.2 L) | ||
* Under certain conditions, such as at very hight altitudes and in intense cold, the unit may not function properly. Please avoid using in such conditions.
* If the unit is not being used in cold conditions, make sure to empty it of water. The water left in the inner container may freeze causing damage.
主要特點
味道
- 有效利用備長碳燒水
natural_image
Line drawing of a kitchen appliance with a lid and internal compartments (no text or symbols)方便
- 電動出水
(參看第 39-31 頁的 “出水”)
natural_image
Illustration of hands using a pressure pump to press a device (no text or symbols visible)使用經濟
- 6小時定時器
natural_image
Line drawing of a rice cooker with control panel and side door (no text or symbols)natural_image
Illustration of a bucket with two lights inside, showing a hand holding a light bulb and a magnified inset (no text or symbols)電源軟線
電源插頭*
軟線
主機插頭
natural_image
Line drawing of a cable plugged into an electrical outlet (no text or symbols)*插頭的形狀是根據不同地區而不同。
如何打開/拆卸
再沸騰
natural_image
Illustration of a hand using a tool to clean or mark a device with a cross symbol (no text or symbols present)内瓶
用濕海綿清洗。
natural_image
Hand holding a brush applying material to a textured object (no text or symbols visible)儲存時
natural_image
Diagram showing a container with internal components and an upward arrow, no text or symbols present向上牵拉, 便可卸下。
請在經銷店購買易耗品。
natural_image
Line drawing of a kitchen appliance with a lid and internal compartments (no text or symbols)Pratique
natural_image
Illustration of hands using a water dispenser to lift a cup (no text or symbols)Écono-énergie
natural_image
Line drawing of a rice cooker with control panel and side door (no text or symbols)Réébullition
natural_image
Illustration of a hand using a device to lift a machine, with a gray X symbol below (no text or symbols present)Réservoir intérieur
natural_image
Line drawing of a hand using a tool to apply a small object to a conical object (no text or symbols present)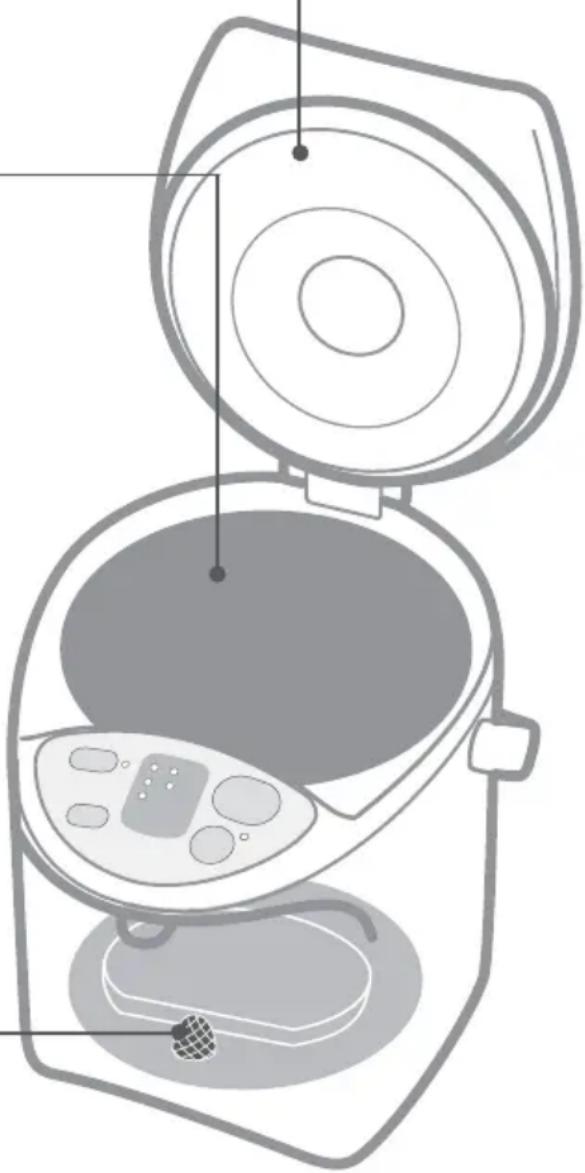
natural_image
Diagram of a portable kitchen appliance with open lid and internal compartments (no text or labels)Rangement de la bouilloire
natural_image
Diagram showing a container with internal components and an upward arrow, no text or symbols presentPanasonic Corporation of North America
USA : http://www.panasonic.com/consumersupport
CANADA : http://www.panasonic.ca
PZ05A6101
SP1107M0

- Operating Instructions
- 使用說明書
- 目錄
- SAVE THESE INSTRUCTIONS
- Note:
- 重要的安全措施
- Convenient
- Economy use
- WARNING
- CAUTION
- To Prevent Burns
- Power Cord
- Never do anything that might cause damage to the cord, power plug or body plug,
- Do not connect or disconnect the power plug or the body plug with wet hands.
- Make sure the power plug is correctly inserted into the wall outlet.
- Clean dust from the power plug or the body plug regularly.
- Use a single outlet that matches the power rating of the unit.
- During use
- Do not immerse the unit in water or splash water over it.
- Never disassemble, repair or modify the unit.
- Do not use to store ice.
- Part Names and Handling Instructions
- Operation panel
- Mesh filter
- (Replaceable part)
- Rotating base (360 degrees)
- How to Open/Remove
- Overheating Protection
- Cause
- How to cancel the display
- Notice
- How to Use
- Before you use this pot for the first time
- To reduce the chlorine in the water (Long Boil)
- Securely plug the body plug horizontally into the body.
- Plug into wall outlet. (1 → 2)
- Time required to boil water (approx.)
- Press the
- Press Key and dispense the hot water.
- When the unit is not in use
- Unplug, and remove the lid. Pour out any remaining hot water slowly via
- the DRAKN
- Cautions
- Convenient use methods
- Reboil
- Keep-warm Function
- Setting the 6h timer
- Time required for the reboil procedure
- Flashing
- Time required to reach the setting keep-warm temperature
- Daily Maintenance
- Main unit and lid
- Clean with a damp, well-wrung cloth.
- Inner container
- Clean with a wet sponge.
- About "Scale"
- Clean the filter with a brush.
- When storing the unit
- Make sure that the mesh filter is attached to the container.
- Put citric acid in the inner container.
- Add water to the maximum water level mark, and mix the citric acid and water well. Close the lid.
- Connect the plug immediately after stirring and press the key more than 3 seconds.
- Dispense some water, then unplug, remove the lid and throw away the hot water via the "DRAIN" mark.
- Refill with water and boil it to remove the smell of the citric acid or lemons. Then throw the hot water away in the same way as in step 5.
- Troubleshooting
- If... Causes
- Possible cause
- Replacement of Parts
- Rubber gasket set
- Specifications
- 主要特點
- 味道
- 方便
- 使用經濟
- 電源軟線
- 如何打開/拆卸
- 再沸騰
- 内瓶
- 用濕海綿清洗。
- 儲存時
- Pratique
- Écono-énergie
- Réébullition
- Réservoir intérieur
- Rangement de la bouilloire
Brand : PANASONIC
Model : NCEH40PC
Category : Kettle