
WorkCentre 7346V AZ - Printer XEROX - Free user manual and instructions
Find the device manual for free WorkCentre 7346V AZ XEROX in PDF.
| Product Type | Multifunction printer (copy, print, scan, fax) |
| Brand | Xerox |
| Model | WorkCentre 7346V AZ |
| Dimensions (W × D × H) | 640 × 700 × 1130 mm (estimate for 7300 series) |
| Weight | Approximately 132 kg (estimate) |
| Power Supply | 220–240 V AC, 50/60 Hz, max. 2.2 kW |
| Main Functions | Copy, print, scan, fax (LAN) |
| Touch Screen | Yes, for programming and instructions |
| Paper Trays | 5 trays (3 standard, 2 optional) + bypass tray |
| Capacity of Trays 1-2 | Adjustable sizes (A4, Letter, etc.) |
| Trays 3-4 High Capacity | Only A4 or 8.5 × 11 inches |
| ID Card Copy | Yes, duplex on one sheet |
| Booklet Creation | Yes (Special Presentation option) |
| LAN Fax | Yes, via printer driver |
| Scan to Network Directory | Yes (option) |
| Authentication and Accounting | Auditron mode: up to 1000 user accounts |
| Cover Pages | Yes, can be enabled in print properties |
| Billing Counters | Yes, accessible via Machine Status |
| Replaceable Toner Cartridge | Yes, procedure described (open front panel, rotate) |
| Maintenance and Cleaning | Follow instructions in manual; avoid spilling toner |
| Security | Password authentication, user accounts |
Frequently Asked Questions - WorkCentre 7346V AZ XEROX
User questions about WorkCentre 7346V AZ XEROX
0 question about this device. Answer the ones you know or ask your own.
Ask a new question about this device
Download the instructions for your Printer in PDF format for free! Find your manual WorkCentre 7346V AZ - XEROX and take your electronic device back in hand. On this page are published all the documents necessary for the use of your device. WorkCentre 7346V AZ by XEROX.
USER MANUAL WorkCentre 7346V AZ XEROX
Microsoft, MS-DOS, Windows, Windows NT, Microsoft Network, and Windows Server are either trademarks or registered trademarks of Microsoft Corporation in the United States and/or other countries.
Novell, NetWare, IntranetWare and NDS are registered trademarks of Novell, Inc. in the United States and other countries.
Adobe, Acrobat, PostScript, PostScript3, and PostScript Logo are trademarks of Adobe Systems Incorporated.
Apple, AppleTalk, EtherTalk, LocalTalk, Macintosh, MacOS and TrueType are trademarks of Apple Computer, Inc., registered in the U.S. and other countries.
HP, HPGL, HPGL/2, and HP-UX are registered trademarks of Hewlett-Packard Corporation.
All product/brand names are trademarks or registered trademarks of the respective holders.
The data saved in the hard disk of the machine may be lost if there is any problem in the hard disk. Xerox is not responsible for any direct and indirect damages arising from or caused by such data loss. Xerox is not responsible for any breakdown of machines due to infection of computer virus or computer hacking.
Important(1) This manual is copyrighted with all rights reserved. Under the copyright laws, this manual may not be copied or modified in whole or part, without the written consent of the publisher.(2) Parts of this manual are subject to change without prior notice.(3) We welcome any comments on ambiguities, errors, omissions, or missing pages.(4) Never attempt any procedure on the machine that is not specifically described in this manual. Unauthorized operation can cause faults or accidents.
Xerox is not liable for any problems resulting from unauthorised operation of the equipment.
An export of this product is strictly controlled in accordance with Laws concerning Foreign Exchange and Foreign Trade of Japan and/or the export control regulations of the United States.
Xerox and Ethernet are registered trademarks.
NOTE: BLUE title is for IT administrator type personnel, GREEN for end users and RED means machine needs attention. Depending on the configuration of the machine, some User Interface screens may vary.
Table of Contents
Control Panel 3
Tray Settings 5
7
ID Card Copying 9
Replacing the Toner Cartridges 27
3
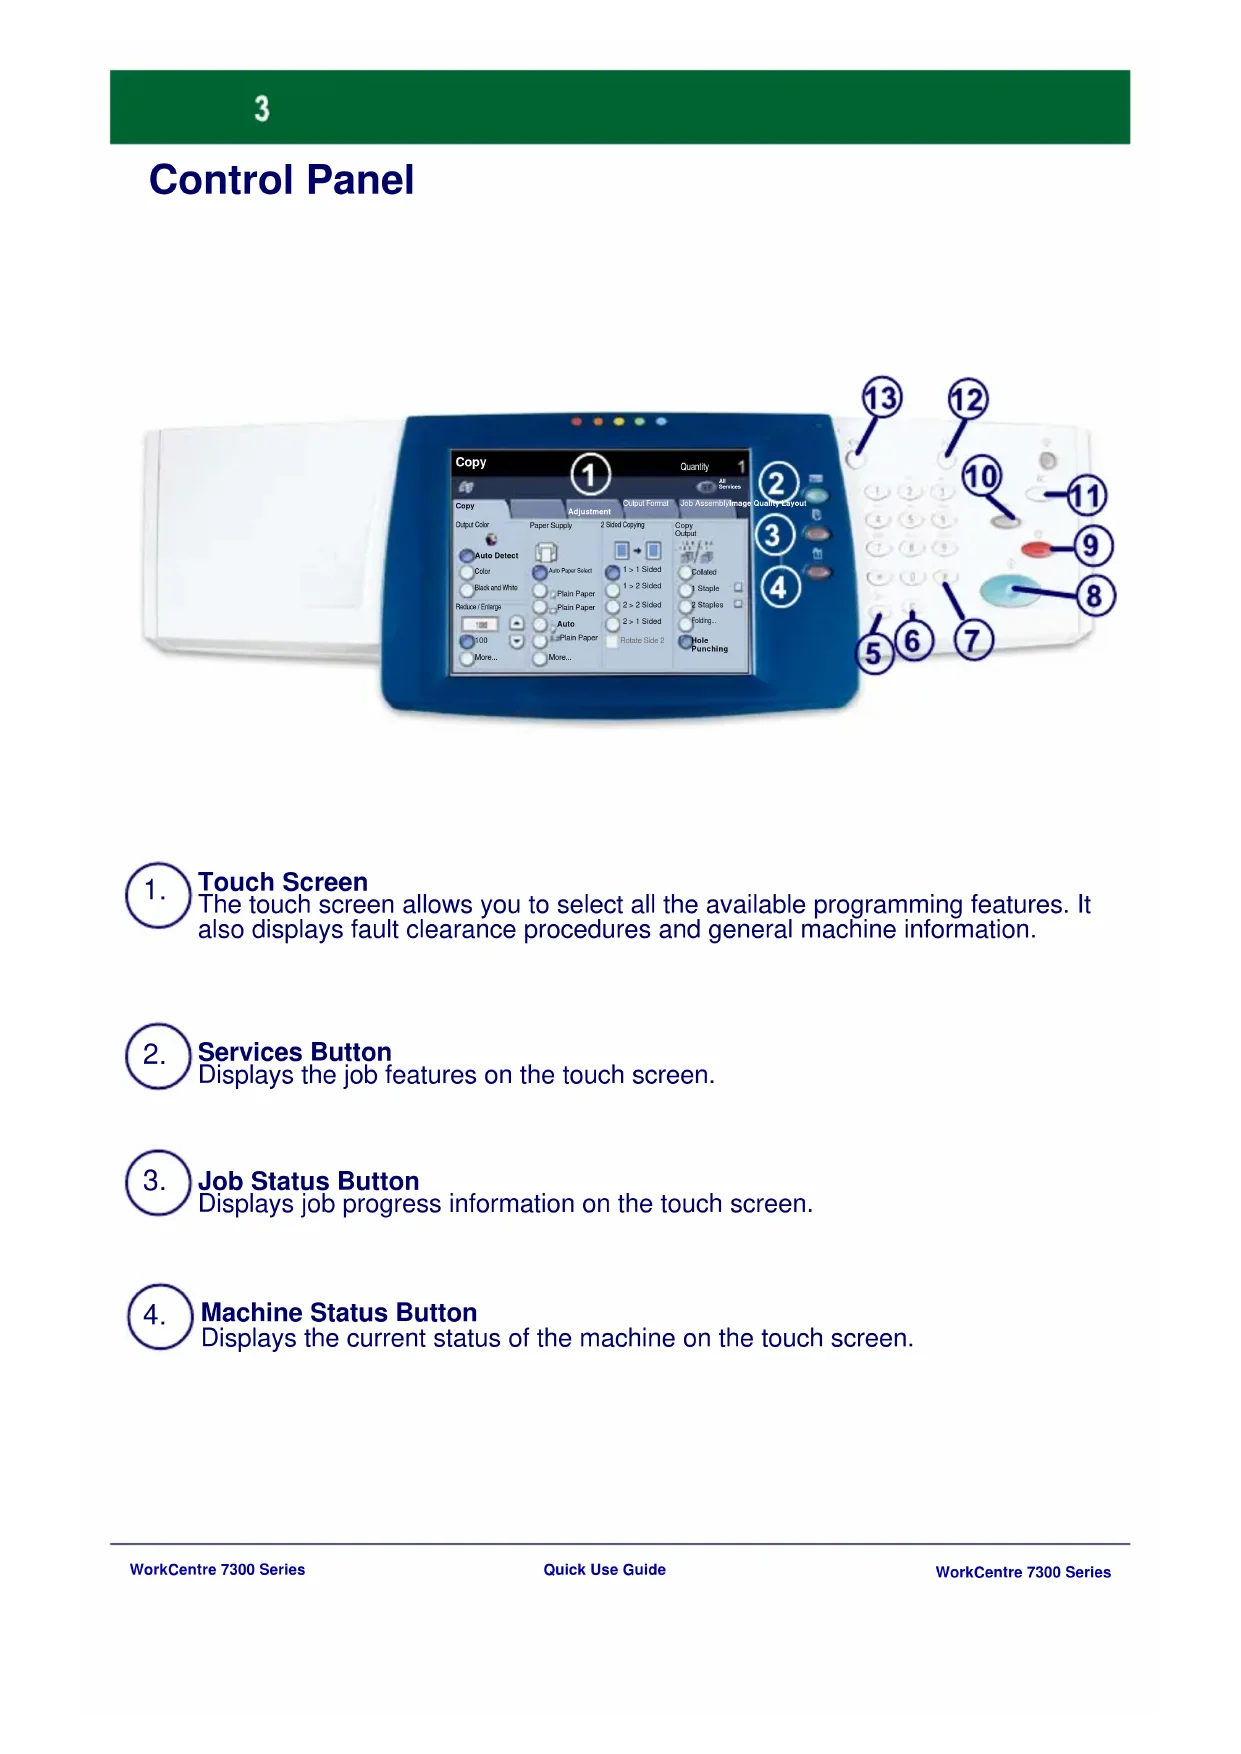
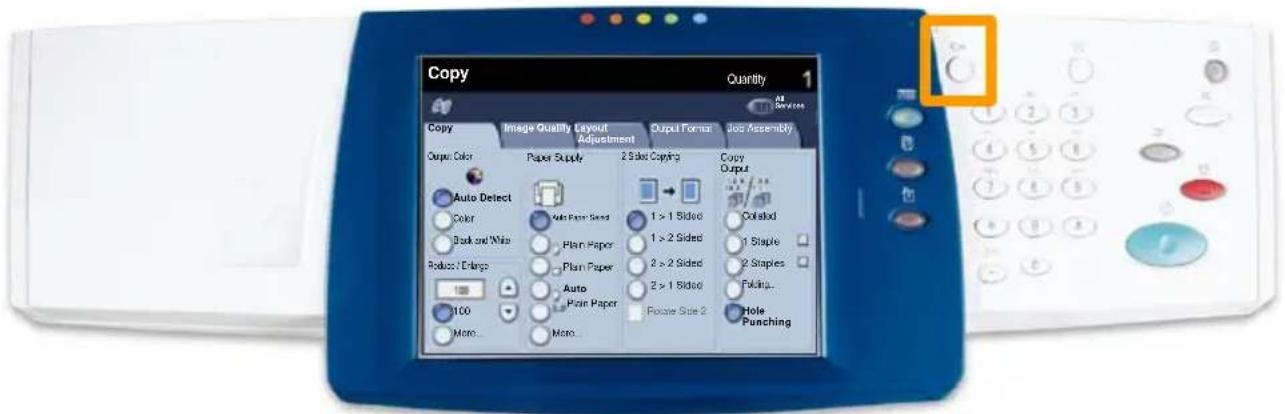
Control Panel
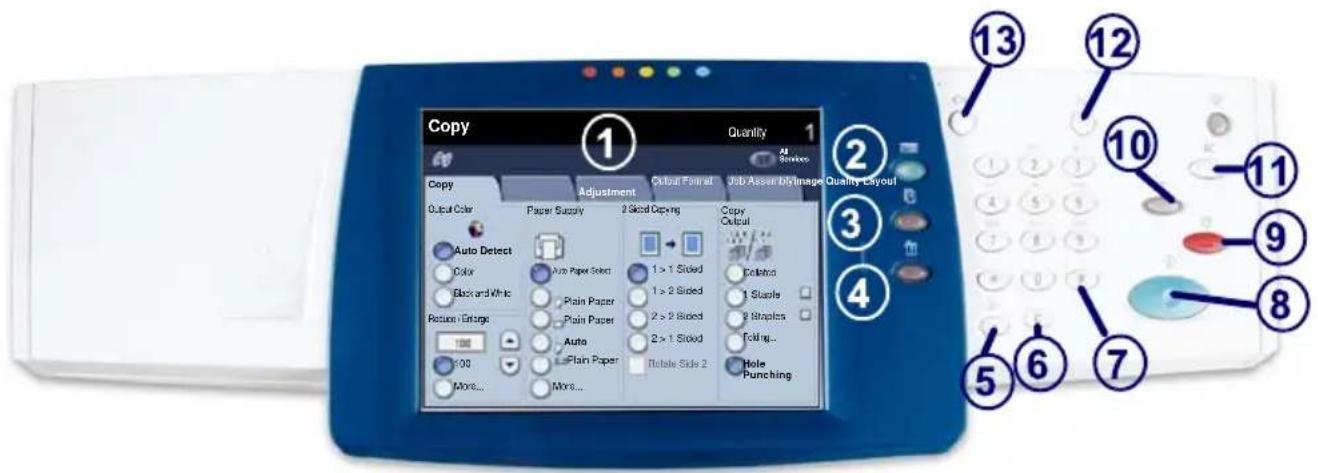
Touch Screen
The touch screen allows you to select all the available programming features. It also displays fault clearance procedures and general machine information.
2. Services Button
Displays the job features on the touch screen.
3. Job Status Button
Displays job progress information on the touch screen.
4. Machine Status Button
Displays the current status of the machine on the touch screen.
Control Panel

Dial Pause
Enters a pause in a telephone number when transmitting a fax.

Clear
- Deletes numeric values or the last digit entered.

(Pound)
Indicates the dialing character or designates a group dial number.

Start
Starts the job.

Stop
Temporarily stops the current job. Follow the message to cancel or resume your job.

Interrupt
Temporarily stops the current copy job to allow a priority job to be run.

Clear All
If pressed once, resets the default settings and displays the first screen for the current pathway. If pressed twice, resets all the features to their machine default settings.

Language
Changes text to an alternative language (when available).

Log In/Out
Provides password protected access to the Tools used to adjust the defaults of the machine.
Tray Settings
There are 3 standard paper trays and 2 optional paper trays, designed to use a variety of paper and other media. The bypass tray and trays 1 and 2 are fully adjustable trays and can hold a variety of paper sizes. Trays 3 and 4 are high capacity feeders holding 8.5'' x 11'' or A4 paper sizes only.
When a paper tray is opened, your machine assumes that more paper is to be loaded. Depending on the machine setup, the touch screen displays a pop-up window, giving the option to change the paper and its attributes, or load more of the same paper.
Before loading paper into the paper trays, fan the edges. This procedure separates any sheets of paper that are stuck together and reduces the possibility of paper jams.
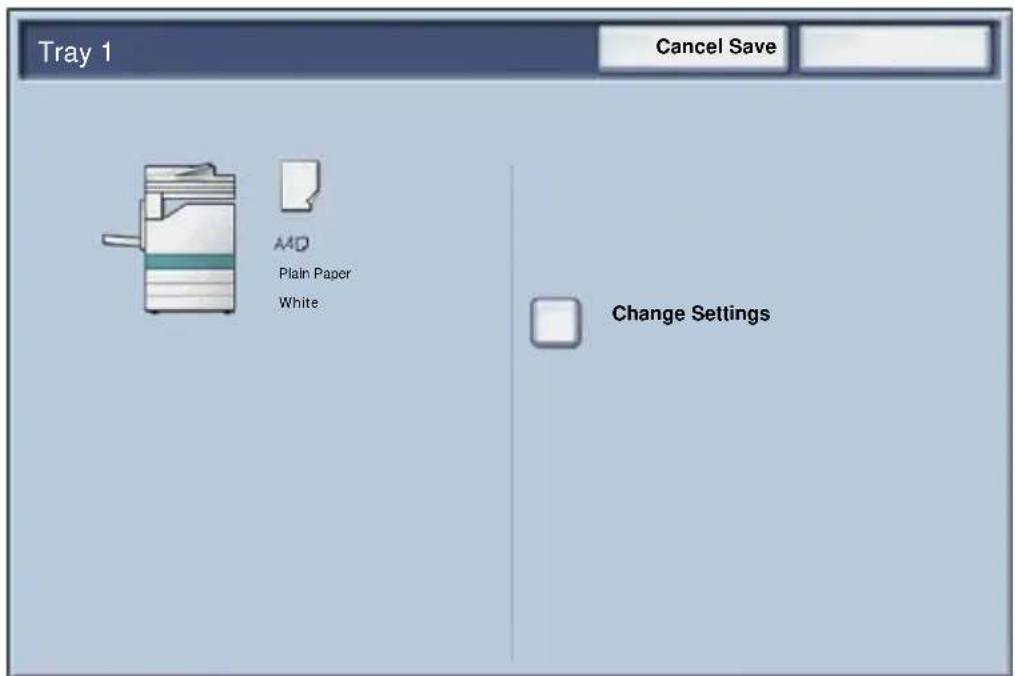
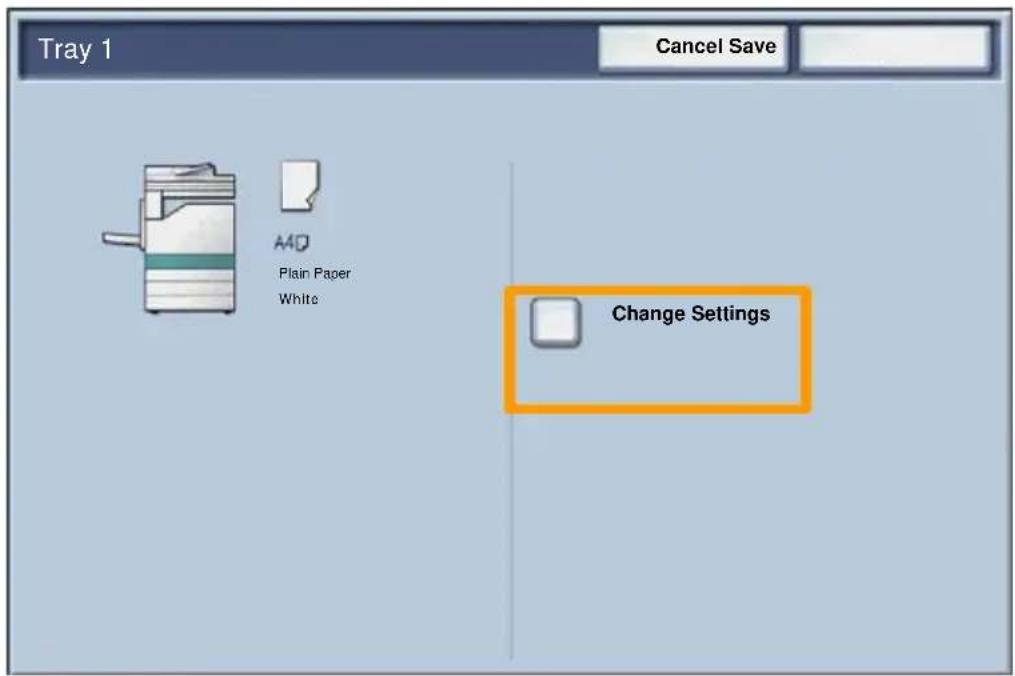
Tray Settings
The tray information screen will be displayed on the touch screen. If the tray information is correct select the Confirm button. Alternatively change the paper size or paper type by selecting the Change Settings button on the touch screen.
That completes the procedure for loading the paper tray.
Booklet Creation
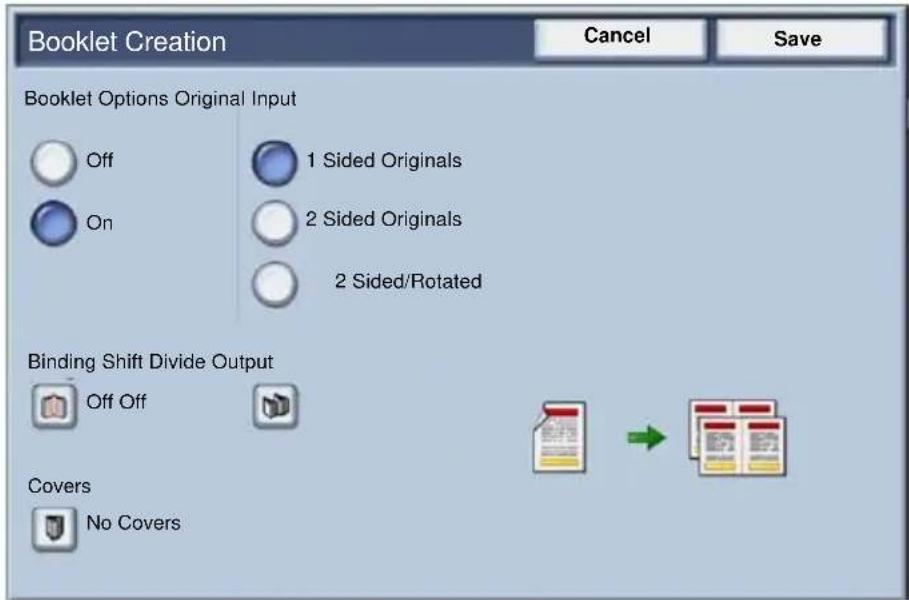
The Booklet Creation feature enables the production of booklets or multi-page copies from 1 or 2-sided originals. The machine will scan your originals and automatically reduce and arrange the images in the correct sequence on your selected copy paper so that a booklet is created when the copy set is folded in half.
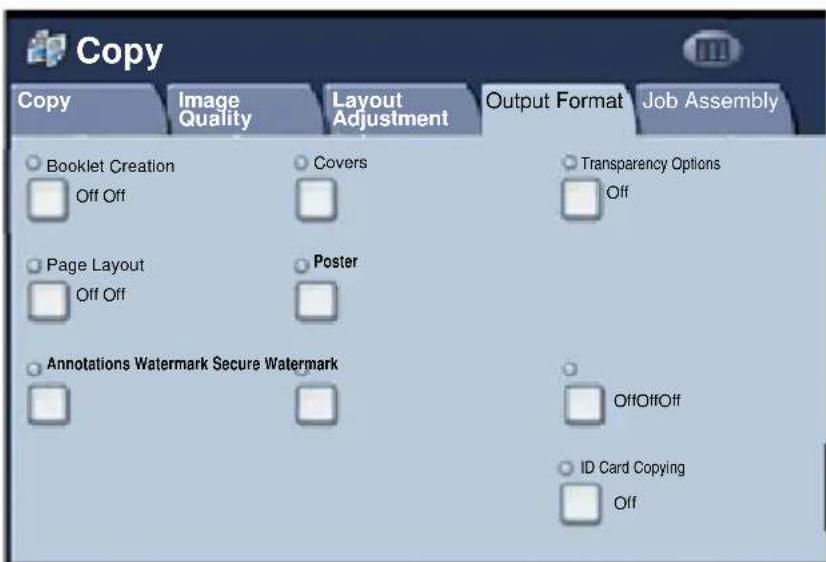
The Booklet creation feature is switched on from a button on the Output Format tab.
When Booklet creation is switched on, you need to tell the machine that your originals are 1-sided or 2-sided. When you have made your selection you must select Save so that you can program any other features you may require from the control panel.
Switch on Booklet creation by selecting the Output Format tab, the Booklet Creation button and the On button.
Booklet Creation
There are 2 simple rules that must be followed when making booklets:
- First select the tray that contains the paper you want to use.
- Always load your documents with the long edge to the left.
ID Card Copying
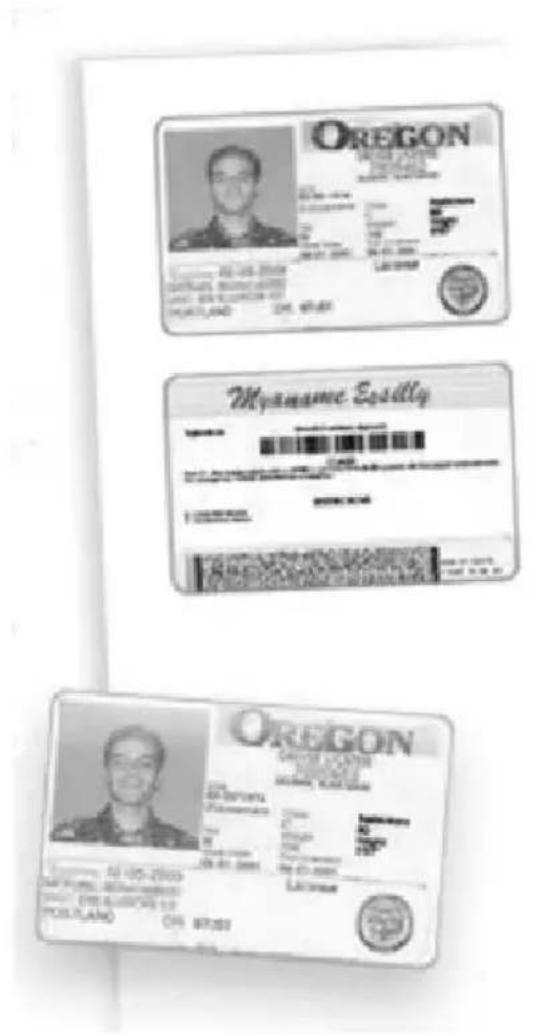
Whether needing to copy insurance cards, a driver's license, or any other form of identification, the ID Card Copying feature offers a simple and efficient way to save time.
Information on both sides of the ID Card can be copied onto one side of one sheet of paper, without the need to reload the paper into the paper or bypass tray.
ID Card Copying
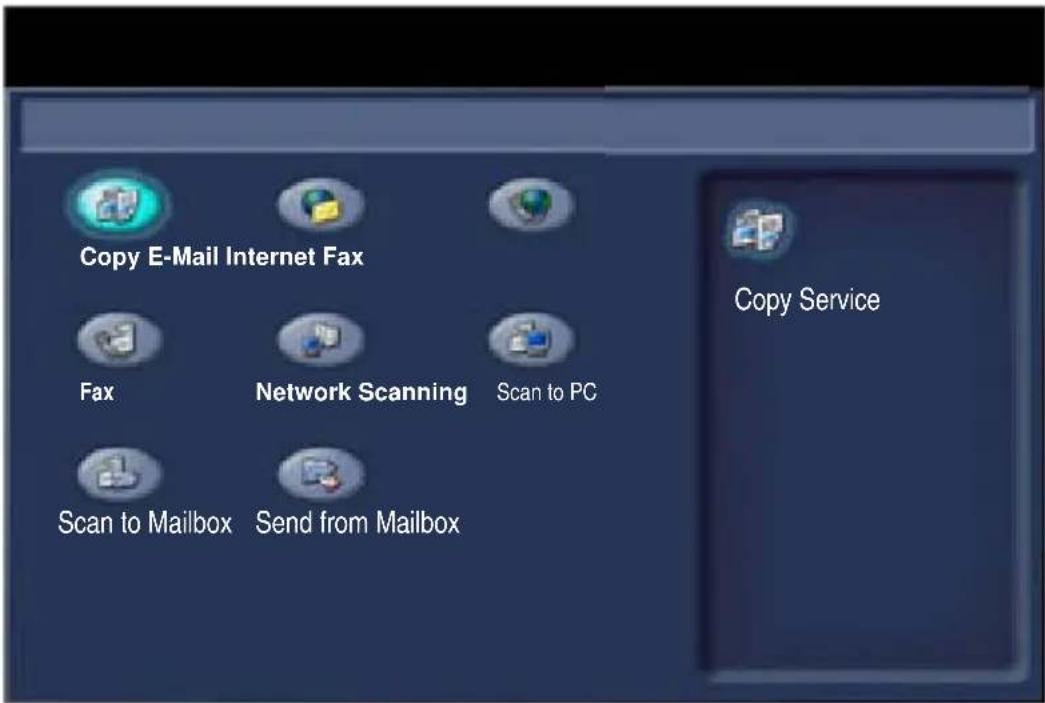
- Pressing the Clear All (AC) button once will cancel any previous screen programming selections.
Select the All Services icon, then select the Copy icon.
ID Card Copying
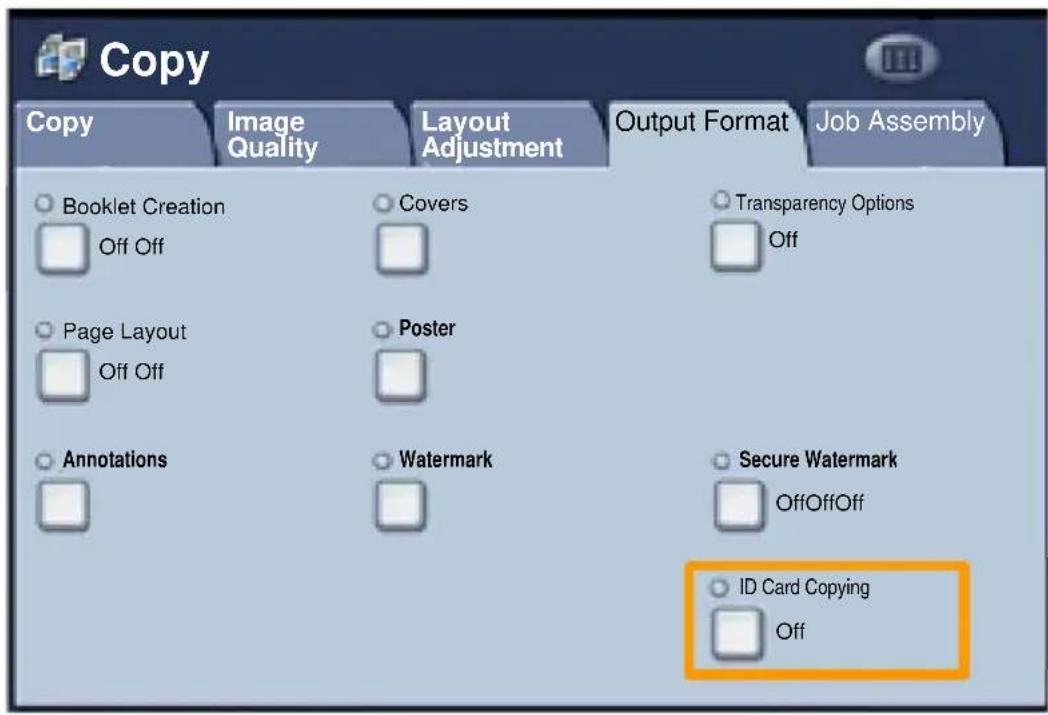
- The ID Card Copying option is accessed from a button on the Output Format tab.
Access the ID Card Copying feature by selecting the Output Format tab, then the ID Card Copying button.
ID Card Copying
- Follow the instructions below to complete the ID Card Copy process:
Step 1.
Lift the Document Feeder and place the ID Card on the top left corner of the document glass. Gently lower the Document Feeder.
Step 2.
Use the number keypad to enter the number of copies you require.
Step 3.
Press Start to begin scanning side 1.
Step 4.
Lift the Document Feeder and turn the ID Card over to copy side 2. Gently lower the Document Feeder.
Step 5.
Press Start to begin scanning side 2. Printing begins and copies are delivered into the Output Tray.
Simple LAN Faxing
- Open the Print Driver
- Select Fax as Job Type
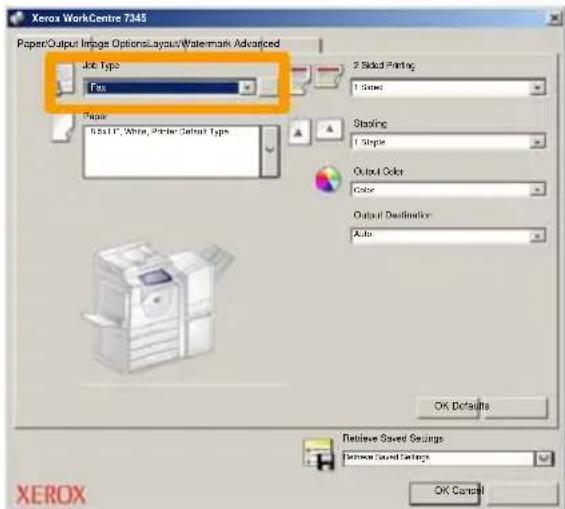
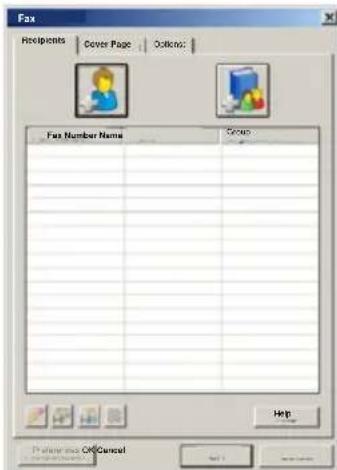
- Enter the Recipient Details
Simple LAN Faxing
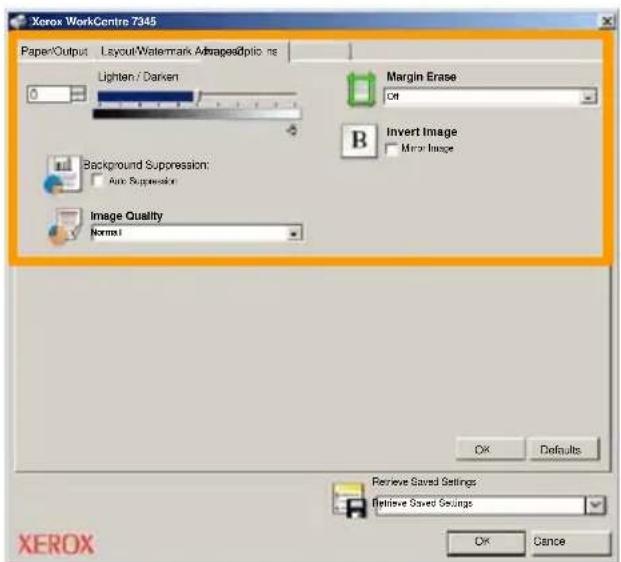
4. Set the Fax Options
5. Send the Fax
When you have selected all the options you require, select OK. Select OK on the print driver screen and OK on the Print Screen. The Fax Confirmation screen will appear with the list of recipients you have chosen. If the details are correct, select the OK button and your fax will be submitted to the machine fax queue ready to be transmitted.
Using,Th弹簧 Preview
Thamburger Preview is an optional feature and may not be available on your machine. Contact your system administrator to set up this feature on your machine.
- Select the Send from Mailbox icon.
- Select the Mailbox Name.
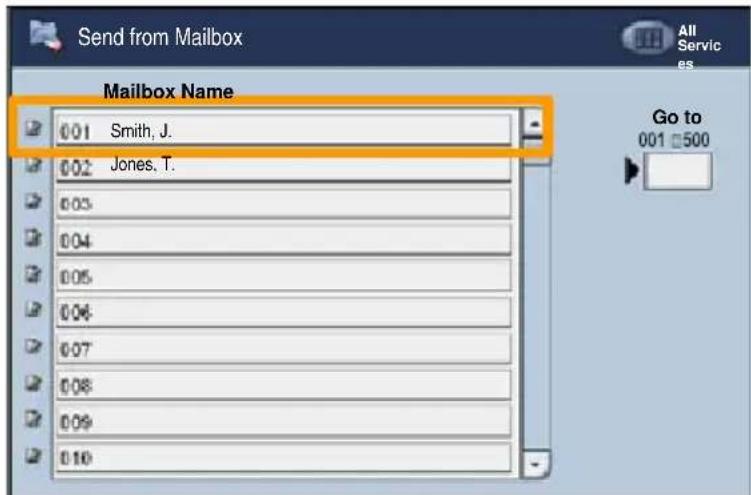
- Select the Document Name.
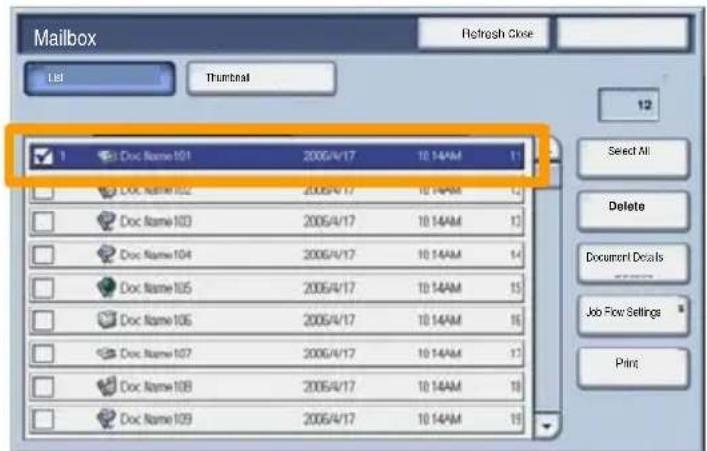
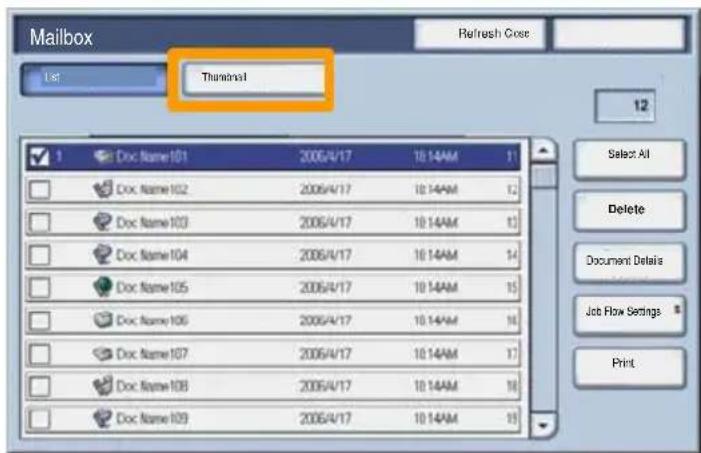
Using,Th弹簧 Preview
4. Select Thumbnail.
5. Select Print.
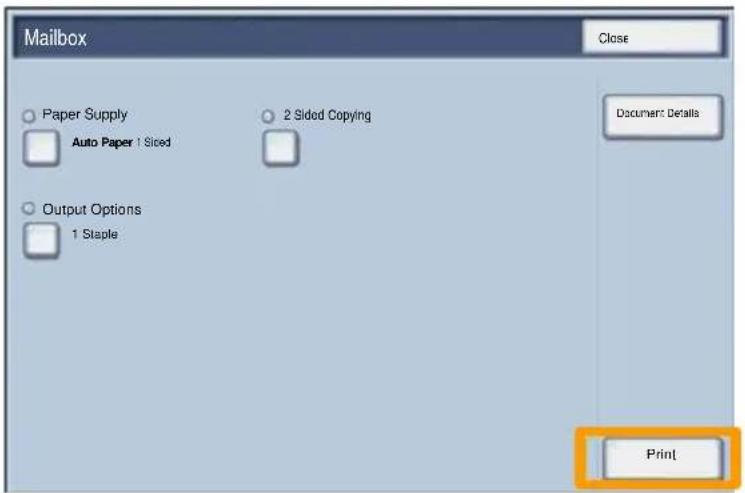
6. Select the Paper Supply, Output, and 2 Sided Printing Options
7. Select Print
Scan to Home
Scan to Home is an optional feature which allows a user to scan hard copy originals at the device and send them to a destination on the network which is specified as their "Home" destination.
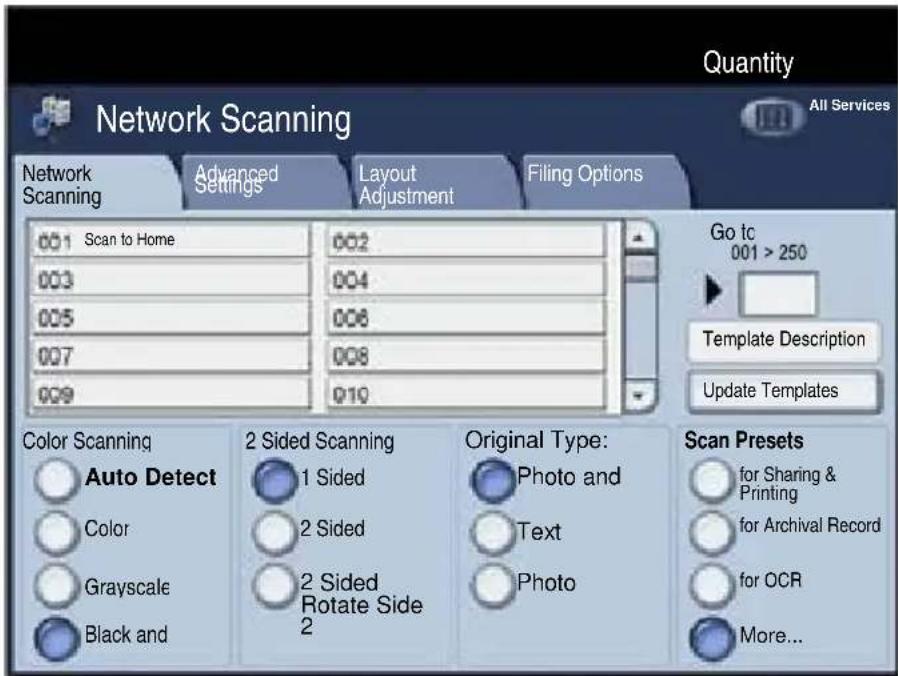
To use this option, the user must first enter their Network Authentication login at the device. The device displays one Scan to Home template. When a document is scanned, the authentication server produces the information as to who is logged in at the device.
Scan to Home
Network Scanning must be installed before using this feature, but it is not necessary for the repositories and templates to be configured.
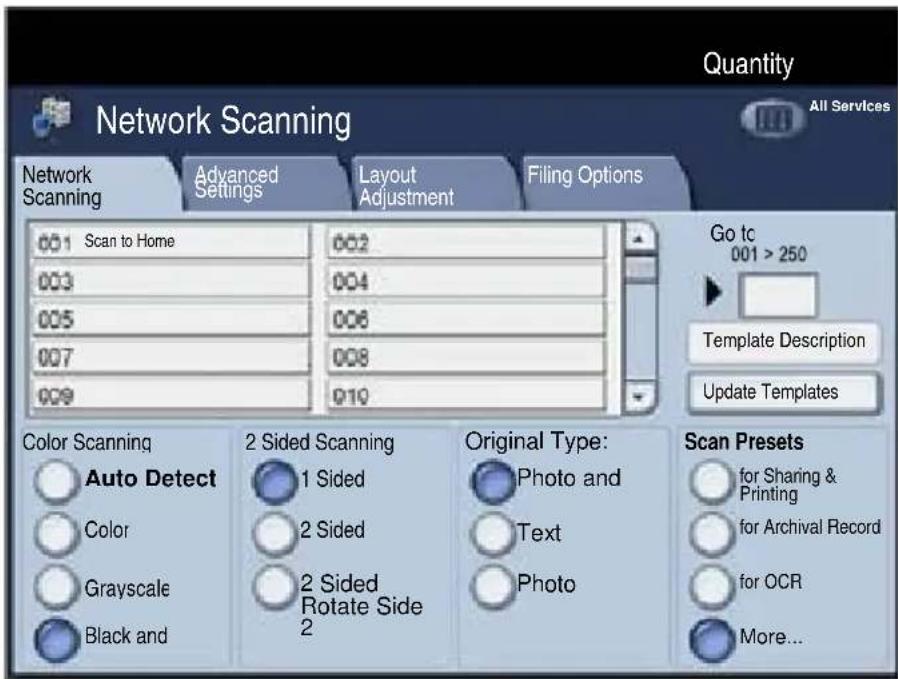
The system administrator enables the feature using Internet Services. They also have to enable Network Authentication for this feature to be available. Lightweight Directory Application Protocol (LDAP) connectivity may also be used.
19
Auditron Setup
To setup Auditron you must first create user accounts and then enable Auditron. Users will then be required to enter the User ID setup with their account to perform certain machine functions. You can create up to 1000 accounts.
All user accounts must have the following defined:
- User ID
- User Name
- Feature Access
- Account Limit
Once accounts are defined and created, enable the desired accounts to begin Auditron usage. User IDs and User Names must be unique from other User IDs and User Names.
Auditron Setup
You can enable Auditron Mode for copy, scan, fax, or print. When Auditron Mode is enabled, the user must select the Log In/Out button and enter the appropriate User ID to start using the machine.
Auditron Setup
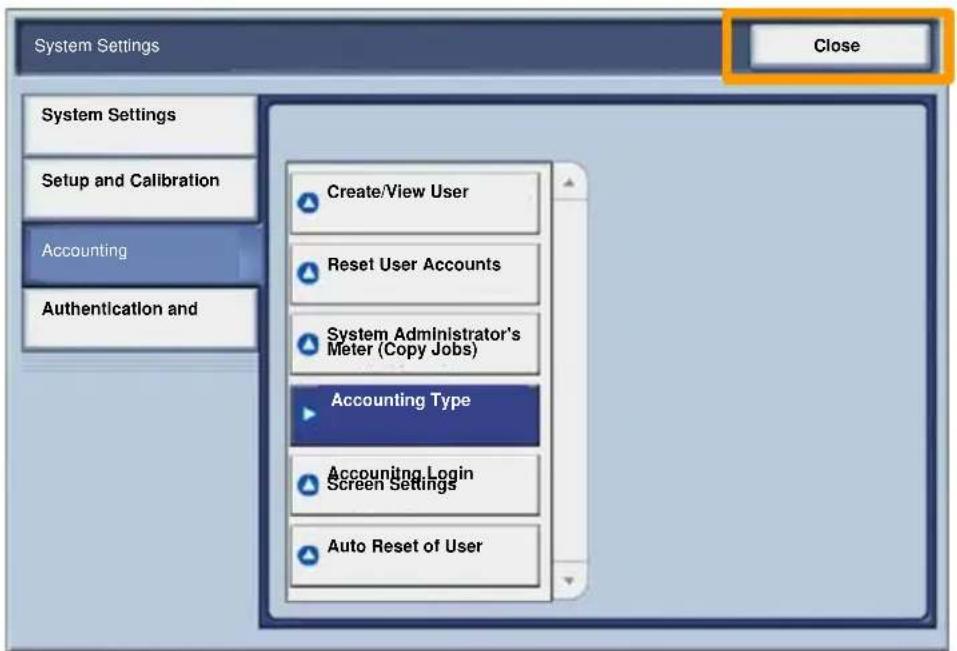
- To access the Auditron mode, touch the Tools tab, then select Accounting.
Under the Group heading, touch Accounting Type, then touch Local Accounting.
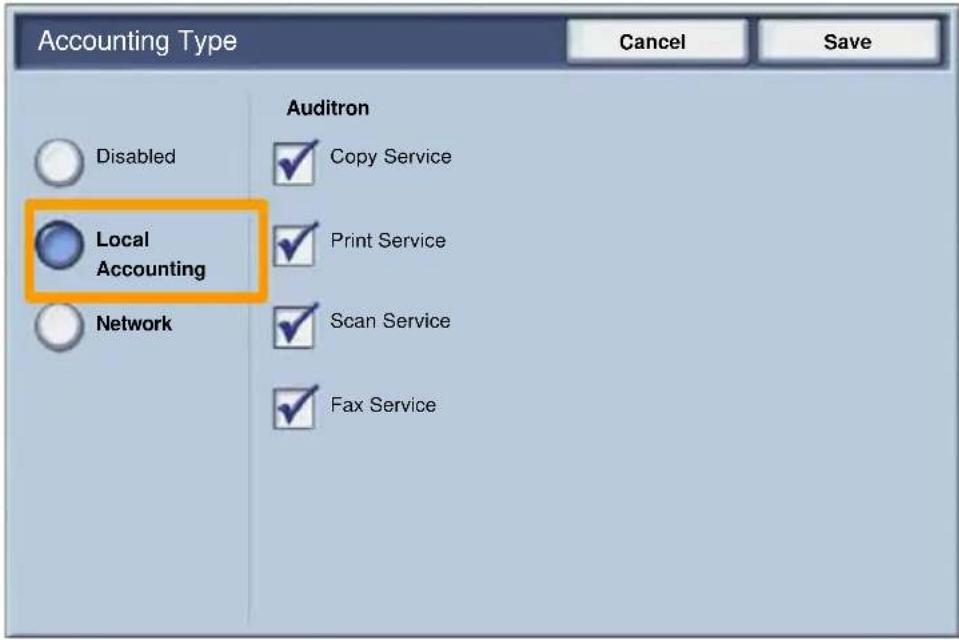
Auditron Setup
- Touch the Save button.
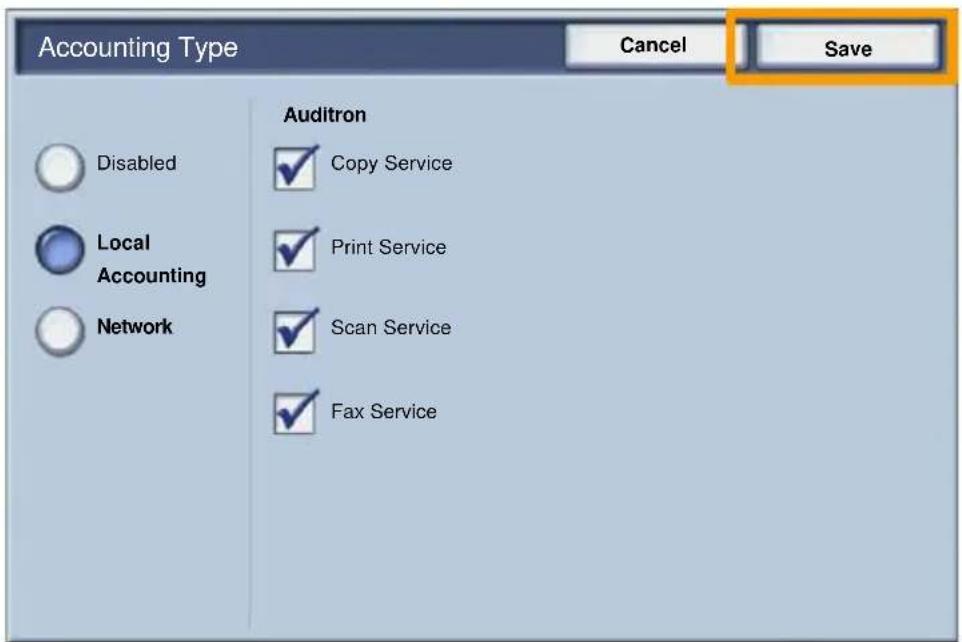
- Select the Close button.
Banner Sheets
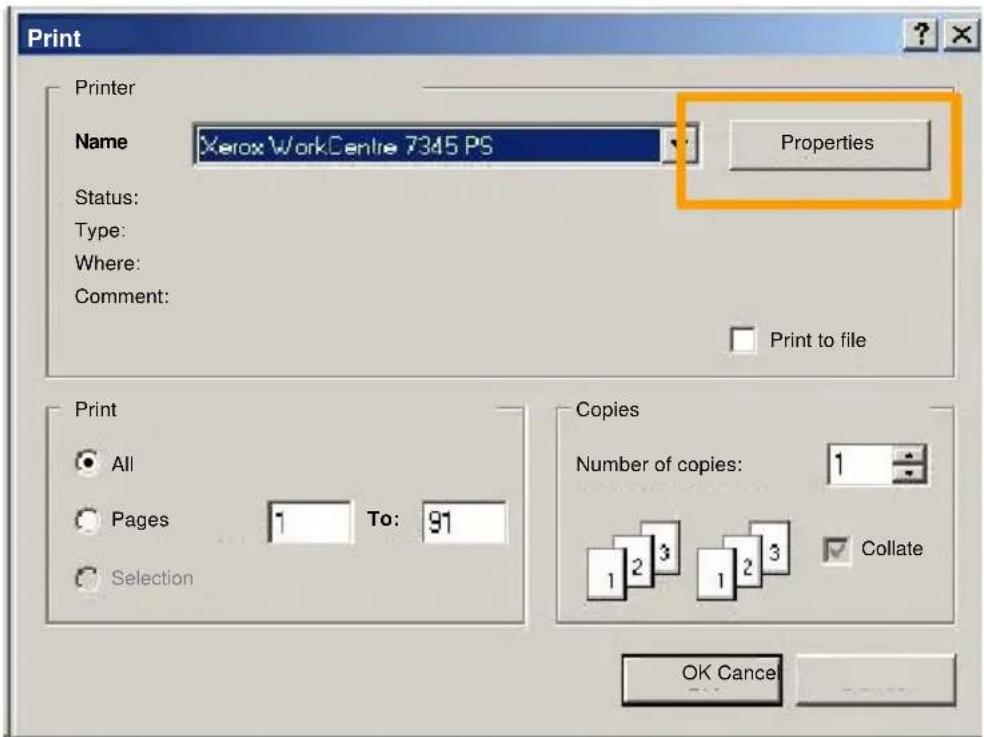
1. Open the Print Driver
- Select the Properties button to open the printer properties dialogue box.
NOTE: The printer properties dialogue window will vary according to the driver you are using and the user interface selected. This is the WorkCentre 7345 PS version in Enhanced UI mode which will be used here for demonstration purposes. The major features and options will be available on all drivers but there are some differences.
Banner Sheets
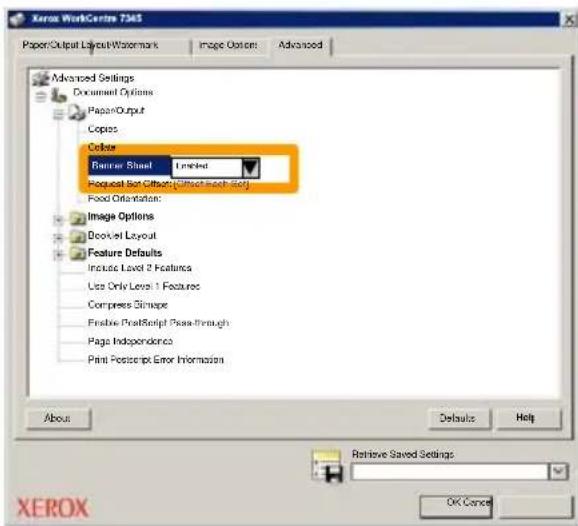
3. Select the Advanced tab.

4. Choose Enabled if you want a Banner Sheet to be provided with each print job.
Billing Meters
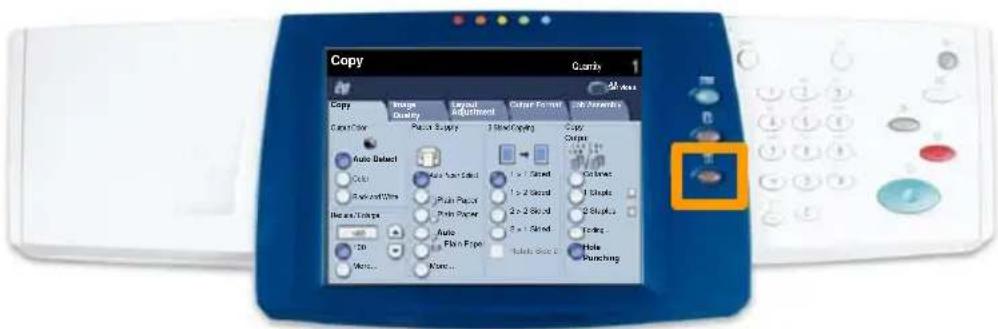
The Billing Meters screen provides access to machine usage and billing information. The meters vary depending on your machine configuration and setup.
To access the Billing Meters:
- Select the Machine Status button.
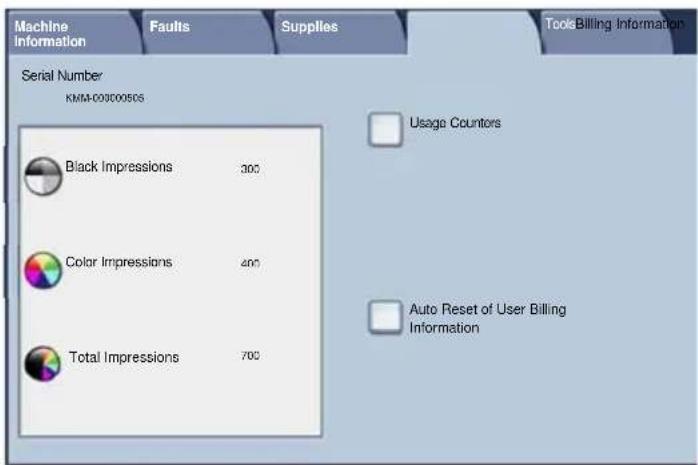
Billing Meters
- Select the Billing Information tab.
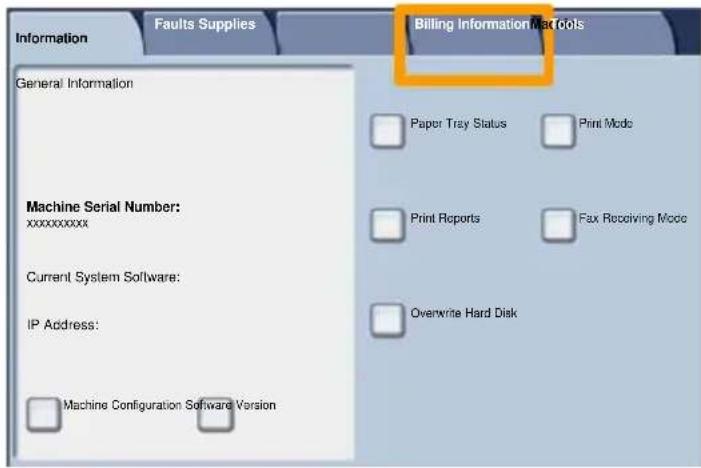
- The Billing Meters are displayed.
Replacing the Toner Cartridges
This procedure shows you how to remove a used toner cartridge and replace it with a new toner cartridge. The machine will tell you when you will need to order a new cartridge and when to install it.
Follow the disposal instructions for the old cartridge when
-
Open the Front Door.
-
Turn the toner cartridge counter clockwise to the unlocked position.
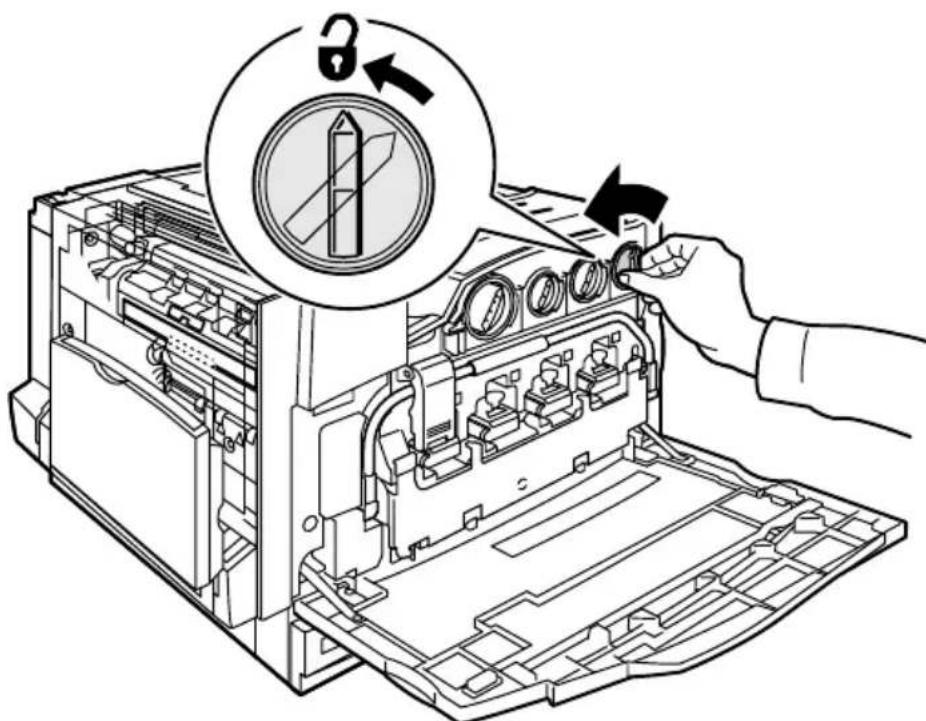
Replacing the Toner Cartridges
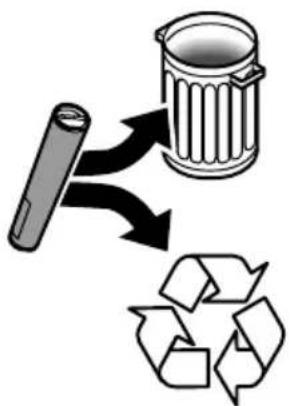
- Remove the toner cartridge by pulling it straight out. Be careful to not get toner on clothing.
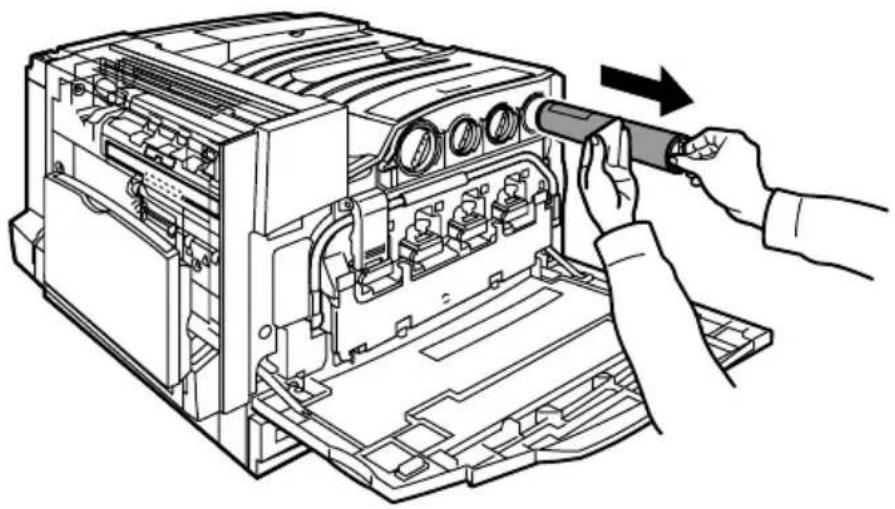
- Dispose the toner cartridge as normal office waste or recycle the cartridge.
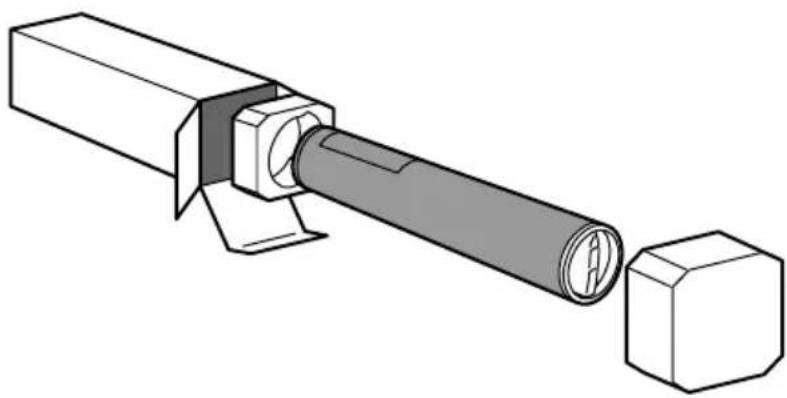
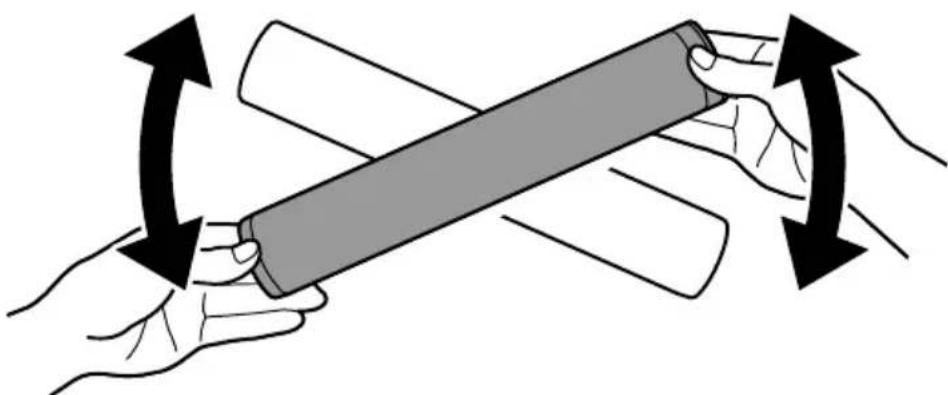
Replacing the Toner Cartridges
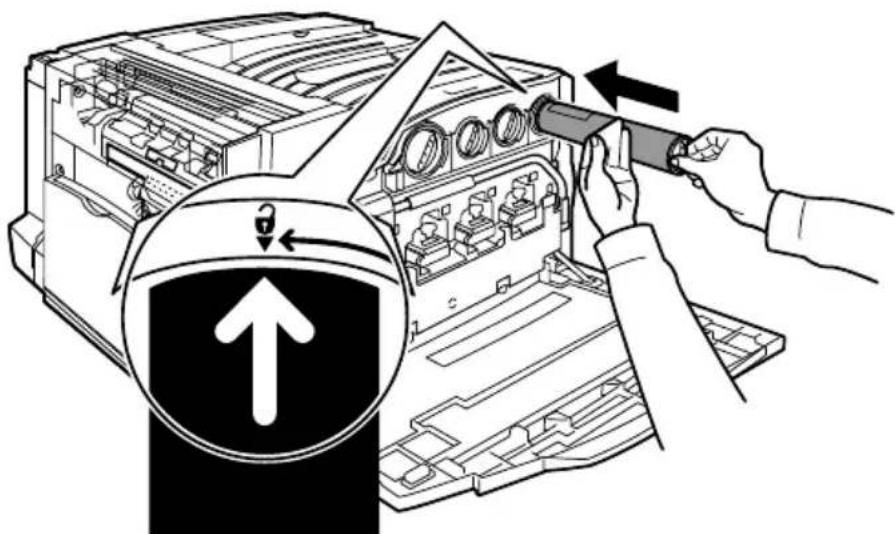
- Remove the new toner cartridge from its packaging.
- Shake the new toner cartridge several times in an up and down twisting motion to redistribute the toner.
Replacing the Toner Cartridges
- Install the toner cartridge by aligning the arrows on the cartridge with unlock symbol on the printer. Make sure the cartridge is fully installed then turn the cartridge clockwise to the locked position.
- Close the Front Door. If the door will not close completely, make sure the cartridge is in the lock position and the toner cartridge is installed into the appropriate toner location.
That completes the procedure for replacing the toner cartridge.

C recreation cahier 7
- Table of Contents
- Control Panel
- Touch Screen
- Services Button
- Job Status Button
- Machine Status Button
- Dial Pause
- Clear
- (Pound)
- Start
- Stop
- Interrupt
- Clear All
- Language
- Log In/Out
- Tray Settings
- Booklet Creation
- ID Card Copying
- Step 1.
- Step 2.
- Step 3.
- Step 4.
- Step 5.
- Simple LAN Faxing
- Set the Fax Options
- Send the Fax
- Using,Th弹簧 Preview
- Select Thumbnail.
- Select Print.
- Select the Paper Supply, Output, and 2 Sided Printing Options
- Select Print
- Scan to Home
- 19
- Auditron Setup
- Banner Sheets
- Open the Print Driver
- Select the Advanced tab.
- Choose Enabled if you want a Banner Sheet to be provided with each print job.
- Billing Meters
- Replacing the Toner Cartridges
Brand : XEROX
Model : WorkCentre 7346V AZ
Category : Printer