
AutoMax 500C - Shredder FELLOWES - Free user manual and instructions
Find the device manual for free AutoMax 500C FELLOWES in PDF.
| Product Type | Cross-Cut Paper Shredder |
| Brand | Fellowes |
| Model | AutoMax 500C |
| Paper Capacity (A4, 80 gsm) | 500 sheets |
| Cut Size (Cross-Cut) | 4 x 38 mm |
| Security Level | P-4 (estimated) |
| Power Supply | 120 V, 60 Hz, 9.5 A |
| Key Features | SmartLock™, JamGuard System™, Delayed Start (30/60/90 min), Energy-Saving Sleep Mode |
| Detection Type | Infrared sensors for auto-start |
| Additional Shredding Capacity | Staples, paper clips, credit cards, CD/DVD (occasional) |
| Control Panel | Indicator lights: Overheat, Remove Paper, Bin Full, Drawer/Door Open, Delay, SmartLock, Start, On/Off |
| Bin | Removable drawer with SmartLock |
| Maintenance | Monthly oiling with Fellowes oil #35250; clean infrared sensors with rubbing alcohol |
| Safety | Emergency stop switch; auto-stop if overheated, bin full, drawer/door open |
| Warranty | Parts: 2 years; Cutters: 20 years |
| Included Accessories | Fellowes waste bag (part #3608401 recommended) |
| Dimensions (approx.) | Not provided |
| Weight (approx.) | Not provided |
Frequently Asked Questions - AutoMax 500C FELLOWES
User questions about AutoMax 500C FELLOWES
0 question about this device. Answer the ones you know or ask your own.
Ask a new question about this device
Download the instructions for your Shredder in PDF format for free! Find your manual AutoMax 500C - FELLOWES and take your electronic device back in hand. On this page are published all the documents necessary for the use of your device. AutoMax 500C by FELLOWES.
USER MANUAL AutoMax 500C FELLOWES
natural_image
Exterior view of a modern office building (no signage)Please read these instructions before use.
Do not discard: keep for future reference.
Quality Office Products Since 1917

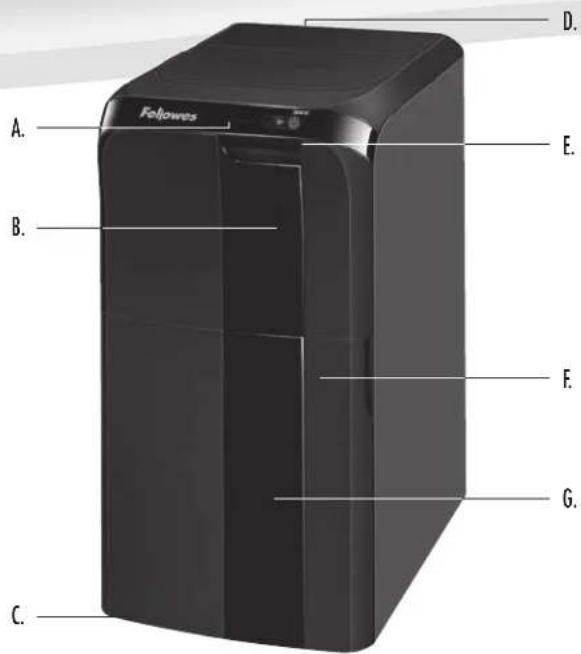
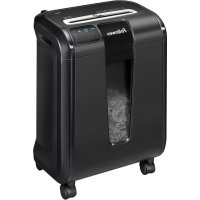
KEY FEATURES AND CONTROLS
A. Control Panel (see below)
B. Shredder Drawer
C. Casters
D. Disconnect Power Switch
100FF
1 2. ON
E. See Safety Instructions
(inside drawer)
F. Bin Door
G. Bin (inside)
CONTROL PANEL
- Overheat (red)
- Remove Paper (red)
- Bin Full (red)
-
Drawer/Bin Door Open (red)
-
Time Delay (blue)
- Smart Lock™ (blue)
- Start (blue)
- On/Off (blue)
500C

1.2.3.


4.

5.6.8.
7.
*300C does not include time delay feature.
CAPABILITIES
WILL SHRED
8-1/2" x 11" paper 8-1/2" x 14" paper
(200 sheets)
Paper clips
Credit cards
Staples
CD/DVD

Junk mail
Crumpled paper
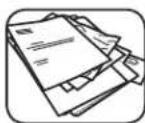
Messy stack of paper
Will not shred: Adhesive labels, continuous form paper, bound documents, transparencies, newspaper, cardboard, binder clips, industrial staples, more than 20 pages stapled or paper clipped together, laminates, 3½ in. Floppies, file folders, X-rays or plastic other than noted above
Paper shred size:
Cross-Cut 5/32 in. x 1-1/2 in. (4mm x 38mm)
SHREDDING MIXED MEDIA

20+ Sheets Stapled – Pull apart stapled stacks of paper containing more than 20 sheets
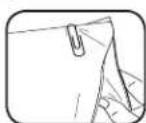
20+ Sheets Clipped – Pull apart clipped stacks of paper containing more than 20 sheets
An occasional CD or DVD is acceptable. Interlace the CD or DVD within a standard paper stack
Materials smaller than 8.5" x 11", interlace small sheets, mailers and credit cards in between standard sheets
Maximum:
500C Paper Capacity (8.5 in. x11 in. paper) 500*
300C Paper Capacity (8.5 in. x11 in. paper) 300 ^-
* 8.5 in. x11 in., 20lb., (75g) paper at 120V, 60 Hz, 9.5Amps; heavier paper, humidity or other than rated voltage may reduce capacity.
WARNING: IMPORTANT SAFETY INSTRUCTIONS — Read Before Using!


- Operation, maintenance, and service requirements are covered in the instruction manual. Read the entire instruction manual before operating shredders.
- Keep away from children and pets. Keep hands away from paper entry. Always set to off or unplug when not in use.
- Keep foreign objects – gloves, jewelry, clothing, hair, etc. – away from shredder openings. If object enters top opening, switch to Reverse (R) to back out object.
- Never use aerosol products, petroleum based lubricants or other flammable products on or near shredder. Do not use canned air on shredder.
-
Avoid touching exposed cutting blades, gears and tacks under shredder head or feed arms.
• Unplug shredder before cleaning or servicing. -
Do not use if damaged or defective. Do not disassemble shredder. Do not place near or over heat source or water.
- This shredder has a Disconnect Power Switch (D) that must be in the ON(I) position to operate shredder. In case of emergency, move switch to OFF (O) position. This action will stop shredder immediately.
- Shredder must be plugged into a properly grounded wall outlet or socket of the voltage and amperage designated on the label. The grounded outlet or socket must be installed near the equipment and easily accessible. Energy converters, transformers, or extension cords should not be used with this product.
- FIRE HAZARD – Do NOT shred greeting cards with sound chips or batteries.
• For indoor use only.
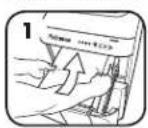
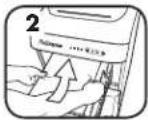
PAPER
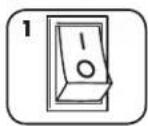
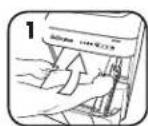
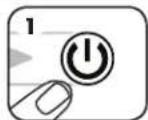
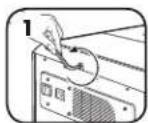
Plug in and put
disconnect power
switch in ON (I) position
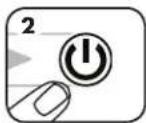
Press (○) ON to activate
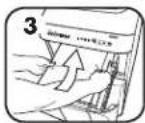
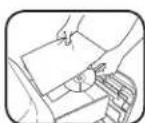
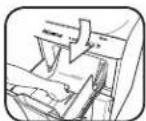
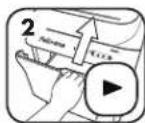
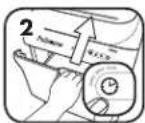
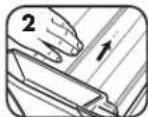
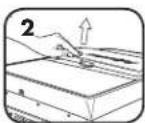
Open drawer and add paper. (Note: Pull firmly to open drawer)
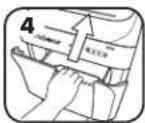
Close drawer
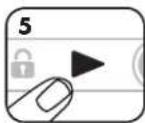
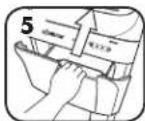
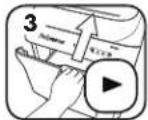
Press start ( ▶to begin shredding. Drawer will lock automatically
After turning the disconnect power switch on, the shredder will run through a start up cycle before ready for use.
ADVANCED PRODUCT FEATURES
JamGuard System™
Prevents shredding interruptions for jam free operation

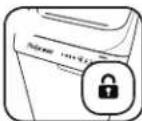
SmartLock™
Engages with each shred cycle to protect confidential information

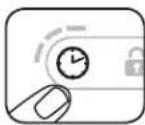
Energy Saving Sleep Mode Feature shuts down the shredder after 2 minutes of inactivity
JAMGUARD SYSTEM™
In the event of a paper jam
PAPER JAM

Shredder will automatically reverse paper and Remove Paper icon will illuminate
Lock icon will turn off and shredder drawer will unlock
Open drawer and remove paper. (Note: Pull firmly to open drawer)
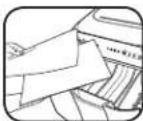
Separate shredded stack, turn stack around so clean, un-shredded edge goes into drawer first
Close drawer and press start to resume shredding

SMARTLOCK™
Engages with each shred cycle to protect confidential information
ENGAGE SMARTLOCK
Open drawer and add paper. (Note: Pull firmly to open drawer)
Close drawer and press
Start to begin shredding
Smart Lock automatically engages. Drawer will lock and Lock icon on control panel will illuminate
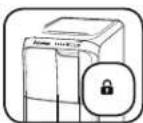
When shred job is complete, Lock icon will turn off and shredder drawer will unlock

Feature shuts down the shredder after 2 minutes of inactivity
WHEN IN SLEEP MODE
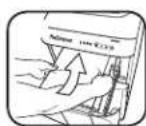
To get out of sleep, open drawer and load paper. (Note: Pull firmly to open drawer)

or
DELAYED START (ON 500C ONLY)
Allows you to delay shredding for 30, 60 or 90 minutes.
DELAYED START
Open drawer and add paper. (Note: Pull firmly to open drawer)
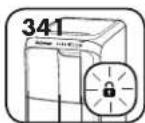
Close drawer and press clock icon on control panel
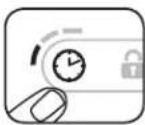
Press once for 30 minute delay (one LED will illuminate)
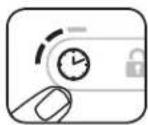
Press twice for 60 minute delay (two LEDs will illuminate)
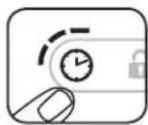
Press three times for 90 minute delay (three LEDs will illuminate)
Press four times to reset clock
**To cancel Delayed Start, press and hold Clock icon for 2 seconds
PRODUCT MAINTENANCE
OILING SHREDDER

All cross-cut shredders require oil for peak performance. Under or over oiling a machine could lead to issues such as diminished sheet capacity, intrusive noise when shredding and it could ultimately stop running. To avoid these problems, we recommend you oil your Fellowes® AutoMax™ shredder once per month.
FOLLOW OILING PROCEDURE BELOW
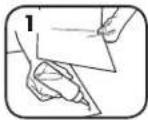
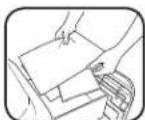
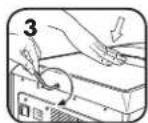
Apply a light coat of oil between two sheets of paper
Open paper feed drawer and place oiled sheets in drawer
Close the paper feed drawer and press start to shred the oiled sheets
CLEANING AUTO-START INFRARED SENSORS
Paper detection sensors are designed for maintenance free operation. However, on rare occasions the sensors may become blocked by paper dust causing the motor to run even if there is no paper present.
(Note: two paper detection sensors are located at the bottom of the paper drawer).
TO CLEAN THE SENSORS
Turn off and unplug shredder
Locate Auto-start infrared sensor
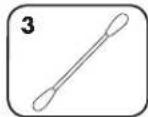
Dip cotton swab in rubbing alcohol
Using cotton swab, wipe away any contamination from the paper sensors

* Only use a non-aerosol vegetable oil in long nozzle container such as Fellowes 35250.

TROUBLESHOOTING

Overheat Indicator: When the Overheat Indicator is illuminated, the shredder has exceeded its maximum operating temperature and needs to cool down. This indicator will remain illuminated and the shredder will not operate for the duration of the recovery time.

Drawer/Bin Door Open: The shredder will not run if the bin is open. When illuminated, close the bin to resume shredding.

Bin Full: When illuminated, the shredder waste bin is full and needs to be emptied. Use Fellowes waste bag 3608401.

Remove Paper: When illuminated, see Paper Jam section under Advanced Product Features.
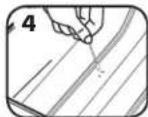
If a critical situation occurs while SmartLock™ is engaged and the shredder drawer needs to be accessed, follow the steps below.
Locate the access screw on the back of the machine and turn counter clockwise with a 6mm allen wrench.
The service hatch will begin to rise. Keep turning until the hatch panel is easily removed from the top of the machine.
To replace the service hatch, position hatch panel back on top of the machine. Hold panel in place while turning the allen wrench clockwise until you feel resistance.
* Shredder will not run if the hatch is not in place. Always replace the hatch to resume shredding.

- Operation, maintenance, and service requirements are covered in the instruction manual. Read the entire instruction manual before operating shredders.

• Unplug shredder before cleaning or servicing.
- Avoid touching exposed cutting blades, gears and tacks under shredder head or feed arms.
In case of a power outage, SmartLock™ will remain engaged. Once power is restored, shred cycle will automatically resume.

LIMITED PRODUCT WARRANTY
Limited Warranty: Fellowes, Inc. ("Fellowes") warrants the parts of the machine to be free of defects in material and workmanship and provides service and support for 2 years from the date of purchase by the original consumer. Fellowes warrants the cutting blades of the machine to be free from defects in material and workmanship for 20 years from the date of purchase by the original consumer. If any part is found to be defective during the warranty period, your sole and exclusive remedy will be repair or replacement, at Fellowes' option and expense, of the defective part. This warranty does not apply in cases of abuse, mishandling, failure to comply with product usage standards, shredder operation using an improper power supply (other than listed on the label), or unauthorized repair. Fellowes reserves the right to charge the consumers for any additional costs incurred by Fellowes to provide parts or services outside of the country where the shredder is initially sold by an authorized reseller. ANY IMPLIED WARRANTY, INCLUDING THAT OF MERCHANTABILITY OR FITNESS FOR A PARTICULAR PURPOSE, IS HEREBY LIMITED IN DURATION TO THE APPROPRIATE WARRANTY PERIOD SET FORTH ABOVE. In no event shall Fellowes be liable for any consequential or incidental damages attributable to this product. This warranty gives you specific legal rights. The duration, terms, and conditions of this warranty are valid worldwide, except where different limitations, restrictions, or conditions may be required by local law. For more details or to obtain service under this warranty, please contact us or your dealer.
FONCTIONS ET CONTRÔLES CLÉS
5.6.8.
7.
GARANTIE LIMITÉE DU PRODUIT
PRINCIPALES CARACTERÍSTICAS Y CONTROLES
Questions or Concerns?
www.fellowes.com
Troubleshooting
Registration
Manuals
Customer Service & Support
Troubleshooting
Replacement parts
General questions
Canada +1-800-665-4339
Mexico +001-800-514-9057
United States +1-800-955-0959


- KEY FEATURES AND CONTROLS
- CONTROL PANEL
- CAPABILITIES
- Paper shred size:
- Maximum:
- WARNING: IMPORTANT SAFETY INSTRUCTIONS — Read Before Using!
- ADVANCED PRODUCT FEATURES
- JAMGUARD SYSTEM™
- SMARTLOCK™
- DELAYED START (ON 500C ONLY)
- PRODUCT MAINTENANCE
- OILING SHREDDER
- CLEANING AUTO-START INFRARED SENSORS
- TROUBLESHOOTING
- LIMITED PRODUCT WARRANTY
- FONCTIONS ET CONTRÔLES CLÉS
- GARANTIE LIMITÉE DU PRODUIT
- PRINCIPALES CARACTERÍSTICAS Y CONTROLES
- Questions or Concerns?
Brand : FELLOWES
Model : AutoMax 500C
Category : Shredder