
Hurricane 75 B - Blower AL-KO - Free user manual and instructions
Find the device manual for free Hurricane 75 B AL-KO in PDF.

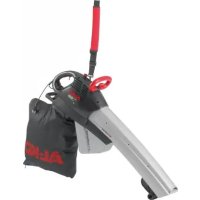
| Brand | AL-KO |
| Model | Hurricane 75 B |
| Product type | Leaf blower / Vacuum |
| Power supply | Unleaded petrol |
| Engine type | 4-stroke petrol engine |
| Engine oil volume | Approximately 0.6 liters |
| Suction height adjustment | Yes, on front wheels |
| Safety stop system | Safety lever (engine brake) |
| Main function | Suction of fallen leaves |
| Use | Gardens, lawns |
| Recommended operating hours | Mon-Sat 7am-12pm and 3pm-7pm |
| Safety instructions | Wear closed shoes, long trousers, keep away children and animals |
| Routine maintenance | Clean after use with a cloth, do not spray water |
| Empty petrol before storage | Yes, outdoors |
| Spare parts | Use exclusively original parts |
| Repairs | Reserved for specialized companies |
| Warranty | Legal, subject to compliance with use |
| Minimum age of use | 16 years |
| Collection bag capacity | Not specified |
| Weight | Not specified |
Frequently Asked Questions - Hurricane 75 B AL-KO
User questions about Hurricane 75 B AL-KO
0 question about this device. Answer the ones you know or ask your own.
Ask a new question about this device
Download the instructions for your Blower in PDF format for free! Find your manual Hurricane 75 B - AL-KO and take your electronic device back in hand. On this page are published all the documents necessary for the use of your device. Hurricane 75 B by AL-KO.
USER MANUAL Hurricane 75 B AL-KO
INFORMATION I MANUALS I SERVICE
LAUBSAUGER HURRICANE 75 B / POWERLINE 750 B
Betriebsanleitung

528123_f | 02/2012

When using leaf sweeper, comply with the following basic safety instructions to protect against risk of injury:
Read and then comply with the operating manual.
- Keep the operating manual for subsequent use or for the next owner.
Follow the safety instructions and warnings.
Users
People under 16 years or people who have not read the operating instructions are not allowed to use the machine.
Local regulations may specify the minimum age.
Always wear long trousers and sturdy shoes when working with the machine. Never work barefoot or with open sandals.
Always ensure a firm stand on slopes. Only push the machine at slow walking pace.
Working area
Do not use the leaf sweeper if there are any person (caution: children) or animals (including wildlife) in the working area.
Check the ground for stones, twigs, wires, bones and other debris prior to starting work. Keep looking out for debris as you are working.
Operating times
Only vacuum in daylight or under good artificial lighting.
Monday - Saturday:
07:00-12:00
15:00-19:00
Not allowed on Sundays and bank holidays.
Always adhere to the local/communal regulations about operating times!
Operation
Always visually inspect the leaf sweeper before use.
Damaged or worn parts must be replaced immediately.
Use the unit only in a technical condition stipulated by the manufacturer.
The user of the unit is responsible for any accidents involving other persons or their property.
The machine must only be used for vacuuming up dropped leaves. Any use for other purposes is not permissible.
Do not disable the safety equipment or protective equipment on the leaf sweeper.
- Keep hands and feet away from rotating parts!
- Never lift or carry the machine with the engine running. Wait until the engine has stopped, then pull spark plug lead.
Pull spark plug lead prior to working on the leaf sweeper.
Turn off the engine and pull out the spark plug if the mower starts to vibrate unusually severely. Afterwards it should be checked immediately by an expert.
Warning!
Petrol is highly flammable!
Store petrol in designated containers only.
Fill up with petrol outdoors only. Do not smoke while filling up with petrol!
Do not open the tank cap or refill with petrol while the engine is running or when the machine is hot.
If petrol overflows, do not start the engine. Clean the unit and do not start the engine until the petrol vapours have dispersed.
For reasons of safety replace a damaged petrol tank and/or tank cap.
When filling up with petrol, use a funnel or filling tube to prevent fuel from running into the engine, the housing or the lawn.

Risk of burns!
The exhaust and the areas around the exhaust may rise to a temperature of 80^ .
Replace damaged mufflers.
Do not change the governor settings of the engine.
Never leave a combustion engine running in closed areas:
- Risk of poisoning! -
Spare parts and accessories
Use original spare parts and accessories only.
We reserve the right to introduce changes to the design and model without prior notice.
Safety devices
Safety lever
Release the safety lever in a moment of danger. Motor and gauge box are stopped.
Do not disable the function of the safety lever!
Explanation of the symbols on the unit

Make sure you read the instruction manual before operating the machine!
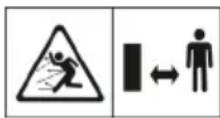
Keep all bystanders away from the operating range of the machinery!
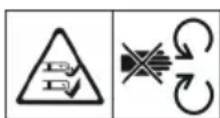
Pull spark plug lead prior to working on the leaf sweeper!
Danger!
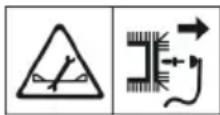
Keep hands and feet away from the suction inlet!
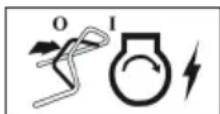
Release motor brake.
In this operating manual

Danger! Non-compliance could result in personal injury.
Assembly
Assemble this unit in accordance with the separately enclosed assembly manual.
Protection of the environment, disposal

Do not dispose of worn-out units through the household garbage!
The appliance, is packaging and accessories are all produced from recyclable materials and must be disposed of accordingly.
Switching on the unit
Do not switch on the unit until it has been completely assembled.
The numeral printed on the left before the text (e.g. 1) refers to the diagrams.
Always comply with the petrol engine operating manual supplied by the engine manufacturer.
Before switching on the machine for the first time, fill up with oil and petrol!
Petrol: standard petrol - lead-free.
Engine oil: see operating manual supplied by the engine manufacturer.
Filling up with petrol: the tank cover is situated on the petrol tank and is identified by the symbol "petrol pump" (petrol station).
Filling up with oil: capacity approx. 0,6 litres.
Engine without dipstick: fill up to the upper edge of the inlet nozzle.
Engine with dipstick: fill up to the mark between "FULL" and "ADD" on the dipstick.
The oil level is checked with the dipstick screwed in.
Starting the engine
a) Without throttle remote control.
1 Press the primer button 3x at intervals of approx. 2 seconds. At temperatures below 10^ press the primer button 5x.
If the engine is warm, do not press the primer button!
Pull the engine brake handle towards the upper handle and in hold in position - the engine brake handle does not lock into position.
3 Quickly pull out the starter cable and then let it slowly wind up again.
The engine has a fixed throttle setting. Speed control is therefore not possible.
b) With throttle remote control.
④ Throttle to position (Start).
1 Press the primer button 3x at intervals of approx. 2 seconds. At temperatures below 10^ press the primer button 5x.
If the engine is warm, do not press the primer button!
Pull the engine brake handle towards the upper handle and in hold in position - the engine brake handle does not lock into position.
3 Quickly pull out the starter cable and then let it slowly wind up again. As soon as the engine is running, position the throttle between (Start) and (Stop) according to the desidered engine speed.
Switching off the motor
Move the throttle to position (Stop).
Release the engine brake handle.

When the motor has been switched off, the gauge box continues running for several seconds - therefore do not touch with the hands!
Setting suction height:
The adjustment takes place at the front-wheels only!
Both wheels must be set at the same height!
Maintenance and care

Before carrying out any maintenance or cleaning work, pull off the spark plug connector!
Turn off the engine, wait until the engine has stopped, then pull spark plug lead.
■ Be careful during setting up - danger of injury! Wear protective gloves.
- Never store the leaf sweeper inside a building when there is petrol in the tank, where petrol fumes could possibly get ignited by sparks or an open flame
- Danger of explosion!
The petrol tank should be drained outdoors only.
Before storing the machine in a closed room, leave the engine to cool down.
The leaf sweeper may be repaired by authorised specialist companies only.
Cleaning the machine:
after suction, clean the unit thoroughly.
Do not spray the unit with water. Water wich gets into the ignition system or the carburetor may result in malfunctions.
Clean the unit with a cloth, hand brush. etc.
i If the leaf sweeper is tilted sideways, the motor must be (depending on the manufacturer):
TECUMSEH, HONDA or AL-KO:
carburetor / air filter
BRIGGS & STRATTON:
spark plug point upwards!!!
See motor manufacturer's operating manual!
Expert inspection is required:
if the unit strikes an object
if the motor stops suddenly
if the motor shaft is bent (do not align!)
Changing the oil / air filter / spark plug:
See operating manual supplied by the engine manufacturer.
Warranty
We shall rectify any material or production faults on the machine during the statutory limitation period for claims based on defects according to our choice of repair or replacement.
The limitation period is determined under the law of the Country in which the machine was purchased.
The guarantee is only valid under the following conditions:
The machine has been treated properly.
The operation instructions have been followed.
Genuine spare parts have been used.
The guarantee is void if:
Attempts have been made made to repair the machine.
The machine has been altered.
The machine is not used as intended: commercial or municipal use, etc.
The following items are excluded from the guarantee:
Paint damage due to normal wear.
Natural wear and parts which are identified by the frame on the spareparts card: XXX XXX (X)
Internal combustions engines - separate guarantee conditions apply to these from the relevant engine manufacturer.
In the event of a claim under the guarantee, please contact your dealer or the nearest authorised customer service centre with this guarantee declaration and a proof of purchase.
The statutory claims of the purchaser based on defects with respect to the seller shall remain unaffected by this promise of guarantee.
Troubleshooting
Engine does not start...
Fill up with petrol.
Move throttle to position (Start).
Pull the engine brake handle towards the upper handle.
Check the spark plug and, if required, replace it.
Clean the air filter.
Clean discharge channel / housing.
Motor power drops...
Clean discharge channel / housing.
Clean the air filter.
Reduce the stepping speed.
Emptying of the leaf collecting bag.
Benzine:normale loodvrijbe benzine


- LAUBSAUGER HURRICANE 75 B / POWERLINE 750 B
- Users
- Working area
- Operating times
- Operation
- Warning!
- Petrol is highly flammable!
- Risk of burns!
- Spare parts and accessories
- Safety devices
- Safety lever
- Explanation of the symbols on the unit
- In this operating manual
- Assembly
- Protection of the environment, disposal
- Switching on the unit
- Before switching on the machine for the first time, fill up with oil and petrol!
- Starting the engine
- Switching off the motor
- Maintenance and care
- Cleaning the machine:
- Expert inspection is required:
- Changing the oil / air filter / spark plug:
- Warranty
- Troubleshooting
- Engine does not start...
- Motor power drops...
Brand : AL-KO
Model : Hurricane 75 B
Category : Blower