
MiniVac FC6092 - Vacuum Cleaner PHILIPS - Free user manual and instructions
Find the device manual for free MiniVac FC6092 PHILIPS in PDF.
User questions about MiniVac FC6092 PHILIPS
0 question about this device. Answer the ones you know or ask your own.
Ask a new question about this device
Download the instructions for your Vacuum Cleaner in PDF format for free! Find your manual MiniVac FC6092 - PHILIPS and take your electronic device back in hand. On this page are published all the documents necessary for the use of your device. MiniVac FC6092 by PHILIPS.
USER MANUAL MiniVac FC6092 PHILIPS
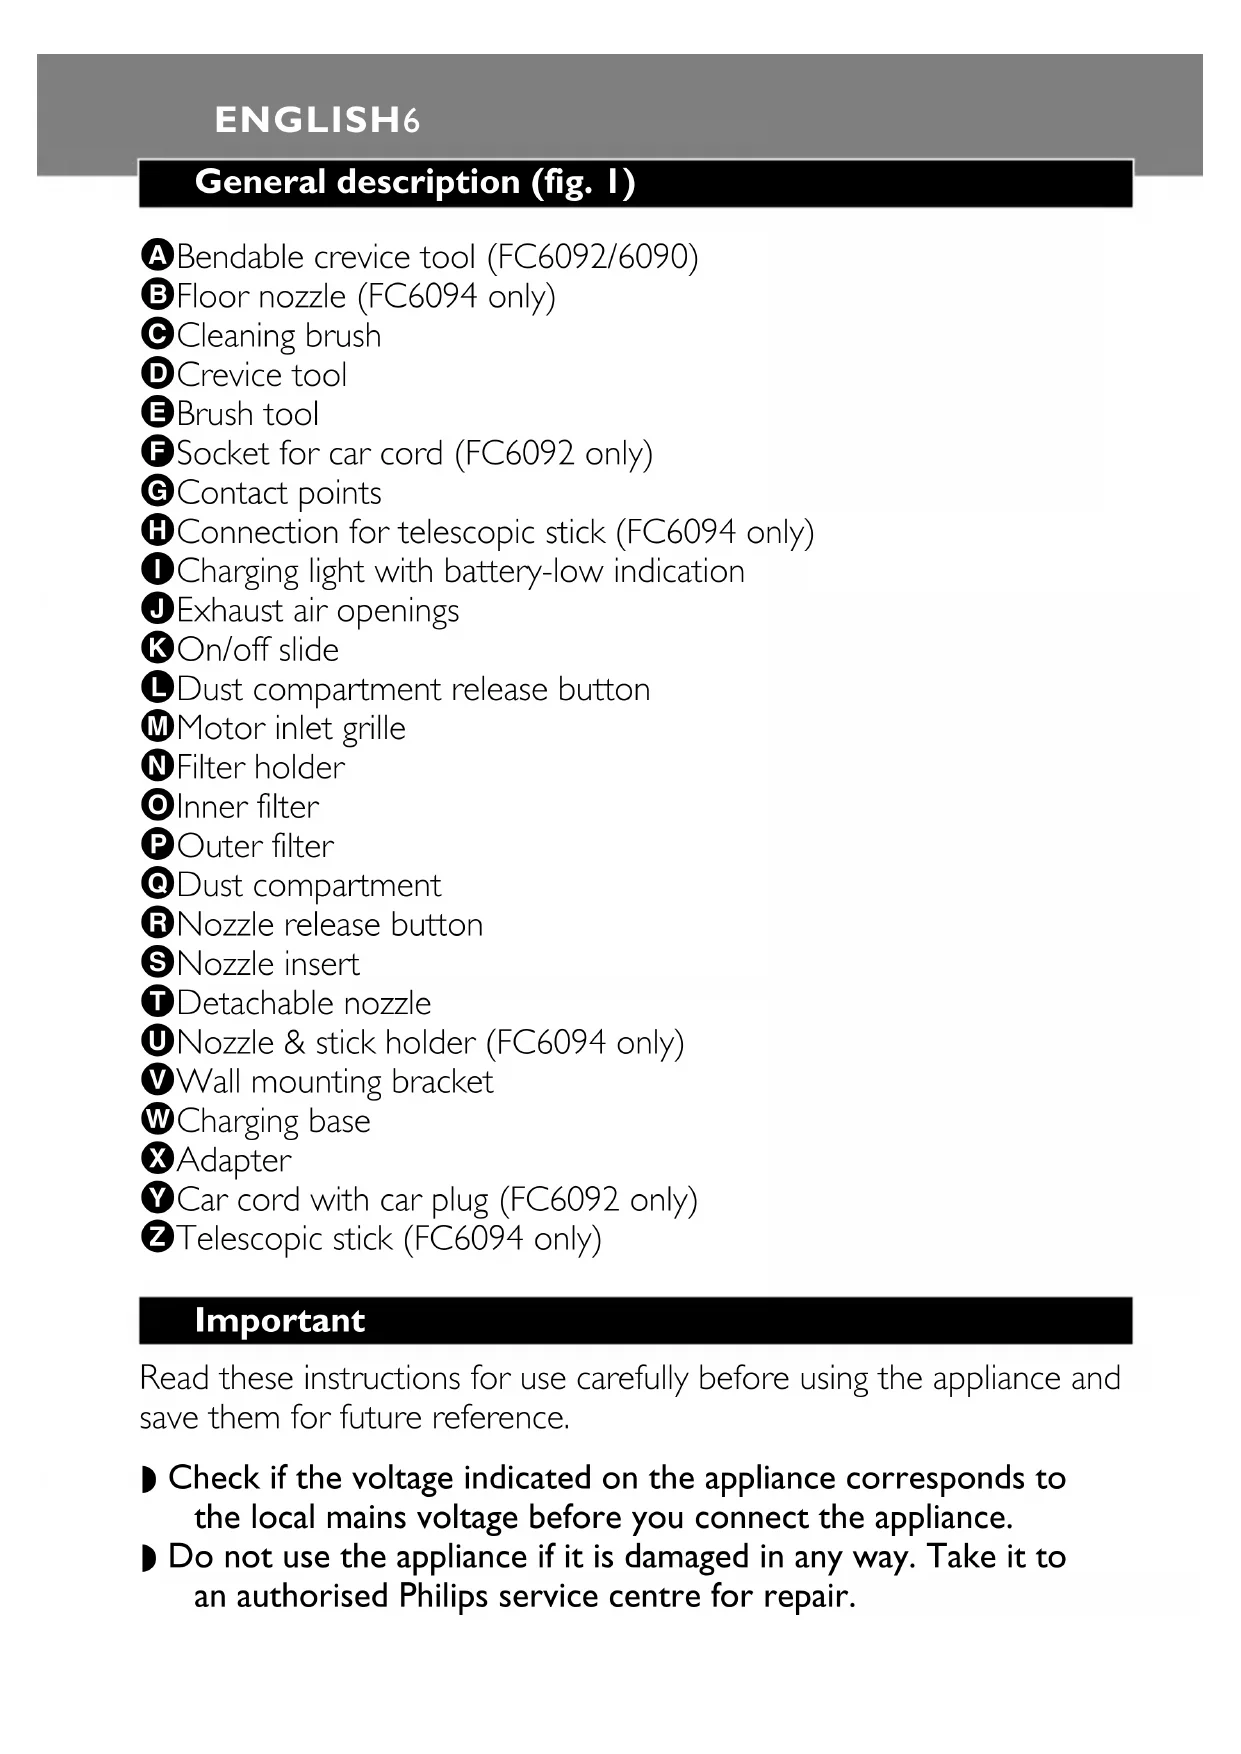
A Bendable crevice tool (FC6092/6090)
B Floor nozzle (FC6094 only)
Cleaning brush
Crevice tool
Brush tool
Socket for car cord (FC6092 only)
Contact points
Connection for telescopic stick (FC6094 only)
Charging light with battery-low indication
Exhaust air openings
On/off slide
Dust compartment release button
Motor inlet grille
Filter holder
- Inner filter
Outer filter
Dust compartment
RNozzle release button
SNozzle insert
Detachable nozzle
Nozzle & stick holder (FC6094 only)
Wall mounting bracket
Charging base
Adapter
Car cord with car plug (FC6092 only)
Telescopic stick (FC6094 only)
Important
Read these instructions for use carefully before using the appliance and save them for future reference.
- Check if the voltage indicated on the appliance corresponds to the local mains voltage before you connect the appliance.
Do not use the appliance if it is damaged in any way. Take it to an authorised Philips service centre for repair.
If the adapter or charging base is damaged, always have it replaced by one of the original type to avoid a hazard.
FC6092 only: if the car cord or car plug is damaged, stop using the car cord and have it replaced by one of the original type.
- Never suck up water or any other liquid. Never suck up ashes until they are cold.
- Never immerse the vacuum cleaner, the adapter or the charging base in water.
- Remove the adapter from the wall socket before cleaning the charging base.
- Only charge the vacuum cleaner with the adapter and charging base supplied. During charging, the adapter will feel warm to the touch. This is normal.
Always switch the vacuum cleaner off after use.
- Keep the appliance out of the reach of children.
The voltage on the contact points in the charging base is low (max. 30 volts) and therefore not dangerous.
Never block the exhaust air openings during vacuuming.
- Switch the appliance off when recharging it.
- To avoid the risk of electric shock, be careful when drilling holes in the wall to attach the wall mounting bracket, especially close to a wall socket.
Always use the appliance with the filter unit.
Always use the appliance with the nozzle insert in place.
Preparing for use
Attaching the charging base to the wall
Screw the wall mounting bracket to the wall with the screws supplied with the appliance (fig. 2).
2 Attach the charging base to the wall mounting bracket (fig. 3).
3 Attach the nozzle & stick holder to the wall mounting bracket (FC6094 only).
4 Screw the nozzle & stick holder to the wall with the screws supplied with the appliance.
ENGLISH8
5 You can also place the charging base on a level and horizontal surface (fig. 4).
6 slide the brush tool onto the crevice tool and place them in the charging base (fig. 5).
7FC6094 only: insert the telescopic stick and the floor nozzle into the nozzle & stick holder ('click') (fig. 6).
Charging the appliance
Charge the appliance for at least 18 hours before you use it for the first time.
When the charging light starts blinking during operation, the battery pack is running low and needs to be recharged.
Insert the small plug into the charging base and insert the adapter into the wall socket (fig. 7).
The charging light will go on to indicate that the appliance is charging (fig. 8).
The charging light will stay on as long as the appliance is placed on the charging base and the adapter is in the wall socket.
The charging light does not give any information about the charge level of the built-in battery pack.
Using the appliance
Push the on/off slide forwards to switch the appliance on (fig. 9).
2 Push the on/off slide backwards to switch the appliance off (fig. 10).
3 Leave the adapter in the wall socket and always put the vacuum cleaner back onto the charging base after use, even if the battery pack is still almost fully charged.
Tools
This appliance comes with the following tools:
- ① brush tool for cleaning delicate surfaces
- 2 crevice tool for cleaning hard-to-reach places
- ③ bendable crevice tool for cleaning at an angle (FC6092/6090 only)
Take the tool you want to use.
2 Attach the tool to the detachable nozzle (fig. 11).
Car cord (FC6092 only)
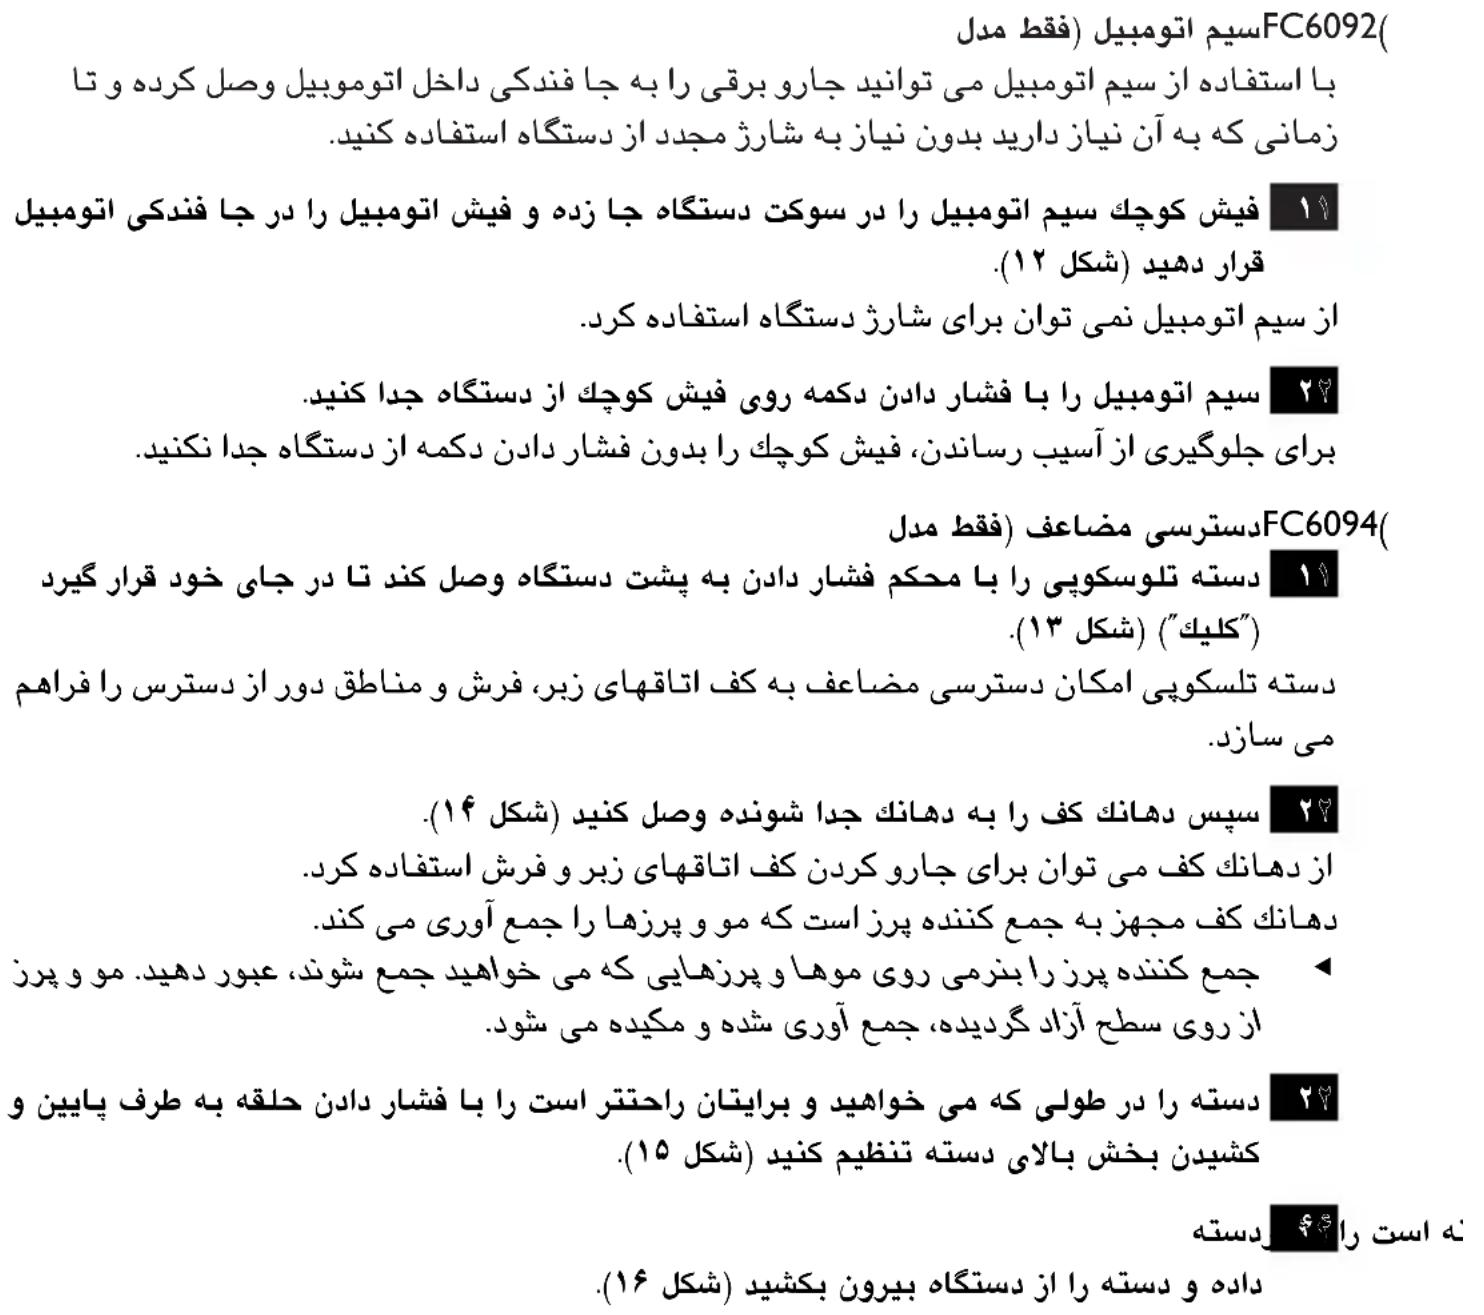
With the car cord you can connect the vacuum cleaner to the cigarette lighter socket in your car and use it as long as necessary without having to recharge it.
Insert the small plug of the car cord in the socket of the appliance and insert the car plug in the cigarette lighter socket of your car (fig. 12).
The car cord cannot be used to charge the appliance.
2 Detach the car cord from the appliance by pressing the button on the small plug.
To prevent damage, do not pull the small plug out of the appliance without pressing the button.
Extra reach (FC6094 only)
1 Attach the telescopic stick by pushing it firmly into the back of the appliance until it locks into position ('click') (fig. 13).
The telescopic stick gives you extra reach when cleaning hard floors, carpets and hard-to-reach areas.
2 Then attach the floor nozzle to the detachable nozzle (fig. 14).
The floor nozzle can be used to vacuum hard floors and carpets. The floor nozzle is equipped with a fluff collector that removes hair or fluff.
Pass the fluff collector gently over the hairs or fluff to be removed. The hairs or fluff will be worked loose from the surface, collected and then sucked up.
ENGLISH 10
3 Adjust the stick to the length you find most comfortable during vacuum cleaning by pushing the ring downwards and pulling the upper part of the stick upwards (fig. 15).
4 To detach the telescopic stick, press the release button on the back of the vacuum cleaner and pull the stick out of the appliance (fig. 16).
Cleaning
Always remove the adapter from the wall socket before cleaning the charging base.
Never immerse the vacuum cleaner, the adapter or the charging base in water.
Clean the charging base and the appliance with a damp cloth.
Dust compartment and filters
Make sure you empty the dust compartment and clean the filters regularly.
We advise you to clean the filters every 2 to 4 weeks to maintain optimal suction performance.
Quick cleaning
To quickly empty the dust compartment:
Remove the detachable nozzle by pressing the nozzle release button (fig. 17).
2 shake the contents of the dust compartment out into a dustbin (fig. 18).
Thorough cleaning
To thoroughly clean the dust compartment and the filter unit:
Hold the appliance over a dustbin, press the dust compartment release button (1) and remove the dust compartment (2) (fig. 19).
2 Take the filter unit out of the dust compartment (fig. 20).
3 Empty the dust compartment by shaking it out with your free hand.
4 To clean the filter, remove the outer filter from the filter holder by turning it anticlockwise (fig. 21).
5 Remove the inner filter from the filter holder by gently turning it anticlockwise (fig. 22).
6 Clean the inner filter and the outer filter with the cleaning brush supplied (fig. 23).
Brush the inner filter from the top downwards along the ribs of the filter.
If necessary, you can clean the outer filter and the inner filter in cold or lukewarm water.
The inner filter and outer filter are not dishwasher-proof.
7 Attach the inner filter to the filter holder by turning it clockwise (fig. 24).
8 Place the outer filter back onto the filter holder and fasten it by turning it clockwise (fig. 25).
9 Place the filter unit back into the dust compartment (fig. 26).
Never put the filter unit back into the dust compartment when the outer filter and inner filter are still wet.
10 To clean the detachable nozzle, press the nozzle release button to remove the detachable nozzle from the appliance (fig. 17).
Pull the nozzle insert out of the detachable nozzle.
- Both the nozzle insert and the detachable nozzle can be cleaned in warm water with some washing-up liquid or in the dishwasher.
Make sure the nozzle insert and the detachable nozzle are dry before you reattach them to the appliance.
12 Reattach the dust compartment to the body of the vacuum cleaner ('click').
Replacement
- Replace the inner filter if it can no longer be cleaned properly (usually after having been cleaned about 50 times).
Take the filter unit out of the dust compartment (fig. 20).
2 Remove the outer filter from the filter holder by turning it anticlockwise (fig. 21).
3 Remove the inner filter from the filter holder by gently turning it anticlockwise (fig. 22).
4 Attach a new inner filter to the filter holder (fig. 24).
5 Reattach the outer filter to the filter holder (fig. 25).
New inner filters can be obtained at Philips service centres.
Environment
Do not throw the appliance away with the normal household waste at the end of its life, but hand it in at an official collection point for recycling. By doing this you will help to preserve the environment (fig. 27).
Disposal of the battery pack
NiCd/NiMH batteries can be harmful to the environment and may explode if exposed to high temperatures or fire.
Always remove the battery pack before handing the appliance in at an official collection point. Dispose of the battery pack at an official collection point for batteries. If you have trouble removing the battery pack, you can also take the appliance to a Philips service centre, which will remove the battery pack for you and will dispose of it in an environmentally safe way.
Only remove the battery pack if it is completely empty.
Remove the battery pack in the following way.
Let the appliance run until it stops, loosen and remove the screws and open the vacuum cleaner (fig. 28).
2 Cut the connecting wires one by one and remove the battery pack (fig. 29).
Saving energy
If you are not going to use the appliance for a longer period of time, we advise you to remove the adapter from the wall socket to save energy.
Guarantee & service
If you need information or if you have a problem, please visit the Philips website at www.philips.com or contact the Philips Customer Care Centre in your country (you will find its phone number in the worldwide guarantee leaflet). If there is no Customer Care Centre in your country, turn to your local Philips dealer or contact the Service Department of Philips Domestic Appliances and Personal Care BV.
Como descartar as baterias
11
22 3
33 152n77777777777777777777777777777777777777777777777
44
55 5
66 15
77 Fu FC6094 nhu: 1nauuauu uunuunu uuuu uuuu uuuuuuuuuuuuuuuuuuuuuuuuuuuuuuuuuuuuuuuuuuuuuuuuuuuuuuuuuuuuuuuuuuuuuuuuuuuuuuuuuuuuuuuuuuuuuuuuuuuuuuuuuuuuuuuuuuuuuuuuuuuuuuuuuuuuuuuuuuuuuuuuuuuuuuuuuuuuuuuuuuuuuuuuuuuuuuuuuuuuuuuuuuuuuuuuuuuuuuuUU
18 1
Wn
11
(8)
y
H
n
11
22 10.
33 1
unnnnne
1
-166
3 3 FC6092/6090
11
22 157nnaaunrnnnnaaannnnaananaan (11).
wwnnnaunuunn (FC6092 nnu)
y
11
22
(FC6094n)
1 13.
22 14.
10000000000000000000000000000000000000000000000
33 15.
44 Jaaananaan nannnnaaunnnnnaaannnnnnaan anan anan anan anan anan anan anan anan anan anan anan anan anan anan anan anan anan anan anan anan anan anan anan anan anan anan anan anan anan anan anan anan anan anan anan anan anan anan anan anan anan anan
n
y
1
y
11 17.
22 18.
11 11 11 11 11 11 11 11 11 11 11 11 11 11 11 11 11 11 11 11 11 11 11 11 11 11 11 11 11 11 11 11 11 11 2) (3)
22 20.
33
44 nnnnnaaannnnaanrnnnnaanrnnnnaanrnnnnaanrnnnnaanrnnnnaanrnnnnaanrnnnnaanrnnnnaanrnnnnaanrnnnnaanrnnnnaanrnnnnaanrnnnnaanrnnnnaanrnnnnaanrnnnnaanrnnnnaanrnnnnaanrnnnnaanrnnnnaanr
5 nnnnnae nnne naanennn nnnn nnnn nnnn nnnn (22).
66 nannnnaan ananrnnnnaaunnnaan anan annan (23).
1
77 1
83 124
99 126
110 nnaa aannnnaaennnnnnaan an naananaananaananaananaananaananaananaananaananaananaananaananaananaananaananaananaananaananaananaananaananaananaananaananaananaananaananaananaananaananaananaananaananaananaananaananaananaananaananaananaananaananaananaananaananaananaananaananaananaananaanaraannaa
111
112
n
()
11 20.
22 21
33 127
44 1s2nannnnnnae nue nne nne nne (24).
55 Uznaunnnaunuunnnnun (25).
T
N
7 2
n7nJbUa
NiCd/NiMH
D 1
2
1
11
22 29.
山
y
m
ww.philips.com
wamnnaanmnnnnaaannnnnnaanennnnnnnnnnnnnnnnnnnnnnnnnnnnnnnnnnnnnnnnnnnnnnnnnnnnnnnnnnnnnnnnnnnnnnnnnnnnnnnnnnnnnnnnnnnnnnnnnnnnnnnnnnnnnnnnnnnnnnnnnnnnnnnnnnnnnnnnnnnnnnnnnnnnnnnnnnnnnnn nn n n n n n n n n n n n n n n n n n n n n n n n n n n n n n n n n n n n n n n n n n n n n n n n n nn nn nn nn nn nn nn nn nn nn nn nn nn nn nn nn nn nn nn nn nn nn nn nn nn nn nn nn nn nn nn nn nn nn nn nn nn nn nn nn nn nn nn nn nn nn nn nn nn nn nn nn nn nn nn nn nn nn nn nn nn nn nn nn nn nn nn nn nn nn nn nn nn nn nn nn nn nn aan annn an annn an annn an annn an annn an annn an annn an annn an annn an annn an annn an annn an annn an annn an annn an annn an annn an annn an annn an annn an annn an annn an annn an annn an annn an annn an annn an annn an annn an annn an annn an annn an annn an annn anannn nanannn nanannn nanannn nanannn nanannn nanannn nanannn nanannn nanannn nanannn nanannn nanannn nanannn nanannn nanannn nanannn nanannn nanannn nanannn nanannn nanannn nanannn nanannn nanannn nanannn nanannn nanannn nanannn nanannn nanannn nanannn nanannn nanannn nanennn nanannn nanannn nanannn nanannn nanannn nanannn nanannn nanannn nanannn nanannn nanannn nanannn nanannn nanannn nanannn nanann
产品图示(图一)
aalalalalalalalalalalalalalalalalalalalal
a. i|g |laai
Ic Iy Philips gogg y Jz Jy K k aia aiaa aia aia aia aia aia aia aia aia aia aia aia aia aia aia aia aia aia aia aia aia aia aia aia aia aia aia aia aia aia aia aia aia aia aia aia aia aia aia aia aia aia aia aia aia aia aia aia aia aia aia aie
JgLg Lgii 1 Jg Jgll lal gag gag gag gag gag gag gag gag gag gag gag gag gag gag gag gag gag gag gag gag gag gag gag gag gag gag gag gag gag gag gag gag gag gag gag gag gag gag gag gag gag gag gag gag gag gag gag gag
J
L
(1)
(·)j
(1)K)aLllBrae ssc alj ybjjill Jolno jyjll j
()LJ)aLlBcSscljBbBjBjBjBjBjBjBjBjBjBjBjBjBjBjBjBjBjBjBjBjBjBjBjBjBjBjBjBj
(K)jll Jol ju jui
(0)jll Jol jll
.Philips
i
#
1
aal
(V.) 1c
a
NiCd/NiMH
J
a 1
aagll lkiy yiey bll 1s j 1s JSLg 1s 1s
a a a a a a a a a a a a a a a a a a a a a a a a a a a a a a a a a a a a a a a a
laai jia jiai k 1j baa aaiy
a
aill aaiall 15g jgl giall alll iisie. gii l Jaa jj
(VJ
(49J)aIgjglgglgglgglg
e
:
(1V J) aagg jj j j j j j j j j j j j j j j j j j j j j j j j j j j j j j j j j j j j j j
(1)K)
pI 1
iJolS Jilal jg g jz
(1)j(2)j(3)
(19)
(·)j
y
aLwlll joc ool aol g y bgyj JdJd jn nn nnnnne
(1)
J 1 J 1 J 1 J 1 J 1 J 1 J 1 J 1 J 1
(J)acllljolgaiy
jll lalll yolal yolal yolal yolal yolal yolal yolal yolal yolal yolal yolal yolal yolal yolal yolal yolal yolal yolal yolal yolal yolal yolal yolal yolal yolal yolal yolal yolal yolal yolal yolal yolal yolal yolal
()
(0K)j#
y
()()
(1 JSe) pLe
(FC6094 baa) a
A
B
G
D
E
F bae) 3rJ
G
H baej
0 1b
J
K
L
M
N
0
P
R
s
T
0
V
W
X
Y
pLa
Jaiiill 151111111111111111111111111
J 1
j4
Philips 1
yauu
L 1
1
jI 1 Jg jg jg jg jg jg jg jg jg jg jg jg jg jg jg jg jg jg jg jg jg jg jg jg jg jg jg jg jg jg jg jg jg jg jg jg jg jg jg
(1)
()
J 1
1
1
wgyg jil
Philips.
Philips.
1
1
J 1
() 1
#
j0. j 2yga) d k yg 1 r jn j n g i s 4s g
()
()
J 1
()
1
()
()
()
Philips
S_ OBC = S_ COD + S_ BOC
J 1
(IV J) 154
J 1
NcD/NiMH
J 1
a
L 1
Philips
1
84
1
1
(IV J) 1
j001 12iLai Li jai Jai Jai Jai Jai Jai Jai Jai Jai Jai Jai Jai
(IV)
1
:FC60941g:1h 1Vg dL
(J)(
L
1
sJL 50
a
V
(A)
aL bJgRg. dLo aIg
1
oi:wiwi
(9)LgJb 1
J 1
(1. )


