
NoStop Professional Eco - Iron IMETEC - Free user manual and instructions
Find the device manual for free NoStop Professional Eco IMETEC in PDF.
| Brand | Imetec |
| Model | NoStop Professional Eco |
| Category | Iron with steam station |
| Product type | Steam station |
| Eco function | Yes, for energy saving and delicate fabrics |
| Water tank | Removable, with empty level indicator |
| Temperature adjustment | Yes, with heating indicator light |
| Steam adjustment | Yes, rotating knob |
| Steam control | Push button on handle |
| Recommended water type | Tap water, or mix 50% demineralized water if hard water |
| Anti-scale cleaning | Periodic cleaning of the station with indicator light |
| Safety | Automatic shut-off not mentioned, do not leave unattended |
| Iron rest | Heat-resistant iron rest mat included |
| Warranty | Manufacturer's warranty, assistance via toll-free number |
| Power supply | 220-240 V (standard estimate) |
| Power | Not specified |
| Weight | Not specified |
| Dimensions | Not specified |
Frequently Asked Questions - NoStop Professional Eco IMETEC
User questions about NoStop Professional Eco IMETEC
0 question about this device. Answer the ones you know or ask your own.
Ask a new question about this device
Download the instructions for your Iron in PDF format for free! Find your manual NoStop Professional Eco - IMETEC and take your electronic device back in hand. On this page are published all the documents necessary for the use of your device. NoStop Professional Eco by IMETEC.
USER MANUAL NoStop Professional Eco IMETEC
Operating instructions
Tel. +39.035.688.111 Fax +39.035.320.149
IMETEC wwy.imetec.com
![[A] 19 18 17 16 15](/content/2026/02/358749/images/a6b40d69bb4b9c9834e65825814b5bdc6aee719d116077f72f31aeff70596c32.jpg)
natural_image
Close-up of a hand holding a small object with an arrow indicating rotation (no visible text or symbols)![[E] Ø Max](/content/2026/02/358749/images/05fb9153175436910e6834ec597cbb5e8d430f136a5d7139a9a96e38183a22db.jpg)
natural_image
Close-up of a white plastic electronic component with a black arrow indicating a fold or adjustment (no text or symbols visible)
natural_image
Close-up of a hand holding a small object with an arrow indicating rotation (no visible text or symbols)![[A] [A] GUIDA ILLUSTRATIVA ILLUSTRATIVE GUIDE GUIDE ILLUSTRÉ GUÍA ILLUSTRATIVA GUIA ILLUSTRADO SLIKOVNI VODNIK EIKONOΓΡΑΦΗΜΕΝΟΣ ΟΔΗΓΟΣ ΚέΡΕS HASZNÁLATI ÚTMUTATÓ UDHEZIME ILLUSTRUESE](/content/2026/02/358749/images/6b35090e43c917a721db81fabc316acbec0333582992d0bec6a6f965c7ccab8c.jpg)
DATI TECNICI
TECHNICAL DATA
DONNEES TECHNIQUES
DATOS TÉCNICOS
DADOS TECNICOS
TEHNIČNI PODATKI
TEXNIKA ΣΤΟΙΧΕΙΑ
MUSZAKI ADATOK
TE BHENA TEKNIKE
TE DHENA TERNIKE
Tel. +39.035.688.111 Fax +39.035.320.149
(人人WW)
MI000757

OPERATING INSTRUCTIONS
FOR THE BOILER IRON
GB
Dear customer, IMETEC thanks you for purchasing this product. We are certain you will appreciate the quality and reliability of this appliance, designed and manufactured with customer satisfaction in mind. These instructions for use have been drawn up in compliance with the European Standard EN 62079.

ATTENTION!
Instructions and warnings for a safe use.
Please read the use and safety instructions before using the appliance and follow these at all times. Keep this manual and illustrative guide with the appliance for future consultation. Should you pass the appliance on to another user, make sure to also include this documentation.
Should certain parts of this user manual be difficult to understand or should doubts arise, contact the company before using the product, at the address indicated on the last page.
CONTENTS
OPERATING INSTRUCTIONS page 9
SAFETY WARNINGS page 10
SYMBOLS page 12
DESCRIPTION OF THE APPLIANCE AND ACCESSORIES page 12
PREPARATIONS page 13
USE page 13
- Filling the reservoir page 13
- Ironing page 13
- ECO function page 13
- Filling the reservoir while ironing page 14
MAINTENANCE page 14
- Cleaning the boiler page 14
- Cleaning the appliance page 15
END OF USE page 15
PROBLEMS AND SOLUTIONS page 15
DISPOSAL page 16
ASSISTANCE AND WARRANTY page 16
Illustrative guide I-II
Technical data III
- The appliance may be used by children who are at least 8 years old, by persons with reduced physical, sensorial or mental abilities or persons lacking experience only if they have received prior instructions concerning its safe use and if they are informed about the dangers associated with this product. Children may not play with the appliance. The appliance cannot be cleaned or serviced by children without adult supervision. Keep the appliance and power cord away from children under 8 when the appliance is on or cooling down.

NEVER leave the iron unattended when connected to the power supply.
ATTENTION!
Always disconnect the appliance from the mains supply before cleaning or performing maintenance and when the appliance is not in use.
- The iron must be used on a stable surface. When the iron is placed on the iron rest make sure the support is stable. The iron must not be used if it has been dropped, if it is visibly damaged or leaks water.
GB
- After having removed the appliance from its packaging, check the integrity of the supply based on the drawing and any presence of transport damages. If in doubt, do not use the appliance and contact the authorised service centre.
- Do not let children play with the packaging! Keep the plastic wrapping out of the reach of children; risk of suffocation!
- Before connecting the appliance, check to make sure that the mains voltage carried on the identification specifications corresponds to that of the available electrical mains. The identification plate is attached to the appliance.
- This appliance must be used solely for the purpose for which it was designed, namely, as a boiler iron for home use. Any other use is improper and potentially dangerous.
- In case of a fault or malfunctioning of the appliance, switch it off and do not tamper with it. If the appliance needs to be repaired, contact an authorised technical service centre.

DO NOT use the appliance with wet hands, damp feet or barefoot.

DO NOT pull the power cord or the appliance itself to remove the plug from the socket.

DO NOT expose the appliance to humidity or weather conditions (rain, sun, etc.).
- If the power cord is damaged, it must be replaced by an authorised technical service centre, so as to prevent all risks.
- The electrical safety of this appliance is only guaranteed when it is connected correctly to an effective earthing system as required by applicable electrical safety standards. This important safety requirement must be verified and if in doubt, request a thorough check of the system by a skilled technician.

DO NOT immerse the iron, the power cord or the plug in any kind of liquid.

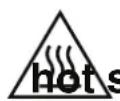
DO NOT leave the hot iron in contact with easily flammable fabric.

DO NOT press the steam button when the iron is resting on its mat.

DO NOT use chemical additives, scented substances or descaling agents.
IMPORTANT GUIDELINES
The appliance is designed to work with tap water, however, if the water in your residence area is very hard, mix the tap water (50%) with distilled and/or demineralised water (50%). Salt concentration in water in certain seaside areas is very high: in which case, demineralised water for steam irons (available on the market) must be used. In which case, demineralised water for steam irons (available on the market) must be used.
Do not introduce diluting agents, scented liquids or descaling agents. These can damage the product.
GB
Do not use water from dryers, air-conditioners and rain water.
The boiler may contain some water as each product is tested before being put on the market.
It is recommended to place a cloth between the iron and the fabric when using the iron for the first time.
It is recommended to direct a jet of steam into the air before starting to iron, for any residual condensation to be let out.
SYMBOLS

WARNING

HIBITION
DESCRIPTION OF THE APPLIANCE AND ACCESSORIES
Refer to the illustrative guide at the beginning of this user manual to verify your appliance equipment. All the figures are at the front of this instruction manual.
- Reservoir water fill cover
- Water reservoir
- ECO button
- Steam adjustment knob
- Steam (ready) LED (green)
- Boiler cleaning LED (yellow)
- No water LED (blue)
- Iron mat
- MAX fill-up level
- Cable reel compartment
- Cap cover
- Cleaning cap
- ON/OFF button
- Plug
- Multi-hole plate
- Steam button
- Iron temperature adjustment knob
- Plate temperature LED
- Cable duct
PREPARATIONS
Sort the laundry according to the international symbols shown on the labels; if these are missing, sort according to the type of material.
Start to iron the garments that require a lower temperature so as to reduce idle time (the iron requires less time to warm up than to cool down) and eliminate the risk of burning the fabric.

Synthetic, acrylic, nylon, polyester: low temperatures.

Wool, silk: medium temperatures.
Cotton, linen: high temperatures.

Do not iron.
USE
Filling the reservoir
Lift the reservoir water fill cover (1) and fill the water reservoir (2) without overflowing. Once finished, lower the water fill cover (1).
Ironing
- Connect the plug (14) to a suitable socket.
- Press the ON/OFF button (13). The LED will turn on.
- Adjust the iron temperature (17) according to the international symbols on the clothing labels and wait for the plate temperature LED to go off (18).
- Turn the steam adjustment knob (4) to obtain the desired amount of steam.
- When the steam (ready) LED (5) lights up and stops blinking, you can start ironing. The plate temperature LED (18) goes on and off intermittently while ironing, indicating that the appliance maintains the optimal temperature.
- Press the steam button (16) to steam iron.
- Dry iron by not pressing the steam button (16).

ATTENTION!
Use the steam button (16) only at the highest temperatures in order to prevent water drops leaking from the plate [Fig. E].
ECO function
The appliance is equipped with a new technology that optimises the steam production, thereby reducing energy consumption.
Activate the Eco function by pressing the ECO (3) button. The ECO LED lights up.
It is recommended to use the ECO function for delicate garments (silk, wool and light cotton).
The ECO function goes off automatically each time the appliance is switched off.
GB
Filling the reservoir while ironing
- When the water in the reservoir is less than the minimum level, the no water LED (7) lights up and the iron does not produce any steam.
- Lift the reservoir water fill cover (1) and fill the water reservoir (2) without overflowing. Once finished, lower the water fill cover (1) completely.
- The appliance can then ready to continue ironing.
MAINTENANCE
Cleaning the boiler
The boiler must be cleaned when the boiler cleaning LED (6) lights up or every 3 months, in order to prevent limescale from forming.
The boiler cleaning LED (6) lights up when the boiler must be cleaned. The LED then remains on and you can start ironing. The boiler cleaning LED (6) will remain on until the boiler is cleaned.

ATTENTION!
The boiler must only be cleaned when it is cold.
NOTE:
- Failure to carry out this operation will make the warranty null and void.
Sequence of operations:
- Press the ON/OFF button (13).
- Disconnect the plug (14) from the socket.
- Let the boiler cool down for at least 4 hours.
- Place the boiler on a wash basin.
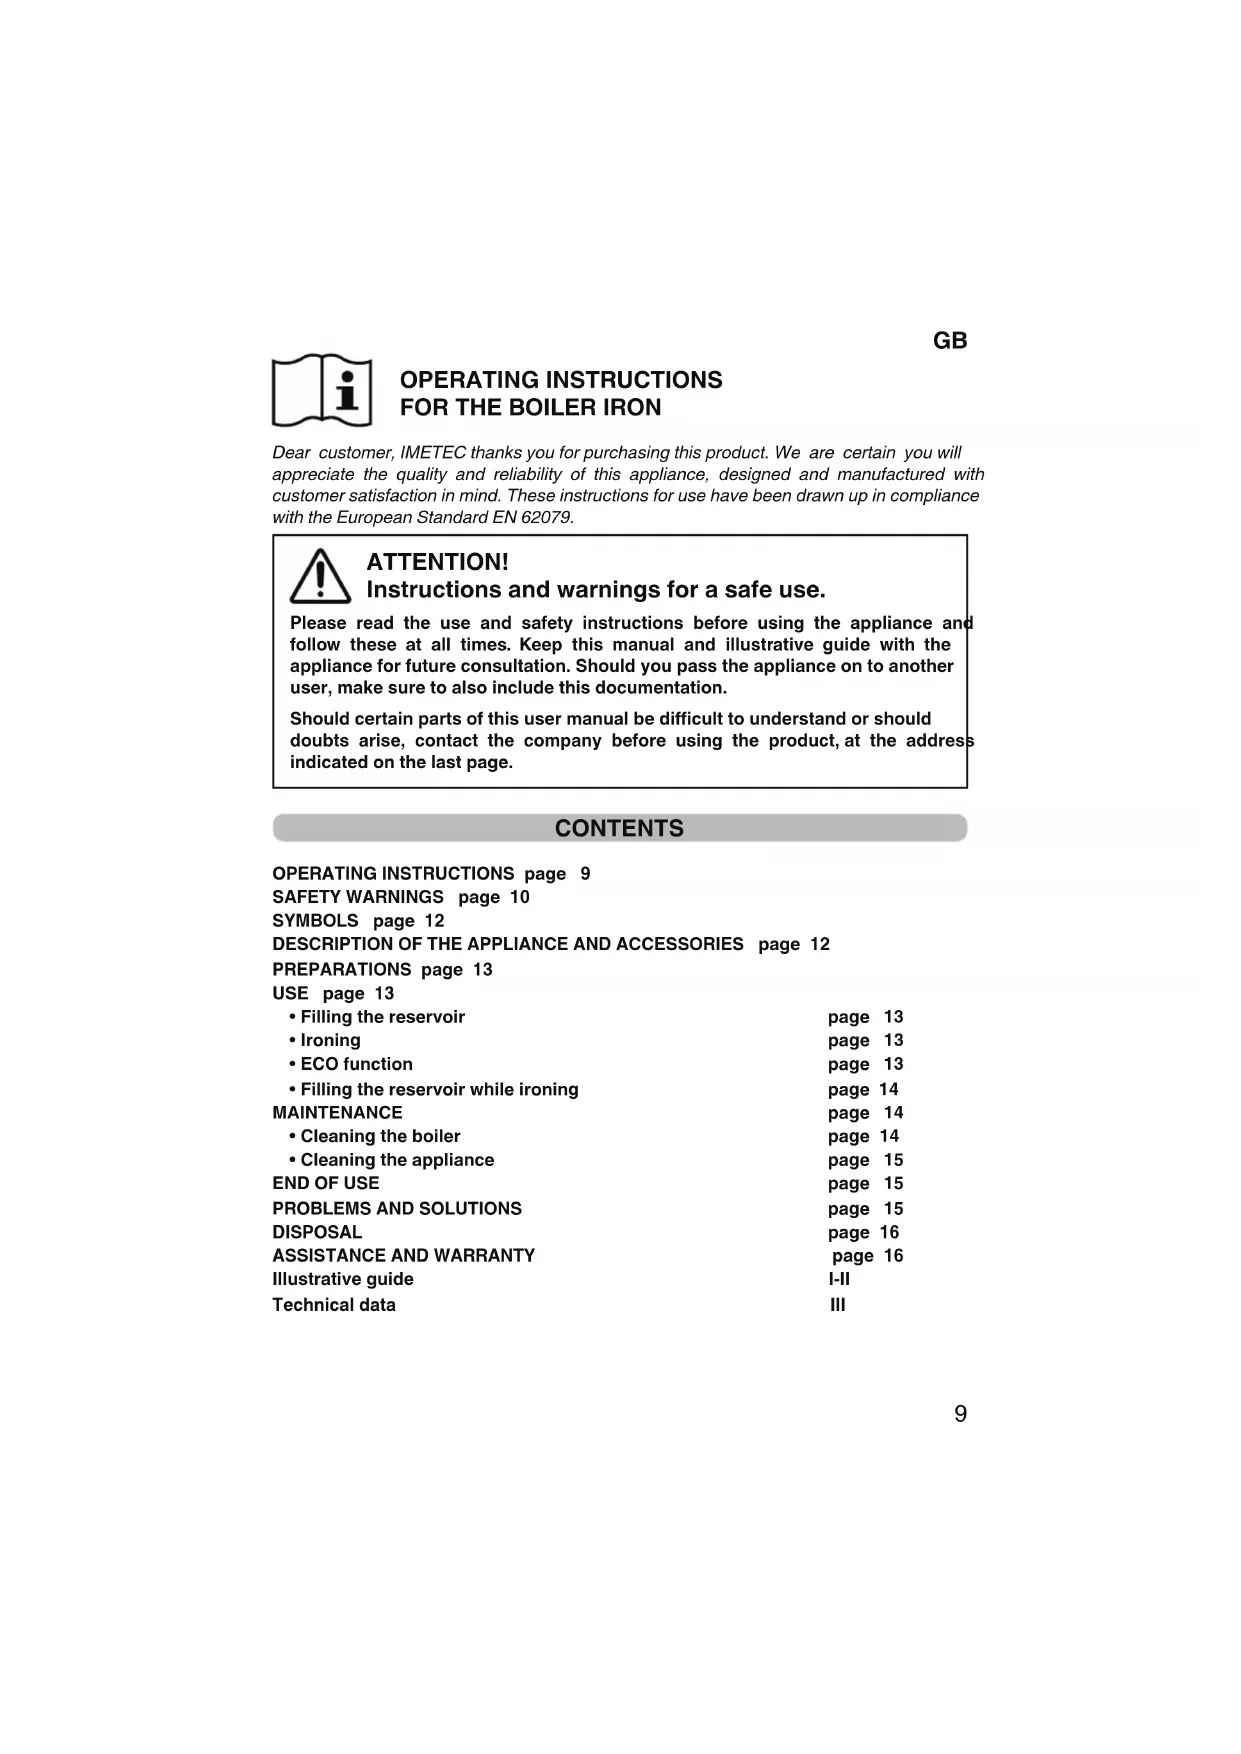
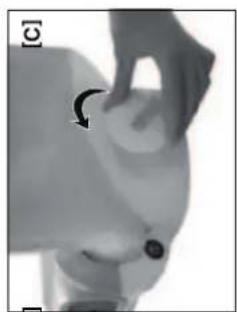
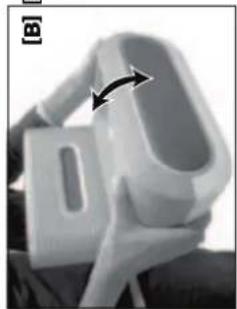
- Shake the base to help the limescale chips detach (Fig. B).
- Remove the cap cover (11) on the rear side of the boiler by turning it anti-clockwise (Fig. C).
- Loosen the cleaning cap (12) by turning it anti-clockwise with a coin (Fig. D).
- Let the water and lime scale drain from the hole.
- Shake the boiler once again for the remaining water and limescale chips to come out.
- Tighten the cleaning cap (12) by turning it clockwise with a coin.
- Set the cap cover in place (11) by turning it clockwise.
- Refill the water reservoir (2) before using the boiler again.
Make sure the cleaning cap (12) is tightened well.
Do not clean the boiler with detergents, anti limescale products, vinegar or any other type of substance.
Cleaning the appliance:
Before cleaning the appliance, switch it off by pressing the ON-OFF button (13) and disconnect the plug (14) from the socket. If necessary, clean the appliance with a damp cloth. Do not use solvents or other aggressive or abrasive detergents. Otherwise, the surface could be damaged. Before re-using the appliance, make sure that all wet-cleaned parts are completely dry.
END OF USE
Switch the appliance off by pressing the ON/OFF (13) button.
- Disconnect the plug (14) from the socket.
- Wait for the appliance to cool down completely before putting it away. The reservoir does not have to be emptied.
NOTES:
- If the appliance is not to be used for several weeks, empty the water reservoir (2) completely: wait for the appliance to cool down completely and turn it over to allow all the water to flow out of the reservoir (2).
PROBLEMS AND SOLUTIONS
This chapter describes the most common problems related to appliance use. If the problems cannot be resolved with the information below, please contact the Authorised Assistance Centre.
| Problem Possible cause Solution | ||
| The appliance does not go on. The household appliance is not on. | Ensure that the appliance is properly connected to the socket, that the ON/OFF button (13) is pressed and the light is on. | |
| The plate temperature LED (18) goes on and off. | Normal procedure. | The LED (18) switch-on/off indicates the heating phase of the iron. The LED goes once the set temperature is reached. |
| Smoke comes out of the appliance when it is switched on for the first time. | This is absolutely normal and is due to the expansion of the plastic material. | This no longer occurs after a while. |
| Impurities come out of the plate (15) of the new iron. | This is perfectly normal in a new iron. | These particles are completely harmless and will disappear after the iron is used a few times. |
| Drops of water come out of the plate (15). | The iron temperature adjustment knob (12) is set to a low temperature for steam ironing. | Adjust the temperature for steam ironing (see the "IRONING" chapter). |
| The appliance does not produce steam. | The appliance is not on. Press the ON/OFF button (13). | |
| The steam button (16) is not being pressed. | Keep the steam button (16) pressed as you iron. | |
| The water in the reservoir (2) has finished and the no water LED (7) is on. | Fill the water reservoir (2) (see chapter: Filling the reservoir while ironing). | |
| The plate (15) is dirty: there are impurities or lime scale residue. | The impurities or chemical substances found in the water have deposited on the plate. | Wait for the plate to cool down and clean it with a damp cloth. |
| You are ironing with a temperature that is too high. | Wait for the plate to cool down and clean it with a damp cloth. | |
| An excessive amount of lime scale and minerals has accumulated in the boiler. | Clean the boiler (see the CLEANING THE BOILER chapter). | |
GB
| The steam (ready) LED (5) does not light up or water leaks from the boiler cleaning cap (12). | The cleaning cap (12) has not been tightened correctly. | Make sure the cleaning cap is tightened well. Use a coin to tighten the cleaning cap (12). |
| Patches remain wet while ironing. | Sometimes patches remain wet after being steam ironed as the steam condenses on the ironing board. Pass the iron a number of times on the wet patches without dispensing steam. If the lower part of the ironing board is wet, dry it with a dry cloth. | Use a mesh ironing board to prevent the steam from condensing on the ironing board. |
| The iron must not rest in vertical position. | The iron has been designed to be set horizontally. | Place the iron on the heat resistant mat. |
DISPOSAL

The product is packaged in recyclable materials. Dispose of it in compliance with the environmental protection standards.

The product must be disposed of appropriately, in compliance with European standard 2002/96/EC. The recyclable materials contained in the appliance must be recovered so as to prevent environmental pollution. For further information, contact the local disposal body or the appliance dealer.
ASSISTANCE AND WARRANTY
To request repairs or purchase spare parts, please contact IMETEC's authorised customer service centre on the Toll-Free Number below or via the website. The appliance is covered by the manufacturer's warranty. For details, read the attached warranty sheet. Failure to comply with the instructions for use and maintenance provided in this manual will render the manufacturer's warranty null and void.
IMETEC
www.imetec.com
Tenacta Group S.p.A. Via Piemonte 5/11 24052 Azzano S. Paolo (BG) ITALY
Tel. +39.035.688.111 Fax +39.035.320.149
(人人WW)
MI000757
INSTRUCTIONS POUR L'EMPLOI DU FER CENTRALE VAPEUR
FR
INDICATIONS IMPORTANTES
Tel. +39.035.688.111 Fax +39.035.320.149
(人人WW)
M1000757

Tel. +39.035.688.111 Fax +39.035.320.149
(人人WW)
M1000757
INSTRUÇÕES PARA O USO DO FERRO COM CALDEIRA
PT
INDICAÇÕES IMPORTANTES
PROBLEMAS E SOLUÇÕES
ASSISTÊNCIA E GARANTIA
Tel. +39.035.688.111 Fax +39.035.320.149
(人人WW)
MI000757

NAVODILA ZA UPORABO PARNE LIKALNE POSTAJE
SL
Tel. +39.035.688.111 Fax +39.035.320.149
(人人WW)
M1000757

EL
Tel. +39.035.688.111 Fax +39.035.320.149
(人人WW)
M1000757
HU
HASZNÁLATI UTASÍTÁS GÓZÁLLOMÁSHOZ
Tel. +39.035.688.111 Fax +39.035.320.149
(人人WW)
M1000757

SQ
UDHEZIME PERDORIMI TE HEKURIT ME KALDAJE
Tel. +39.035.688.111 Fax +39.035.320.149
(人人WW)
MI000757
- IMETEC wwy.imetec.com
- OPERATING INSTRUCTIONS
- FOR THE BOILER IRON
- ATTENTION!
- CONTENTS
- GB
- IMPORTANT GUIDELINES
- SYMBOLS
- DESCRIPTION OF THE APPLIANCE AND ACCESSORIES
- PREPARATIONS
- USE
- Filling the reservoir
- Ironing
- ECO function
- Filling the reservoir while ironing
- MAINTENANCE
- Cleaning the boiler
- NOTE:
- Cleaning the appliance:
- END OF USE
- NOTES:
- PROBLEMS AND SOLUTIONS
- DISPOSAL
- ASSISTANCE AND WARRANTY
- INSTRUCTIONS POUR L'EMPLOI DU FER CENTRALE VAPEUR
- INDICATIONS IMPORTANTES
- INSTRUÇÕES PARA O USO DO FERRO COM CALDEIRA
- INDICAÇÕES IMPORTANTES
- PROBLEMAS E SOLUÇÕES
- ASSISTÊNCIA E GARANTIA
- NAVODILA ZA UPORABO PARNE LIKALNE POSTAJE
- HASZNÁLATI UTASÍTÁS GÓZÁLLOMÁSHOZ
- UDHEZIME PERDORIMI TE HEKURIT ME KALDAJE
Brand : IMETEC
Model : NoStop Professional Eco
Category : Iron