KSK3201 BT - Keyboard KeySonic - Free user manual and instructions
Find the device manual for free KSK3201 BT KeySonic in PDF.
| Product Type | Wireless Bluetooth keyboard with integrated trackball |
| Brand | KeySonic |
| Model | KSK3201 BT |
| Number of keys | 84 (83-87 depending on country) |
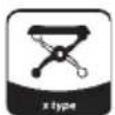
| Key technology | X-Type membrane technology |
| Key lifespan | Approximately 5 million keystrokes per key |
| Actuation force | 55 ± 15 g |
| Key travel | 1.7 ± 0.3 mm |
| Trackball type | Laser trackball Ø 8 mm, 400 dpi |
| Mouse buttons | 2 buttons (left and right click) |
| Wireless technology | Bluetooth V2.1 EDR, ISM 2.4 GHz band |
| Range | Approximately 10 m |
| Bluetooth output power | 0 dBm (Class 2) |
| Power consumption during use (keyboard) | 11.5 mA ± 1 mA |
| Power consumption during use (mouse) | 28 mA ± 2 mA |
| Standby power consumption | 202~286 µA |
| Power supply | 2 AAA 1.5 V batteries (included) |
| Low battery indicator | Flashing red LED (< 2.0 V) |
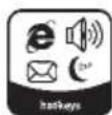
| Multifunction keys | 11 keys (sync, media, email, Internet, volume, mute, etc.) |
| Housing material | Brushed metal |
| Color | Black |
| Package contents | Keyboard, Bluetooth adapter KSR-10 BT, 2 AAA batteries, user manual |
| System compatibility | Windows XP / Vista / 7 |
| Operating temperature | 0 °C to +40 °C |
| Storage temperature | -30 °C to +65 °C |
| Humidity | 0% to 95% RH |
| Cleaning | Cloth slightly dampened with water, no aggressive solvents |
| Certifications | CE, FCC, WEEE/RoHS, REACH |
Frequently Asked Questions - KSK3201 BT KeySonic
User questions about KSK3201 BT KeySonic
0 question about this device. Answer the ones you know or ask your own.
Ask a new question about this device
Download the instructions for your Keyboard in PDF format for free! Find your manual KSK3201 BT - KeySonic and take your electronic device back in hand. On this page are published all the documents necessary for the use of your device. KSK3201 BT by KeySonic.
USER MANUAL KSK3201 BT KeySonic
CE, FCC, WEEE/RoHS, REACH
XP / Vista / Windows7


Bluetooth V2.1 EDR / Human Interface Device (HID)
0 dBm (Klasse 2)
0 8 mm, Laser-Abtastung, 400 dpi
ca. 10m
2× AAA1,5V
3 V_DC ± 5%
CE, FCC, WEEE/RoHS, REACH
XP / Vista / Windows7


5. Installation KSK-3201 RF
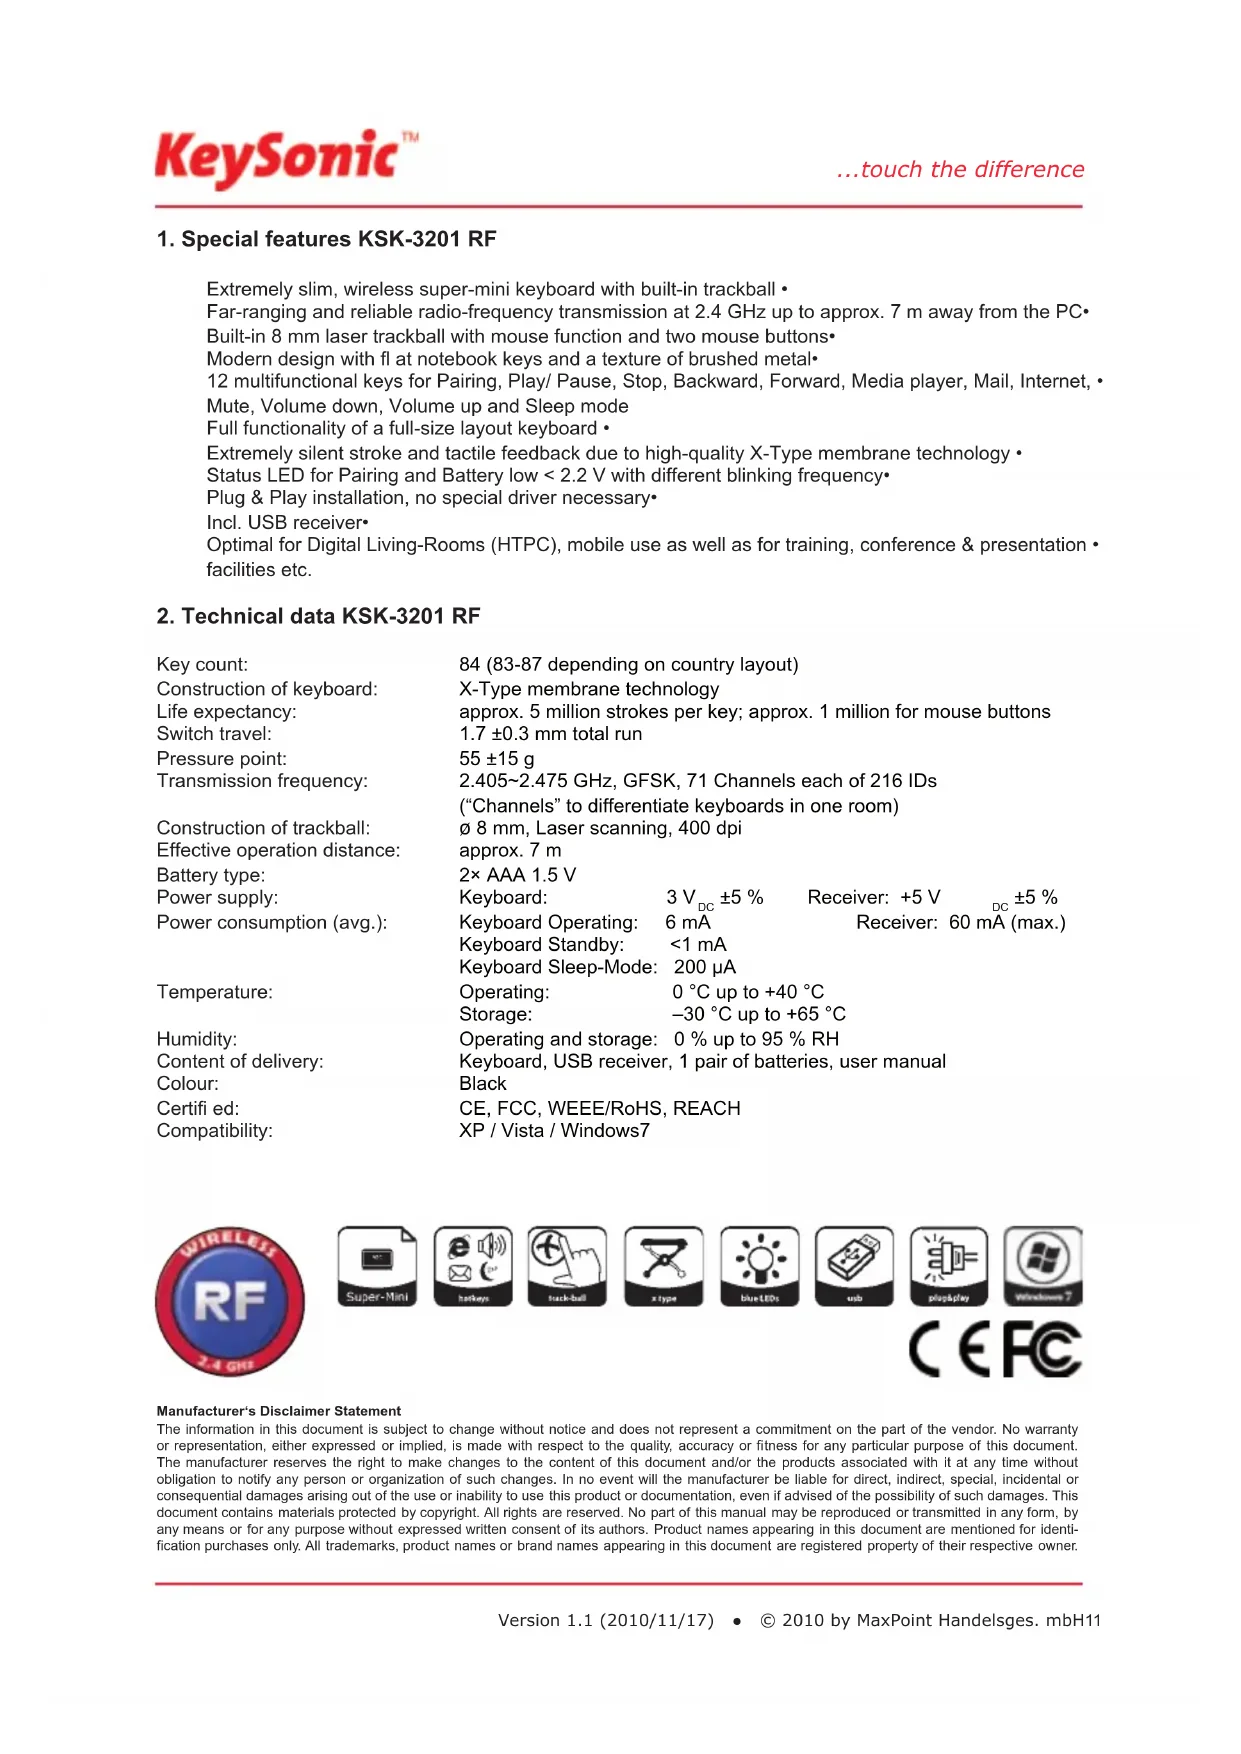
1. Special features KSK-3201 RF
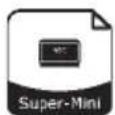
Extremely slim, wireless super-mini keyboard with built-in trackball
Far-ranging and reliable radio-frequency transmission at 2.4 GHz up to approx. 7 m away from the PC
Built-in 8 mm laser trackball with mouse function and two mouse buttons
Modern design with fl at notebook keys and a texture of brushed metal
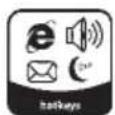
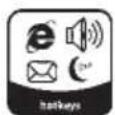
12 multifunctional keys for Pairing, Play/ Pause, Stop, Backward, Forward, Media player, Mail, Internet,
Mute, Volume down, Volume up and Sleep mode
Full functionality of a full-size layout keyboard
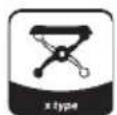
Extremely silent stroke and tactile feedback due to high-quality X-Type membrane technology
Status LED for Pairing and Battery low < 2.2V with different blinking frequency
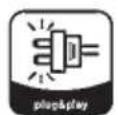
Plug & Play installation, no special driver necessary.
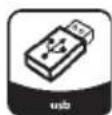
Incl. USB receiver
Optimal for Digital Living-Rooms (HTPC), mobile use as well as for training, conference & presentation
facilities etc.
2. Technical data KSK-3201 RF
Key count:
Construction of keyboard:
Life expectancy:
Switch travel:
Pressure point:
Transmission frequency:
Construction of trackball:
Effective operation distance:
Battery type:
Power supply:
Power consumption (avg.):
Temperature:
Humidity:
Content of delivery:
Colour:
Certified:
Compatibility:
84 (83-87 depending on country layout)
X-Type membrane technology
approx. 5 million strokes per key; approx. 1 million for mouse buttons
1.7± 0.3 mm total run
55± 15g
2.405~2.475 GHz, GFSK, 71 Channels each of 216 IDs
("Channels" to differentiate keyboards in one room)
8mm , Laser scanning, 400 dpi
approx. 7 m
2 × AAA 1.5 V
Keyboard: 3V_DC ± 5% Receiver: +5V DC ±5%
Keyboard Operating: 6 mA
Keyboard Standby: <1 mA
Keyboard Sleep-Mode: 200 A
Operating: 0^ C up to +40^ C
Storage: -30 °C up to +65 °C
Operating and storage: 0% up to 95% RH
Keyboard, USB receiver, 1 pair of batteries, user manual
Black
CE, FCC, WEEE/RoHS, REACH
XP / Vista / Windows7


Manufacturer's Disclaimer Statement
The information in this document is subject to change without notice and does not represent a commitment on the part of the vendor. No warranty or representation, either expressed or implied, is made with respect to the quality, accuracy or fitness for any particular purpose of this document. The manufacturer reserves the right to make changes to the content of this document and/or the products associated with it at any time without obligation to notify any person or organization of such changes. In no event will the manufacturer be liable for direct, indirect, special, incidental or consequential damages arising out of the use or inability to use this product or documentation, even if advised of the possibility of such damages. This document contains materials protected by copyright. All rights are reserved. No part of this manual may be reproduced or transmitted in any form, by any means or for any purpose without expressed written consent of its authors. Product names appearing in this document are mentioned for identification purchases only. All trademarks, product names or brand names appearing in this document are registered property of their respective owner.
1. Special features KSK-3201 BT
Extremely slim, wireless super-mini keyboard with built-in trackball
Far-ranging and reliable Bluetooth transmission up to approx. 10m away from the PC
Built-in 8 mm laser trackball with mouse function and two mouse buttons
Modern design with fl at notebook keys and a texture of brushed metal
11 multifunctional keys for Pairing, Play/ Pause, Stop, Backward, Forward, Media player, Mail, Internet, Mute, Volume down & up
Full functionality of a full-size layout keyboard
Extremely silent stroke and tactile feedback due to high-quality X-Type membrane technology
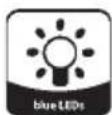
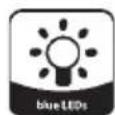
Status LEDs: blue for Pairing and red for Battery low < 2.2V
Plug & Play installation, no special driver necessary
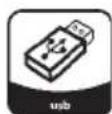
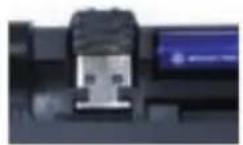
Incl. USB Bluetooth adapter KSR-10 BT to connect keyboard with not Bluetooth enabled computers
Optimal for Digital Living-Rooms (HTPC), mobile use as well as for training, conference & presentation
facilities etc.
2. Technical data KSK-3201 BT
Key count:
Construction of keyboard:
Life expectancy:
Switch travel:
Pressure point:
Transmission frequency:
Power output:
Construction of trackball:
Effective operation distance:
Battery type:
Power supply:
Power consumption (avg.):
Temperature:
Humidity:
Content of delivery:
Colour:
Certified:
Compatibility:
84 (83-87 depending on country version)
X-Type membrane technology
approx. 5 million strokes per key; approx. 1 million for mouse buttons
1.7 ± 0.3 ~mm total run
55 ± 15g
2.401-2.48 GHz ISM Band, GFSK, 79 channels Frequency Hopping
Bluetooth V2.1 EDR / Human Interface Device (HID)
0 dBm (Class 2)
0 8 mm, Laser scanning, 400 dpi
approx. 10m
2 × AAA 1.5 ~V
3 V_DC ± 5%
Operation keyboard: 11.5 mA ±1 mA
Operation mouse: 28mA± 2mA
Standby: 3.4 mA (nach 3 Sek.)
Sleep mode: 202~286 μA ±10 μA
Operating: 0^ C up to +40^ C
Storage: -30 °C up to +65 °C
Operating and storage: 0% up to 95% RH
Keyboard, USB Bluetooth adapter KSR-10 BT, 1 pair of batteries, user manual
Black
CE, FCC, WEEE/RoHS, REACH
XP / Vista / Windows7


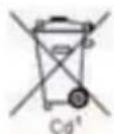
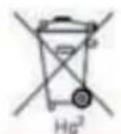
Information on disposal of old batteries (Battery Regulation)
The new Regulation obliges battery manufacturers and importers to take back, sort and dispose all old batteries. The consumer is obliged to give back used batteries in retail stores or in municipal collection points. The disposal in municipal waste is explicitly prohibited according to Battery Regulation. You can send batteries purchased from us after consumption to the following address via suffi client stamped mail:
MaxPoint Handelsgesellschaft mbH, Kurl-Fischer-Straße 50, D-22926 Ahrensburg Batteries, which contain pollutants, are marked with the symbol of a crossed-out dustbin, similar to the symbol in the illustration. The chemical description of the pollutant is situated below the symbol of the dustbin. "Cd" stands for Cadmium, "Pb" for Lead, "Hg" for Mercury.

5. Installation KSK-3201 RF
5.1 System requirements
This keyboard requires a PC with USB connection and one of the following operating systems: Windows XP / Vista / Windows7
For the installation of the keyboard under the mentioned above operating systems you need NO special driver!
5.2 Installation of the USB receiver for KSK-3201 RF
In order to install your keyboard, please perform the following steps:
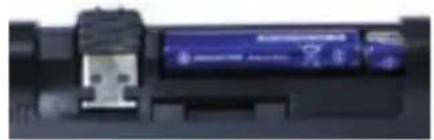
Take the USB receiver (USB dongle receiver) out of the box. [If you are just not using the keyboard you can store the receiver next to the battery case on the back side of the keyboard.]
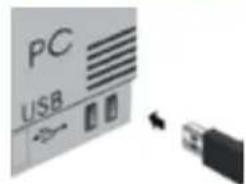
Connect the USB receiver to a free USB port on your computer.
Advise: Please ensure, that the USB receiver has a minimal distance of 20~cm to metallic dividing walls, other computer cases, monitors, ZIP drives, loudspeakers and switching power supplies.
All mentioned above state-of-the-art operating systems with Plug & Play support will recognize your key- board automatically and load the required drivers. During the phase of installation your operating system informs you via changing Pop-up information windows on the task-bar about the current status of installation. Please be patient, until the system informs you finally about the successful installation. The USB receiver is now ready for operation.

Older operating systems not always support automatic recognition of USB devices. If you have attached your USB receiver and exactly this error occurs on your system, you have the following alternatives to solve the problem:
Perform an update of your operating system and return to Step 5.2
In some cases the installation CD of your operating system is necessary according to the instructions on your screen. In this circumstance please follow these instructions*.
- Check whether your BIOS system supports USB keyboards*. Some main board manufacturers offer BIOS up-dates for download over the Internet.
Ensure in your system settings, that the used USB connection was not deactivated in your operating system*.
Should your system updates keep out of success, it is recommended to test the keyboard with another PC with the same operating system to rule out a hardware damage of the USB receiver.
- Refer to the documentation of your PC for details.
5.3 Keyboard installation KSK-3201 RF
Recommended requirement is the successful installation of the USB receiver under point 5.2.
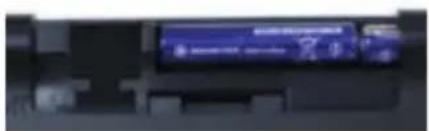
If you haven't done yet, remove the covering of the battery case on the bottom of your keyboard. Install the included batteries of type AAA 1.5 V considering the right polarity in the battery case (see picture).
2x
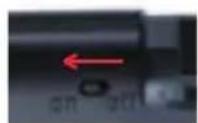
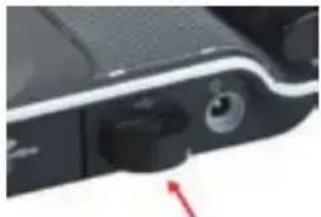
Switch ON the On/Off sliding switch on keyboard's back side·!
The USB receiver and the keyboard are factory-made already synchronised on the same channel. Normally you have not to make a new-synchronisation (as described under point 5.4).
Now you can check this by pressing any key of your keyboard. If you press the Windows key, for instance, the Windows Pop-up menu down left on your screen has to open. If so, your wireless keyboard is working correctly now. If not, please synchronise the USB receiver and the keyboard again like described under point 5.4.
Advise: Should the functionality be influenced by other users applying their wireless keyboard close-by, make a newsynchronisation as described under point 5.4.
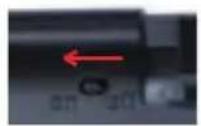
5.4 New-synchronisation of the radio channel KSK-3201 RF
When you install your keyboard for the first time and no connection can be established, please synchronise the radio channel between keyboard and USB receiver again by pressing and holding the keys (Fn + F1) simultaneously. After 2 seconds pairing starts, the pairing LED is blinking. Pairing can take several seconds and is fi nished, when the LED above the trackball goes off. Now the keyboard is ready for usage. Check now the functionality of the keyboard as described under point 5.3.
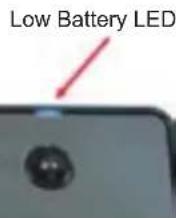
Pairing LED
In implausible case the keyboard does not work even after new-synchronisation, you have the following options to solve this problem:
Repeat the procedure of synchronisation as described under 5.4.
Sometimes it is necessary to repeat this routine several times, until the right radio channel is found.
In case your USB receiver is attached to an USB hub, you should install it directly on the USB connector of your notebook or desktop.
During the procedure of synchronisation the keyboard should be located close to the USB receiver to make sure, that the immediate environment has no influence on the radio transmission (for instance reduction/interferences due to metal cases, other sources of interferences etc.).
Ensure that you use only batteries with full loading capacity. In case of doubt change the old batteries before next synchronisation against new ones as a precaution. Low battery capacity is signalised by permanent glowing of the blue LED above the trackball.
6. Installation KSK-3201 BT
6.1 System requirements
Precondition for the use of the keyboard is that your device (PC, notebook, tablet, handheld, etc.)
is hardware-sided Bluetooth-enabled (e.g. by an integrated Bluetooth module or external adapter) software-sided (Bluetooth) supports faultlessly the HID profi le software-sided (operating system) supports faultlessly standard keyboard drivers with corresponding country code
Below there are various technical situations:
End device is hardware- and software-technically already Bluetooth-enabled.
Skip the further text and follow the instructions under 6.3
End device is hardware- and software-technically not Bluetooth-enabled. Follow the further text
6.2 Installation of the included Bluetooth adapter for KSK-3201 BT
In order to install the Bluetooth adapter, please perform the following steps:
Connect the included USB adapter (KSR-10 BT) to a free USB port on your computer.
Advise: Please ensure, that the USB adapter has a minimal distance of 20~cm to metallic dividing walls, other computer cases, monitors, ZIP drives, loudspeakers and switching power supplies.
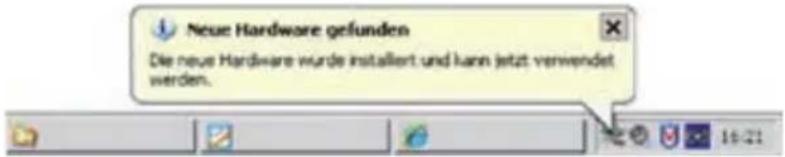
All mentioned above state-of-the-art operating systems with Plug & Play support will recognize your USB adapter automatically and load the required drivers. During the phase of installation your operating system informs you via changing Pop-up information windows on the task-bar about the current status of installation. Please be patient, until the system informs you finally about the successful installation. The USB adapter is now ready for operation.
Older operating systems not always support automatic recognition of USB devices. If you have attached your USB receiver and exactly this error occurs on your system, you have the following alternatives to solve the problem:
Perform an update of your operating system and return to Step 6.2
In some cases the installation CD of your operating system is necessary according to the instructions on your screen. In this circumstance please follow these instructions*.
Check whether your BIOS system supports USB keyboards*. Some main board manufacturers offer BIOS - updates for download over the Internet.
Ensure in your system settings, that the used USB connection was not deactivated in your operating system*.
Should your system-updates keep out of success, it is recommendable to test the keyboard with another PC with the same operating system to rule out a hardware damage of the USB receiver.
- Refer to the documentation of your PC for details.
6.3 Keyboard installation KSK-3201 BT
Ensure for the further procedure that the used Bluetooth driver software was installed correctly on your PC.
If you haven't done yet, remove the covering of the battery case on the bottom of your keyboard. Insert the included batteries of type AAA 1.5 V considering the right polarity in the battery case (see picture).
2x
Switch ON the On/Off sliding switch on keyboard's back side·!
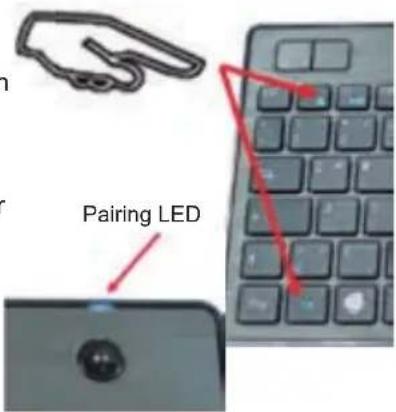
After connecting the Bluetooth adapter with your PC, the necessary drivers are installed automatically by the Windows' PNP functionality and the blue Bluetooth logo appears at the bottom right corner of the screen.

Now the radio connection must be established between the Bluetooth · adapter and the keyboard (Pairing). Press the keys (Fn + F1) on your keyboard simultaneously. After 2 seconds pairing starts, the pairing LED is blinking. Pairing can take several seconds and is fi nished, when the LED above the trackball goes off.
Should the pairing process break off (LED goes off) without getting a connection, try it again. Probably, it can be necessary to switch the rear sliding switch off and on again.

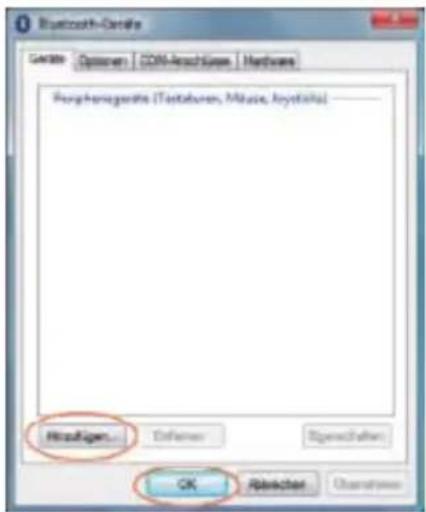
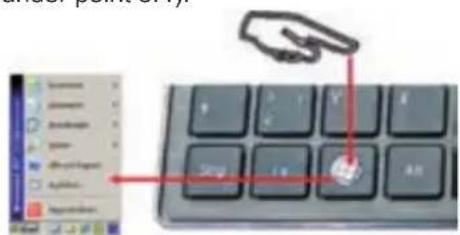
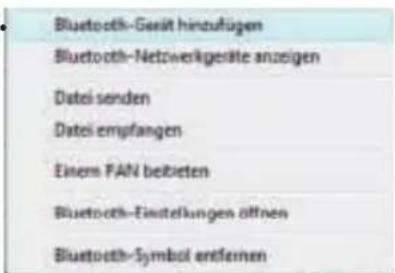
A double click with the left mouse - key on the Bluetooth logo opens the menu „Bluetooth devices".
Click "Add" and OK.
Alternatively to the just described method, a single click on the Bluetooth logo opens a pull up menu; and after a further click on the option ,add Bluetooth devices" appears the menu (shown in the picture).
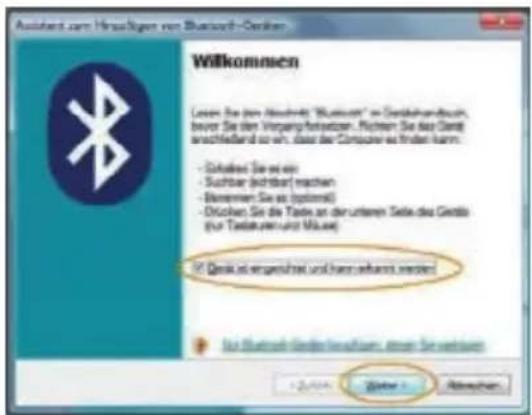
Place a tick for _Device is set and can be identified
and click ,Continue>".
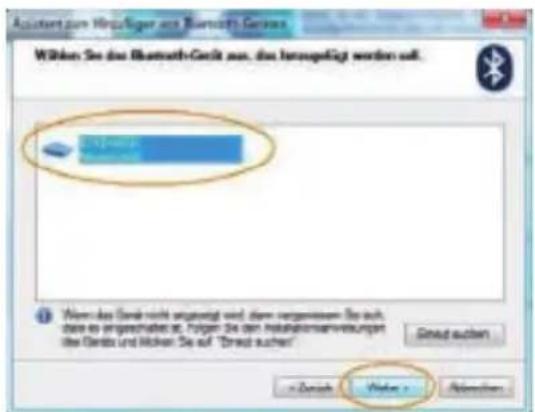
Select the identifi ed keyboard, which is shown in the next window (here ,BTKB-66EB-New device") and confirm with "Continue>. (Attention: here can be listed of course also more Bluetooth devices as shown in our picture)
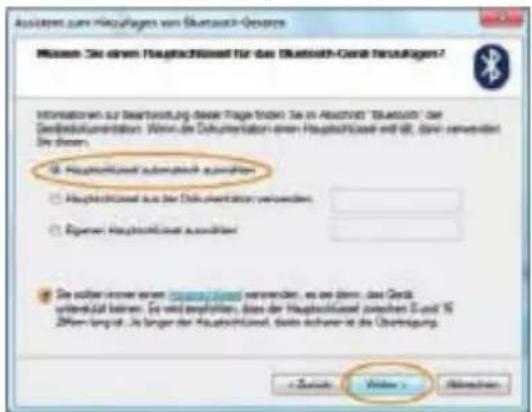
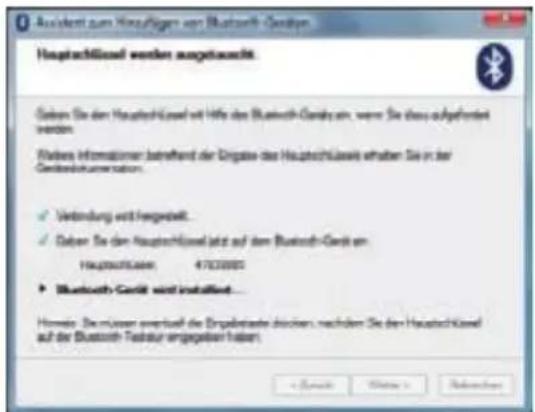
The option,select pass key automatically" is already given, so click ,Continue >
Type the shown in the menu pass key with the Bluetooth - keyboard and confirm with "Enter".
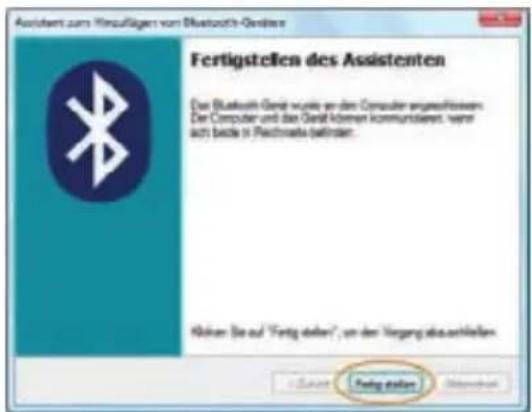
Finish the Bluetooth assistant with a final click on "Finish". The Bluetooth keyboard is now ready for use and functional.
Would you like to use instead of the included Bluetooth USB super-mini adapter another Bluetooth adapter or an integrated Bluetooth module, so please note the following instructions:
- If your PC is running Windows XP (SP2), Vista or Windows7 and the IC of your Bluetooth adapter is from manufacturer CSR, please use the included and preloaded Microsoft Bluetooth driver software. You do not need to install other Bluetooth driver software. If you do not like to use the Microsoft Bluetooth driver software for any reason, you can install optionally Bluetooth driver software Toshiba or BlueSoleil (from software manufacturer IVT). *
If your PC is running Windows XP (SP2), Vista or Windows7 and the IC of your Bluetooth adapter is from manufacturer CSR, please first install the Bluetooth driver software Toshiba or BlueSoleil (IVT).
If your PC is running Windows XP (SP2), Vista or Windows7 and the IC of your Bluetooth adapter is from manufacturer Broadcom, please first install the Bluetooth driver software WIDCOMM.*
- For details, see the documentation of your PC, your built-in Bluetooth module or your Bluetooth adapter.
Advice:
The most Bluetooth keyboards cannot work under BIOS or DOS environment, because the Bluetooth adapter works only in HID mode (Human Interface Device). For this a dual Bluetooth USB adapter would be necessary, which supports both HID and HCI mode (Host Controller Interface.
7. How to use the keyboards KSK-3201 RF and KSK-3201 BT
After successful launch enjoy now during the operation a free and independent choice of location up to approx. 7 / 10m distance to the PC. More or less range can be caused, like mentioned above, by metallic dividing walls, other computer cases, monitors, ZIP drives, loudspeakers, switching power supplies etc., but also by different loading capacity of the batteries.
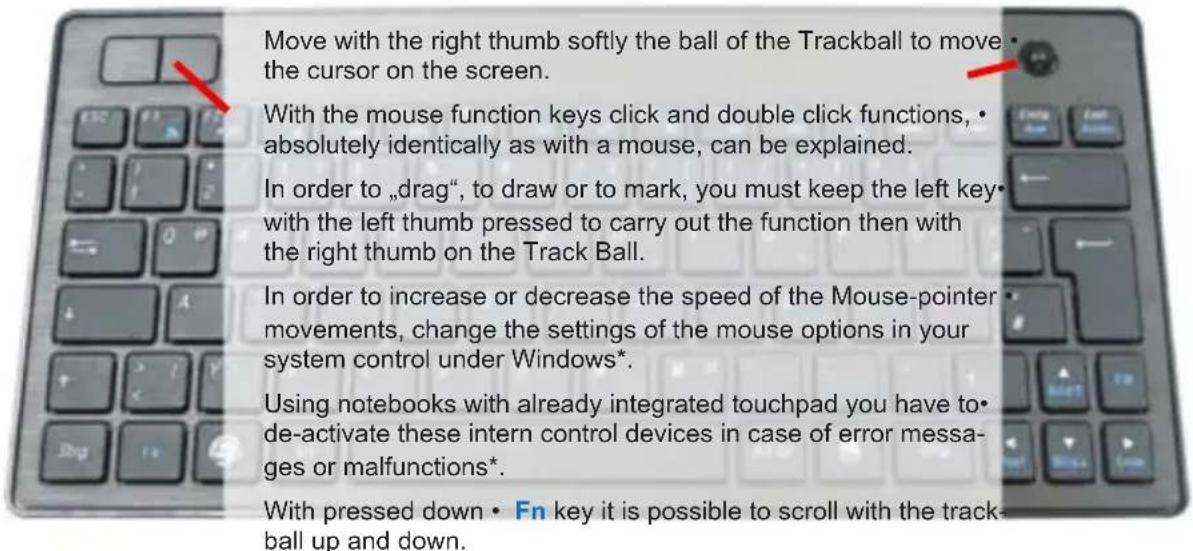
7.1. Trackball
As a mouse alternative the keyboard is equipped with a Laser Trackball inclusive two mouse function keys allowing comfortable and ergonomic handling of the PC, for instance from a sofa. Thereby the handling of the Trackball is as simple as brilliant.
Should the precision of the cursor decrease after several months of usage, please check the installed batteries for their state. In the case of doubt exchange them for new.
Advise: A too low battery capacity might be responsible for the fact that the operation distance to the radio remote control of the PC is impaired respectively signs are let out sporadically when writing.
7.2 Status LEDs of the keyboards (above the Trackball)
- Low Battery [amber LED (KSK-3201 RF) respectively red LED (KSK-3201 BT) - blinking] It indicates that the battery is below 2.2 Volt (KSK-3201 RF) respectively 2.0 V (KSK-3201 BT). It is blinking, until new battery is installed or the battery is total used up. It is fl ashing only while the keyboard is not in sleep mode.
- Pairing LED [gelbe LED (KSK-3201 RF) bzw. blaue LED (KSK-3201 BT) - blinkend] It indicates that the keyboard is in Pairing mode (searching a RF / Bluetooth receiver). When Fn+F1 (Pairing key) are pressed, the LED fl ashes till a receiver has been found or the relevant computer stops pairing in advance.
7.3. Operating modes of the keyboards
Standby/ Sleep mode
Standby: after 3 seconds
Sleep mode: after 180 seconds
Wake up mode
To wake up the keyboard from sleep mode, press any key of the keypad including left or right mouse buttons. It can take up to 4 Seconds until the keyboard wakes up.
7.4. Keys with double functions
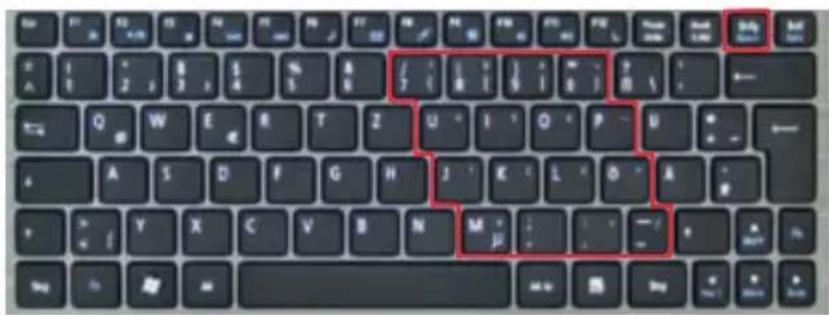
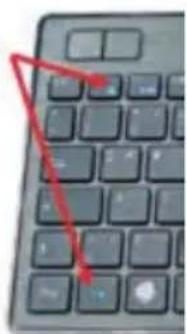
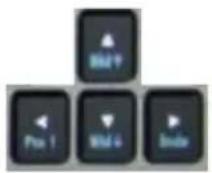
The layout of the keyboard is a special space-saving layout with the same virtual numeric keypad also used in notebooks. Press the NumLk key in the top key row in order to switch the virtual numeric keypad function on and off. (Characters depicted in blue are assigned to the keys)
- With activated Num Lock function you can hold pressed the key Fn in the left down corner for the temporary deactivation of the virtual numeric keypad. This is particularly convenient to enter letters quickly apart from numbers.
- Without previous activation of the NumLk key, the pressed down Fn key will control the integrated position keys in the same way as an external keypad (please refer to the picture).
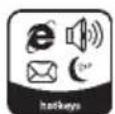
7.4 Multifunctional keys
The keyboard has 12 integrated multifunctional keys for a fast and comfortable operation, as second assignment of the function keys F1 to F12. These keys perform the below described functions when pressing simultaneously with Fn; e.g. open documents or start software programs or web pages.

Pairing
Connects the keyboard with the USB receiver (RF receiver respectively Bluetooth adapter)

Play/Pause
One-time pressing starts the track of a CD, VCD, DVD or media file; repeated pressing pauses the replay

Stop
Stops the track of the CD, VCD, DVD or media file

Previous track
Starts the previous track of the CD, VCD, DVD or media file

Next track
Starts the next track of the CD, VCD, DVD or media file

Media-Player
Opens the start page of the preset Media Player

Opens the home page of the preset E-mail program

Internet
Starts the default Web browser and goes to the home web page.

Mute
Activates or de-activates computer's sound

Volume -
Decreases the computer's sound volume

Volume +
Increases the computer's sound volume

Sleep
Puts the keyboard into sleep mode (only for KSK-3201 RF!)
8. How to clean the keyboards KSK-3201 RF and KSK-3201 BT
Remove dust with a brush, with soft compressed air, or with a vacuum cleaner with brush head nozzle.
Remove fi ne dirt with a not-too-damp cloth.
DO NOT use any aggressive detergents, solvents or gasoline in order to clean the keyboard.
2. Technical data KSK-3201 RF
Distance effective :
env. 10m
Type de pile :
2 × AAA 1.5 ~V
Alimentation :
3 V_DC ± 5%
Courant absorbé max.:
CE, FCC, WEEE/RoHS, REACH
Compatibility :
XP / Vista / Windows7