VeroCafe TES50159DE - Machine à café BOSCH - Free user manual and instructions
Find the device manual for free VeroCafe TES50159DE BOSCH in PDF.
Download the instructions for your Machine à café in PDF format for free! Find your manual VeroCafe TES50159DE - BOSCH and take your electronic device back in hand. On this page are published all the documents necessary for the use of your device. VeroCafe TES50159DE by BOSCH.
USER MANUAL VeroCafe TES50159DE BOSCH
Register your new Bosch now:
Included in delivery (see page 20)
electrical and electronic equipment
(see overview images A, B, C, D and E at
the start of the operating instructions)
3 Selector for grind setting
4 Drawer (ground coffee / cleaning tablet)
5 Brewing unit (Figure E)
c) Eject lever for brewing unit
6 Milk frother (Figure C) removable
7 Height-adjustable coffee outlet
b) Coffee grounds container
c) Drip tray for coffee outlet
d) Grate for coffee outlet
9 Power on/off switch O / I
13 “Coffee strength” rotary knob
14 “Drink selection” rotary knob
16 Removable water tank
(insertion aid for water lter)
19 Storage compartment for
20 Power cable with storage compartment
Included in delivery 20
Preparation using coffee beans 28
Preparation using ground coffee 28
Dispensing hot water 29
Preparing milk froth 29
Maintenance and daily cleaning 29
Tips on saving energy 32
Service programme 32
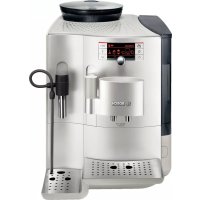
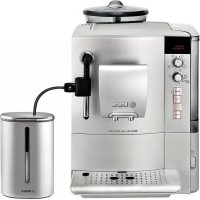
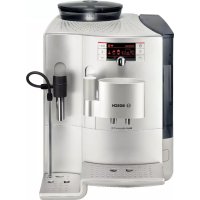
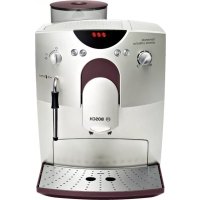
Congratulations on purchasing this fully
automatic espresso machine from Bosch.
Included in delivery
(see overview image at the start of the
a TES501 fully automatic
b Operating instructions
c Water hardness testing strips
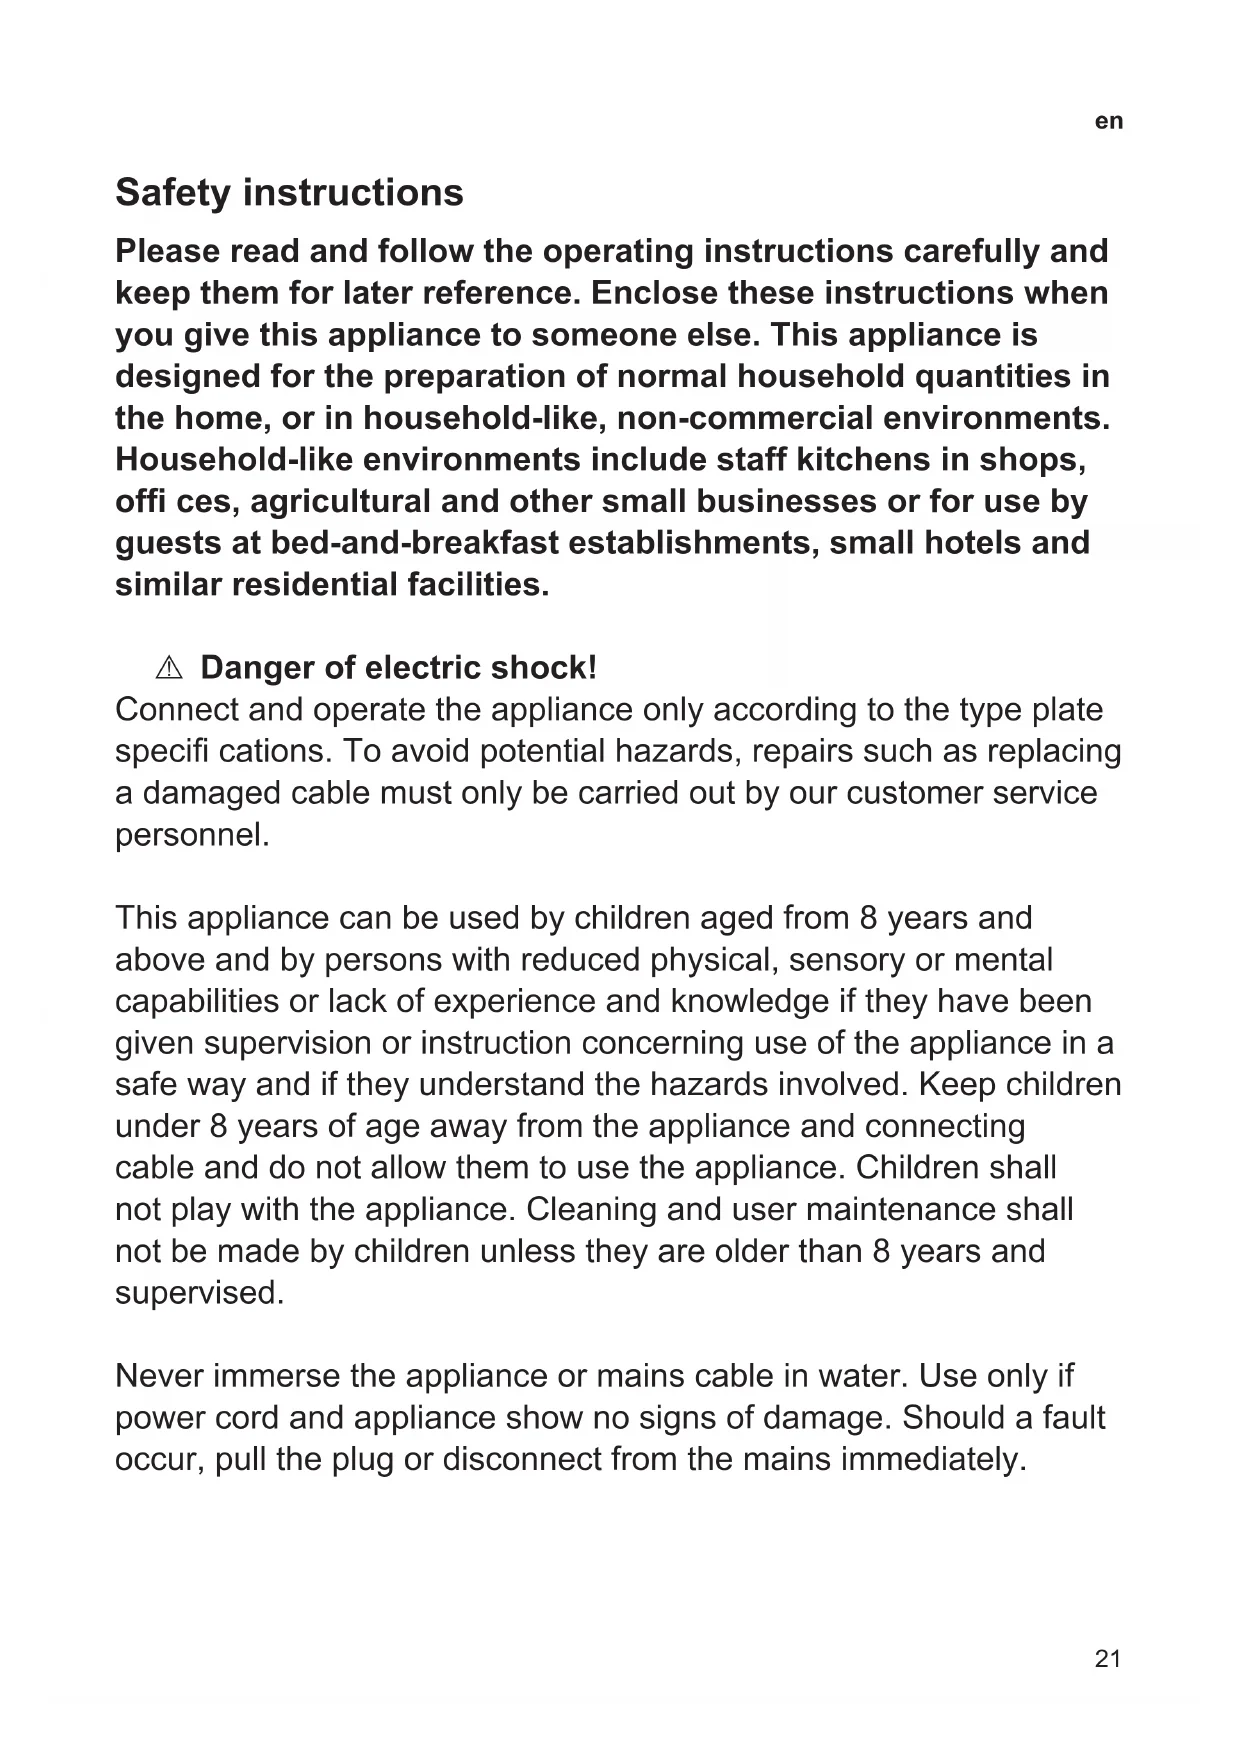
Please read and follow the operating instructions carefully and
keep them for later reference. Enclose these instructions when
you give this appliance to someone else. This appliance is
designed for the preparation of normal household quantities in
the home, or in household-like, non-commercial environments.
Household-like environments include staff kitchens in shops,
of ces, agricultural and other small businesses or for use by
guests at bed-and-breakfast establishments, small hotels and
similar residential facilities.
¡ Danger of electric shock!
Connect and operate the appliance only according to the type plate
speci cations. To avoid potential hazards, repairs such as replacing
a damaged cable must only be carried out by our customer service
This appliance can be used by children aged from 8 years and
above and by persons with reduced physical, sensory or mental
capabilities or lack of experience and knowledge if they have been
given supervision or instruction concerning use of the appliance in a
safe way and if they understand the hazards involved. Keep children
under 8 years of age away from the appliance and connecting
cable and do not allow them to use the appliance. Children shall
not play with the appliance. Cleaning and user maintenance shall
not be made by children unless they are older than 8 years and
Never immerse the appliance or mains cable in water. Use only if
power cord and appliance show no signs of damage. Should a fault
occur, pull the plug or disconnect from the mains immediately.22
The appliance contains permanent magnets that may in uence
electronic implants such as pacemakers or insulin pumps. Persons
with electronic implants should keep a minimum of 10 cm away from
the front of the appliance.
¡ Risk of suffocation!
Do not allow children to play with packaging material.
Store small parts safely as they can be easily swallowed.
Do not reach into the grinding unit. A misuse of the appliance can
potentially lead to injury.
The milk frother gets very hot. After use, allow to cool down rst
before touching. After the use the heating element surfaces and
warming plate can be subjected to residual heat.23
The various LEDs light up and ash to
indicate the following:
D lights up The water tank is empty and
needs to be relled.
D ashes The water lter is exhausted
and needs to be replaced.
Important: When you rst
take the appliance into opera-
tion this ashing light does
not signify “Change lter” (see
“Setting up the appliance”)
E lights up The bean container is empty
and needs to be relled.
F lights up The steam valve needs to be
F ashes Depending on the setting,
steam or hot water is coming
out of the milk frother.
G lights up When G is selected using
the “coffee strength” rotary
knob, the symbol lights up
while ground coffee is being
H lights up The drip tray is missing or has
not been inserted correctly.
Insert the drip dray.
H ashes The trays are full. Empty the
trays and reinsert them.
I lights up The brewing unit door is open.
I ashes Remove and clean the
Power on/off switch O / I The power on/off switch O / I (9) is used to
switch the appliance on or to switch it off
completely (power supply off).
Important: To switch off, use the service
Service button A When the service button (12) is pressed
briey, the appliance rinses and switches
off. If the service button (12) ashes, the
service programme needs to be run. Press
and hold the service button (12) to start
the service programme. The service button
(12) ashes while the service programme is
running and turns off when the programme
Steam button B Press the steam button (11) to generate
steam for frothing milk.
Start button C Press the start button (10) to start preparing
a drink. Press again during drink prepara-
tion to stop the dispensing process early.24
“Coffee strength” rotary knob
This rotary knob (13) is used
to adjust the coffee strength
or select the setting for
“Drink selection” rotary knob
This rotary knob (14) is
used to select the required
beverage and quantity. It is
also used to change user
Pull the milk frother (6) out to open it and
push it back in to close it.
Fill the appropriate container using only
pure, cold, uncarbonated water and only
roasted beans (preferably espresso or
coffee bean blends for fully automatic coffee
machines). Do not use coffee beans that
have been glazed, caramelised or treated
with other additives containing sugar, since
they will block the brewing unit.
The water hardness setting can be adjusted
on this appliance. The factory setting for the
water hardness is 4. Check the hardness
of the water you use with the enclosed
test strip. If the test reveals a value other
than 4, change the setting on the appliance
accordingly after switching on (see
“Settings” – “Water hardness”).
Setting up the appliance
2. Place the fully automatic espresso
machine on a at, waterresistant
surface that can take its weight. The
venti lation slots on the appliance must
Important: Only use the appliance in
frost-free rooms. If the appliance has been
transported or stored at temperatures below
0 °C, wait at least 3 hours before operation.
3. Pull out the mains plug from the cable
compartment (20) and plug it in. Adjust
the length of the cable by pushing it
back in and pulling it out. To do this,
place the appliance with its back ush
with the edge of the work surface and
either pull the cable downwards or
4. Assemble the milk frother. Only use the
appliance when the milk frother (6) is
completely assembled and tted.
5. Lift the water tank lid (17).
6. Remove and rinse the water tank (16)
and ll it with fresh cold water. Do not ll
7. Replace the water tank (16) and push it
rmly downwards into place.
8. Close the water tank lid (17).
9. Fill the bean container (1) with
coffee beans (for preparation using
ground coffee see “Preparation using
10. Press the power on/off switch O / I (9) to
switch on the appliance. LED D ashes
and LED F lights up.
11. Place a container under the milk frother
12. Carefully pull out the milk frother (6)
to open it. The appliance rinses out
the milk frother (6) with water. LED F
13. When LED F lights up constantly,
press in the milk frother (6) to close it.
The appliance heats up and rinses. Some
water will run out of the coffee outlet. When
buttons A (12), B (11) and C (10) light
up, the appliance is ready for use.
Switching off the appliance
The factory settings of the fully automatic
espresso machine are programmed for
optimal performance. The appliance
switches off automatically after a specic
time (the length of time can be adjusted,
see “ Settings” – “Automatic switch-off”).
Exception: The appliance switches off
without rinsing if only hot water or steam
To switch the appliance off manually before
this, press the service button (12).
The appliance rinses and switches off.
Note: If the appliance is being used for the
rst time, the service programme has been
run, or the appliance has not been operated
for a long period, the rst beverage will
not have the full aroma and should not be
When the fully automatic espresso machine
is rst used, you will achieve a suitably thick
and stable “crema” only after the rst few
cups have been dispensed.
If the appliance is in use for a long period
of time, water droplets will form on the
venti lation slits. This is normal.
Using a water lter can prevent a buildup
of limescale deposits.
A new water lter must be rinsed before it
can be used. To do this, proceed as follows:
1. Press the water lter rmly into the empty
water tank with the aid of the measuring
2. Fill the water tank (16) with water up to
A (12) simultaneously for at least
5 seconds. Either “off” or “on”
5. Press the start button (10) to select “on”.
6. Press and hold the start button (10) for
at least 5 seconds to conrm. All of the
LEDs light up briey.
7. LED D ashes and LED F lights up.
8. Place a container with a capacity of 0.5 l
under the milk frother outlet (6).
9. Pull out the milk frother (6) to open it.
10. Water will now ow through the lter and
11. When LED F lights up constantly,
press in the milk frother (6) to close it.
12. Empty the container.
The appliance is ready to use again.
Information: Rinsing the lter simultane-
ously activates the setting for the change
lter display (= LED D ashes).
The lter is no longer effective when the
change lter display appears, or at the
latest after two months. It needs to be
replaced for reasons of hygiene and so
that there is no build-up of limescale (this
could damage the appliance). Replacement
lters can be obtained from retailers or from
customer service (see “Accessories”). If no
new lter is inserted, change the setting for
the lter (see “Water hardness”).
Information: You can use the lter indicator
to mark the month in which you inserted the
lter. You can also mark the month in which
you will need to replace the lter next
(at the latest after two months).
Information: If the appliance has not been
used for a prolonged period (for example,
when you are on vacation), the existing lter
should be rinsed before the appliance is
used again. To do so, dispense a cup of hot
water and pour it away.
You can customize the settings on the
You can make the following adjustments:
The water hardness setting can be adjusted
on this appliance. It is important to set the
water hardness correctly so that the appli-
ance can accurately indicate when it is time
to run the descale process. The factory
setting for the water hardness is 4. You can
establish the water hardness either by using
the test strip provided or by asking your
local water provider.
Dip the test strip in the water briey, shake it
gently and check the result after one minute.
Level Water hardness
If you wish to change the default degree
of water hardness, or if you have inserted
a water lter, proceed as follows:
knob (13) to position
2. Press and hold buttons B (11) and
A (12) simultaneously for at least
5 seconds. The set water hardness is
indicated by the number of LEDs that
3. Now press the start button (10) repeat-
edly until the required water hardness
is indicated, e. g., for water hardness 3,
LEDs D, E and F will light up.
4. Press and hold the start button (10)
for at least 5 seconds. The set number
of LEDs will light up to indicate that
the selected water hardness has been
Important: If a water lter is used (see
“Accessories”), proceed as follows, see
Note: If no button is pressed within
90 seconds, the appliance switches to
stand-by mode without saving the new
settings. In this case, the previously saved
water hardness setting is retained.
Automatic switch-off
Here you can set the period of time after
which the appliance should switch off auto-
matically following the last drink preparation.
A time between 15 minutes and 4 hours can
be set. To save power you can specify a
knob (13) to position
2. Press and hold buttons B (11) and A
(12) simultaneously for at least 5 seconds.
The time after which the appliance
should switch off is indicated by the
number of LEDs that now light up.
3. Now press the start button (10) repeatedly
until the required number of LEDs light
up to indicate the switch-off time:
D and E = 30 minutes
D, E and F = 45 minutes
D, E, F and G = 1 hour
D, E, F, G and H = 2 hours
D, E, F, G, H and I = 4 hours
4. Press and hold the start button (10) for
at least 5 seconds. The set number of
LEDs will light up to indicate that the
selected switch-off time has been saved
Note: If no button is pressed within
90 seconds, the appliance switches to
stand-by mode without saving the new
settings. In this case, the previously saved
switch-off time is retained.
Setting the brewing temperature
The brewing temperature can also be set.
knob (13) to position
2. Press and hold buttons B (11) and
A (12) for at least 5 seconds. The set
brewing temperature is indicated by the
number of LEDs that now light up.
3. Now press the start button (10) repeatedly
until the required number of LEDs light
up to indicate the temperature:
LED D and E = medium
LED D, E and F = high
4. Press and hold the start button (10) for
at least 5 seconds. The set number of
LEDs will light up to indicate that the
selected temperature has been saved
Note: If no button is pressed within
90 seconds, the appliance switches to
stand-by mode without saving the new
settings. In this case, the previously saved
brewing temperature setting is retained.28
Adjusting the grind settings
The selector (3) for grind setting adjusts the
grind settings from coarse to ne.
Adjust the grinding unit only while it is
r unning! Otherwise the appliance may be
damaged. Do not reach into the grinding
● With the grinding unit running, adjust the
selector (3) from ne (a: turn anticlock-
wise) to coarse (b: turn clockwise).
Information: The effects of the new grind
setting will not become apparent until after
the second cup of coffee.
Tip: Choose a ner grind for dark roasted
beans and a coarser grind for lighter beans.
grinds beans freshly for each brew.
Tip: If possible, use only beans for fully
automatic coffee and espresso machines.
For optimal quality, deep-freeze the beans
or store in a cool place in sealed containers.
Coffee beans can be ground while frozen.
Important: Fill the water tank (16) with
fresh water every day. The water tank (16)
should always contain sufcient water for
operating the appliance.
Different coffee drinks can be prepared
quite simply at the press of a button.
The appliance must be ready for use.
1. Place the pre-warmed cup(s) under the
Tip: For a small espresso, always
preheat the cup, e.g. using hot water.
2. Select the required coffee and the
required quantity by turning the upper
3. Select the required coffee strength by
turning the lower rotary knob (13).
4. Press the start button (10).
Coffee is brewed and then poured into the
Press the start button (10) again to stop the
brewing process early.
also be operated using ground coffee (not
instant coffee powder).
Important: Fill the water tank (16) with
fresh water every day. The water tank (16)
should always contain sufcient water for
operating the appliance.
1. Open the drawer (4).
2. Put ground coffee into the drawer
(maximum two level measuring spoons).
Caution: Do not use whole beans or
3. Close the drawer (4).
4. Turn the bottom rotary knob (13) to the
5. Press the start button (10).
Coffee is brewed and then poured into
Dispensing hot water
The milk frother (6) gets very hot. Hold the
milk frother (6) by the plastic part only.
The milk frother must be cleaned before
The appliance must be ready for use.
1. Place a pre-heated cup or glass under
the milk frother outlet (6).
2. Pull out the milk frother (6) to open it.
The appliance heats up. Hot water runs
out of the milk frother outlet (6) for about
3. Stop the process by pushing in the milk
Preparing milk froth
The milk frother (6) gets very hot. Hold the
milk frother (6) by the plastic part only.
Tip: You can froth the milk rst and then
dispense coffee, or froth the milk separately
and pour it onto the coffee.
The appliance must be ready for use.
1. Press button B (11).
Button B ashes and the appli-
ance now heats up for approximately
2. As soon as button and LED F lights
up, immerse the milk frother so that it
reaches the bottom of a cup or glass
that is onethird lled with milk.
3. Pull out the milk frother (6) to open it.
Escaping steam is very hot and may cause
liquids to sputter. Do not touch the metal
sleeve or aim it at anyone.
5. Push the milk frother (6) in to close it.
Tip: For optimal milk froth, if possible use
cold milk with a fat content of at least 1.5 %.
Important: Dried milk residue is difcult
to remove, so the milk frother (6) must be
cleaned with lukewarm water immediately
Risk of electric shock!
Unplug the appliance before cleaning it.
Never immerse the appliance in water.
Do not use a steam cleaner.
● Wipe the housing with a soft, damp cloth.
● Do not use abrasive cloths or cleaning
● Always remove any traces of limescale,
coffee, milk and descaler immediately.
Such residue can cause corrosion.
● New sponge cloths may contain salts.
Salts can cause rust lm on stainless
steel and must therefore be washed out
thoroughly before use.
● Pull the drip tray (8c) with the coffee
grounds container (8b) forwards and out.
Remove the panel (8a) and grate (8d).
Empty and clean the drip tray and coffee
● Remove the drawer (4) and clean.30
● Remove oat (8e) and clean with a damp
K Do not put the following items in the
dishwasher: panel (8a), oat (8e),
drawer (4), brewing unit (5a).
J The following items are dishwasher-
safe: drip tray (8c), coffee grounds
container (8b), grate (8d), aroma cover
(2) and measuring spoon (18).
● Wipe out the inside of the appliance (tray
holders and drawer).
Important: The drip tray (8c) and coffee
grounds container (8b) should be emp-
tied and cleaned daily to prevent mould
Note: If the appliance is cold when switched
on with the power on/off switch O / I (9) or if
it switches off automatically after coffee has
been dispensed, the appliance performs an
Important: If the appliance is not used for
a prolonged period (for example, when you
are on vacation), clean the entire appliance
thoroughly, including the milk system and
Cleaning the milk frother
The milk frother (6) must be cleaned after
each use in order to remove residues.
Important: Let the milk frother cool down
before you remove it.
Dismantle the milk frother for cleaning:
1. To remove, take hold of the metal sleeve
and pull it downwards and off.
2. Twist the steam nozzle (6d) anticlock-
3. Remove the frothing tube (6c).
4. Clean the individual parts with a deter-
gent solution and a soft brush. If neces-
sary, soak in a warm detergent solution.
Clean the air hole (6e) thoroughly.
5. Rinse all parts with clean water and dry.
6. Fit the steam nozzle (6d) and frothing
(6c) back into the metal sleeve.
7. Twist the steam nozzle clockwise until
the marks are aligned.
8. Attach the milk frother to the steam
valve. Check that the red mark on the
steam valve is covered.
Only use the appliance when the milk
frother (6) is completely assembled and
Cleaning the brewing unit
Clean the brewing unit regularly.
To pre-clean the brewing unit automatically:
Press the service button (12) briey. The
appliance will rinse if coffee was dispensed
previously. It then switches off.
In addition to the automatic cleaning pro-
gramme, the brewing unit (5a) should be
removed regularly for cleaning (Figure E
at the beginning of the instructions).
1. Press the power on/off switch O / I (9) to
switch off the appliance. All lights go off.
2. Open the door (5b) to the brewing unit.
3. Slide the red lock (5d) on the brewing
unit (5a) completely to the left.
4. Press the eject lever (5c) down fully. The
brewing unit is released.
5. Grasp the brewing unit (5a) by the
recessed grips and remove carefully.
6. Remove the cover (5e) of the brewing
unit and rinse the brewing unit (5a)
thoroughly under running water.
7. Thoroughly clean the brewing unit sieve
under the running water.32
Important: Do not clean with detergent or
other cleaning agents and do not put it in
8. Wipe out the inside of the appliance
thoroughly with a damp cloth and
remove any coffee residues.
9. Allow the brewing unit (5a) and the
interior of the appliance to dry.
10. Replace the cover (5e) on the brewing
unit and reinsert the brewing unit (5a)
fully into the appliance.
11. Press the eject lever (5c) up fully.
12. Slide the red lock (5d) fully to the right
and close the door (5b).
Tips on saving energy
machine when not in use. To do
this, press the service button (12).
The appliance rinses and switches off.
● If possible, do not interrupt coffee or milk
froth dispensing. Stopping a process
prematurely results in higher energy
consumption and the drip tray lls up
● Descale the appliance regularly to avoid
a build-up of limescale. Limescale residue
results in higher energy consumption.
Duration: approx. 35 minutes
Depending on use, the service button (12)
ashes at certain intervals.
The appliance should be cleaned and
descaled immediately using the service
programme. If the service programme is
not run as instructed, the appliance may
Follow the instructions for using the
descaling and cleaning agents for each
service programme. Please observe the
safety instructions on the packaging of
Never interrupt the service programme.
Do not drink the liquids.
Never use vinegar, vinegar-based products,
citric acid or citric acid-based products.
Never put descaling tablets or other
descaling agents in the drawer (4).
Specially developed and suitable
descaling and cleaning tablets are
available from retailers or customer
service (see “Accessories”).
Important: If there is a water lter in the
water tank (16), it must be removed before
starting the service programme. Clean the
brewing unit before starting the service
programme, see chapter “Cleaning the
To start the service programme, press and
hold the service button (12) for at least
Information: The service button (12)
ashes while the programme is running.
● Empty the drip tray (8) and reinsert it.
● Open the drawer (4).
● Drop a Bosch cleaning tablet into the
drawer (4) and close it.
● Press the start button (10).
● Pour lukewarm water into the empty
water tank (16) up to the 0.5 l mark and
then dissolve 1 Bosch descaling tablet
TCZ8002 in it. When using TCZ6002,
2 tablets must be dissolved.
● Press the start button (10).
The service programme will now run for
approximately 10 minutes.
● Place a container with a capacity of at
least 0.5 litres under the milk frother
● Pull out the milk frother (6) to open it.
The service programme will now run for
approximately 12 minutes.
● Rinse the water tank (16) and rell it with
fresh water up to the max mark.
● Press the start button (10).
The service programme will now run for
approximately 30 seconds and rinse the
● Push the milk frother (6) in to close it.
The service programme will now run for
approximately 8 minutes.
● Empty the drip tray (8) and reinsert it.
If you are using a lter, reinsert it now.
The appliance has been cleaned, descaled
and is ready for use again.
Important: Wipe down the appliance using
a soft, damp cloth to immediately remove
any descaler residue. Such residue can
cause corrosion. New sponge cloths may
contain salts. Salts can cause rust lm
on stainless steel and must therefore be
washed out thoroughly before use.
To avoid damage caused by frost
during transport and storage, the
appliance must be completely
Information: The appliance must be ready
for use and the water tank (16) lled.
1. Place a large container under the milk
2. Press the steam button (11).
LED h ashes and the appliance now
heats up for approximately 20 seconds.
3. If LED h lights up, open the milk frother
(6) by pulling it out and release steam
for about 15 seconds.
4. Press the power on/off switch O / I (9) to
switch off the appliance.
5. Empty the water tank (16) and the
The following accessories are available
from retailers or from customer service:
Accessories Ordering number
J Dispose of packaging in an
environ mentally-friendly manner. This
appliance is labelled in accordance
with European Directive 2012/19/
EU concerning used electrical and
electronic appliances (waste electrical
and electronic equipment – WEEE).
The guideline determines the frame-
work for the return and recycling
of used appliances as applicable
throughout the EU. Please ask your
specialist retailer about current
disposal facilities.
The guarantee conditions for this appliance
are as de ned by our representative in the
country in which it is sold. Details regarding
these conditions can be obtained from
the dealer from whom the appliance was
purchased. The bill of sale or receipt must
be produced when making any claim under
the terms of this guarantee.
Technical specications
Electrical connection (voltage – frequency) 220-240 V – 50/60 Hz
Heating output 1600 W Maximum pump pressure, static 15 bar
Maximum water tank capacity (without lter) 1.7 l
Dimensions (H x W x D) 385 x 280 x 479 mm
Weight, unlled 9.3 kg
Type of grinding unit Ceramic35
Problem Cause Remedy
Grinding unit does not
Beans are not falling into
the grinding unit (beans too
Gently tap the bean container (1).
Change the type of coffee if neces-
When the bean container (1) is
empty, wipe it with a dry cloth.
No hot water dispensed. The milk frother (6) is
Clean the milk frother (6), see
“Maintenance and daily cleaning”.
Too little or no milk froth. The milk frother (6) is
Clean the milk frother (6), see
“Maintenance and daily cleaning”.
Milk unsuitable for frothing. Use milk with a fat content of at
The milk frother (6) is not
assembled correctly.
Wet the milk frother parts and press
Build-up of limescale in the
Descale the appliance as described
in the instructions.
Coffee dispensing slows
to a trickle or stops
The grind setting is too ne
or the pre-ground coffee is
Adjust the grinding unit to a coarser
setting or use coarser pre-ground
Build-up of limescale in the
Descale the appliance as described
in the instructions.
Coffee has no “crema”. Unsuitable type of coffee. Use a type of coffee with a higher
proportion of robusta beans.
The beans are no longer
The grind setting is not
suitable for the beans.
Adjust the grind setting to ne.
Coffee is too “acidic”. The grind setting is too
coarse or the pre-ground
coffee is too coarse.
Adjust the grinding unit to a ner
setting or use ner preground
Unsuitable type of coffee. Use a darker roast.
Coffee is too “bitter”. The grind setting is too ne
or the pre-ground coffee is
Adjust the grinding unit to a coarser
setting or use coarser pre-ground
Unsuitable type of coffee. Change the type of coffee.
The water lter does not
stay in position in the
The water lter is not tted
Firmly press the water lter straight
down into the tank connection.
If you are unable to solve the problem, please call the hotline.
You will nd the telephone numbers at the back of these instructions.
Simple troubleshooting36
The water tank is not
correctly installed or the
Correctly install the water tank. If
the LED continues to ash, install
a new lter and rinse, see chapter
Carbonated water in the
Fill the water tank with fresh tap
The coffee grounds are
not compact and are too
The grind setting is too
ne or too coarse, or not
enough ground coffee has
Adjust the grinding unit to a coarser
or ner setting, or use 2 level
measuring spoons of ground coffee.
Brewing unit (5) is soiled. Cleaning the brewing unit (5).
coffee in the brewing
Clean the brewing unit (5). Put in
no more than 2 level measuring
spoons of ground coffee.
Remove and clean the brewing
unit, see “Maintenance and daily
Brewing unit (5) is missing
or has not been detected.
Switch off the appliance with the
brewing unit (5) in place, wait
three seconds and switch on the
Coffee or milk froth qual-
Build-up of limescale in the
Descale the appliance as described
in the instructions.
Water dripped onto the
inner oor of the appli-
ance when the drip tray
Drip tray (8) removed too
Wait a few seconds after the
last drink was dispensed before
removing the drip tray (8).
The default settings have
been changed and need
Some settings have been
made that are no longer
Press the power on/off button O / I
(9) to switch off the appliance.
Press and hold the service button
(12) and the steam button (11) and
press the power on/off button O / I
(9) to switch on the appliance. Then
press the start button (10) to con-
rm. The default settings are reset.
The appliance has a fault. Please contact the hotline.
Incorrect voltage. Operate the appliance at
Operate the appliance at
temperatures > 5° C.
If you are unable to solve the problem, please call the hotline.
You will nd the telephone numbers at the back of these instructions.37
3. Retirer le tube (6c).
electrical and electronic equipment –
BSH Home Appliances FZE Round About 13,
HEATHERTON, Victoria 3202
mailto:bshau-as@bshg.com
www.bosch-home.com.au
European Trade Center
Centrale Servicestation
Milton Keynes MK12 5PT To arrange an engineer visit, to
order spare parts and accessories
or for product advice please visit
www.bosch-home.co.uk
Tel.: 0344 892 8979* *Calls are charged at the basic rate, pleasecheck with your telephone service providerfor exact charges*0.03 € per minute at peak.Off peak 0.0088 € per minute. GR Greece, Ελλάς
BSH Ikiakes Siskeves A.B.E.
Central Branch Service
BSH Home Appliances Limited
Unit 1 & 2, 3rd Floor
North Block, Skyway House
www.bosch-home.com/hr
IE Republic of Ireland
BSH Home Appliances Ltd.
Unit F4, Ballymount Drive
Ballymount Industrial Estate
Service Requests, Spares and
Industrial Park North
Mahakali Caves Road,
www.bosch-home.com/it
General Serviss Limited
S.R.L. "Rialto-Studio"
Bin Hamran Commercial Centr.
4th floor, No. 112, Sec 1
gama-electronics.com
15th Road Randjespark
bosch-infoteam@bshg.com