EM4571 - Router Eminent - Free user manual and instructions
Find the device manual for free EM4571 Eminent in PDF.
User questions about EM4571 Eminent
0 question about this device. Answer the ones you know or ask your own.
Ask a new question about this device
Download the instructions for your Router in PDF format for free! Find your manual EM4571 - Eminent and take your electronic device back in hand. On this page are published all the documents necessary for the use of your device. EM4571 by Eminent.
USER MANUAL EM4571 Eminent
EM4543/ EM4544/ EM4571 Wireless Router, Access Point and Signal Booster
Multilingual
User manual
AlsIRST product defect raakt
Trademarks: all brand names are trademarks and/or registered trademarks of their respective holders.
The information contained in this document has been created with the utmost care. No legal rights can be derived from these contents. Eminent cannot be held responsible, nor liable for the information contained in this document.
Eminent is a member of the Intronics Group

EM4543 / EM4544 / EM4571
Wireless Router,Access Point and Signal Booster

Manual
EM4543 / EM4544 / EM4571- Wireless Router, Access Point and Signal Booster
Table of contents
1.0 Introduction 3
1.1 Packing contents 3
2.0 Using the installation wizard 3
3.0 Manually configure as wireless router 4
3.1 Connecting the router 4
3.2 Configuring the router for connection with the Internet 4
3.3 Determining the connection method 5
3.3.1 Configuring the router for a DHCP Internet connection 5
3.3.2 Configuring the router for a Static Internet connection 6
3.3.3 Configuring the router for a PPPoE Internet connection 6
3.4 Securing a wireless network 7
3.4.1 WPA2 AES security (recommended) 7
3.4.2 WEP security 8
3.5 Finishing the installation procedure of your wireless router 8
4.0 Setting up a secured connection using WPS 9
4.1 Using the WPS button (Router and Wireless WPS adapter) 9
5.0 Manual configuration as an Access Point 10
5.1 Connecting the router 11
5.2 Configuring the router as an Access Point 11
5.3 Securing a wireless network 12
5.3.1 WPA2 AES security (recommended) 13
5.3.2 WEP security 13
5.4 Finishing the installation procedure of your Access Point 14
6.0 Configuring the router as a signal booster (WDS) 14
6.1 Connecting the signal booster (2) 15
6.2 Configuring the signal booster (2) 15
6.3 Securing your signal booster (2) (WPA2 AES) 16
6.4 Configuring your wireless router (1) 17
6.5 Connecting your wireless router with the signal booster (2) 18
6.6 Completing the installation of the signal booster 18
7.0 Configuring the router as a signal booster (Wireless Multi Bridge) 19
7.1 Connecting the signal booster 19
7.2.Configuring the local wireless network on the signal booster 20
7.3 Configuring the Wireless Multi Bridge settings 20
8.0 Configuring the wireless network on your computer 21
8.1 Configuring a wireless network using Windows XP 21
8.2 Configuring a wireless network using Windows Vista/7 22
9.0 Firewall settings 22
9.1 Port Forwarding 23
9.2 URL filtering 23
10.0 Frequently Asked Questions and other related information 24
11.0 Service and support 24
12.0 Warning and points of attention 25
13.0 Warranty conditions 25
14.0 Declaration of Conformity 27
1.0 Introduction
Congratulations with the purchase of this high-quality Eminent product! This product has undergone extensive testing by Eminent's technical experts. Should you experience any problems with this product, you are covered by a five-year Eminent warranty. Please keep this manual and the receipt in a safe place.
Register your product now on www.eminent-online.com and receive product updates!
1.1 Packing contents
The following parts need to be present in the packing:
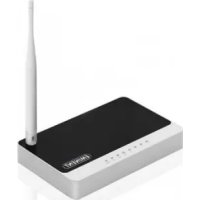
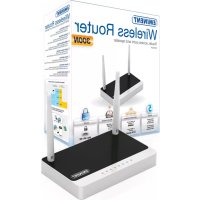
- EM4543 / EM4544 / EM4571 Wireless router, Access Point and signal booster
Power adapter - UTP network cable
- CD-ROM with installation wizard and manuals
- User manual
2.0 Using the installation wizard
The easiest way to install the router is with the help of the installation wizard. In case you do not want to use the wizard on the enclosed CD-ROM, you can install the device as a wireless router (chapter 3), an Access Point (chapter 5) or a signal booster (chapter 6 & 7) manually.
- Turn on your computer.
- Place the CD-ROM in the CD-ROM or DVD drive of your computer.
- The wizard will automatically start.
- Follow the instructions on your screen until the installation has been finished. You now have a working Internet connection.
Note! The CD-ROM does not allow you to configure the router as a signal booster. Would you like to install the router as a signal booster? Then continue with chapter 6 or 7.
3.0 Manually configure as wireless router
Install the device as a wireless router if you have a cable modem or ADSL modem without a router function. Make sure that your Internet browser and your network are correctly configured when configuring the wireless router manually. You can assume that the settings are correct, unless you have changed any of the settings in the past.
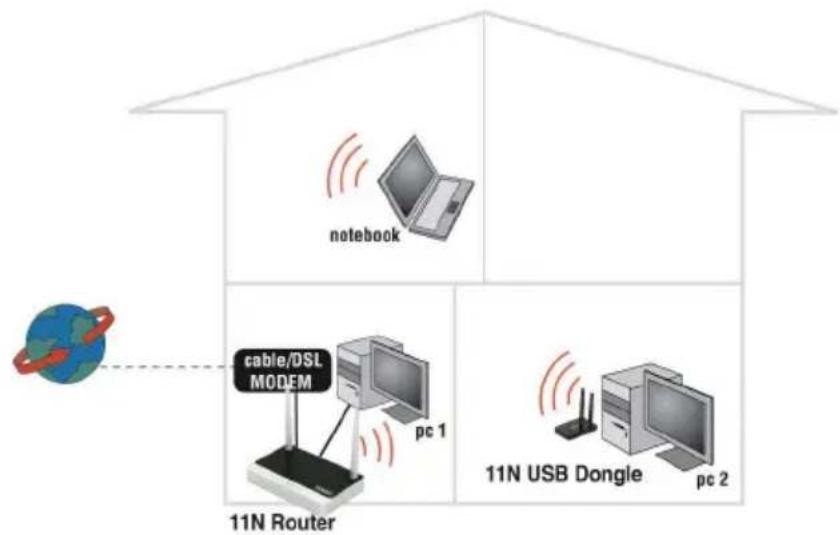
Example of EM4543/EM4544/EM4571 as wireless router
3.1 Connecting the router
- Turn off your computer.
- Connect the router to a wall outlet using the supplied power adapter.
- Connect the supplied UTP network cable to the 'WAN' port of the router.
- Connect the other end of the UTP network cable to the 'LAN' port of your cable modem.
- Connect a UTP network cable to one of the four LAN' ports of your router.
- Connect the other end of the UTP network cable to the network adapter in your computer.
Do I have a proper network connection? Turn on the computer and verify if the LED on the router, corresponding with the LAN-port to which you connected the UTP networking cable, is lit. The LED on the network adapter of your computer should also be lit.
3.2 Configuring the router for connection with the Internet
Before you can configure the router for a connection with the Internet, you will first need to connect to the router. Follow the instructions below to connect to the router.
- Turn on your computer.
-
Open your Internet browser (e.g. Internet Explorer or Firefox).
-
Type 'http://192.168.8.1' in the address bar.
- Press the enter key or click 'Go to'.
- A new screen with three different icons appears. These icons are named 'Setup Tool', 'Internet Wizard' and the 'Wireless Wizard'.
- Click 'Internet Wizard'.
- You will now be asked for a 'Username' and a 'Password'. Fill out 'admin' in the 'Username' field and 'admin' in the 'Password' field and press the enter key.
- Continue with chapter 3.3.
Hint: Click 'Wireless Wizard' if you want to setup the wireless network connection. If you have selected 'Wireless Wizard' you can continue with chapter 3.4.
3.3 Determining the connection method
To quickly configure the router for a connection to the Internet through your provider you will first need to determine which connection method your provider is using (DHCP', 'Static IP', or 'PPPoE'). Consult the information you received from your provider or look at table 1.
| Internet provider | Connection method |
| Caiway DHCP+MAC Address | |
| Compuserve with Sagem ADSL modem DHCP | |
| KPN ADSL with Thomson Speedtouch 546(i) ADSL modem DHCP | |
| OnsBrabantnet DHCP+MAC Address | |
| Telfort with Zyxel modem DHCP | |
| Tiscali with Zyxel or Sagem modem DHCP | |
| UPC Chello DHCP+MAC Address | |
| Ziggo DHCP+MAC Address | |
| Belgian providers Connection method | |
| Telenet with Motorola modem DHCP |
Table 1.
3.3.1 Configuring the router for a DHCP Internet connection
For an internet connection using 'DHCP' you can use the following steps.
- Click 'Internet Wizard'.
- Select 'Manual Internet Configuration'.
- Click 'Next'.
-
Select 'DHCP Method'.
-
Click 'Next'.
- Click 'Next'.
- Click 'Save' and 'Close'.
- The wizard will now save the settings en will close the screen automatically.
- You now have a working internet connection.
In order to prevent losing your password, write down the altered password below:
Password:
3.3.2 Configuring the router for a Static Internet connection
If your provider requires you to make a connection by using a Static IP-address, then use the following steps. (e.g. Speedtouch Home).
- Click 'Internet Wizard'.
- Select 'Manual Internet Configuration'.
- Click 'Next'.
- Select 'Static IP'.
- Click 'Next'.
- Fill in the data as provided by your Internet Service Provider.
- Click 'Next'.
- Click Save and Close'.
- The wizard will now save the settings and will close the screen automatically.
- You now have a working internet connection.
3.3.3 Configuring the router for a PPPoE Internet connection
If your provider requires you to make a connection by using PPPoE (with username and password), then use the following steps.
- Click 'Internet Wizard'.
- Select 'Manual Internet Configuration'.
- Click 'Next'.
- Select 'PPPoE'.
- Click 'Next'.
- Fill in the data as provided by your Internet Service Provider.
- Click 'Next'.
- Click Save and Close'.
- The wizard will now save the settings and will close the screen automatically.
3.4 Securing a wireless network
To avoid having uninvited guests probing your wireless network we strongly recommend securing your wireless network. There are several security methods which can secure the network at different levels. To apply a method to your network it is required that all wireless network devices support this method. The strongest method of security is WPA2 (WiFi Protected Access).
The strongest method of security is WPA2 AES. It is recommended to use this type of security. However, it is possible that (older) wireless hardware is not able to use this type of security, but can only use WPA-TKIP. Refer to the documentation of your hardware to be sure if your hardware can use WPA2 AES.
If you wish to use WPA2 AES security, continue with paragraph 3.4.1 (recommended). If you wish to use WEP security, continue with paragraph 3.4.2.
3.4.1 WPA2 AES security (recommended)
- The wizard appears in a pop-up screen. Click 'Next'.
- Choose you country/region and click 'Next'.
- At the field 'SSID' fill out the name desired for your wireless network. (Use the 'CheckSSID' option to ensure this name is not already in use.)
- Click 'Next'.
- The router will automatically scan for a suitable wireless channel.
- As a choice, the most suitable wireless channel will appear on your screen.
- Click 'Next' to confirm this channel. (You can pick a wireless channel yourself if you want).
- You will see a brief summary with the settings you have made so far. Click 'Next' to continue.
- Choose 'WPA2' and click 'Next'.
- Choose 'AES' and click 'Next'.
- Fill out a password in the 'Network Key' field (e.g. 'yourname1'). Do not use any punctuation marks and make sure the password is at least 8 characters long!
- Write down the network name and the chosen password*.
- Click 'Next'.
- Click 'Finish'.
- The wizard will now save the settings and will close the screen automatically.
Hint: WPA2 AES security is supported by Windows XP Service Pack 2 (with all updated installed). This security method is not supported by Windows 98, unless your wireless network adapter software supports WPA2 AES. In case you do not have Windows XP, Vista, Windows 7 or the required software, continue with section 3.4.2.
3.4.2 WEP security
- Choose you country/region and click 'Next'.
- Fill out the desired name for your wireless network in the field 'SSID'. (Use the 'CheckSSID' option to ensure this name is not already in use.)
- Click 'Next'.
- The router will automatically scan for a suitable wireless channel.
- As a choice, the most suitable wireless channel will appear on your screen.
- Click 'Next' to confirm this channel. (You can pick a wireless channel yourself if you want).
- You will see a brief summary with the settings you have made so far. Click 'Next' to continue.
- Choose 'WEP' and click 'Next'.
- Choose 'Use a 128 bit key' and click 'Next'.
- Fill out a password in the field 'Network Key'. For this WEP key you are only allowed to use numbers from 0 till 9 and the letters a till f. Do not use any punctuation marks and make sure the password is exactly 26 characters long.
- Write down the network name and the chosen password*.
- Click 'Next'.
- Click 'Finish'.
- The wizard will now save the settings and will close the screen automatically.
3.5 Finishing the installation procedure of your wireless router
After following chapter 4, you can finish the installation procedure by following the next steps:
- Remove the UTP network cable from your computer.
- Remove the UTP networking cable from the LAN port of your router.
- Restart your computer.
- Congratulations! You have properly installed the router.
An explanation how to connect your wireless network using Windows XP, Windows Vista and Windows 7 can be found in chapter 8.
- The connection is lost when WPA2 AES or WEP has been enabled in the router and not yet in the wireless network adapter. When WEP/WPA2 AES has also been enabled in the wireless network adapter, the connection will be repaired.
Write down the security method, the network name and the key:

WPA2 AES
WEP

Network name:
Key:
4.0 Setting up a secured connection using WPS
The EM4543/EM4544/EM4571 can be secured using WPS. WPS is a handy feature, which allows you to secure your wireless network by pressing the WPS button on both your Eminent router and your wireless WPS adapter. The Eminent router and your wireless WPS device will then automatically 'agree' to use a SSID and WPA2 AES security key. The connection between the Eminent wireless router and your WPS device will be established automatically.
Make sure the wireless WPS adapter is installed on your computer.
4.1 Using the WPS button (Router and Wireless WPS adapter)
Note: The following steps are created using Windows 7.
- Make sure your computer has been started and your Wireless WPS adapter is installed on your computer. Also make sure your Wireless Eminent router has an internet connection.
- If correct, an icon of the wireless connection () will be added to your taskbar.
- Click the icon after which a list of available wireless networks will be listed as shown in the following image:
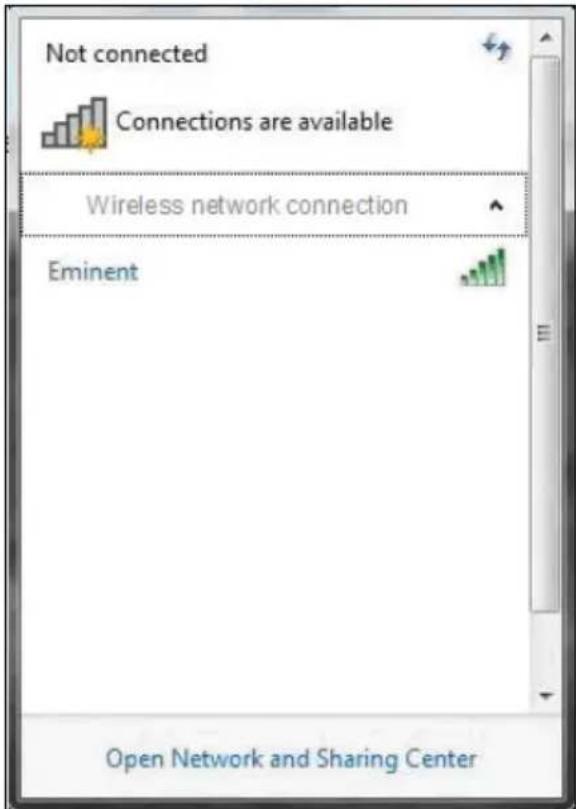
- Select the network you want to connect to and click 'Connect'.
- If correct, Windows will now ask you to fill out your wireless security key. Also, the lower part of the screen shows you to push the WPS button on the router.
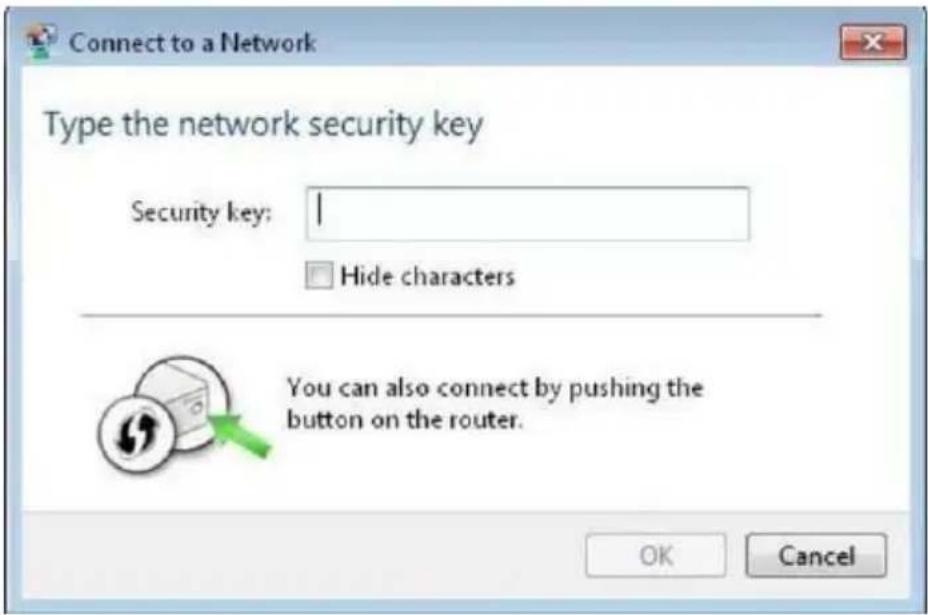
- Press the WPS button on the Eminent router for approximately 1-2 seconds (not longer!).
- Press the WPS button on your wireless WPS adapter. Refer to the manual of your wireless WPS adapter for the exact amount of time you need to press the WPS connection.
- The connection between the Eminent router and your wireless WPS adapter will be established automatically. The following icon will be visible in the
taskbar: This icon tells you an internet connection has been established. You will now be able to access the internet.
Hint: The WPS button also acts as a reset button. If you press the WPS button too long, (for example: 8~10 seconds), the Eminent router will be set back to factory defaults.
Hint: Some WPS adapters and Windows versions require you to use the supplied WPS adapter software. If so, the steps described above can differ from your own situation. Please refer to the manual of the wireless WPS adapter for the exact steps.
5.0 Manual configuration as an Access Point
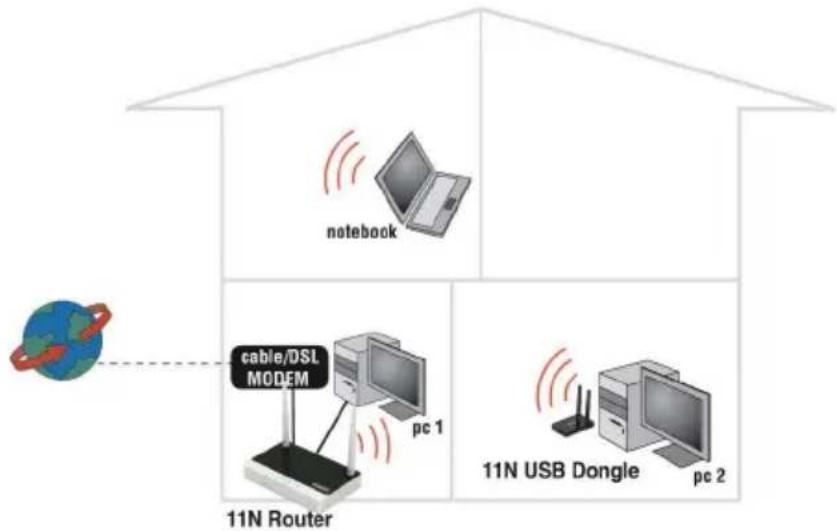
Install the router as an access point if you have a router or DSL modem router. Make sure that your Internet browser and your network are well configured when configuring manually. You can assume that the settings are correct, unless you have changed any of the settings in the past.
Install the router as an access point if you have a router or DSL modem router. Make sure that your Internet browser and your network are well configured when configuring manually. You can assume that the settings are correct, unless you have changed any of the settings in the past.
Example of EM4543/EM4544/EM4571 as an Access Point
5.1 Connecting the router
- Turn off the computer.
- Connect the router to a wall outlet using the supplied power adapter.
- Connect the supplied UTP network cable to the 'LAN 4' port of the router.
- Connect the other end of this UTP network cable to the network adapter of your computer.
Is my router correctly connected to the wall outlet? You can check this by verifying that the POWER LED is on.
Do I have a proper network connection? Turn on the computer and verify if the LED on the router, corresponding with the LAN-port to which you connected the UTP networking cable, is lit. The LED on the network adapter of your computer should also be lit..
5.2 Configuring the router as an Access Point
Before you can configure the router for an Internet connection you first need to connect to the router by following the procedure below.
- Turn on your computer.
- Open your webbrowser (e.g. Internet Explorer or Firefox).
- Type 'http://192.168.8.1' in the address bar.
-
Press the 'Enter key' or click 'Go to'.
-
Click 'Setup Tool'.
- You will now be asked for a 'Username' and a 'Password'. Fill out 'admin' in the 'Username' field and 'admin' in the 'Password' field and press the enter key.
- Click 'Advanced Setup' in the left menu.
- Click 'Network' in the left menu.
- Click LAN/DHCP Server'.
- Select 'Stop' at 'DHCP Server'.
- Click 'Apply' at the right side in the menu 'DHCP Server'.
- Type '192.168.8.200' in the 'LAN IP address' field.
- Type '255.255.255.0' in the 'Subnet mask' field.
- Click the button 'Apply & Restart'.
Note! If you wish to log in to your router at a later point in time, you must assign a fixed IP- address to your computer.
- Click 'Start'.
- Click 'Control Panel'.
- Double click 'Network Connections'.
- Right click the appropriate 'LAN Connection'.
- Click 'Properties'.
- Select 'Internet-protocol (TCP/IP)'.
- Click 'Properties'.
- Select 'Use the following IP Address'.
- Enter '192.168.8.25' in the 'IP Address' field.
- Enter '255.255.255.0' in the 'Subnet mask' field.
- Click 'OK'.
- Enter 'http://192.168.8.200' in the address bar to log in to the router.
5.3 Securing a wireless network
To avoid having uninvited guests probing your wireless network we strongly recommend securing your wireless network. There are several security methods which can secure the network at different levels. To apply a method to your network it is required that all wireless network devices support this method. The strongest method of security is WPA2 (WiFi Protected Access).
The strongest method of security is WPA2 AES. It is recommended to use this type of security. However, it is possible that (older) wireless hardware is not able to use this type of security, but can only use WPA-TKIP. Refer to the documentation of your hardware to be sure if your hardware can use WPA2 AES.
If you wish to use WPA2 AES security, continue with paragraph 4.3.1 (recommended). If you wish to use WEP security, continue with paragraph 4.3.2.
5.3.1 WPA2 AES security (recommended)
- Click 'Wireless Wizard'.
- The wizard appears in a pop-up screen. Click 'Next'.
- Choose you country/region and click 'Next'.
- Fill out the desired name for your wireless network in the field 'SSID'. (Use the 'CheckSSID' option to ensure this name is not already in use.)
- Click 'Next'.
- The router will automatically scan for a suitable wireless channel.
- As a choice, the most suitable wireless channel will appear on your screen.
- Click 'Next' to confirm this channel. (You can pick a wireless channel yourself if you want).
- You will see a brief summary with the settings you have made so far. Click 'Next' to continue.
- Choose 'WPA2' and click 'Next'.
- Choose 'AES' and click 'Next'.
- Fill out a password in the 'Network Key' field (e.g. 'yourname1'). Do not use any punctuation marks and make sure the password is at least 8 characters long!
- Write down the network name and the chosen password**.
- Click 'Next'.
- Click 'Finish'.
- The wizard will now save the settings and will close the screen automatically.
Hint: WPA2 AES security is supported by Windows XP Service Pack 2 (with all updated installed). This security method is not supported by Windows 98, unless your wireless network adapter software supports WPA2 AES. In case you do not have Windows XP, Vista, Windows 7 or the required software, continue with section 4.3.2.
5.3.2 WEP security
- Click 'Wireless Wizard'.
- The wizard appears in a pop-up screen. Click 'Next'.
- Choose you country/region and click 'Next'.
- Fill out the desired name for your wireless network in the field 'SSID'. (Use the 'CheckSSID' option to ensure this name is not already in use.)
- Click 'Next'.
- The router will automatically scan for a suitable wireless channel.
- As a choice, the most suitable wireless channel will appear on your screen.
- Click 'Next' to confirm this channel. (You can pick a wireless channel yourself if you want).
- You will see a brief summary with the settings you have made so far. Click 'Next' to continue.
- Choose 'WEP' and click 'Next'.
-
Choose 'Use a 128 bit key' and click 'Next'.
-
Fill out a password in the field 'Network Key'. For this WEP key you are only allowed to use numbers from 0 till 9 and the letters a till f. Do not use any punctuation marks and make sure the password is exactly 26 characters long.
- Write down the network name and the chosen password**.
- Click 'Next'.
- Click 'Finish'.
- The wizard will now save the settings and will close the screen automatically.
5.4 Finishing the installation procedure of your Access Point
After following chapter 4, you can finish the installation procedure:
- Remove the UTP network cable from your computer.
- Remove the UTP networking cable from the LAN port of your router.
- Restart your computer.
- Congratulations! You have now properly installed the router.
An explanation how to connect your wireless network using Windows XP, Windows Vista and Windows 7 can be found in chapter 8.0
** The connection is lost when WPA2 AES or WEP has been enabled in the router and not yet in the wireless network adapter. When WEP/WPA2 AES has also been enabled in the wireless network adapter, the connection will be repaired.
Write down the security method, the network name and the key:

WPA2 AES
WEP

Network name:
Key:
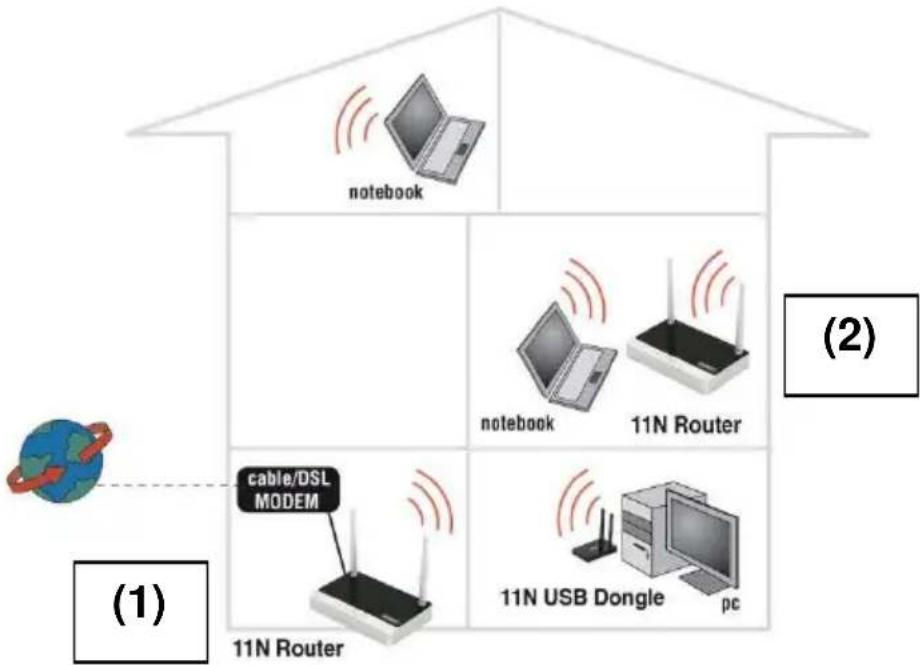
6.0 Configuring the router as a signal booster (WDS)
Do you already have a wireless network and do you like to increase the range of the wireless signal? Then connect the router as a signal booster. In order to realize this, several settings of your signal booster (2) and of your wireless router / access point (1) must be modified.
A 2^nd EM4543/EM4544/EM4571 as signal repeater
6.1 Connecting the signal booster (2)
- Turn off your computer.
- Connect the router to a wall outlet using the supplied power adapter.
- Connect the supplied UTP network cable to the 'LAN 1' port of the router.
- Connect the other end of the UTP network cable to the network adapter of your computer.
Is my router correctly connected to the wall outlet? You can check this by verifying that the POWER LED is on.
6.2 Configuring the signal booster (2)
- Turn on your computer.
- Open your internet browser (e.g. Internet Explorer or Firefox).
- Type 'http://192.168.8.1' in the address bar.
- Press the 'Enter key' or click 'Go to'.
- Click 'Setup Tool'.
- You will now be asked for a 'Username' and a 'Password'. Fill out 'admin' in the 'Username' field and 'admin' in the 'Password' field and press the enter key.
- Click 'Advanced Setup' in the left menu.
- Click 'Network' in the left menu.
- Click LAN/DHCP Server'.
- Select 'Stop' at 'DHCP Server'.
-
Click 'Apply' at the right side in the menu 'DHCP Server'.
-
Type '192.168.8.200' in the 'LAN IP address' field.
- Type '255.255.255.0' in the 'Subnet mask' field.
- Click the button 'Apply & Restart'.
Note! If you wish to log in to your router at a later point in time, you must assign a fixed IP address to your computer.
- Click 'Start'.
- Click 'Control Panel'.
- Double click 'Network Connections'.
- Right click the appropriate 'LAN Connection'.
- Click 'Properties'.
- Select 'Internet-protocol (TCP/IP)'.
- Click 'Properties'.
- Select 'Use the following IP Address'.
- Enter '192.168.8.25' in the 'IP Address' field.
- Enter '255.255.255.0' in the 'Subnet mask' field.
- Click 'OK'.
- Enter 'http://192.168.8.200' in the address bar to log in to the router.
6.3 Securing your signal booster (2) (WPA2 AES)
If you use the router as a signal booster with another device, WPA2 AES security is supported. If you use another type of wireless router, WEP security is recommended.
To avoid having uninvited guests probing your wireless network we strongly recommend securing your wireless network.
- Click 'Wireless Wizard'.
- The wizard appears in a pop-up screen. Click 'Next'.
- Choose you country/region and click 'Next'.
- Fill out the desired name for your wireless network in the field 'SSID'. (Use the 'CheckSSID' option to ensure this name is not already in use.)
- Click 'Next'.
- The router will automatically scan for a suitable wireless channel.
- As a choice, the most suitable wireless channel will appear on your screen.
- Click 'Next' to confirm this channel. (You can pick a wireless channel yourself if you want). Write down the chosen channel***.
- You will see a brief summary with the settings you have made so far. Click 'Next' to continue.
- Choose 'WPA2' and click 'Next'.
- Choose 'AES' and click 'Next'.
- Fill out a password in the field 'Network Key'. (e.g. 'yourname01'). Do not use any punctuation marks and make sure the password has e minimum length of 8 characters long.
-
Write down the network name and the chosen password***.
-
Click 'Next'.
- Click 'Finish'.
- The wizard will now save the settings and will close the screen automatically.
The connection is lost when WPA2 AES has been enabled in the router and not yet in the wireless network adapter. When WPA2 AES has also been enabled in the wireless network adapter, the connection will be repaired.
Write down the network name, the key and the channel:
WPA2 AES
Network name:
Key:
Channel:
6.4 Configuring your wireless router (1)
When configuring the router and its security (paragraph 6.5), we assume you will be using the device as a wireless router. Make sure your wireless router is connected to your computer using a UTP network cable.
- Open your web browser (e.g. Internet Explorer, Opera or Firefox).
- Type 'http://192.168.8.1' in the address bar.
- Press the 'Enter' key or click 'Go to'.
- Click 'Wireless Wizard'.
- You will now be asked for a 'Username' and a 'Password'. Fill out 'admin' in the 'Username' field and 'admin' in the 'Password' field and press the enter key.
- The wizard appears in a pop-up screen. Click 'Next'.
- Choose you country/region and click 'Next'.
- Fill out the desired name for your wireless network in the field 'SSID'. (Use the 'CheckSSID' option to ensure this name is not already in use.)
- Click 'Next'.
- The router will automatically scan for a suitable wireless channel.
- As a choice, the most suitable wireless channel will appear on your screen.
- Select the same channel you have chosen for your signal booster.
- Click 'Next'.
- You will see a brief summary with the settings you have made so far. Click 'Next' to continue.
- Choose 'WPA2' and click 'Next'.
- Choose 'AES' and click 'Next'.
- Fill out the same password in the field 'Network Key' you have chosen for your signal booster.
- Click 'Next'.
-
Click 'Finish'.
-
The wizard will now save the settings and will close the screen automatically.
6.5 Connecting your wireless router with the signal booster (2)
If you have followed the previous steps, then you have filled in the following:
- The signal booster (2) has the following IP-address: '192.168.8.200'.
- The wireless router has the following IP-address: '192.168.8.1'.
- Both devices are using the WPA2 AES protocol and are both using the same security key.
- Both devices are using the same channel.
- The SSD does not need to be the same (e.g. 'Upstairs' and 'Downstairs').
Both devices must be set up in order to connect to each other. We will begin setting up your wireless router (1).
- Connect the wireless router and the signal booster to each other using the following steps: Connect a network cable to LAN4 of the wireless router. Connect the other end of the network cable to LAN4 of the signal booster.
- Connect a computer using a network cable to LAN port 1 of the wireless router.
- Turn on the your wireless router and the signal booster.
- Turn on your computer.
- Open your web browser (e.g. Internet Explorer or Firefox).
- Type 'http://192.168.8.1' in the address bar.
- Click 'Setup Tool'..
- You will now be asked for a 'Username' and a 'Password'. Fill out 'admin' in the 'Username' field and 'admin' in the 'Password' field and press the enter key.
- Click 'Advanced Setup' in the left menu.
- Click 'Wireless' in the left menu.
- Click 'WDS Setup' in the left menu.
- Click 'Search AP' in the right screen.
- A screen appears. A summary of found wireless networks will be displayed.
- Double-click with the left mouse button on the name (SSID) of the signal booster.
- Click 'OK'.
- Click 'Add' in the right screen.
- Click 'Save' at the top of the right screen.
- Click 'OK' to save the settings.
- Close the window.
6.6 Completing the installation of the signal booster
- Type 'http://192.168.8.200' in the address bar to connect to the signal booster.
- Click 'Setup Tool'.
-
You will now be asked for a 'Username' and a 'Password'. Fill out 'admin' in the 'Username' field and 'admin' in the 'Password' field and press the enter key.
-
Click 'Advanced Setup' in the left menu.
- Click 'Wireless' I the left menu.
- Click 'WDS Setup' in the left menu.
- Click 'Search AP' in the right screen.
- A screen appears. A summary of found wireless networks will be displayed.
- Double-click with the left mouse button on the name (SSID) of your wireless router.
- Click 'OK'.
- Click 'Add' in the right screen.
- Click 'Save' at the top of the right screen.
- Click 'OK' to save the settings.
- Now remove the network cable between both the wireless router and signal booster.
- You have now completed the settings. You can now place the signal booster to the location where the wireless signal was weak.
Hint: To make sure there is a wireless connection between both devices, you can try to connect to both devices with the still connected computer. If correct, you can still access both devices on their web pages. If this does not work, you can repeat the steps shown in chapter 6.
7.0 Configuring the router as a signal booster (Wireless Multi Bridge)
If your own modem or your other wireless router has no support for WDS, you can setup the EM4543/EM4544/EM4571 as a signal booster by using the Wireless Multi Bridge option.
Using this option, the Eminent router will connect to your wireless modem or router using the same technique as your computer does. Once the Eminent router has established a connection with your wireless modem or router, the Eminent router has an internet connection. The Eminent router will also broadcast another wireless signal which your computer can connect to. Your computer will then have an internet connection.
Use the following steps to setup a Wireless Multi Bridge connection:
7.1 Connecting the signal booster
- Turn off your computer.
- Connect the router to a wall outlet using the supplied power adapter.
- Connect the supplied UTP network cable to the 'LAN 1' port of the router.
- Connect the other end of the UTP network cable to the network adapter of your computer.
Is my router correctly connected to the wall outlet? You can check this by verifying that the POWER LED is on.
7.2.Configuring the local wireless network on the signal booster
Before setting the Eminent router for Wireless Multi Bridge usage, you need to have the following at hand:
The network name of the first wireless router (SSID)
The security key of the first wireless router
The channel of the first wireless router
Preferably, setting up the Wireless Multi Bridge connection is done using a wired connection between the wireless Eminent router and the computer.
- Turn on your computer.
- Open your internet browser (e.g. Internet Explorer or Firefox).
- Type 'http://192.168.8.1' in the address bar.
- Press the 'Enter key' or click 'Go to'.
- Click 'Setup Tool'.
- You will now be asked for a 'Username' and a 'Password'. Fill out 'admin' in the 'Username' field and 'admin' in the 'Password' field and press the enter key.
- Click 'Advanced Setup'.
- Click 'Wireless'.
- Click 'Wireless Setup'.
- Fill out a SSID: If you want your current wireless network to be extended using the same network name (SSID), you need to fill out the SSID as used on your first wireless router. Also, the channel needs to be the same.
- Set a security at 'Authentication'. If you want your current wireless network to be extended using the same network name (SSID), you can set the same security as used on your first wireless router.
- Click 'Apply' to save the settings.
- Then click 'Save' at the top of the screen.
7.3 Configuring the Wireless Multi Bridge settings
- Click 'Wireless'.
- Click 'Wireless Multi Bridge'.
- Set 'Operation' to 'Start'.
- Make sure 'Wireless Bridge' is selected.
- Click the 'Search AP' button.
- Select the network name (SSID) you want to connect to (First wireless router).
- If the network is secured, you need to fill out the security key.
- Click 'Apply'.
- Then click 'Save' at the top of the screen.
-
Click 'Network'.
-
If your first wireless router has another LAN IP-Address (range), you can change the IP-Address of the Eminent router at 'LAN IP'.
- Click 'Apply and restart'. Close your web browser en restart your computer or disable the network card and then enable the LAN card again.
- Log in to the Eminent router using the new IP-Address.
- Click 'Setup Tool'.
- Click 'Advanced Setup'.
- Click 'Network'.
- Click 'LAN/DHCP Server'.
- Set 'DHCP Server' to 'Stop'.
- Click 'Apply'.
- Click 'Save' at the top of the screen.
- Your Eminent router has now been set using Wireless Multi Bridge.
Hint: If you have set another LAN IP-Address as described in step 11, this IP-Address needs to be in the same range as the first router. For Example: If your first modem or router is accessible on IP-Address '192.168.1.1', you need to make sure the Eminent router is set to this IP-range. You can set the Eminent router to '192.168.1.200'. From that moment on, the Eminent router is accessible using this new IP-Address.
8.0 Configuring the wireless network on your computer
Now that the router has been secured you will need to configure the computer itself so it can recognize your secured wireless network and will be able to make a connection. Windows XP, Windows Vista and Windows 7 are at this moment the most commonly used operating systems. We will now explain how to set up a wireless connection using these operating systems.
Now that the router has been secured you will need to configure the computer itself so it can recognize your secured wireless network and will be able to make a connection. Windows XP, Windows Vista and Windows 7 are at this moment the most commonly used operating systems. We will now explain how to set up a wireless connection using these operating systems.
8.1 Configuring a wireless network using Windows XP
To realize a wireless connection using Windows XP you will need to follow the steps below:
- Turn on your computer.
- Click 'Start'.
- Click 'Control Panel'.
- Click 'Network Connections'.
-
You should now be able to see your wireless adapter. Right click this adapter.
-
Click 'View available wireless networks'. A list of available networks will now be shown.
- Select your own wireless network from this list.
- After clicking 'Connect' your computer will warn you that this network is secured and that a network key is required.
- Enter the network key and click 'Connect'.
- If the key was entered correctly, Windows will state that the network has been connected. You are now online.
8.2 Configuring a wireless network using Windows Vista/7
To realize a wireless connection using Windows Vista you will need to follow the steps below:
- Click 'Start'.
- Click 'Control Panel'.
- Click 'Network and Internet'.
- Click 'Network and Sharing Centre'.
- Click 'Manage wireless networks' in the left menu.
- Click 'Add'.
- Select 'Add a network that is in range of this computer' in the next screen.
- Select your own network.
- Click 'Connect'.
- Your computer will display the following message: 'Type the network security key or passphrase for your network'. Enter your security key.
- Click 'Connect'. If you have correctly entered your security key, your computer will be wirelessly connected and you are online.
The steps for Windows 7 are described in the following steps:
- Click the network icon in the taskbar (near the clock).
- The available wireless networks will be shown.
- Select your own network and click 'Connect'.
- You will be asked to fill out a security key. Enter your security key.
- Click 'Connect'. If you have correctly entered your security key, your computer will be wirelessly connected and you are online.
9.0 Firewall settings
The router is equipped with an advanced firewall. This firewall allows you to open ports, allowing certain programs to gain access to the Internet. You can open these ports using the function 'Port Forwarding'.
In some cases you will want to block access to the Internet. If, for instance, you have children, you may want to block some explicit websites. You can do this using the built-in URL filtering method.
Hint! For your own security the Firewall is enabled by default. We do however advise you to also use a virus scanner and always keep it up to date.
9.1 Port Forwarding
- Open your web browser (e.g. Internet Explorer or Firefox).
- Type 'http://192.168.8.1' in the address bar.
- Press the enter key or click 'Go to'.
- Click 'Setup Tool'.
- You will now be asked for a 'Username' and a 'Password'. Fill out 'admin' in the 'Username' field and 'admin' in the 'Password' field and press the enter key.
- Click 'Advanced Setup' in the left menu.
- Click 'Port Forwarding' bellow 'NAT/Routing' in the left menu.
- In the field 'LAN IP-address you can fill out the IP-address of the computer for which you want to open the specific ports.
- Select the correct protocol in the 'Protocol' field.
- Fill out the necessary ports at the 'External port' field. Fill out the start or begin port in the first field. In the second field you can fill out the end port. In case you only need to open one port, you can fill out the same port number in both fields.
- Fill out the same port number in the 'Internal Port' field.
- Fill out a name in the 'Rule Name' field. For Example: Fill out the name of the application or game you want to open these ports for.
- Click 'Add' to save the settings.
9.2 URL filtering
'URL filtering' allows you to block websites by name or parts of a name. A useful feature if you want to protect your children from the contents of certain websites.
- Open your web browser (e.g. Internet Explorer or Firefox).
- Type 'http://192.168.8.1' in the address bar.
- Press the enter key or click 'Go to'.
- Click 'Setup Tool'.
- You will now be asked for a 'Username' and a 'Password'. Fill out 'admin' in the 'Username' field and 'admin' in the 'Password' field and press the enter key.
- Click 'Advanced Setup' in the left menu.
- Click 'Internet Access Control'.
- Select at the 'Input Type' field 'URL Filter Setup'.
- You can fill out a name for this rule in the 'Rule Name' field.
- In the 'Source IP' fields you can fill out a from-till range, or place a check mark at 'ALL IP' to deny access to the specific site(s) for all computers.
- Fill out the address you want to block at 'Filter URL'.
- Click 'Add' to save the settings.
Hint: You can select a large variety of predefined programs such as MSN Messenger and ICQ. You can block these programs as described in chapter 9.2
10.0 Frequently Asked Questions and other related information
The latest Frequently asked questions for your product can be found on the support page of your product. Eminent will update these pages frequently to assure you have the most recent information. Visit www.eminent-online.com for more information about your product.
11.0 Service and support
This users manual has been carefully written by Eminent's technical experts. If you have problems installing or using the product, please fill out the support form at the website www.eminent-online.com/support.
You can also contact us by phone. Below you will find a list with phone numbers for each supported country.
| Country | Phone number | Rate per minute* |
| Belgium (Dutch) | 070 277 286 €0.30 | |
| Belgium (French) | 070 277 286 €0.30 | |
| Denmark +45 69918565 Local Costs | ||
| Finland +35 8942415826 Local Costs | ||
| Germany +49 (0)30 887 89 298 Local Costs | ||
| Italy +39 0240042016 Local Costs | ||
| Norway +47 21075033 Local Costs | ||
| Spain 807 080 042 €0.41 | ||
| Sweden +46 840 309985 Local Costs | ||
| The Netherlands | 0900-3646368 €0.10 | |
| UK | +44 (0)203 318 9998 | Local Costs |
| Hungary | 1-4088902 (From Budapest) | Local Costs |
| Hungary | 06-1-4088902 (From the rest of Hungary) | Local Costs |
| Hungary | +36 1-4088902 (International) | Local Costs |
- Rates mentioned in this table do not include cell phone charges.
12.0 Warning and points of attention

Due to laws, directives and regulations set out by the European parliament, some (wireless) devices could be subject to limitations concerning its use in certain European member states. In certain European member states the use of such devices could be prohibited. Contact your (local) government for more information about this limitations.
Always follow up the instructions in the manual*, especially where it concerns devices which need to be assembled.
Warning: In most cases this concerns an electronic device. Wrong/improper use may lead to (severe) injuries!
Repairing of the device should be done by qualified Eminent staff. The warranty immediately voids when products have undergone self repair and/or by misuse. For extended warranty conditions, please visit our website at www.eminentonline.com/warranty.
*Tip: Eminent manuals are written with great care. However, due to new technological developments it can happen that a printed manual does not longer contain the most recent information. If you are experiencing any problems with the printed manual or you can not find what you are looking for, please always check our website www.eminent-online.com first for the newest updated manual.
Also, you will find frequently asked questions in the FAQ section. It is highly recommended to consult the FAQ section. Very often the answer to your questions will be found here.
13.0 Warranty conditions
The five-year Eminent warranty applies to all Eminent products, unless mentioned otherwise before or during the moment of purchase. After buying a second-hand Eminent product the remaining period of warranty is measured from the moment of purchase by the product's initial owner. Eminent warranty applies to all Eminent products and parts, indissolubly connected or mounted to the product it concerns. Power supply adapters, batteries, antennas and all other products not directly integrated in or connected to the main product or products of which, without reasonable doubt, can be assumed that wear and tear during use will show a different pattern than the main product, are not covered by the Eminent warranty. Products are not covered by the Eminent warranty when exposed to incorrect/improper use, external influences or when opening the service parts of the product by parties other than Eminent. Eminent may use refurbished materials for repair or replacement of
your defective product. Eminent cannot be held responsible for changes in network settings by internet providers. We cannot guarantee that the Eminent networking product will keep working when settings are changed by the internet providers.
Eminent cannot guarantee the working of web services, apps and other third party content that is available through Eminent products. Eminent products with an internal hard disk have a limited warranty period of two years on the hard disk. Eminent could not be held responsible for any data lost. Please make sure that if the product stores data on a hard drive or other memory source, you will make a copy before you return the product for repair.
When my product gets defective
Should you encounter a product rendered defective for reasons other than described above: Please contact your point of purchase for taking care of your defective product.
14.0 Declaration of Conformity
Application of Council Directives:
Manufacturer's Name: Eminent
Type of Equipment: Router
Equipment Class: Commercial, Light Industrial, Consumer
PRODUCTNUMBER: EM4543/M4544/EM4571
Conforms to the following standards: EN300328-1 V1.7.1 (2006-10)
EN301489-1 V1.8.1 (2008-04)
EN301489-17 V2.1.1 (2009-05)
EN62311 (2008)
Manufactured from: 17-05-2012
I, the undersigned, hereby declare that the equipment Conforms with the essential requirements and other relevant requirements of the R&TTE Directive (1999/5/EC) and to the above standards.
Place: Barneveld, The Netherlands
Date: 17-05-2012
Name: Marc Pannebakker
Signature:


WWW.EMINENT-ONLINE.COM
Trademarks: all brand names are trademarks and/or registered trademarks of their respective holders.
The information contained in this document has been created with the utmost care. No legal rights can be derived from these contents. Eminent cannot be held responsible, nor liable for the information contained in this document.
Eminent is a member of the Intronics Group
CE
11.0 Service et assistance
Trademarks: all brand names are trademarks and/or registered trademarks of their respective holders.
The information contained in this document has been created with the utmost care. No legal rights can be derived from these contents. Eminent cannot be held responsible, nor liable for the information contained in this document.
Eminent is a member of the Intronics Group
CE
EM4543 / EM4544 / EM4571
Trademarks: all brand names are trademarks and/or registered trademarks of their respective holders.
The information contained in this document has been created with the utmost care. No legal rights can be derived from these contents. Eminent cannot be held responsible, nor liable for the information contained in this document.
Eminent is a member of the Intronics Group

EM4543 / EM4544 / EM4571
Wireless router, Access Point e signal booster

Manuale
EM4543 / EM4544 / EM4571 - Wireless router, Access Point e signal booster
Contenuti
6.3 Securing your signal booster (2) (WPA2 AES)
Trademarks: all brand names are trademarks and/or registered trademarks of their respective holders.
The information contained in this document has been created with the utmost care. No legal rights can be derived from these contents. Eminent cannot be held responsible, nor liable for the information contained in this document.
Eminent is a member of the Intronics Group
CE
Name: Marc Pannebakker
Unterschrift:
EM4543 / EM4544 / EM4571
Hely: Barneveld, The Netherlands
Datum: 17-05-2012
Név: Marc Pannebakker
Aláirás:


WWW.EMINENT-ONLINE.COM
Trademarks: all brand names are trademarks and/or registered trademarks of their respective holders.
The information contained in this document has been created with the utmost care. No legal rights can be derived from these contents. Eminent cannot be held responsible, nor liable for the information contained in this document.
Eminent is a member of the Intronics Group