
VERMELA - Above-ground pool GRE - Free user manual and instructions
Find the device manual for free VERMELA GRE in PDF.
| Product type | Above-ground wood pool |
| Brand | GRE |
| Model | VERMELA |
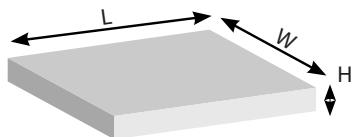
| Dimensions (L x W x H) | 551 x 351 x 119 cm |
| Main material | Autoclave-treated Scots pine class IV |
| Interior lining | Blue PVC liner |
| Filtration system | Sand filter with pump |
| Estimated water volume | 23 m³ |
| Pump power supply | 220-240 V / 50 Hz |
| Required electrical protection | 30 mA residual current device |
| Wood warranty | 10 years against rot and insects |
| Liner warranty | 2 years on welds and waterproofing |
| Pump warranty | 2 years (electrical problem) |
| Spare parts availability | 5 years from invoice date |
| Number of people for assembly | 2 people minimum |
| Estimated assembly time | 2 days (excluding earthwork and filling) |
| Routine maintenance | Filter cleaning, water treatment, winterizing |
| Safety | Electrical equipment more than 3.5 m from the pool; mandatory supervision of children |
Frequently Asked Questions - VERMELA GRE
User questions about VERMELA GRE
0 question about this device. Answer the ones you know or ask your own.
Ask a new question about this device
Download the instructions for your Above-ground pool in PDF format for free! Find your manual VERMELA - GRE and take your electronic device back in hand. On this page are published all the documents necessary for the use of your device. VERMELA by GRE.
USER MANUAL VERMELA GRE
The diagonal dimensions of the pool SHOULD BE verified. This is necessary to avoid problems later. Revise them several times until obtaining the dimensions indicated on the drawings.

In the case of breakages and/or deformations of the wood, make a complete inventory of the state of the pieces before requesting them from after-sales. This way, the pieces will all arrive in the same delivery
For the assembly, the tongue of the strip should always be facing upwards, (for pools with tongue and groove system).
In the first line of strips, (at the base of the pool) it is normal that some strips have a groove at the bottom part and others do not have one, with a flat base (medium width strips).
During the winter, metal finishes of the beaches can oxidise. You are responsible for the maintenance of these parts. If you use a winter cover, make sure it has correct ventilation.
Do not completely empty the pool for long periods because the structure may suffer deformation.
Locate the maintenance section in the manual of your stainless-steel ladder (in the case this is included with the pool)

EN Before screwing on the edges of the pool, the wood should be presented for its correct localization. If your pool has a double edge, both the internal one and the external one should be presented and you should start screwing the internal perimeter.
Sitting on or walking on the beaches is strictly prohibited. Any breakage is not covered by the guarantee.
The concrete slab must have the dimensions indicated according to the pool model and never smaller. The pool must be centered on this base.
This concrete slab must be done by a professional according to the following characteristics:
Concrete slab: Dosing 350kg / m3 (standardized type C125 430)

Once you open the pallet of the wood, the pool must be assembled within a maximum period of two days. In addition, we suggest doing this on days without any rain to avoid that the wood is humidified, complicating the final assembly.

KIT ANGLE
COVER 135^
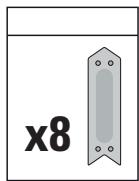
SABOT
FLOOR TAPESTRY
WALL PROTECTOR
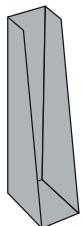
SAND BAG
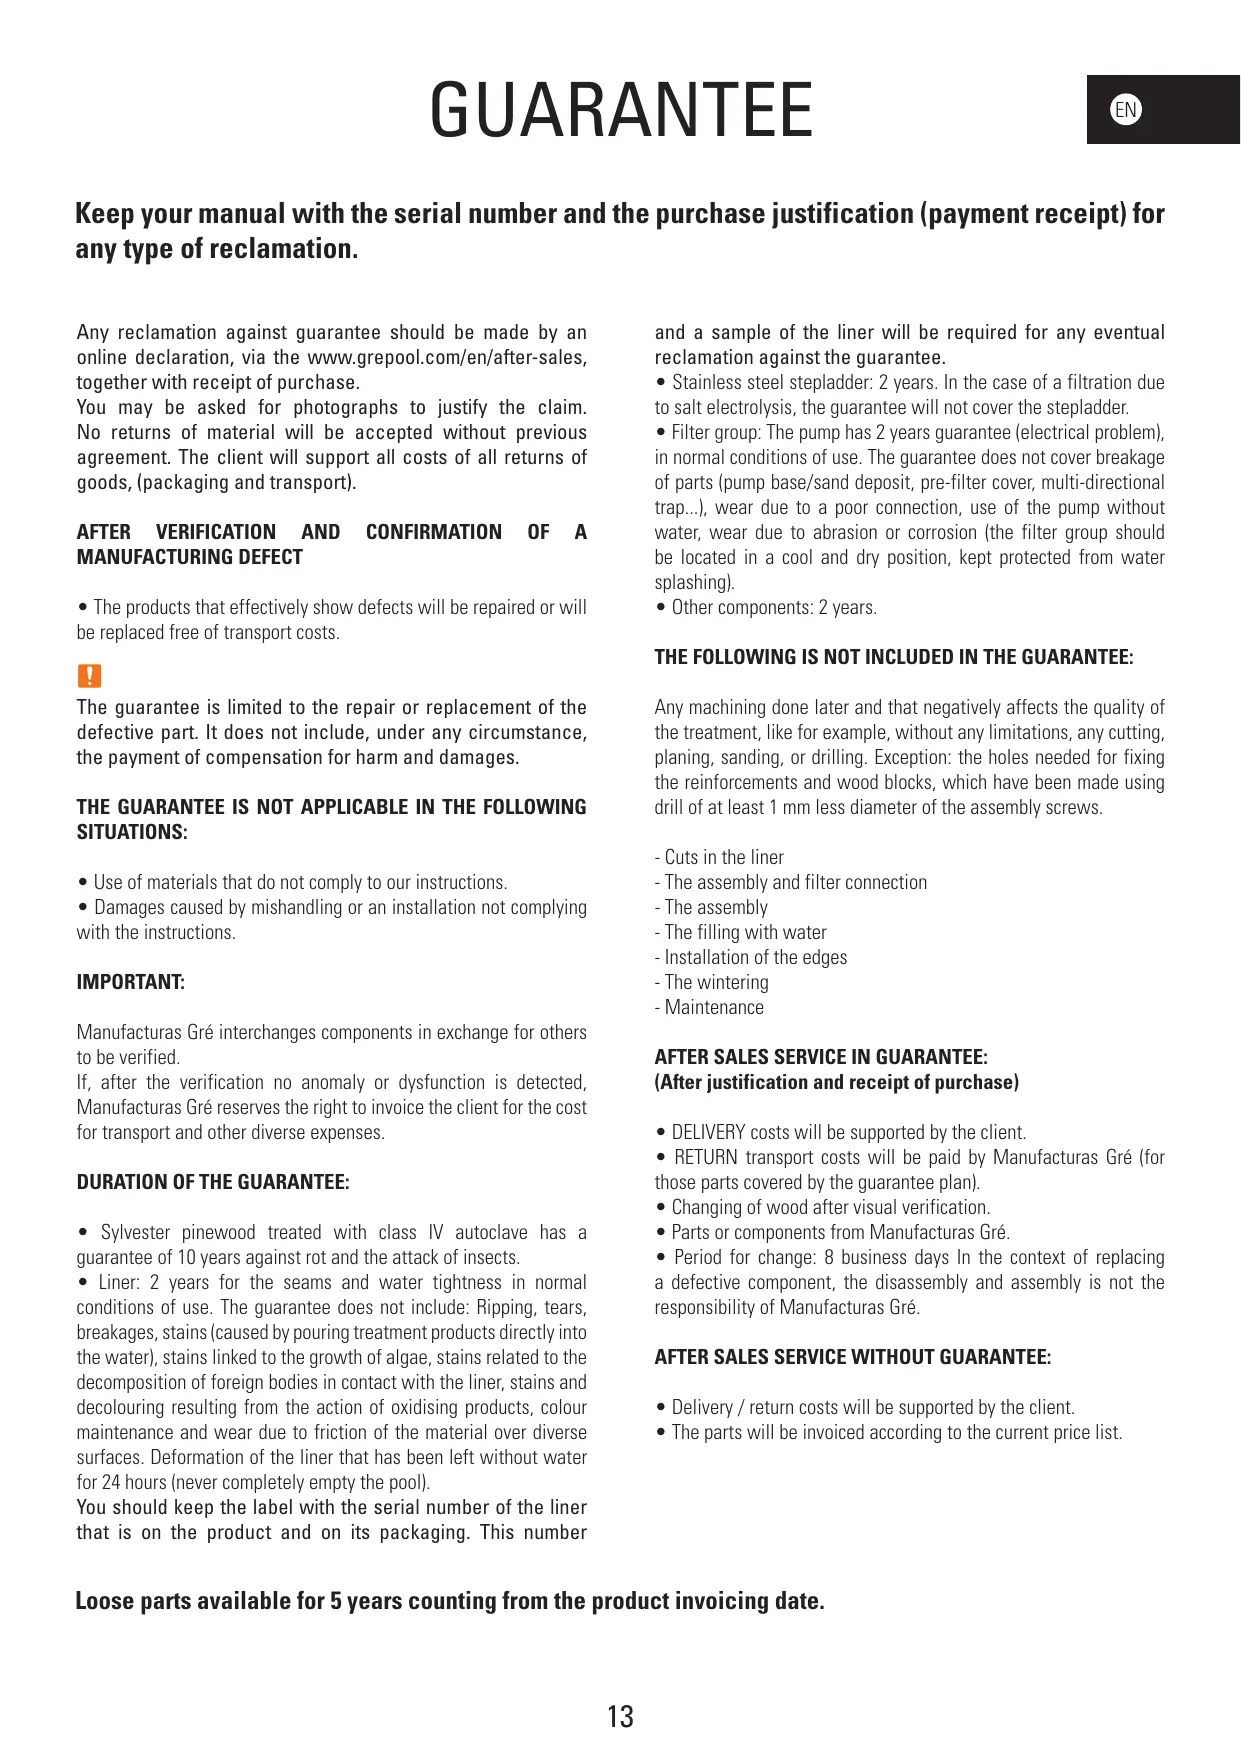
WOODEN LADDER FIXING PIECES
KIT HINGE FOR SKIMMER
| 790098 | ||
| WOOD SCREWS | 1 | |
| SABOT SCREWS | 2 | |
| LINER | 1 | |
| STAINLESS STEEL LADDER | 1 | |
| MONOBLOCK | 1 | |
| HOSE | 2 | |
| SKIMMER | 1 | |
| LINER PROFILE | 9 | |
| KIT ANGLE COVER | 135° | 1 |
| SABOT | 4 | |
| FLOOR TAPESTRY | 1 | |
| WALL PROTECTOR | 1 | |
| KIT CORNER PIECE | 1 | |
| SAND BAG | 4 | |
| WOODEN LADDER FIXING PIECES | 0 | |
| KIT HINGE FOR SKIMMER | 1 | |
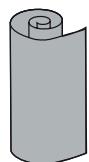
STORAGE INSTRUCTIONS • INSTRUCCIONES DE ALMACENAJE INSTRUCTIONS D'ENTREPOSAGE • HINWEISE ZUR AUFBEWAHRUNG INSTRUZIONI DI STOCCAGGIO • INSTRUCTIES VOOR OPSLAG INSTRUÇões DE ARMAZENAMENTO
EN This pallet should be stored on a level floor, preferably concrete. If the pool is going to be immediately assembled:
Revise the content.
- Assemble it as soon as possible to avoid deformation of the parts after having released the pallet straps.
If the pool is not going to be immediately assembled:
- Do not remove the straps from the wooden pallet.
- In the case of having to undo the pallet and the pool is not going to be immediately assembled, the pallet should be rebuilt assuring good fixing to avoid deformation of the parts (using ropes, straps, etc).
In both cases, put weight on top to assure the parts remain flat. Store the pallet in an adequately ventilated place.
Carefully read this information and keep it for later consultations
Congratulations on your choice. The model you have chosen has been especially designed for simple and rapid installation, but some precaution is necessary for the good use of your pool. Before starting with the installation and assembly of your pool, consider the current local regulation about on ground and in ground pools.
The use of the pool kit includes respecting the safety instructions described in the maintenance manual and instructions for use. If the safety regulations are not respected serious damage for your health and specially for that of children may occur. Carefully read this manual and pay attention to the illustrations before starting to assemble the pool. In the case that the assembly does not follow this manual the guarantee may be rejected in the case of failure.
The information appearing in this installation manual shows exactly how it should be done. Nevertheless, the illustrations in the same are to explain the assembly process. Contractual elements will not be considered regarding the shape, the colours and the aspects shown in the illustrations. Manufacturas Gré in its commitment to ongoing improvement of their products, reserves the right to modify at any time and without previous warning the features, the technical details, the standardized equipment and the options of its products.
ESATENCLION!
Keep your manual with the serial number and the purchase justification (payment receipt) for any type of reclamation.
Any reclamation against guarantee should be made by an online declaration, via the www.grepool.com/en/after-sales, together with receipt of purchase.
You may be asked for photographs to justify the claim. No returns of material will be accepted without previous agreement. The client will support all costs of all returns of goods, (packaging and transport).
AFTER VERIFICATION AND CONFIRMATION OF A MANUFACTURING DEFECT
- The products that effectively show defects will be repaired or will be replaced free of transport costs.
!
The guarantee is limited to the repair or replacement of the defective part. It does not include, under any circumstance, the payment of compensation for harm and damages.
THE GUARantee IS NOT APPLICABLE IN THE FOLLOWING SITUATIONS:
- Use of materials that do not comply to our instructions.
- Damages caused by mishandling or an installation not complying with the instructions.
IMPORTANT:
Manufacturas Gré interchanges components in exchange for others to be verified.
If, after the verification no anomaly or dysfunction is detected, Manufacturas Gré reserves the right to invoice the client for the cost for transport and other diverse expenses.
DURATION OF THE GUARANTEE:
- Sylvester pinewood treated with class IV autoclave has a guarantee of 10 years against rot and the attack of insects.
- Liner: 2 years for the seams and water tightness in normal conditions of use. The guarantee does not include: Ripping, tears, breakages, stains (caused by pouring treatment products directly into the water), stains linked to the growth of algae, stains related to the decomposition of foreign bodies in contact with the liner, stains and decolouring resulting from the action of oxidising products, colour maintenance and wear due to friction of the material over diverse surfaces. Deformation of the liner that has been left without water for 24 hours (never completely empty the pool).
You should keep the label with the serial number of the liner that is on the product and on its packaging. This number
and a sample of the liner will be required for any eventual reclamation against the guarantee.
- Stainless steel stepladder: 2 years. In the case of a filtration due to salt electrolysis, the guarantee will not cover the stepladder.
- Filter group: The pump has 2 years guarantee (electrical problem), in normal conditions of use. The guarantee does not cover breakage of parts (pump base/sand deposit, pre-filter cover, multi-directional trap...), wear due to a poor connection, use of the pump without water, wear due to abrasion or corrosion (the filter group should be located in a cool and dry position, kept protected from water splashing).
- Other components: 2 years.
THE FOLLOWING IS NOT INCLUDED IN THE GUARantee:
Any machining done later and that negatively affects the quality of the treatment, like for example, without any limitations, any cutting, planing, sanding, or drilling. Exception: the holes needed for fixing the reinforcements and wood blocks, which have been made using drill of at least 1mm less diameter of the assembly screws.
- Cuts in the liner
- The assembly and filter connection
- The assembly
- The filling with water
- Installation of the edges
- The wintering
- Maintenance
AFTER SALES SERVICE IN GUARANTEE: (After justification and receipt of purchase)
- DELIVERY costs will be supported by the client.
- RETURN transport costs will be paid by Manufacturers Gré (for those parts covered by the guarantee plan).
- Changing of wood after visual verification.
- Parts or components from Manufacturas Gré.
- Period for change: 8 business days In the context of replacing a defective component, the disassembly and assembly is not the responsibility of Manufacturers Gré.
AFTER SALES SERVICE WITHOUT GUARANTEE:
- Delivery / return costs will be supported by the client.
- The parts will be invoiced according to the current price list.
PROLOGUE
STORAGE PRECAUTIONS
While the pool is disassembled, it is sensitive to variations of temperature and humidity. Therefore, certain precautions should be taken for storage.
When you receive the packets, store the pieces of wood in horizontal position on a flat surface, shielding them from humidity and sunlight to avoid any risk of deformation.
ESSENTIAL:
- Do not store the wood in sunlight, to avoid excessive sags or cracks in the wood.
- Do not store the pool outside protected by a watertight cover, because the condensation emanating from the wood will make it even more humid and will subject to changes of shape.
COMPULSORY:
- Assemble the structure only once.
- Store the wood of your pool on a flat surface, shielding it from humidity and sunlight.
- Remove the protective film so the wood can «breathe».
DURATION OF THE INSTALLATION
The installation of this pool needs the intervention of at least two persons and takes two days (besides the preparation of the land and the filling).
BEFORE BUILDING YOUR POOL MAKE SURE
- You have the assistance of a qualified person for the electrical connections.
- There is sufficient water supply to fill the pool.
- That you have carefully read the manual, step by step, to fully understand the installation of your pool.
IMPORTANT
Manufacturas Gre, S.A. will not be responsible for any fault due to poor quality in concrete.
The concrete slab must be made by a professional in accordance with the instructions given in this instruction manual. If there was any complaint, the invoice for the slab may be requested in order to examine the pool's warranty.
IN GROUND POOLS AND SPECIFIC REGULATIONS
For on ground pools, we recommend protecting access to the pool by one standardized protection element.
For semi in-ground and fully in ground pools, the French law no. 2003-9 of 3rd January 2003. related to pool safety, as well as French decree no. 2003-1398 of 31st December 2003, related to pool safety, require protecting the pool by at least one element of standardized protection, like:
- Protection fence
- Pool alarm
- Pool cover
- Pool hut

INSTALLATION SUGGESTION
The land should be prepared as indicated in the «installation» chapter of this manual.
DO NOT SITUATE YOUR POOL
- Under overhead electricity cables
- Under branches of trees
- On non-stable land
A good location allows you to save time and avoid limitations. The pool should be in a sunny spot and easily reached.
The location of the pool should be free of tubes or electrical connections.
Take into account that the best is to assemble the pool on a sunny day and avoid high winds.
PACKAGING, CLASSIFICATION AND RECYCLING
- Some pool components are packed in plastic bags. To avoid all risk of asphyxia, never allow babies or children to play with these.
- Thanks for respecting the European Union Laws and collaborating in protecting the environment.
When you have installed your pool and all the components are assembled, we thank you for classifying and recycling all the packaging.
PROLOGUE
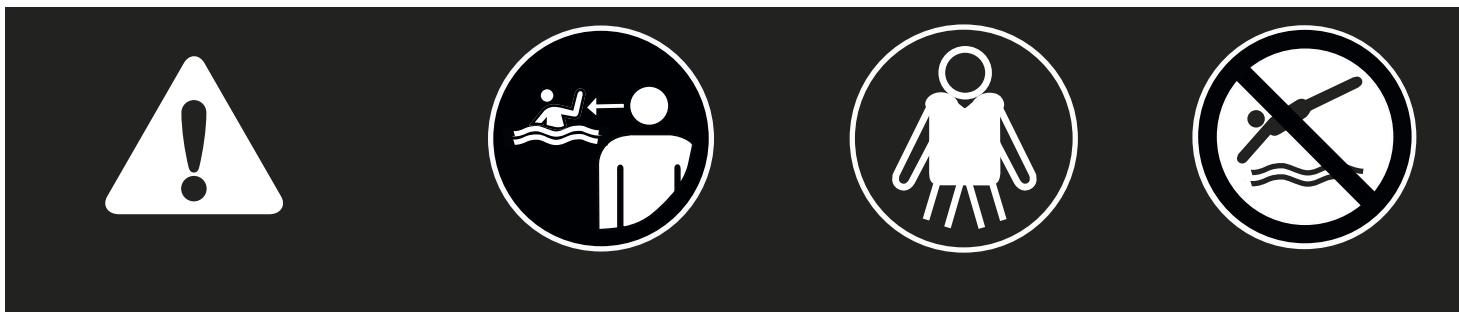
SAFETY INSTRUCTIONS
The filter kit (filter + pump) should be installed at least 3.5 metres from the pool to avoid the risk of electrocution.
There should be a special differential electricity protection device for pools with electric filter pumps, according to the regulation.
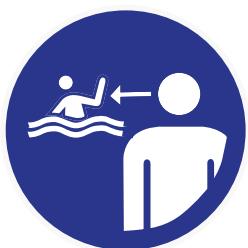
Never leave children without surveillance near the pool.
After each bath, remove the external stepladder to avoid accidental falling into the pool of children or of pets (Regulation EN-P90-317).
This pool is exclusively designed for family use. Walking on the edges or diving or jumping from them is strictly forbidden.
SAFETY ADVICES
Carefully read, understand, and follow all information in this user manual before installing and using the swimming pool.
These warnings, instructions, and safety guidelines address some common risks of water recreation, but they cannot cover all risks and dangers in all cases. Always use caution, common sense, and good judgment when enjoying any water activity. Retain this information for future use.
Non Swimmers safety
Continuous, active, and vigilant supervision of weak swimmers and non-swimmers by a competent adult is required at all times (remembering that children under five are at the highest risk of drowning).
-
Designate a competent adult to supervise the pool each time it is being used.
-
Weak swimmers or non-swimmers should wear personal protection equipment when using the pool. - When the pool is not in use, or unsupervised, remove all toys from the swimming pool and its surrounding
to avoid attracting children to the pool.
Safety devices
-
It is recommended to install a barrier (and secure all doors and windows, where applicable) to prevent unauthorized access to the swimming pool.
-
Barriers, pool covers, pool alarms, or similar safety devices are helpful aids, but they are not substitutes for continuous and competent adult supervision.
Safety equipment
-
It is recommended to keep rescue equipment (e.g. a ring buoy) by the pool.
-
Keep a working phone and a list of emergency phone numbers near the pool.
Safe use of the pool
- Encourage all users especially children to learn how to swim
- Learn Basic Life Support (Cardiopulmonary Resuscitation - CPR) and refresh this knowledge regularly.
This can make a life-saving difference in the event of an emergency. - Instruct all pool users, including children, what to do in case of an emergency
- Never dive into any shallow body of water. This can lead to serious injury or death.
- Do not use the swimming pool when using alcohol or medication that may impair your ability to safely use the pool.
- When pool covers are used, remove them completely from the water surface before entering the pool.
- Protect pool occupants from water related illnesses by keeping the pool water treated and practicing good hygiene. Consult the water treatment guidelines in the user's manual.
- Store chemicals (e.g. water treatment, cleaning or disinfection products) out of the reach of children.
- Signage is to be displayed in a prominent position within 2m of the pool.
- Removable ladders shall be placed on a horizontal surface.
Loose parts available for 5 years counting from the product invoicing date.

PEFC
PEFC/14-38-00166


WARNING:
Every electrical appliance fed in 220V , has to be located at least at 3,50m from the edge of the pool. The equipment should be connected to a voltage, with earth connection, protected by a residual current device (RCD) having a rated residual operating current not exceeding 30mA .
Read the instructions carefully and keep for future reference.
IF YOU HAVE ANY PROBLEM, ..j CONTACT US!
www.grepool.com
When you have installed your pool and all the components are assembled, we thank you for classifying and recycling all the packaging.
"Installation" darge lept.
VOORSCHRIFTEN VOOR OPSLAG
VERPAKKING, AFVALSCHEIDING EN RECYCLING
Wood is a natural product, the fissures visible on the edges of the wood are completely normal and do not modify the resistance characteristics of the same.
Wood is always a malleable material (from 3% to 4% of dimensional variations) with humidity and temperature oscillations. Therefore, small cracks can appear and in order to limit later deformations, the technical criteria have been respected regarding the design, the choice of sections, and of packaging and the fixing methods. Knots are natural elements of wood: their aspect and their size vary from one product to another. The secretion of resin is a natural phenomenon of resinous wood. Just as no tree is like another tree, the following photographed elements cannot be considered as defects:
LA MADERA: UN MATERIAL VIVO
Mould can appear on the surface of wood, although not penetrating into it and not degrading it. After being treated with UV radiation, wood turns greyish with time without this affecting its durability. Varnish can be applied to wood treated in autoclave. In addition to protection, varnish contributes to the beauty and long-life of wood. In this case, wait for the wood to completely dry before applying the varnish.
SYLVESTER PINE TREATED IN AUTOCLAVE
The wood we use is select pine and dried to 2.5% before treatment in class IV autoclave. It has a 10-year guarantee against insect attack and against rot for the parts in the ground.
Small reinforcements
RefuerzosAFPES
Petits renforts
Kleine Verständkungen
Rinforzi piccoli
Kleine verstevigingen
Reforços pequenos

Big reinforcements
Refuerzos grandes
Grands renforts
You should respect all these dimensions to perfectly adjust the liner and the edges. Approximate dimensions

Paraaabstarperfectamenteelliner ylosbordesesimportanterespetardostadasmedidas.Medidasaproximas.

The filter group and especially the electric pump should necessarily be located at a distance of at least 3.5 metres from the bowl (electricity regulation NFC-100).
WATER EVACUATION
Maintenance and wintering of the filter requires water evacuation. The evacuation should be foreseen when installing the filter group.
FILTER TUBE
In the case you want to bury the filter tubes, these should be protected against risk of deterioration, by protecting them with a cover before burying them.
POOL ORIENTATION
The pool should be positioned so the skimmer is facing the prevailing winds. The skimmer is a very important element in the filter system and is always installed facing the prevailing winds. The optimum filtering of the pool water depends on the suction capacity and position of the skimmer.

The filter group should be located below the level of the pool and ideally at floor level of the pool, otherwise there is a risk of the pump becoming deactivated. The filter pump should be protected from splashing of water, from floods, and from humidity, in a dry, well ventilated place. Otherwise, the metallic pieces and the pump motor may be comedeteriorated.

GRUPO DE FILTRACION
EN This is a determining stage in the construction of your pool. Certain works performed in situ, like the preparation of the land, the concrete slab, the draining... can need the intervention of professionals that will propose the most adequate solutions.
Select the ideal location, in the sunniest spot possible, taking into account the local regulations (distance from the paths, public rights of way, networks...) and the landscaping after installing the pool. Decide the location by marking the ground, check the «Ground layout» section.
Your pool can be installed in these three ways:
Try to not install your pool on recently filled land or unstable land. Whatever type of installation you choose, you should excavate and prepare the land for levelling.
Attention: in the case that the land is sloping, you need to excavate it for levelling. Do not add soil to level it.
The installation should be using a concrete foundation slab, at least 17 centimetres thick. The pool is assembled after the concrete foundation slab has completely dried (3 weeks). The filter group should be located below the level of the pool and ideally at floor level of the pool.
Take the reference number of your pool into account when you do the assembly
- 1 screwdriver (with Torx point No. T15, T20, T25) • 1 drill with bits for wood Ø4, Ø6 and Ø10, for concrete Ø10 and for metal Ø5
- 1 cutter • 1 spirit level • 1 decametre • 1 mallet • 1 hammer • 1 screwdriver • 1 No. 19 spanner • 1 hacksaw • 1 saw for wood • 1 ballpoint pen • PVC adhesive • Roll of Teflon • Two-faced adhesive tape or stapler • Gloves • Seal closer Assembly time (besides land preparation and filling) 2 days with at least 2 persons.
ES HERRAMIENTAS
INTERIOR DIMENSIONS:
Mark the shape of your pool on the ground using the previous dimensions. The marking can be done by using a cord.
If your pool is fully or partially in-ground, proved the excavation for an area of 50~cm additional to the perimeter to facilitate your movements during assembly.
CONCRETE FOUNDATION SLAB:
The installation of your pool requires preparing a concrete foundation slab reinforced with fibres or with welded lath. The concrete should be 350~kg / m^3 (standardized C125 430). We recommend to ask a professional to prepare the foundation slab.
If the installation is fully or partially in-ground, try to remove all the fragments of wood, branches or roots that could become degraded with time. Do not install any formwork around the pool or near it with wood that is not treated for installation in contact with the ground. Do not apply any additional treatment to the in-ground part, for example, applying tar or non-micro porous varnish is prohibited. Make sure that the wood can «breathe», check the «Preparing the land» chapter.

LOS ADE HORMIGON: ES FUNDAMENTAL CENTRAR LA PISCINA EN LA SOLERA DE HORMIGON, COMO SE INDICA EN LA IMAGEN. LAS MEDIDAS INCLUYEN EL ESPESOR DE LA PARED.

DIMENSIONES INTERIORES:
AFMETINGEN BINNENZIJDE:
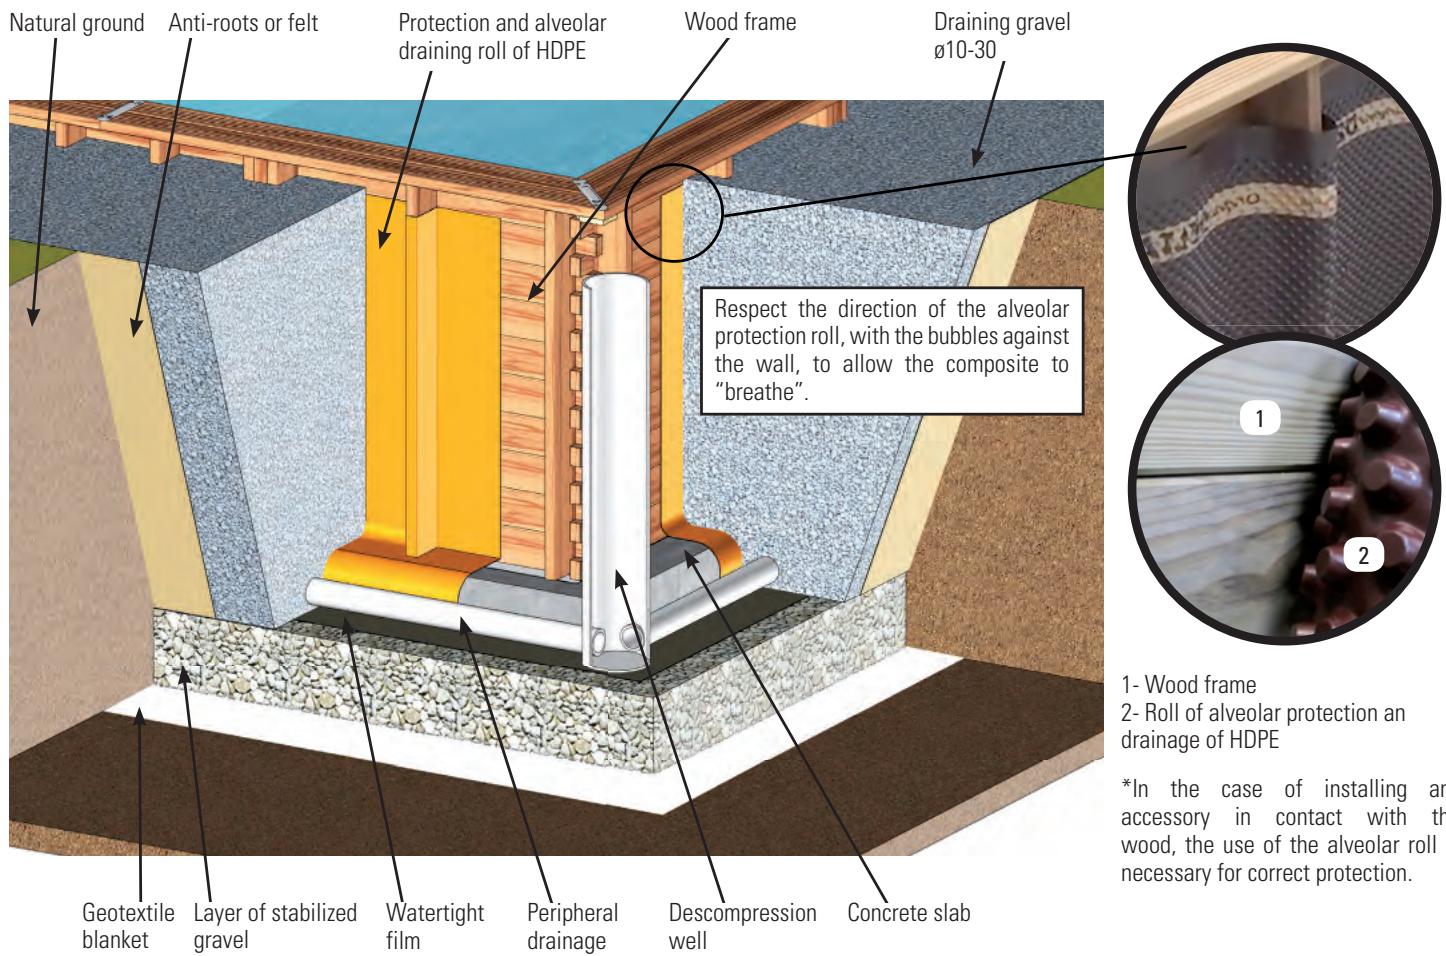
The recommendations about the construction for completely or partially in-ground pools are effective in the context of an installation in land which is not humid. You should conveniently adapt the basic instructions to avoid the restrictions related to the type of land (clay for example) or to the excessive presence of water in the ground, (sources, run-off rainwater...). In order to avoid any excess humidity in your land, you should install a draining system under the pool, and around it by building a decompression well. In all cases, an adapted draining system is necessary to avoid water stagnation with the possible consequences of ground contamination including the deterioration of the structure (rooting of the wood, deformation of the structure...) To guarantee quality planning, you can consider any information from a specialist as very important.
UNACCEPTABLE LOCATION: Sloping, uneven ground. Sandy, rocky or soggy ground.
MARK THE INSTALLATION AREA
Once the location area is chosen (which have to be perfectly levelled), we'll proceed at the marking. Mark the ground using wood pickets, screwdriver, funnel (or plastic bottle), flour or lime and a rope.
It is advisable to level the total surface area necessary before marking it (marking should be centered on the rectangle corresponding to the pool model) so that assembly work is more convenient and easy.
In order to avoid any excess humidity in your land, you should install a draining system under the pool, and around it by building a decompression well.
LEVELLING
When levelling the ground, always remove material from the top of the slope rather than filling in the bottom: this will ensure greater ground stability and firmness. Always remove all grass, roots, stones, etc. Levelling is extremely important: devoting the necessary time and effort to ensuring that your pool sits properly on the ground will avoid problems later.
How to level: thanks to a large mason rule (aluminium or wood) and a level, level out the ground forming rectangles (or squares), locating this rule in the selected and cleaned area. When all the areas are on level and when the excess of ground is removed, you may fill in the small areas which are left to level out (with clean ground or sand) but always compacting and levelling again afterwards. It is very important the installation area is well-compressed and firm in order the ground do not subside when the pool will be full of water. Please ask a professional: builder, gardener...
Finishing: On the cleaned and levelled ground, spread a light coat of sieved sand (max. 1cm).
Water and compact it (with a garden roller). Check that is well levelled.
Do not use the sand to level the ground. The finishing has to be perfect.
Important: The installation of your pool requires preparing a concrete foundation slab reinforced with fibres or with welded lath.
The bag should be perfectly flat and smooth, to avoid any imperfection.

We recommend to ask a professional to prepare the foundation slab.
The concrete slab is not included.
Dosing 350kg / m^3 (standardized type C125 430)
L: 6,82 x W: 5,32 x H: 0,17 m - 6,17 m³ of concrete.
PARTIAL OR COMPLETELY IN-GROUND INSTALLATION
According to the nature of the land, you should install a peripheral drainage and connect it to a decompression well. The well will be excavated before the construction of the pool to avoid that the excavations fill with water during the works. It should be near the pool, a few centimetres lower than the deepest point of the same and reach up to the surface. The decompression well is located at the most humid point. It acts as an overflow in the case of water infiltrations or clay soil, starting from the fact that water rises quicker through a tube than through the soil.
EN LAYOUT OF THE BOARDS: Prepare the boards «as trial», forming the silhouette of the pool.
INSTALLATION OF THE FIRST LAYER OF BOARDS: • Build the first layer placing boards (A22), (A23) and (B12) as shown by figure 1. • Adjust the shape of the pool using the inside dimensions indicated in the installation diagram (see page 44). • The drawing shows the inside dimensions of the pool for the different opposing diagonals. After having installed de first layer, you should check the inside dimensions of the pool.
DISPOSITION DE LAS TABLAS: Prepare las tablas «de prueba» formando la silueta del vaso.
2nd LAYER OF BOARDS: • Install the second layer of boards as shown in figure 2. • There is a wooden wedge in the structure packet to correctly assemble the boards. • Never directly hit against the boards. You would damage the pegs and would weaken the structure. Do not hit them with anything metallic. This would inevitably damage the wood. • Try to correctly assemble the boards right from the start. There should not be any space between each layer of boards to avoid maladjustment of the higher boards.

IMPORTANT: It is very important that the boards are correctly installed, above all the bottom ones, (where the water pressure is greater). There is a possibility of some boards coming loose. This is completely normal because wood is a living material. Even loose, the board may be installed. Follow these steps: Position and fit one of the two sides of the boards. Redirect the other side using a joint closer. Fit the board using a mallet and wooden wedge.

LAYOUT OF THE COLUMNS: Position the columns as shown by figure (figure 3). Tighten the columns well around the entire layer of boards. Vertically drill the layer using a drill with a 010mm bit for concrete, and using the column as a guide. The depth of the hole should be at least 100mm to guarantee good fixing. Place the fixing bolts (with wachers and nuts) into the holes and fix them with the help of a hummer. COMPLETELY hammer in the fixing bolts (only the head should be visible). Tighten crosswise the 4 nuts. The support columns are installed with a drill after laying the second layer of boards. Tighten the columns well around the entire layer of boards.

COMPLETELY hammer in the fixing bolts (only the head should be visible)
SPECIFIC BOARDS: Refilling fitting with key: place the specific board for the refilling with key (E12) situating the larger diameter on the external side of the pool.
Skimmer: •Place the specific boards of the skimmer facing the prevailing winds. Boards (C12) and (D12) will always be placed over a panel starting by board (B12) (figure 5). •The skimmer will not be stable until the pool is filled. The skimmer (with its flap) is fitted as the same time as the finishing board.

Internal side - cut outs
Zona interior - rebaje
EN The part (E12) must be just below part (C12).
Part (E12) must be located at height number 9.
A- Align the upper part of the wooden blocks with the level of the last board. Maintain the wooden blocks in their place.
B- Drill the boards with a 0.6mm bit for wood from inside the pool.
- Systematically check that the upper part of the wooden block.
- Make sure that the head of the screw is level with the surface of the wood.
Take into account the length of the second screw to make sure it does not show on the rear side. Place it as close as possible to the wood at the upper part.
- Align the upper part of the reinforcements with the level of the last board. Maintain the reinforcements in their place. - Drill the boards with a 0.6mm bit for wood. Tighten the screws in 2 times, from inside the pool. - First tighten the upper screws into the reinforcements and then the lower ones (in the 1st and last boards). - Check the verticality of the reinforcements. - Finish assembling the reinforcements using 1 screw per board and correct possible deformations of the wood (boards). Systematically check that the upper part of the reinforcement is well aligned with that of the board and that the head of the screw is level with the surface of the wood.
ES REFUERZOS (6x90)
- Position the L trimming on the ends of the boards. - Cut off the excess part of the trimming according to the height of the pool if necessary (figure 6).
Fix trimming L using 3 screws 4 × 60 uniformly distributed over the height of the piece (figure 7).
This finishes the assembly of the structure. Now all that needs doing is to position the edges (see the edges chapter).
At this time of the assembly:
- The skimmer is positioned facing the prevailing winds. - The panel of the structure on which the removable stepladder will be located has been decided.
ES EMBELLECEDORES L (4x60)
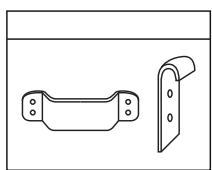
Each trim consists of:
2xRENFORT46x145x1400
2xJOUE C SABOT 22/120/1226
1x CACHEDSABOT 22/145/1216
First you have make a U-shaped piece You must fix the 3 thinnest strips (22mm thick) using 3 screws for each side, as shown in photographs A and B. It is always good to use a drill bit of the appropriate size before screwing the parts. When you have made the U-shaped piece, place it against the pool covering the metal wedge as in photograph C. You will see there is a part of the metal wedge that remains visible.
To hide this part, place the vertical reinforcements always aligned with the upper part of the pool (photograph D) and screw them first from the inside of the pool with 6x90 screws (preferably 1 screw er board) and secondly against the "U" part as in photograph E (3 screws 4x60 distributed over the height of the part). It should look like that in photograph F.

1x CacheSABOT 22/145/1216
1x CacheSABOT 22/145/1216
2x TRAVESSAS 22x120x1226
1xTRAVESSA 22x145x1216
The wooden stepladder is included for access to the pool. Do not use for anything else.
Assemble the wooden stepladder and use it as a template to define the separation of the wooden blocks that support it. In the case that the pool ahs an elongated shape, the stepladder will be positioned on a small side.
Centre the external stepladder in relation to the side.
Drill with a 10 mm bit for wood the 2 support and the 2 wooden blocks.
Do not use the stepladder for other needs different to those indicated in this manual.
Admitted maximum weight = 150~kg
Its is COMPULSORY to remove the stepladder after using the pool.
According to the height of the pool, the stepladder may need adjusting.
- Cut the supports of the ladder checking the dimensions as shown in figure 8 at the bottom part of the stepladder support and saw off the part you do not need. - Assemble the stepladder and position it as shown in figure 9.
In the case that the pool is partially in-ground the stepladder should be cut to adapt it to the pool. For safety reasons, if the space between the floor and the first step is between 80 and 230mm (dimension A) close this space using the step of the ladder you have removed so that dimension B is less than 89mm . To do that, follow these steps:
1- Reduce the length of the step by 12mm
2- If dimension A is less than 140mm , reduce the width of the step so that when the step is installed the space below its is completely closed.
3- Assemble the modified step in the stepladder as shown in the upper diagram, trying to pre-cut the stepladder support.
ES
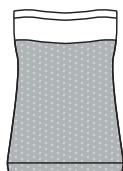
EN There are two possibilities to install the wall protecting blanket
TWO FACED ADHESIVE TAPE (NOT INCLUDED)
- Stick the two-faced adhesive tape panel by panel, aligning it with the upper part of the top boards (figure 10). If the wood is slightly humid and dusty, it can be smoothened using sandpaper to facilitate adherence.
- Check that the walls and floor are clean.. Remove screws, bark, shavings, sawdust...
- Unroll the blanket aligning it to the upper edge of the top boards (figure 11).
- Cut of the excess blanket and eliminate any folds.
STAPLER (NOT INCLUDED)
- Staple the end of the blanket starting from a corner.
- Unroll the blanket aligning it to the upper edge of the top boards.
Use one staple every 20 cm. (figure 12)
- Cut of the excess blanket and eliminate any folds.
- Keep the excess of wall tapestry. (It may be necessary for the bottom).
ES Dos posibilidades para instalar la manta protectora de pared. ADHESIVO DE DOBLE CARA (NO INCLUIDO)
EN Start by laying the protective blanket, which should be cut from the roll included, on the floor.
- Unroll the blanket taking into account how the pool is oriented. (It is better to use scissors instead of a cutter)
- Join the pieces without them overlaying.
- Do not have any folds.
- Join the pieces by the edges using single-face adhesive tape.
- If your pool has any area of wall not covered by the blanket, take advantage now when installing the bottom blanket and move it up a little at the lower part of the wall. That way the liner will be well-protected.
Fixing of the skimmer joint
EN The skimmer is the water suction point from the pool to the filter. Its position facing the prevailing winds allows recovery of all the possible residues floating on the surface of the water (dust, leaves...)
INSTALLATION
- Cut the blanket with a cutter.. The cut will be larger than the hole (hole radius + 2 cm).
Fix the first watertight seal (flat joint) to the body of the skimmer
EN The refilling fitting with key is for introducing water into the pool. It goes through the wall through the hole made in the pre-cut board. INSTALLATION
- Locate the position of the hole for the nozzle..
- Make a cross-shaped cut in the blanket from inside the pool.
- Cut the blanket with a cutter.. The cut will be larger than the hole (hole radius + 2 cm).
The automatic cleaner connection of the skimmer is only used for pool maintenance.
EN ADJUSTMENT AND FIXING OF THE PROFILES (4X40): Place the liner. Perforate the strip with a 4 mm drill bit, beginning 50 mm from the edge. Screw in the strip at the upper edge of the ledge using the screws (4 x 40). Distribute the screws evenly along the strip. Follow the same steps for the rest of short panels. Using a hacksaw, cut the excess off of the strip. As you cut the white profiles to the correct dimension to fix the liner, the excess will be needed to continue installing the other side of the pool.
Do not previously drill the boards.
Check the serial number in the label of the box.
- Clean the inside structure of the pool (grains of sand, screws...) use a vacuum cleaner if necessary.
- Check that the skimmer seal is in its place. Position the trap door inside the skimmer.
- Locate it on the bottom or wall of the liner and write the serial No. in the box on the instruction sheet for possible claims*
- Check that there are no screw heads protruding above the surface of the wood.

EN The liner should have been at least 24 hours at a room temperature of at least 20^ before being installed. The dimension of the liner are a few centimetres shorter than the inside dimensions of the pool, so the liner is densely installed. The liner should be installed at an external temperature of at least 15^ . We extremely recommend putting the liner in the sun a few hours before assembly, so it is flexible and easy to install. The sticker with the serial number of the liner should be kept for future reference. This number will be required for any eventual reclamation against the guarantee. INSTALLATION (It is mandatory to fill the pool with water before placing the edges)
To do this, you should take off your shoes to not damage the liner.
A Enter the pool, without wearing shoes.
B Place the liner in the centre of the pool (figure 13) and unfold it starting from there (figure 14) Uniformly distribute the space between the dimensions of the liner and those the structure all round.
C Correctly align the lower angles of the liner (angles of the floor closures) with the corners of the pool (figure 15).
D Insert the hooking profile of the liner into the profile (figure 16).
The liner should have been at least 24 hours at a room temperature of at least 20^ before being installed. The liner should be installed at an external temperature of at least 15^ .
To move the already installed liner, slide it along the profile. If this is difficult the liner can be removed by lifting it not to damage it. Make sure that the liner is well positioned both on the floor as on the walls, uniformly adjust the tension of the same (with your foot, push the liner by its angles towards the corners of the walls) (figure 17).
F Fit the pool with about two centimetres of water (figure 18). To facilitate installing the liner, this water should be very cold.
G Flatten the bottom of the liner to avoid folds starting from the centre towards the edges. Continue filling the pool. If there are still folds, correct the tension of the liner at the walls by sliding it along the hooking profile. (Oblique folds in the wall indicate incorrect positioning) (figure 19).

The angles of the liner should necessarily correspond to the corners of the pool structure.

Once the liner is installed, continue filling the pool up to 10cm below the refilling fitting with key.
Some weeks after filling the pool, the liner will show a different colour between the submerged part and that in the air. This decolouration is normal and does not risk the sturdiness and/or characteristics of the liner. To avoid that a dark mark appears due to atmospheric contamination between the submerged part and the part of the liner in the air, (called water line), we recommend regularly cleaning the liner in this area with a specific cleaner.

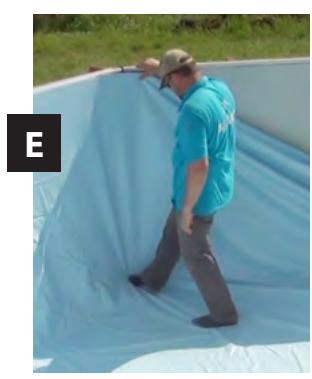
Fig.17/Abb.17/Afb.17
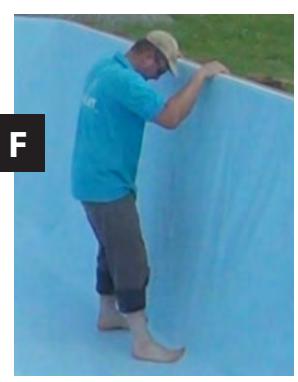
Fig.18/Abb.18/Afb.18

Fig. 19 / Abb. 19 / Afb. 19
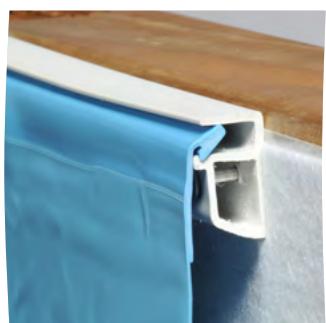
This transversal view shows the liner placed in the angle.
Esta vista transversal muestra el liner colocado en el ángulo.
Cette vue en coupe montre le liner en place dans la cornière.

Tense the liner well at the corners Tense bien el liner en las esquinas Tendez bien le liner dans les angles
DE
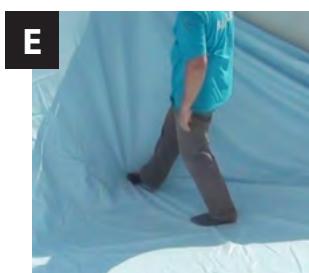
Fig.17/Abb.17/Afb.17
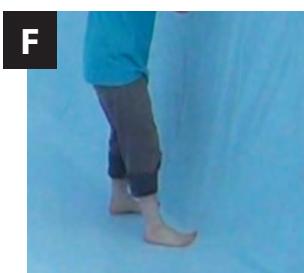
Fig. 18 / Abb. 18 / Afb. 18
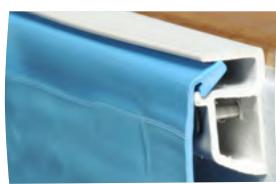
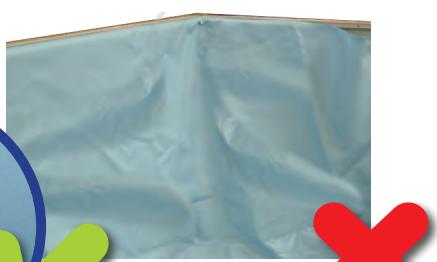
Fig.19/Abb.19/Afb.19
These Querschnittansicht zeit den im Anschlusswinkel positionierten Liner Questa vista traversale mystra il liner posizionato nell'angolo
EN In fully or partially in-ground pools, a gravel landfill is necessary to favour perfect draining. The landfill of a pool can seem a mere formality, because a first sight there are no special technical difficulties. Nevertheless, it is a more delicate operation than what it seems, for which certain precautions are necessary. An incorrect landfill can give way to later deterioration of the pool and its surroundings. It is necessary to consider the type of material being used and to perform all the necessary verifications. Before performing the landfill, you should:
- Check that all the hydraulic and electrical equipment is well connected. - Check the water tightness of the connections of the channelling, especially regarding those sealed parts. - Protect, if applicable, the peripheral draining tube covering it with geotextile. It is important to fill the pool in parallel to the landfill in order to balance the pressures and that way avoid deformations of the structure during the operation. We recommend following the
landfill technique by thirds (1/3 of water and 1/3 of landfill). During the landfill, we recommend processing by successive layers around the entire perimeter of the pool to not run the risk of damaging the structure. Position the alveolar HDPE protection (not included) around the pool.. The alveolar protection, should, likewise continue over the slab and all round the outside of the same. To avoid draining obstruction, you should place felt on the natural soil (not included) to retain the soil. Install the peripheral draining over the protection and connect it to the decompression well (if applicable). Otherwise, leave the draining extended over the land. Now, make the landfill against the walls with compacted gravel (10/30 calibre) that will facilitate drainage. This landfill should be done at the same time that you fill the pool. Land-filling with vegetable soil is prohibited.
Natural ground • Terreno natual
Start filling the pool with water, up to 4cm from the lower edge of the valve hole.
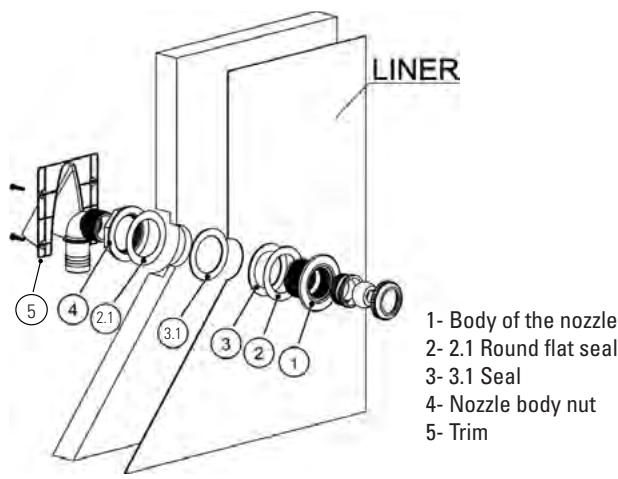
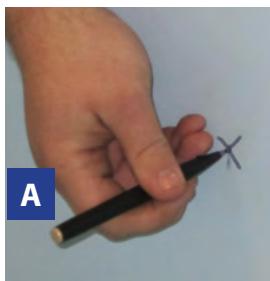
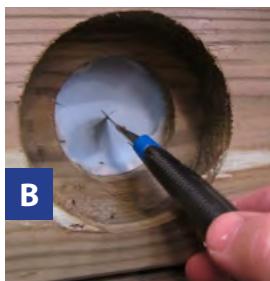
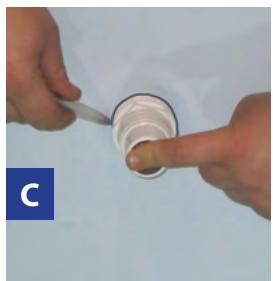
Mark the hole with a felt tip pen (A) and cut a cross in the centre of the opening (B) with a cutter (BLADE), without going over the hole of the die cut.
From inside the pool, insert through the cut (C), the return valve (No. 1) with one of the friction rings (No. 2) and one of the seals (No. 3). The pieces of liner that stick out through the outer part of the pool, should be cut cleanly and accurately.
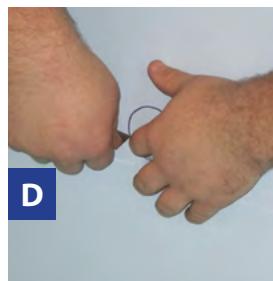
The other gasket (No 3.1) is placed from the outside, folding it, so that it is in contact with the liner and the panel.
Place the other friction ring (No 3.1) and tighten firmly with the nut. Thread the connector tube previously prepared with Teflon into the body of the nozzle, from outside of the pool.
Insert the return hose which goes from the outlet of the treatment unit to the return valve, and secure it with the clamp.
Important: Before placing the hose, insert the trim. (No 5)
Make sure that the filter apparatus valve is in the CLOSED position.

Install the filter before continuing with cutting the liner.

SKIMMER
ASSEMBLING THE SKIMMER
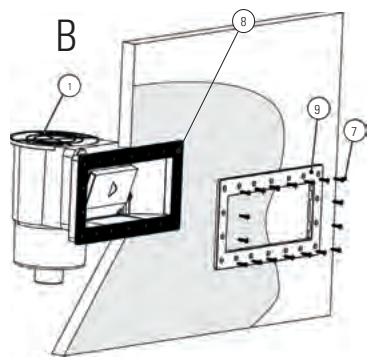
Before installing the skimmer to the pool, the gate unit must be installed in the skimmer opening
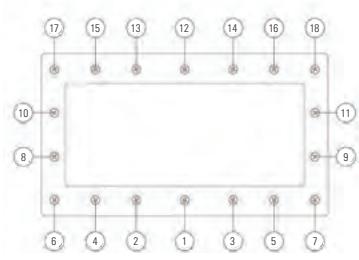
Then place the seal (No. 6) and the conical opening (No. 7), bolting the parts with 8 screws (No. 8) DIN7982 5,5x25 , as indicated in A.
ANCHORING THE SKIMMER
Continue filling the pool with water until it reaches a level of 4 cm. under the die-cut of the skimmer of the pool wooden.
Cut the liner using the cutter (blade) following the line of the die cut.
SKIMMER

A
C
- Before continuing, make sure that the skimmer flap is well positioned.
- Mark the position of the fixing screws on the liner with a felt-tip pen.
- (B) Position the second rectangular flat seal (5.1) and the flange (8) against the liner, aligning the holes with the position marks of the screws.
Fix the flange (6) on the liner with 18 screws (7) starting at the bottom(C). The pressure of fixing points on the liner should be constant, (fixing in cross - Screw slightly at first to make sure they fit properly, then fully tighten them, following the order indicated in (C)
- Press on the trim cover No. 9, taking care to place the level mark in the correct position (D).
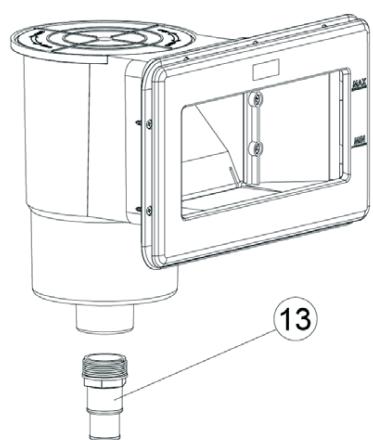
- Use Teflon to bolt the hose adapter (11) to the lower hole of the skimmer body, and then connect the suction hose and tighten with a clamp. (E)
- Cut the liner with a cutter from the inside of the skimmer.
- Now you should install the filter.


D
E
1-Skimmer cover
2-Suction cover
3-Basket
4-Gate unit
5- Connection seal
6- Conical opening
7-Bag of screws (26 DIN 7982 5,5X25 and 10DIN 7982 4,8X19)
8-Gasket
9- Flange with trim cover
10- Return valve
11- Winter storage plug
12-Key
13-Hose adapter
BOQUILLA DE IMPULSION
EN ASSEMBLY SUGGESTIONS: The filter should be located at least 3.50m from the pool.
The following diagrams explain the movement direction of the water. Check the manual that comes with the filter group for the assembly instructions. Note: Fill the filter with 2/3 of clean, calibrated sand: only one calibration is supplied guaranteeing good use of the filer. (1) The colours and connec- tions of the filter can vary according to models. Check the specific manual
The multi-directional flap determines the flow direction. The marks "PUMP", "RETURN", "WASTE" are engraved on the inlets and outlets of the pump. The installation of all the electrical systems should comply with the NF-C15-100 regulation. Check with the manufacturer for any modification of one or several filter system components. The suction pump should not be situated above the water level, because there is a risk of becoming deactivated.
All the threaded connections should be assembled with the watertight Teflon tape included *, except the connection with O rings. The Teflon should be wound round the thread in a counter clockwise direction.
LAND-FILLING: Finish filling the pool The water level should be situated between the upper third part and the second half of the skimmer mouth.

EN This is the oldest of filtering systems. The filtered water passes through the sand (calibrated silicon) that retains all impurities. This type of filter is equipped with a multi-directional flap that allows easy manipulations and cleaning.
DIFFERENT POSITIONS OF THE MULTI-DIRECTIONAL FLAP (4 OR 6)*: When you perform changes the position of the multi-directional flap that pump should always be stopped, without risking seriously damaging the filter and cancelling the guarantee.
- FILTERING POSITION (OR FILTER): Usual position of the flap that allows the water coming from the pump to enter through the upper part of the filter and circulate through the sane, where all its impurities are trapped. The water is collected in the mesh at the bottom and returned to the pool. The pressure gauge situated at the upper part of the filter allows controlling the pressure. In the case that the pressure increase 0.2 bar regarding the starting pressure, you will need to clean the filter.
- WASHING POSITION (OR BACKWASH): Sand washing position. Allow the water to circulate in reverse direction in the filter. The water enters through the lower part of the filter elevates the filtering mass and therefore collects all its impurities and because they are lighter than sand, they area evacuated through the upper part of the filter towards the drain. This operation should last between 2 and 3 minutes.

- RINSE POSITION / DRAINING OF THE FILER** (OR RINSE): Operation that follows washing the filter. When you have cleaned the filter, you should rinse and re-compress the filtering mass. In this position the water circulates through the filter as in the filtering position but is evacuated through the drain at the filter outlet. This operation should be performed between 20 and 30 seconds.

- EMPTYING POSITION / DRAIN (OR WASTE): Position to evacuate the water of for emptying the pool. In this case, the water does not pass through the filter, it goes directly to the drain.

- CLOSED POSITION (OR CLOSED): This position does not allow the water to pass and is used to put the pool into complete wintering when the filtering stops.

-
RECIRCULATION POSITION / CIRCULATION**: Position used so the water circulates through the hydraulic network without passing through the filter. This possibility is used to move the water if you want to add a product to the pool or if you should perform any operation in the filter, because in this case the filter is isolated and the water coming from the pump is directly expelled.
-
Some models are delivered with 4-way flap (available options: Filtering, Washing, Emptying/drain Closed or wintering).
** These positions refer exclusively to the 6-way flap.

EDGES (It is mandatory to fill the pool with water before placing the edges. Sitting on or walking on the beaches is strictly prohibited. Any breakage is not covered by the guarantee.)
The edge consists of 2 pieces, an inside one and an outside one. Check the drawings (4x60) (See page 44).
PREPARATION
- Before fixing the edge, position all the pieces as a trial, checking the installation drawings at the end of the manual, without screwing them, to uniformly distribute the sets.
- Let the edge overlap towards the inside to create a «breakwater».
FIXING
- You should previously drill the edges with a 4 mm bit for wood to obtain a firm and long-lasting fixing. Use 4 × 60 mm stainless steel screws for the assembly, these should be obliquely screwed in (in the case of the exterior ones) to the bottom of the slits.
- When all the edges have been adjusted, continue with levelling the blocks of wood. (*)
Fixing of the plates
Fixing of the corner trimmings
- Position the pieces of wood under the edges at the angles and fix them with 4 screws (4x40).

PLACA BAJO LAS PLAYAS (4X40) (*)
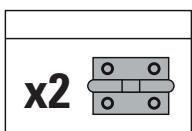
- In the panel where the skimmer is located, cut only the outer edge with a measure corresponding to the distance between the blocks
- Secure the skimmer access hatch with the hinge included.
ES PLAYA ACCESO SKIMMER
A.- Slot in the upper (1) and lower (10) handrails, fasten them with the steps (9) and the steps to the handrails using screws (11), nuts (8) and washers (7). (Fig.20)
B.- Assemble the end pieces (12) of the handrail so that the ladder cannot damage the pool.
C.- Once the ladder is assembled, place it in the pool and drill four holes 9mm using the strip as a template.
D.- Place against flange with the screws (3) and washers (4,7) and nuts (8) and fasten with spanner 12-13. (Fig.21)
E.- Insert the trim (2).

During the first use, you should wash the filter (check the filer system maintenance). Filtering is a mechanical treatment that allows cleaning the pool water by means of eliminating the impurities and contaminating particles. The hydraulic circuit and water purifying group is an essential element for the optimal operation of the filtering system. The filtering system should be coherent: The filter dimensions should be proportionate to the volume of water in the pool and to the pump performance. The filtering is not anti-bacteria Therefore, you should add a product (or a system) for disinfection of the water.
FILTERING TIME:
During the period of use of the pool kit, the filtering system should be used every day, for sufficient time to guarantee a complete renovation of the entire volume
of water. Theoretically, this the calculation:
(Water Temp / 2) = equals the filtering hours
Often, it is more practical to filter 4 hours before and 4 hours after use.
We do not recommend intermittent operation (stopping and starting every hour)
because not all the water volume will be renovated.
OPERATION PRINCIPLE:

The skimmer sucks the water from your pool (this element and especially the basket that collects leaves and other large impurities, should be very clean).
The water is then sent through the tubes to reach a pump with pre-filter * (there another basket filters medium impurities, therefore its cleanliness is essential for good operation).
| WATER TEMPERATURE | FILTERING TIME FOR ONE DAY |
| 15 to 18°C | 8 hours |
| 19 to 21°C | 10 hours |
| 22 to 25°C | 12 hours |
| 26 to 28°C | 14 hours |
| 28 to 30°C | 19 hours |
| + than 30°C | 24 hours |
The pump sends the water towards a filter that retains all the suspended impurities thanks to its filtering material. This is a sand filter. The filtered water returns to the pool. This unit can be manipulated, programmed and protected using an electrical unit (optional).
The water from your pool should be subject to physical and chemical treatment to keep its transparency and to guarantee a completely safe bath.
We do not recommend filling to the pool with well water, to avoid all types of chemical reaction and water colouring risks.
-
The water level is correct: that is to say, slightly above half of the skimmer.
-
The skimmer and pump pre-filer baskets are clean.
- The hydraulic circuit is controlled and the flap positions verified.
- The filter can be started and the pressure controlled with a pressure gauge (according to the type and the position of the technical location regarding the pool).
HAVING ACCESS TO THE POOL IS PROHIBITED IN THE CASE THAT THE FILTER SYSTEM IS DETERIORATED
- According to model
MAINTENANCE OF THE FILTERING SYSTEM
CLEANING THE FILTER
Perform this procedure each time you need to clean the filter. When the pressure increases 0.2 bar regarding the starting pressure you need to clean as follows. Make sure that you have correctly installed the emptying tube (not included) in the collector of the multi-directional flap, so that it allows water evacuation when the sand or filer is cleaned.
- Stop the filtering.
- Put the multi-directional flap to the WASH position.
- Start the filter and let it work for at least 2 to 3 minutes.
- Stop the filtering again, put the multi-directional flap into RINSE position and re-start the filter for 10 seconds.
- Stop the filer and put the multi-directional flap into FILTERING position.
- Re-start the filter and check that the pressure is correct.
CLEANING THE POOL
With a manual pool cleaner
- Connect the pool cleaner tube
- Introduce the pool cleaner into the water
- Fill the tube with water placing it before the refilling fitting with key.
- Place the other end in the pool cleaner outlet.
- You should slowly move the pool cleaner (to avoid moving the dust) and without taking it out of the water, to avoid deactivating the pump.
- When you have finished the cleaning, clean the filter before putting it into its normal position.
RECOMMENDATIONS:
- You should check that the suction holes are not blocked.
- You should stop the filtering during the maintenance operations of the filtering system.
- Periodically check the greasing level of the filter.

Maintenance and wintering of the filter requires water evacuation. The evacuation should be foreseen when installing the filter group.
WATER TREATMENT
Whichever is your filtering system, you will need to chemically treat the pool water to destroy the bacteria and the micro-bodies and to avoid development of algae.
Several sterilization products can be used, like chloride, bromine, oxygen, etc. Request the assessment of a pool treatment product sales person to take a decision.
First, you have to verify the pH level using an analysis kit. Pay attention that the test bottles are only valid for one year.
The ideal level is between 7.2 and 7.4 of pH and 1.5 regarding CHLORIDE. Rectify this level using pH correctors (increasers or reducers). The quantity of product is proportional to the cubic meters of your pools. To treat your pool, check the indications appearing on the product you have chosen for your pool.
pH (potential hydrogen) You should always maintain the water pH between 7.2 and 7.4 because below these values the water becomes corrosive (due to acidity)

and rapidly deteriorates the metal parts of your pool. Above these values the water is basic and greatly reduces the action of treatment.
Never introduce chlorine tablets directly into the pool. The liner would be «burnt».


YouTube
SAFETY SUGGESTIONS
Carefully read, understand, and follow all information in this user manual before installing and using the swimming pool.
These warnings, instructions, and safety guidelines address some common risks of water recreation, but they cannot cover all risks and dangers in all cases. Always use caution, common sense, and good judgment when enjoying any water activity. Retain this information for future use.
When your pool reaches the end of its useful life, it should be disassembled; the different materials (plastic and steel) should be separated and taken to the disposal point indicated by local authorities.
Non Swimmers safety
Continuous, active, and vigilant supervision of weak swimmers and non-swimmers by a competent adult is required at all times (remembering that children under five are at the highest risk of drowning).
- Designate a competent adult to supervise the pool each time it is being used.
- Weak swimmers or non-swimmers should wear personal protection equipment when using the pool.
- When the pool is not in use, or unsupervised, remove all toys from the swimming pool and its surrounding to avoid attracting children to the pool.
Safety devices
- It is recommended to install a barrier (and secure all doors and windows, where applicable) to prevent unauthorized access to the swimming pool.
- Barriers, pool covers, pool alarms, or similar safety devices are helpful aids, but they are not substitutes for continuous and competent adult supervision.
Safety equipment
- It is recommended to keep rescue equipment (e.g. a ring buoy) by the pool.
- Keep a working phone and a list of emergency phone numbers near the pool.
Safe use of the pool
- Encourage all users especially children to learn how to swim
- Learn Basic Life Support (Cardiopulmonary Resuscitation - CPR) and refresh this knowledge regularly.
This can make a life-saving difference in the event of an emergency. - Instruct all pool users, including children, what to do in case of an emergency
- Never dive into any shallow body of water. This can lead to serious injury or death.
- Do not use the swimming pool when using alcohol or medication that may impair your ability to safely use the pool.
- When pool covers are used, remove them completely from the water surface before entering the pool.
- Protect pool occupants from water related illnesses by keeping the pool water treated and practicing good hygiene. Consult the water treatment guidelines in the user's manual.
- Store chemicals (e.g. water treatment, cleaning or disinfection products) out of the reach of children.
- Signage is to be displayed in a prominent position within 2m of the pool.
- Removable ladders shall be placed on a horizontal surface.
WARNING:
Every electrical appliance fed in 220V , has to be located at least at 3,50m from the edge of the pool.
The equipment should be connected to a voltage, with earth connection, protected by a residual current device (RCD) having a rated residual operating current not exceeding 30 mA.
Read the instructions carefully and keep for future reference.
IF YOU HAVE ANY PROBLEM, ..jCONTACT US!
CONTACT:
web: www.grepool.com/en/after-sales


web: www.grepool.com/post-venta


web: www.grepool.com/it/post-vendita


web: www.grepool.com/post-venta


RESPECT THE ENVIRONMENT
DO NOT TAKE APART THE POOL UNLESS IT IS STRICTLY NECESSARY. IF YOU DO SO, PLEASE REUSE THE WATER. WATER IS A SCARCE GOOD.
MAINTENANCE AND USE:
- Switch on the filter system once a day in to insure a complete water volume renewal and never do it when somebody is in the pool (see filter manual).
- Check the filter's level of clogging regularly in summer when the pool kit is in use.
- Check screws, nuts and washers (for rust).
- The pool water level has always to be hold in a minimum of 15 cm from the pool superior edge.
- Never empty the pool completely. Low water levels may cause serious damage to the pool.
- Failure to comply with the maintenance instructions may lead to serious health risks, especially for children.
- The use of a swimming costume entails respect for the safety regulations set out in the maintenance and user guide.
- Never leave a pool kit empty on the ground, outdoors.
- Clean regularly the P.V.C liner and the water level mark with non-abrasive products. Regularly clean the fold joining the bottom to the side of the liner, as it is an area where
dirt accumulates. If you do by accident a small hole in the liner, you can repair it thanks to our rubber patches AR202 or V12.
- The isothermic covers (for the summer) protect your pool from insects, dust, leaves,... and avoid to loose the water temperature. Do always set it in order the bubbles are in contact with the water.
WINTER-SEASON:
1- Clean the liner bottom and sides with a non-abrasive product.
2- Treat the water with a chemical product for wintering. We recommend using LIQUID WINTERISER instead of floats with solid product to avoid discolouring the liner.
3- Leave the pool full of water considering:
a) For pools with skimmer and refilling pipe, reduce the water level 5cm underneath the skimmer and close the refilling pipe with the screw tap which is included with the filter.
b) For pools with exhaustion and refilling pipes, reduce the water level 20~cm from the superior edge of the pool and close the pipes using the screw system incorporated.
4- Disconnect the pipes. Do not dismount the skimmer and the refilling and exhaustion pipes.
5- Protect the pool with a winter cover, and put a floating element between the cover and the water, in order to protect it from frost.
6- Filter: disconnect it from the pool. Clean it, empty the sand or remove the cartridge, dry it and keep it in a covered and sheltered from dampness place.
7- Accessories: remove every accessories (ladder, alarm, spotlight, pole...), rinse them with soft water and tidy them away.
TO RUN THE POOL AGAIN: Remove the winter cover, install the filter, change at least 1/3 of water and realize a chlorine treatment.
Switch on the filter for at least 8
hours in an uninterrupted way, respecting the continuous working period indicated in the filter manuals.
CHIMICAL MEASURES:
Please read carefully the chemical product manufacturer instructions. WARNING: Keep chemical products in a clean, dry and out of children place. Important: Every products used have to be compatible with the P.V.C liner.
-
First filling: Analyse the water pH and chlorine (Cl) and adjust them to the optimal levels: pH: 7,2-7,6; Chlorine: 0.5-2 ppm.
-
Chlorine treatments: Consist in increasing the chlorine level until approximatively 20 ppm to eliminate germs and seaweeds. This process has to be done only when the pool water comes from rivers or ponds, ... or if it stayed a long time without any treatments.
-
Checking: Check at least once a week the chlorine levels (use a chlorine and pH analyser). In the same way, we advise to add an algicid to prevent seaweeds appearance.
Never have a swim before the chlorine level stabilization. Do always use a floating dispenser for the chemical product (tablets) dissolution. The chemical product measuring out has to be done in accordance with: Your pool water volume, the bathe frequency, the climatic conditions, the water temperature and the location. Do always move the water and wait for the chemical product dissolution before adding another one. Wait approximatively 12 hours between any pH, chlorine or algicid adjustment using the filter system.
MECHANICAL MEASURES:
Check the filter, the skimmer, the valves and the pipes are well connected to the pool. Do consider high water temperature will involved more time for the filtering. Theoretic filtering time = Water volume / Filter system discharge (generally 8h/day with water temperature of 21^ ), (Ideal: 2h in the morning - 4h around midday - 2h in the afternoon). PLEASE RESPECT THE CONTINUOUS WORKING PERIOD INDICATED IN THE FILTER MANUALS.
VACUUM CLEANER (MANUAL OR AUTOMATIC):
Only for pools with skimmer. Connect an hose extremity to the brush head and immerse it into the water to make it fill in. Connect the other pipe extremity to the exhaustion adapter (TA) and place it above the skimmer basket. Switch on the filter in the FILTER position and begin to clean the bottom. Pay special attention to areas with folds where dirt accumulates.
BOTTOM CLEANER VENTURY STYLE:
Connect a garden hose to the bottom cleaner join and introduce it into the pool. Open the tap until a normal pressure to make the water flow out against the bottom of the pool, producing in that way an ascendant stream which leave the dirt into the filter (bag) which is adjust on the bottom cleaner.
| EFFECTS | CAUSES | SOLUTIONS |
| Cloudy water Green coloured | · Dirty filter · pH incorrect · Formation of algae | · Washing the filter. · Re-adjustment · Shock treatment |
| The pump does not start | · Breaker disconnected · Fuse burnt · Turbine blocked | · Re-start · Replace it · Check that the fan at the rear of the motor turns |
| The pump turns but does not discharge | · Suction flaps closed · The skimmer sucks air · Pre-filter full · Air inlet in the cover · Defective turbine | · Open them again · Rectify water level · Clean it · Check the seal and change the pre-fil-ter cover · Change the turbine |
| The skimmer does not suck | · Basket full · Flap not closed well · Water level too low | · Empty it · Open it · Re-adjust it |
| Dirty water returned to pool | · Filter obstructed | · Wash it, rinse it |
| Pressure in pressure gauge too high | · Filter washing badly done · Outlet flap closed | · Repeat it · Open the trap, check condition of sand (change it every 3 or 4 years) |
| The pool cleaner does not suck or does not suck enough | · Pre filter obstructed · Corresponding flap closed · Tube worn or perforated · Air in the tubes · Other flaps open · Dirty filter | · Clean it · Open it · Replace it · Purge and wait for priming · Close them · Clean it |
| Corrosion marks | · pH very low | · Increase pH to 7,2-7,4 |
| Sand in the pool | · Mesh broken · Manipulation of the multi-directional flap with the pump working · Filter inversely connected The tubes have been inverted during assembly. | · Change the mesh · Change the multi-directional flap · Correctly connect the filter |