UF NF 240 C S180C - Freezer VALBERG - Free user manual and instructions
Find the device manual for free UF NF 240 C S180C VALBERG in PDF.
| Product type | Freezer |
| Brand | VALBERG |
| Model | UF NF 240 C S180C |
| Climate class | SN, N, ST, T |
| Power supply | 220-240 V ~ 50 Hz |
| Control type | Electronic with digital display |
| Main functions | Super Freeze, Eco mode, child lock, door alarm |
| Interior lighting | LED |
| Defrost | Automatic |
| Door reversal | Yes, left side possible |
| Shelves | Removable glass shelf |
| Drawers | Several drawers for frozen food |
| Adjustable feet | Yes |
| Temperature range | -14°C to -24°C (Super Freeze mode) |
| Maintenance and cleaning | Regular cleaning with mild detergent; automatic defrosting |
| Safety | Child lock, door alarm |
| Warranty | 2 years |
| Spare parts and repairability | LED lamp replaceable by a professional |
Frequently Asked Questions - UF NF 240 C S180C VALBERG
User questions about UF NF 240 C S180C VALBERG
0 question about this device. Answer the ones you know or ask your own.
Ask a new question about this device
Download the instructions for your Freezer in PDF format for free! Find your manual UF NF 240 C S180C - VALBERG and take your electronic device back in hand. On this page are published all the documents necessary for the use of your device. UF NF 240 C S180C by VALBERG.
USER MANUAL UF NF 240 C S180C VALBERG
This product has a 2-year warranty as of the date of purchase*, covering any fault resulting from a manufacturing or material defect. This warranty does not cover defects or damage resulting from incorrect installation, improper use or abnormal wear of the appliance.
*upon presentation of the sales receipt.
CONDITION DE GARANTIE
FR
Thank you for choosing this VALBERG product.
Chosen, tested and recommended by ELECTRO DEPOT,
the products of the VALBERG brand are easy to use,
reliable and of an impeccable standard.
Thanks to this appliance, you can be sure that each
use will bring you satisfaction.
Welcome to ELECTRO DEPOT.
Visit our website: www.electrodepot.fr

Preview of the appliance
Description of the appliance

Using the appliance
Installing your new appliance
Display controls
Using your appliance
Reversing the door

Useful information
Cleaning and care
Helpful hints and tips
Troubleshooting
Disposal of the appliance
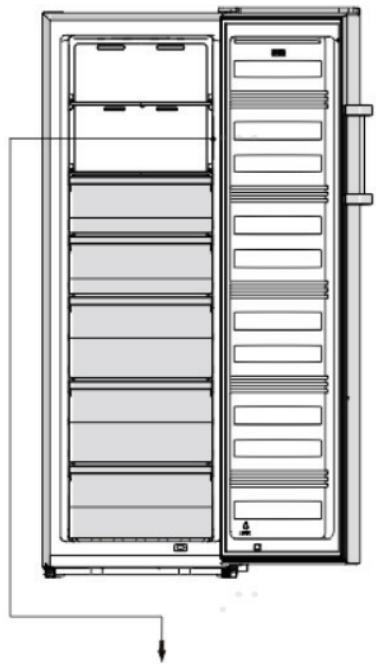
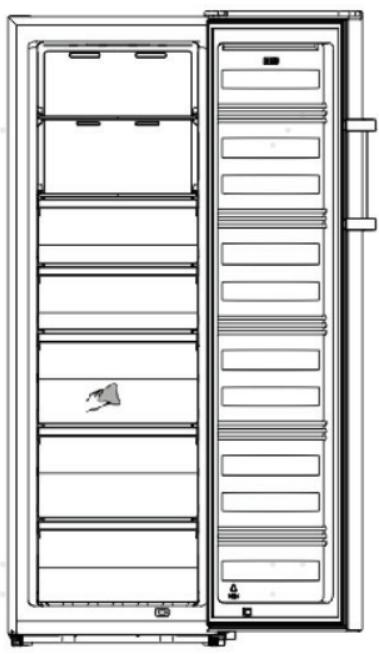
Description of the appliance
Cabinet
2 LED light
Glass shelf
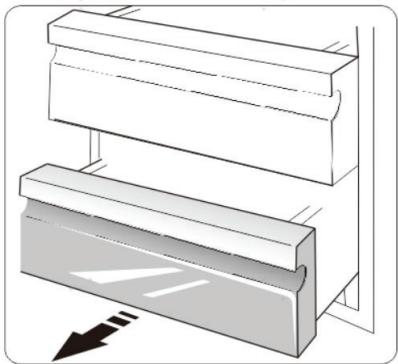
Upper drawer parts
5 Display
Middle drawer parts
Lower drawer part
Adjustable bottom feet
9 Freezer door
10 Handle [optional]
1 Freezer gasket
- Due to unceasing modification of our products, your freezer may be slightly different from this instruction manual, but its functions and using methods remain the same.
- To get the best energy efficiency of this product, please place all shelves, drawers and baskets on their original position as the illustration above.
Installing your new appliance
Before using the appliance for the first time, you should be informed of the following tips.
WARNING
For proper installation, this freezer must be placed on a level surface of hard material that is the same height as the rest of the flooring. This surface should be strong enough to support a fully loaded freezer.
The rollers, which are not castors, should be only used for forward or backward movement. Moving the freezer sideways may damage your floor and the rollers.
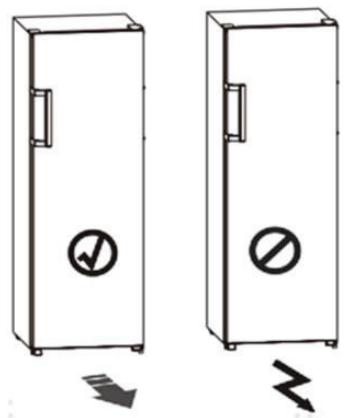
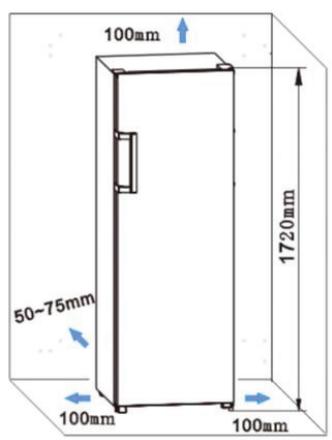
Ventilation of appliance
In order to improve efficiency of the cooling system and save energy, it is necessary to maintain good ventilation around the appliance for the dissipation of heat. For this reason, sufficient clear space should be available around the freezer.
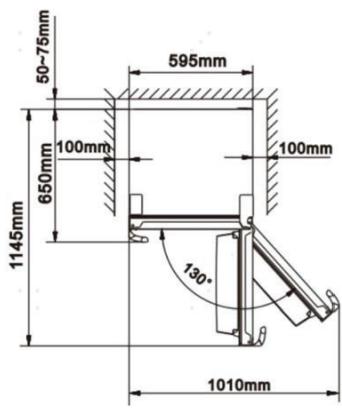
Suggest: It is advisable for there to be 50-75mm of space from the back to the wall, at least 100mm from its top, at least 100mm from its side to the wall and a clear space in front to allow the doors to open 130^ . As shown in follow diagrams.
NOTE
This appliance performs well within the climate class from SN to T showed in the table below. It may not work properly if being left at a temperature above or below the indicated range for a long period.
| Climate class | Ambient temperature |
| SN | +10°C to +32°C |
| N | +16°C to +32°C |
| ST | +16°C to +38°C |
| T | +16°C to +43°C |
- Stand your appliance in a dry place to avoid high moisture.
- Keep the appliance out of direct sunlight, rain or frost. Stand the appliance away from heat sources such as stoves, fires or heaters.
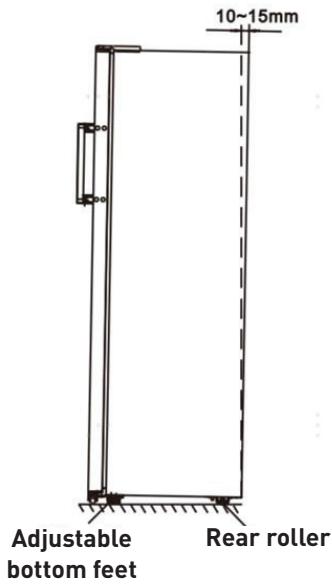
Leveling of appliance
-
For sufficient leveling and air circulating in the lower rear section of the appliance, the bottom feet may need to be adjusted. You can adjust them manually by hand or by using a suitable spanner.
-
To allow the doors to self-close, tilt the top backwards by 10-15mm.
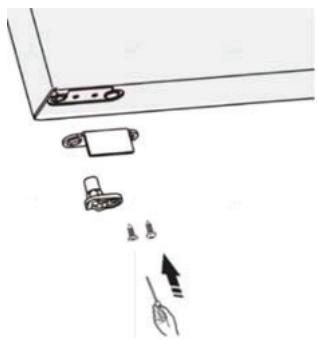
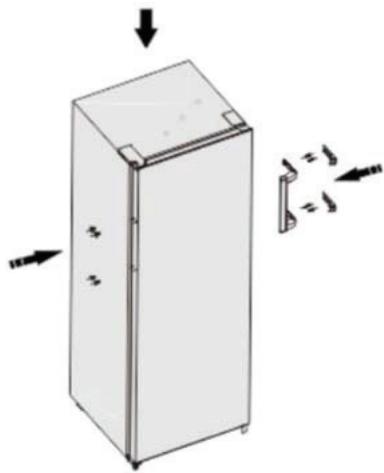
Installing the door handles
For the convenience of transportation, the door handles are separately provided in a plastic bag, you can install the door handles as follows.
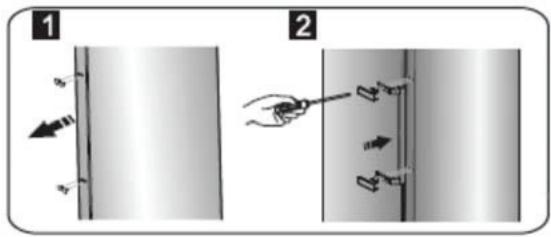
- Lever screw covers on the left side of the door, and then put them back to the plastic bag.
- Match the handle on the left side of the door, keeping axes of the screw holes in the handle and the door in a line, as the picture shows.
- Fix the handle with the special screws provided in the plastic bag.
Display controls
Use your appliance according to the following control regulations, your appliance has the corresponding functions and modes as the control panels showed in the pictures below. When the appliance is powered on for the first time, the backlighting of the icons on display panel starts working. If no buttons have been pressed and the doors are closed, the backlighting will turn off.
Display panel inside
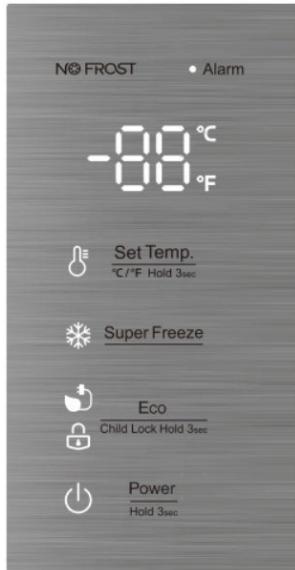
Controlling the temperature
For optimum food preservation, we recommend that when you start your freezer for the first time the temperature for the freezer is set to -18^ ( 0^ ) if you want to change the temperature follow the instructions below.
CAUTION
When you set temperature, you set an average temperature for the whole freezer cabinet. Temperature inside each compartment may vary from the temperature values displayed on the panel, depending on how much food you store and where you place them. Ambient temperature may also affect the actual temperature inside the appliance.
NOTE
High temperature setting will accelerate food waste.
Temp
Set Temp.
In the unlocked state, you can switch the display mode from ^ C to ^ F by press the
C/F Hold 3sec
button for 3 seconds.
In the unlocked state, press
Set Temp.
C/F Hold 3sec
button, when the

light is on, the freezer set
temperature is cyclically adjusted between -14^ and -24^ .

When the light is on, the freezer set temperature is cyclically adjusted between 7^ and -11^ .

| Thermostat setting for ambient T°C : NORMAL ≈ +24°C (± 4°C) | -19°C |
| Thermostat setting for ambient T°C : COLD ≈ +16°C (± 4°C) | -19°C |
| Thermostat setting for ambient T°C : HOT ≈ +32°C (± 4°C) | -19°C |
Super Freeze
Super Freeze will quickly lower the temperature within the freezer so food will freeze faster.
This feature also helps to keep the vitamins and nutrition of fresh food for longer period.
- In the unlocked state, press Super Freeze button to enter the Super Freeze mode, the Super Freeze icon is lit and the temperature is set to -24^(-11^) .
- To freeze fresh food activate the Super Freeze function at least 24 hours before placing the food to complete prefreezing
Super Freeze mode automatically exits after about 52 hours. - When Super Freeze function is on, in the unlocked state, you can switch it off by pressing Super Freeze button and the freezer temperature setting will revert back to the previous setting.
Eco
If you are going to be away for a long period of time, you can turn it to Eco mode to save on electricity.
- In the unlocked state, press Child Lock Hold 3= button to enter the Eco mode, the Eco icon is lit and the temperature is set to -17°C 1°F.
When the Eco function is on, in the unlocked state, you can switch it off by pressing Eco button. The freezer temperature setting will revert back to the previous setting.
Child Lock
When the light is On, the freezer is locked. Press and hold the button for 3 seconds, the light is off. The freezer is in the unlocked state, it can perform other button operation. If no button have been press for 20 seconds, the light will be on.
Alarm
Alarm In case of alarm, icon will be flashing and there will be buzzing sound.
Door Alarm
When the door is open for over 2 minutes, the door alarm will sound, meanwhile the display panel show «dr» . In case of door alarm, buzzer will sound 3 times every 1 min. After the door alarm time exceeds more than 10 minutes, the buzzer stops beeping, the icon is off, and the display screen shows normal. The door alarm can also be cleared by closing the door.
To save energy, please avoid keeping the door open for a long time when using the appliance.
Power
Power Pressing and hold the Hold 3sec button for 3 seconds to turn the power function on or off. When the freezer is working, In the unlocked state, you can switch the appliance off by pressing Power button for 3 seconds, the light is on, meanwhile the display panel show - - -
IMPORTANT
Do not store any food in the freezer during this time.
When the freezer is in standby mode and unlocked, press the Power Hold 3sec button for 3 seconds, the light is off, the freezer will turn on and the display will shows normal.
NOTE
The display control only can be setted in the unlocked state.
Using your appliance
Your appliance has the accessories as the «Description of the appliance» showed in general, with this part instruction you can have the right way to use them. We recommend that you read through them carefully before using the appliance
Shelf in Refrigerator chamber
There are shelves in freezer chamber, and they can be taken out to be cleaned.
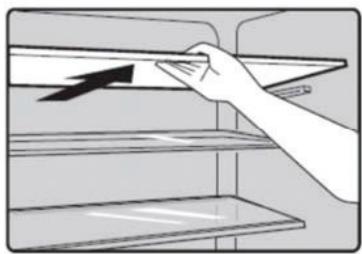
FreezerDrawer
It is sued to store food which needs to be frozen, including meat, fish, ice cream, etc.
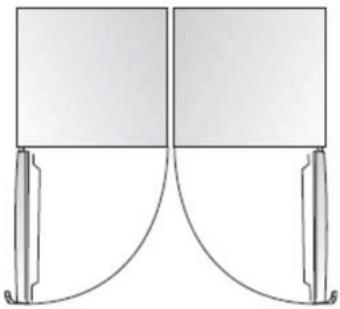
Installing refrigerators in pairs
- Your freezer can be installed with fridge in pairs.
- It can be installed by installation pairs supplied like this, but the energy consumption will increase slightly.
Reversing the door
The side in which the door opens can be changed from the right side (as supplied) to the left side, if the installation site allows for it. Tools you will need:
Not provided
8mm socket wrench
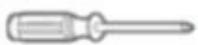
Thin-blade screwdriver
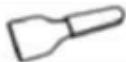
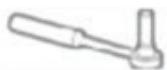
Putty knife
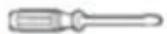
Cross-shaped screwdriver
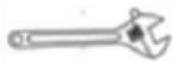
Monkey wrench
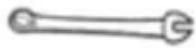
7mm wrench
Additional parts (in the plastic bag)
Left Hinge

Left Hinge Cover
Right Screw Cover
NOTE
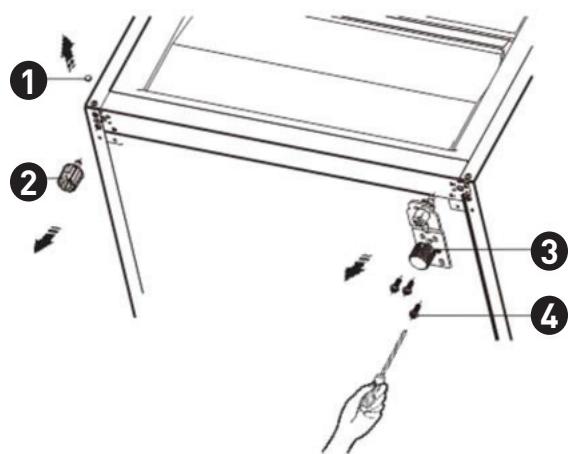
Before you start lay the freezer on it's back in order to gain access to the base, you should rest it on soft foam packaging or similar material to avoid damaging the backboard of the freezer. To reverse the door. The following steps are generally recommended.
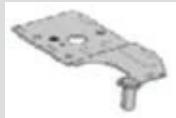
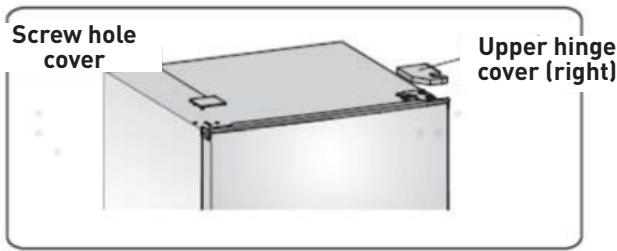
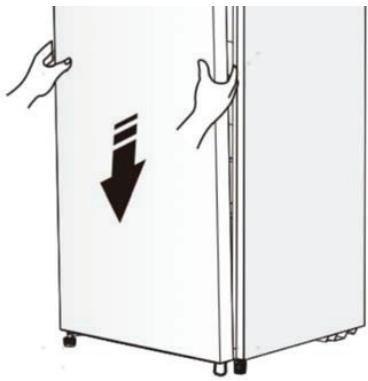
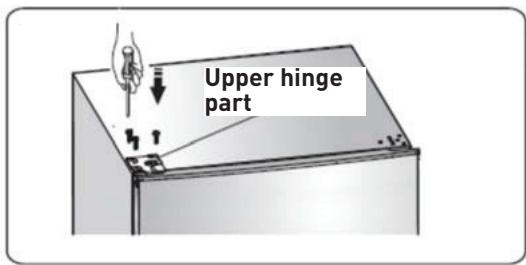
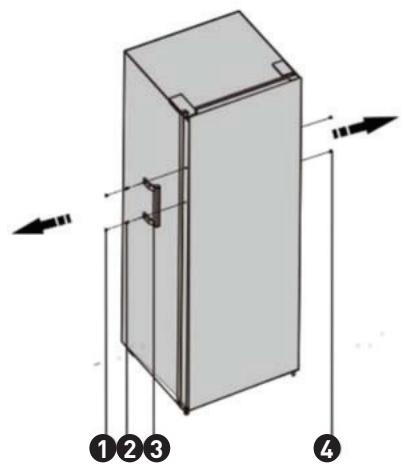
- Stand the freezer upright. Remove the screw hole cover and upper hinge cover (right) as follow diagram.
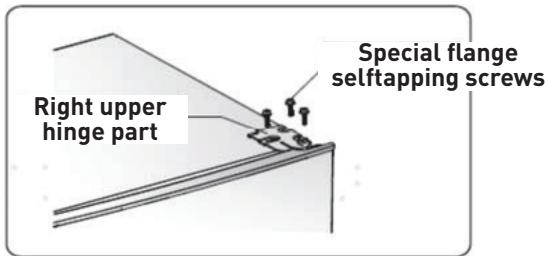
- Remove the three screws as follow diagram. Lift the right upper hinge part.
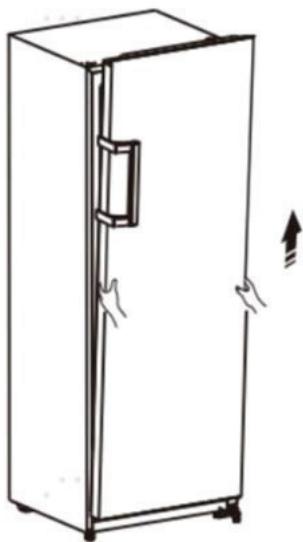
- Lift the door and place it on a padded surface to prevent scratching.
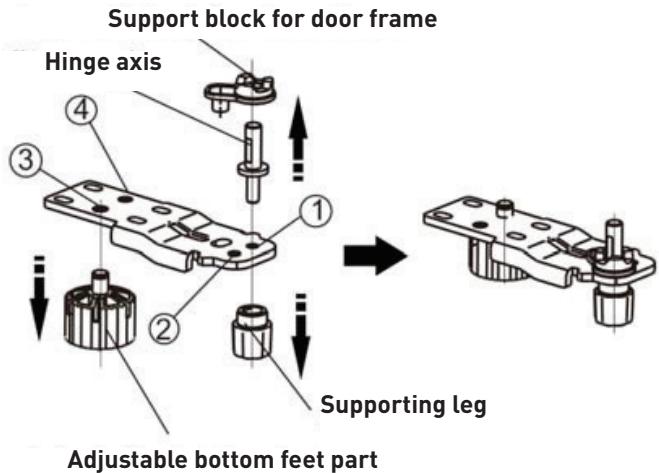
- Loose screws ③ remove part ① and part ② then replace them to the left side and tighten securely with screws ③.
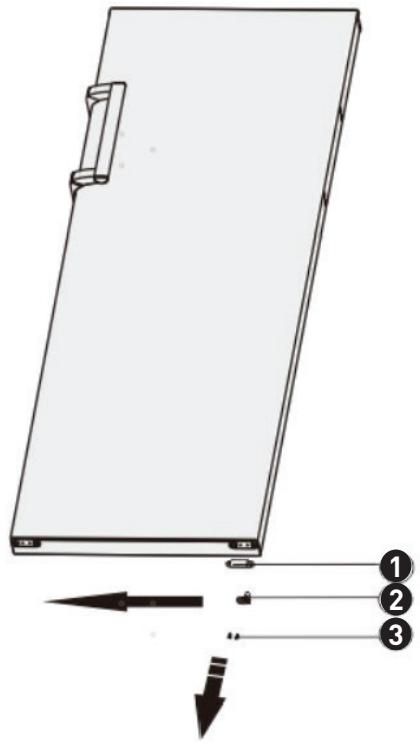
Door stopper
2 Limit block
Self-tapping screw
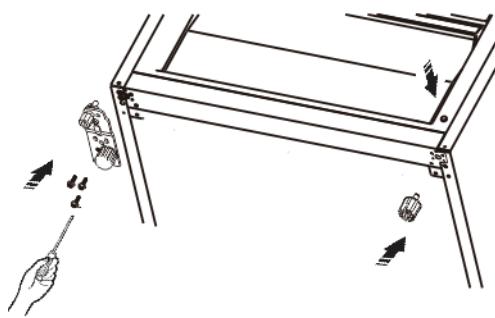
- Lay the freezer on soft foam packaging or similar material.
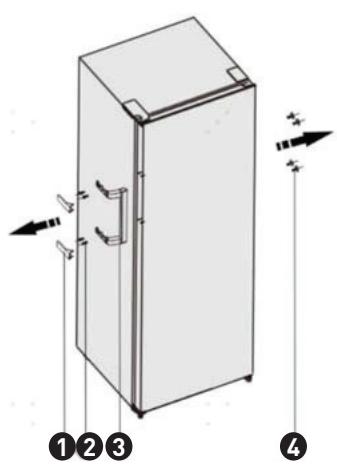
- Remove part ① part ②, and part ③ by unscrewing the screws ④.
Screw cover
Adjustable bottom feet part
3 Right lower hinge part
Special flange self-tapping screw
- Replace part ③ to the left side and fixing it with the screws ⑥
- Replace part ① and part ② to another side and fixing it.
NOTE
You need move hinge axis from hole ① to ②, move adjustable bottom feet part from hole ③ to ④ before transfer.
- Set the door into its new place making sure the pin enters the bushing at the lower frame section.
- Replace the lid by fitting the upper hinge core into the upper door's hole, securing it with the 3 screws.
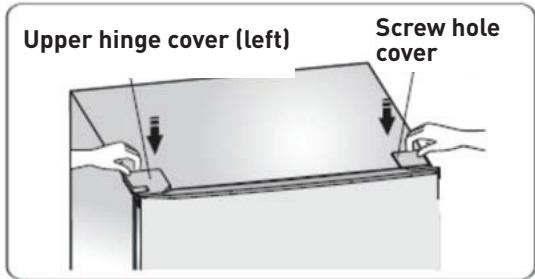
- Put the screw hole cover and upper hinge cover (left) as follow diagram.
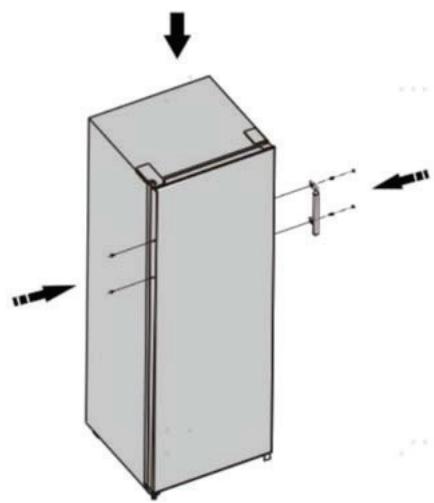
- Switch the handles from the left to the right (only for the model with handles).
1 Handle cover
Screw
3 Handle part
4 Cover-screw cap
NOTE
Due to unceasing modification of our products, handle may be slightly different from this instruction manual, but its functions and using methods remain the same. Switch the handles from the left to the right as follow diagram.
1 Handle cover
Screw
3 Handle part
4 Cover-screw cap
WARNING
When changing the side at which the door opens, the appliance must not be connected to the mains. Remove plug from the mains beforehand.
Cleaning and care
For hygienic reasons the appliance (including exterior and interior accessories) should be cleaned regularly (at least every two months.
WARNING
The appliance must not be connected to the mains during cleaning as there is a danger of electrical shock! Before cleaning switch the appliance off and remove the plug from the mains socket.
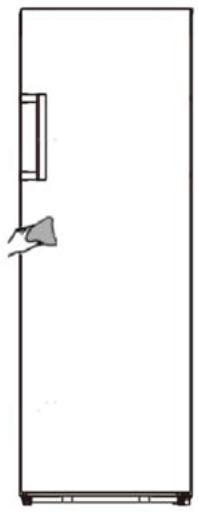
Exterior cleaning
- Wipe the control panel with a clean, soft cloth.
- Spray water onto the cleaning cloth instead of spraying directly on the surface of the appliance. This helps ensure an even distribution of moisture to the surface.
- Clean the doors, handles and cabinet surfaces with a mild detergent and then wiped dry with a soft cloth.
CAUTION
Don't use sharp objects as they are likely to scratch the surface.
Don't use Thinner, Car detergent, Clorox, ethereal oil, abrasive cleansers or organic solvent such as Benzene for cleaning. They may damage the surface of the appliance and may cause fire.
Interior cleaning
- You should clean the appliance interior regularly. It will be easier to clean when food stocks are low.
- Wipe the inside of the freezer with a weak solution of bicarbonate of soda, and then rinse with warm water using a wrung-out sponge or cloth.
- Wipe completely dry before replacing the shelves and baskets.
- Thoroughly dry all surfaces and removable parts before putting them back into place.
CAUTION
Do not use sharp objects to remove frost from the freezer compartment. Only after the interior is completely dry should the appliance be switched back on and plugged back into the mains socket.
Door seals cleaning
- Take care to keep door seals clean. Sticky food and drinks can cause seals to stick to the cabinet and tear when you open the door. Wash seal with a mild detergent and warm water. Rinse and dry it thoroughly after cleaning.
CAUTION
Only after the door seals are completely dry should the appliance be powered on.
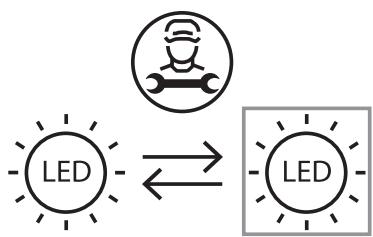
Replacing the LED light
This product contains a light source of energy efficiency class F.
Light source in this product can only be replaced by qualified professionals.
Please contact after-sales service if the light source fails.
The light source shall be removed at the end of the product's useful life, with sorting and recycling done separately.
To replace the LED light, the below steps can be followed:
- Unplug your appliance.
- Remove light cover by pushing up and out.
- Detach the LED and pull it while pressing the connector latch.
- Replace LED light and snap it correctly in place.
Helpful hints and tips
Energy saving tips
We recommend that you follow the tips below to save energy.
- Try to avoid keeping the door open for long periods in order to conserve energy.
- Ensure the appliance is away from any sources of heat (Direct sunlight, electric oven or cooker etc)
- Don't set the temperature colder than necessary.
- Don't store warm food or evaporating liquid in the appliance.
- Place the appliance in a well ventilated, humidity free, room. Please refer to Installing your new appliance chapter.
- If the diagram shows the correct combination for the drawers, crisper and shelves, do not adjust the combination as this is designed to be the most energy efficient configuration.
Hints for freezing
- When first starting-up or after a period out of use, let the appliance run at least 2 hours on the higher settings before putting food in the compartment.
- Prepare food in small portions to enable it to be rapidly and completely frozen and to make it possible to subsequently thaw only the quantity required.
- Wrap up the food in aluminum foil or polyethylene wraps which are airtight.
- Do not allow fresh, unfrozen food to touch the food which
is already frozen to avoid temperature rise of the latter.
- Iced products, if consumed immediately after removal from the freezer compartment, will probably cause frost burns to the skin.
- It is recommended to label and date each frozen package in order to keep track of the storage time.
Hints for the storage of frozen food
- Ensure that frozen food has been stored correctly by the food retailer.
- Once defrosted, food will deteriorate rapidly and should not be re-frozen. Do not exceed the storage period indicated by the food manufacturer.
Switching off your appliance
If the appliance needs to be switched off for an extended period, the following steps should be taken prevent mould on the appliance.
- Remove all food.
- Remove the power plug from the mains socket.
- Clean and dry the interior thoroughly.
- Ensure that all the doors are wedged open slightly to allow air to circulate.
Troubleshooting
If you experience a problem with your appliance or are concerned that the appliance is not functioning correctly, you can carry out some easy checks before calling for service, please see below.
WARNING
Don't try to repair the appliance yourself. If the problem persists after you have made the checks mentioned below, contact a qualified electrician, authorized service engineer or the shop where you purchased the product.
| Problem | Possible cause & Solution |
| Appliance is not working correctly | Check whether the power cord is plugged into the power outlet properly. Check the fuse or circuit of your power supply, replace if necessary. It is normal that the freezer is not operating during the defrost cycle, or for a short time after the appliance is switched on to protect the compressor. |
| Odours from the compartments | The interior may need to be cleaned Some food, containers or wrapping cause odours. |
| Noise from the appliance | The sounds below are quite normal: • Compressor running noises. • Air movement noise from the small fan motor in the freezer compartment or other compartments. • Gurgling sound similar to water boiling. • Popping noise during automatic defros-sting. • Clicking noise before the compressor starts. |
| Other unusual noises are due to the reasons below and may need you to check and take action: • The cabinet is not level. • The back of appliance touches the wall. • Bottles or containers fallen or rolling. | |
| The motor runs continuously | It is normal to frequently hear the sound of the motor, it will need to run more when in following circumstances: • Temperature setting is set colder than necessary • Large quantity of warm food has recently been stored within the appliance. • The temperature outside the appliance is too high. • Doors are kept open too long or too often. • After your installing the appliance or it has been switched off for a long time. |
| A layer of frost occurs in the compartment | Check that the air outlets are not blocked by food and ensure food is placed within the appliance to allow sufficient ventilation. Ensure that door is fully closed. To remove the frost, please refer to the «Cleaning and care» chapter. |
| Temperature inside is too warm | You may have left the doors open too long or too frequently; or the doors are kept open by some obstacle; or the appliance is located with insufficient clearance at the sides, back and top |
| Temperature inside is too cold | Increase the temperature by following the «controls panel» chapter. |
| Doors can't be closed easily | Check whether the top of the freezer is tilted back by 10-15mm to allow the doors to self close, or if something inside is preventing the doors from closing. |
To avoid contamination of food, please respect the following instructions
- Opening the door for long periods can cause a significant increase of the temperature in the compartments of the appliance.
- Clean regularly surfaces that can come in contact with food and accessible drainage systems.
- Store raw meat and fish in suitable containers in the refrigerator, so that it is not in contact with or drip onto other food.
- Two-star frozen-food compartments are suitable for storing pre-frozen food, storing or making icecream and making ice cubes.
- One-, two- and three- star compartments are not suitable for the freezing of fresh food.
| Order | Compartments TYPE | Target storage temp. [°C] | Appropriate food |
| 1 | Fridge | +2~+8 | Eggs, cooked food, packaged food, fruits and vegetables, dairy products, cakes, Drinks and other foods which are not suitable for freezing. |
| 2 | (**)*-Freezer | -18 | Seafood (fish, shrimp, shellfish), freshwater aquatic products and meat products (recommended time is 3 months - nutrition values and taste decrease with time), suitable for frozen fresh food. |
| 3 | ***-Freezer | -18 | Seafood (fish, shrimp, shellfish), freshwater aquatic products and meat products (recommended time is 3 months - nutrition values and taste decrease with time). Not suitable for freezing fresh food. |
| 4 | **-Freezer | -12 | Seafood (fish, shrimp, shellfish), freshwater aquatic products and meat products (recommended time is 2 months - nutrition values and taste decrease with time). Not suitable for freezing fresh food. |
| 5 | *-Freezer | -6 | Seafood (fish, shrimp, shellfish), freshwater aquatic products and meat products (recommended time is 1 month - nutrition values and taste decrease with time). Not suitable for freezing fresh food. |
| 6 | 0-star | -6~0 | Fresh pork, beef, fish, chicken, some packaged processed foods, etc. (Recommended to eat within the same day, preferably not later than 3 days). |
| 7 | Chill | -3~+3 | Fresh/frozen pork, beef, fish, chicken, freshwater aquatic products, etc.(7 days below 0°C and above 0°C is recommended for consumption within that day, preferably no more than 2 days). Seafood (less than 0 for 15 days, it is not recommended to store above 0°C). |
| Order | Compartments TYPE | Target storage temp. [℃] | Appropriate food |
| 8 | Fresh Food | 0-+4 | Fresh pork, beef, fish, chicken, cooked food, etc. (Recommended to eat within the same day, preferably no more than 3 days). |
| 9 | Wine | +5-+20 | red wine, white wine, sparkling wine etc. |
NOTE
Please store different foods according to the compartments or target storage temperature of your purchased products.
If the refrigerating appliance is left empty for long periods, switch off, defrost, clean, dry, and leave the door open to prevent mould developing within the appliance.
Water dispenser cleaning (special for water dispenser products):
Clean water tanks if they have not been used for 48 ~h ; flush the water system connected to a water supply if water has not been drawn for 5 days.
WARNING
Food needs to be packed in bags before putting into the refrigerator, and liquids need to be packed in bottles or capped containers to avoid the problem that the product design structure is not easy to clean.