VAL-TF40 REMOTE - Fan VALBERG - Free user manual and instructions
Find the device manual for free VAL-TF40 REMOTE VALBERG in PDF.
| Product type | Tower fan |
| Brand | VALBERG |
| Model | VAL-TF40 REMOTE (985774) |
| Operating voltage | 220-240 V~, 50 Hz |
| Rated power | 45 W |
| Protection class | Class II |
| Dimensions (W x D x H) | 30 x 30 x 91 cm |
| Power cord length | 180 cm |
| Remote control | Yes (with CR2025 battery included) |
| Number of speeds | 3 (Low, Medium, High) |
| Operating modes | Normal, Natural, Sleep |
| Auto-off timer | 1 to 12 hours |
| Oscillation | Yes (left-right) |
| Maximum airflow | 34.2 m³/min |
| Sound power | 56.9 dB(A) |
| Standby consumption | 0.1 W |
| Seasonal consumption | 12.1 kWh/year |
| Remote control battery type | 1x CR2025 3V (Lithium) |
| Room temperature display | Yes |
| Maintenance and cleaning | Unplug before cleaning. Clean with a soft, dry or damp cloth. Use a vacuum for the grilles. |
| Storage | Unplug, store in a cool, dry place away from dust. Disassemble by reversing the assembly steps. |
| Warranty | 2 years from purchase date (upon presentation of receipt) |
| Country of manufacture | Not specified (manufactured for Electro Dépôt) |
Frequently Asked Questions - VAL-TF40 REMOTE VALBERG
User questions about VAL-TF40 REMOTE VALBERG
0 question about this device. Answer the ones you know or ask your own.
Ask a new question about this device
Download the instructions for your Fan in PDF format for free! Find your manual VAL-TF40 REMOTE - VALBERG and take your electronic device back in hand. On this page are published all the documents necessary for the use of your device. VAL-TF40 REMOTE by VALBERG.
USER MANUAL VAL-TF40 REMOTE VALBERG
Thank you for choosing this VALBERG product. VALBERG products are chosen, tested, and recommended by ELECTRO DEPOT, so you can be sure you are getting a top-quality, easy-to-use product that won't let you down. We're confident your new device will be a pleasure to use every day!
Welcome to ELECTRO DEPOT.
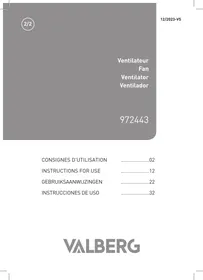
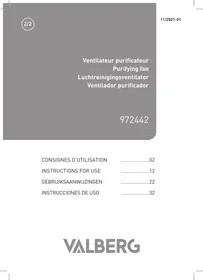
Table of Contents

Parts Product overview Intended use Specifications

Assembly Installing the remote control battery Use

Cleaning and maintenance Storage
Parts

Control panel

On/Off button

Speed button

Mode button

Timer button

Oscillation button

Display

Mode icon

Speed level icon

Oscillation icon

Room temperature / Auto-off Timer

Air outlets

Base

Handle

Remote control storage compartment

Air inlets

Remote control

On/Off button

Speed button

Timer button

Oscillation button

Mode button
Product overview
- Unpack and remove all labels from the unit except the nameplate. Please check that all parts are included and intact. If the unit is damaged or faulty, do not use it and take it to your retailer or after-sales service centre.
- Keep all packaging out of the reach of children. There is a risk of accidents if children play with packaging materials.
Intended use
This unit is intended for household use only and not for commercial, industrial, or outdoor use. The unit has been designed for indoor use to circulate air and generate airflow. Use the unit in a room with dry conditions and adequate ventilation.
Any other use may damage the unit or cause injury.
Specifications
| Model: | 985774 - VAL-TF40 REMOTE |
| Tower fan | |
| Operating voltage: | 220-240 V~, 50 Hz |
| Rated power: | 45 W |
| Protection class: | Class II |
| Power cable length: | 180 cm |
| Dimensions (W x D x H): | 30 x 30 x 91 cm |
| Remote control | |
| Battery type: | 1x CR2025 3V Lithium button battery (included) |
Information requirements for comfort fans according to Regulation (EU) N°206/2012
| Model identification | 985774 - VAL-TF40 REMOTE | ||
| Description | Symbol | Value | Unit |
| Maximum fan flow rate | F | 34.2 | m³/min |
| Fan power input | P | 37.4 | W |
| Service value | SV | 0.9 | (m³/min)/W |
| Standby power consumption | PSB | 0.1 | W |
| Seasonal electricity consumption | Q | 12.1 | kWh/a |
| Fan sound power level | LWA | 56.9 | dB(A) |
| Maximum air velocity | c | 2.7 | meters/sec |
| Measurement standard for service value | (EU) No 206/2012 + (EU) No 2016/2282; EN IEC 60879:2019; EN 50564:2011; EN 60704-1:2010 + A11:2012/ EN IEC 60704-1:2021; EN IEC 60704-2-7:2020 | ||
| Contact details for obtaining more information | Electro Dépôt - 1 route de Vendeville F-59155 FACHES THUMESNIL - France | ||
Assembly

WARNING!
Before assembling or disassembling the unit, always disconnect the unit from the mains supply to avoid the risk of injury.
Tool required: Cross-head screwdriver.
1 Carefully turn the main unit over and hold it during assembly.
Turn base halves A and B over. Place the power cable in the centre, align the four rings of section A over the four plugs of section B, and press down firmly.
3 Place the base on the bottom of the main unit by aligning the three holes and secure the base with the 3 screws by turning them clockwise.
Lock the base halves by tightening the 2 washer head screws on the two outermost plugs clockwise. Pass the cable through the notch in the base and secure it with the clip.
5 Turn the tower fan upright.
Installing the remote control battery
Before first use, remove the insulating strip from the battery compartment of the remote control. The battery is provided inside.
To replace the battery: Turn over the remote control, push the locking clip toward the opposite corner and pull out the battery compartment. Insert a new battery (1x CR2025 3 V button battery) with the "+" side facing up, and close the battery compartment firmly.
Use
- Place the tower fan on a dry, level and stable surface.
- Make sure the tower fan is properly assembled.
- Plug the power cable into a suitable mains socket.
- Press the On/Off button (A1/H1) to turn on the fan. The fan starts running and the display shows the room temperature and current settings.
- Press the Speed button (A2/H2) to set the desired speed.
B
Product usage

- To start or stop the left-right oscillation, press the Oscillation button (A5/H4).
-
Press the Mode button (A3/H5) to switch the mode:
-
Normal Mode: The fan operates at the selected speed.
- Natural Mode: The fan simulates natural breezes by alternating between various speeds.
-
Sleep Mode ^z : The fan alternates between Low and Medium speed.
-
To set the Auto-off Timer: When the fan is on, press the Timer button (A4/H3) repeatedly to set the desired time (1 hour - 12 hours). The timer is displayed (B4) and the countdown starts. The fan will automatically turn off when the timer ends.
To cancel the Auto-off Timer: Press the Timer button (A4/H3) repeatedly until the room temperature is displayed, or press the On/Off button (A1/H1).
- To turn off the fan, press the On/Off button (A1/H1).
- Turn off the fan after each use. Unplug the fan from the mains socket if it is not going to be used for a long period of time.
Cleaning and maintenance

WARNING! To avoid the risk of injury, electric shock or fire:
- Always turn off and unplug the unit from the mains socket before cleaning.
-
Never immerse the unit, power cable or plug in water or any liquid. Do not rinse the unit under the tap..
-
Never use solvents, chemical or abrasive cleaning agents, wire brushes, sharp objects or scouring pads to clean the unit.
- Clean the unit regularly with a soft, dry or moist cloth. Allow to dry completely before use.
- You can use a vacuum cleaner to remove dust or lint from the air vents.
Storage
- Always unplug the unit before storing it.
- Store the unit in a fresh, dry and dust-free place, out of the reach of children and pets.
- Please retain the packaging and use it to store your unit when it is not in use for an extended period of time.
- To disassemble the unit for storage, reverse the steps in the "Assembly" section.

Merci!
This product is guaranteed against faults caused by defects in manufacturing or the materials used for a period of two years, starting from the date of purchase.* This warranty does not cover defects or damage caused by failure to install the device correctly, incorrect use of the product, or excessive wear and tear.
*proof of purchase required.