HMC LEDCLBK - Alarm Clock ONEARZ - Free user manual and instructions
Find the device manual for free HMC LEDCLBK ONEARZ in PDF.
User questions about HMC LEDCLBK ONEARZ
0 question about this device. Answer the ones you know or ask your own.
Ask a new question about this device
Download the instructions for your Alarm Clock in PDF format for free! Find your manual HMC LEDCLBK - ONEARZ and take your electronic device back in hand. On this page are published all the documents necessary for the use of your device. HMC LEDCLBK by ONEARZ.
USER MANUAL HMC LEDCLBK ONEARZ
HORLOGE REVEIL DIGITAL 3D LED
MANUEL D'UTILISATION
INTRODUCTION
A PROPOS DE CE MANUEL
3D LED DIGITAL ALARM CLOCK INSTRUCTION MANUAL
INTRODUCTION
Thank you for choosing the H'mc 3D LED clock. We hope this product will bring you total satisfaction.
MAIN FEATURES
3 buttons on product: MODE, DOWN, UP.
4 digits display. Time display, display hour and minute, 12/24hr display for option.
Brightness option: high, medium, low.
Alarm and snooze function, when alarm turned on, the snooze default is on.
CR2032 as back-up battery to remember the time in case of electricity off.
Working power: 5V, powered by USB cable (USB adapter not included).
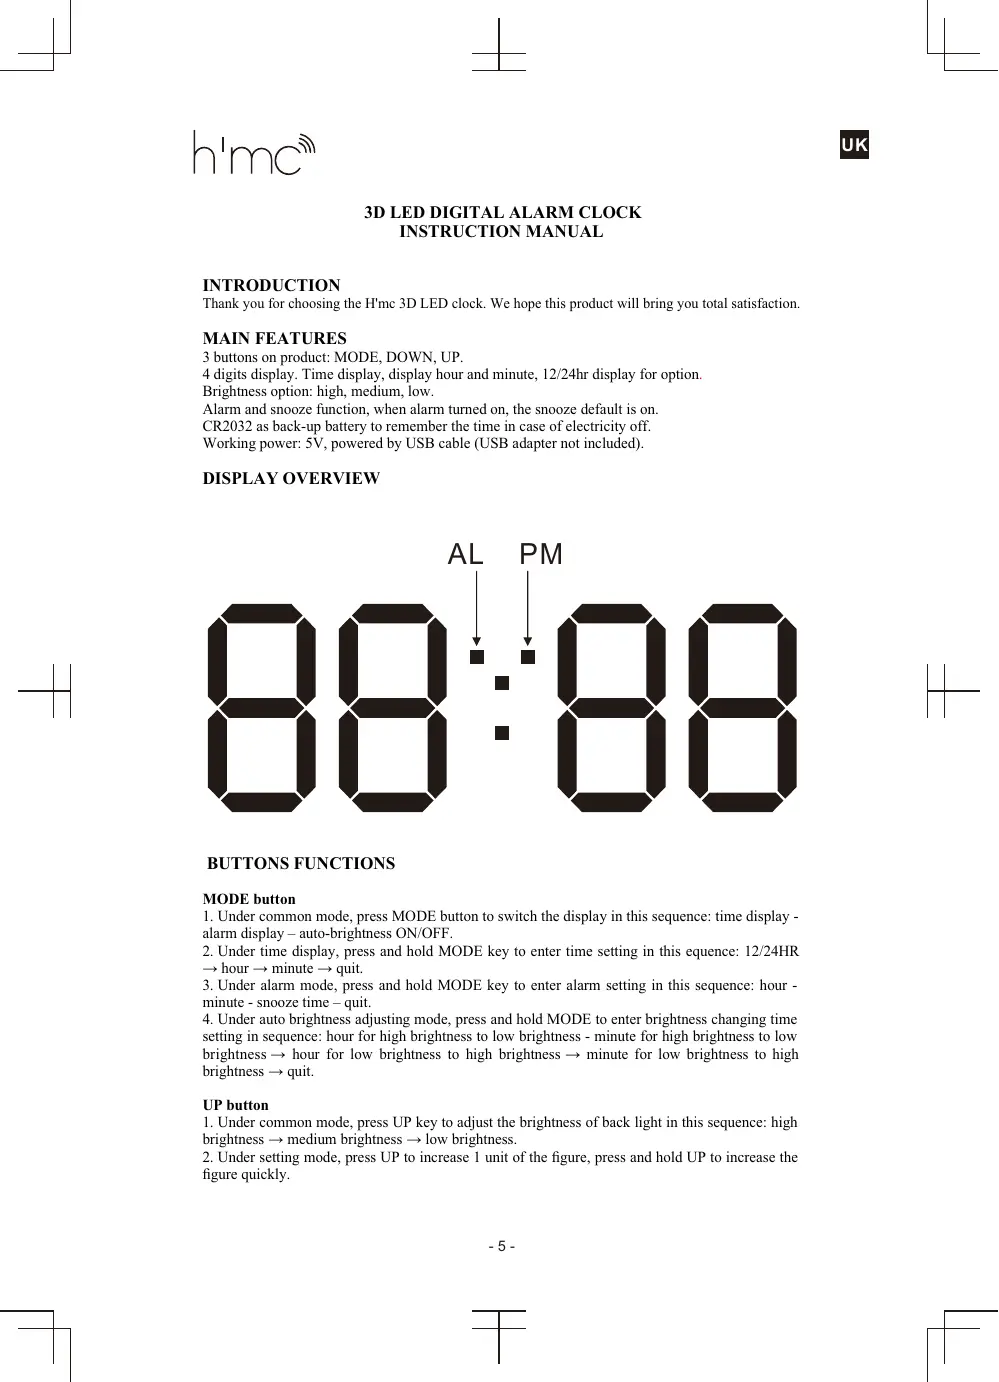
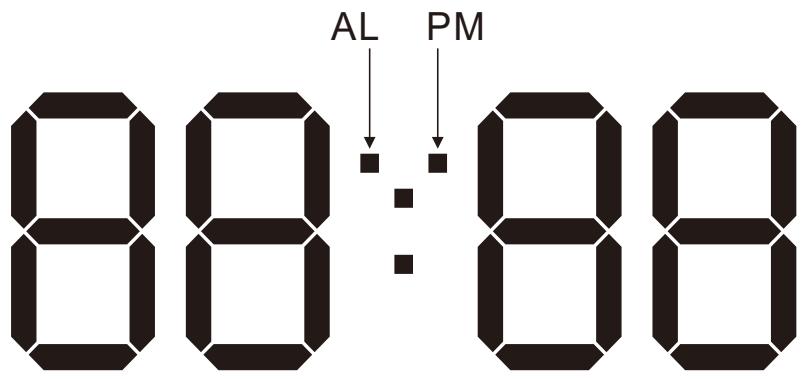
DISPLAY OVERVIEW
BUTTONS FUNCTIONS
MODE button
- Under common mode, press MODE button to switch the display in this sequence: time display - alarm display - auto-brightness ON/OFF.
- Under time display, press and hold MODE key to enter time setting in this equivalence: 12/24HR hour minute quit.
- Under alarm mode, press and hold MODE key to enter alarm setting in this sequence: hour - minute - snooze time - quit.
- Under auto brightness adjusting mode, press and hold MODE to enter brightness changing time setting in sequence: hour for high brightness to low brightness - minute for high brightness to low brightness hour for low brightness to high brightness minute for low brightness to high brightness quit.
UP button
- Under common mode, press UP key to adjust the brightness of back light in this sequence: high brightness medium brightness low brightness.
- Under setting mode, press UP to increase 1 unit of the figure, press and hold UP to increase the figure quickly.
DOWN button
- Under common mode, press DOWN key to turn on/off the alarm.
- Under setting mode, press DOWN to decrease 1 unit of the figure, press and hold DOWN to decrease the figure quickly.
OPERATION
After powered by USB, the LED digits change quickly from 0000 to 9999, then you hear a DI sound and then the normal time display appears.
The default data are:
Hour system display is 24hr
The default time is 0:00
The default brightness is medium brightness.
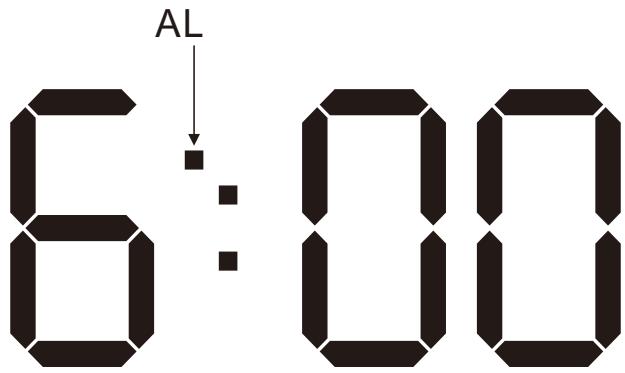
The default alarm time is 6:00
The default brightness adjust mode is off.
1. Time setting

Under time mode, press and hold MODE key to enter time setting mode in this sequence: 12/24hr hour minute quit. The setting item is blinking at 1HZ.
Press UP or DOWN keys to set the figure. Press MODE key to confirm the setting and quit.
Without any operation during 10 seconds, the clock exits from setting mode and the setting figures are saved.
2. Alarm setting
Under common mode, press MODE key to switch to alarm mode.
Under alarm mode, the AL symbol light is blinking.
Under alarm mode, without any button operation during 5 seconds, the clock will go back to the time display mode automatically.
Under alarm mode, press and hold MODE button to enter alarm setting in this sequence: hour - minute - snooze interval time - quit. Press UP or DOWN keys to set the figures.
The default snooze interval is 5 minutes, the interval could be set from 5 to 60 minutes.
Press MODE to confirm the settings.
Without any operation during 10 seconds, the clock exits from setting mode and the setting figures are saved.
3. Snooze setting
When the alarm time is reached, the buzzer will emit 4 beeps per second during 2 minutes.
During buzzer, press MODE key to stop and enter the snooze mode, the AL symbol is blinking until the buzzer emit beep sounds again, when the snooze time is reached. Under snooze mode, press any key to exit from snooze.
During buzzer, press DOWN key to turn off the alarm, AL light stops blinking.
4. Auto-adjust brightness setting
Under common mode, press the MODE key to switch to brightness adjust mode.
Brightness auto-adjust is off:

Brightness auto-adjust is on:

Under brightness auto-adjust mode, press UP or DOWN keys to turn it on/off.
When brightness auto-adjust is on:
1) under high brightness mode: default is from 6:00 to 17:59 with high brightness, and from 18:00 to 5:59 with low brightness.
2) Under medium brightness mode: default is from 6:00 to 17:59 with medium brightness, and from 18:00 to 5:59 with low brightness.
3) Under low brightness mode: there are no changes of brightness all the time.
Under common mode, press UP to adjust the brightness manually in this sequence: high brightness
- medium brightness - low brightness.
5. Time setting for brightness auto-adjust
Under common mode, press MODE key to switch to brightness auto-adjust, when ON is displayed, press and hold the MODE key to enter the time setting for brightness adjust in this sequence: hour setting for changing high brightness to low brightness - minute setting for changing high brightness to low brightness - hour setting for changing the low brightness to high brightness - minute setting for changing the low brightness to high brightness - exit.
Time for high to low:

Time for low to high:

Remarks:
When electricity is off and CR2032 battery is used, the time will keep running, but other functions cannot be worked out. When the item cannot work normally, please replace the battery.
RESPECT OF THE ENVIRONMENT

This product or its battery can not be disposed of with household waste, it must be returned to a collection point to be recycled. Please check with your local authorities for details.
ABOUT THIS MANUAL
We strive to ensure that the information contained in this manual are as accurate as possible. Changes may be made to the manual or the product without prior notification. The latest updates will be available on our website www.h-mc.eu. Our company shall under no circumstances be held liable for injury or damage caused by errors or omissions in this manual.
©H'MC 2018. All rights reserved. All brands and trademarks mentioned in this manual are the property of their respective owners.