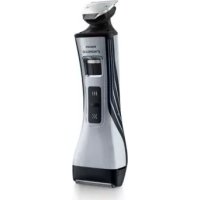
Q63320/15 - Electric mower PHILIPS - Free user manual and instructions
Find the device manual for free Q63320/15 PHILIPS in PDF.

| Brand | PHILIPS |
| Model | Q63320/15 |
| Product type | Electric trimmer (beard, nose, and ear trimmer) |
| Power supply | Mains adapter (charging only), built-in rechargeable battery |
| Adapter voltage | Matches local mains voltage (check before use) |
| Standard charging time | Approximately 10 hours |
| Optimized charging time | 16 hours for 45 minutes of cordless use |
| Runtime | Up to 35 minutes (standard charge), 45 minutes (16h charge) |
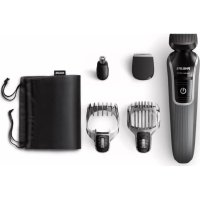
| Included accessories | Beard comb (1-18 mm), nose/ear trimmer, cleaning brush, adapter |
| Cutting settings | 1 to 18 mm in 1 mm increments (via sliding comb) |
| Cordless use | Yes, after full charge |
| Waterproofness | Waterproof device: rinse under tap (device off and unplugged) |
| Maintenance | Clean after each use with warm water and/or brush. Do not use abrasive products. |
| Safety | Do not cut the adapter; do not use in bath or shower; keep out of reach of children |
| Operating temperature | Between 5°C and 35°C |
| Noise level | Lc = 75 dB(A) |
| EMC compliance | Complies with electromagnetic field exposure standards |
| Warranty | International warranty (except wear parts: cutting units) |
| Recycling | Do not dispose of with household waste; remove rechargeable battery before disposal |
Frequently Asked Questions - Q63320/15 PHILIPS
User questions about Q63320/15 PHILIPS
0 question about this device. Answer the ones you know or ask your own.
Ask a new question about this device
Download the instructions for your Electric mower in PDF format for free! Find your manual Q63320/15 - PHILIPS and take your electronic device back in hand. On this page are published all the documents necessary for the use of your device. Q63320/15 by PHILIPS.
USER MANUAL Q63320/15 PHILIPS
Always here to help you
Register your product and get support at
www.philips.com/welcome

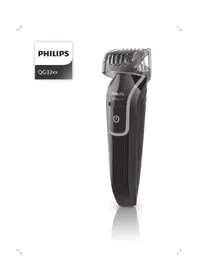
QG3320
natural_image
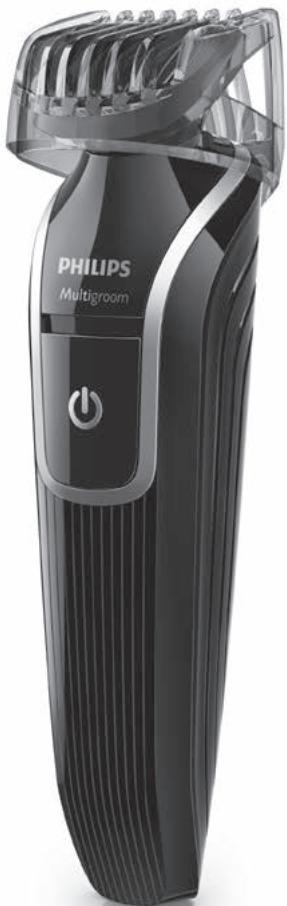
Black Philips Multigroom electric shaver with adjustable arm and power button (no text or symbols on body)User manual
PHILIPS
natural_image
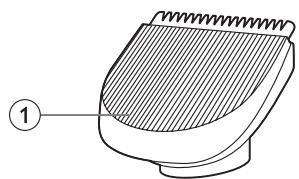
Illustration of a mechanical component with a shaded top surface and a numbered label (1) on the left side.
natural_image
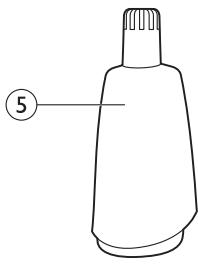
Line drawing of a conical object with a cap and label (no text or symbols on the object itself)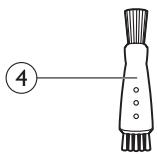
Introduction
Congratulations on your purchase and welcome to Philips! To fully benefit from the support that Philips offers, register your product at www.philips.com/welcome.
General description (Fig. 1)
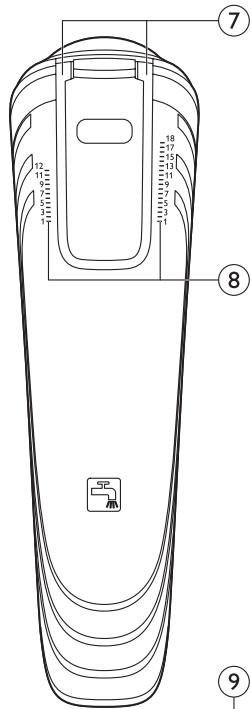
1 Beard trimmer
2 Handle
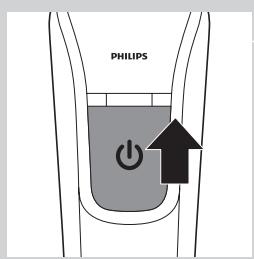
3 On/off slide
4 Cleaning brush
5 Nose/ear trimmer
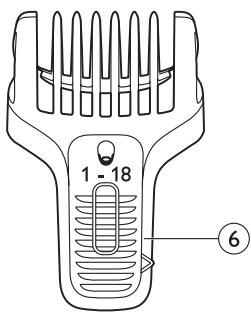
6 Beard comb
7 Guiding grooves
8 Setting indicator
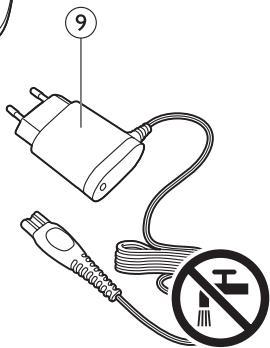
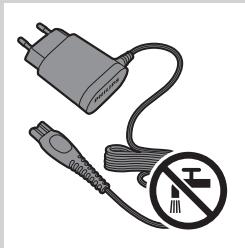
9 Adapter
Important
Read this user manual carefully before you use the appliance and save it for future reference.
Danger
- Keep the adapter dry.
Warning
- Check if the voltage indicated on the adapter corresponds to the local mains voltage before you connect the appliance.
- The adapter contains a transformer. Do not cut off the adapter to replace it with another plug, as this causes a hazardous situation.
- This appliance is not intended for use by persons (including children) with reduced physical, sensory or mental capabilities, or lack of experience and knowledge, unless they have been given supervision or instruction concerning use of the appliance by a person responsible for their safety.
- Keep the appliance and its cord out of reach of children.
- Always check the appliance before you use it. Do not use the appliance if it is damaged, as this may cause injury.
- Do not use the appliance in the bath or in the shower.
Caution
- Only use the adapter supplied.
- Use, charge and store the appliance at a temperature between 5^ C and 35^ C.
- Make sure the appliance is switched off and disconnected from the mains before you clean it under the tap.
- If the adapter is damaged, always have it replaced with one of the original type in order to avoid a hazard.
- If the appliance is subjected to a major change in temperature, pressure or humidity, let the appliance acclimatise for 30 minutes before you use it.
- Do not use the appliance if any of its parts is damaged or broken, as this may cause injury.
- Never use compressed air, scouring pads, abrasive cleaning agents or aggressive liquids such as petrol or acetone to clean the appliance.
- Noise level: Lc = 75dB(A)
natural_image
Illustration of a charging plug connected to a cable with a no-smoking symbol (no text or labels)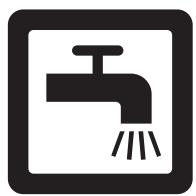
natural_image
Simple black-and-white icon of a faucet with raindrops, no text or symbols present.Compliance with standards
- This Philips appliance complies with all applicable standards and regulations regarding exposure to electromagnetic fields (EMF).
Charging
Standard charging takes approximately 10 hours. When the appliance is fully charged, it has an operating time of up to 35 minutes.
Note: You can get 45 minutes of cordless operating time when you charge the appliance overnight for 16 hours.
natural_image
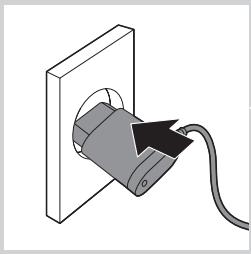
Diagram of a cable inserted into a wall socket, showing internal components and wiring (no text or symbols)1 Switch off the appliance before you charge it.
2 Insert the appliance plug into the appliance.
3 Put the adapter in the wall socket.
The charging light on the adapter goes on to indicate that the appliance is charging.
Note: The charging light does not change colour and does not go out when the appliance is fully charged.
Using the appliance
Beard trimming

natural_image
Line drawing of a mechanical component with a downward arrow indicating motion (no text or symbols)When you trim your beard for the first time, be careful.
Do not move the trimmer too fast. Make smooth and gentle movements.
Beard trimming with beard comb
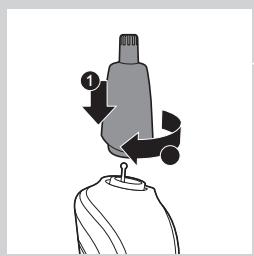
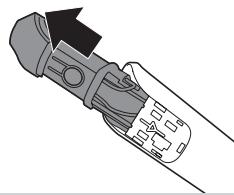
1 Place the beardtrimmer on the handle (1). Turn the trimmer clockwise to fix it (2).
2 Slide the beard comb into the guiding grooves on both sides of the handle.
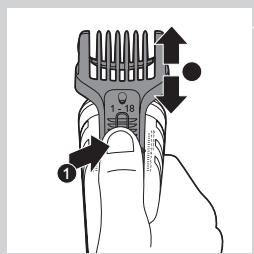
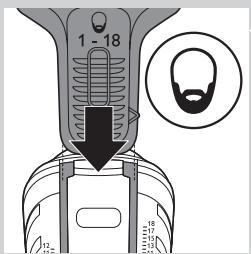
3 Press the setting selector (1) and slide the comb to the desired hair length setting (2).
You can choose any setting between 1 and 18mm.
4 Switch on the appliance.
5 Slowly move the trimmer against the hair growth direction. Press lightly and always make sure the surface of the comb is in full contact with the skin.
Note: When you trim for the first time, start at the highest setting (18mm) to familiarise yourself with the appliance.
Trimming nose and ear hair
natural_image
Line drawing of a person using a hairbrush (no text or symbols present)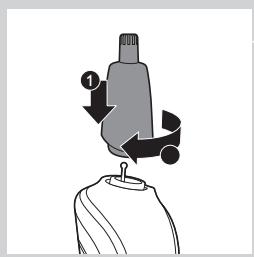
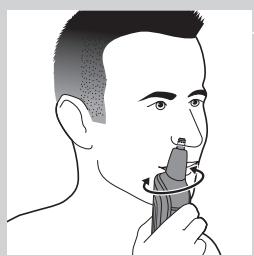
Trimming nose hair
1 Place the nose/ear trimmer on the handle (1). Turn the nose/ear trimmer clockwise to fix it (2).
2 Make sure your nostrils are clean.
3 Switch on the appliance and insert the tip of the trimmer into one of your nostrils.
Do not insert the tip more than 0.5cm into your nostril.
4 Slowly move the tip in and out while turning it round at the same time to remove unwanted hair.
To reduce the tickling effect, make sure that you press the side of the tip firmly against the skin.
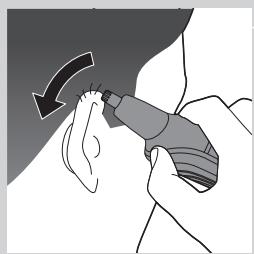
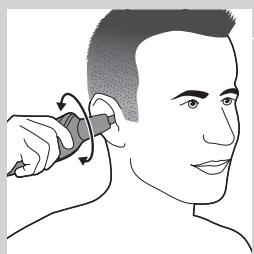
Trimming ear hair
1 Attach the nose/ear trimmer onto the handle.
2 Clean the outer ear channel. Make sure it is free from wax.
natural_image
Illustration of a hand holding a tool with a curved arrow indicating motion (no text or symbols)3 Switch on the appliance and move the tip softly round the ear to remove hairs that stick out beyond the rim of the ear.
natural_image
Illustration of a person receiving neck massage with a tool (no text or symbols)4 Carefully insert the tip into the outer ear channel.
Do not insert the tip more than 0.5cm into the ear channel as this could damage the eardrum.
Cleaning
Never use compressed air, scouring pads, abrasive cleaning agents or aggressive liquids such as petrol or acetone to clean the appliance.
Always keep the adapter dry.
Clean the appliance after each use. The appliance is waterproof and therefore you can easily clean the handle and attachments under the tap.
1 Make sure the appliance is switched off and disconnected from the mains.
2 Remove any attachments from the appliance.
3 Blow and/or shake out any hair that has accumulated in the attachments or use the cleaning brush.
4 Clean the attachments under a lukewarm tap and/or with the cleaning brush.
5 Clean the handle under a lukewarm tap and/or with the cleaning brush.
Ordering accessories
To purchase accessories for this appliance, please visit our online shop at www.shop.philips.com/service. If the online shop is not available in your country, go to your Philips dealer or a Philips service centre. If you have any difficulties obtaining accessories for your appliance, please contact the Philips Consumer Care Centre in your country. You find its contact details in the worldwide guarantee leaflet.
If the adapter is damaged, always have it replaced with one of the original type in order to avoid a hazard.
Only replace damaged or worn attachments with original Philips replacement attachments.
Environment
natural_image
Symbol of a waste bin with crossed lines indicating no waste, and a solid black rectangle below (no text or labels)- Do not throw away the appliance with the normal household waste at the end of its life, but hand it in at an official collection point for recycling. By doing this, you help to preserve the environment.
natural_image
Symbol of a trash bin crossed out by a diagonal line, representing no waste or elimination (no text or numbers present)- The built-in rechargeable battery contains substances that may pollute the environment. Always remove the battery before you discard and hand in the appliance at an official collection point. Dispose of the battery at an official collection point for batteries. If you have trouble removing the battery, you can also take the appliance to a Philips service centre. The staff of this centre will remove the battery for you and will dispose of it in an environmentally safe way.
Removing the rechargeable battery
Only remove the rechargeable battery when you discard the appliance. Make sure the battery is completely empty when you remove it.
Be careful, the battery strips and housing parts are very sharp.
1 Make sure the appliance is disconnected from the mains.
2 Remove any attachment.
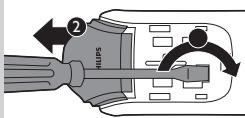
3 Remove the on/off slide with a flathead screwdriver.
4 Remove the front panel of the appliance with a flathead screwdriver.
5 To release the inner part of the handle, insert a flathead screwdriver in the hole (1). Tilt the screwdriver upwards to push the inner part out of the handle (2).
6 Pull the inner part out of the handle.
7 Remove the white round disc.
natural_image
Diagram of a hand holding a connector with cable and socket (no text or symbols)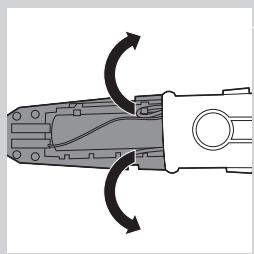
natural_image
Diagram of a pliers with directional arrows indicating movement or rotation (no text or symbols)8 Unhook and remove the battery cover to expose the rechargeable battery.
9 Cut the wires to separate the rechargeable battery from the inner part.
Guarantee and support
If you need information or support, please visit
www.philips.com/support or read the separate
worldwide guarantee leaflet.
Guarantee restrictions
Cutting units are not covered by the terms of the international guarantee because they are subject to wear.
Troubleshooting
This chapter summarises the most common problems you could encounter with the appliance. If you are unable to solve the problem with the information below, visit www.philips.com/support for a list of frequently asked questions or contact the Consumer Care Centre in your country.
| Problem | Possible cause | Solution |
| The beard comb does not stay attached to the handle. | You do not attach the beard comb correctly. | Slide the beard comb into the guiding grooves on both sides of the handle until you hear a click. |
| The guiding grooves are dirty. | Clean the appliance and the guiding grooves thoroughly. | |
| The comb is broken. | Go to your Philips dealer or contact a Philips service centre to purchase a new comb. | |
| The appliance does not work anymore. | The rechargeable battery is empty. | Charge the appliance (see chapter ‘Charging’). Make sure you switch off the appliance before you charge it. During charging, the charging light on the adapter lights up continuously. If the charging light does not light up, check whether there is a power failure or if the wall socket is live. If there is no power failure and the wall socket is live but the charging light still does not light up, take the appliance to your dealer or a Philips service centre. |
| The appliance does not work when it is connected to the mains. | The appliance is not designed to work from the mains. | Switch off the appliance and charge it for 10 hours (see chapter ‘Charging’). |
| The appliance does not charge when it is connected to the mains. | The appliance has to be switched off when you charge it. | Switch off the appliance. |
| The appliance does not trim as well as it used to. | The cutting element of the attachment you are using is dirty. | Remove the attachment from the appliance.Clean the attachment under a lukewarm tap. |
| The appliance becomes hot. | The cutting element of the attachment you are using is dirty. | Remove the attachment from the appliance.Clean the attachment under a lukewarm tap. |