
KD435XG7077SAEP - TV SONY - Free user manual and instructions
Find the device manual for free KD435XG7077SAEP SONY in PDF.
Download the instructions for your TV in PDF format for free! Find your manual KD435XG7077SAEP - SONY and take your electronic device back in hand. On this page are published all the documents necessary for the use of your device. KD435XG7077SAEP by SONY.
USER MANUAL KD435XG7077SAEP SONY
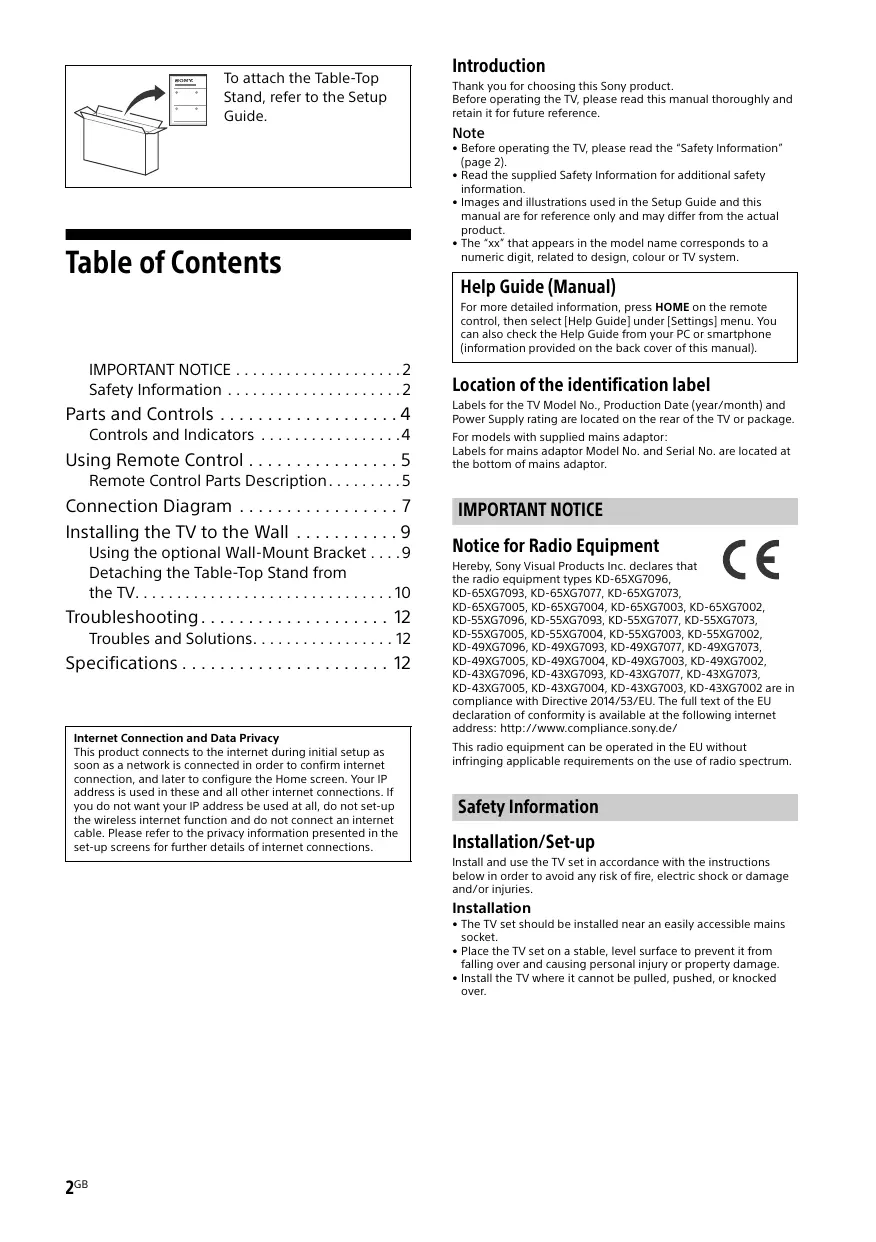
To attach the Table-Top Stand, refer to the Setup Guide. Introduction Thank you for choosing this Sony product. Before operating the TV, please read this manual thoroughly and retain it for future reference. Note Table of Contents
- Before operating the TV, please read the “Safety Information” (page 2).
- Read the supplied Safety Information for additional safety information.
- Images and illustrations used in the Setup Guide and this manual are for reference only and may differ from the actual product.
- The “xx” that appears in the model name corresponds to a numeric digit, related to design, colour or TV system. Help Guide (Manual) For more detailed information, press HOME on the remote control, then select [Help Guide] under [Settings] menu. You can also check the Help Guide from your PC or smartphone (information provided on the back cover of this manual). IMPORTANT NOTICE . . . . . . . . . . . . . . . . . . . . 2 Safety Information . . . . . . . . . . . . . . . . . . . . . 2 Parts and Controls . . . . . . . . . . . . . . . . . . . 4 Controls and Indicators . . . . . . . . . . . . . . . . . 4 Using Remote Control . . . . . . . . . . . . . . . . 5 Location of the identification label Labels for the TV Model No., Production Date (year/month) and Power Supply rating are located on the rear of the TV or package. For models with supplied mains adaptor: Labels for mains adaptor Model No. and Serial No. are located at the bottom of mains adaptor. Remote Control Parts Description . . . . . . . . . 5 Connection Diagram . . . . . . . . . . . . . . . . . 7 Installing the TV to the Wall . . . . . . . . . . . 9 Using the optional Wall-Mount Bracket . . . . 9 Detaching the Table-Top Stand from the TV. . . . . . . . . . . . . . . . . . . . . . . . . . . . . . . 10 Troubleshooting . . . . . . . . . . . . . . . . . . . . 12 Troubles and Solutions. . . . . . . . . . . . . . . . . 12 Specifications . . . . . . . . . . . . . . . . . . . . . . 12 Internet Connection and Data Privacy This product connects to the internet during initial setup as soon as a network is connected in order to confirm internet connection, and later to configure the Home screen. Your IP address is used in these and all other internet connections. If you do not want your IP address be used at all, do not set-up the wireless internet function and do not connect an internet cable. Please refer to the privacy information presented in the set-up screens for further details of internet connections. IMPORTANT NOTICE Notice for Radio Equipment Hereby, Sony Visual Products Inc. declares that the radio equipment types KD-65XG7096, KD-65XG7093, KD-65XG7077, KD-65XG7073, KD-65XG7005, KD-65XG7004, KD-65XG7003, KD-65XG7002, KD-55XG7096, KD-55XG7093, KD-55XG7077, KD-55XG7073, KD-55XG7005, KD-55XG7004, KD-55XG7003, KD-55XG7002, KD-49XG7096, KD-49XG7093, KD-49XG7077, KD-49XG7073, KD-49XG7005, KD-49XG7004, KD-49XG7003, KD-49XG7002, KD-43XG7096, KD-43XG7093, KD-43XG7077, KD-43XG7073, KD-43XG7005, KD-43XG7004, KD-43XG7003, KD-43XG7002 are in compliance with Directive 2014/53/EU. The full text of the EU declaration of conformity is available at the following internet address: http://www.compliance.sony.de/ This radio equipment can be operated in the EU without infringing applicable requirements on the use of radio spectrum. Safety Information Installation/Set-up Install and use the TV set in accordance with the instructions below in order to avoid any risk of fire, electric shock or damage and/or injuries. Installation
- The TV set should be installed near an easily accessible mains socket.
- Place the TV set on a stable, level surface to prevent it from falling over and causing personal injury or property damage.
- Install the TV where it cannot be pulled, pushed, or knocked over. 2GB
- Install the TV so that the TV’s Table-Top Stand does not protrude out from the TV stand (not supplied). If the Table-Top Stand protrudes out from the TV stand, it may cause TV set to topple over, fall down, and cause personal injury or damage to the TV. Topple prevention KD-65XG70xx / 55XG70xx 8 mm – 12 mm M6 screw (not supplied)
- Only qualified service personnel should carry out wall-mount installations.
- For safety reasons, it is strongly recommended that you use Sony accessories, including: Wall-Mount Bracket: SU-WL450
- Be sure to use the screws supplied with the Wall-Mount Bracket when attaching the Wall-Mount Bracket to the TV set. The supplied screws are designed as indicated by illustration when measured from the attaching surface of the Wall-Mount Bracket. The diameter and length of the screws differ depending on the Wall-Mount Bracket model. Use of screws other than those supplied may result in internal damage to the TV set or cause it to fall, etc.
{15 kgf·cm} Cord (not supplied) Screw (not supplied) KD-49XG70xx / 43XG70xx 8 mm – 12 mm M6 screw (not supplied) 8 mm – 12 mm Screw (M6) Wall-Mount Bracket TV’s rear cover Transporting
- Before transporting the TV set, disconnect all cables.
- Two or three people are needed to transport a large TV set.
- When transporting the TV set by hand, hold it as shown below. Do not put stress on the LCD panel and the frame around the screen.
- When lifting or moving the TV set, hold it firmly from the bottom.
{15 kgf·cm} Cord (not supplied) Screw (not supplied)
- When transporting the TV set, do not subject it to jolts or excessive vibration.
- When transporting the TV set for repairs or when moving, pack it using the original carton and packing material. 3GB Parts and Controls Controls and Indicators KD-65XG70xx KD-55XG70xx / 49XG70xx / 43XG70xx
(Power) /+/– When the TV is off, Press to power on. When the TV is on, Press and hold to power off. Press repeatedly to change the function, then press + or – button to:
- Select the input source of TV. Remote Control sensor* / LED indicator The LED indicator lights up or blinks according to the status of the TV. For more information, refer to the Help Guide.
- Do not place anything near the sensor. Note
- Make sure that the TV is completely turned off before unplugging the mains lead.
- To disconnect the TV from the mains completely, pull the plug from the mains socket.
- Please wait for a while when perform input selection to change to other input. 4GB
The remote control shape, location, availability and function of remote control buttons may vary depending on your region/country/TV model. Note
- The number 5, , PROG + and AUDIO buttons have tactile dots. Use the tactile dots as references when operating the TV.
(Input select/Text hold) In TV mode: Display and select the input source. In Text mode: Hold the current page. (TV standby) Turn on or turn off the TV (standby mode). SYNC MENU Display the BRAVIA Sync Menu. For more detailed information, press HOME on the remote control, then select [Help Guide] under [Settings] menu. Number buttons DIGITAL/ANALOG EXIT Switch between digital and analogue input. Return to the previous screen or exit from the menu. When an Interactive Application service is available, press to exit from the service. 5GB (Text) PROG +/–// Display text information. In TV mode: Select the channel. In Text mode: Select the next () or previous () page. Colour buttons Execute corresponding function at that time. YouTube (Only on limited region/ country/TV model) Access the “YouTube” online service. NETFLIX (Only on limited region/ country/TV model) Access the “NETFLIX” online service.
(Info/Text reveal) Display information. AUDIO Select the sound of multilingual source or dual sound for the programme currently being viewed (depend on programme source). (Subtitle setting) Turn subtitles on or off (when the feature is available). TITLE LIST (Not available for Italy) Display the Title list. SLEEP
Press repeatedly until the TV displays the time in minutes ([Off]/[15 min]/[30 min]/ [45 min]/[60 min]/[90 min]/[120 min]) that you want the TV to remain on before shutting off. To cancel the sleep timer, press SLEEP repeatedly until [Off] appears. Operate media contents on the TV and connected BRAVIA Sync-compatible device. This key also can be used to operate VOD (Video on Demand) service playback. Availability is depend on VOD service. GUIDE/ REC (Not available for Italy) Display the Digital EPG (Electronic Programme Guide). Record the current programme with the USB HDD recording function. RETURN/ (Wide Mode) Return to the previous screen. OPTIONS Display a list that contain shortcuts to some setting menus. The listed options vary depending on the current input and content. HOME Display the TV Home Menu.
(Navigation D-pad) On screen menu navigation and selection. +/– (Volume) Adjust the volume. (Jump) Return to the previous channel or input viewed more than 15 seconds. (Mute) Mute the sound. Press again to restore the sound. 6GB Adjust the screen display. Press repeatedly to select the desired wide mode. Note
- If subtitles are selected and the user launches a digital text application via ‘text’ key, subtitles may, under certain circumstance stop being displayed. When the user exits the digital text application, subtitle decoding will resume automatically. Connection Diagram You can connect a wide range of optional equipment to your TV. Note
- Terminals, labels and functions may vary depending on region/country/TV model.
Digital still camera/ Camcorder/USB storage media Digital still camera/ Camcorder/USB storage media
Cable/Antenna/ External Box Router VCR/Video game equipment/DVD player/ Camcorder/ External Box*¹ Audio System with Optical Audio Input < 14 mm Satellite < 7 mm < 1.5 mm 7GB
CAM (Conditional Access Module)
- Provides access to pay TV services. For details, refer to the instruction manual supplied with your CAM.
- Do not insert the smart card directly into the TV CAM slot. It must be fitted into the Conditional Access Module provided by your authorised dealer.
- CAM is not supported in some countries/ areas. Check with your authorised dealer.
- A CAM message may appear when you switch to a digital programme after using the Internet video.
- Connecting a large USB device may interfere with other connected devices beside it.
- When connecting a large USB device, connect to the USB 1 port.
- Connect a USB HDD device to the USB 3 port. HDMI IN 1/2/3
- HDMI interface can transfer the digital video and audio on a single cable. < 12 mm < 21 mm
- HDMI IN 2/3 To enjoy high quality 4K 50p/60p contents, connect a Premium High Speed HDMI cable to the HDMI IN 2/3 and set the [HDMI signal format] to [Enhanced format]. For details of supported formats, refer to the “Specifications” in this manual (page 12-14). 8GB
- HDMI IN 3 ARC (Audio Return Channel) Connect your audio system to the HDMI IN 3 to route TV audio to your audio system. An audio system that supports HDMI ARC can send video to the TV, and receive audio from the TV via the same HDMI cable. If your audio system does not support HDMI ARC, an additional connection with DIGITAL AUDIO OUT (OPTICAL) is necessary. (RF input), (Satellite input)*2
- Connections for terrestrial/cable and satellite. AUDIO OUT
- To listen to the TV’s sound through the connected equipment, press HOME, then select [System Settings] t [Setup] t [AV Setup] t [Headphone/Audio Out] and then select the desired item. Note *1 For an external device which has only SCART AV OUT, use a SCART-RCA adaptor. *2 Only on limited region/country/TV model. Installing the TV to the Wall Using the optional Wall-Mount Bracket This TV’s instruction manual only provides the steps to prepare the TV for Wall-Mount installation before it is installed on the wall.
To Customers: For product protection and safety reasons, Sony strongly recommends that installation of your TV be performed by Sony dealers or licensed contractors. Do not attempt to install it yourself. To Sony Dealers and Contractors: Provide full attention to safety during the installation, periodic maintenance and examination of this product. Sufficient expertise is required for installing this product, especially to determine the strength of the wall for withstanding the TV’s weight. Be sure to entrust the attachment of this product to the wall to Sony dealers or licensed contractors and pay adequate attention to safety during the installation. Sony is not liable for any damage or injury caused by mishandling or improper installation. Use the Wall-Mount Bracket SU-WL450 (not supplied) to install the TV to the wall. When installing the Wall-Mount Bracket, also refer to the Operating Instructions and Installation Guide supplied with the Wall-Mount Bracket. Note
- Be sure to store the removed screws in a safe place, keeping them away from children.
- If the Table-Top Stand is attached to the TV, detach the Table-Top Stand beforehand. See the Setup Guide and follow in reverse order the steps to detach the Table-Top Stand.
- Place the TV with its screen facing down on a level and stable surface covered with a thick and soft cloth when removing the Table-Top Stand from the TV to prevent damaging the surface of the LCD display. (KD-49/43XG70xx only) For instructions on Wall-Mount Bracket installation, see the Installation Information (Wall-Mount Bracket) on the product page for your TV model. www.sony.eu/support/ 9GB Detaching the Table-Top Stand from the TV KD-65XG70xx
Remove one side of the Table-Top Stand at a time. Firmly hold the Table-Top Stand securely with both hands while the other people lift up the TV. Repeat the previous step and remove the other side of the Table-Top Stand. Note
- Three or more people are required to detach the Table-Top Stand.
- Be careful not to use excessive force while detaching the Table-Top Stand from the TV as it may cause the TV set to fall resulting in personal injury or physical damage to the TV.
- Take care when handling the Table-Top Stand to prevent damage to the TV.
- Be careful when lifting the TV as the Table-Top Stand is detached, the Table-Top Stand may topple over and cause personal injury.
- Take care when removing the Table-Top Stand from the TV to prevent it from falling over and damaging the surface that the TV is sitting on. 10GB KD-55XG70xx KD-49XG70xx / 43XG70xx
11GB Troubleshooting When the LED indicator is flashing red, count how many times it flashes (interval time is three seconds). If the LED indicator flashes red, reset the TV by disconnecting the mains lead from the TV for two minutes, then turn on the TV. If the problem persists, contact your dealer or Sony service centre with the number of times the LED indicator flashes red (interval time is three seconds). Press on the TV to turn it off, disconnect the mains lead, and inform your dealer or Sony service centre. Troubles and Solutions No picture (screen is dark) and no sound
- Check the antenna (aerial)/cable connection.
- Connect the TV to the mains socket, and press on the TV or the remote control. Picture contours are distorted
- Change the current setting of [Film Mode]* to other settings. Specifications System Panel system LCD (Liquid Crystal Display) Panel, LED Backlight TV system Depending on your country/area selection/TV model Analogue: B/G, D/K, I Digital: DVB-T/DVB-C DVB-T2*1 Satellite*1: DVB-S/DVB-S2 Colour/video system Analogue: PAL/SECAM/NTSC3.58 (Video only)/ NTSC4.43 (Video only) Digital: MPEG-2 MP@ML/HL, H.264/MPEG-4 AVC MP/HP@L5.0, H.265/HEVC MP/Main10@L5.1 (4K 60fps) Channel coverage Depending on your country/area selection/TV model Analogue: UHF/VHF/Cable Digital: UHF/VHF/Cable Satellite*1: IF Frequency 950-2,150 MHz The TV turns off automatically (the TV enters standby mode) Sound output
- Check if the [Sleep Timer]* is activated.
- Check if the [Duration]* is activated by [On Timer]* or [Photo Frame Settings]*.
- Check if the [Idle TV Standby]* is activated. Wireless technology Some input sources cannot be selected
- Select [AV Preset]* and select [Always]* of the input source. Some programmes cannot be tuned
- Check the antenna (aerial)/cable connection. The remote control does not function
- Replace the batteries. The TV surrounds become warm
- When the TV is used for an extended period, the TV surrounds become warm. You may feel hot when touching there by the hand.
- For more detailed information, press HOME on the remote control, then select [Help Guide] under [Settings] menu. 10 W + 10 W Protocol IEEE 802.11b/g/n Frequency band(s) Wireless LAN (IEEE 802.11b/g/n) Frequency range Output Power 2400-2483.5 MHz < 20.0 dBm Software version This radio equipment is intended to be used with the approved version(s) of software that are indicated in the EU Declaration of Conformity. Refer to [Customer Support] under [Settings] menu. The software loaded on this radio equipment is verified to comply with the essential requirements of the Directive 2014/53/EU. Input/Output jacks Antenna (aerial)/cable 75 ohm external terminal for VHF/UHF Satellite antenna*1 Female F Type Connector, 75 ohm. DiSEqC 1.0, LNB 13 V/18 V & 22 kHz tone, Single Cable Distribution EN50494. 12GB
available in Italy) 3 (HDD REC) (Function not USB port 1, 2 and 3 support High Speed USB (USB 2.0) CAM (Conditional Access Module) slot DC IN 19.5 V (models with supplied mains adaptor only) Mains adaptor input LAN 10BASE-T/100BASE-TX connector (Depending on the operating environment of the network, connection speed may differ. The communication rate and quality are not guaranteed.) Others Optional accessories Wall-Mount Bracket: SU-WL450 Operating temperature 0 ºC – 40 ºC Operating humidity 10 % – 80 % RH (non-condensing) Power, Product Fiche and others Power requirements except models with supplied mains adaptor 220 V – 240 V AC, 50 Hz models with supplied mains adaptor only
19.5 V DC with mains adaptor
Rating: Input 220 V – 240 V AC, 50 Hz KD-65XG70xx: A KD-55XG70xx: A KD-49XG70xx: A KD-43XG70xx: A Screen size (measured diagonally) (Approx.) KD-65XG70xx: 163.9 cm / 65 inches KD-55XG70xx: 138.8 cm / 55 inches KD-49XG70xx: 123.2 cm / 49 inches KD-43XG70xx: 108.0 cm / 43 inches
13GB Display resolution 3,840 dots (horizontal) × 2,160 lines (vertical) Output Rating USB 1/2/3 , 500 mA MAX Dimensions (Approx.) (w × h × d) with Table-Top Stand KD-65XG70xx: 146.3 × 90.9 × 33.6 cm KD-55XG70xx: 124.1 × 78.5 × 33.6 cm KD-49XG70xx: 110.1 × 70.4 × 26.0 cm KD-43XG70xx: 97.0 × 63.0 × 26.0 cm without Table-Top Stand KD-65XG70xx: 146.3 × 84.5 × 8.0 cm KD-55XG70xx: 124.1 × 72.1 × 7.9 cm KD-49XG70xx: 110.1 × 64.5 × 5.7 cm KD-43XG70xx: 97.0 × 57.0 × 5.7 cm Mass (Approx.) with Table-Top Stand KD-65XG70xx: 21.6 kg KD-55XG70xx: 16.5 kg KD-49XG70xx: 12.5 kg KD-43XG70xx: 10.3 kg without Table-Top Stand KD-65XG70xx: 20.5 kg KD-55XG70xx: 15.4 kg KD-49XG70xx: 11.9 kg KD-43XG70xx: 9.7 kg *1 Not all the TV sets have DVB-T2 or DVB-S/S2 technology or satellite antenna terminal. *2 HDMI IN 2 and HDMI IN 3 support High-Quality HDMI formats such as 4K 60p/50p 4:2:0 10 bit, 4:4:4, 4:2:2. *3 Energy consumption in kWh per year, based on the power consumption of the television operating 4 hours per day for 365 days. The actual energy consumption will depend on how the television is used. *4 Specified standby power is reached after the TV finishes necessary internal processes. *5 Standby power consumption will increase when your TV is connected to the network. Note
- Do not remove the dummy card or cover (availability depends on TV model) from TV CAM (Conditional Access Module) slot other than to insert a smart card fitted in CAM.
- Optional accessories availability depends on countries/region/TV model/stock.
- Design and specifications are subject to change without notice. 14GB Notes on Digital TV function
- Digital TV (DVB terrestrial, satellite and cable), interactive services and network functions may not be available in all countries or areas. Some functions might not be enabled or might not operate correctly with some providers and network environments. Some TV service providers may charge a fee for their services.
- This TV supports digital broadcasting using MPEG-2, H.264/MPEG-4 AVC and H.265/ HEVC codecs, but compatibility with all operator/service signals, which may change over time, cannot be guaranteed. Notes on HDR (High Dynamic Range) (Only on limited region/country/TV model)
- Compatible with all HDR PS4 Game titles via HDMI and HDR videos of built-in Netflix and YouTube App only. (See Sony support website for more information).
- HDR image signal specifically means HDR10 Media Profile format (commonly referred to as HDR10).
- Compatibility with all HDR content is not guaranteed. Trademark information
- The terms HDMI and HDMI High-Definition Multimedia Interface, and the HDMI Logo are trademarks or registered trademarks of HDMI Licensing Administrator, Inc. in the United States and other countries.
- Manufactured under license from Dolby Laboratories. Dolby, Dolby Audio, and the double-D symbol are trademarks of Dolby Laboratories.
- Vewd® Core. Copyright 1995-2019 Vewd Software AS. All rights reserved.
- Wi-Fi®, Wi-Fi Alliance®, Wi-Fi Direct® and Miracast® are registered trademarks of Wi-Fi Alliance.
- Wi-Fi Protected Setup™ is a trademark of Wi-Fi Alliance.
- The Wi-Fi CERTIFIED™ Logo is a certification mark of Wi-Fi Alliance.
- Netflix is a registered trademark of Netflix, Inc.
- “YouTube” and the “YouTube logo” are registered trademarks of Google LLC.
- “BRAVIA”, and BRAVIA Sync are trademarks or registered marks of Sony Corporation.
- “Blu-ray Disc”, “Blu-ray” and “Blu-ray Disc” logo are trademarks of Blu-ray Disc Association.
- “PlayStation” is a registered trademark and “PS4” is a trademark of Sony Interactive Entertainment Inc.
- For DTS patents, see http:// patents.dts.com. Manufactured under license from DTS, Inc. DTS, the Symbol, & DTS and the Symbol together are registered trademarks, and DTS Digital Surround is a trademark of DTS, Inc. © DTS, Inc. All Rights Reserved.
- TUXERA is a registered trademark of Tuxera Inc. in the US and other countries.
For satellite models only:
- DiSEqC™ is a trademark of EUTELSAT. This TV supports DiSEqC 1.0. This TV is not intended for controlling motorized antennas.
- All other trademarks are the property of their respective owners. 15GB Pour attacher le support de table, reportez-vous au Guide d’installation. Introduction Sony vous remercie d’avoir choisi ce téléviseur. Avant de l’utiliser, nous vous invitons à lire attentivement ce manuel et à le conserver pour vous y référer ultérieurement. Remarque Table des matières
- Vewd® Core. Copyright 1995-2019 Vewd Software AS. All rights reserved. 15FR
- Vewd® Core. Copyright 1995-2019 Vewd Software AS. All rights reserved.
- Vewd® Core. Copyright 1995-2019 Vewd Software AS. All rights reserved.
- Vewd® Core. Copyright 1995–2019 Vewd Software AS. All rights reserved.
- Vewd® Core. Copyright 1995-2019 Vewd Software AS. All rights reserved.
- Vewd® Core. Copyright 1995-2019 Vewd Software AS. All rights reserved.
- Vewd® Core. Copyright 1995-2019 Vewd Software AS. All rights reserved.
- Vewd® Core. Copyright 1995-2019 Vewd Software AS. All rights reserved.
- Vewd® Core. Copyright 1995-2019 Vewd Software AS. All rights reserved.
- Vewd® Core. Copyright 1995-2019 Vewd Software AS. All rights reserved.
- Vewd® Core. Copyright 1995-2019 Vewd Software AS. All rights reserved.
- Vewd® Core. Copyright 1995-2019 Vewd Software AS. All rights reserved.
- Vewd® Core. Copyright 1995-2019 Vewd Software AS. All rights reserved.
- Vewd® Core. Copyright 1995–2019 Vewd Software AS. All rights reserved.
- Vewd® Core. Copyright 1995-2019 Vewd Software AS. All rights reserved.
- Vewd® Core. Copyright 1995-2019 Vewd Software AS. All rights reserved.
- Vewd® Core. Copyright 1995-2019 Vewd Software AS. All rights reserved.
- Vewd® Core. Copyright 1995-2019 Vewd Software AS. All rights reserved.