
MARIS T-SHAPE FGB 906 IS AC - Hob FRANKE - Free user manual and instructions
Find the device manual for free MARIS T-SHAPE FGB 906 IS AC FRANKE in PDF.
| Brand | Franke |
| Model | MARIS T-SHAPE FGB 906 IS AC (FMA 839 HI) |
| Product type | Induction hob with integrated hood |
| Number of cooking zones | 4 (including 2 flexible zones that can be bridged) |
| Dimensions (W x D) | 830 x 520 mm |
| Weight | 21 kg |
| Power supply | 220-240 V, 50 Hz; 220 V, 60 Hz; 3N~ / 2N~ 380-415 V, 50 Hz; 3N~ / 2N~ 380 V, 60 Hz |
| Total max power (adjustable) | 7.4 kW / 4.5 kW / 3.5 kW / 2.8 kW |
| Power per zone (standard / Boost) | 2100 W / 3000 W (single zone); 3000 W / 3700 W (flexible zone in bridge) |
| Main functions | Power Boost, fast cooking, keep warm, timer (1-99 min), pause/restart, bridge function, automatic pan detection, residual heat indicator, child lock (cleaning and safety), defrost function, parameter recall after power cut |
| Controls | Touch slide controls with digital displays |
| Integrated hood | Adjustable speed 0-9, automatic and manual modes, intensive speeds 1 and 2, timer, grease and charcoal filters |
| Filters | Washable grease filter (dishwasher) - alert after 100 h; regenerable charcoal filter - alert after 200 h |
| Cleaning and maintenance | Clean the ceramic glass surface after each use with a soft cloth and suitable product; use a scraper for baked-on residues; do not use abrasive pads |
| Safety | Control lock (3 seconds), child safety, automatic shut-off after 20 s of inactivity, pan detection, residual heat indication, overheating protection |
| Surface material | Ceramic glass |
| Suitable cookware type | Magnetizable base (enameled steel, cast iron, ferritic stainless steel, etc.) |
| Energy efficiency class | Not provided |
| General information | Instructions available in multiple languages; manufacturer: Franke; website: www.franke.com |
Frequently Asked Questions - MARIS T-SHAPE FGB 906 IS AC FRANKE
User questions about MARIS T-SHAPE FGB 906 IS AC FRANKE
0 question about this device. Answer the ones you know or ask your own.
Ask a new question about this device
Download the instructions for your Hob in PDF format for free! Find your manual MARIS T-SHAPE FGB 906 IS AC - FRANKE and take your electronic device back in hand. On this page are published all the documents necessary for the use of your device. MARIS T-SHAPE FGB 906 IS AC by FRANKE.
USER MANUAL MARIS T-SHAPE FGB 906 IS AC FRANKE
Information on the manual 3
Safety information 3
Electrical connection 9
Overview 10
Types of control 11
Controls 12
Functions 14
Suction hood controls 17
User menu (custom settings) 18
Installer menu (hob power settings) 19
The device 20
Operation 23
Cleaning and care 24
Troubleshooting 25
Maintenance and repairs 27
Disposal 27
Technical data 28
INFORMATION ON THE MANUAL
These instructions for use are valid for various models of the device. This means that some of the features and functions described here may not be available in the specific model you have purchased.
Please read the instructions for use carefully before using the device.
- Keep the instructions for use safely.
Only use the device described in these instruction for the purposes foreseen.
Symbol Meaning

Danger warning. Danger of injury warning.

Safe actions and instructions to avoid injury or damage.

Action. Specifies an action that must be carried out.

Result. Result of one or more actions.

Requirement that must be met before carrying out the next action.
SAFETY INFORMATION
For your own safety and to guarantee proper use of the appliance, please read this manual carefully before installing and using the product. These instructions must always be kept with the appliance, even if it is moved or sold. Users must be fully aware of how the appliance works and of its safety features.
These hobs have induction systems that comply with the requirements of EMC standards and with the EMF
directive, and they should not interfere with other electronic devices. Pacemaker wearers and those using other electronic implants must consult their doctor or the manufacturer of the implanted device to assess whether or not it is sufficiently resistant against interference.
Electrical connections must be performed by a trained technician. Before making the electrical connection,
please read the section on ELECTRICAL CONNECTION.
For appliances with a power supply cable, the terminals or section of wire between the cable anchor point and the terminals must be arranged in such a way as to allow the live wires to be pulled out before the earth wire in the event of the cable coming out of its anchor.
The manufacturer will not be liable for any damage resulting from incorrect or inadequate installation.
Check that the mains power supply corresponds to the one indicated on the identification plate fixed to the inside of the product.
Fixed electrical connections must incorporate the cut-out devices envisaged by current regulations.
For class I appliances, check that the domestic power supply guarantees an adequate earthing system.
Connect the suction hood to the flue using a suitable pipe. Please refer to the accessories to be purchased, indicated in the installation manual (for circular pipes: minimum diameter 120~mm ). The exhaust pipe must be as short as possible.
Connect the product to the mains using an omnipolar switch.
The air venting regulations must be complied with.
Never connect the suction appliance to ducts carrying combustion fumes (heaters, fireplaces, etc..).
If the suction hood is used alongside non-electrical appliances (e.g. appliances with gas burners), it is necessary to guarantee a sufficient level of ventilation in the room, to prevent any exhaust backflow. When the cooking appliance is used together with other appliances using non-electrical power sources,
the negative pressure in the room must not exceed 0.04 mbar, to prevent the fumes being sucked back into the room by the cooking appliance.
The air must not be discharged into a pipe that is also used as a flue for appliances powered by gas or other fuels.
If the power cable is damaged, it must be replaced by the manufacturer, by an authorised service centre or by a qualified technician, to avoid any risk of danger.
Connect the appliance plug to a socket that complies with current regulations and is in an accessible area.
As regards the technical and safety measures to be taken for exhausting of fumes, it is important that the regulations set by local authorities be followed carefully.
CAUTION: remove the protective films before installing the appliance.
Only use the screws and other small components supplied with the appliance.
WARNING: failure to install the screws or fixing elements as described in these instructions may result in a risk of electric shocks.
Never look at the light directly through optica devices (binoculars, magnifying glasses...).
Cleaning and scheduled maintenance must not be carried out by children, unless they are under the supervision of an adult.
Supervise children, to make sure they do not play with the appliance.
This appliance must not be used by persons (including children) with limited physical, sensory or mental abilities, or by persons without adequate experience and knowledge, unless they
are supervised or instructed in use of the appliance by the those responsible for their safety.
This appliance may be used by children over the age of 8 years and by persons with limited physical, sensory or mental abilities or with insufficient experience and knowledge, provided they are supervised or have been adequately instructed on safe use of the appliance and understand the risks that it involves. Do not allow children to play with the appliance.
CAUTION: The appliance and its accessible parts become extremely hot during use.
Take great care not to touch the heating elements.
Keep children under 8 years of age well away from the appliance, unless they are under constant supervision.
Clean and/or replace the filters after the period
indicated (danger of fire). See the paragraph on Cleaning and maintenance.
Always guarantee adequate ventilation of the room when the appliance is used in conjunction with other appliances powered by gas or other fuels (this does not apply to appliances that only recirculate the air within the room).
WARNING: If the surface is damaged, turn the appliance off to prevent any risk of electric shocks.
Do not turn the device on if the surface is cracked or any damage is visible in the thickness of the material.
Do not touch the appliance if your hands or body are wet.
Do not use steam appliances to clean the product.
Do not rest metal objects such as knives, forks, spoons and pan lids on the surface of the hob, as they might overheat.
Use the relevant control to turn the cooker hob off after
use, do not rely on the pan sensors.
WARNING: Unsupervised cooking on a hob using oil and grease may be dangerous and may cause a fire. NEVER attempt to put flames out with water. On the contrary, turn the appliance off and suffocate the flames, for example using a pan lid or a fire blanket.
WARNING: The cooking process must be supervised. Short cooking processes require continual supervision.
The appliance is not designed to be started using an external timer or a separate remote controlled system.
WARNING: Danger of fire: Do not rest objects on the cooking surfaces.
The appliance must be installed in such a way as to allow disconnection from the electrical power supply with a contact aperture (3
mm) that ensures complete disconnection in category III overload conditions.
The appliance must never be exposed to weather (rain, sun).
Ventilation of the appliance must comply with the manufacturer's instructions.
Requirements for kitchen units
The cooker hob is designed to be fitted flush with the kitchen worktop, on a kitchen unit with a width of 600 mm or more.
If the appliance is mounted on flammable materials, the guidelines and regulations relating to low voltage installations and fire prevention must be followed strictly.
For the fitted units, the components (plastic materials and veneered wood) must be mounted with heat-resistant adhesives (min. 100^ ): the use of unsuitable material and
adhesives may result in warping and detachment.
The kitchen unit must have sufficient space to allow for electrical connection of the device. Wall-mounted units above the device must be installed at a sufficient distance to leave the space required to work in comfort.
The use of decorative hardwood borders around the worktop behind the device is allowed, provided the minimum distance always complies with the indications provided in the installation drawings.
The minimum distance between the fitted device and the rear wall is indicated in the installation drawing for the flush-fitted device (150 mm for the side wall, 40 mm for the rear wall and 500 mm for any wall-mounted units above it).
To avoid any infiltration of liquids between the hob frame and the worktop, position the adhesive seal
provided along the whole outer edge of the hob before installation.
Proper use
The suction hood has been designed solely to eliminate cooking fumes during domestic use.
Never use the appliance for purposes other than those for which it has been designed.
Deep-fryers must be kept under constant supervision when in use: the oil may catch fire if it gets too hot.
Do not use the device with an external timer or separate remote controlled system.
The device must never be installed behind a decorative door, to prevent it from overheating.
Never climb onto the device, as this may damage it.
Never place hot pots and pans on the frame, as this may damage the silicon seal.
Never cut or prepare food on the vitreous ceramic
surface, or drop hard objects onto it.
Never drag pots and pans
across the vitreous ceramic surface.
ELECTRICAL CONNECTION
Electrical connections must be carried out by a trained technician.
This appliance has a "Y" type connection, so the power cable must have a "neutral" wire. The power cable must be at least of type H05VV-F. SINGLE PHASE, TWO PHASE and THREE PHASE connection: min. cross-section of wires: 2.5 ~mm^2 . External diameter of the power cable: min. 7 mm-max. 15 mm.
The connection terminals can be accessed by removing the junction box cover.
Check that the domestic power supply characteristics (voltage, maximum power and current) are compatible with those of the appliance.
Connect the appliance as shown in the diagram (in compliance
with reference standards in force nationally for mains voltage).
It is recommended that you use the H05V2V2-F 5 x 2.5 mm² power cable. When using the H05V2V2-F 5 x 2.5 mm² power cable, follow the instructions provided here: for three phase connection, separate the 2 wires and remove the blue sheathing from the grey wires.
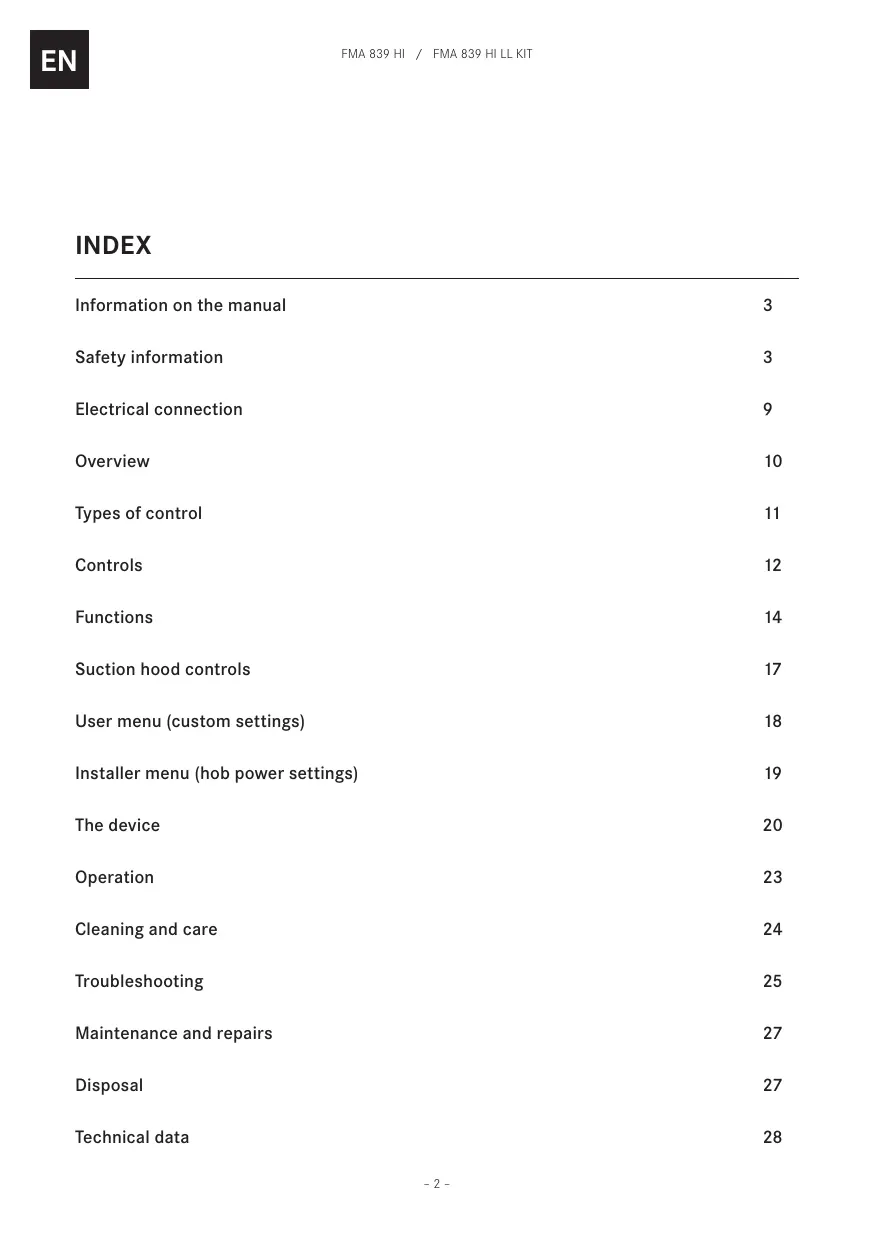
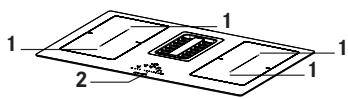
OVERVIEW
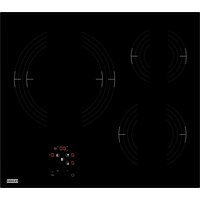
FMA 839 HI - 4-area hob with integrated hood
1 Cooking area
2 Control panel
Buttons and display elements
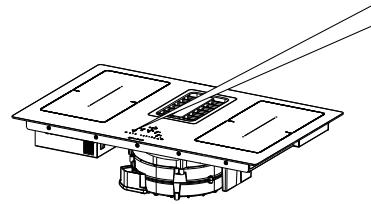
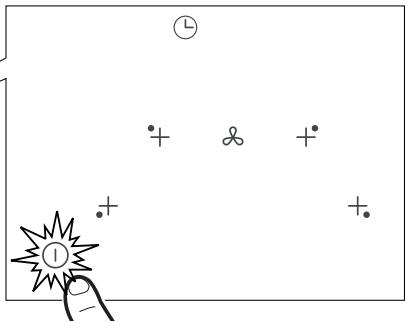
Press and hold the On/Off button ① for 2 seconds to turn the hob on and activate its functions. All the Digits show B. and the Timer digits show " C L ".
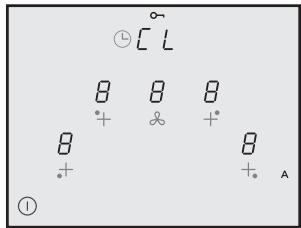
At this point the hob is on but all the cooking areas and the hood are at zero power. The Hob will switch off automatically after 20 seconds if it is not used.
Warning: For safety reasons the hob can always be turned off using the On/Off ① button.
Warning: The functions that can be selected will always be the ones that are illuminated/visible on the control panel, and these will always be the only ones that can be activated.
Instructions for the installer: Check the hob power setting and change it if necessary. See the paragraph " Installer Menu (Hob power settings)".
The hob is pre-set as standard to an absorption level of 7.4 Kw.
TYPES OF CONTROL
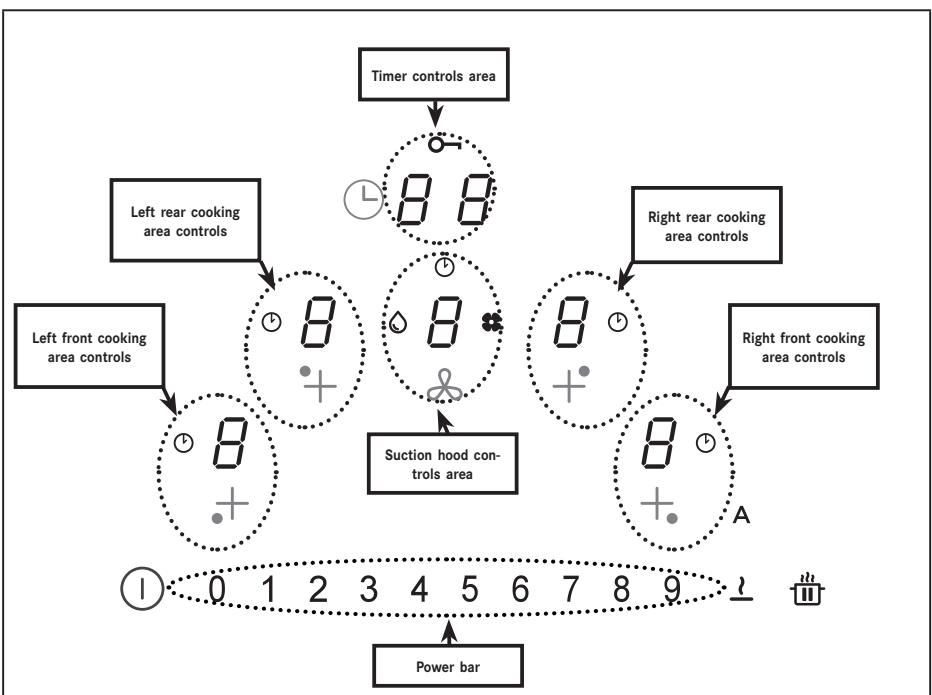
The controls for the cooking areas, suction hood and timer can be activated by pressing on the reference Digit.
The Digit lights up more intensely to confirm the operation.
CONTROLS
| Controls | Description |
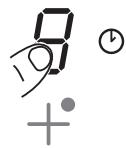
| 0 1 2 3 4 5 6 7 8 9 | Selecting cooking area controls Press and hold the On/Off button ① for 2 seconds. The cooking areas can be activated by pressing the reference Digit ②. The corresponding Digit lights up brightly to confirm the operation. |
| The symbol ② indicates that the timer corresponding to the selected area is active (see the function "Cooking area Timers"). | |
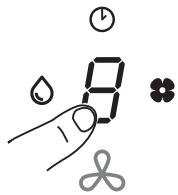
| 0 1 2 3 4 5 6 7 8 9 | Selecting suction hood controls Press and hold the On/Off button ① for 2 seconds. The hood controls can be selected by pressing on the reference Digit ②. The corresponding Digit lights up brightly to confirm the operation. The symbol ② indicates that the timer corresponding to the hood functions is active. The symbol ② indicates maintenance/cleaning of the grease filter after 100 hours of use. The symbol ② indicates maintenance of the activated charcoal (odour) filter after 200 hours of use. |
| 0 1 2 3 4 5 6 7 8 9 | Selecting the cooking area power and/or suction hood speed Press and hold the On/Off button ① for 2 seconds. The power bar is only visible after the Hood Digit or one of the 4 cooking areas has been selected. The power of the cooking areas or the speed of the suction hood can be increased or decreased by pressing the required value directly, or by sliding your finger (from right to left or vice versa) according to whether the set value is to be increased or decreased. |
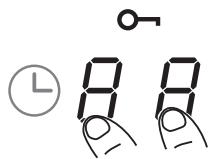
| 88 | Selecting Timer controls Press and hold the On/Off button ① for 2 seconds. Select the controls areas used to manage the cooking area Timers and the suction hood, which normally display “C L “ (see the Timer functions). |
| The symbol ⌒ indicates the safety functions button (see “Keyboard Lock (cleaning)”. | |
| A | The standard setting when the hob/suction hood is switched on is for the hood to start up in automatic mode with the LED A brightly lit. The Hood comes into operation if the power in the cooking areas is greater than “1”.It is deactivated by pressing the LED A which changes intensity from bright to dim in confirmation. It can also be deactivated by pressing a value, higher than “1”, on the power bar, which is confirmed by the fact that the LED A changes intensity from bright to dim.It is reactivated by pressing the LED A which changes to brightly lit. |
| II | PAUSE and START function. |
| When used in combination with other buttons this accesses the user menu. | |
| The Defrost function is used to defrost foodstuffs or gently melt butter, chocolate or honey ...etc. | |
| When used in combination with other buttons this accesses the installer menu. |
FUNCTIONS
| Function | Description |
| Keyboard Lock (Child Safety) | Used to lock the cooker hob settings to prevent accidental modifications. |
| To activate: when no pans are present, press and hold for 3 seconds one of the 4 digits for the cooking areas. Release and slide your finger from 0 to 9 along the power bar following the animation. Confirmation is given when all the digits display Ⓞ. The operations described must be completed within 10 seconds. | |
| To deactivate: press and hold for 3 seconds one of the 4 digits for the cooking areas. Release and slide your finger from 9 to 0 along the power bar following the animation. The operations described must be completed within 10 seconds. | |
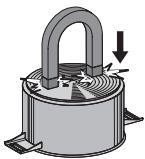
| Keyboard Lock (cleaning) | Used to lock the cooker hob settings for 15 seconds to allow rapid cleaning. |
| To activate: simultaneously press the Digits Ⓞfor the right front and left front cooking areas. The Display in the Timer management controls area shows the 15 second countdown and Ⓞlights up. | |
| To deactivate: press Ⓞor wait until the end of the 15 seconds. | |
| Cooking areas Timer | Countdown with alarm for planned switch-off of each cooking area. |
| To activate: with the hob turned on, select one of the 4 cooking areas and select a value on the power bar. Press the Digits in the Timer controls area one at a time, setting the values individually by selecting them on the power bar (Minimum 1 minute - Maximum 99 minutes). Confirmation takes place after 10 seconds without action. The Display in the Timer management controls area shows the countdown, if it has been set. Otherwise it displays “ C L “ as standard. All the areas can have a Timer set, and the display will always show the one with the shortest time remaining. Repeat the operations described to modify the Timer value. | |
| To deactivate: set the timer values to zero or press Ⓞ. | |
| Timer (generic) | Countdown with alarm for generic use. |
| To activate: with the hob turned on and with no pans present, press the Digits in the Timer controls area one at a time, setting the values individually by selecting them on the power bar (Minimum 1 minute - Maximum 99 minutes). The Display in the Timer management controls area shows the countdown, if it has been set. Otherwise it displays “ C L “ as standard. | |
| To deactivate: set the timer values to zero or press Ⓞtwice with the hob turned off. | |
| Hotplate function to keep food warm | To activate: select one of the 4 cooking areas and press ⋅. The Digit for the selected area will show ⋅. |
| To deactivate: press ⋅ or press Ⓞ. | |
| Turbo function | Both the cooking areas and the Hood can be set to extra power. |
| To activate: both for the hood and for the cooking areas, press “9” on the power bar 2 times. The corresponding Digit displays ⋅. | |
| To deactivate: select one of the other possible values on the power bar. | |
| Quick heating function | Select one of the 4 cooking areas and press and hold for 3 seconds on the selected value (from 1 to 8) on the power bar. The hob will peak at maximum power for a given time before returning to the set power (See table below). The Display shows “A” plus the selected value. 1 -> 40 seconds 2 -> 72 seconds 3 -> 120 seconds 4 -> 176 seconds 5 -> 256 seconds 6 -> 432 seconds 7 -> 120 seconds 8 -> 192 seconds 9 -> not available P -> not available |
| Function Pause + Restart | This function freezes all the hob settings for approximately 10 minutes if the person using the hob needs to go away for a short time. During the pause: - No energy is being used in any of the cooking areas. - All the Timers are stopped. - The “Turbo” and “Quick Heating” functions are deactivated When the 10 minutes are up, the hob will continue with all the actions that were set previously. |
| To activate: press and hold ⋅ for at least 1 second. All the Digits indicate ⋅. | |
| To deactivate: press and hold ⋅ for at least 1 second until it flashes. Press any other button within 10 seconds. | |
| Recall Function | This function is used to recall all the hob function settings in the event of involuntary shut-down or a sudden power cut. |
| When the hob is turned off, if it is not turned on again within 6 seconds using ① , the ② button will flash for 6 seconds. Press the button again to recover the functions set previously. A beep sounds to confirm the operation. | |
| With the hob turned off, if it is turned on again within 6 seconds the previous function settings are recovered automatically. | |
| Bridge Function | This function allows 2 cooking areas to be connected, so that they can be controlled as a single, large cooking area. This means it is possible to use pans with a larger bottom. |
| To activate: with the hob turned on, simultaneously press the required buttons to select the 2 areas to form a bridge, until a Digit displays ④ to indicate that the function has been activated. The other Digit is used to set the power level. Warning: The left cooking areas cannot be connected to the right ones, and vice versa. | |
| To deactivate: simultaneously press the buttons that have been used to create the bridge, until the symbol ⑦ disappears. | |
| Automatic pan detection function | If a pan is placed on one of the cooking areas, the hob detects it automatically and lights up the corresponding Digit at maximum intensity, displaying ⑧. |
| Residual heat indicator | The residual heat indicator is a safety feature, indicating that the surface of the cooking area is still at a temperature of 60 °C or above, which may cause burns if touched by a naked hand. The Digit for the corresponding cooking area displays ⑨. |
SUCTION HOOD CONTROLS
| Timer symbol. After selecting the suction hood Digit, press the Timer Management Digit to set the countdown. | |
| Grease filter maintenance symbol The grease filter cleaning signal is displayed by LED and it is always enabled. | |
| Press “9” on the power bar to set INTENSIVE 1 speed. This setting is timed to operate for 10 minutes. Once this time has passed, the system will automatically return to the speed set previously. It is deactivated by selecting a different speed. | |
| Press “9” on the power bar twice to set INTENSIVE 2 speed. This setting is timed to operate for 5 minutes. Once this time has passed, the system will automatically return to the speed set previously. It is deactivated by selecting a different speed. | |
| Delay | This function is only available if Automatic mode is deactivated. Automatic mode is deactivated by pressing A. Press the suction hood Digit and set a speed on the power bar. Press the Timer management Digit, which was displaying “CL” but will change to the countdown. This is pre-set to 15 minutes. |
| Charcoal filter maintenance symbol • The hood is set by default to ducting mode. Press the On/Off key. With no loads on, press the Hood controls digit to enable the suction hood. Press and hold the Digit again for 5 seconds to: Activate the charcoal filter: • The charcoal (anti-odour) filter symbol lights up for 1 second and the device emits a double beep. Deactivate the charcoal filter: • The charcoal (anti-odour) filter symbol flashes twice and the device emits a double beep. | |
| Filter reset and reactivation • After 200 hours of operation of the charcoal filter and 100 hours of the grease filter, the coming on of the relative icons will signal that it is necessary to perform maintenance on the indicated filter. Having completed maintenance on the filter with the hob off, proceed as follows: • Turn the hob On/Off • Press the Hood digit to activate the numbered bar. • Press key “A” for at least 5 seconds and wait for confirmation of the reset which will be signalled by two beeps and the symbol disappearing. • If the reset confirmation (double beep and symbol disappearing) does not occur within 6 seconds, turn off the hob and repeat the procedure from the beginning. | |
USER MENU (CUSTOM SETTINGS)
| The User menu enables the user to customise at will both the audio (tone and volume) and visual signals sent by the hob. Press ① . Press ① again within 3 seconds. - The symbol ⑪ will appear - Continuing to hold ⑩ , press the 4 Digits for the cooking areas ( ) one at a time in a clockwise direction, starting from the one on the left. A beep sounds each time you press, and when button ⑦ is released it shows: The Digit ④ alternately displays ⑥ and a number from 2 to 7 indicating the type of menu (See table below). Digit ⑧ shows a number that depends on the parameters indicated in the selection (See table below). Press Digit ⑨ and a number from 2 to 7 on the power bar to access the settings menu (See table below). Once the correct value has been entered, confirm by pressing and holding ① until confirmation is received. |
| Menu Code | Description | Value |
| U2 | Menu to manage the button sounds volume. | 0 - 1 - 2 - 3 |
| U3 | Menu to manage the alarm signal sounds volume. | 0 - 1 - 2 - 3 |
| U4 | Menu to manage the display lighting level. | Max. 0 - 1 - 2 - 3 - 4 - 5 - 6 - 7 - 8 - 9 Min. |
| U5 | Menu to manage the countdown animation. | 0 - 1 |
| U6 | Pan recognition function always active menu. | 0 - 1 |
| U7 | Menu to manage the end of countdown buzzer. | 0 - 1 - 2 |
INSTALLER MENU (HOB POWER SETTINGS)
| When first connecting to the domestic power supply, the installer must set the power of the hob cooking areas based on the actual abilities and capacity of the power supply itself. If this is not necessary, the hob can be turned on directly using ①, otherwise, follow the operations below to access the menu. - When the power is first turned on, the symbol √ flashes. - Press and hold √. - Press the 4 Digits for the cooking areas ( √) one at a time in an anticlockwise direction, starting from the one on the right. A beep sounds each time you press, and when button √ is released it shows: Digit √ will alternately display √ and √. Digit √ will display √. - Press Digit √ and number 8 on the power bar to access the settings menu. The operation is confirmed by the fact that the display changes from ( √ and √) to ( √ and √). We are now in the hob power settings menu. Press Digit √ and select one of the values displayed in the power bar (0-1-2-3) following the table provided below. Once the correct value has been entered, confirm by pressing and holding ① until confirmation is received. |
| ① | 0 1 2 3 4 5 6 7 8 9 ↓ 曲 |
| kW | |
| 0 | 7.4 kW |
| 1 | 4.5 kW |
| 2 | 3.5 kW |
| 3 | 2.8 kW |
THE DEVICE
Power management function
This product has an electronically controlled power management function. The Power management function detects when the maximum power level of 3.7 kW/16 A is being delivered for the combined cooking elements (right and left hand side phases), optimising power distribution and avoiding any overloading of the induction system.
To do this, the total power is monitored continuously, and reduced when necessary. If it is not possible to supply the total power required, a control element reduces by a predefined amount the power in another cooking element so that it is at a level immediately below its respective power curve. This ensures that the current absorption of 16 A is not exceeded.
In this case the generator detects the last command with the highest priority sent by the user interface and, if necessary, reduces the previous settings activated for another cooking element
The Power management function is first activated when the presence of a pan is detected on the cooking element.
Example:
If the power boost level (boost) () is selected in the same phase (right and left hand phase) in a cooking area, the other cooking area is automatically prevented from simultaneously exceeding power level 5.
This aspect is variable according to the limits set for the product (See paragraph "INSTALLER MENU").
How induction hobs work
Induction hobs work very differently from traditional hobs or metal plate cookers. The induction coil located under the vitreous ceramic surface quickly creates a highly variable magnetic field, which heats the magnetisable bottom of the pan directly.
The vitreous ceramic surface is only heated by the hot pan. When the pan is removed from the cooking area, the current supplied is cut off immediately.
Pan presence detection
Each of the cooking areas is equipped with a system to detect the presence of a pan. The pan presence detection system recognises pans with a magnetisable base suitable for use with induction hobs.
If the pan is removed during operation, or if an unsuitable pan is used, the display alongside the bar graph flashes with the symbol U.
If there are no pans positioned on the cooking area during the 20 second pan presence detection period:
- The cooking area switches off automatically after 20 seconds.
The display for each cooking area will indicate
Pans
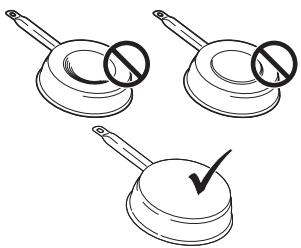
Suitable pans
Only pans with a fully magnetisable base are suitable to cook on induction hobs.
A magnet is able to stick to every point on the whole bottom of the pan.
Pans suitable for use with induction hobs
The pans to be used on induction cooking surfaces must be made of metal, with magnetic properties and with a sufficiently wide base.
Suitable pans:
Enamelled steel pans with a thick bottom.
- Cast iron pans with an enamelled bottom.
Multi-layer stainless steel, ferritic stainless steel and aluminium pans with a special bottom.
Unsuitable pans:
Brass, stainless steel, aluminium, refractory glass, wooden, ceramic and terracotta pots and pans.
To see whether or not a pan is suitable, bring a magnet up to its bottom: if the magnet is attracted, the pan is suitable for induction cooking.
If you do not have a magnet, you can put a small amount of water into the pan, place it on a cooking area and turn the hob on. If the display shows the symbol U, the pan is not suitable.
Caution: only use pans with a perfectly flat bottom that are suitable for induction cooking. Using pans with an uneven bottom may detract from the efficiency of the heat radiation system, and may prevent detection of the pan on the cooking area.
Noises during cooking
Pans may produce noises during cooking. This does not indicate a malfunction, nor does it have any influence on how the device works.
The noise depends on the type of pan being used.
If the noise is particularly annoying, it might help to change the pan.
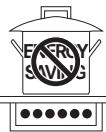
Energy saving information
The diameter of the pan bottom must correspond with the diameter of the cooking area.
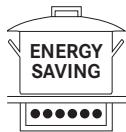
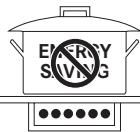
When purchasing a pan, check whether the diameter indicated corresponds to the bottom or the top of the pan, as the latter is usually wider than the bottom.
When preparing dishes that require long cooking times, both time and energy can be saved by using a pressure cooker. Cooking in this way also allows more vitamins to be preserved in the food.
Make sure that the pressure cooker contains enough liquid; if there is not enough liquid and it overheats, this may cause damage both to the pressure cooker and to the cooking area.
If possible, always cover pans with a suitable lid.
Select a pan that is suitable for the amount of food to be cooked. Cooking with wide pans that are only partially used is a waste of energy.
Cooking area
Pan bottom
Min (recommended)
Max (recommended)
210mm× 190mm (single)
110 mm
145 mm
Normal working noises in the hob
Induction technology is based on the creation of electromagnetic fields. These electromagnetic fields generate heat directly on the bottom of the pan. Pots and pans may produce a variety of noises or vibrations, according to their construction.
These types of noise can be described as follows:
Light buzz (like the noise made by a transformer)
This noise is produced when cooking with a high level of heat, and it is determined by the amount of energy transferred by the hob to the pans. The noise will stop or decrease when the heat level is reduced.
Light whistle
This noise is produced when the pot or pan is empty, and stops as soon as it is filled with water or food.
Crackle
This noise occurs with pans made from layers of numerous different materials, and is caused by vibration of the surfaces where the different materials meet. The noise comes from the pans, and may vary according to the quantity of food and preparation method being used.
Loud whistle
This noise occurs with pans made up of layers of different materials, and also when these are used at maximum level and on two cooking areas. The noise will stop or decrease when the heat level is reduced.
Fan noises
For the electronic system to operate correctly, the temperature of the cooker hob must be regulated. To do this, the hob is equipped with a cooling fan that is activated to reduce and regulate the temperature in the electronic system. The fan may continue to operate after the appliance has been turned off, if the temperature of the cooker hob is still detected to be too high.
Rhythmic sounds like a clock ticking
This noise only occurs when at least three cooking areas are operating, and it disappears or decreases when some of them are turned off.
The noises described are a normal feature of induction technology and are not to be considered as defects.
| Power level | Cooking method | To be used for |
| 1 | Melting, heating gently | Butter, chocolate, gelatine, sauces |
| 2 | Melting, heating gently | Butter, chocolate, gelatine, sauces |
| 3 | Warming up | Rice |
| 4 | Prolonged cooking, thickening, stewing | Vegetables, potatoes, sauces, fruit, fish |
| 5 | Prolonged cooking, thickening, stewing | Vegetables, potatoes, sauces, fruit, fish |
| 6 | Prolonged cooking, braising | Pasta, soups, braised meat |
| 7 | Light frying | Rösti (potato fry-ups), omelettes,breaded and fried foods, sausages |
| 8 | Frying, deep fat frying | Meat, potato chips |
| 9 | Quick frying at high temperature | Steak |
| P | Quick heating | Boiling water |
OPERATION
Turning the device on
Press and hold ① to turn the device on.
- All the power level displays will indicate "0".
- If no other selections are made, the device will turn off after 20 seconds for safety reasons.
Selecting a cooking area
Press on the reference Digit B for one or more of the cooking areas and set the power level.
Turning a cooking area off
Touch "0" on the power bar.
- If no other selections are made and the other cooking areas are off, the device will switch off after 20 seconds.
Turning the hob off
Touch ① for a few seconds to turn the hob off.
- If no other selections are made on the display and all the other cooking areas are off, the device will switch off after 20 seconds.
Residual heat indicator
If a cooking area has been turned off but is still hot, the letter "H" will still be displayed on the panel to indicate the risk of burning.
Defrost settings
The Defrost function can be used to defrost foodstuffs or gently melt butter, chocolate or honey.
- Select the cooking area by pressing the corresponding Digit.
-Press
PowerPlus regulation
Both the cooking areas and the Hood can be set to extra power.
The selected cooking area will operate at extra power for 10 minutes. This can be used, for example, to heat up a large amount of water quickly.
- Select one of the areas and press twice on "9" on the power bar. The corresponding Digit displays P .
Timer
When the timer is set, the cooking area switches off after a set period of time.
Setting the timer
-Hob on
- Cooking area set
- Press Digit
- Set the Timer, selecting a time of between 1 and 99
minutes.
Modifying the timer
- Timer set
- Press the active cooking area for the timer you wish to modify.
- Press Digit
- Set the Timer, selecting a time of between 1 and 99 minutes.
Bridge function
The "bridge" connection function allows two individual cooking areas to be activated so that they can operate and be adjusted together. This means it is possible to use pans with a larger bottom.
Simultaneously press the required buttons to select the 2 areas to form a bridge, until a Digit displays to indicate that the function has been activated.
The other Digit is used to set the power level.
Warning: The left cooking areas cannot be connected to the right ones, and vice versa.
Child lock
- Device on
- To activate:
press and hold for 3 seconds one of the 4 Digits for the cooking areas. Release and slide your finger from 0 to 9 along the power bar. All the Digits display L. The operations described must be completed within 10 seconds.
- To deactivate:
Press and hold for 3 seconds one of the 4 Digits for the cooking areas. Release and slide your finger from 9 to 0 along the power bar. The operations described must be completed within 10 seconds.
| MODEL | FMA 839 HI |
| Total maximum power (hob + hood) | 7.62 kW (standard setting) |
| Total maximum power (hob + hood) | 4.72 kW |
| Total maximum power (hob + hood) | 3.72 kW |
| Total maximum power (hob + hood) | 3.02 kW |
CLEANING AND CARE
The activated charcoal odour filter can be regenerated. Follow the instructions provided with the kit both for the regeneration procedure and for the replacement times.
Grease filters Z: The filters must be cleaned every 2 months of use, or more frequently in the case of particularly intensive use. They can be washed in a dishwasher. Do not wash the grilles in the dishwasher.

Remove food containing sugar, for example jam that has spilled during cooking, using a scraper pad suitable for vitreous ceramic, while the cooker hob is still hot. If you do not, the residue may damage the vitreous ceramic surface.
Remove any melted plastic using a scraper pad suitable for vitreous ceramic, while the cooker hob is still hot. If you do not, the residue may damage the vitreous ceramic surface.
Remove limescale using a small amount of limescale remover solution, for example vinegar or lemon juice, once the cooker hob has cooled down. Then clean again with a damp cloth.
General recommendations
Never use abrasive sponges, wire wool, hydrochloric acid or other products that might scratch or mark the surface.
Food that falls accidentally or builds up on the surface, the functional or aesthetic elements of the cooker hob must not be eaten.
Cleaning the device
Clean the hob after every use, to prevent any residual food from burning on.
For day-to-day dirt, use a soft cloth or sponge and a suitable detergent. Follow the manufacturer's recommendations regarding detergents to be used. The use of protective detergents is recommended.
Remove crusted dirt, for example milk that has boiled over, using a scraper pad suitable for vitreous ceramic, while the cooker hob is still hot. Follow the manufacturer's recommendations regarding scraper pads to be used.
TROUBLESHOOTING
| Error codes | |||
| Error code | Description | Possible cause of the error | Solution |
| "Buzzer sounds on switching on. No error code displayed" | The hood command does not work | LIN cable damaged or badly connected to the hood electronic board | Check connection/replace the LIN cable |
| ER03 | Continuous sensor activation. TC turns off after 10 sec. | Water or pan on glass, on sensors or on control. | Clean the surface of the control. Remove the objects from the sensors. |
| ER20 | TC internal error | - | Replace TC. |
| ER21 | Overheating. | The temperature control has detected a temperature higher than 85°C. | Leave the hob to cool down and the error will disappear when the temperature is below 75°C. |
| Check the thermal insulation. | |||
| ER22 | Faulty button assessment. The user interface switches off after 3.5 - 7.5 seconds. | - | Replace TC |
| ER31 | There is an inconsistency in the configuration of TC and induction. | The generator configuration data do not coincide with those of the TC. | New configuration. |
| Replace TC. | |||
| Change the generator. | |||
| ER36 | TC internal error | - | Replace TC. |
| ER47 | Communication error between TC and induction | LIN cable damaged. There is no power supply in the LIN cable. | Replace the Cable. Check that the Cable has been inserted properly. |
| E2 | Cooking area sensor overheats. TC turns off after 10 sec. | Pan empty | Do not heat empty pans. |
| E3 | Wrong pan. The cooking areas are Off. | The pans are losing their magnetic characteristics | Use appropriate pans |
| Internal error in generator circuits | Replace the module | ||
| E4 | Configuration error. The cooking area cannot be activated. | The induction module is not configured yet. | Perform manual configuration. |
| E5 | No communication between UI and induction generator. The cooking area cannot be activated | LIN cable or power cable faulty. | Check the cables and the power supply voltage. |
| Internal error in generator or filter circuits. | Replace the module. | ||
| E6 | The power supply voltage does not fall within the range (voltage and/or frequency). The cooking area cannot be activated | The power supply voltage does not fall within the range (see technical data for details). | Check the mains voltage. |
| Internal error in generator circuits. | Replace the module. | ||
| E7 | TC internal error. The cooking areas are deactivated. | - | Replace the module. |
| E8 | Suction hood malfunction. | The suction hood is blocked. | Clean and remove any blocks. |
| Faulty fan or electronic module. | Replace the module. | ||
| E9 | Cooking area temperature sensor error. The corresponding cooking area is Off. | The temperature sensor circuit is open or there is a short-circuit. | Replace the inductor. |
| EA | TC internal error. The cooking areas are Off. | - | Replace the generator. |
| EH | Temperature sensor blocked. The corresponding cooking area is Off. | No change in temperature (min. 10 K / 5 min.) after activation of the cooking area. | Replace the inductor. |
TC = TOUCH CONTROL
UI = USER INTERFACE
NTC = TEMPERATURE SENSOR
MAINTENANCE AND REPAIRS
Make sure that maintenance on electrical components is only carried out by the manufacturer or by the service technicians
Make sure that damaged cables are only replaced by the manufacturer or by the service technicians.
When contacting the service department, please provide the following information:
Type of fault
Device model (Art./Cod.)
Serial number (S.N.)
This information can be found on the identification plate. The identification plate is affixed to the bottom of the device.
DISPOSAL
The symbol on the product or on the packing material indicates that the product must not be treated as domestic waste; on the contrary it must be sent to a collection point that recycles electrical and electronic appliances. Disposing of the product properly will help avoid potentially negative effects to the environment and to human health. For further information on how to treat, recover and recycle this product, please contact your local waste disposal office, the domestic waste disposal service or the shop from which you purchased the product.
The appliance complies with directive 2012/19/EU relating to reduction in the use of dangerous substances in electrical and electronic appliances and waste disposal.
TECHNICAL DATA
Product identification
Type: 4300
Model: FMA 839 HI
Please see the identification plate affixed to the bottom of the product.
The manufacturer makes continual improvements to products. For this reason, the text and illustrations in these instructions for use may change without warning.
Further information on technical data can be found on the website:
- www.franke.com
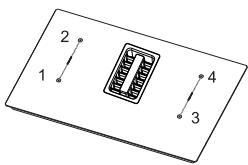
1,2 Flexible cooking area 1 + 2 In bridge
3,4 Flexible cooking area 3 + 4 In bridge
FMA 839 HI
| Parameter | Value | Dimensions (mm) |
| Working dimensions | - | 830 × 520 (W x D) |
| Power supply voltage/frequency | 220–240 V, 50 Hz; 220 V, 60 Hz3N~ / 2N~ 380–415 V, 50 Hz;3N~ / 2N~ 380 V, 60 Hz | |
| Electrical and heating element data | ||
| Cooking area 1,2,3,4 | 2100 W;Power Boost: 3000 W | 210 x 190 |
| Flexible cooking area1 + 2, 3 + 4 | 3000 W;Power Boost: 3700 W | 210 x 390 |
| Parameter | Value | Unit of measurement |
| Weight of the device | 21 | kg |
| Number of cooking areas | 4 | |
| Heat source | induction | |
INHALTSVERZEICHNIS
INFORMATIONS SUR LE MANUEL
Recipients adequados
Recipients adequados:
TC = NADZOR NA DOTIK
UI = UPORABNIŠKI VMESNIK
NTC = TEMPERATURNI SENZOR
VZDRŽEVANJE IN POPRAVILA
Franke Aus. Pty. Ltd.
(PR Kitchen Systems)
Melbourne 3175
Phone +61 3 9700 9100
Belgium
Franke N.V.
9400 Ninove
Phone +32 54 310 111
Brazil
Franke Sistemas de Cozinas do Brasil
Dona Francisca, 8.300. Bloco N - Sala 49 -
Condomínio Perini Business Park Distrito
Industrial-89219-600
Joinville - SC - Brasil
Fone +55 4734310500
Canada
Franke Kindred Canada Limited
Midland, ON L4R 4K9
Phone +1 866 687 7465
China
Franke (China) Kitchen Systems Co., Ltd.
Heshan, Guangdong, 529700
Hotline 400 882 9898
Czech Republic
Franke s.r.o.
190 00 Praha 9
Phone +420 281 090 411
Denmark
Franke Kitchen Systems Denmark
8520 Lystrup
Phone +45 8624 9024
Finland
Franke Finland Oy
76850 Naarajärvi
Phone +358 15 341 11
France
Franke France S.A.S.
60230 Chambly
Phone +33 130 289 400
Germany
Franke GmbH
79713 Bad Säckingen
Phone +49 7761520
Greece
Franke Hellas S.A.
19003 Markopoulos Attikis (Athens)
Phone +30 22991 500 00
Hong Kong SAR
Franke Asia Hong Kong Office
Causeway Bay
Phone +852 3184 1900
India
Franke Faber India Limited
Aurangabad-431136
Phone 1800 209 3484
Italy
Franke S.p.A.
37019 Peschiera del Garda
Numero Verde 800 359 359
Kazakhstan
Franke Kazakhstan Ltd.
040918 Almaty City
Phone +7 727 297 3812
Norway
Franke Kitchen Systems Norway
8520 Lystrup, Denmark
Phone +47 35566450
Poland
Franke Polska Sp. z o.o.
05-090 Raszyn
Phone +48 22 711 6700
Portugal
Franke Portugal S.A.
2735-531 Cacém
Phone +351 214269670
Romania
Franke Romania SRL
Pantelimon 077145
Phone +40 213501550
Russia
Franke Russia GmbH
199106 St. Petersburg
Phone +7 812 703 1540
Slovak Republic
Franke Slovakia s.r.o.
010 01 Žilina
Phone +421 41 733 6200
South Africa
Franke South Africa
Durban 4052
Phone +27 31 450 6300
Spain
Franke Espana S.A.U.
Phone +46 912 405 00
Switzerland
Franke Kitchen Systems LLC
Smyrna, TN 37167
Phone 8006265771
- INFORMATION ON THE MANUAL
- Symbol Meaning
- SAFETY INFORMATION
- Requirements for kitchen units
- Proper use
- ELECTRICAL CONNECTION
- OVERVIEW
- FMA 839 HI - 4-area hob with integrated hood
- Buttons and display elements
- TYPES OF CONTROL
- CONTROLS
- SUCTION HOOD CONTROLS
- USER MENU (CUSTOM SETTINGS)
- INSTALLER MENU (HOB POWER SETTINGS)
- THE DEVICE
- Power management function
- Example:
- How induction hobs work
- Pan presence detection
- Pans
- Suitable pans
- Pans suitable for use with induction hobs
- Suitable pans:
- Unsuitable pans:
- Noises during cooking
- Energy saving information
- Normal working noises in the hob
- Light buzz (like the noise made by a transformer)
- Light whistle
- Crackle
- Loud whistle
- Fan noises
- Rhythmic sounds like a clock ticking
- OPERATION
- Turning the device on
- Selecting a cooking area
- Turning a cooking area off
- Turning the hob off
- Residual heat indicator
- Defrost settings
- PowerPlus regulation
- Timer
- Setting the timer
- Modifying the timer
- Bridge function
- Child lock
- CLEANING AND CARE
- General recommendations
- Cleaning the device
- TROUBLESHOOTING
- MAINTENANCE AND REPAIRS
- DISPOSAL
- TECHNICAL DATA
- Product identification
- INHALTSVERZEICHNIS
- INFORMATIONS SUR LE MANUEL
- Recipients adequados
- Recipients adequados:
- VZDRŽEVANJE IN POPRAVILA
- Belgium
- Brazil
- Canada
- China
- Czech Republic
- Denmark
- Finland
- France
- Germany
- Greece
- Hong Kong SAR
- India
- Italy
- Kazakhstan
- Norway
- Poland
- Portugal
- Romania
- Russia
- Slovak Republic
- South Africa
- Spain
- Switzerland
Brand : FRANKE
Model : MARIS T-SHAPE FGB 906 IS AC
Category : Hob