
NC1102 - Surveillance Camera NEST - Free user manual and instructions
Find the device manual for free NC1102 NEST in PDF.
User questions about NC1102 NEST
0 question about this device. Answer the ones you know or ask your own.
Ask a new question about this device
Download the instructions for your Surveillance Camera in PDF format for free! Find your manual NC1102 - NEST and take your electronic device back in hand. On this page are published all the documents necessary for the use of your device. NC1102 by NEST.
USER MANUAL NC1102 NEST
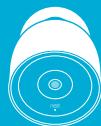
outdoor security camera
Installation Guide
Contents
In the box 4
What you'll need 5
Do this first 6
Choose a good spot 8
Mount your camera 10
Warranty 12
Safety 14
Want to see how it's done?
Go to nest.com/installnestcam for installation videos and additional tips.
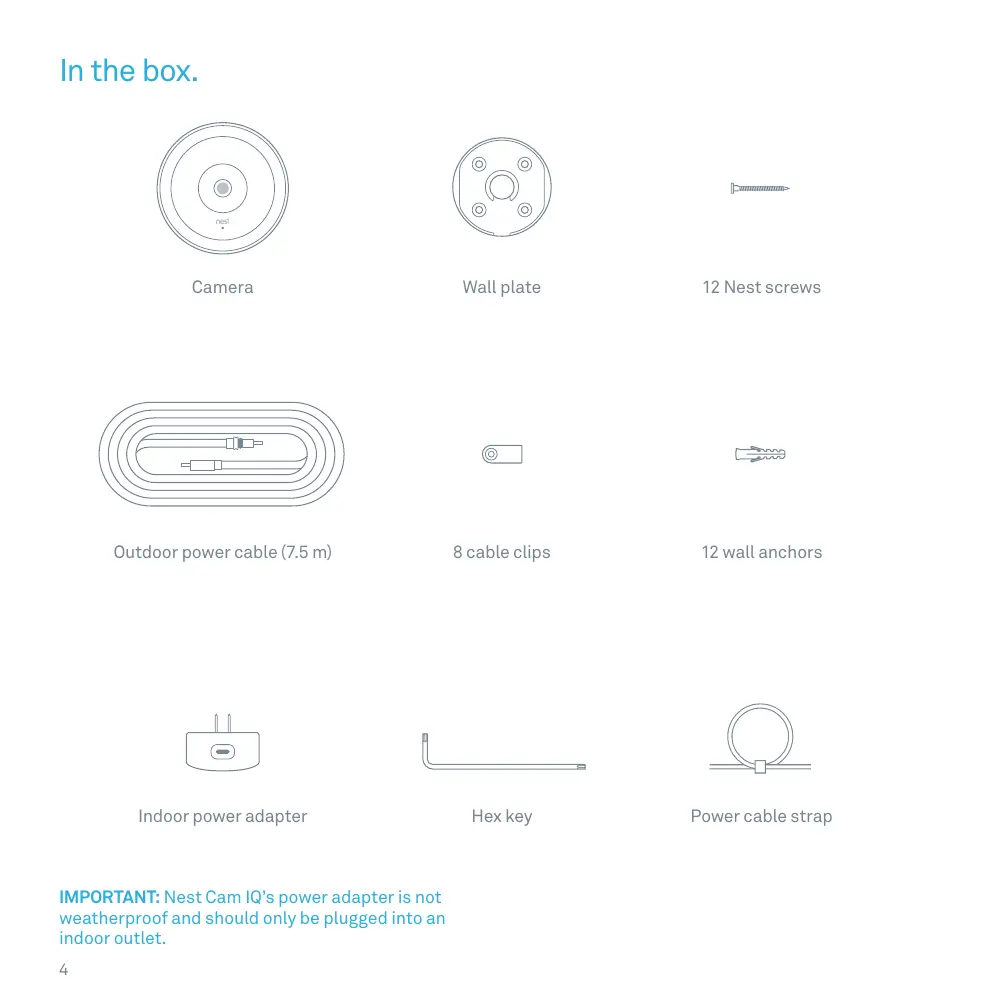
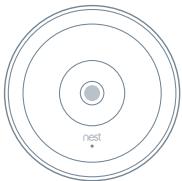
In the box.
text_image
nestCamera
natural_image
Simple line drawing of a circular mechanical component with four holes and a central oval feature (no text or symbols)Wall plate

12 Nest screws

natural_image
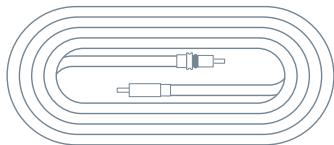
Pure diagram of concentric oval layers with internal components, no text or symbols presentOutdoor power cable (7.5 m)

8 cable clips

12 wall anchors
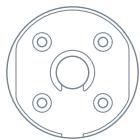
Indoor power adapter
Hex key
Power cable strap
IMPORTANT: Nest Cam IQ's power adapter is not weatherproof and should only be plugged into an indoor outlet.
What you'll need.
- Wi-Fi and a working broadband internet connection with at least 2 Mbps upload speed. DSL connections may not have enough bandwidth.
- A compatible phone or tablet with Bluetooth 4.0
- A Nest Account
• An indoor power outlet
• A power drill with Phillips driver bit
Other items you may need
- Drill bits (2 mm for pilot holes, 6 mm for wall anchors, 13 mm for cable hole)
- Caulk to seal the wall plate
Want a Pro to do it for you?
We can connect you with an independent installer who's been trained to install Nest products. Find a local Nest Pro at nest.com/ca/install
Do this first.
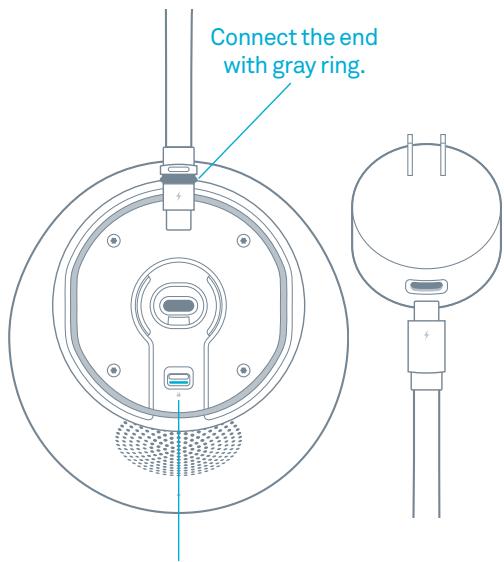
1. Turn on Nest Cam IQ indoors
Start by turning on your camera inside your home to get it set up before you take it outside.
Plug the end of the power cable with the gray ring into the base of your camera. It will click into place.
Plug the other end into the power adapter.
Then plug the adapter into an indoor power outlet close to your Wi-Fi router. Your Nest Cam IQ will turn on and its light ring will turn blue.
text_image
Connect the end with gray ring.IMPORTANT: Push the latch to unlock the cable before trying to remove it.
2. Connect it to the app
If you're new to Nest:
- Get the Nest app from the App Store or Google Play.
- Open the app and tap "Sign up" to create an account.
- Then tap Add.
If you already have a Nest Account:
- Tap the Settings icon in the top-right corner of the app home screen.
- Then tap "Add product".
The app will guide you through a few steps. You'll scan the camera's QR code, name your camera, and connect it your Wi-Fi network.
If you need help, go to nest.com/pair
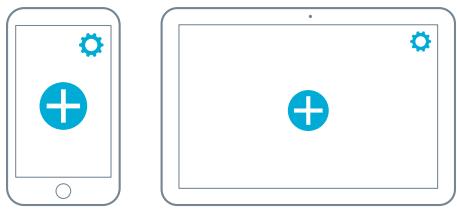
natural_image
Two smartphone screens showing app icons: one with a plus sign and another with a plus sign, both without any text or symbols.3. Test your camera's video streaming outside
Keep your camera plugged into an outlet and take it outside. Hold it where you'd like to mount it and check to make sure it's streaming video to the Nest app.
If you don't see video, the Wi-Fi may not be strong enough there — you'll need to find a different spot or move your Wi-Fi router.
→ See location tips on the next page.

natural_image
Line drawing of two hands holding smartphones, one holding a small device (no text or symbols)4. Plan the cable path
Before you mount your camera, measure the cable along the route where you'll be installing it. You can disconnect your camera from the cable to make it easier to measure.
If there's an existing opening, you may be able to run the cable through it to the outside. If not, you can use a 13 mm ( 12 ) bit to drill a hole for the cable. Make sure you know where all in-wall pipes and electrical wires are before drilling.

natural_image
Line drawing of a garage with a car, lamp, and potted plant (no text or symbols)Choose a good spot.
text_image
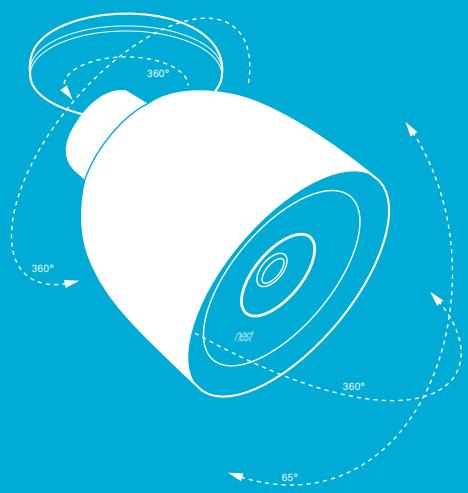
360° 360° 720° 360° 65°Consider the view
Nest Cam IQ has a wide 130-degree field of view and a fully articulating hinge, so you can mount it almost anywhere you want and point it in any direction. Typically, you should install it where it can look over a large area of your property: over the garage or patio, or your back, side or front doors. You can also use the Nest app to zoom and enhance the view to get it exactly how you want.
text_image
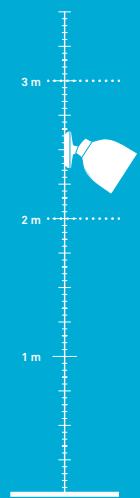
3 m 2 m 1 mInstall it just above head height
2 m to 3 m (7 to 10 feet) above the ground, tilted downward, is best — this is high enough to let you see people's faces and talk to them with the camera's speaker and microphone.
natural_image
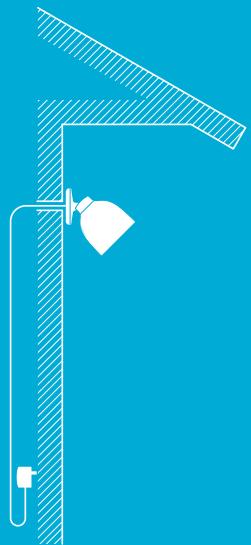
Simple line drawing of a lamp mounted on a vertical pole against a solid blue background (no text or symbols)Look for a nearby indoor outlet
Nest Cam IQ has a 7.5 m (25 foot) outdoor-rated power cable that is designed to be easily routed through or along a wall to an indoor power outlet. Look for an outlet that's close to where you want to install your camera.

Keep it in range of your router
Make sure to pick a place within range of your network. Thick or insulated walls can greatly reduce Wi-Fi signal strength even if your router is close by. So you should test streaming video with the app before you mount your camera.
Learn more at nest.com/ca/wifihelp
Mount your camera.
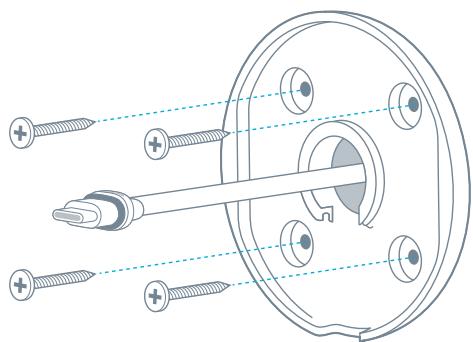
5. Install the wall plate
Use a 2 mm drill bit to drill pilot holes for the screws.
If the wall is made of a hard material like brick or stucco, you may need to use the included wall anchors to hold the screws. Use a 6 mm (7/32") bit for the anchors.
Spread caulk around the edge of the wall plate before installing to seal it. Leave a small open space at the bottom for water to drain out.
- If you're installing the camera directly over the cable hole (see illustration), mount the wall plate over the hole and route the cable through the center hole.
- If you're running the cable along the wall before it goes inside, mount the wall plate where you want and route the cable through the notch in the wall plate.
natural_image
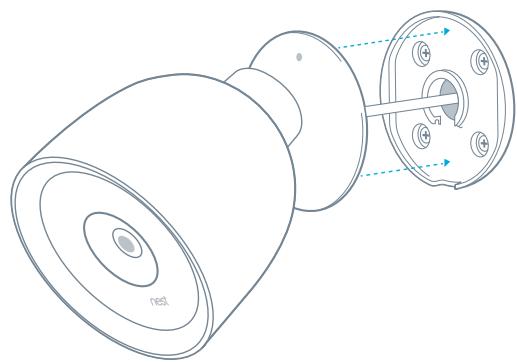
Technical diagram of a mechanical assembly with screws and a central component (no text or labels)6. Attach the camera
- Plug the end of the power cable that has the gray rubber ring into the base of your camera. It will click into place.
- Then push the camera base into the wall plate until it clicks into place.
- Your Nest Cam will turn on and reconnect to Wi-Fi.
- Check your camera's video feed with the Nest app and adjust the camera angle if needed.
natural_image
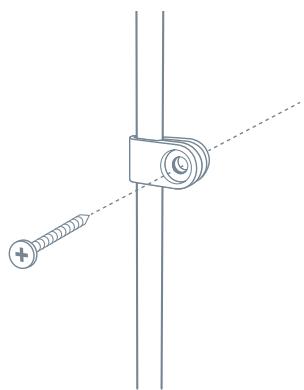
Technical line drawing of a showerhead with internal components and no visible text or symbols7. Install the cable
Secure the cable using as many of the included cable clips as you need.
For a clean looking installation, try to route the cable along a ledge or corner. You can also paint the cable and the clips to match your home. Do not paint the camera.
Using your Nest Cam
For help getting started, learning about Nest Cam IQ features, tips and more, go to nest.com/ca/camerabasics
IMPORTANT: If you ever need to unmount your camera, you can use the included hex key to disconnect it from the wall plate.
natural_image
Technical line drawing of a mechanical clamp or bracket with a screw and plus symbol, no text or labels present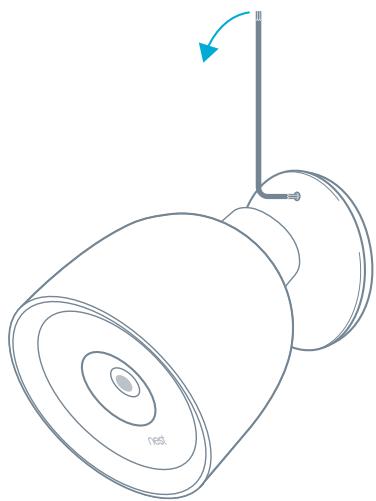
natural_image
Line drawing of a ceiling lamp with a vertical pole and base mount (no text or symbols)Nest Labs, Inc.
Limited Warranty
Nest Cam IQ
For more information, visit nest.com/ca
Need help? Contact us at nest.com/ca/support
For IC Compliance Statement, visit nest.com/ca/legal/ic-compliance-notice

Please recycle Nest's packaging.
RECYCLING AND DISPOSAL
Visit nest.com/ca/recycle
THIS LIMITED WARRANTY CONTAINS IMPORTANT INFORMATION ABOUT YOUR RIGHTS AND OBLIGATIONS, AS WELL AS LIMITATIONS AND EXCLUSIONS THAT MAY APPLY TO YOU.
1. WHAT THIS LIMITED WARRANTY COVERS; PERIOD OF COVERAGE
Nest Labs, Inc. (“Nest Labs”), 3400 Hillview Avenue, Palo Alto, California USA, warrants to the owner of the enclosed product that the product contained in this box (“Product”) will be free from defects in materials and workmanship for a period of two (2) years from the date of delivery following the original retail purchase (the “Warranty Period”). If the Product fails to conform to this Limited Warranty during the Warranty Period, Nest Labs will, at its sole discretion, either (a) repair or replace any defective Product or component; or (b) accept the return of the Product and refund the money actually paid by the original purchaser for the Product. Repair or replacement may be made with a new or refurbished product or components, at Nest Labs’ sole discretion. If the Product or a component incorporated within it is no longer available, Nest Labs may, at Nest Labs’ sole discretion, replace the Product with a similar product of similar function. This is your sole and exclusive remedy for breach of this Limited Warranty. Any Product that has either been repaired or replaced under this Limited Warranty will be covered by the terms of this Limited Warranty for the longer of (a) ninety (90) days from the date of delivery of the repaired Product or replacement Product, or (b) the remaining Warranty Period. This Limited Warranty is transferable from the original purchaser to subsequent owners, but the Warranty Period will not be extended in duration or expanded in coverage for any such transfer.
2. TOTAL SATISFACTION RETURN POLICY
If you are the original purchaser of the Product and you are not satisfied with this Product for any reason, you may return it in its original condition within thirty (30) days of the original purchase and receive a full refund.
3. WARRANTY CONDITIONS; HOW TO GET SERVICE IF YOU WANT TO CLAIM UNDER THIS LIMITED WARRANTY
Before making a claim under this Limited Warranty, the owner of the Product must (a) notify Nest Labs of the intention to claim by visiting nest.com/ca/support during the Warranty Period and providing a description of the alleged failure, and (b) comply with Nest Labs' return shipping instructions. Nest Labs will have no warranty obligations with respect to a returned Product if it determines, in its reasonable discretion after examination of the returned Product, that the Product is
an Ineligible Product (defined below). Nest Labs will bear all costs of return shipping to owner and will reimburse any shipping costs incurred by the owner, except with respect to any Ineligible Product, for which owner will bear all shipping costs.
4. WHAT THIS LIMITED WARRANTY DOES NOT COVER
This Limited Warranty does not cover the following (collectively "Ineligible Products"): (i) Products marked as "sample" or "Not for Sale", or sold "AS IS"; (ii) Products that have been subject to: (a) modifications, alterations, tampering, or improper maintenance or repairs; (b) handling, storage, installation, testing, or use not in accordance with the User's Guide, Placement Guidelines, or other instructions provided by Nest Labs; (c) abuse or misuse of the Product; (d) breakdowns, fluctuations, or interruptions in electric power or the telecommunications network; or (e) Acts of God, including but not limited to lightning, flood, tornado, earthquake, or hurricane; or (iii) any non-Nest Labs branded hardware products, even if packaged or sold with Nest Labs hardware. This Limited Warranty does not cover consumable parts, including batteries, unless damage is due to defects in materials or workmanship of the Product, or software (even if such consumable parts or software are packaged or sold with the product). Nest Labs recommends that you use only authorized service providers for maintenance or repair. Unauthorized use of the Product or software can impair the Product's performance and may invalidate this Limited Warranty.
5. DISCLAIMER OF WARRANTIES
EXCEPT AS STATED ABOVE IN THIS LIMITED WARRANTY, AND TO THE MAXIMUM EXTENT PERMITTED BY APPLICABLE LAW, NEST LABS DISCLAIMS ALL EXPRESS, IMPLIED, AND STATUTORY WARRANTIES AND CONDITIONS WITH RESPECT TO THE PRODUCT, INCLUDING THE IMPLIED WARRANTIES OF MERCHANTABILITY AND FITNESS FOR A PARTICULAR PURPOSE. TO THE MAXIMUM EXTENT PERMITTED BY APPLICABLE LAW, NEST LABS ALSO LIMITS THE DURATION OF ANY APPLICABLE IMPLIED WARRANTIES OR CONDITIONS TO THE DURATION OF THIS LIMITED WARRANTY.
6. LIMITATION OF DAMAGES
IN ADDITION TO THE ABOVE WARRANTY DISCLAIMERS, IN NO EVENT WILL NEST LABS BE LIABLE FOR ANY CONSEQUENTIAL, INCIDENTAL, EXEMPLARY, OR SPECIAL DAMAGES, INCLUDING ANY DAMAGES FOR LOST DATA OR LOST PROFITS, ARISING FROM OR RELATING TO THIS LIMITED WARRANTY OR THE PRODUCT, AND NEST LABS' TOTAL CUMULATIVE LIABILITY ARISING FROM OR RELATED
TO THIS LIMITED WARRANTY OR THE PRODUCT WILL NOT EXCEED THE AMOUNT ACTUALLY PAID FOR THE PRODUCT BY THE ORIGINAL PURCHASER.
7. LIMITATION OF LIABILITY
THE NEST LABS ONLINE SERVICES (“SERVICES”) PROVIDE YOU INFORMATION (“PRODUCT INFORMATION”) REGARDING YOUR NEST PRODUCTS OR OTHER PERIPHERALS CONNECTED TO YOUR PRODUCTS (“PRODUCT PERIPHERALS”). THE TYPE OF PRODUCT PERIPHERALS THAT MAY BE CONNECTED TO YOUR PRODUCT MAY CHANGE FROM TIME TO TIME. WITHOUT LIMITING THE GENERALITY OF THE DISCLAIMERS ABOVE, ALL PRODUCT INFORMATION IS PROVIDED FOR YOUR CONVENIENCE, “AS IS”, AND “AS AVAILABLE.” NEST LABS DOES NOT REPRESENT, WARRANTY, OR GUARANTEE THAT PRODUCT INFORMATION WILL BE AVAILABLE, ACCURATE, OR RELIABLE OR THAT PRODUCT INFORMATION OR USE OF THE SERVICES OR PRODUCT WILL PROVIDE SAFETY IN YOUR HOME. YOU USE ALL PRODUCT INFORMATION, THE SERVICES, AND THE PRODUCT AT YOUR OWN DISCRETION AND RISK. YOU WILL BE SOLELY RESPONSIBLE FOR (AND NEST LABS DISCLAIMS) ANY AND ALL LOSS, LIABILITY, OR DAMAGES, INCLUDING TO YOUR WIRING, FIXTURES, ELECTRICITY, HOME, PRODUCT, PRODUCT PERIPHERALS, COMPUTER, MOBILE DEVICE, AND ALL OTHER ITEMS AND PETS IN YOUR HOME, RESULTING FROM YOUR USE OF THE PRODUCT INFORMATION, SERVICES, OR PRODUCT. PRODUCT INFORMATION PROVIDED BY THE SERVICES IS NOT INTENDED AS A SUBSTITUTE FOR DIRECT MEANS OF OBTAINING THE INFORMATION. FOR EXAMPLE, A NOTIFICATION PROVIDED THROUGH THE SERVICE IS NOT INTENDED AS A SUBSTITUTE FOR AUDIBLE AND VISIBLE INDICATIONS IN THE HOME AND ON THE PRODUCT, NOR FOR A THIRD PARTY MONITORING SERVICE THAT MONITORS ALARM STATE.
8. YOUR RIGHTS AND THIS LIMITED WARRANTY
This Limited Warranty gives you specific legal rights. You may also have other legal rights that vary by state, province, or jurisdiction. Likewise, some of the limitations in this Limited Warranty may not apply in certain states, provinces or jurisdictions. The terms of this Limited Warranty will apply to the extent permitted by applicable law. For a full description of your legal rights you should refer to the laws applicable in your jurisdiction and you may wish to contact a relevant consumer advisory service.
Safety
PLACEMENT GUIDELINES
To avoid risk of overheating and burns:
Use only in temperatures between -40^ to 45^ C ( -40^ and 113^ F).
Do not block airflow to Nest Cam IQ.
To avoid risk of fire and shock:
Use only provided power cable and power adapter.
Install in accordance with building and installation codes where you live.
To avoid risk of other serious injury:
Keep camera and all components out of the reach of children and pets.
For more information on safety go to nest.com/ca/camsafety
Patent & TM: nest.com/ca/ip-and-other-notices
Open source: nest.com/ca/compliance
nest
Caméra de sécurité
natural_image
Simple line drawing of a circular mechanical component with four bolt holes and a central hole (no text or symbols)Plaque murale

12 vis Nest
natural_image
Pure diagram of concentric oval layers with internal components, no text or symbols presentnatural_image
Two smartphone screens showing app icons: one with a plus sign and another with a plus sign, both without any text or symbols.natural_image
Line drawing of two hands holding devices, one holding a smartphone and the other cleaning a device (no text or symbols)natural_image
Line drawing of a car parked in front of a garage with a lamp and potted plant nearby (no text or symbols)natural_image
Simple line drawing of a lamp mounted on a vertical pole against a solid blue background (no text or symbols)natural_image
Technical diagram of a mechanical assembly with screws and a central shaft (no text or labels)6. Fixez la caméra
natural_image
Technical line drawing of a showerhead component with internal structure and mounting holes (no text or symbols)natural_image
Technical line drawing of a mechanical clamp or bracket with a screw and plus symbol (no text or labels)
natural_image
Line drawing of a lamp with a stand and vertical pole, showing no text or symbolsNest Labs, Inc. Garantie limitée Nest Cam IQ
CETTE GARANTIE LIMITÉE CONTIENT DES RENSEIGNEMENTS IMPORTANTS SUR VOS DROITS ET VOS OBLIGATIONS, AINSI QUE LES LIMITES ET LES EXCLUSIONS QUI PEUVENT S'APPLIQUER À VOTRE CAS.