
BCS82KA14 - BCS82KA14 - Vacuum Cleaner BOSCH - Free user manual and instructions
Find the device manual for free BCS82KA14 - BCS82KA14 BOSCH in PDF.
User questions about BCS82KA14 - BCS82KA14 BOSCH
0 question about this device. Answer the ones you know or ask your own.
Ask a new question about this device
Download the instructions for your Vacuum Cleaner in PDF format for free! Find your manual BCS82KA14 - BCS82KA14 - BOSCH and take your electronic device back in hand. On this page are published all the documents necessary for the use of your device. BCS82KA14 - BCS82KA14 by BOSCH.
USER MANUAL BCS82KA14 - BCS82KA14 BOSCH
Cordless handstick vacuum cleaner
| BBS82 | BCS82 | BSS82 | BLS82 | BKS82 |
[de] Gebrauchsanleitung 9
[en] User manual 17
[fr] Manuel d'utilisation 24
[it] Manuale utente 31
[nl] Gebruikershandleiding 38
[da] Betjeningsvejledning 45
[no] Bruksanvisning 52
[sv] Bruksanvisning 59
[fi] Käyttöohje 65
[es] Manual de usuario 72
[pt] Manual do utilizador 80
[el] Εγχειρίδιο χρήστη 87
[tr] Kullanım kılavuzu 96
[pl] Instrukcja obsługi 105
[hu] Használati útmutató 113
[cs] Návod k obsluze 120
[ru] Руководство пользователя 127
[ro] Manual de utilizare 138
[fa] دستورالعمل استفاده 145
[zh-tw] 使用手册 151
natural_image
Line drawing of a mechanical device with a rectangular housing and mounting base (no text or symbols)A
B
natural_image
Line drawing of a handheld electronic device with a clip and base (no text or symbols)C
D
E
natural_image
Simple line drawing of a laboratory flask (no text or symbols)F
natural_image
Line drawing of a handheld vacuum cleaner (no text or symbols)G
H
natural_image
Line drawing of a vacuum cleaner with attached sensor array (no text or symbols)|
natural_image
Technical line drawings of two mechanical components (no text or symbols)K
natural_image
Line drawing of a mechanical tool or tool with a handle and pointed tip (no text or symbols)L

M
natural_image
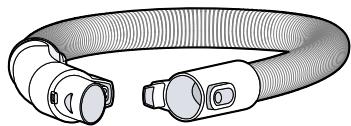
Illustration of a flexible hose with two connectors (no text or symbols)J
N
natural_image
Line drawing of a mechanical device with no visible text or symbolsO
natural_image
Line drawing of a small electronic device with a power outlet and coiled cable (no text or symbols)P
text_image
Diagram of a vacuum cleaner with numbered parts for identification and assembly reference.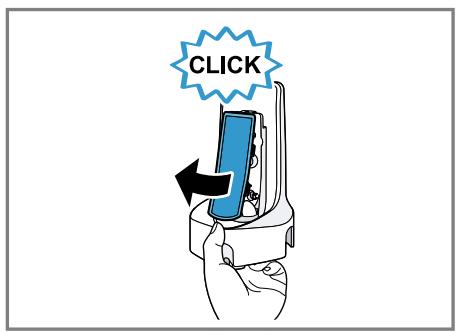
text_image
CLICK3
text_image
< 1,2m4
text_image
Diagram of a device with labeled parts and directional arrows, showing two numbered components.5
text_image
① ② CLICK ③6
natural_image
Diagram of a vacuum cleaner with a blue plastic housing, showing internal components and a directional arrow (no text or symbols)7
text_image
CLICK8
natural_image
Diagram showing a device being inserted into a housing, with an inset highlighting the tool's direction (no text or symbols present)9

text_image
Diagram showing a blue plug connected to a car seat with a warning sign and indicator lights, alongside a close-up of the device's seat.10
natural_image
Illustration of a blue handheld device with a black arrow pointing to a white cylindrical component (no text or symbols)11
text_image
Diagram of a device with labeled components and directional arrow, showing a highlighted component with dashed lines.12
text_image
Diagram showing two steps of a blue car seatbelt device, labeled 1 and 2, with arrows indicating movement.13

text_image
CLICK14
text_image
CLICK15
text_image
Auto16
text_image
Turbo17

text_image
Eco +/-18
text_image
CLICK CLICK19
text_image
CLICK20
text_image
CLICK21
text_image
Diagram showing two mechanical assembly steps with numbered components and directional arrows indicating movement or force.22
text_image
CLICK23
text_image
CLICK24
text_image
max25

natural_image
Diagram showing two stages of a hairdryer tool: one with black arrows indicating process, the other with blue handle and mesh texture (no text or symbols)26
natural_image
Diagram of a mechanical device with an upward arrow indicating motion or force, no text or symbols present.27
natural_image
Illustration of a blue industrial machine emitting particles with a black arrow indicating flow direction (no text or symbols)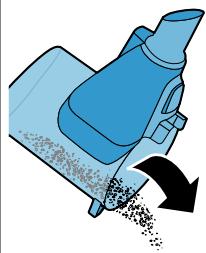
natural_image
Illustration of a blue conveyor belt with particles being inserted, showing motion direction (no text or symbols)
natural_image
Diagram of a mechanical device with a blue filter and downward arrow indicating compression or disassembly (no text or symbols)28
text_image
CLICK ① ②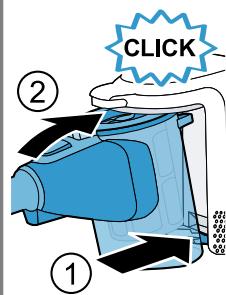
text_image
CLICK ② ①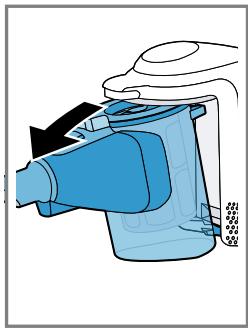
natural_image
Illustration of a mechanical device with blue and black components, no visible text or symbols29
natural_image
Diagram of a mechanical device with a blue component and an upward arrow, no text or symbols present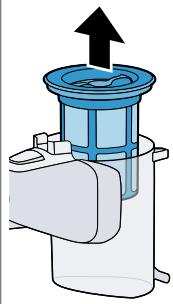
natural_image
Diagram of a mechanical device with an upward arrow indicating motion or force (no text or symbols present)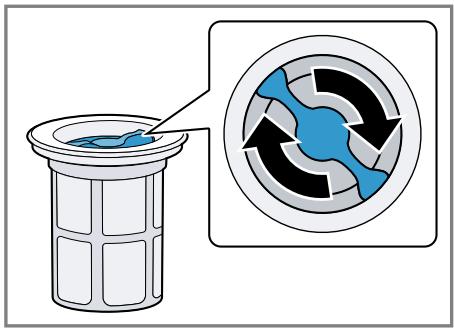
text_image
Diagram showing a cleaning or cleaning process with a magnified circular diagram illustrating the cycle of cleaning.30
natural_image
Illustration of hands holding a plastic waste bin with a tool, no text or symbols present31
text_image
Illustration showing a hand placing a trash bin with an upward arrow, above it, and a separate empty container.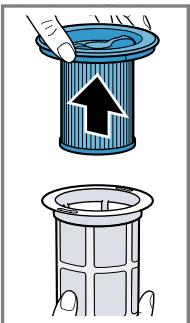
text_image
Illustration showing a hand using a brush to lift a trash bin with an upward arrow, and another hand holding a container with hands.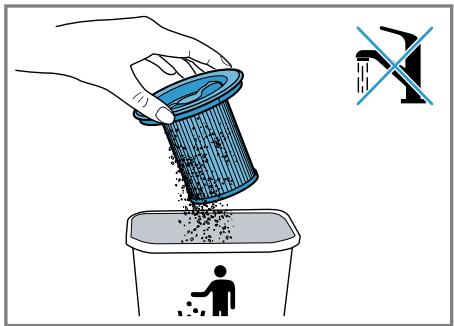
text_image
Illustration showing a hand pouring granular material into a trash bin with a 'no waste' symbol, indicating a no-smoking or disposal mechanism.32
natural_image
Illustration of a hand pouring granular material into a trash bin with a person below (no text or symbols)33
natural_image
Illustration of hands cleaning a blue filter with a mesh container (no text or symbols)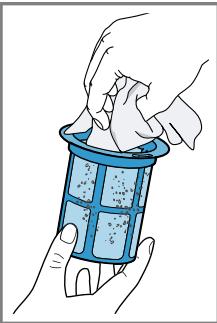
natural_image
Illustration of hands cleaning a blue plastic container with a cloth (no text or symbols)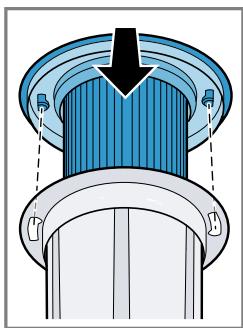
natural_image
Diagram of a mechanical component with a downward arrow and clamped parts (no text or symbols)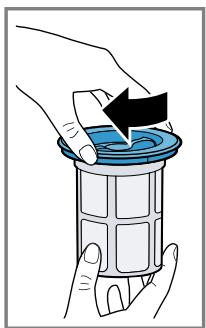
natural_image
Illustration of hands removing a plastic filter into a plastic container (no text or symbols)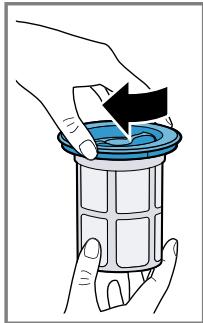
natural_image
Illustration of hands using a plastic filter to remove liquid (no text or symbols)34
natural_image
Diagram of a mechanical device with a blue component and arrow indicating downward motion (no text or symbols)35
text_image
CLICK ② ①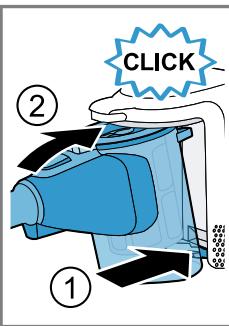
text_image
CLICK ① ②
natural_image
Illustration of a mechanical assembly with blue scissors cutting through a gear-like component (no text or symbols)37
text_image
Diagram showing a mechanical assembly with numbered components, likely illustrating a process or assembly step.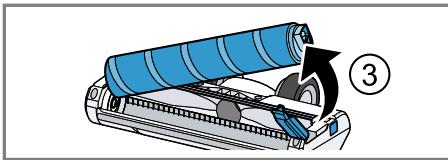
natural_image
Illustration of a blue roller being opened into a machine, with a numbered arrow indicating motion (no text or symbols present)39
text_image
Diagram showing a printer or scanner with labeled parts, indicating two different states of operation.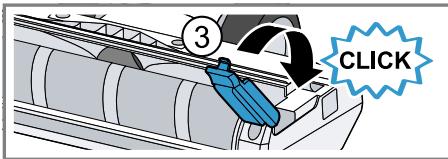
text_image
③ CLICK41
text_image
Diagram illustrating lock mechanism with labeled components and directional arrows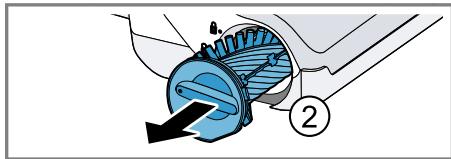
natural_image
Mechanical diagram showing a gear or turbine component with a blue internal structure and directional arrow (no text or symbols)36
natural_image
Mechanical diagram showing a gear assembly with a blue mesh component and directional arrow (no text or symbols)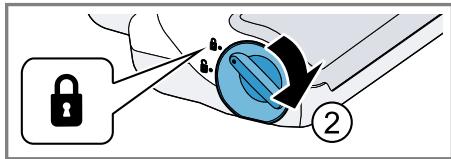
text_image
Diagram illustrating lock mechanism with labeled components and directional arrows38
natural_image
Illustration of a hand holding a blue cylindrical object wrapped in paper, with no visible text or symbols.40

Sicherheit
bosch-infoteam@bshg.com
- Read this instruction manual carefully.
- Keep the instruction manual and the product information safe for future reference or for the next owner.
■ Do not connect the appliance if it has been damaged in transit.
Only use this appliance:
■ With genuine parts and accessories. Damage caused by using third-party products is not covered under the warranty.
■ In private households and in enclosed spaces in a domestic environment at room temperature.
■ Up to an altitude of max. 2000 m above sea level.
This appliance may be used by children aged 8 or over and by people who have reduced physical, sensory or mental abilities or inadequate experience and/or knowledge, provided that they are supervised or have been instructed on how to use the appliance safely and have understood the resulting dangers.
Children must not play with the appliance.
Cleaning and user maintenance must not be performed by children unless they are being supervised.
▶ Repairs to the appliance should only be carried out by trained specialist staff.
▶ Only use genuine spare parts when repairing the appliance.
▶ Never operate a damaged appliance.
▶ Never operate an appliance with a cracked or fractured surface.
▶ Call customer services.
▶ Only use the appliance in enclosed spaces.
▶ Never expose the appliance to intense heat or humidity.
- Do not use steam- or high-pressure cleaners to clean the appliance.
▶ Never let the power cord come into contact with hot appliance parts or heat sources.
▶ Never let the power cord come into contact with sharp points or edges.
▶ Never kink, crush or modify the power cord.
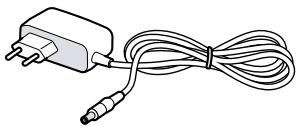
- Connect and operate the charging cable ^1 and the quick charger ^1 only in accordance with the specifications on the rating plate.
- Connect the charging cable ^1 and the quick charger ^1 to a power supply with alternating current only via a properly installed socket with earthing.
- When cleaning the appliance, do not use flammable substances or substances that contain alcohol.
- Keep clothing, hair, fingers and other body parts away from the openings on the appliance and the moving parts.
▶ Never point the pipe or the nozzles towards eyes, hair, ears or mouths.
▶ Ensure that children do not play with the appliance, even when it is in the base station ^1 .
▶ Persons with electronic implants must stand at least 10 cm away from the appliance. - Keep packaging material away from children.
▶ Do not let children play with packaging material.
▶ Protect the battery against fire, heat and constant sunlight.
▶ Protect the battery against water and penetrating moisture.
▶ Never open the battery. - When not in use, keep the battery away from metal objects, e.g. paper clips, coins, keys, nails or screws.
▶ Supply fresh air.
▶ If there are any problems, seek medical advice from a doctor.
▶ If these come into contact with the skin, wash immediately with cold water.
▶ If these come into contact with the eyes, seek medical help.
Preventing material damage
To prevent material damage to your appliance, accessories or any other objects, follow these instructions.
▶ Check and clean any wet objects.
▶ Replace damaged objects.
▶ Regularly check the outsides of the nozzles for wear.
▶ Replace the worn nozzle.
▶ Never use the nozzle without the brush roller in place.
▶ Never operate the appliance without the filter unit.
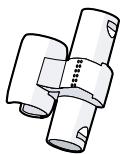
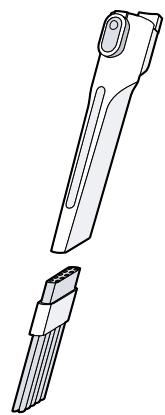
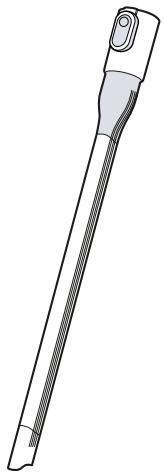
Included with the appliance
After unpacking all parts, check for any damage in transit and completeness of the delivery.
Note: The appliance comes with additional accessories depending on its features.
→ Fig. 1
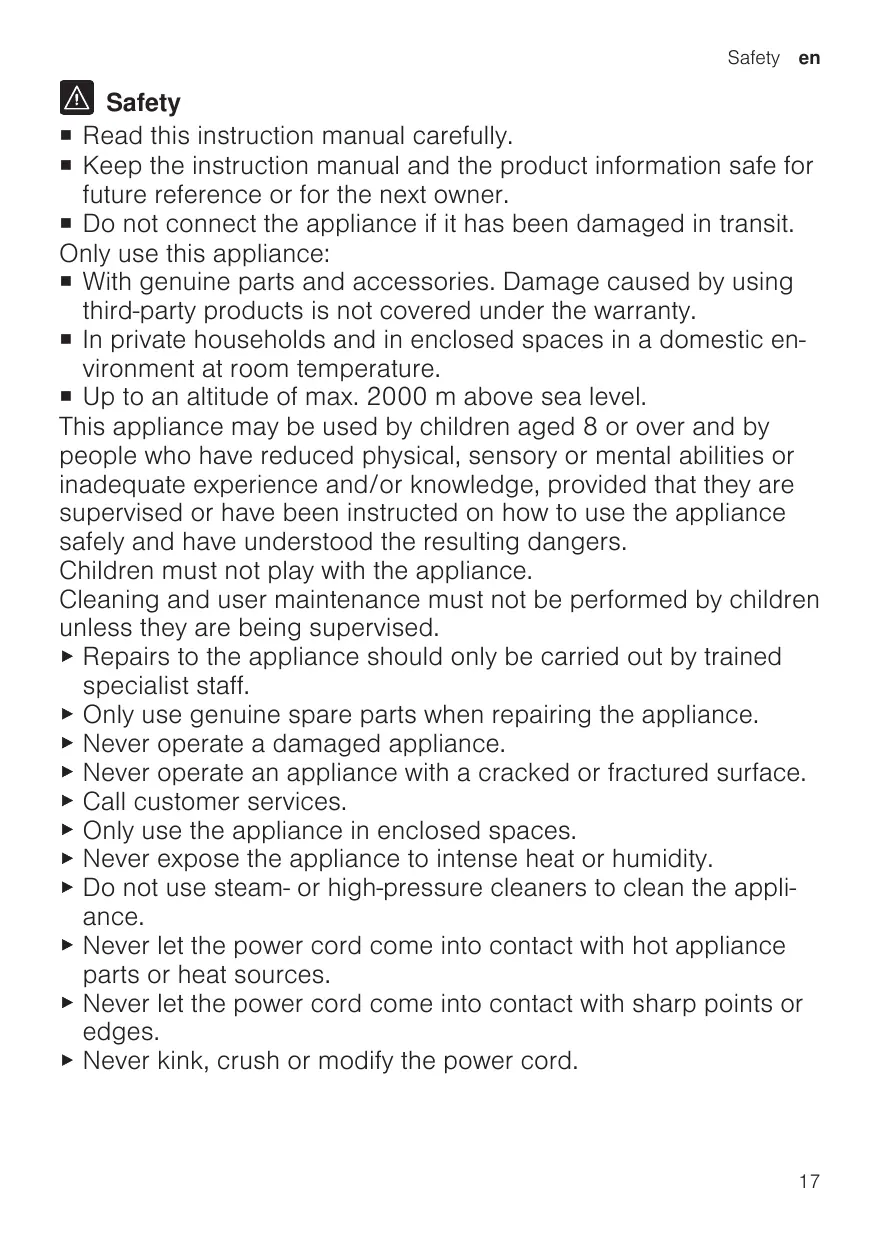
| A | Base station ^1 |
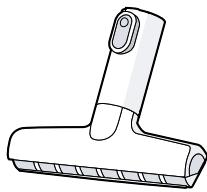
| B | 2-in-1 furniture brush with upholstery nozzle ^1 |
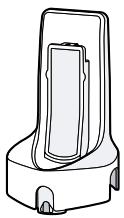
| C | Mini electro-nozzle ^1 |
| D | Replacement brush for mini electro-nozzle ^1 |
| E | Replacement brush for power brush ^1 |
| F | Mattress nozzle ^1 |
| G | XXL upholstery nozzle ^1 |
| H | Variable accessory holder ^1 |
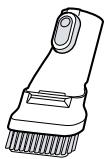
| I | Power brush for hard floors ^1 |
| J | Flexible extension hose ^1 |
| K | Keyboard and drawer nozzle ^1 |
| L | Long, flexible crevice nozzle ^1 |
| M | Short crevice nozzle ^1 |
| N | Battery ^1 |
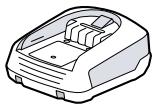
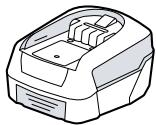
| O | Quick charger ^1 |
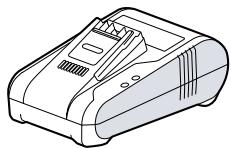
| P | Charging cable ^1 |
^1 Depending on the appliance specifications
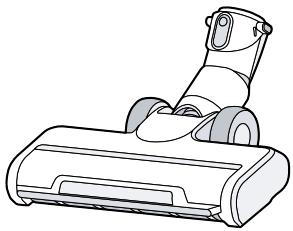
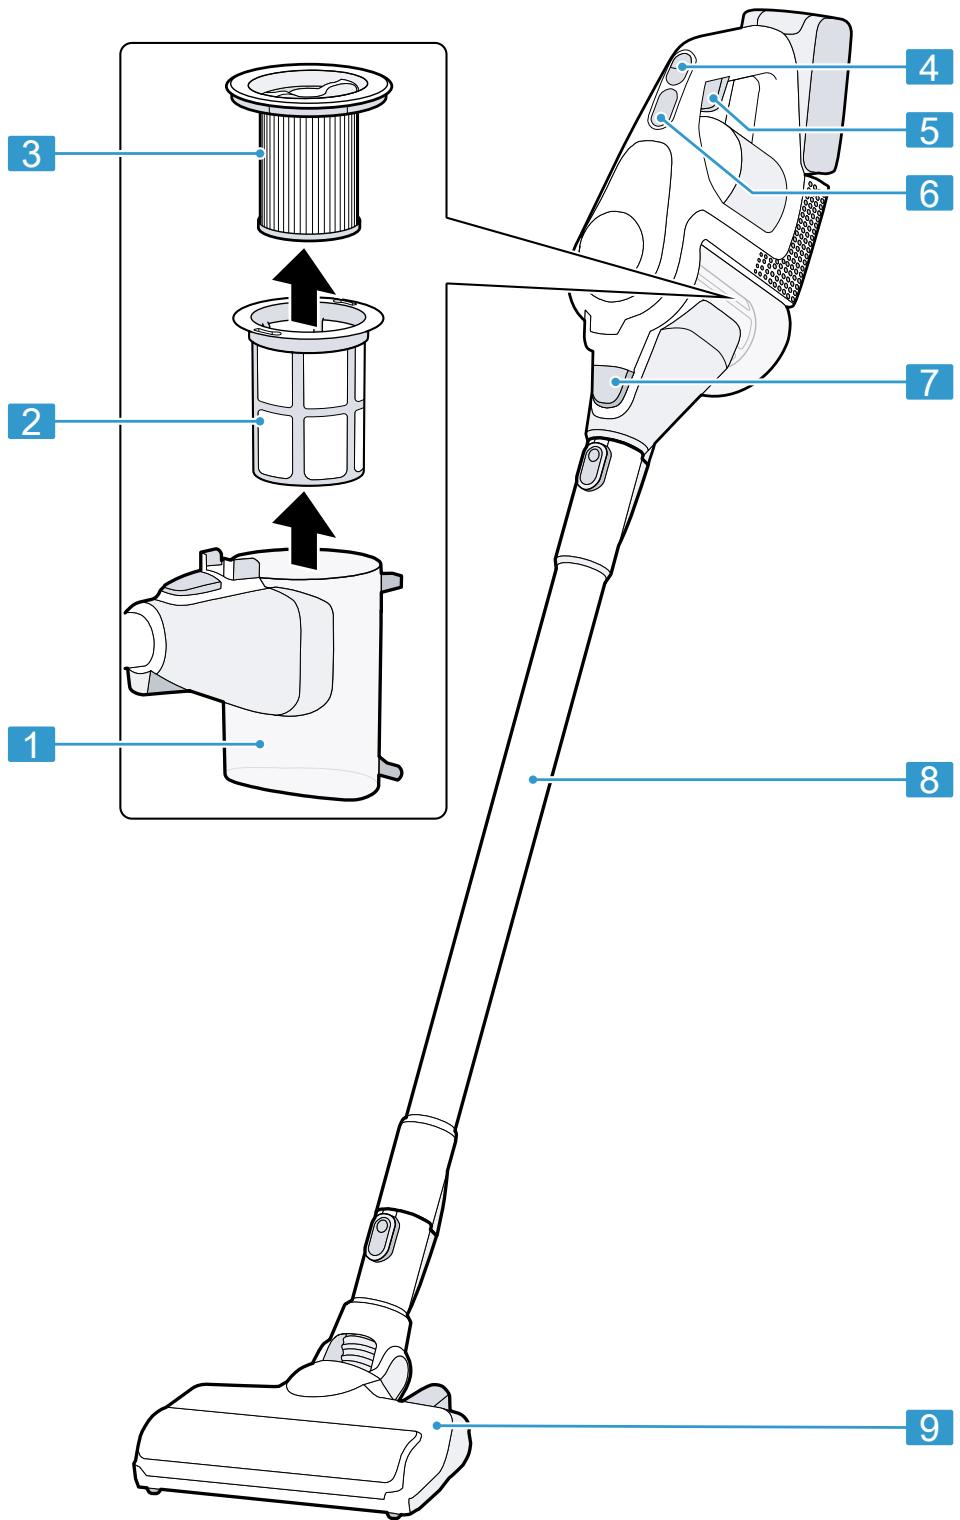
Appliance
You can find an overview of the parts of your appliance here.
→ Fig. 2
| 1 | Dust container |
| 2 | Fluff filter |
| 3 | Cartridge filter |
Battery charging times
You can find an overview of the battery charging times here.
Notes
■ The specified charging times may vary depending on the battery charging status, the battery temperature and the age of the battery.
| 4 | Regulating the operating statuses |
| 5 | On/off switch |
| 6 | Status display |
| 7 | Dust container release button |
| 8 | Suction pipe |
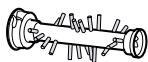
| 9 | Power brush |
Controls
You can find an overview of the controls for your appliance here.
① ■ Switch on the appliance.
■ Switch off the appliance.
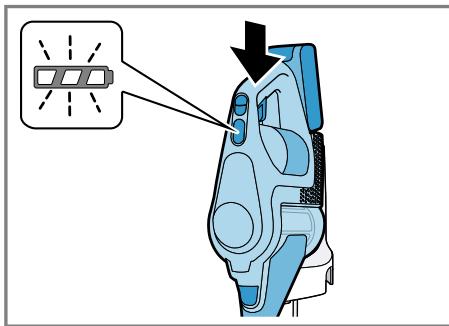
Status display
The status display indicates the different operating statuses.
| Operating status | Status display |
| Normal mode | Auto lights up. |
| Turbo mode | Turbo lights up. |
| Energy-saving mode | Eco lights up. |
| Battery charge below 20% | flashes quickly. |
| Battery empty | Display goes out. |
| Charging process | flashes and shows the already charged status. |
| Battery is fully charged | lights up and goes out after approx. two minutes. |
| Error display | lights up red and goes out after approx. 10 seconds.→ "Troubleshooting",Page 21 |
- You can find out which battery charging times are achieved with the quick charger ^1 in the instructions of for the quick charger ^1 .
Tip: If the quick charger ^1 displays a battery charging status of approx. 80%, you can remove and use the battery.
| Battery charging status of | 18 V 3,0 Ah | 18 V 4,0 Ah | 18 V 5,0 Ah |
| 80% in hrs | 4 | 4 | 5 |
| 97%-100% in hrs | 5 | 412 | 512 |
Battery runtimes
You can find an overview of the battery runtimes, depending on the battery that is used, here.
Note
The following modes affect the battery runtime:
■ Mode 1: Energy-saving mode with non-electrical accessory
■ Mode 2: Energy-saving mode with electrical floor nozzle
■ Mode 3: Auto mode with electrical floor nozzle
■ Mode 4: Turbo mode with electrical floor nozzle
| Runtime | 18 V 3,0 Ah | 18 V 4,0 Ah | 18 V 5,0 Ah |
| Mode 1 up to min. | 45 | 65 | 45 |
| Mode 2 up to min. | 35 | 50 | 35 |
| Mode 3 up to min. | 15 | 20 | 28 |
| Mode 4 up to min. | 10 | 10 | 12 |
Notes
■ Like every Li-ion battery, the batteries from the Power for ALL 18 V series wear out over time, meaning that the battery capacity and the runtime decrease. This is a natural aging process and not the result of a material error, manufacturing error or material defect.
■ You can delay the natural wear by using the following measures:
- Only charge the battery in the temperature range between 0^ and 45^ .
- Only store the battery in the temperature range between -20 °C and 50 °C.
- Do not store the battery for an extended period of time if it is fully charged or fully discharged.
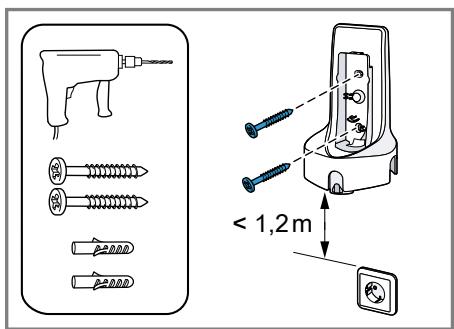
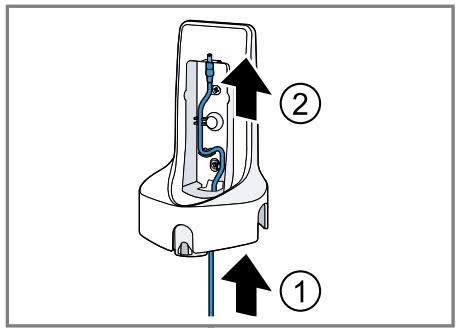
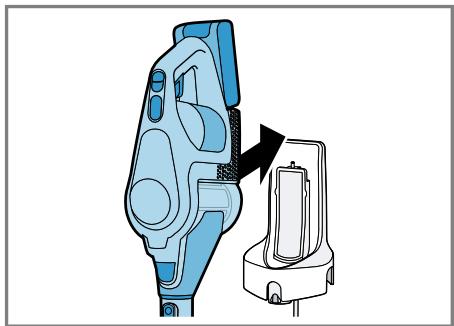
Installing the base station
▶ Check whether any household wiring could be damaged in the installation area.
- Do not install the base station horizontally or vertically above, below or next to a socket.
→ Fig. 3 - 6
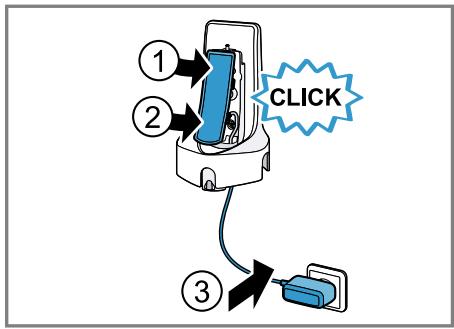
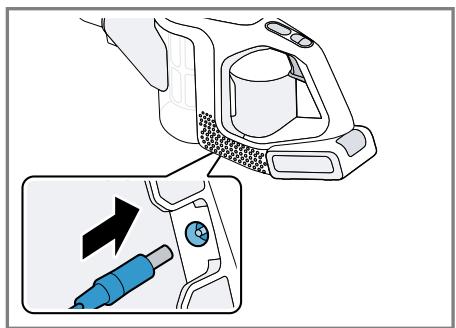
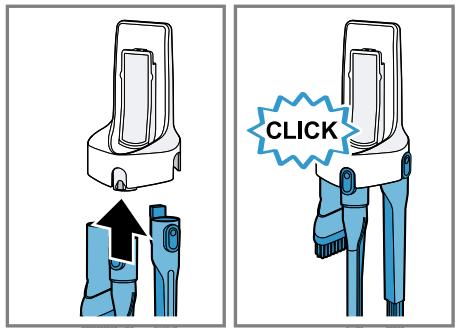
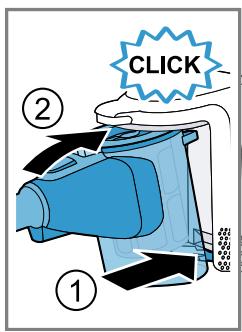
Inserting and charging the bat- tery
→ Fig. 7 - 8
Charging
▶ Only charge the battery in chargers that are recommended by the manufacturer.
▶ Only use the battery in connection with the Bosch appliance.
▶ Charge the battery using the original charging cable ^1 or the original quick charger ^1 .
▶ Only use batteries from the Power for ALL 18 V series.
Note: The power supply unit on the charging cable ^1 and the appliance heat up while charging. This is normal and harmless.
Charging using the charging cable
$$ \rightarrow \text { Fig. } 9 - 1 0 $$
Charging in the base station
▶ Ensure that children do not play with the appliance, even when it is in the base station ^1 .
$$ \rightarrow \text { Fig. } \boxed {1 1} - \boxed {1 2} $$
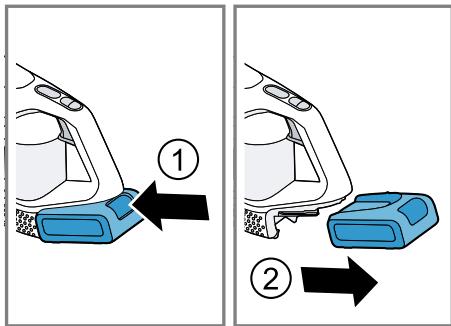
Charging using the quick charger ^1
- Press the release button and remove the battery to the rear.
- Observe the enclosed instructions.
$$ \rightarrow \text { Fig. } 1 3 $$
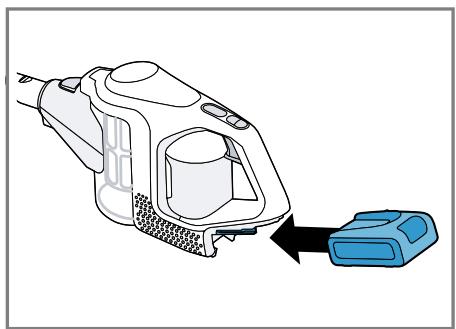
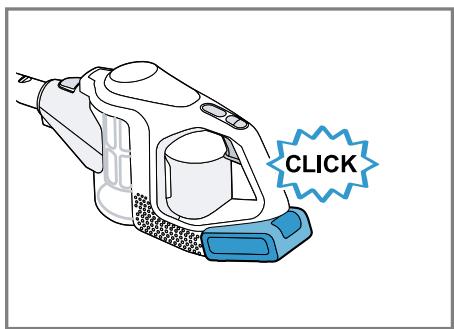
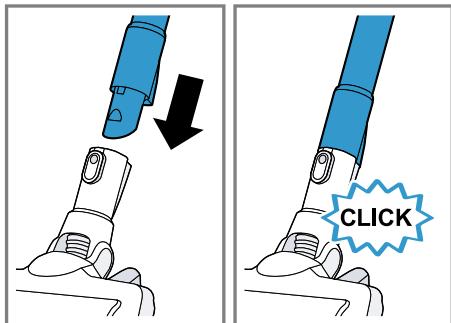
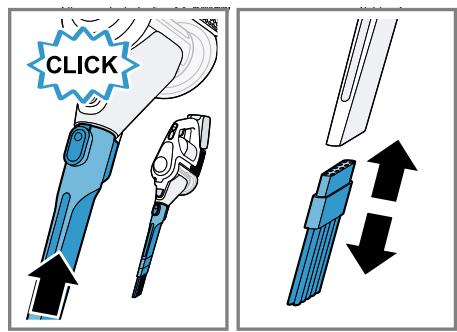
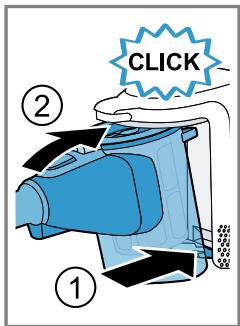
Installing the appliance
$$ \rightarrow \text { Fig. } 1 4 - 1 5 $$
Switching on the appliance
▶ Press Ⓘ.
$$ \rightarrow \text { Fig. } 1 6 $$
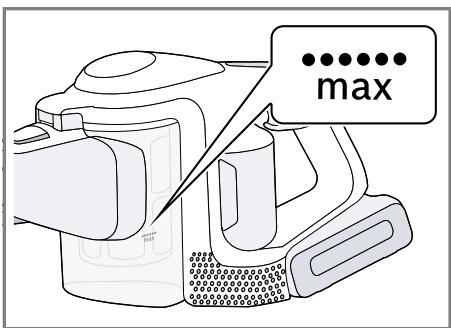
Setting the power
$$ \rightarrow \text { Fig. } 1 7 - 1 8 $$
Vacuuming with accessories
$$ \rightarrow \text { Fig. } \boxed {1 9} - \boxed {2 0} $$
Storing accessories
$$ \rightarrow \text { Fig. } \boxed {2 1} - \boxed {2 2} $$
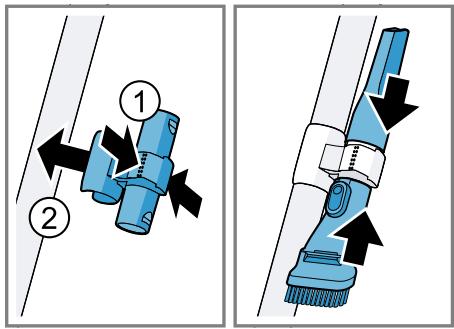
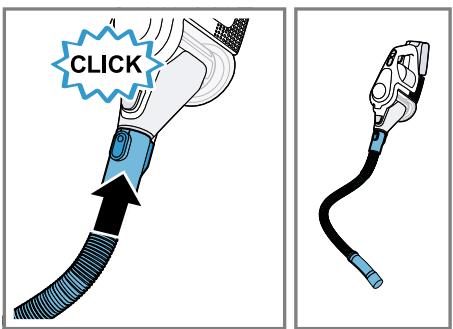
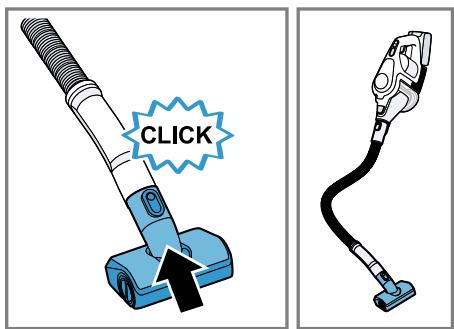
Using the flexible extension hose
$$ \rightarrow \text { Fig. } \boxed {2 3} - \boxed {2 4} $$
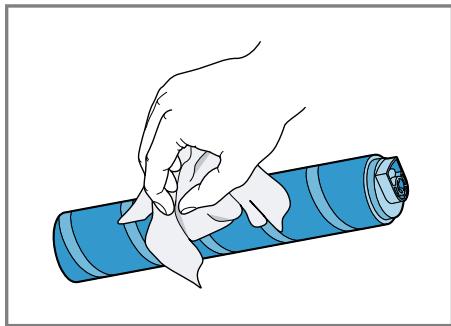
Cleaning the appliance
Requirement: The appliance is switched off.
- Disconnect the appliance from the charging cable ^1 .
- Clean the appliance and the accessory with a soft cloth and a commercially available plastic cleaner.
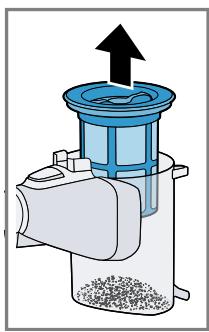
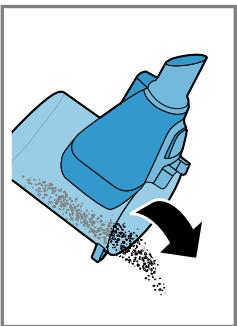
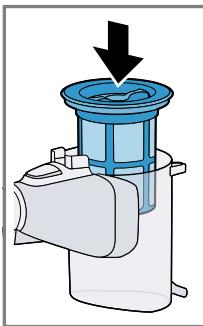
Emptying the dust container
$$ \rightarrow \text { Fig. } \boxed {2 5} - \boxed {2 8} $$
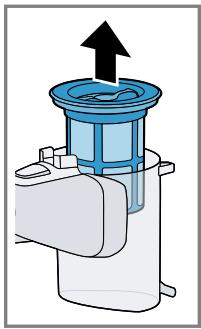
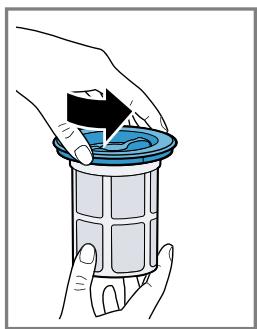
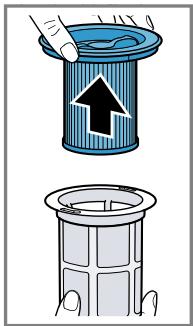
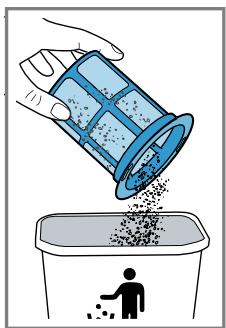
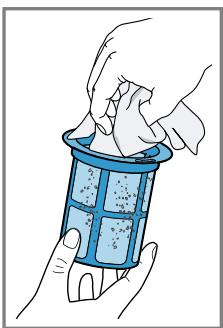
Cleaning the filter unit
▶ Never allow the filters to come into contact with liquids.
$$ \rightarrow \text { Fig. } \boxed {2 9} - \boxed {3 5} $$
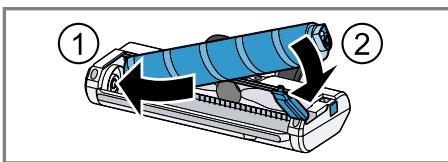
Cleaning the power brush
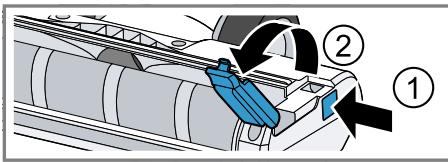
$$ \rightarrow \text { Fig. } \boxed {3 6} - \boxed {3 8} $$
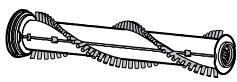
Cleaning the power brush for hard floors
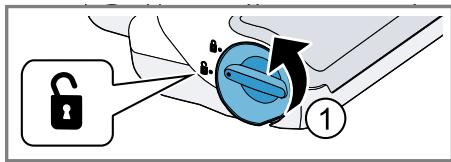
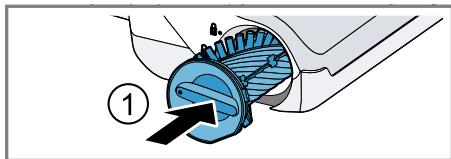
$$ \rightarrow \text { Fig. } \boxed {3 9} - \boxed {4 1} $$
Troubleshooting
You can rectify minor faults on your appli-ance yourself. Read the troubleshooting information before contacting after-sales service. This will avoid unnecessary costs.
▶ Repairs to the appliance should only be carried out by trained specialist staff.
▶ Only use genuine spare parts when repairing the appliance.
Malfunctions
| Fault | Cause | Troubleshooting |
| The appliance is not working. | The battery has not been inserted correctly. | Insert the battery correctly. |
| The battery status display does not show any status. | The battery has not been charged. | Charge the battery. |
| The red fault indicator lights up for 10 seconds. | The battery has overheated or overcooled. | Switch off the appliance and disconnect the appliance from the power supply. |
en Disposing of old appliance
| Fault | Cause | Troubleshooting |
| The appliance is not working.The battery status display does not show any status.The red fault indicator lights up for 10 seconds. | 2. Wait until battery has reached room temperature. | |
| The appliance has overheated or overcooled. | 1. Switch off the appliance and disconnect the appliance from the power supply.2. Wait until the appliance has reached room temperature. | |
| No charging function. | Incorrect charger was used. | ► Only use the charger that is included. |
| The dust container cannot be inserted. | The filter unit is not complete. | ► Check whether the filter unit is complete. |
| The filter unit or dust container is not positioned correctly. | ► Check whether the filter unit and dust container are inserted correctly. | |
| Suction is reduced. | The filter is blocked. | 1. Switch off the appliance and disconnect the appliance from the power supply.2. Clean the filter unit. |
| The nozzle is blocked. | 1. Switch off the appliance and disconnect the appliance from the power supply.2. Check whether the air channel from the nozzle to the appliance is blocked.3. Empty the dust container.4. Clean the filter unit.5. Once the appliance has cooled down, switch the appliance back on. |
Disposing of old appliance
Valuable raw materials can be reused by recycling.
- Dispose of the appliance in an environmentally friendly manner.
Information about current disposal methods are available from your specialist dealer or local authority.
This appliance is labelled in accordance with European Directive 2012/19/EU concerning used electrical and electronic appliances (waste electrical and electronic equipment - WEEE).
The guideline determines the framework for the return and recycling of used appliances as applicable throughout the EU.
Disposing of batteries
Batteries should be recycled in an environmentally friendly manner. Do not dispose of the batteries in the household rubbish.
- Dispose of batteries in an environmentally friendly manner.
Only for EU countries:
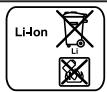
According to the European Guideline 2006/66/EC, defective or used battery packs/batteries, must be collected separately and disposed of in an environmentally correct manner.
Warranty conditions
You can make warranty claims for your appliance under the following conditions.
The guarantee conditions for this appliance are as defined by our representative in the country in which it is sold. Details regarding these conditions can be obtained from the dealer from whom the appliance was purchased. The bill of sale or receipt must be produced when making any claim under the terms of this guarantee.

Sécurité
c) Derivate, expandable and stable
(2) Gathason recorded for email for hospital/medizinist illness.
: Tamson's summer situation, will tell a serious situation.
«SABUS, ENTRICI-NEWA (ITRAFARI) TANARFIENIEN-TYR TAPWITA
www.bosch-home.com/tr
www.bosch-yetkiliservisi.com
Bandrol ve Seri No. :

Bezpieczeństwo
PB5858 / iaryor 2019

Siguranța
Central Service Contacts
AM AM Armenia, ٢١٠٠٠٠
ZIG ZAG LLC
Charenci str. 25
Yerevan 375025
Tel.:010556010
mailto:service@zigzag.am
www.zigzag.am
Gate 1, 1555 Centre Road
Clayton, Victoria 3168
Tel.: 1300 369 744*
mailto:customersupport.au@bshg.com
www.bosch-home.com.au
*Mon-Fri 24 hours
19F, Jinling Asia Pacific Tower, No.2 Han-zhong Road, Gulou District
210005 Nanjing, Jiangsu Province
Service Tel.: 400 8855 888*
mailto:careline.china@bshg.com
www.bosch-home.cn
*phone rate depends on the network used
CY Cyprus, Kúnpoc
BSH Ikiakes Syskeves-Service
39, Arh. Makaariou III Str.
2407 Egomi/Nikosia (Lefkosia)
Tel.: 777 78 007
mailto:EGO-CYCustomerSer-
vice@bshg.com
CYN
Turkish Rep. Of North Cyprus
Argas Limited Company
37 Osman Paşa Cad. K. Çiltlik
Lefkoşa
Tel.:02284070
mailto:argas.teknik@yar-group.com
Turkish Rep. Of North Cyprus
Semson Ticaret Sti. Ltd.
Bedrettin Demirel Cad. no 17
Girne
Tel.:08160494
mailto:m.defterali@ercantangroup.com
Grand Union House, Old Wolverton Road,
Wolverton
Milton Keynes MK12 5PT
To arrange an engineer visit, to order spare
parts and accessories or for product advice
please visit www.bosch-home.co.uk Or call
*Calls are charged at the basic rate, please
check with your telephone service provider
for exact charges.
GR Greece, Ελλάς
BSH Ikiakes Siskeves A.B.E.
Central Branch Service
17 km E.O. Athinon-Lamias & Potamou 20
14564 Kifisia
IE Republic of Ireland
BSH Home Appliances Ltd.
M50 Business Park, Ballymount Road Upper, Walkinstown
Dublin 12
To arrange an engineer visit, to order spare parts and accessories or for product advice please call Tel.: 01450 2655*
www.bosch-home.ie
*Calls are charged at the basic rate, please check with your telephone service provider for exact charges
IS Iceland Smith & Norland hf. Noatuni 4 105 Reykjavik Tel.: 0520 3000 www.sminor.is
IT Italia, Italy BSH Elettrodomestici S.p.A. Via. M. Nizzoli 1 20147 Milano (MI) Tel. 02 412 678 100 mailto:info.it@bosch-home.com www.bosch-home.com/it
LU Luxembourg BSH électroménagers S.A. 13-15, ZI Breedeweues 1259 Senningerberg Tel.: 26349 811 Reparaturen: lux-repair@bshg.com Ersatzteile: lux-spare@bshg.com www.bosch-home.com/lu
MT Malta Oxford House Ltd. Notabile Road Mriehel BKR 14 Tel.: 021 442 334 www.oxfordhouse.com.mt
NL Nederland, Netherlands BSH Huishoudapparaten B.V. Taurusavenue 36 2132 LS Hoofddorp Storingsmelding/Onderdelenverkoop: Tel.: 088 424 4010 mailto:bosch-contactcenter@bshg.com mailto:bosch-onderdelen@bshg.com www.bosch-home.nl
NO Norge, Norway BSH Husholdningsapparater A/S Grensesvingen 9 0661 Oslo Tel.: 22 66 05 54 mailto:Bosch-Service-NO@bshg.com www.bosch-home.no
NZ New Zealand
BSH Home Appliances Ltd.
Level 3, Air NZ Building, Smales Farm
Business Park, 74 Taharoto Road, Taka-puna
Auckland 0622
Tel.: 0800 245 700*
mailto:aftersales.nz@bshg.com
www.bosch-home.co.nz
*Mon-Fri 8.30am to 5pm (exclude public holidays)
Thank you for buying a Bosch Home Appliance!
Register your new device on MyBosch now and profit directly from:
- Expert tips & tricks for your appliance
- Warranty extension options
• Discounts for accessories & spare-parts
• Digital manual and all appliance data at hand - Easy access to Bosch Home Appliances Service
Free and easy registration – also on mobile phones:
www.bosch-home.com/welcome
BOSCH HOME APPLIANCES SERVICE
Looking for help? You'll find it here.
Expert advice for your Bosch home appliances, help with problems or a repair from Bosch experts.
Find out everything about the many ways Bosch can support you:
www.bosch-home.com/service
Contact data of all countries are listed in the attached service directory.


