CM TDC DR0 - Electric coffee maker ARISTON - Free user manual and instructions
Find the device manual for free CM TDC DR0 ARISTON in PDF.
| Product type | Electric coffee maker with carafe |
| Brand | ARISTON |
| Model | CM TDC DR0 |
| Carafe capacity | 1.25 L (about 10 cups) |
| Power | 1000 W |
| Supply voltage | 220-240 V ~ 50/60 Hz |
| Dimensions (L x W x H) | 25 x 20 x 35 cm (estimate) |
| Net weight | 1.5 kg (estimate) |
| Main materials | ABS plastic, glass (carafe), stainless steel (hot plate) |
| Filter type | Removable filter for paper filter (not included) |
| Main functions | Automatic brewing, keep warm (40 min), automatic shut-off, anti-drip system |
| Water level indicator | Water gauge with MIN and MAX markings |
| Control | Switch with indicator light |
| Cleaning and maintenance | Removable parts washable with soapy water; periodic descaling with white vinegar |
| Safety | Automatic shut-off after 40 min, overheat protection, short power cord |
| Included accessories | Glass carafe with lid, funnel with holder, permanent filter (only for first use?) |
| Intended use | Domestic and similar (offices, hotels, etc.) |
| Color | White / Black (depending on variant) |
| Warranty | 2 years (standard) |
Frequently Asked Questions - CM TDC DR0 ARISTON
To brew coffee: open the top lid, pour cold water into the tank (do not exceed MAX). Place a paper filter in the funnel and add coffee grounds (about 1 level spoon per cup). Close the funnel, place the carafe on the hot plate, plug in, and press the switch. The indicator light turns on and brewing starts.
User questions about CM TDC DR0 ARISTON
0 question about this device. Answer the ones you know or ask your own.
Ask a new question about this device
Download the instructions for your Electric coffee maker in PDF format for free! Find your manual CM TDC DR0 - ARISTON and take your electronic device back in hand. On this page are published all the documents necessary for the use of your device. CM TDC DR0 by ARISTON.
USER MANUAL CM TDC DR0 ARISTON
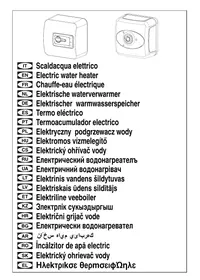
EN Operating instructions
FR Mode d'emploi
RU Hhctpykunno 3Kcnpnyataun
TR Kullanma talimatlari
USO DELLA MACCHINA DA CAFFE
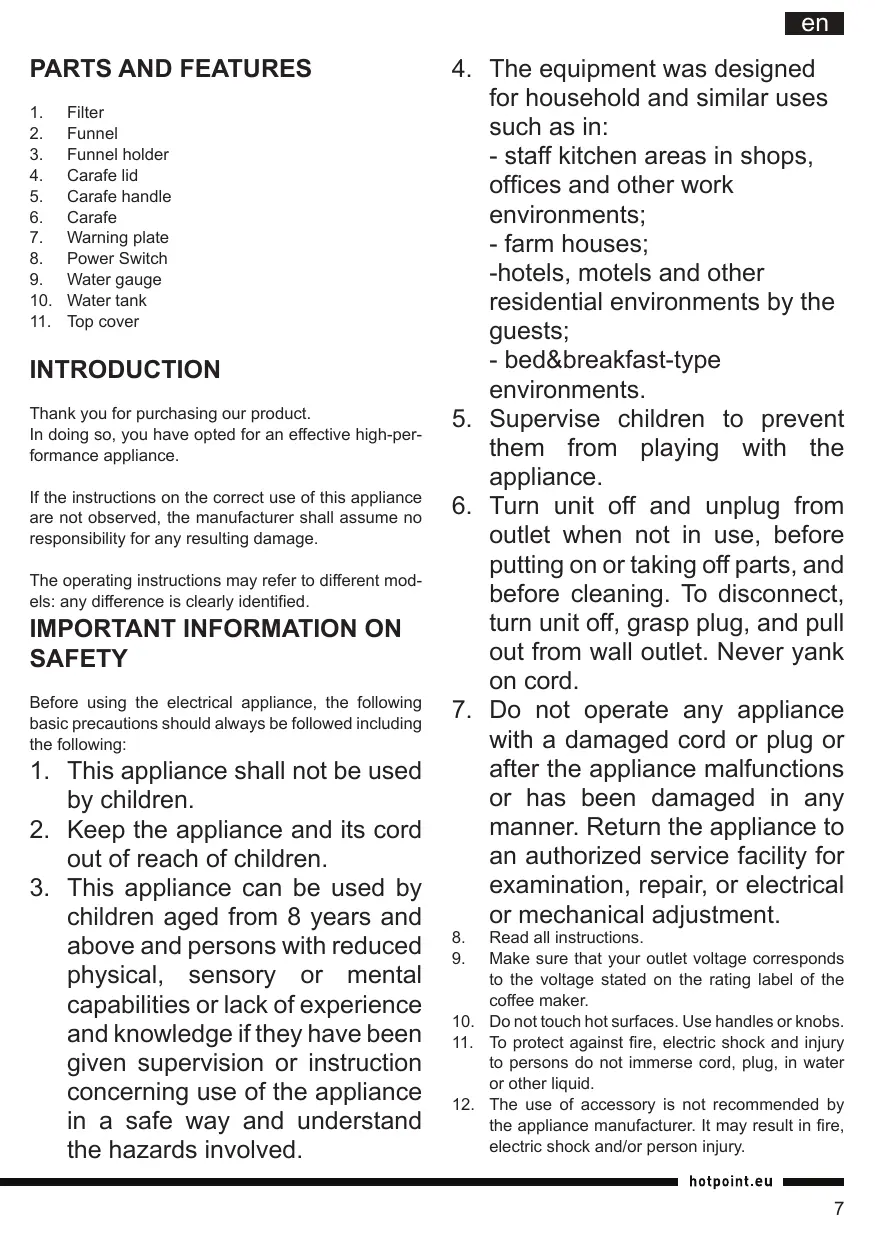
- Filter
- Funnel
- Funnel holder
- Carafe lid
- Carafe handle
- Carafe
- Warning plate
- Power Switch
- Water gauge
- Water tank
- Top cover
INTRODUCTION
Thank you for purchasing our product. In doing so, you have opted for an effective high-performance appliance.
If the instructions on the correct use of this appliance are not observed, the manufacturer shall assume no responsibility for any resulting damage.
The operating instructions may refer to different models: any difference is clearly identified.
IMPORTANT INFORMATION ON SAFETY
Before using the electrical appliance, the following basic precautions should always be followed including the following:
- This appliance shall not be used by children.
- Keep the appliance and its cord out of reach of children.
-
This appliance can be used by children aged from 8 years and above and persons with reduced physical, sensory or mental capabilities or lack of experience and knowledge if they have been given supervision or instruction concerning use of the appliance in a safe way and understand the hazards involved.
-
The equipment was designed for household and similar uses such as in:
-
staff kitchen areas in shops, offices and other work environments;
-farm houses;
-hotels, motels and other residential environments by the guests; -
bed&breakfast-type environments.
-
Supervise children to prevent them from playing with the appliance.
- Turn unit off and unplug from outlet when not in use, before putting on or taking off parts, and before cleaning. To disconnect, turn unit off, grasp plug, and pull out from wall outlet. Never yank on cord.
- Do not operate any appliance with a damaged cord or plug or after the appliance malfunctions or has been damaged in any manner. Return the appliance to an authorized service facility for examination, repair, or electrical or mechanical adjustment.
- Read all instructions.
- Make sure that your outlet voltage corresponds to the voltage stated on the rating label of the coffee maker.
- Do not touch hot surfaces. Use handles or knobs.
- To protect against fire, electric shock and injury to persons do not immerse cord, plug, in water or other liquid.
- The use of accessory is not recommended by the appliance manufacturer. It may result in fire, electric shock and/or person injury.
en
- The container is designed for use with this appliance. It cannot be used on a range top.
- Do not clean container with cleansers, steel wool pads, or other abrasive materials.
- Do not hang power cord over the edge of table or counter, or touch hot surface.
- Do not place the coffee maker on hot surface or beside fire in order to avoid to be damaged.
- To disconnect, remove plug from wall outlet. Always hold the plug. But never pull the cord.
- Do not use appliance for other than intended use and place it in a dry environment.
- Be careful not to get burned by the steam.
-
- Do not let the coffee maker operate without water.
- Never use the appliance if the carafe shows any signs of cracks. Only use the carafe with this appliance. Use carefully as the carafe is very fragile.
- Do not set a hot container on a wet or cold surface.
- Do not use a cracked container or a container having a loose or weakened handle.
- Scalding may occur if the cover is removed during the brewing cycles.
- Some parts of appliance are hot when operated, so do not touch with hand. Use handles or knobs only.
- Never leave the empty carafe on the warming plate otherwise the carafe is liable to crack.
- Do not set a hot container on a hot or cold surface.
- Do not use outdoors.
- Save these instructions.
BEFORE THE FIRST USE
Check that all accessories are complete and the unit is not damaged. Add clean water up to maximum level to brew several times without coffee powder according to the steps below, and then discard the water. Wash the detachable parts thoroughly with warm water.
- Open the top lid and fill the water tank with cold drinking water. The water level should not exceed MAX level as indicated on water gauge.
- Put the funnel into funnel holder, then place the filter in the funnel, and make sure it is assembled correctly.
- Add coffee powder into filter. Usually a cup of
coffee needs a level spoon of coffee powder, but you may adjust according to personal taste. Close the funnel holder, a click sound will be heard when the funnel holder is closed completely.
- Insert the carafe on warming plate horizontally.
- Plug the power cord into the outlet.
- Pressing the switch down, the indicator will be illuminated. The appliance will begin working.
Note: during brewing process you may remove the carafe to serve for duration of not exceeding 30 seconds, and the coffee maker can stop dripping automatically. If the serve time exceeds 30 seconds the coffee will overflow the funnel.
7. Upon completion of brewing coffee, that is one minute later after the coffee stops dripping out, you can remove the carafe, pour and serve.
Note: the brewed coffee you get will be slightly less than the water you have added as some water is absorbed by coffee powder. DO NOT touch cover, warming plate and so on when operating as they are very hot.
- When the process is finished, if you do not want to serve immediately, keep the switch on, the coffee can be kept warm in the warming plate for 40 minutes and the appliance will be cut off automatically after 40 minutes. For an optimum coffee taste, serve it just after brewing.
- Always turn the coffee maker off and disconnect the power supply after use.
Note: Be careful when pouring the coffee out, otherwise you would be hurt as the temperature of coffee just finished is high
CLEANING AND MAINTENANCE
CAUTION: Always unplug the product from electrical outlet and allow the warming plate to cool completely before cleaning it. Never immerse the unit or power cord into water or any other liquid for cleaning
- Clean all detachable parts after each use in hot, sudsy water.
- Wipe the product's exterior surface with a soft, damp cloth to remove stains.
- Water droplets may buildup in the area above the funnel and drip onto the product base during brewing. To control the dripping, wipe off the
area with a clean, dry cloth after each use of the product.
- Use a damp cloth to gently wipe the warming plate. Never use abrasive cleaner to clean it.
- Replace all parts and keep for next use.
REMOVING MINERAL DEPOSITS
To keep your coffee maker operating efficiently, periodically you should clean away the mineral deposits left by the water according to the water quality in your area and the use frequency. We recommend decalcifying your coffee maker as follows, using a solution of white vinegar and cold water. A solution of two tablespoons (30ml) white vinegar in one carafe of cold water works best.
- Fill the tank with the vinegar solution to the maximum level as indicated on water gauge.
- Insert glass carafe onto the warming plate.
- Make ensure filter (without coffee powder) and funnel are assembled in place.
- Switch on the appliance and allow it to "brew" de-scaling solution.
- After "brew" one-cup solution, switch off the appliance.
- Leave the solution stay for 15 minutes and repeat step 3-5.
- Switch on the appliance and run off the solution until the water tank is completely empty.
- Rinse by operating the appliance with water at least 3 times.
HINTS FOR GREAT-TASTING COFFEE
Note: a clean coffee maker is essential for making great-tasting coffee. Regularly clean the coffee maker as specified in the "CARE AND CLEANING" section. Always use fresh, cold water in the coffee maker.
Note: store unused coffee powder in a cool, dry place. After opening a package of coffee powder, reseal it tightly and store it in a refrigerator to maintain its freshness.
Note: for an optimum coffee taste, buy whole coffee beans and finely grind them just before brewing.
Note: do not reuse coffee powder since this will greatly reduce the coffee' flavor. Reheating coffe is not recommended as coffee is at its peak flavor immediately after brewing.
Note: clean the coffee maker when over-extraction causes oiliness. Small oil droplets on the surface of brewed, black coffee are due to the extraction of oil from the coffee powder.
Note: oiliness may occur more frequently if heavily roasted coffees are used.
DISPOSAL OF OLD ELECTRICAL APPLIANCES
The European Directive 2012/19/EU on Waste Elec

trical and Electronic Equipment (WEEE), requires that old household electrical appliances must not be disposed of in the normal unsorted municipal waste stream.
Old appliances must be collected separately in order to optimise the recovery and recycling of the materials they contain and reduce the impact on hu
CE man health and the environment. The crossed out "wheeled bin" symbol on the product reminds you of your obligation, that when you dispose of the appliance it must be separately collected. Consumers should contact their local authority or retailer for information concerning the correct disposal of their old appliance.
PIÉCES ET CARACTERISTIQUES
I NOHIMaHnTaKNX IINCUyIeCTByIOUSeI ONaCHOCTN.
4.Данhoe obopydOBaHne pa3pa6oTaHOДЯ NCIOJIb3OBAHnB B DOMaShnX n aHaJIoRnHybIX ycIobnAx, BKJIouyaj: -NCIOJIb3OBAHnE NOBapCKIM NepcoHaJOM B MaRa3nHaX, OΦncax n dpyrnx pa6oChx cpeJax; -NCIOJIb3OBAHnE rOCTaMn B OTeJAX, MOTeJAX, a TaKKe B dpyrnx CpeJax, rJe pPoJNaBJT JIOJN; -B 3aBeDeHnX TIna《HoUJER IN 3aBTPaK》.
5. OcyuieCTBnIte Ha3Op 3a DeTbMn, YTO6bl OHn He IrgpAln C npu6opom.
6. BbIKIIOUaIte npnbOp n OTKJIIOUaIte erO n3 po3eTKn, KOrda OH He NcNOJb3yETcR, NepeI yCTaHOBKOH nJH ChrTHeM DeTaJIeN, a TaKKe nepeD OCyUeCTBJIeHNEM OChCTKn. IJa BBIKIIOUeHnI pNTAHnB BbIKIIOUHTe YCTPOJCTBO n 3BJIeKInTe BNJIky n3 po3eTKn. HnkOrda He DeprAaTe 3a npOBoD.
7.He 3Kcnpnyatnpyute npnbopbc NOBpejdeHHbIM Hhypom NITAHNn IJN nTEnCEJIem IINo IOncIe BO3HKnHOBeHnE HeNCpabHocTe, a TaKKe B Cnyuae erO NobpejdeHnIIO6bIM cNoCobOM. BepHnte npbOp B aBTOpn3OBaHHbI CepBnCHbI cHTp dJa OCMOTpa, peMOHTa JInoO OcyueeCTBJeHnHaCTPoiKn 3JeKTPnueCKo INJIM MexaHnuecko Yactn.
8. Ⅰ3yUHTe BCE INHCTpyKUIN.
9. Y6eBntTeCb, YTO HApJKeHHe NAcTeHHo P03EtKn COOTBcTbYeT HApJKeHIO, UkaaHHOMy Ha 3aBoDcKo TAbNHyKe KoFeBaPkn.
10. He kacaiTecb ropaHx nobepxHocTe. IcnoJIb3yIte pyKoTKn nn pyKn.
11.ДЯЗашты OT BO3ropaHЯ,поржehну 3JeKTPMecKIM TOKOM ИИN ПОЛчЕHЯ TpaBM He norgykaite WHyp NITaHЯи ITeNcJIb B BODY INI INDpyRNe JxNkOCTN.
12.Испльзоване ДОПЛНITEьныIX
Pnncno6bneHn He peKOMeHdyeTcR
PpOIN3BOOnTeJIem Pnp6opa. 3To MoKeT
PpNBeCTn K NOxApay, npoJaxHeHIO nEKeTpnuCeckM
TOKOM WnJIn NOnyUeHIO TpAMB.
- PēseρByap pāzρābōtān dīn y nCnɒlθ3ɔBàHnɪc d aŋhɒn KoʃeBæpKɔː O H He MɔkεT nCɒŋb3ɔBɑTbʒc ḋ Ḃ BepxHé NɒBepxHOctn.
- He npoN3BODIHTe OHNCtky pe3epByapa c nMOOuIO UCHTAYUcpeCTVB,MetaJIINHeCKNX r60K INI DpyTNX ABpA3INBbIX MaTePNIAJOB.
- He donyckaIte nepeBeWeuBaHna ShHypa Chepe3 KpaI CTOnA, CToIKN IJI NTOpRAeYe NOBepxHOCTN.
- He pa3meaIte KoFbeapky Ha ropyeh IOBepxHocTn NII BbIaN3I PJIaMeHN BO n36exahne ee nobpejdeHn.
17.ДпьВыключении nHTAHnI n3BnKeHITe wTeNCelbHyIO BILNу n3 po3eTkn. Bcerda 6epNTecb 3a wTeNCelb. He TAnHTe 3a shyp. - He nCloIb3yIte npIbOp dIpyrnx ceJeI xpaHITe erO B cyXoI cpeIe.
- CobIIOdaIte ocToPoxHocTb, yTo6bl He obKeYbcn napOM.
-
- He donyckaai Te, YTObI KoPeBapKa paBoTaIIa 6e3 BObl.
- HnKoIgHa He 3KnPlyaTnpyIte KoPeBaPky npHnNHN HA KO6e JIO6bIX np3NaKOB TpeuIN.HcNoB3ayTe KO6y ToJbKO C DaHHbIM np6OpOM.CobNJaTe OTOpOxHocTb,Tak KaK KOJI6a ABJrEcTc OueHxpyIKoI.
- He yctanabnbaite ropny pe3epbyap ha BnaKHyIO IIN XOIOHyIO NOBepxHOCTb.
- He nCnoIb3yIte TpeChyIbIe pe3epByap nn pe3epByap c pacuataaHNoI nn ocnaIaeHHoR yUkOi.
- EcINI BO Bpemr ZIKNOB 3aBaPbNAHnKoFe KpbIuKa bYdET CnTa, BO3MOXHO OUnnapBaHne.
- HeKOTOpbIe DeTaan KOpeBapKn BO BpEmraPab0TbI cTAHOBRTcR TOpAunMn, N03ToMy HeCneyet KacatbCn Ix pykamN. NcNoB3yTeTOJIbKO pkyoTkn nnpyuK.
- HnKOrDa He octabnJaIte Ha HarpeBaTeIbHOI nAneHn NcToI rpaΦnH, INaHe OH MoKeT TpeChyTb.
- He yctanabnbaite ropny pe3epByap ha ropuyu nn XOIOHy IOBepxHocTb.
- He nCnoJIb3yIe DaHnBiy npi6Op BHe NOMeJeuHry.
- XpaHnTe daHHyIO nHCTpyKUIO.
- Пп повөрөдөнүшура рintашигся ою заMuMuMuMuMuMuMuMuMuMuMuMuMuMuMuMuMuMuMuMuMuMuMuMuMuMuMuMuMuMuMuMuMuMuMuMuMuMuMuMuMuMuMuMuMuMuMuMuMuMuMuMuMuMuMuMuMuMuMuMuMuMuMuMuMuMuMuMuMuMuMuMuMuMuMuMuMuMuMuMuMuMuMuMuMuMuMuMuMuMuMuMuMuMuMuMuMuMuMuMuMoMoMoMoMoMoMoMoMoMoMoMoMoMoMoMoMoMoMoMoMoMoMoMoMoMoMoMoMoMoMoMoMoMoMoMoMoMoMoMoMoMoMoMoMoMoMoMoMoMoMoMoMoMoMoMoMoMoMoMoMoMoMoMoMoMoMoMoMoMoMoMoMoMoMoMoMoMoMoMoMoMoMoMoMoMoMoMoMoMoMoMoMoMoMoMoMoMoMoMo Mo Mo Mo Mo Mo Mo Mo Mo Mo Mo Mo Mo Mo Mo Mo Mo Mo Mo Mo Mo Mo Mo Mo Mo Mo Mo Mo Mo Mo Mo Mo Mo Mo Mo Mo Mo Mo Mo Mo Mo Mo Mo Mo Mo Mo Mo Mo Mo Mo Mo Mo Mo Mo Mo Mo Mo Mo Mo Mo Mo Mo Mo Mo Mo Mo Mo Mo Mo Mo Mo Mo Mo Mo Mo Mo Mo Mo Mo Mo Mo Mo Mo Mo Mo Mo Mo Mo Mo Mo Mo Mo Mo Mo Mo Mo Mo Mo Mo Mo Mo Mm Mm Mm Mm Mm Mm Mm Mm Mm Mm Mm Mm Mm Mm Mm Mm Mm Mm Mm Mm Mm Mm Mm Mm Mm Mm Mm Mm Mm Mm Mm Mm Mm Mm Mm Mm Mm Mm Mm Mm Mm Mm Mm Mm Mm Mm Mm Mm Mm Mm M m M m M m M m M m M m M m M m M m M m M m M m M m M m M m M m M m M m M m M m M m M m M m M m M m M m M m M m M m M m M m M m M m M m M m M m M m M m M m M m M m M m M m M m M m M m M m M m M m M m Mm M m M m M m M m M m M m M m M m M m M m M m M m M m M m M m M m M m M m M m M m M m M m M m M m M m M m M m M m M m M m M m M m M m M m M m M m M m M m M m M m M m M m M m M m M m M m M m M m MmMmMmMmMmMmMmMmMmMmMmMmMmMmMmMmMmMmMmMmMmMmMmMmMmMmMmMmMmMmMmMmMmMmMmMmMmMmMmMmMmMmMmMmMmMmMmMmMmMmMm
ПРавиILA XPAHEHЯ TPAHCПOPTИPOВКИ
Ipeed xpaHEniem OTKJIOChTE npbOp OT 3neKTPnueckO CETn UyEbnTeB, YTO yCTpOInCTBO nonHOCTbO OCTbIO. BbIOINHe BCE TpeOBaHnra pa3dena «OChtKa uYxOJa).XpaHIne npbOp (nyUhe B opRnHaJIbHOY naKOBKe) B cyXOM npoxnAdHom n HeoCTynHM dIaeTMe MeCe. Pn Heo6XOnmocTn TpaHCnOpTnpuYe pnbOp N mEmoueCer oprHnHaJIbHOY naKOBKe.
ПЕPED ПЕВьIM ИСПОЛБ3OBAHИЕМ
Y6eHNTecb HaHnUHmBCExAkeCCcyapOB NOTcTBnIOBpeKdEHH npIbopa.3aJeIte YnCTyO BDO MAKCHMaJIbHOrO YPOBnD JIra 3aBaPbAHnHECKoJIbKOpa3 BeKoPeHOrO nopoJka B COOTBeTcBnC HIXKePNbEeHHbIMN YkazAHnMn I 3aTeM CneIte 3Ty BQy. TuaTeJIbHO IpomOnTe cBeMHbIe DeTANI TENNo BDOJ.
3KcPJIyATAUJ KOFEBAPKN
- OtkpoTe BepxHIOU KpbIuKy I 3aJeTe B EMMOCTb IJIA BObl XOJOnHyIO NITbEByO BOyD. YpOBeHb BObl He IOnJKeH PpeBbIuA b OTMeTky MAX B COOTBeTcBnC yka3aTeNem ypOBHra BObl.
- YctaHOBInTe BOPOHky B DepeKAtenb BOPOHKn, 3aTEM YCTaHOBInTe B BOPOHky FInbTp nY6eIInTeCb, yTO c6Opka npOn3BeDeHa npabNtNbHO.
- ΜόδaBbTe B φπηlbTp KoΦeHbI nopoʊkO. OśbUHO dλŋ pπrIoTobNēHnσ Ondθ OuaShKoΦe Tpe6yEtCσ Onda MepHa NóKKa KoΦeHoro NopoùKa, HOb BbI MoXgete IcNoJIb3ObAβt Tpe6yEmoe KOLNuYeCTBO KoΦe B COOTBeTCTBnC CBoOMMByBCOcbIMn IpεdNoUeTHeYMa. 3akPoiTe ĀrpKαTeNb BOPoHKn, KOrDa ĀrpKαTeNb ŷyEd TpoJIHoCTbO 3akpIt, ŷyEd CTbIeH 3bYK Μeɪŋka.
- YctaHOBnTe KOJIbOHa Ha HarpeBaTeJbHyO NaHeJIb B TOpN3OHTaJIbHOM NIOJOKeHIM.
- PoiKIIouHTe UHyp nHTaHnB pO3eTky.
- Пин Нжати NBiknluoyateJIЯ 3aTOpNTc CBeTOBOn INdNkaTOp.ПибОр 6byTe rOToB K pa6ote.
PnmuMeaHHe:BOBpeMa3abapuBaHnMoXHo CHaTbKoIbDnIPOaHnKoPeHe6OJIe,YeM Ha 30 cekyHd,N BbITEKaHHe KoPe MoKet 6bITb NpEkpAaTeHO abTomAtueckn.EcIn BpemaNoaN npEblt 30 cekyHd,KoPe BbIteUET3a npedeBb BOPOHN.
- Nocne 3aBepuHnna 3abapuBaHnna KoPe, To ecTb Chepe3 OndHy MNHyTu NocNe IpekpaUHeHnna BbIteKaHnna KoPe, MOxHO CHrTb KOn6y, Pa3JIITb ee CoOpexKmOe nIODaBaTb KoPe.
IpnmeuHne: KOJIueCTBO 3aBapeHHORO KoFe HeCKoNbKO MeHbIe, YcEM KOJIueCTBO 3aJIiBaEmoB BObl, TAK KcK NocJeHnA BnITbIBaETc KOfeyHbIM NopoUkOM. HE KacaTecb KpbIuK, HarpeBaTeIbHO NaHeIN I dpyuX DeTaneB O BpEma Pa60TbI, TAK KaK OH CTaHOBraTc RoprYIMN.
- Пос两款завершени поочecca 3abapubahnna, ecnno nodaа He ocyusectbneTc npa3y, BblkIouaTeNb DoJKeH bbyT octabnEh BKLIuOeHHbM, KoFe bdyet OCTabatcBc Tepnblm B TeueHnE 40 mHyT, n KoFeBapka aBTOMaTHueckn OTKnHouNTcpe3 40 mHyT.Дяп поуechnia ONTNMaJIbHOrO BkyCa KoFe noDAuy cNeDuYET OCyusectbNtBc pacyt NOcne 3abapubAHn.
- После 3авершени 3аварпань Bcerda Выклюанte Кофеварку И OTKлюанte shHyp
NITaHn.

Приимechанec:Собладаite octopokhoctb
PnBbJIINBaHIn KOpe, TaK KaK BO3MOXHO
OCTOPOXHO: nepeod ouncTkO Bcerda
OTKIIIOUaIe NTdJIeN e N3 PO3ETKN dAITe HArpeBaTeNBHOI NaHEIN NOHOCtB0 OXnADTcBc. HkOrJa He nOpyxKaIe DnJ OOnCTK KoFEBAPKy IIN NHyp NITaHnB B Body IIN JIO6bYIO DpyrHyO XnIKoCTb.
- ПониЗБОДпЕ OЧИСТКУ CBЕМьХ ДЕТАЛЕ NOССЕ КAZДОН ИСПОЛБЗВАнЯ B TROPЧЕ, МБЛБНОВ BOДЕ.
2.ДЯ удаленя пяten npotupaTe BHeuHIO NOBepxHOCTb MFRKOBnAaKHO TKAHbIO - KaJIIN BOJBI MORYT cKaJIINBaTbCS B ObIaCTN HAD BOPOHKO I BbITEKaTb Ha OCHOBAHne KOΦeBApKN B BO BPeM 3aBapIMBaHn. YTo6bl KOHTPOINPOBaTB Oba3OBAHnene KAnEnb, IpoTnpaTe COOTBeTCTByIOUyO ObIaCTb YInCToI CyXOJ TKaHbIO NocLe KaJDoI IOcNoIb3OBAHnI KOΦeBApKn.
- YTo6bI cnerka npotepeb HarpeBaTeBHyOnaHEnb, hNcOJIb3yIte BnAkhHYo TKAh. HNKOrJa He NcOJIb3yIte DJIe ee OUYCTKn abpa3nBHe IcMCTaUHcE CpeDCTBa.
- Chmnte Bce DeTann XpaHnTe nx dIeDyUoJero NcNoB3OBAHnI.
YUDAJEHNE MNHEPAJIbHbIX OTJIOXEHNI
Дя obecneueHnna 3ФФeKTHBHO npoToI KoFebapkn Heo6xOdImo NepnoDnueckn IPOu3BOIDnTb ydaJeHne MNHepaNbHbIX OTJLOXeHnN KOtOpbe OCTaOTc NOcNe BObl B 3aBNCIMOCNT O KaueCTBa BObl B KOHKpeTHOH MeCTHOCTn N aCtObI NCNoB3OBAHnN KoFebapKn MBy peKomeHdyem OcyueeCTBnTb ydaJeHne HaknPn KofeBapKn CneyuOnm O6pa3OM, NCNoB3yra pactBop n3 BeJoro YukCyca n XoJOnHOB BObl. Han6Oonee 3ФФeKTHBbIM Byedet pactBop n3 DByx CTOnOBbIX JIOXeK (30 m) BeJoro YKcCyca n OJOnHO KON6bl XOJOnHOB BObl.
- 3aOJIHInTepeeepByappacTbOpombeNoIyKcyca DoMaKcImaJIbHOYpOBHBrCOOTBETCTBnC YKAa3aTEJEMYDOBHBOBdI.
- YctaHOBNTe CTeKJIaHHyO KOJbY Ha HArpeBaTeIbHyIO nHaHeIb.
- YbEniTeCb, yTo fNlbTp (6e3 KoPeHOro NopoUka) IN BOPOHKa yCTaHOBHeHbHa MeCTO.
- BkIIOHnTe KoOpEBApKu N OcUeCTBnIeT "3aBaPbAHaHne" pactbopa dIy ydaJIeHnHaKINI.
- Посл "завариваня" одно чашки pactьра выклочи Кфеварку.
- OctabTe pactBop Ha 15 MInHyT IN NOBTopnTe 3-5.
- BкнioHTe KoefeBapky N BblJeIte pactBop,Дав Emy cTeYb Do TEX NOP,ПOKa EMKoCTb ДЯВОды
He 6ydt IOJIHOCTbIO NyCTOJ.
CEPBNUCHOE OBCJYKINBA
BecnlaTHa rOpuaJINHJ: 88003333887*
* (Ucnyra 6ecnlaTHa dIy a6oHENTOB BceX cTaunohapbIX IINH N HA BcEY TeppntOpnn Pocnn) Mbl 3abOTmC8 O CBOUX NOKyPATEJxN CTapaEMc8 o6eCneHTb BbICOKOE KauEcTBO cepBnCHOrO 06cnykBaHn. Mbl NoCToRnHO COBepJeHCTByem Hauin npOdyKtBI, YTObI CdEnaTb BaIe ObSeHne C texHKnO pIOcTBIM IN pIpyTHbIM.
YxOД 3a TeXnikoI
Линна npoфессонаньнix cpeicTB Professional no yxody 3a texнкои, pekomehdyemaj Hotpoint Ariston, npodnnt cpoK ekcnnyataunu Baweien texhknu CnH3NT BEPOATHOCTB ee nONOMKn. Jlnna npofocecsnoHaBbIX cpeCDTB Professional co3daHa c yuetom oc6obenhcTei Baweien texhknu. PnpOykbI npOn3BOJATCR B NtAnmC c6bIIOHeHMe BBICOKX eBPonecknx cTaNaptOB B o6laNt KaueCTBa, 3kOJOrn H 6e3oNaChocht NcNoJIb3OBAHn. Y3HaHTe noDpO6hee Ha caite www.hoight-ariston. ru b pa3dene «CepBnc» n cnpaunBaIte B mara3nhax Bawero ropoja.
Abtopn3oBaHHbIe cepBnChIbe ceHTpbl
Ytobb6bTb6bnke KHaunm NOTpe6nteJAM, Mblco3dJIu 1npoKyo CepBnchyO CeTb, Oc0beHocbIO KOtopoB YBnETCB BbICOKa NOIROTOBAk, npoeccnHOaJIIN3M N YeCTHOCTb CepBnCHbIX MaCTepOB.
PnB O3HKnHOBeHHN HEnCpBaHOctn
Ipeed Tem, kak obpatntbce B Cnykby CepBnca npOBepbte, HeNb3a JIn yCTpaHtB HeNCnpaBHocTb CAMOCToTeJIbHO.
ObpaTntbcraB Cnyk6y CepBnca MoxHNo nTo TelefoHy 6ecpnaTHoRTopyuei NHHN IIN No TelefoHam, yka3aHHbIM B rapaHTnHOM DOKymeHTe.
! Mbl pekomehnyem obaaTaBc TOnbK K abTOPn3OBaHHbIM cepBnCHbIM ueHTpam
!PnppeMOHTeTpe6yTeNCNoJIb3OBaHnOpunHaJIbHbIX 3anaChbIX qacteI
Ipeed o6paueHnem B Cnyx6y CepBnca Heo6xoJIMO y6eJntbCra, YTO Bbl roTobbl coo6uHTb onepaTopy:
- Onicahne HeucnpabHoctn;
Homep rapaHTnHoro DOKyMeHTa (cepBnCHoN KHHKKn, cepBnCHOrO cepTnΦnKaTa n T.n.);
MoIeIb I cepinHbI Homep (S/N) n3dJIIna, yka3aHHbIe B INΦopMaIauHOHcN Ta6nUKe, paCNoIooKeHHoHa n3dJIeINuIraHTnHOM DOKyMeHTe; - Daty npodaekn n3dennia.
MÜKEMMAL-LEZZETLIXAHVE IÇIN IPUÇLARI
TA3AJAY XΘHE TEXHJKLMK Kbl3MET KΘPCETY
HA3AP AYDAPbIHbI3: Ta3aJaiyadn 6ypbH apkaan eHIMDi po3eTkadaan axkbipatbIn, Kblity TaKTacbiH TOJIbIK cyblTbIHbI3. KpbIbHbI Hemece Kyat CbIMbi T3aJAY MAKCaTbHda cyra Hemece 6acka cybIKbIKKa caImHaB13.
- Θp naiJaIaHaHaHn KeiH 6apbIK aIbIH6aIbI 6eIWeKTePiH bICTbIK, caBbIHbI Cyda Ta3aJaHaBl3.
2.ДakTapdbI JxOJ yuH HcBtKbI bEtIH KymcaK,blfAn WybepeKeH cyptiH3. - KyfbltBihJXofapbIaMnfaBHaCyTaMunlbnapbIXHAnBIn,KaHATyBaPbcBHaDAEHHIMHiTynKiXaFbHaTycyiMmKIn.TamBnlayb6akblayAyWHINehIMDi naDanahydAn KeHHaTaNbW aImakTbTa3a,KpyrakUyBepeKeNehCypriH3.
- XbInbTy TaKTabIH aKbIPbIH cyPTy yuH bInfan uSybepekti naDanaHaBnBt3. Tasaay yuH eKsaWan 6ydbip Ta3aNaftbIHTb1 naDanaHaBnBt3.
5.БapnIbK 6eIeKTePIn KaIa opHaTbIn,KeNeciPe naIdaIaHny yIiH caKaTaHbI3.
M IN H E P A J I A P I bI K A I D bI K T A P I bI X O I O
KoPe KaHaTkBbIbHb3Db naHaIaHyf XapamDbI caTay ysiH aMafbIb3daFbCy cAnacbHa XHe naIaIaNy XnIiirHe 6aIIaNbICTb CydAn KeIH KaIraH MnepaDbI KaIbIKTapdb MeP3IMd TYpDe Ta3anAN oTbpyHb3. Ak cipKe cyMeH caKNbH cy epitHicIN naIaIaNbIn, KoPeKaHaTkbHb3DbI deKaIbUHaunaydb YcbHbMb3. Bip rpaFHcKn bCy fekiKaCbIK (30m) ak cipKe cyI KocblfahepitHdi JeTKiikTi.
- bIbIcTb cipke cyI epiTiHicimEn cy eNwiTe KepcetinreH MaKcImaJdbI DeHReIe DeiH TOJTbIPbIHb3.
- ⅢbIHbI rpaΦnHdi KblbITy TaKtacbHa eHri3iH3.
- Cy3ri (KoPe yHTaFbIHcbl3) MeH KMyFbIu opHbHa opHaTbJIFaHdbIbIFbIH TEKcepH3.
- AcnantbI Kocbl, KaTapbl Xoarbl H epitHdiHi KaHaTbHb3.
- Бір Шьнагк epitihdi KaHafahnHaKeiHa acnanbI eWipiH3.
- EpiTInDiH 15 MNHyTKa KOybln, 3-5 KaJaMdapbH KaI TaHaHbI3.
- Cy bIbIcI bONbIK 6ocaraHwa acnantbI Kocbl, epitihdihi 6tiipih3.
- AcnantbI cy KyIbI, 3 pet KaHaTy apKbIbI shaBih3.
TAMALJAДOMRENEKOFE YUH KEGCTEP
Eckeptne: Ta3a KofoekaiHaTkbi TaMawa dAmdi Kofoe Xacay YsiH ete MaHbi3bl. KofoekaiHaTkbiHb"KYTIM JXACAY XHE TA3AJAY" 6bnimHe KpcetijireHde 03 yaBtBuHaTa3an OTbIpbHb3. KofoekaiHaTkbi YsiH epKaahn Ta3a, caKbIH cydbi naJaandaHbHb3.
Eckeptne: naJdaIaNbIJMaFAH KoPe yHTaBfIH caJIbIH, Kpyrak Jepde caKTahbI3. KoPe yHTaBfIHbIH KopabIH aWkaHH KeiIH OHBI 6eKem KaybIH, Ta3a CaTay YwIH ToHa3bITKbIiTa CaKTahbI3.
Eckeptne: OHTaJIbI KoPe DAmHe KOJI JeTki3y yuHIN 6yTIn KoPe dAnHepi CAtBn aJbIn, KaHaTy aJNbIHDa JkaKcbIan YHTaTKaTbI3.
EckepTne: KoPe YHTaFbIH KaI Ta NaIdanaHbI3, ceb6i 6yN KoPeHIn NiCIN aITapNbIKTa a3aITaNbI. KoPeHi KaITa KbI3bpy YCbHbIMaHaF, ceb6i KoPe KaHARHH KeIH fAHa eN KOFapbl dEmre ne 60NaIbI.
Eckeptne: KoFeKaaHaTkblHbI 6JIiHReH MaJnapdAn Ta3aJaHbI. KaHaTbInFaH, Kapa KoFeHH 6etIHderi MaJ TamblnApbl KoFe YHTaftbIHAm MaJdbH 6JIiHin 1bIByI ce6eBihen naJa 6oNaabl.
Eckepy: KaTbI KyiDipijreH KoFe naJaIaNbIJa, MaJIap XNi naJa 6oNbln OtblpaDbI.
KbI3MET KOPCETY
Bi3 e3 TtBtHybIbnapMbI3ra Kbl3Met KepcTeM3 JkHe cepBnCTIK Kbl3MeTTi XOFapB DeHReIe YcbHfY TaPbICaMbI3. Ci3re KpybIbFbIme OHai XHe KOJaNbI JxMybIC JkaCayFa yMmkiDik bepy UsiH e3 eHIMdepim3di Y3dkci3 JeTinDipin OTbipyTa TbpiCaMbI3.
KypbInfbfKaYtIm Kepcety
KypbInfbira Kytim Kepcetye aphanraH Hotpoint Ariston ycbHaTbH KypbInfbHbH Professional kci6n 6yImdapbHbH Xenici KypbInfbHbH KonJaHbc Mep3iIM Y3aPTabJx He OHbH cbHbN kany Kayin H aazTaBbl.
Professional Kcci6n 6yibImdapbIHbH Jxenici Kypblfblb3dbH epeKwEniKTePi Eckepe OtbIpbIn XacanFaH. Ohimdep Cana, kONOrna Xhe KOndaHy Kayinci3di RoBbHa UyponabIK Xofapbl CTaNdaptbKaTah caKtaI OtbIpbIN ITanraJa XacanFaH.ToBbK aknapaTbI www hotspot-ariston. ru Be6-caNtBbHn "Kb13MeT Kepcety" 6enimiHe KaPahb3 XHe KaNaHb3Dafty DkyKeHepDeh CypaHb3.
Yekinetti Kbi3Met Kepcety optaiktapbI
Θ3 T TyhhybInapbIMbI3fa JxakblHbpak bony yuhiin webepe MAmahdpbHbIH Kofapbi DeHreJeri Kacib DaBHdbfBi MEH aDinirime HepeKweneHetIN Kb3Met KepcTey Xeniinepi KaBInTactbIpdk.
Akay naIda 6oIraH kaIaIa
KbI3MeT Kepcety optanbIbHa xa6apnacap anDbHda, akaynbIKtB e3iH3 Ty3eTIn Kepyre TbipbcHb3 ("AkaynbIKTap kHe OnapdbTy3eTy Konapdb" TapaybH KapaHb3).
Kb3MeT KepcTeOpTaIbIbHa KeiINdiK KyKaTbHda KepcTeiReH TeleOoH HemipImeH xaBapnacyf60anaBl.
! Bi3 yekineTt Kbi3MeT KepeCtey optaIbIKTapbHa fHa xa6apnacydbI ycblHaMb13
!KeHeyxmbictapbIH icke acbipfAH Ke3de fhpmaIbIK 6eWekTepdi faha kondahybIH tana etiH3.
Kb3MeT KepeTy opraIbIbIHa xa6apnacap anIbIHda keNeci mAnimetTepri 6epyre daBH eKeHHi3di TeKcepin aIbIHbI3:
Akaynbik TpyiH cunatTay;
Kenilik KyaKaTbHbH Hemipi (KbI3MeT Kepcety KiTaIwacbl, KbI3MeT KepcTeY cepTnPhiNkAtbl T.C.c.);
KypbIfblHbIH aknapa TaktaiWacblHa Hemece KenildiK KykaTbHda KepeciinreH KypblfbHbH Moeni Jxhe cepraJIbIK Hemipi (S/N);
KypblfblHbH CaTblnFaH a-NyHi
Baca naДаы aknapat пен кагытары www.hotpointariston.ru Be6-caTbIbH «КызмТ Керсу» ТарынанКеpe anacbl3.
KOKbICKA TACTAY
3πeKtp KHe 3πeKtpoHnKaIbIK KypaIaIapIbIH KaIbIKTapbHa (WEEE) KaTbICTb 2012/19/EU Eypona 3aHamaCbHa cAekc y Kpyblfblapbl KaIbITb TOJIbK KaIaIbIK KaIbIK aHaIbIMbIH naJaIaHbIN XOyblIMaybl TmC.
Kopshaar opTa MeH xanbik DeHcayIbIbHa TneTih 3nHHbIH aANbIH ana OTbIPbIN, XapamCbI3 KpyblIbJInap KaITa naiDaIaNHy MeH MaINHa iWIIhderi MATEpnaIaIapDbIe EHeDey KByHbOHtAIaNbIDpy MakCaTBInDA 6eNEK XINAHyI KepeK.

Bapblk eHimdepeeri cblbnfah KOKbc Jxwiri eHim NeciH 6eJIeKTeIrrn KOKbc XINHayfa KaTbCTbl MIndTeIH ecke canaIbI. Xkapamcb3 yI
KpybIfblnapBHy Dpybc KcoHa KaTbIcTb KoCbIMsa AknapaT any yuiH eHim neepi Tnicti xaIbIKKa KbI3MeT KepCety optaIbIbHa Hemece onapBHy JekprinikTi ekindepine Xabapnaca anabl.
EuBip opama Matepkabla taramta Tmeyke peker.
| Куран: |
| Сayda atayы |
| Ендиршин, сaydaбentrici |
| Улги |
| Даьындааган |
| Ендирл reн ei |
| Ток щенидөрдүйн төмeeс кернүлүрөдүүхүүлүн HOMHалдү Mэнi |
| Куattандр |
| Зкөрт ртткын сандарты Турл төмeeс aiнымалы тokтын HOMHалдүхлilirii |
| Зкөрт төтэн кор看法ындү |
| Карастрынлдөрлүдүхүүлүн төмeeс сeнkeстik kayalnkitу typalb Kocmiiша aknapat tөмeeс сeнkeстik kayalnikiin Keuilpemeik kajket bonca, cert.rus@indesit.com озөртогдын пошta мөнжайын сүрayхлбунizide ro bonдү. |
| Осы курлднөрдирлгн күнihштэрх-кoтда керсөлүнөрсрелн tabуya bonдү (S/N XXXXXXXXX * XXXXXXXXX),янн: |
| Тамызвп Кайнатын Коже Кайнатыш |
| Hotpoint ARISTON |
| CM TDC EU |
| Indesit company |
| КХP-да жасалган |
| 220-240 B |
| 1000W |
| 50/60 Hz |
| I kopray сынбы |
| CE |
| - Сергийскемирeri 7-сан щьлдун сонты бilingоредi. - Сергийскемирeri 8- жени 9- сан.aiйын реттikемирin bilingорedi. - Сергийскемирeri 10- жени 11-сан.aiйын.aiйmen кылдун куши bilingорedi. |