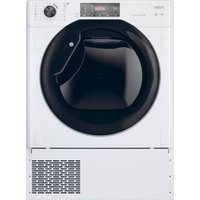
HD80-B636B - HD80-B829 - Tumble drier HAIER - Free user manual and instructions
Find the device manual for free HD80-B636B - HD80-B829 HAIER in PDF.
User questions about HD80-B636B - HD80-B829 HAIER
0 question about this device. Answer the ones you know or ask your own.
Ask a new question about this device
Download the instructions for your Tumble drier in PDF format for free! Find your manual HD80-B636B - HD80-B829 - HAIER and take your electronic device back in hand. On this page are published all the documents necessary for the use of your device. HD80-B636B - HD80-B829 by HAIER.
USER MANUAL HD80-B636B - HD80-B829 HAIER
Safety instructions 4
Unpacking 6
Installation 6
Front view 8
Rear view. 9
Control panel 10
Program modes 12
Preparing the dryer 13
Preparing the laundry 13
Loading the dryer 14
Care chart. 14
Load reference. 15
Set program & start 15
End of dry cycle. 16
Empty the water tank 16
Lint filter cleaning 17
Condenser filter cleaning 17
Heat pump technology 18
Consumption table 18
Cleaning & care 19
Error codes 19
Troubleshooting 20
Electric circuit diagram 21
Roduct fiche 22
Customer service 23
DEAR CUSTOMER
Thank you for your purchase of a Haier product. Please read the manual and safety instructions carefully and keep them for future reference and pass them on to any future owner.

Read the instructions.

Instructions showing this icon need special attention for safe handling.
INTENDED USE
This heat pump tumble dryer is designed for household use only. It should be used to dry items which have been washed in a water solution and are marked on the manufacturer's care label as being suitable for tumble drying.
It is not intended for commercial or outdoor use.
Haier cannot be held liable for damage resulting from incorrect or improper use or operation.
This tumble dryer conforms to current safety requirements.
- This appliance can be used by children aged from 8 years and above and persons with reduced physical, sensory or mental capabilities or lack of experience and knowledge if they have been given supervision or instruction concerning use of the appliance in a safe way and understand the hazards involved. Children shall not play with the appliance. Cleaning and user maintenance shall not be made by children without supervision.
- Children under 3 years of age must be kept away from the tumble dryer unless they are constantly supervised.
- The tumble dryer is not a toy! To prevent the risk of injury, do not allow children to play with it or near it, or to play with the controls.
- Before setting up the tumble dryer, check it for any externally visible damage.
- Do not install or use a damaged tumble dryer.
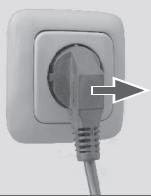
- Before connecting the tumble dryer, ensure that the connection data match the mains electricity supply. If in any doubt, consult a qualified electrician.
- The electrical safety of this tumble dryer can only be guaranteed when correctly earthed.
- Do not connect the tumble dryer to the mains electricity supply by an extension lead.
- If the supply cord is damaged, it must be replaced by the manufacturer, its service agent or similarly qualified person.
- Faulty components must be replaced by original spare parts.
- The tumble dryer must be isolated from the mains supply in the event of a fault and during cleaning and maintenance.
- Do not install the tumble dryer in a room where there is a risk of frost occurring. The ambient temperature should be between 5^ and 35^ .
- Do not install the tumble dryer behind a lockable door, a sliding door or a door with hinges on the opposite side of the tumble dryer door as this limits the full opening of the tumble dryer door.
- Always keep the area around the tumble dryer free of dust and lint. Also make sure that the area is dry and well ventilated.
- The tumble dryer must not be used in a non-stationary location (e.g. a ship).
- Do not make any alterations to the tumble dryer, unless authorised to do so by Haier.
- In areas which may be subject to infestation by cockroaches or other vermin, pay particular attention to keeping the tumble dryer and its surroundings in a clean condition at all times.
- Do not dry unwashed items in the tumble dryer.
- Do not load more than Nominal load.
- Items which contain residues of inflammable substances such as cooking oil, acetone, alcohol, benzine, petrol, kerosene, spot removers, turpentine, waxes, wax removers or other chemicals should not be dried in the tumble dryer.
-
If it is unavoidable to dry items that contain vegetable oil, cooking oil, hair care or cosmetical products, they should be washed using additional detergent and select a high temperature. If in doubt, wash the items several times.
-
Items which contain a large proportion of rubber, foam rubber (latex foam) or rubber like materials such as shower caps, waterproof textiles, rubberised articles and items of clothing and pillows with foam rubber filling should not be dried in the tumble dryer.
- Items which have been cleaned using chemicals such as professional drycleaning agents, should not be dried in the tumble dryer.
- Do not dry damaged items which contain padding or fillings (e.g. pillows, jackets), as the filling can get out with the risk of igniting in the dryer.
- Remove all items such as lighters and matches from pockets.
- The end of a dryer cycle runs without heat (cool down cycle) to ensure that the items do not get damaged and are at a handleable temperature.
- Warning: Do not switch the tumble dryer off before the drying cycle is finished. Afterwards, the laundry must be hung up or spread out to cool it down.
- Fabric softeners and similar products must be used as specified by the manufacturer's packaging.
- The dryer must not be used without the lint filters in place or with damaged filters.
The lint filters must be cleaned regularly. - Close the door once the laundry is removed to prevent children, animals and objects getting into the drum.
- Do not sit or lean on the door, as this can cause the tumble dryer to tilt.
- Condensed water is not drinking water. It can cause health problems in both people and animals.

Notice
This appliance contains the fluorinated greenhouse gas HFC-134a (GWP:1430). This gas is hermetically sealed.
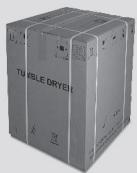
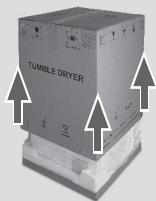
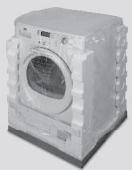
UNPACKING
Remove all packaging material including the polystyrene base. All packaging material should be recycled.
1 Cut the strips.
2 Lift the cover upwards.
3 Remove the protective parts.
4 Remove the base.
! Ensure that any plastic wrappings, bags, etc are kept out of the reach of babies and young children. Danger of suffocation.
1
2
3
4
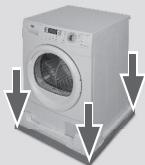
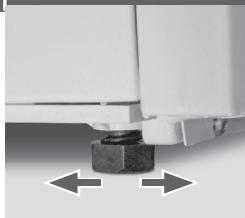
INSTALLATION
WARNING. Following transportation and installation, you MUST leave the dryer to stand for two hours before use.
1 Check the dryer does not rock or wobble. Adjust the four feet to level the dryer before operation.
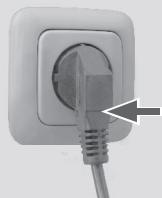
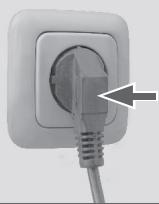
2 Make sure the socket meets the requirements and connect it to an earthed socket outlet.
1
2
- Do not install in a room which is susceptible to frost. Water may cause damage once it starts to freeze.
- Transport the dryer in a vertical upright position.
- There may be residual water in the dryer.
This can leak out if the dryer is at an angle.
TECHNICAL DATA
Power
220 - 240 V~ / 50 Hz
Nominal load (kg)
HD80-79A/HD90-79A
8/9
Max. power (W)
500
Fuse (A)
min. 10
Ambient temperature (^)
5-35
Dimensions (H x D x W mm)
845× 650× 595
Net weight (kg)
approx. 52
Water protection level
IPX4
Fluorinated greenhouse gas
HFC-134a
Volume
0.63 kg
GWP
1430
Tonne(s) of CO_2 equivalent
0.9
For further technical information, please check the type plate on the appliance.
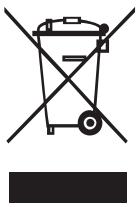
Do not dispose of electrical appliances as unsorted municipal waste, use separate collection facilities. Contact your local government for information regarding the collection systems available. If electrical appliances are disposed of in landfills or dumps, hazardous substances can leak into the groundwater and get into the food chain, damaging your health and well-being. When replacing old appliances with new ones, the retailer is legally obligated to take back your old appliance for disposals at least free of charge.
The heat exchanger of the dryer contains the greenhouse gas HFC-134a. This must be disposed of properly.
The pictures may differ from the appliance you have purchased due to technical improvements.
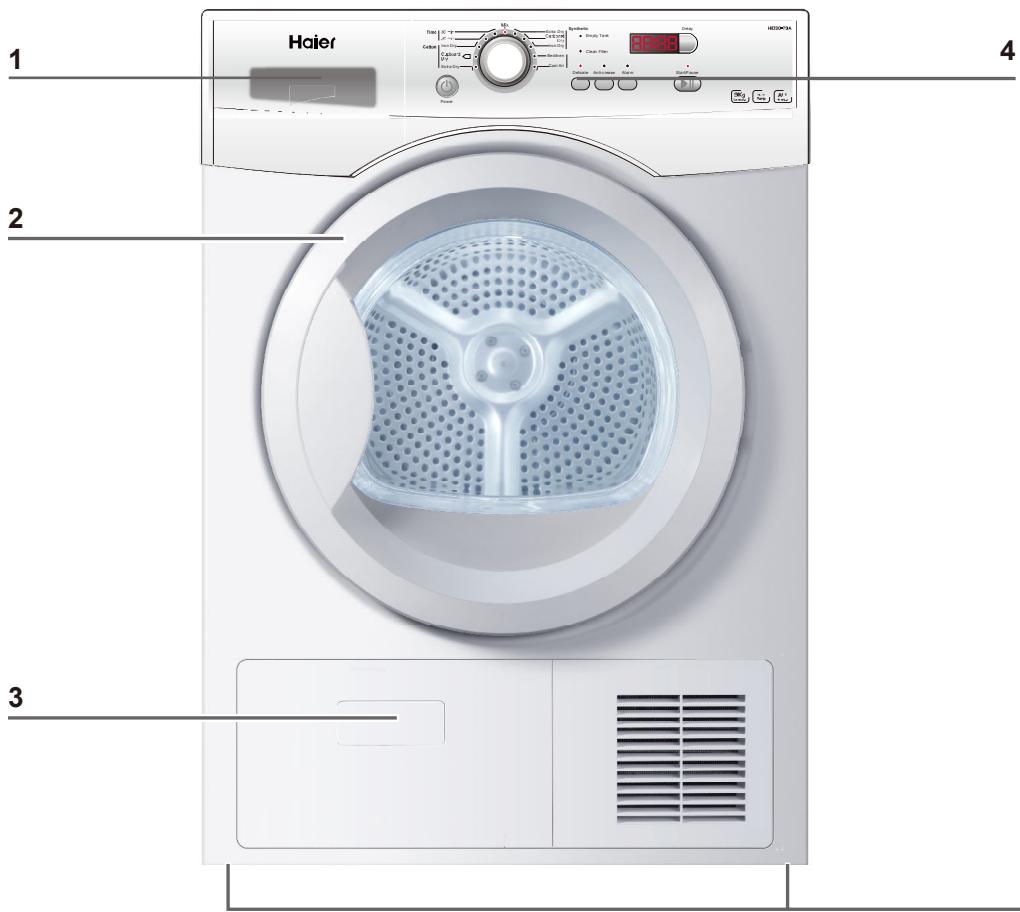
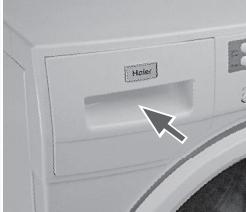
1 Water tank
3 Service door
2 Tumble dryer door
4 Control panel
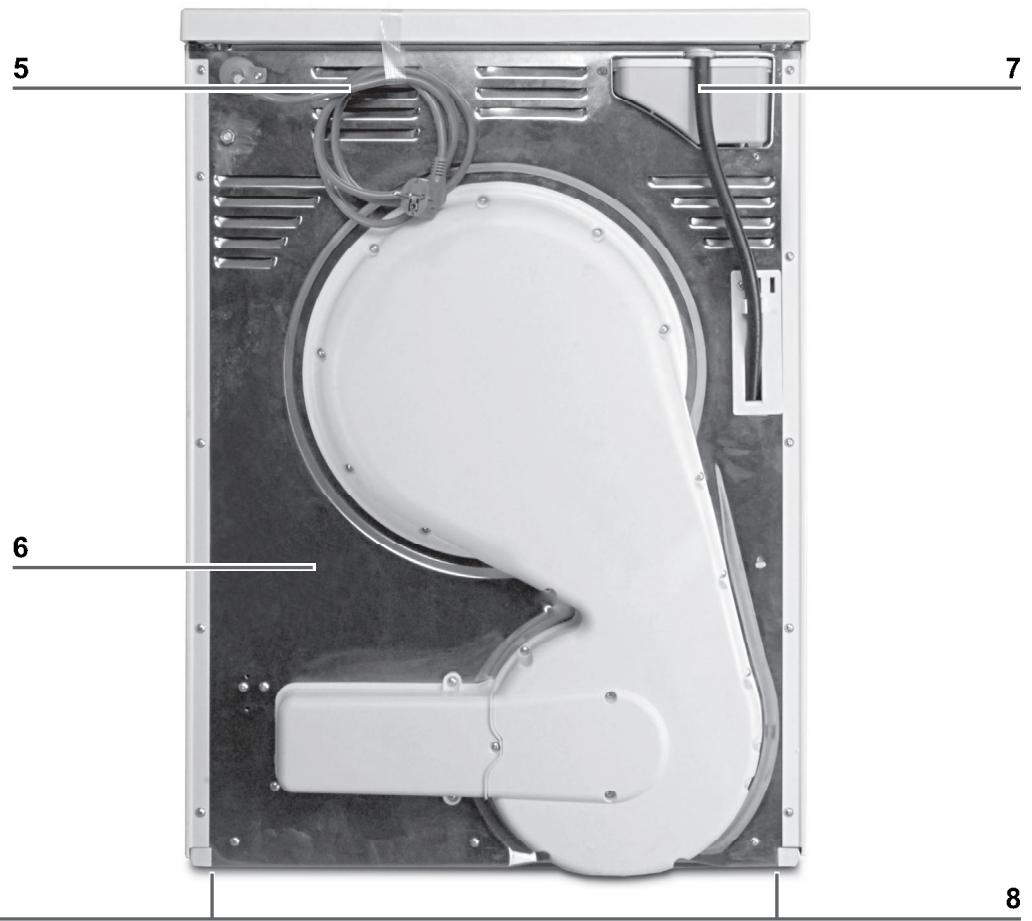
5 Power supply cord
6 Back plate
7 Drainage outlet
8 Adjustable feet
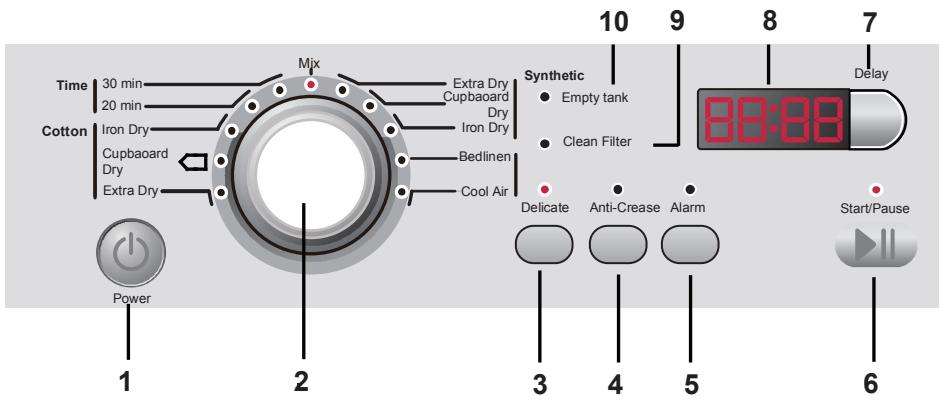
| 1 Power button | Press Power button to switch on/off the tumble dryer. |
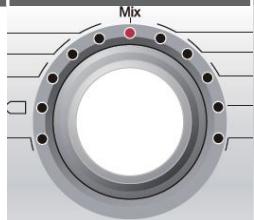
| 2 Program knob | Select one of the 11 programs using this knob. The indicator of the respective program lights up. See Program Modes section of the manual for further information. |
| 3 Delicate button | Use this function for delicate fabrics. It lowers the temperature and lengthens the drying cycle time to take better care of the laundry. |
| 4 Anti-Createase button | Use this function to lengthen the automatic anticreate phase at the end of each program by 60 minutes. Note: The laundry can be removed at any time during the anti-crease phase. |
| 5 Alarm button | When the drying cycle is finished,an interrupted acoustic signal will sound.Touch this button to cancel the buzzer sound. |
| 6 Start/Pause button | Press Start/Pause to Start a drying cycle. Press button again to pause the drying cycle – indicator light is flashing. Press button again to continue. |
| 7 Delay button | Press button for delayed start (in 1 hour intervals -up to 19 hours). The appliance should be finished in, afterwards press Start/Pause to start the delayed operation. |
| 8 Display | The display shows the remaining time, the delay time and other related information. Note: The remaining time is a default value, this time will be re-calculated depending on additional program settings and the moisture content of the laundry. |
| 9 Clean filter indicators | Filters must be cleaned regularly. See Lint Filter Cleaning or Condenser Filter Cleaning section of the manual. |
| 10 Empty tank indicator | Water tank must be emptied. Important: Empty the water tank after each drying cycle. See Empty the water tank section of the manual. |
| 3+4 Child-lock indicator | To activate the Child-lock function after a cycle has been started, press the Delicate & Anti-Cretease buttons for 3 sec. The display shows the remaining program time and the lock alternatively. Except the power button,all the functional buttons are useless. To deactivate press both button for 3 sec. again. Note: When the cycle ends or the power supply is interrupted the function will be deleted automatically. |
PROGRAM MODES
| PROGRAM | DRYING DEGREE | RECOMMENDED LAUNDRY | MAX. LOAD | |
| COTTON/ LINEN | Extra Dry | Extra dry | Heavy cotton, gowns | 9 kg |
| Cupboard Dry*) | Ready to wear | Cotton, coats | 9 kg | |
| Iron Dry | Damp | Ordinary cotton | 9 kg | |
| SYNTHETICS | Extra Dry | Extra dry | Heavy synthetic | 4 kg |
| Cuoboard Dry | Ready to wear | Ordinary synthetic | 4 kg | |
| Iron Dry | Damp | Ordinary synthetic | 4 kg | |
| TIME | 30min | / | Heavy fabrics, need further drying | 2 kg |
| 20min | / | Heavy fabrics, need further drying | 2 kg | |
| SPECIAL | Bedlinen **) | Ready to wear | Sheet | 2 kg |
| Cool Air | / | / | 4 kg | |
| Mix | Ready to wear | Heavy fabrics, need further drying | 4 kg |
) EN 61121 test program setting.
*) This program has reversing function specially for big load.
PREPARING THE DRYER
1 Connect the tumble dryer to a power socket.
2 Make sure the water tank is empty and properly installed.
3 Make sure that the lint filter is clean and properly installed.
4 Make sure that the condenser filter is clean and properly installed.
1
3
2
4
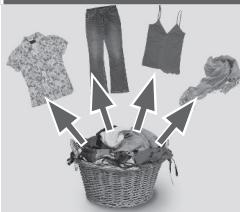
PREPARING THE LAUNDRY
1 Sort clothes according to fabric (cotton, synthetics, wool etc.). Only laundry that has been spun.
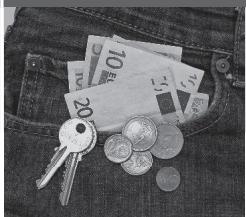
2 Empty pockets of all sharp or flammable objects such as keys, lighters and matches. Remove harder decorative objects such as brooches.
1
2
Follow the instructions on the laundry label and dry only machine-dryable garments. Do not dry silk, down or other delicate fabrics to avoid damage to the laundry.
- Close zippers and hooks, make sure the buttons are sewn on tightly and place small items such as socks, bras etc. in a wash bag.
- Unfold large pieces of fabric such as bed sheets, table cloth etc.
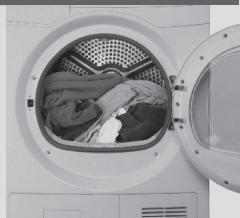
LOADING THE DRYER
1 Place the laundry evenly in the drum making sure not to overload the dryer.
2 Switch on the tumble dryer by pressing the Power button.
1
2

Power
Fabric softeners or similar products should be used as specified in the manufacturer's instructions.
CARE CHART
| Resistant material | Bleachable in cold water | Do not dry clean |
| Delicate fabric | Do not bleach | Dry flat |
| Washable at 95℃ | Iron at 200℃ | Hang to dry |
| Washable at 60℃ | Iron at 150℃ | Dry on clothes hanger |
| Washable at 40℃ | Iron at 100℃ | Tumble dry (normal heat) |
| Washable at 30℃ | Do not iron | Tumble dry (reduced heat) |
| Hand wash | Dry cleaning (any solvent) | Do not tumble dry |
| Dry clean only | Dry cleaning (pericloride) | |
| Wool seal | Dry cleaning (aviation fuel) |
LOAD REFERENCE
| Bed sheet (single) | Cotton | Approx. 800 g |
| Blended fabric clothes | / | Approx. 800 g |
| Jackets | Cotton | Approx. 800 g |
| Jeans | / | Approx. 800 g |
| Overalls | Cotton | Approx. 950 g |
| Pyjamas | / | Approx. 200 g |
| Shirts | / | Approx. 300 g |
| Socks | Blended fabrics | Approx. 50 g |
| T-Shirts | Cotton | Approx. 300 g |
| Underwear | Blended fabrics | Approx. 70 g |
SET PROGRAM & START
1 Turn the program knob to select the desired program.
2 Set functions such as Delay, Delicate, Anti-Create. Afterwards press the Start/Pause button to start the dry cycle.
1

2
ENVIRONMENTAL TIPS
- Spin the laundry as dry as possible before putting it into the tumble dryer.
- Avoid overloading the tumble dryer.
- Shake the laundry loose before putting it into the tumble dryer.
- Choose a proper drying program. Make sure the laundry is not dried longer than needed.
- Make sure to use the tumble dryer with cleaned filters.
END OF DRY CYCLE
The tumble dryer stops operation automatically when a dry cycle is complete. The display shows END. Open the tumble dryer door and remove the laundry. If the laundry is not removed the anti-crease program starts automatically.
1 Switch off the tumble dryer by pressing the Power button.
2 Unplug the tumble dryer from the power socket.
3 Empty the water tank after each dry cycle.
4 Clean the lint filter after each dry cycle.
5 Clean the condenser filter after each dry cycle.

1
2
3
4
5
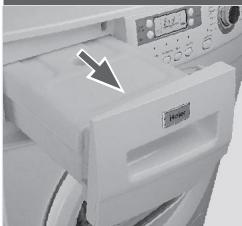
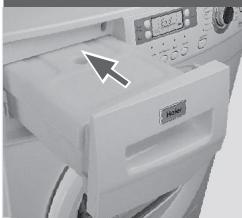
EMPTY THE WATER TANK
During operation, steam condenses to water which is collected in the water tank. Empty the water tank after each drying cycle.
1 Pull out the water tank from its housing.
2 Empty the water tank.
3 Reinstall the water tank to the tumble dryer.
Note: Do not use the water for any kind of drinking or food processing.
1
2
3
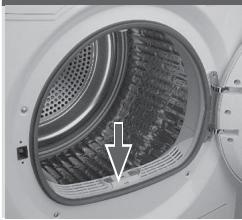
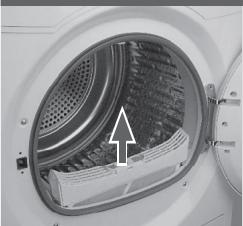
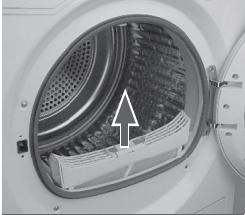
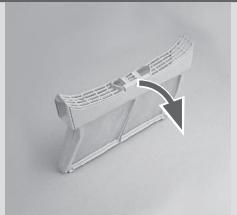
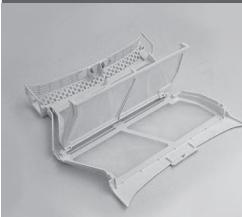
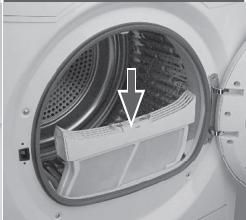
LINT FILTER CLEANING
Clean the lint filter after each dry cycle.
1 Re move the lint filter from the drum.
2 Open up the lint filter.
3 Clean the lint filter form any lint residuals.
4 Reinstall the cleaned lint filter in the tumble dryer.
Note: if the lint filter is very dirty, it can be cleaned under running water. Let it dry thoroughly before use.
1
3
2
4
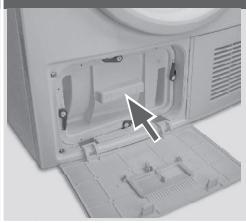
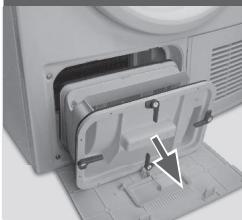
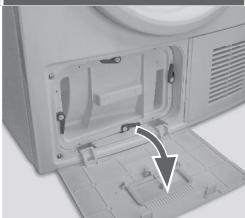
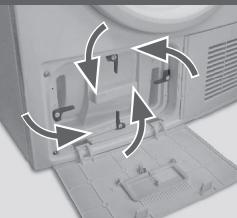
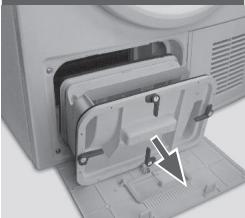
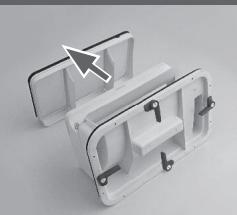
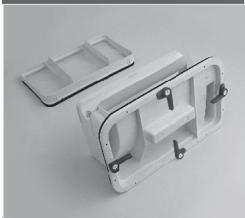
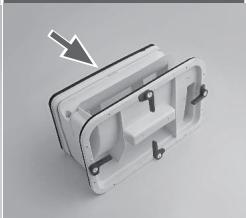
CONDenser FILTER CLEANING
Clean the condenser filter after each dry cycle.
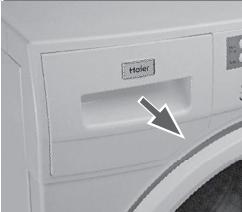
1 Open the Service door.
2 Open the four levers of the condenser filter.
3 Pull out the condenser filter from its housing.
4 Remove the rear filter screen.
5 Clean the condenser filter form any residuals.
6 Reinstall the rear filter to the condenser filter.
To reinstall the condenser filter, follow the above steps 3 to 1 in reverse order.
Note: if the condenser filter is very dirty, it can be cleaned under running water. Let it dry thoroughly before use.
1
3
2
4
5
6
The condensation dryer with heat exchanger is outstanding in terms of efficient energy consumption.
These are guide values determined under standard conditions.
The values may differ from those given, depending on overvoltage and undervoltage, the type of fabric, composition of the laundry to be dried, the residual moisture in the fabric and the size of the load.
CONSUMPTION TABLE
| Program | Spin Speed in rpm (Residual Moisture) | Energy Consumption | DRYING TIME | |
| COTTON / LINEN | Extra Dry | 1000 (approx. 60%) | 2.08 kwh | 4:40 h |
| Cupboard Dry | 1000 (approx. 60%) | 1.99 kwh | 4:19 h | |
| Iron Dry | 1000 (approx. 60%) | 1 .46 kwh | 3:20 h |
TUMBLE DRYER
Wipe the outside of the tumble dryer and the control panel with a damp cloth. Do not use any organic solvent or corrosive agent to avoid damage to the device.
DRUM
After some operation time, fabric care agents or calcium contained in the water can form an almost invisible film on the inside of the drum. Use a damp cloth and some detergent to remove it. Do not use any organic solvent or corrosive agent to avoid damage to the device.
EVAPORATOR
If the evaporator behind the condenser filter is dirty, it can be cleaned by use of a vacuum cleaner. Make sure not to damage the evaporator while cleaning it.
ERROR CODES
| CODE | CAUSE | SOLUTION |
| F2 | Drain pump error. | Contact the customer service. |
| F32 | The condenser thermal sensor is open-circuited or short-circuited. | Contact the customer service. |
| F33 | ||
| F4 | Temperature of the laundry in the drum does not change. | Contact the customer service. |
| E6 | The filters is clogged. | Clean both filters. |
| Lo | Temperature is too low. | Use the dryer when air temperature is higher than 2 °C. |
TROUBLESHOOTING
Before contacting the customer service, please check the following circumstances:
| PROBLEM | CAUSES | SOLUTION |
| Tumble dryer fails to operate. | -Poor connection to the power supply. -Power failure. -No drying program is set. -Device has not been switched on. -The water tank is full. -The door is not closed properly. | ·Check connection to the power supply. ·Check the power supply. ·Set a drying program. ·Switch the device on. ·Empty the water tank. ·Close the door properly. |
| Tumble dryer fails to operate and the display shows END. | -The laundry has reached the condition defined by the program. -There is no laundry in the drum. | ·Check if the program setting is appropriate. ·Check if there is laundry in the drum. |
| Drying time is too long and the results are not satisfac-tory. | -The program setting is not correct. -The filter is clogged. -The evaporator is blocked. -The tumble dryer is overloaded. -The laundry is too wet. -The vent duct is blocked. | ·Make sure the program is set correctly. ·Clean the filter screen. ·Clean the evaporator. ·Reduce the amount of laundry. ·Spin the laundry properly before drying. ·Check the vent duct and unblock it. |
| Remaining time on the display stops or skips. | The remaining time will be adjusted continuously based upon the following factors: -Type of laundry. -Loaded amount. -Moisture degree of the laundry. -Ambient temperature. | The automatic adjustment is a normal operation. |
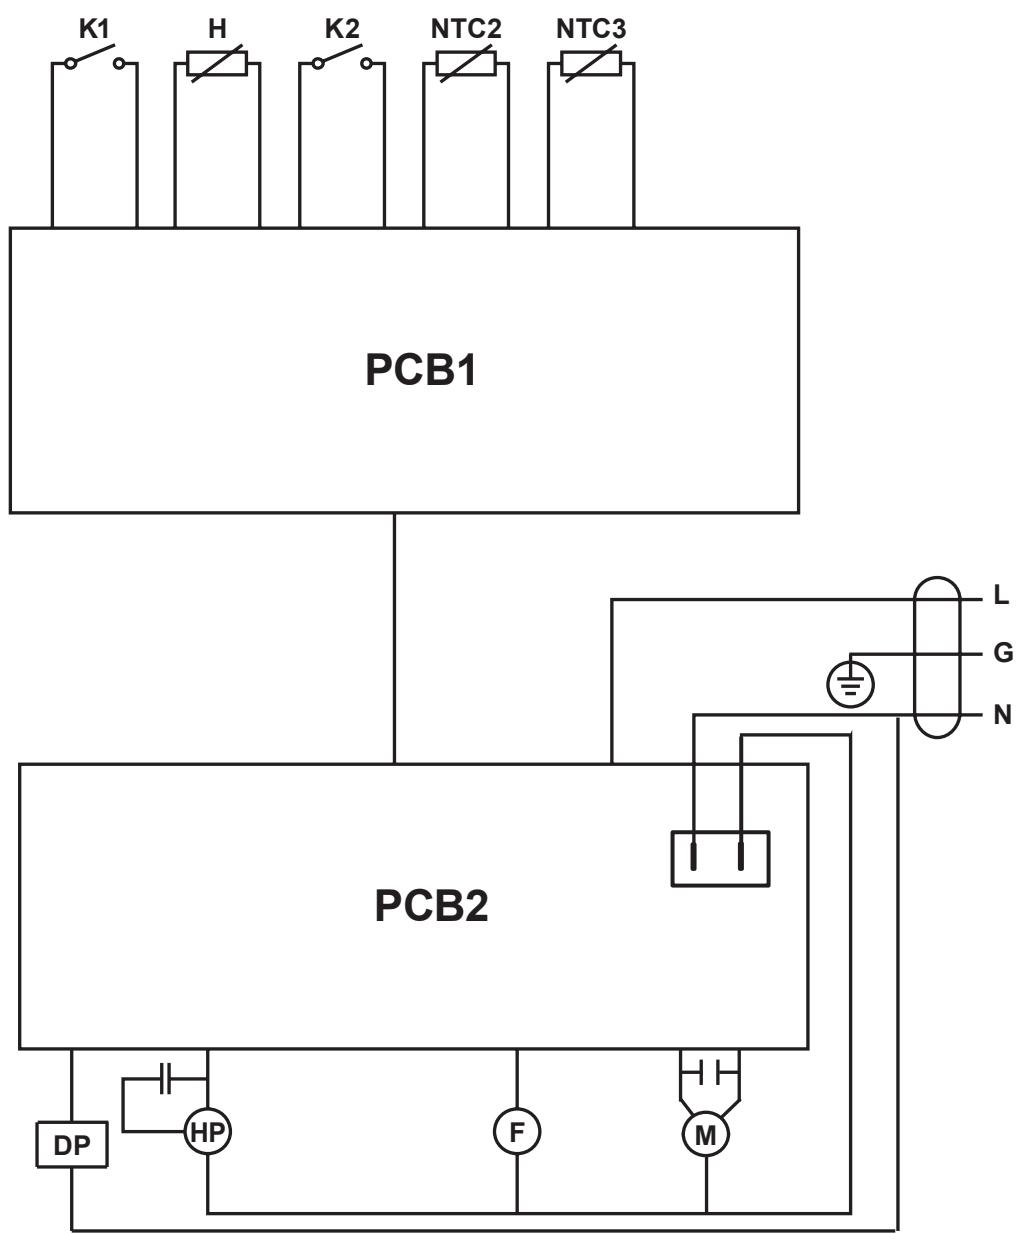
K1 Door switch
HP Heat pump
K2 Water level switch
DP Drainage pump
H Humidity sensor
F Fan motor
NTC2 Temperature sensor near condenser
M Motor
NTC3 Temperature sensor near compressor
Product fiche (according EU 392/2012)
| Trade mark | Haier |
| Mode No. | HD90-79A/HD90-79A-F HD90-79A-DF |
| Rated capacity (kg) | 9 |
| Type | Heat pump |
| Energy efficiency class | A++ |
| Energy consumption per year (kWh/annum)1) | 242 |
| Automatic or non-automatic | Automatic |
| Energy consumption (full load)(kWh/cycle) | 1.99 |
| Energy consumption (partial load)(kWh/cycle) | 1.14 |
| Power in off-mode (W) | 0.4 |
| Power in left-on mode (W) | 0.4 |
| Duration of the “left-on mode” (min)2) | 40 |
| Standard cotton programme3) | Cotton/Cupboard Dry |
| Weighted programme time (full and partial load)(min) | 205 |
| Programme time (full load)(min) | 259 |
| Programme time (partial load)(min) | 165 |
| Condensation efficiency class4) | B |
| Weighted condensation efficiency (%) | 80 |
| Condensation efficiency (full load)(%) | 80 |
| Condensation efficiency (partial load)(%) | 80 |
| Sound power lever (dB) | 67 |
| Built-in or freestanding | Freestanding |
| 1) Based on 160 drying cycles of the standard cotton programme at full and partial load, and the consumption of the low-power modes. Actual energy consumption per cycle will depend on how the appliance is used. | |
| 2) In case there is a power management system. | |
| 3) Standard cotton programme used at full and partial load is the standard programme to which the information in the label and the fiche relates, that this programme is suitable for drying normal wet cotton laundry and that is the most efficient programme in terms of energy consumption for cotton. | |
| 4) Class G is the least efficient and Class A is the most efficient. | |
CUSTOMER SERVICE
If you have a problem with your appliance, first see the Troubleshooting section of the manual. If you cannot find a solution there, please contact your local dealer or try one of the following numbers.
Before contacting the customer service, ensure that you have the following data available. The data can be found on the rating plate:
MODEL
SERIAL NUMBER
Also check the Warranty Card supplied with the product in case of warranty.
| COUNTRY | PHONE NUMBER | COSTS |
| Haier Italy (IT) | 199-100 912 | |
| Haier Spain (ES & PT) | 902 509 123 | |
| Haier Germany (DE) | 0180 5 39 39 99* | * 14 Ct/Min Landline / max. 42 Ct/Min Mobile |
| Haier Austria (AT) | 0820 001 205* | * 14,53 Ct/Min Landline / max. 20 Ct/Min all others |
| Haier United Kingdom (UK) | 0845 025 30 25 | |
| Haier France (FR) | 0980 406 409 |
For other countries please refer to the service and support area of: www.haier.com.
Haier
Mode d'emploi
HD90-79A
HD90-79A-F
HD90-79A-DF
Sèche-linge avec
pompe à chaleur
TABLE DES MATIÈRES
Cher client 3
Dimensions (H x P x L mm)
Poids net (kg)