
RCR311W - Remote control RCA - Free user manual and instructions
Find the device manual for free RCR311W RCA in PDF.
| Product type | Universal remote control |
| Brand | RCA |
| Model | RCR311W |
| Dimensions (approx.) | 20 x 5 x 2.5 cm |
| Weight (with batteries) | 150 g |
| Power supply | 2 AA alkaline batteries (included or not depending on model) |
| Number of controllable devices | Up to 3 devices (TV, VCR/DVD player, satellite/cable receiver) |
| Communication technology | Infrared (IR) |
| Backlight | Yes (some models only) |
| Illuminated ON·OFF key | Yes, flashing in programming mode |
| Programming methods | Brand code search and entry, direct entry, manual search, automatic search |
| Sleep timer | Yes, adjustable from 1 to 99 minutes |
| Menu functions | On-screen menu access via MENU key |
| Compatibility | Most IR devices manufactured after 1990, including RCA, GE, PROSCAN |
| Battery saver | Automatic shutdown after 60 seconds of inactivity |
| Care and cleaning | Wipe with a soft, dry cloth; do not use liquids |
| Safety | Do not expose to moisture; use alkaline batteries |
| Spare parts and repairability | No user-serviceable parts; replacement under limited lifetime warranty |
| General information | Limited lifetime warranty; consolidates three remotes into one |
Frequently Asked Questions - RCR311W RCA
User questions about RCR311W RCA
0 question about this device. Answer the ones you know or ask your own.
Ask a new question about this device
Download the instructions for your Remote control in PDF format for free! Find your manual RCR311W - RCA and take your electronic device back in hand. On this page are published all the documents necessary for the use of your device. RCR311W by RCA.
USER MANUAL RCR311W RCA
Compatible with today's most popular brands.
Battery Installation and Information 3
Battery Saver 3
Backlighting 3
Illuminated ON-OFF Key 4
Programming the Remote 4
Programming Methods 4
Brand Code Search and Entry 4
Direct Code Entry 6
Manual Code Search and Entry 7
Auto Code Search and Entry 9
Code Retrieval 11
Using the Remote to Control Your Components 12
On-screen Menus 13
Accessing and Selecting Menu Items 13
Exiting a Menu Mode 13
Sleep Timer 13
Programming the Sleep Timer 13
Canceling the Sleep Timer 14
Troubleshooting 14
Warranty 47
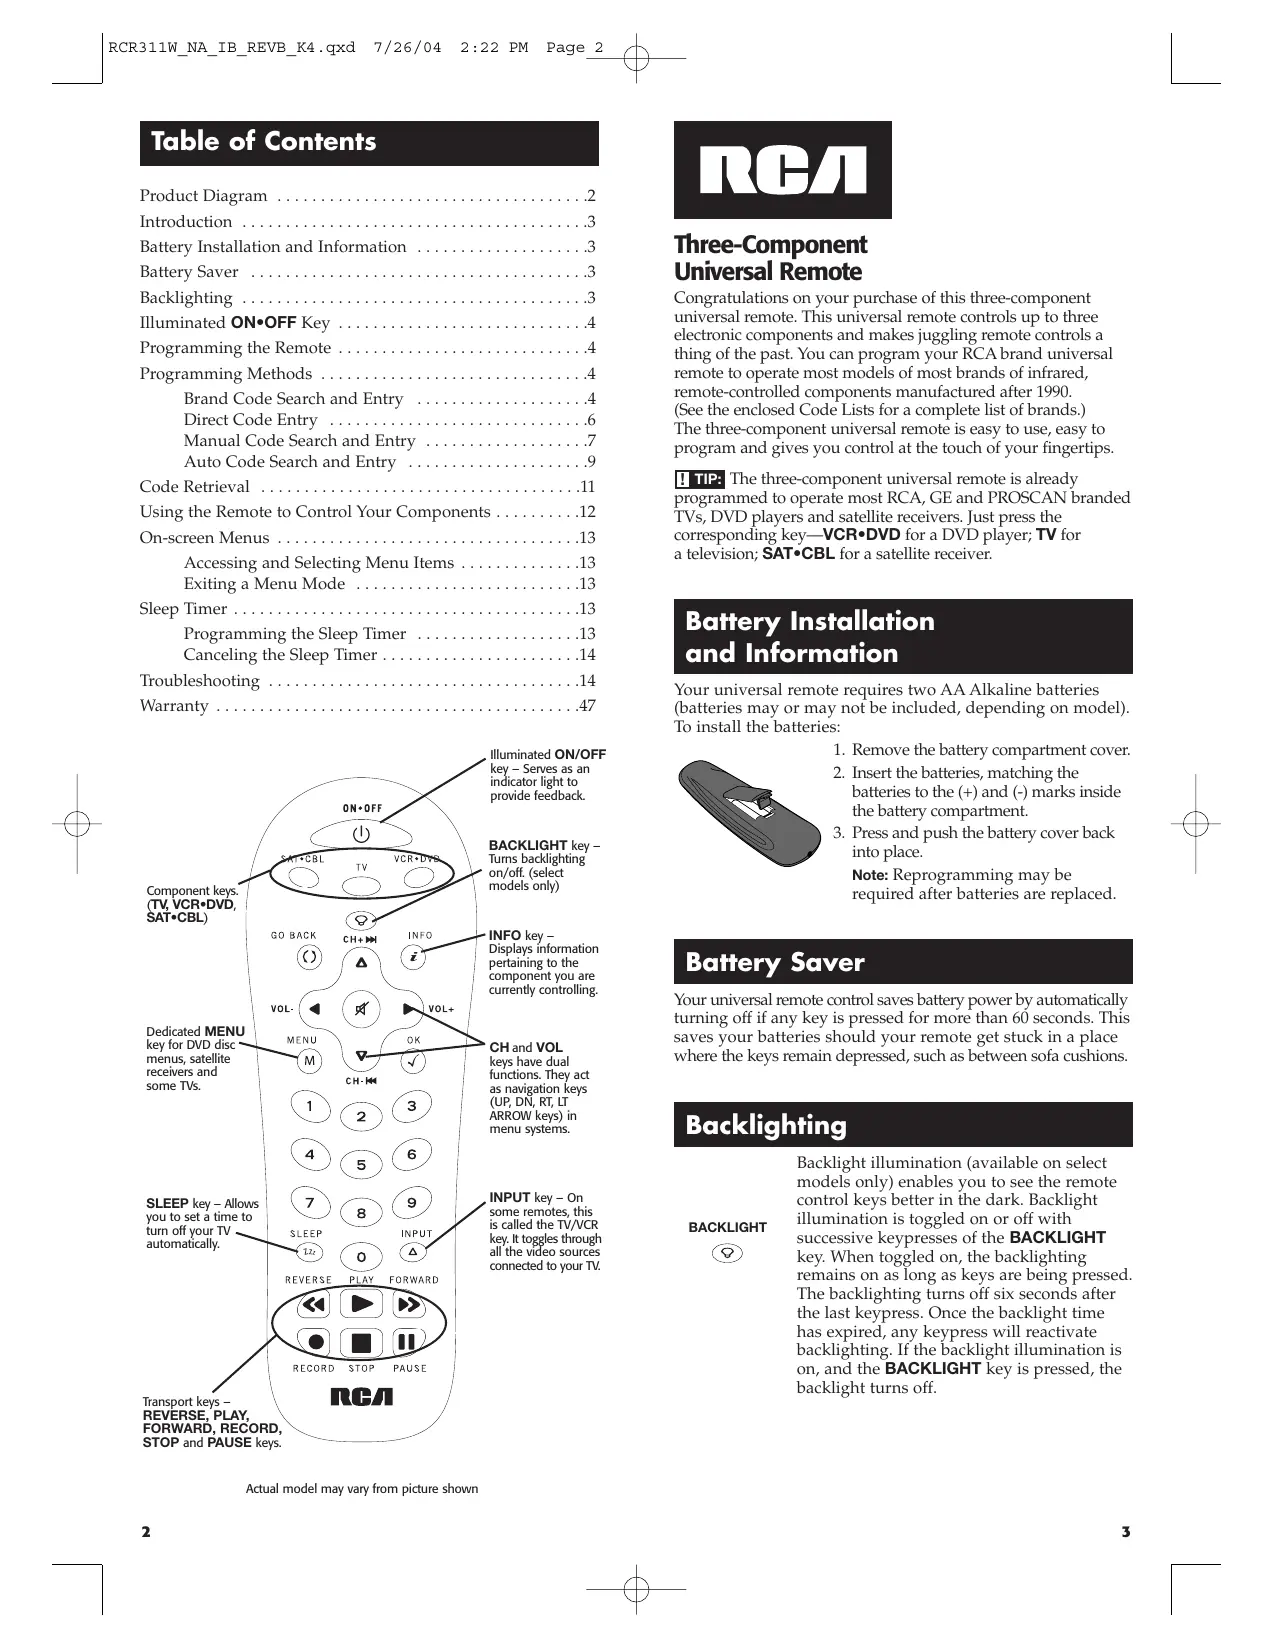
Actual model may vary from picture shown
RCA
Three-Component Universal Remote
Congratulations on your purchase of this three-component universal remote. This universal remote controls up to three electronic components and makes juggling remote controls a thing of the past. You can program your RCA brand universal remote to operate most models of most brands of infrared, remote-controlled components manufactured after 1990. (See the enclosed Code Lists for a complete list of brands.) The three-component universal remote is easy to use, easy to program and gives you control at the touch of your fingertips.
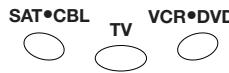
! TIP: The three-component universal remote is already programmed to operate most RCA, GE and PROSCAN branded TVs, DVD players and satellite receivers. Just press the corresponding key—VCR · DVD for a DVD player; TV for a television; SAT · CBL for a satellite receiver.
Battery Installation and Information
Your universal remote requires two AA Alkaline batteries (batteries may or may not be included, depending on model). To install the batteries:
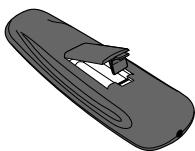
- Remove the battery compartment cover.
- Insert the batteries, matching the batteries to the (+) and (-) marks inside the battery compartment.
- Press and push the battery cover back into place.
Note: Reprogramming may be required after batteries are replaced.
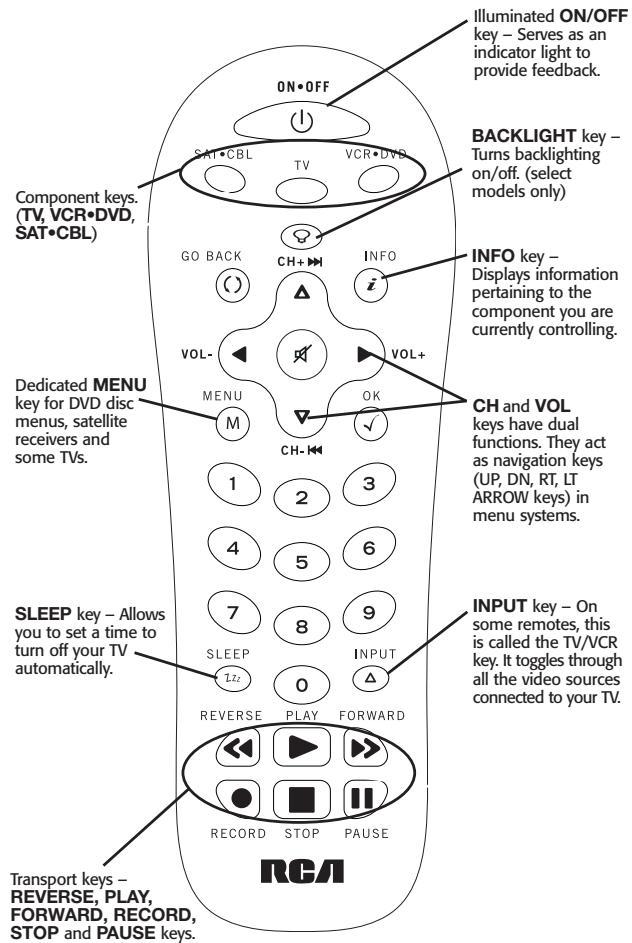
Battery Saver
Your universal remote control saves battery power by automatically turning off if any key is pressed for more than 60 seconds. This saves your batteries should your remote get stuck in a place where the keys remain depressed, such as between sofa cushions.
Backlighting
BACKLIGHT

Backlight illumination (available on select models only) enables you to see the remote control keys better in the dark. Backlight illumination is toggled on or off with successive key presses of the BACKLIGHT key. When toggled on, the backlighting remains on as long as keys are being pressed. The backlighting turns off six seconds after the last keystress. Once the backlight time has expired, any keystress will reactivate backlighting. If the backlight illumination is on, and the BACKLIGHT key is pressed, the backlight turns off.
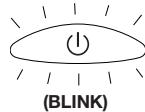
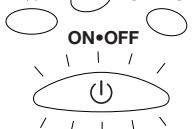
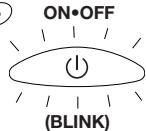
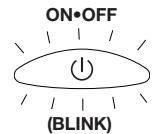
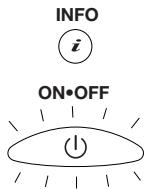
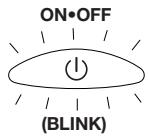
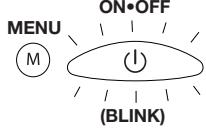
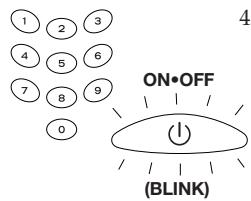
Illuminated ON·OFF Key

ON-OFF

ON-OFF
(BLINK)
The ON-OFF key powers components on and off. It also lights up to serve as an indicator light, providing feedback for various functions. When a valid key is pressed, the illuminated ON-OFF key remains lit as long as the key is pressed and turns off when the key is released. The ON-OFF key also blinks in Programming Mode or in Menu Mode to provide feedback.
Programming the Remote
Your universal remote can operate a variety of brands of components. In order for your universal remote to control your components, you need to program the remote with the codes that match the components (See Code Lists enclosed). These codes enable the remote to communicate with your components. Each brand and each component has its own "language," and, by programming the correct codes into your remote, you tell the remote to "speak the same language" as your components.
There are four methods you can use to program your remote to operate your components: Brand Code Search and Entry, Direct Code Entry, Manual Code Search and Entry, and Auto Code Search and Entry. Most components can beprogrammed in one of these four ways. Try them in the order listed.
In order to control combo units, like TV/VCRs or TV/DVDs, you must program the individual corresponding component keys to control each part of the combo unit. Once programmed successfully, the TV key controls the TV functions on your unit, and the VCR*DVD key controls the VCR or DVD functions, respectively. There is a specific section in the Code Lists for combo units. The codes in this section should be tried first, using Direct Code Entry on the TV and VCR*DVD keys. If this is unsuccessful, follow the normal programming methods for both the TV and the VCR*DVD keys.
Programming Methods
Brand Code Search and Entry
If your brand is listed in the Brand Code List (See Code Lists enclosed), you may be able to program your universal remote by searching through only the Code Lists for that specific manufacturer. Brand Code Search and Entry can be the quickest method to program your remote, if your component (TV, VCR and/or DVD, satellite receiver and/or cable box) is one of those brands listed.
If your brand is not listed in the Brand Code List, use one of the other programming methods: Direct Code Entry, Manual Code Search and Entry or Auto Code Search and Entry.
Follow these instructions to program your remote using the Brand Code Search and Entry method.
GO BACK
( )
! TIP: To exit without saving at any point in the Brand Code Search, press and release the GO BACK key.
- Manually turn on the component you want the remote to control (TV, VCR, DVD, satellite receiver or cable box).
- Locate the Brand Codes in the Code Lists and keep it handy.
Note: If you press an invalid key during the Brand Code Search, the remote does not respond and the search times out after two minutes. When the search times out, the illuminated ON-OFF key blinks four times and turns off. The last programmed code under that component key is retained.
- If you are programming the remote to control your TV, satellite receiver or cable box, go directly to step 5.
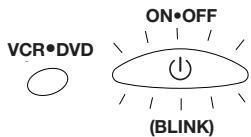
- To program the remote to control a VCR or DVD. The VCR-DVD key can control only one component, either your VCR or your DVD. To program your remote to control either your DVD or your VCR, you must first put the remote in the proper programming mode. Follow these directions before proceeding to step 5.
VCR\*DVD
ON-OFF


VCR\*DVD
VCR\*DVD

ON-OFF
VCR\*DVD
TV SATCBL
(BLINK)
ON\*OFF

1 2 3

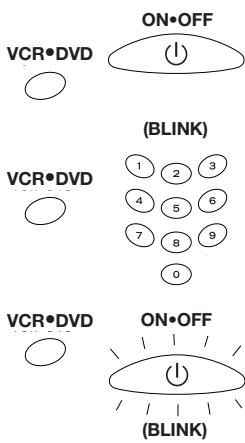
a. Press and hold the VCR-DVD key. The illuminated ON-OFF key turns on.
b. While holding down the VCR-DVD key, press and release the number 2 key on the keypad to control a VCR or the number 3 key to control a DVD. The illuminated ON-OFF key turns off.
c. Release the VCR-DVD key. The illuminated ON-OFF key blinks four times and then turns off. Your remote is now either in VCR or DVD Programming Mode, depending on which you chose. Proceed to step 5.
-
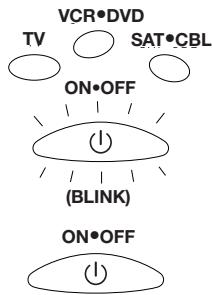
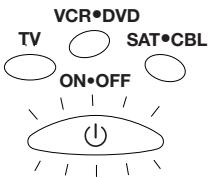
Press and hold the component key (TV, VCR•DVD, SAT•CBL) you wish to program. The illuminated ON•OFF key turns on and remains on.
-
While holding the component key down, press and hold the ON-OFF key. The illuminated ON-OFF key turns off.
- After holding both keys down for three seconds, the illuminated ON-OFF key turns back on.
- Release both keys. The illuminated ON-OFF key remains on.
- Refer to the Brand Codes in the enclosed Code Lists. Press and release the appropriate brand code key, using the number keys on the keypad. The illuminated ON-OFF key blinks once.
!TIP: Throughout the programming of each key, be sure to keep the remote pointed at the IR sensor of the component you are currently programming the remote to control.
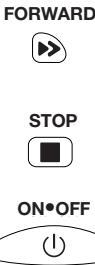
- Press and release the ON-OFF key repeatedly until your component turns off. Wait 4 seconds between each key press. Each time you press the ON-OFF key, the illuminated ON-OFF key blinks, and the next code is sent. The Brand Code Search begins with the first code in the chosen brand list for that component and cycles through all the codes for that brand. If your component turns off, you have found the correct code. (If it cycles through and the illuminated ON-OFF key blinks four times and turns off, all codes in the chosen brand lists have been searched. The Brand Code Search mode is exited.)
Programming Methods (continued)
STOP

ONOFF
(1)
- Once you have found the correct code, you must save that code by pressing and releasing the STOP key. The illuminated ON-OFF key turns off. You must press the STOP key to save the code or the correct code will not be stored!
- To confirm that the component key is programmed with the correct code for maximum functionality, test the component. Attempt to control a variety of the component's functions with the remote. If some of the features of your component do not work, try programming the remote using the direct code entry method.
Direct Code Entry
To program your universal remote to control your components using the Direct Code Entry Method, follow the steps below.
- Manually turn on the component you want the remote to control.
- Locate the enclosed Code Lists. Find the list for the component you wish to program. Find your component's brand. You will see a listing of four-digit codes for each brand. If your brand isn't listed, use one of the Code Search methods to program the remote control. (Refer to pages 7 and 9 for Manual and Auto Code Search methods.)
- Press and hold the component key (TV, VCR-DVD, SAT-CBL) you wish to program. The illuminated ON-OFF key turns on and remains on. If you release the component key at any time during the Direct Code Entry procedure, the illuminated ON-OFF key blinks four times, and the process is exited.
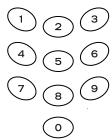
- While holding down the component key, consult the Code Lists for the four-digit code that corresponds to your component's brand and use the number keys (0-9) on the keypad to enter it. While you are pressing the numbers, the illuminated ON-OFF key turns off.
- After the fourth number is entered, the illuminated ON-OFF key turns on. At this time, release the component key. If the illuminated ON-OFF key turns off, you have entered a valid code and have followed the correct procedure for Direct Code Entry.
If you enter a code number that is not in the Code Lists or you do not follow all of the steps for Direct Code Entry, the illuminated ON-OFF key blinks four times when the component key is released. This is an indication that a programming error has occurred. In that case, repeat the Direct Code Entry process from step 3.
!TIP: Throughout the programming of each key, be sure to keep the remote pointed at the IR sensor of the component you are currently programming the remote to control.
- To confirm that the component key is programmed with the correct code for maximum functionality, test the component. Attempt to control a variety of the component's functions with the remote. If some of the features of your components do not work, try programming the remote with a different code in the list until you find the code that allows the remote to control the majority of your component's functions. Different codes can provide different levels of functionality.
- Remember to enter the code for future reference in the box provided in the Code Retrieval section of this manual (See page 12).
Manual Code Search and Entry
If your component's brand isn't listed in the Code Lists, or if you have tried all of the codes for your brand and the remote does not operate your component, try one of the Code Search methods below—Manual Code Search or Auto Code Search. Both Code Search methods cycle through all of the codes in the Code Lists in the event that your component's code is listed under another brand.
The Manual and Auto Code Search methods may take a long time because the remote searches through all of the codes in its memory for the code that operates your component. Therefore, if your brand is listed in the Brand Codes or the Code Lists, first try the Brand Code Search or the Direct Code Entry methods described on pages 4 and 6.

! TIP: To exit without saving at any point in the Manual Code Search, press and release the GO BACK key.
- Manually turn on the component you want the remote to control. Note: If you press an invalid key during the Manual Code Search, the remote does not respond and the search times out after two minutes. When the search times out, the illuminated ON-OFF key blinks four times and turns off. The last programmed code under that component key is retained.
- If you are programming the remote to control your TV, satellite receiver or cable box, go directly to step 4.
- To program the remote to control a VCR or DVD. The VCR · DVD key can control only one component, either your VCR or your DVD. To program your remote to control either your DVD or your VCR, you must first put the remote in the proper programming mode. Follow these directions before proceeding to step 4.
a. Press and hold the VCR · DVD key. The illuminated ON · OFF key turns on.
Programming Methods (continued)
VCR*DVD
VCR*DVD

VCR*DVD
TV SATCBL

ON-OFF

ON·OFF

(BLINK)
ON-OFF

ON*OFF

ON-OFF

(BLINK)
STOP

ON-OFF

Testing the Code for Maximum Functionality
To confirm that the component key is programmed with the correct code for maximum functionality, it is necessary to test the component. If some of the features of your component do not work, different codes in the list can be tried until you find the code that allows the remote to control the majority of your component's functions. Different codes can provide different levels of functionality. Follow these steps to test for maximum functionality.
b. While holding down the VCR-DVD key, press and release the number 2 key on the keypad to control a VCR or the number 3 key to control a DVD. The illuminated ON-OFF key turns off.
c. Release the VCR-DVD key. The illuminated ON-OFF key blinks four times and then turns off. Your remote is now either in VCR or DVD Programming Mode, depending on which you chose. Proceed to step 4.
- Press and hold the component key (TV, VCR-DVD, SAT-CBL) you wish to program. The illuminated ON-OFF key turns on and remains on.
- While holding the component key down, press and hold the ON-OFF key. The illuminated ON-OFF key turns off.
- After holding down both keys for three seconds, the illuminated ON-OFF key turns back on.
- Release both keys. The illuminated ON-OFF key remains on.
ITIP: Throughout the programming of each key, be sure to keep the remote pointed at the IR sensor of the component you are currently programming the remote to control.
- Press and release the ON-OFF key repeatedly, waiting 4 seconds between each key press, until your component turns off. Each time you press the ON-OFF key, the illuminated ON-OFF key blinks, and the next code is sent. This process continues until all of the codes in the Code Lists have been searched. If your component turns off, you have found the correct code. (If it cycles through and the illuminated ON-OFF key blinks four times and turns off, all codes have been searched. The Manual Code Search method is exited.)
-
Once your component turns off, you have found the correct code. You must save the new code by pressing and releasing the STOP key. The illuminated ON-OFF key turns off. You must press the STOP key to save the code or the correct code will not be stored!
-
Once the code has been stored (see Manual Code Search and Entry Method page 7), use the remote to attempt to control a variety of the component's functions. If the code that has been stored controls the majority of the component's functions, programming is complete. If the code stored does not give maximum functionality, you will want to try another code.
- In that case, repeat the Manual Code Search and Entry Method from step 1. When the component turns off for the first time, do not press the STOP key, which would store the code. Instead, wait 4 seconds, with the unit now off, continue to press the ON·OFF key repeatedly until the unit turns back on. Once the unit turns back on, you have found another code that operates the component. Press the STOP key.
- Test the functionality again by attempting to control a variety of the component's functions. If the code that has been stored controls the majority of the component's functions, programming is complete. If the code stored does not give maximum functionality, you will want to try another code.
- Repeat the Manual Code Search and Entry Method from step 1. Each time a code turns the component on or off, you have found a code that operates the remote and needs to be tested for maximum functionality. Continue through the code lists, cycling through the codes you have already tried, until you find one that offers maximum functionality.
Auto Code Search and Entry
The Auto Code Search and Entry Method enables the remote to automatically search through all the codes in the Code Lists for the one that operates your component.
Note: The Manual and Auto Code Search methods may take a long time because the remote searches through all of the codes in its memory for the code that operates your component. Therefore, if your brand is listed in the Brand Codes or the Code Lists, first try the Brand Code Search or the Direct Code Entry methods described on pages 4 and 6.
GO BACK

TIP: To exit without saving at any point in the Auto Code Search, press and release the GO BACK key.
- Manually turn on the component you want the remote to control (TV, VCR, DVD, satellite receiver or cable box).
Note: If you press an invalid key during the Auto Code Search, the remote does not respond. If you do not press a valid Auto Code Search key (TV, VCR · DVD, SAT · CBL, ON · OFF, GO BACK, PLAY, REVERSE, FORWARD, STOP), the search times out after two minutes. When the search times out, the illuminated ON · OFF key blinks four times and turns off. The last programmed code under that component key is retained. - If you are programming the remote to control your TV, satellite receiver or cable box go directly to step 4.
- To program the remote to control a VCR or DVD. The VCR*DVD key can control only one component, either your VCR or your DVD. To program your remote to control either your DVD or your VCR, you must first put the remote in the proper programming mode. Follow these directions before proceeding to step 4.
Programming Methods (continued)
a. Press and hold the VCR-DVD key. The illuminated ON-OFF key turns on.
b. While holding down the VCR-DVD key, press and release the number 2 key on the keypad to control a VCR or the number 3 key to control a DVD. The illuminated ON-OFF key turns off.
c. Release the VCR · DVD key. The illuminated ON · OFF key blinks four times and then turns off. Your remote is now either in VCR or DVD Programming Mode, depending on which you chose. Proceed to step 4.
- Press and hold the component key (TV, VCR-DVD, SAT-CBL) you wish to program. The illuminated ON-OFF key turns on and remains on.
- While holding the component key down, press and hold the ON-OFF key. The illuminated ON-OFF key turns off.
- After holding down both keys for three seconds, the illuminated ON-OFF key turns back on.
- Release both keys. The illuminated ON-OFF key remains on.
I TIP: Throughout the programming of each key, be sure to keep the remote pointed at the IR sensor of the component you are currently programming the remote to control.
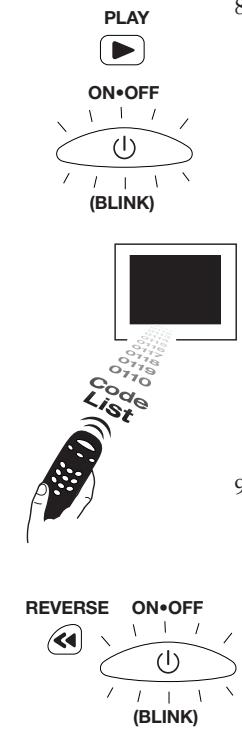
- Press and release the PLAY key, then wait five seconds to see if your component turns off. If your component does not respond, continue to press the PLAY key every five seconds until your component turns off. Each time you press the PLAY key, the illuminated ON-OFF key blinks and a block of 10 codes are sent to your component. This process continues until all of the codes in the Code Lists have been searched. (If your component has not turned off after all codes have been searched, the illuminated ON-OFF key blinks four times and turns off. The Auto Code Search Entry method is exited.)
- When your component turns off, you know the correct code is in the last block of 10 codes sent. Press and release the REVERSE key. Wait two seconds to see if your component turns on again. If your component does not respond, continue to press the REVERSE key every two seconds until your component turns on again. This will isolate the correct code in the last block of codes sent. Each time
the REVERSE key is pressed, the illuminated ON-OFF key blinks. Note: If you accidentally press the REVERSE key after your component responds, press and release the FORWARD key. Then, wait two seconds to see if your component turns off again.
- Once your component turns off, you have found the correct code. You must save the new code by pressing and releasing the STOP key. The illuminated ON-OFF key turns off. You must press the STOP key to save the code or the correct code will not be stored!
- To confirm that the component key is programmed with the correct code for maximum functionality, test the component. Attempt to control a variety of the component's functions with the remote. If some of the features of your components do not work, different codes in the list can be tried until you find the code that allows the remote to control the majority of your component's functions. See the section entitled "Testing the Code for Maximum Functionality" on page 8 for more information.
Code Retrieval
Once you've programmed the remote to control your components, you may want to record the codes for future reference. If you used the Direct Code Entry method, this is easy. Just find the codes you programmed in and make a note of them in the boxes on the next page. If you used one of the Code Search methods to program your remote, you will need to retrieve each component's four-digit code. Retrieving the actual code and writing it down will save you time if you ever need to program the remote again (e.g., if programming is lost when you change the batteries). If the codes are recorded, you can use the Direct Entry method to reprogram your remote to control your components, which is quick and easy.
- Press and hold the component key (TV, VCR-DVD, SAT-CBL) whose code you wish to retrieve. The illuminated ON-OFF key turns on.
- While holding the component key down, press and hold the INFO key. The illuminated ON-OFF key turns off.
- After holding down both keys for three seconds, the illuminated ON-OFF key turns back on.
- Release both keys. The illuminated ON-OFF key remains on.
Code Retrieval (continued)
ON-OFF


GO BACK
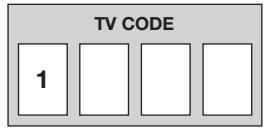
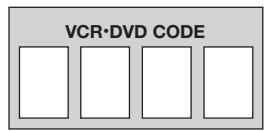
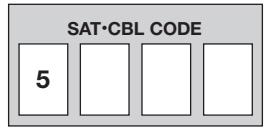
- Starting with the number 1 key, press and release each number key on the keypad in the following order (1-9, then 0). The number that causes the illuminated ON-OFF key to blink is the first number of the code. As you find each number of the code, refer to the code boxes below and write them down for future reference. Note: All TV codes begin with the number 1; all VCR codes begin with the number 2; all DVDs, the number 3; and all satellite receivers and cable boxes, the number 5.
- Repeat step 5 until you have retrieved all four numbers in the code.
- After the fourth number is retrieved, the illuminated ON-OFF key blinks briefly, then turns off.
- To exit the Code Retrieval Mode, press and release the GO BACK key at any time.
- If you press an invalid key during the Code Retrieval process, the remote will not respond. If you do not press a valid Code Retrieval key (TV, VCR-DVD, SAT-CBL, INFO, GO BACK), Code Retrieval times out after 15 seconds. The illuminated ON-OFF key blinks four times, and then turns off.
Using the Remote to Control Your Components
Because this remote controls more than one component, you must first "tell" the remote which component you wish to operate. That means, if you wish to operate your TV, you must first press the TV key to put the remote in the TV Mode. The remote stays in the chosen component mode (such as TV Mode) until you change it. If your remote is in TV Mode, you must change the mode in order to operate your DVD or VCR satellite receiver or cable box. For example, if you are in VCR Mode, and you wish to turn off your TV, you must press the TV key first before pressing the ON-OFF key.
On-screen Menus
Accessing and Selecting Menu Items
Today's advanced components use on-screen menus to help you navigate through all their features and functions. While this remote cannot access every menu system of every component model, it does offer some menu functionality.
To use a component's on-screen menu system, you first have to put the remote in Menu Mode.
- Make sure your components are turned on and your TV is set to the component's input. (Use the INPUT key to toggle through video sources when in TV mode.)
- Press the component key whose menu you want to access.
- Press the MENU key. The illuminated ON-OFF key blinks, indicating you are in the Menu Mode.
OK
MENU

√
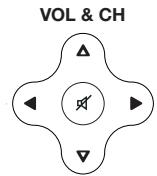
- Use the VOL + / - and/or CH + / - keys to navigate through the on-screen menu system.
- To make a selection from the on-screen menu, press the MENU or OK key to select the highlighted item.
!TIP: If the remote doesn't respond, check to see that the illuminated ON-OFF key is still blinking. Note: it times out after 20 seconds. If this happens, just press the MENU key again, and then retry your selection.
Exiting a Menu Mode
The remote automatically times out of Menu Mode after 20 seconds of inactivity (no keys being pressed). At that time, the remote clears the displayed menu from the TV. If you want to exit the Menu Mode yourself, press the corresponding component key on the remote (TV, VCR-DVD, SAT-CBL). The illuminated ON-OFF key turns off.
Sleep Timer (Select Models Only)
This feature automatically turns off your TV at a duration you choose from 1 to 99 minutes. The Sleep Timer only works if you have found a code that controls your TV. The timing mechanism for the Sleep Timer is built into your universal remote control. To program the Sleep Timer, follow these steps.
PROGRAMMING THE SLEEP TIMER
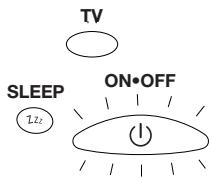
- Press and release the TV key.
- Press and hold the SLEEP key for three seconds. The illuminated ON-OFF key turns on.
- Release the SLEEP key.
- Using the number keys, enter the desired time in minutes (from 1-99 minutes). To set the timer to a number under 10 minutes, first press 0 and then the desired number (e.g., 05 for five minutes). The illuminated ON-OFF key blinks with each keystress.
ON-OFF
(1)
- Once the second number is entered, the illuminated ON-OFF key turns off.
TIP: Any keypress other than the number keys is ignored. If you don't enter the sleep time within 10 seconds after pressing the SLEEP key, you must start over at step 1. The illuminated ON-OFF key blinks four times and then turns off, indicating your attempt to program the Sleep Timer has been unsuccessful.
- The Sleep Timer is now set.
- Leave remote aimed at the TV. Once the Sleep Timer is set, you can continue to use the remote without affecting the Sleep Timer. However, because the timing mechanism for the Sleep Timer is built into the remote itself, the remote must be in TV Mode and pointed at the TV to activate the Sleep Timer.
ONOFF
(1)
- The Sleep Timer program will be canceled and reset to zero by pressing and releasing the ON-OFF key.
Troubleshooting
Problem: The remote does not operate your component.
- You must put the remote in the correct mode by pressing the corresponding component key (TV, VCR•DVD, SAT•CBL) so the remote knows which component you want to operate.
- Remove any obstacles between the remote and the component. Make sure to aim the remote at the IR sensor on the component.
- Make sure the batteries are fresh and are properly installed. (See Battery Installation on page 3.) Replace the batteries with two new AA batteries, if necessary. Reprogramming may be required.
- Reset the remote. Remove the batteries, then press and hold the number 1 key on the remote for several seconds to reset the microprocessor inside the remote. Release the number 1 key, reinstall the batteries, and press the ON-OFF key. If it lights up, reprogram the remote and try again. If it doesn't light up, replace the batteries with new ones.
Problem: The remote can't be programmed to operate your component.
- If you are testing the remote after you have entered the code, you may be too far away from the component or at a wrong angle. This remote uses IR (infrared) technology to communicate with components. The remote sends the code, and the component's IR sensor reads the code. Therefore, there must be an unobstructed path between the remote and the IR sensor on the component. Move closer and make sure you point the remote at the component (VCR or DVD player when programming the VCR-DVD key; TV when programming the TV key; cable box or satellite receiver when you're programming the SAT-CBL key).
- If you've used the Direct Entry programming methods to enter the codes for your brand and the unit is still not functioning properly, try one of the Code Search methods. (See Code Search Methods on pages 7 and 9.)
- To control combo TV/VCR or TV/DVD units, you must program both the TV key and the VCR-DVD key. Once programmed successfully, the TV key controls the TV
functions on your unit, and the VCR-DVD key controls the VCR or DVD functions. There is a specific section in the Code Lists for combo units. The codes in this section should be tried first using Direct Code Entry on the TV and VCR-DVD keys. If this is unsuccessful, follow the normal programming methods for both the TV and the VCR-DVD keys.
- Make sure the batteries are fresh and are properly installed.
Problem: The remote is not performing commands properly.
- You must put the remote in the correct mode by pressing the corresponding component key (TV, VCR-DVD, SAT-CBL) so the remote knows which component you want to operate.
- Make sure component is "ready" (e.g., DVD player has disc loaded; VCR has tape loaded, etc.).
- You may have pressed an invalid key for the mode the remote is in.
- If you're trying to turn on an RCA, GE or PROSCAN branded component, press the component key (TV, VCR-DVD, SAT-CBL) instead of the ON-OFF key.
- If you're trying to change channels, try pressing the OK key after entering the channel number, as this is a requirement of certain models and brands.
- There is a possibility that a programmed code may only be able to control some of your component features (e.g., only turns a component on and off). See "Testing the Code for Maximum Functionality" (page 8-9) for more information.
Problem: The illuminated ON-OFF key does not light when you press a key.
- You must put the remote in the correct mode by pressing the corresponding component key (TV, VCR-DVD, SAT-CBL) so the remote knows which component you want to operate.
- You may have pressed an invalid key for the mode the remote is in.
- Make sure the batteries are fresh and are properly installed. (See Battery Installation on page 3.) Replace the batteries with two new AA batteries, if necessary. Reprogramming may be required.
Problem: The VCR won't record.
- Make sure the remote is in VCR Mode.
- Make sure the tape is properly loaded in the VCR.
- Make sure the tape is not write-protected. If the safety tab is removed, the tape is write-protected, and you cannot record onto that tape.
Problem: The remote will not change channels on your component.
- You must put the remote in the correct mode by pressing the corresponding component key (TV, VCR-DVD, SAT-CBL) so the remote knows which component you want to operate.
- Press the OK key after you enter a channel number.
- Remove any obstacles between the remote and the component. Make sure to aim the remote at the IR sensor on the component.
Problem: The component's menu doesn't appear on the TV screen.
- Make sure you have connected your component to your TV properly and selected the correct Input. (See your components' Owner's Manuals for proper connection procedures.)
- You must put the remote in the correct mode by pressing the corresponding component key (TV, VCR-DVD, SAT-CBL) so the remote knows which component you want to operate.
- Menu access isn't supported for all brands. If that's the case, you'll need to use your original remote control to access menu functions for these components.
For more information, please visit www.rca.com.
Table des matieres
Limited Lifetime Warranty
Our company (in the U.S., THOMSON INC. / In Canada, Thomson multimedia Ltd.) will replace this product, regardless of how long you, the original purchaser, own it if found to be defective in materials or workmanship. For a prompt, no charge replacement of equivalent product, return the defective product postage prepaid to the appropriate address.
In the US:
Product Exchange Center
11721 Alameda Avenue
Socorro, TX 79927
In Canada:
Thomson multimedia Ltd.
6200 Edwards Boulevard
Mississauga, Ontario
Canada L5T 2V7
This replacement is the company's sole obligation under this warranty. THOMSON INC. / Thomson multimedia Ltd. will not be responsible for any incidental or consequential damages or for any loss arising in connection with the use or inability to use this product. Some states/provinces do not allow the exclusion or limitation of incidental or consequential damages, so the above limitation or exclusion may not apply to you. This warranty excludes defects or damage due to misuse, abuse, or neglect. This warranty gives you specific legal rights, and you may also have other rights, which vary from state to state/province to province.
Product Exchange Center
11721 Alameda Avenue
Socorro, TX 79927
Au Canada :
Thomson multimedia Ltd.
6200 Edwards Boulevard
Mississauga, Ontario
Canada L5T 2V7
Product Exchange Center
11721 Alameda Avenue
Socorro, TX 79927
En Canadá:
Thomson multimedia Ltd.
6200 Edwards Boulevard
Mississauga, Ontario
Canada L5T 2V7
Consolidate three remote controls into one!
Operates up to three components:
- TV - DVD or VCR - Satellite Receiver or Cable Box
Dedicated MENU key
Compatible with today's most popular brands!
Your RCA universal remote control is compatible with most brands of infrared remote-controlled components manufactured after 1990. Complete Code Lists included. Operates most RCA, GE and PROSCAN branded products without any programming!
2 Regles 2 AA batteries (sold separately), 2 piles AA requisites (rendues sépéranté). Necessity for the construction of the plant.
©2004 THOMSON INC.
10330 N. Meridian Street
Indianapolis, IN 46290
Made in Indonesia
Fabrique en Indonésie
Hecho en Indonésie
RCR311W NA CAW/IB REV B Trademark(s) 已 Registered. Marque(s) deposé(s). Marca(s) registradad(s).
See inside for details. Details a l'interieur. Para mayor informale

- RCA
- Three-Component Universal Remote
- Battery Installation and Information
- Battery Saver
- Backlighting
- BACKLIGHT
- Illuminated ON·OFF Key
- Programming the Remote
- Programming Methods
- Brand Code Search and Entry
- GO BACK
- VCR\*DVD
- ON-OFF
- TV SATCBL
- ON\*OFF
- 2 3
- Programming Methods (continued)
- Direct Code Entry
- Manual Code Search and Entry
- Testing the Code for Maximum Functionality
- Auto Code Search and Entry
- Code Retrieval
- Code Retrieval (continued)
- Using the Remote to Control Your Components
- On-screen Menus
- Accessing and Selecting Menu Items
- Exiting a Menu Mode
- Sleep Timer (Select Models Only)
- PROGRAMMING THE SLEEP TIMER
- (1)
- ONOFF
- Troubleshooting
- Problem: The remote does not operate your component.
- Problem: The remote can't be programmed to operate your component.
- Problem: The remote is not performing commands properly.
- Problem: The illuminated ON-OFF key does not light when you press a key.
- Problem: The VCR won't record.
- Problem: The remote will not change channels on your component.
- Problem: The component's menu doesn't appear on the TV screen.
- Table des matieres
- Limited Lifetime Warranty
- Consolidate three remote controls into one!
- Compatible with today's most popular brands!
Brand : RCA
Model : RCR311W
Category : Remote control