AVH-270BT - Multimedia car stereo PIONEER - Free user manual and instructions
Find the device manual for free AVH-270BT PIONEER in PDF.
Download the instructions for your Multimedia car stereo in PDF format for free! Find your manual AVH-270BT - PIONEER and take your electronic device back in hand. On this page are published all the documents necessary for the use of your device. AVH-270BT by PIONEER.
USER MANUAL AVH-270BT PIONEER
Fhank you for buying this Pioneer product Please read through these instructions so you il know how to operate your model proper after you have finished reading the instruc- ep this document in a sale place for future reterence. Olmportant Fe screens shoun in lhe examples may ciffer from actual sers changed without not function improvements MPrecaution. Important safety information To ensure safe driving When using a display connected to V OUT. To avoid battery exhaustion Rear view camera Handling the USB connector In case of trouble Visit our website. About this product Protecting ine LCD panel and screen Notes on internal memory. About his manual BBasic operation Checking part names and functions. Remote control Inserting/ejecting/connecting media, On irst-ime startup How to use ne screens Supported AV source Selectng a source Using the touch panêl Lhlbhbone Rhbbbee RE bb MBRegistration and connectioi of Bluetooth device Displaying the “Bluetooth” screen Registering your Bluetooih devices. Gonnecting a registered Bluetooth device manually Switching visibiity Entering îne PIN code for Bluelooïh wireless connection
Displaying the device information. 8 Clearing the Bluetooth memory, 8 Updating Bluetooth software 9 Displaying the Bluetoolh software version. BHands-free phoning Displaying the Phone menu screen. 10 Making a phone call 10 Recelving a phone cal 10 Ghanging the phone settings ol Notes for hands-free phoning 11 Setup for iPod iPod compatiblity Information on the connections and functions 12 BRadio Starting procedure 18 Storing the strongest broadcast frequencies … 13 Displaying the “Radio settings” screen …….18 Tuning into strong frequencies 13 Seting the FM tuning step 13 Switching the sound qualiy of the FM tuner …13 Setting the allernative frequency search. 13 Setting the Auto PI search. 14 Limiting stations to regional pragraming.……14 Receiving traffic announcements (TA) 14 Receiving news announcements mn Disc. Starting procedure 16 Selecting files from the ile name lit 16 Suitching the media file type. 16 Searching for the part you want to play 16 Operating the DVD menu 16 Switching the subile/audio language 16 E Compressed audio files … 17 Starting procedure (for Disc) 17 Starting procedure (for USB). 17 Selecting files from the ile name lt 47 Suitching the media file type. 17 E Compressed Starting procedure Selecting files from the ile name lit 18 mStil Starting procedure 1 Selecting files from the fe name list 19 Switching the media file 1ype. 19 Seting the slideshow interval 18 miPod. Connecting your Pod 20 Starting procedure 21 Selectng song or video sources from he pla istscreen BBluetooth audio player…22 Starting procedure Selecting files from the file name list 2 AUX source Starting procedure Seting the video signal 23 Displaying the “System” setting screen ……24 Activaling the Bluetooth audio source 24 Seting the ever scrol 24 Seting the rear view camera. 24 Seting the camera for Rear View mode 24 Seting the safe mode 24 Selecting Ine system language 24 Seting the beep sound Adusting the response positions of ne louch panel (touch panel calibration) Setting the dimmer. 25 Adjusting the picture 25 BAudio adjustments Displaying the “Audio” setting screen 27 Using faderibalance adjustment 27 Using balance adjustment 27 Adjusting source levels 27 Adiusting loudness. 27 Using ine subwoofer output 27 Adiusting the subwoofer settings. 27 Suitching the rear speaker output. 27 Suitching the RCA rear output 27 Boosting le bass 28 Seting the high pas fier 28 Using ine equalizer 28 mTheme menu Selecting Ine theme color. 29 mSetting up the video player... 30 Setting the top-priority languages Setting the angle icon display. 50 Setting parental lock 30 Setting the DivX Subtitle 41 Displaying your DivX VOD registration code ….31 Displaying your DivX VOD deregistration code. 31 Automatic playback of DVDS 31 Setting the video signal for the rear view camera. ai Favorite menu. Creating a shortcut Selecting a shorteut Removing a shortcut E Common opera! Setting the time and date Changing the wide screen mode. 33 Other functions. Reseting various settngs/Restoring this prod- ct o the default setings 34 BAppendix Troubleshooting Error messages Handling and care of discs 37 Playable discs. 87 Detailed information for playable media ……88 Copyright and trademark notice 40 Bluetooih 40 WMA 40 DivX 40 AAC 40 Detailed information regarding connected iPod devices, 40 Using app-based connected content. a Notice regarding video viewing a Notice regarding DVD-Video viewing a Notice regarding MP ile usage ai Using ine LCD screen correct. ai Specifications, 42
D CE rain country and government laws may pronibit or restrict the placement and use of this product in your vehicle. Ple Écompiy with all applicable laws and regulations regarding fne use. installation and operation of this product
I you want to dispose this product, do not mix it with general household waste. There is à separate collection system for Used electronic products in accordance with legislation that requires proper treatment, recovery and recycling hou Switzerland at holds in the member states of the EU, in d Norway may return their used electronic products free of charge to designated collection facilities or to 2 retailer (f you purchase a similar new one). For countries nat mentioned above, please contact your local authorities for the correct method of disposal. By doing so you will ensure that your disposed product undergoes the necessary treatment, recovery and recycling and thus prevent potential negative effects on 1ne environment and human health CAUTION his product is a Class 1 laser product classified under the Safety of laser products, IEC 60825-1:2007, and contains à class 1M laser module. To ensure continued safety, do not remove any covers or attempt to gain access to the inside of ne product. Reter all servicing to qualified personnel
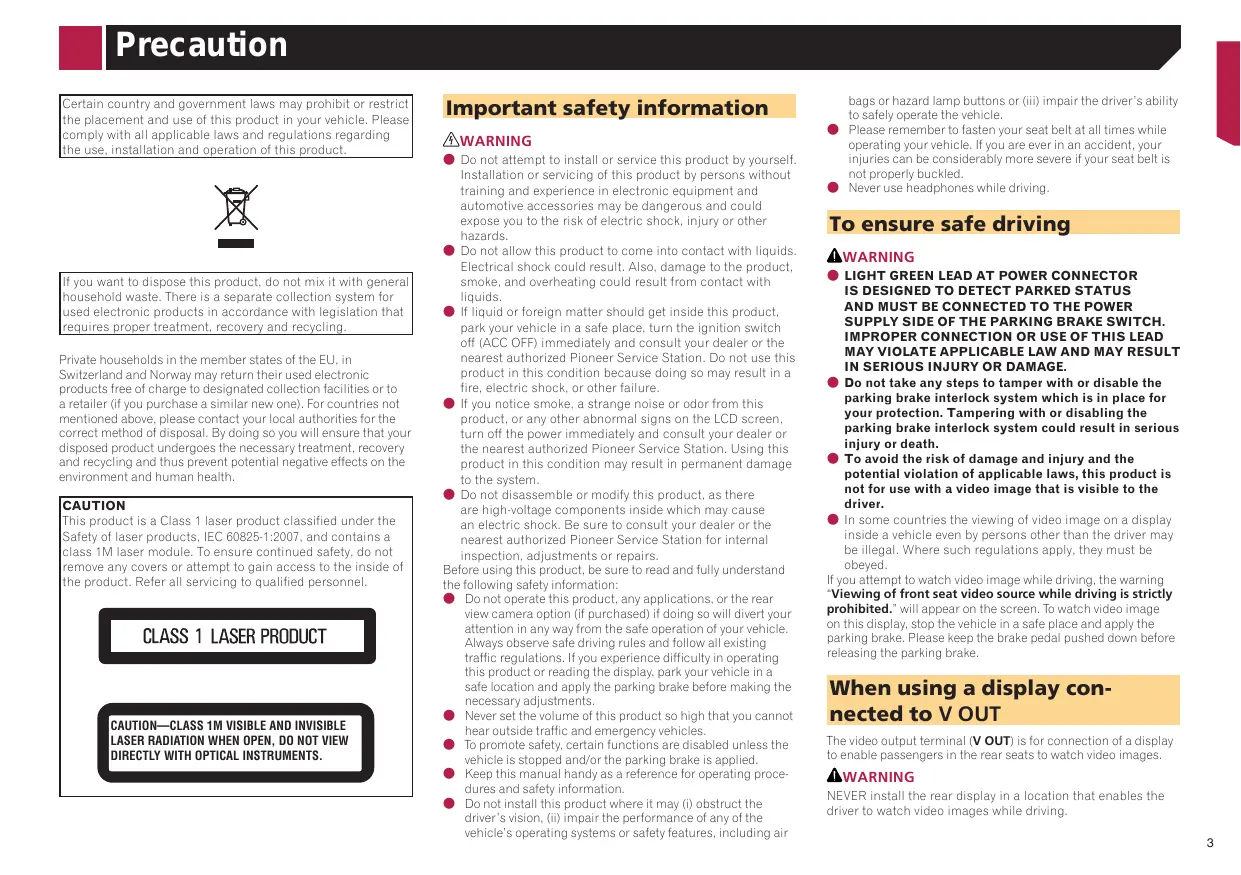
CLASS 1 LASER PRODUCT
ICAUTION—CLASS 1M VISIBLE AND INVISIBLE
LASER RADIATION WHEN OPEN, DO NOT VIEW DIRECTLY WITH OPTICAL INSTRUMENTS. ANWARNING © Do not attempt to install or service this product by yourself Installation or servicing of this product by persons without erience in electronic equipment and cessories may be dangerous and could training and e> automotive expose you to the risk of electric shock, injury or other hazards © Do not allow this product to come into contact with liquid. Electrical shock could result. Also, damage to the produc Smoke, and overheating could result from contact with iquids. If liquid or foreign matter should get inside this product park your veh a the ignition switoh off (ACC OFF) immediately and consult your dealer or the nearest authorized Pioneer Service Station. Do not use this product in this condition because doing so may r fire, electric shock, or other failure. @ if you notice smoke, a strange noise or odor from this product, or any other abnormal signs on the LCD screen turn off the power immediately and consult your dealer or the nearest authorized Pioneer tion. Using this: product in this condition may result in permanent damage to the system © Do not disassemble or modify this product, as there are high-voitage components inside which may cause an electric t your dealer or the Station for internal nspection, adjustments or repairs. Before using this product, be sure to rea the following safety information: © Do not operate this product, any applications, or the rear view camera option (if purchased) If doing so will divert your ntion in any way from the safe operation of your vehicle. Always observe safe driving rules and follow all existing traffic regulations. I you experience difficuly in operating this product or reading he display, park your vehicle in à safe location and apply the parking brake before making the necessary adjustments. © Never set the volume of this product so high that you cannot hear outside traffic and emergency vehicles © Dpromote salety, certain functions are disabled unless the vehicle is stopped and/or the parking brake is applied.
and fully understand Keep this manual handy as a reference for operating proce- dures and safety information. Do not install this product where it may () obstru driver s vision vehi the ) impair the performance of any of the ls operating systems or safety features, including air bags or hazard lamp buttons or (li) impair the drivers ability to safel} operate the vehicle. © Piease remember to fasten your seat belt at all times while operating your vehicle. you are ever in an accident, your njuries can be considerably mare severe if your seat belt is not properly buckled. © Never use headphones while driving. AWARNING
© LIGHT GREEN LEAD AT POWER CONNECTOR
AND MUST BE CONNECTED TO THE POWER SUPPLY SIDE OF THE PARKING BRAKE SWITCH. IMPROPER CONNECTION OR USE OF THIS LEAD MAY VIOLATE APPLICABLE LAW AND MAY RESULT IN SERIOUS INJURY OR DAMAGE. © Do not take any steps to tamper with or disable the parking brake interlock system which is in place for your protection. Tampering with or disabling the parking brake interlock system could result i jury or death. © To avoid the risk of damage and injury and the potential violation of applicable laws, this product is not for use with a video image that is visible to the drive @ in some countries the viewing of video image on a display inside a vehicle even by persons other than the driver may be illegal h regulations apply, they must be obeyed I you attempt to watch video image while driving. the warning Viewing of front seat video source while driving is strictly prohibited." will appear on the screen, Te watch video image On this display, stop the vehicle in a safe place and apphy the parking brake. Please keep the brake pedal pushed don belore releasing the parking brake: The video output terminal (V OUT) is Lo enable pa AWARNING NEVER install the rear display in a location that enables the driver to watch video images while driving fr connection of a display ngers in the rear seats to watch video images.
D CE Be sure Lo run the vehicle engine while using this product. Using this product without running the engine can drain the battery AWARNING Do not install this product in a vehicle that dos ACC wire or circuitry available With an optional rear view camera, you are able to use this product as an aid to keep an eye on trailers, or backing into à tight parking spot AWARNING © SCREEN IMAGE MAY APPEAR REVERSED. © LSE INPUT ONLY FOR REVERSE OR MIRROR IMAGE REAR VIEW CAMERA. OTHER USE MAY RESULT IN
ACAUTION The rear view mode is to use this product as an aid to keep an eye on the trailers, or while backing up. Do not use this function for entertainment purposes, ACAUTION © To prevent data loss and damage to the storage device, never remove it from {his product while data is being transterred. @ Pioneer cannot guarantee compatibility with all USB mai storage devices and assumes na responsibility for any la of data on media players, IPhone, smartphone, or other devices while using this product Should this product fai to operate proper, contact your dealer or nearest authorized Pioneer Service Station. tus at the following site: http://www.pioneereu © Register your product. We will keep the details of your pur: Se on fil to help you refer to this information in the event fan insurance claim such as loss or theft et have an © ie offer the latest information about PIONEER CORPORATION on our website. © Pioneer regular; provides softrare updates to further improve ils products. Please check he support section of the Pioneer website for al available software updates. © This product does not work correctiy Europe. The RDS (Radio Data System) function aperates only in areas with FM stations broadcasting RDS signals. The RDS-TMC service can also be used in the area where there is 2 station that broadcasts the RDS-TMC signal © The Pioneer CarStereo-Pass is for use only in Germany in areas other than © Do not expose the LCD screen to direct sunlight when this product is not used. This may result in LCD screen malfunc lion due to the resulting high temperatures. © When using a celluiar phone, keep the antenna of the cel Autar phone away from the LCD screen ta prevent disruption of the video in the form of spots, colered stripes, etc. © 1 protect the LCD screen from damage, be sure to touch the touch panel keys onty with your inger and do so genth. Before removing the vehicle battery Some of the settings and recorded ntents will not be reset. Data subject to erasure The information is erased by disconnecting the yellow lead from the battery or removing the battery sel © Some of the settings and recorded contents will not be reset Resetting the microprocessor ACAUTION Pressing the RESET button resets settings and recorded contents to the factory settin © Do not perform this operation when a device is connected to this product © Some of the settings and recorded contents will not be reset The microprocessor must be n onditions: © Prior to using this product for the first time after installation © 1finis product fais to operate proper. © iftnere appears Lo be problems with the operation of the system © your vehicle position & cant positioning error Turn the ignition switch OFF. Press the RESET button with a pen tip or other pointed implement. + Checking par names and functions on page 5 Settings and recorded contents are reset {o the factory setings This manual uses diagrams of actual screens ta describe opera: tions. However, the screens on some units may not match {ose shoun in this manual depending on the model used. under the following hou on the map with a signif Meanings of Symbols Used in This Manual is inaicales model name Inat are Supporte he described operations. Mis indicates Lo touch an appropriate soft key on the touch screen. Mis inaicates Lo touch and hold an appropriate soft key on the touch screen. Mis inaicates that ere 1s a reference or supplementary for the key or screen Ce]
RESET [5 Resefting the microprocessor on page 4 button [Volume - puron E [mure to switch 1e mute setting to on or off. button ET Lo switch 1ne display between the top creen and the current source screen. F [psp to turn the display on or of. button FE frrake [Pertorms manual seek tuning fasttonaral IHe@ pl reverse and track search controls D button FE E ing a aise on page 5 loading slot LoD screen The remote control CD-R33 is sold separately. For details conceming operations, see the remote control manual ACAUTION Do not insert anything other than a disc into the disc: lot Inserting and ejecting a Inserting a disc © Insert a disc into the disc-loading slot. Ejecting a disc © Press button to eject a disc. Plugging and unplugging a USB stor- age device G This product may not achieve optimi some USB storage devices. m performance with Connection via a USB hub is not possible. 7 AUSB cable is required for connection.
1. Pull out the plug from the USB port of the USB
cable. Plug a USB storage device into the USB cable.
1. Start the engine to boot up the system.
‘After a short pause, the splash sci me Select Program Language” scr en comes on for a few nds. een appears. Fram the second time on, the screen shown we diff depending on the previous conditions. Touch the language that you want to use on screen.
| Basic operatio Supported AV source | Using the common touch panel keys can play or use the following sources with this product © LE Returns tothe preous screen © DS Cioses the screen. ROM (compressed audio files) e oo The fol Operating list screens urces can be played back or used by cannecting xiliary device. cm) Bluetooth audio (AVH Æ oo ex == Selecting a source D Là abcdeighi Source on the Top menu screen LX abcdefgni action 1 Press = D Touching an item en the list allows you to narrow down the options and proceed to the ne 2 Appears when all characters are not dispi 2 Touch the source icon you want to select. 5 When you select "OFF, the AV source is turned of. ed on the display Source on the source list If you touch the key, the rest are scrolled for display, 2 Appears when items cannot be displayed on a single page 1 Display the source view any hidden items. (O] Operating the time bar “02148 %, EQ O] 999999" -9999'99" D You can change the play G This function is not avai selected as the AV sourc k point by dragging the key le when the Bluetooth Audio is D Displays the source 2 Touch the source key you want to select. Using the touch panel Switches the operation panel of AV You can operate this prodi sources. directiy with This keys not available on all sources. G Toprote screen only with your finger gentiy Switching the operation panel
HE Registratio d connection of Bluetooth device
Press Touch Ce] and then [8] The “Bluetooth” screen appears.
= 0 Ifthree devices are already paired, “Memory Full" is dis played. Delete a paired device first Deleting a registered device on page 8 Activate the Bluetooth wireless technology on your devices. Display the “Bluetooth” screen. Displaying the ‘Bluetooth screen on page 8 Touch [Connection]. Touch the Bluetooth device name you want to register. I your device supports SSP (Secure Simple Pairing) a si digit number appears on the display of this product, Tou [Yes to pair the device Once the connection is established, the device name is displayed. Touch the device name to disconnect Alter lhe device is successfully registered, a Bluetooth con. nection is established from the system. The Bluetooth connection can be also made by detecting this product from the Bluetooth device. Before registration, make sure that “Visibility" in the “Bluetooth” menu s set to “On”. For details on a Bluetooth device operations, refer to the operating instructions supplied with the Bluetooth iching visibiity on page 8 Connecting to a Bluetooth device automatically This function connect {he last connected Bluetooth devic this product automatically as Soon as the two de {han à few melers apart 1 Display the “Bluetooth” screen. 2 Displaying the “Bluetooth” screen on page 8
2. Touch [Auto Connect] to switch “On" (default)
or “off”. Deleting a registered device ACAUTION Never turn th is being deleted 1 Display the “Bluetooth” screen. 2 Displaying the “Bluetooth” screen on page 8 2 Touch [Connection]. product off while the paired Bluetooth device Connect the Bluetooth device manual in the following cases: © Go or more Bluetooth devices are registered, and you want to manualy select Ihe device to be used. You want lo reconnect a disconnected Bluelooth device. © Connection cannot be established automatically for some reason 1 Activate the Bluetooth wireless technology on your devices. 2 Display the “Bluetooth” screen. 3 Displaying the “Bluetooth” screen on page 8 3 Touch [Connection]. 4° Touch the name of the device that you want to connect. This function sets whether or not to make this product visible to the other devi Display the “Bluetooth” screen. Displaying the “Bluetooth” screen on page 8 Touch [Visibility] to switch “On” (default) or “off”. To connect your Bluetooth device to this product, yeu need to enter a PIN code. You can change the PIN code with this function. 1 Display the “Bluetooth” screen. © Displaying the “Bluetooth” screen on page 8 2 Touch [PIN Code Input]. 3 Touch [0] to [9] to input the pin code (up to 8
9 The default PIN code is "0000 1 Display the “Bluetooth” screen. 2 Displaying the “Bluetooth” screen on page 8 2 Touch [Device Information]. The device name and address of the Bluetooth device and this product are displayed. Mis setting is available only when yeu stop yourvehicle in à safe place and apply the parking brake. ACAUTION Never turn this product off while the Bluetooth memory is being cleared 1 Display the “Bluetooth” screen. © Displaying the “Bluetooth” screen on page 8 2 Touch [Bluetooth Memory Clear]. 3 Touch [Clear]. The confirmation screen appears,
ooth software, For details on Bluetooth software and updat ing. refer to our website G The source is turned off and the Bluetooth connection is disconnected before the process starts. G This setting is available only when you stop your vehicle in a fe place and apply the parking brake: ou need Lo store the version up fil ta the USB storage device in advance. ACAUTION Never turn this product off and never disconnect the phone wnile the software is being updated Connect the USB storage device stored the ver- sion up file to this unit. Plugging and unplugging a USB storage device on page 5 Displaying the “Bluetooth' screen on page 8 Touch [BT Software Update].
Touch [Start]. Follow the on-screen instructions Bluetooth software. 0 finish updating the nsult I to operate proper, you may need to m the following procedure to check the software version on this unit 1 Display the “Bluetooth” screen. 2 Displaying the “Bluetooth” screen on page 8 2 Touch [BT Version Info]. The version of this products Bluetooth module appears.
Bluetooth telephone connected indicator The device number of the connected device is displayed. Reception status of the cellular phone Battery status of the cellular phone _| Phone Book [es x CRDI x el * abedefghi abedefghi & LE soc #4 Switches to the initial search. #1. Display te preset il screen @*!_ + Using the preset dalists on page 10 #2. Svitches tothe phone book ist @'2 2° Caling a numberin he phone book on page 10 #3, Switches to the missed,receedand dialed cal its @*3 5" biaingrom ihe history onpage 10 4 Switches the mode to enter the phone number @'4 directs 3 Direct dialing on page 10 ACAUTION For your safety, avoid talking on the phone as much as possible while driving use this function you need to connect your cellular phone to this product via Bluetooth in advance. Registration and connection of Bl device on page 8 1 Press 2 Touch[E]. The Phone menu screen appears You can make a phone call in many different ways. Direct di g 1 Display the “Phone menu’ screen. 2 Displaying the Phane menu screen on page 10 2 Touch[Æ]
Touch the number keys to enter the phone number. 4 Touch [Æ]to make a call. 5 Touch Ælto end the call. G You may hear a noise when jou hang up the phone. Calling a number in the phone book ty” of he “Bluetooth” screen should be or y on page 8
1 Display the “Phone menu’ screen. © Displaying the Phone menu screen on page 10
Touch Touch the desired name on the list. 4 Touch the phone number you want to dial. The dial screen appears and dialing start, to end the call. Dialing from the history 1_ Display the “Phone menu” screen. 2 Displaying the Phone menu screen on page 10 2 Touch 3 Touch the item to switch the history list. The following items are available: © LE Received cal list @ [Æ Diaied call list EE Missed call list 4 Touch the desired entry on the list to make a call. The dial Screen appears and dialing Start. 5 Touch to end the call. Using the preset dial lists Registering a phone number You can easily store up to six phone numbers per device as presets 1 Display the “Phone menu” screen. 2 Displaying Îhe Phone menu screen on page 10 2 Touch [MorEl On the “Phone Book screen 3 Touch [Be] Dialing from the preset dial list ouch the desired name. 1 Display the “Phone menu” screen. 2 Displaying lhe Phone menu screen on page 10 2 Touch 3 Touch the desired item you want to dial. The dial reen appears and dialing stars. 1 Touch [Æ]to answer the call. If you touch Ælwhile getting a call waiting, you can switch to the talking person. Touch ÆIto reject the call. Touch Ælto end the call.
HE CT Answering a call automatically splay the “Bluetooth” screen. playing the “Bluetooth” screerr on page 8 2 Touch [Auto Answer] to switch “On” or “Off” (default). Switching the ring tone n select whether or not to use this products ring tone. splay the “Bluetooth” screen. playing the “Bluetooth” screeri on page 8 2 Touch [Ring Tone] to switch “On (default) or “off”. Inverting names in the phone book splay the “Bluetooth” screen. 2 Displaying the “Bluetooth” screen on page 8 2 Touch [Invert Name]. ate mode Setting the pi During a conversalion, you can switch Lo private mode ( directly on your cellular phone) © Touch ET or BE]to turn private mode on or off. Adjusting the other party's listening volume This product can be adjusted to the other party listening volui © Touch [FE to switch between the three vol- ume levels. 9 Settings can be stored for each device: General notes Connection tal cellular phones featuring Bluetooth wire- less technology is not guaranteed © The line-of-sighit distance between this product and your cellular phone must when sending and receiving voice and data via Bluet © \ith some cellular phones, the ring Sound may not be output from the © 1fprivate mode is selected on the cellular phone, hands-free phoning may be disabled. tration and connection llular phone operations vary depending on the type of cel lular phone. Refer t the instruc with your cellular phone for instructions. © \nen phone book transfer does not work, disconnect your phone and then perform pairing again from your phone to this product Res
may hear a noise in the following situations: nen you answer the phone using the button on the phone. ren the person on the other end of the line hangs up the phone. © 1fine person on the other end of the line cannot hear the conversation due to an echo, decrease the volume level for hands-free phoning. h some cellular phones, even after you press the accept button on the cellular phone when a call comes in, hands. free phoning may not be performed. © The registered name will appear ifthe phone number is already registered in the phone book, When one phone number is registered under different names, only he phone number will be displayed. The received call and the dialed number histories © You cannot make a call ta the entry of an unknown user (no phone number in the rec nistory © lfcalls are made by operating your cellular phone, no history data will be recorded in this product Phone book transfers © 1finere are more than 1 000 lular phone, not all entries may download ec: phone book correct} © Iftne phone book in the phone contains image data, the phone book may not be trans none book entries on your cel mpletely nding on the phone, this product may not display the © Depending on the cellular phone, phone book transfer may not be available.
bn] Setup for iPod When using an iPod with this produ this product according to the device to b figure the settings of onnecte pports only the following iPod models and iPod not work correctiy
i0S 6.0.1 © iPod touch (Ath, 5th generation). iPod touch (ar generation): IOS 5.1.1 iPod touch (2nd generation: 10S 4.2.1 Ver. 2.04
h generation): Ver. 1.0.2 @ iPod nano {Ath generation): Ver. 1.0.4 @ iPod nano (Ard generation): Ver. 1.1.3 ontrol an iPod compatible with this 9 Operation metht andthe software version. 9 Depending on the software version of the iPod, it compatible with this product For details about IPod information on our website This manual applies to the following iPod models. may vary depending on the iPod mac rd, th, 5th, Gth generation jghtning connector @ iPod touch Sth generation @ iPod nano 7th generation The settings and cables required for connecting each device. and the available sour as follows: may not be mpatibility with this product, refer ta the iPhone with a 30-pin connector When connec: separately) @ Available sources iPod (audio) iPod (video) g via CD-IU201V (sold iPod / iPhone with a Lightning connector When connec: separately) @ Available sources iPod (audio) ing via CD-IU52 (sold
D EC Displays the preset channel list. Select an item on the list ("1" to "6 +0 switch to the preset channel. Selects the FM1, FM2, FM3, MW or LW band. Performs manual tuning. 2, Performs seek tuning or non stop seek tuning. Releasing the key in à few seconds, skips to the nearest station from the current frequency. f you touch again while the system is searching, cancels seek tuning and performs manual tuning. Keeping holding the key for a long seconds, performs non stop seek tuning. p Recalls the preset channel stored to a key from memory. 1 Stores the current broadcast frequency to a key.
ressing Mort, you can also switch Ihe preset channels. By pressing and hold or Beeland release, you can also perform seek tuning, By keeping pressing and holding Hé or Bebe you can perform nan stop seek tuning. you press again, non stop seek tuning is canceled and the preset channel is swilched.
1 Press 2 Touch [Radio]. The “Radio” screen appears. M (best stations memory function automatically stores 3x strongest broadcast frequencies under the preset tuning keys" Tto"6 D Storing broadcast frequencies with BSM may replace those you have already saved. 9 Previously stored broadcast frequencies may remain stored ifthe number of frequencies stored has not reached the limit 1 TouchD] 2 Touch[Æ]to begin a search. While the message is displayed, the six strongest broadcast frequencies will be stored under the preset tuning keys in order oftheir signal strength, *_lfyou touch [Cancel], the storage process is canceled. 1 Press 2 Touch] and then OI] 3 Touch [AV Source Settings]. 4 Touch [Radio Settings]. nction when “Radio” is d'asthe n'use this ktuning allows you to only tune into those radio sta tions with sufficiently strong signals: 1 Display the “Radio Settings” screen. 2 Displaying the “Radio sellings” screen on page 13 2 Touch [Local]. Touch the item you want to set. Off (default Turns the seek tuning setting off © Levell 0 Level4: Sets the level of sensitiity for FM to Level to Level4 (for MW and LW 10 Level or Level2) The FM Level4" (MW and LW “Level?” setting allons reception of only stations with the strongest switch the seek tuning step for FM band The tuning step remains at 50 KHz during manual tuning Turn the source off. Source on the Top menu screen on page 7 Display the “Radio Settings” screen. Displaying the “Radio settings” screen on page 13 Touch [FM Step] to switch the step to “100kH: (default) or “50kHz". sv ve us This function is available only when you receive the FM band. Display the “Radio Settings” screen. Displaying the “Radio settings” s Touch [Tuner Sound] to select the item. Music (dsfault) Gives priority ta the sound quality. Talk Gives priority ta noise prevention: Standard Gives no effect non page 13 e e env When the tuner cannet get a good reception, tunes to another broadcast station that supports the same program in the current network. Display the “Radio Settings” screen. 2 Displaying Ihe “Radio settings” screen on page 13 2 Touch [Alternative FREQ] to switch “On”(default) or “Off”.
D EC hen you switch to the broadcast station containing RDS data, arches for the same PI (Program Identification) code broad st station from all frequency band automatically Turn the source off. Source on the Top menu screen on page T Display the “Radio Settings” screen. Displaying the “Radio setings" sereen on page 13 Touch [Auto PI] to switch “On” or “Off” (default). Even if you set to “Off, the PI search is automatically per formed when the tuner cannot get à good reception: You can switch whether the area code is checked during the auto PI search. 1 Display the “Radio Settings” screen. 3 Displaying the “Radio set reen on page 13 2 Touch h [Regional] to switch “On"(default) or The tratfic announcement can be received from the last selec{ frequency, interrupting the other sources, 1 Display the “Radio Settings” screen. 3 Displaying the “Radio settings” screen on page 13 2 Touch [TA Interrupt] to switch “On” or “Off” (default). The news can be received from the last selected frequency inter rupting the other sources. 1 Display the “Radio Settings” screen. 2 Displaying the “Radio settings” sereen on page 13 2 Touch [News Interrupt] to switch “On” or “Off” (default).
Track number indicator Audio source screen 1 Hides the touch panel keys. To display again the keys, touch anywhere on the screen, Performs frame-by-frame playback. # Performs slow-motion playback. Each time you touch [II ] it changes the speed in four steps in the following order: 1/16 1/8-+ 1/4+ 1/2 Video source screen 1 @° Skips files forward or backward. Switches between playback and pause. 8 Plays files in random order. This function is available for music CD. Does not play tracks in random order. [FSI : Plays all tracks in random order. Audio source screen 2 À Track 99 Sets a repeat play range. [&] : Repeats the current disc. : Repeats the current track. LÉ Pertorms fast reverse or fast forward. Touch again to change the playback speed. 8 stops playback. Video source screen 2 © 02148
Stop m99 +:99 Sets a repeat play range. Repeats all files. Repeats the current chapter. Repeats the current title. Changes the viewing angle (Multi-angle). This function is available for DVDs featuring multi-angle recordings. Selects the audio output from IL+R], [Left], [Right], [Mix]. This function is available for Video-CDs and DVDs recorded with LPCM audio.
Stop m99 1:99 ee CEE fr => IN] Resumes playback (Bookmark). This function is available for DVD-Video. You can memorize one point as a Bookmark for a disc (up to five discs). To clear the bookmark on the disc, touch and hold this key. Returns and begins playback from the specified point. This function is available for DVD-Video and Video-CDs featuring PBC (playback control) #4. Selects a track from the list @1 2 “Sclecting files rom the le name list on page 16 #2. Switches the media file pe: @ “ = Switchingthe media file type on page 16
43. Searches forthe par you want o play.
@ ” = Searching forthe part ou want to play on page
+4 Displays the DVD menu. @ ‘ = Operatingthe DVD menu on page 18 #5 Switches the subtitle/audio language: @"5 5° Smichngihe subie/audi language on page
9 By pressing or you can forward or backward 3 By pressing and holding HéAor BB you can also perform fast reverse or fast forward. so skip fles/chapters Gi lfa Video-CD with PBC On is being played, FECN appears. TI Changing the ide screen mode. 2 Common operations on page 33 You can play a normal music CD, Video-CD or DVD-Video using {he builtin drive of this product ACAUTION For safety reasons, video images cannot be viewed while your vehicle is in motion. To view video images, Stop in a safe place and apply the parking brake. 1 Press 2 Insert the disc you want to play. The source changes and then playback nil 2 Inserting and éjecting à disc on page 5 3 Hfthe disc is already set, select [Disc] as the playing 1 Touch Æ] 2 Touch a track on the list to play back. When playing a digital media containing a mixture of various media fil types you can switch between media file types to play. 1 Touch Touch the item you want to set. Music Smitches the media fille type to music (compressed audio)
Switches the media file type to video. CD-DA. Switches the media file type t CD (audio data (CD-DA)) G For DVD-vide For Video-CDs, 1 Touch QI ect [Tite], [Chapter] or [10Key] 4 Track] or [10Key] (PBC on1y) jou can sel Touch the item to select the search function. Touch [0] to [8] to input the desired number. To cancel an input number, touch [C]. Lo start playback from the number you registered. uen n operate the DVD menu by touching the menu item on creen direct G This function may not work property with some DVD disc content. In that case, use touch panel keys to operate the DVD menu: Touch Ælor Touch the desired menu item. to change the language. title language. S the audio language. = You can also switch the subtitle/audio languages using the “DVD/DivX Setup” menu.
bu] Compressed audio files Displays the artwork when the file with the artwork is being played. The artwork file type needs to be JPEG, and the file size should be less than 99 KB. Playback screen 1 (Example: USB) o ABC 4R& &4 Plays files in random order. Does not play files in random order. Plays all files the repeat range in random order. Playback screen 2 (Example: USB)
Loos Switches between playback and pause. Skips files forward or backward. Switches the current music information display. Sets a repeat play range. [ES] or Repeats all files. Repeats the current folder Repeats the current file. Selects the previous folder or the next folder. #4 Selects a file from the list. 2 Selecting files from the ile name list on page 17 #2 Switches the media file type 2 Switching the media file type on page 17 Hd or Bel, jou can also skip files forward or backward. 9 By pressing and holding HA or BB. you can perform fast reverse or fast forward. play compressed audio files stored in a disc or a USB. device. ty chart on page 39 1 Press 2 Insertthe disc you want to play. The source changes and then playback wil Star
IDise] as the playing source. Plug the USB storage device. Plugging and unplugging à USE storage device on page 5 Touch [USB]. Plaÿ back is performed in order of # ed they contain no pla can find files or fo Fer name lt 1 Touch El 2 Touch a file on the list to play back. G Files are played back in file number order. De un = der numbers. Folders to play back using the file name When playing a digital media containing a mixture of varicu media file types you can switch between media file typ 1 Touch 2_ Touch the item you want to set. © Music witehes the media file ideo witehes the media file type to video. © cnpa witches the media file type to CD (audio data (CD-DA)) © Photo witches the media file type to still image (JPEG or BMP o play. pe to music (compressed audio)
sp Er@ = Abcdefghi MR Abcdefghi = pre) Cr ©
Performs fast reverse or fast forward. Touch again to change the playback speed. Switches between playback and pause. Selects a file from the list. 3 Selecting files from the ile name list on page 18 Switches the subtitie/audio language. © Switching the subtitle/audio language on page
+3 Switches ne media fe pe @ 3" Suichingthe media fie ype on page 17 D By pressing H@@or BB1, you can also skip files forward or hacker By pressing and holding Hd or Bel, you can perform fast £rse ar fes forwaré Stored on a disc or in an je device. chart on page 39 ACAUTION For safety reasons, video images cannot be viewed while vehicle Is in motion, To view video images, stop in a safe and apply ne parking brake. 2 Compressed audio files on page 17 can select files to view using the file name list Touch Æ]. Touch a file on the list to play back. are played back in file number order and folders are skipped when they contain no iles, Touch the playback sign of the thumbnail to preview the file.
Lu | Still image files Hides the touch panel keys. To display again the keys, touch anywhere on the screen. Rotates the displayed picture 90° clockwise. Selects the previous or next folder. © 2148 #|,
8% sets a repeat play range. [&]: Repeats all files. Repeats the current folder. € plays files in random order. Does not play files in random order. RS: Plays all files in the current repeat play range in random order. © 02148
2m Abcdefghi B Abcdefghi @* Skips fil or backward. Switches between playback and pause. #4 Selects a file from the list 2 Selecting files from the ile name list on page 19 #2 Switches the media file type 2 Switching the media fil type on page 19 re not displayed in the rear display. Hé or Bel jou can also skip files forward or backward. M By pressing and holding A or Bel. you arch 10 files at a time. the file currently being played is the first or s stored in an USB storage device. chart on page 39 Press Plug the USB storage device. and unplugging à USE storage device on page 5 Playback is performed in order of folder nu: are skipped if they contain no playable files. Touch [USB]. The image is displayed on the screen. You can select files to view using the file name list. 1 Touch El 2 Touch a file on the list to play back. 9 Touching a folder on the list shows its contents. You can play a filon {he list by touching When playing a digital media containing a mixture of varicu media file types you can switch between media file typ 1 Touch[Æ] 2_ Touch the item you want to set. © Music witches the media file type to music (ompressed audio) © Video witches the media file type to video. © Photo with o play. the media file ype to still image (JPEG data) JPEG or BMP files can be viewed as a slideshow on this product In this setting, the interval between each image can be se G This setting is available during playback of the JPEG or BMP files, 1 Display the “Video Setup” screen. Œ]+1% + © 2 Touch [Time Per Photo Slide]. 3 Touch the item you want to set. The following items are available: 105ec" (default), “sec”, “15sec Manual
Audio source screen 1 & Sets a shuffle play. © FE] : Plays randomly songs or | videos within the selected list. Abcdefghi : Plays album randomiy. à Abcdefghi | Audio source screen 2 SAT © Abcdefghi 8 ip à Abcdefghi backward. oABC fo Switches between playback D and pause. Sets a repeat play range. [Œ: Repeats the current song or video. & Changes the audiobook speed. [1]: Normal playback C2] : Fast playback Slow-motion playback
[&]: Repeats all in the selected list. Video source screen © 202148 Abcdefghi EQ Et@ - ms Performs fast reverse or fast forward. Selects a track from the list. 2 Selzcting song orvideo sources from the playlist screen on page 2 ag the Hd or BB button, you can also skip files backward. nd hold the Hé or BB button, you can also rm fast reverse or fast forward. wide screen mode. € cable for iPod s required to conne «if either of the th 80-pin connec re not available. th Lightning con.
ACAUTION For safety reasons, video i vehicle is in motion. To view videe images, stop in a sale place and apply the parking brake. 1 Connect your iPod. anot be viewed while your before. 3 Touch [iPod]. You can search for the song or video you want to play from the playlist screen. 1 Touch 2 Touch[Zlor[£lto switch the music or video category list. 3 Touch the category you want to search for. I jou use English as Ihe system language. the alphabet search function is available. Touch the initial search bar lo use this function, 4° Touch the title ofthe list that you want to play. 5 Start playback of the selected list. © Depending on the generation or version of he iPod, some functions may not be available a playlists create! cation is avai sith the MusieSphere applica le on our website. tion. The api
bn] Bluetooth audio player Playback screen 1 © 702148 4, Abcdefghi EQ à Abcdefghi @ o asc 2% skips files forward or backward. You cannot use this function while the audio is played back. Track number indicator #4 Plays files in random order. Playback screen 2 & Sets a repeat play range. Switches between playback and pause. @ Sects aile from the ist 2 Selecting iles from the file name list on page 22 Hé@or BB button, you can also skip files ar. ted to this prod ns with this product may be limited G While you are listening to songs on your Bluetooth device. please refrain from operating the phone function as much as possible. I you try operating, the signal may cause noise for 19 playbac 9 When you are talking on the Bluetooth device connected to this product via Bluetooth, it may 1 Display the “System” setting screen. CBEACET Touch [AV Source Settings]. Confirm that “Bluetooth Audio” is turned on. playback Press 3, Touch [Bluetooth Audio]. G Thisfunction Bluetooth device Touch Æ]. Touch a file or a folder on the list to play back. le depending on some
Hides the touch panel keys. To display again the keys, touch anywhere on the screen. © 02148
Switches between the screen to operate video files and that to operate music files. ble when there are both audio and video iary equipment le (CD-RM10) (sold separatel}) is required G AMini-jack AV cé for connection 2 For details on how to connect the e ACAUTION For safety reasons, video images ral video compo: er to the installation manual anot be viewed while your vehicle is in motion. To view videe images, stop in a sale place and apply the parking brake. You can display the video im to video input output by the device connected 1 Display the “System” setting screen. CG] # 3% 1 2 Confirm that “AUX Input” is turned on. 3 Press 4 Touch [AUX]. The image is displayed on the screen. When you connect this luct to an AUX equipment, select the suitable video signal setting. 9 You can operate this function only for the video signal input into the AUX input 1 Display the “Video Setup” screen. EG] +#% + 0 2 Touch [Video Signal Setting]. 3 Touch [AUX]. 4° Touch the item you want to set. The following items are available Auto (default), PAL, NTSC, PAL-M. PAL-N, SECAM
REESEUTE 1 Press 2 Touch [®] and then [I]. The “System” selling screen appears. 1 Display the “System” setting screen. S Displaying the “System” seing screen on page 24 2 Touch [AV Source Settings]. 3 Touch [Bluetooth Audio] to switch “Or (default) or “Off”. When “Ever Scroll” is set to “On”, the recorded text information rolls continuousiy in the display. 1 Display the “System” setting screen. © Displaying the “System” seing screen on page 24 2 Touch [Ever Scroll] to switch “On” or “Off” (default). À separately sold rear view camera (eg. ND-BC6) is required for tlizing he rear view camera function, (For details, consult your dealer) Rear view camera This product features a function that automati the ful-screen image of the rear view camera installed on your vehicle, when the shift lever is in the REVERSE (R) positior © When the shift lever is aligned to the REVERSE (R) position immediately after the system of this product is started up. only the camera image will be displayed and the parking assist guidelines will not be displayed. Camera for Rear View mode Rear View can be displayed at all times. Please note that with
this setting, the camera image is not resized to fit, à portion of what is seen by he camera is not viewable. ACAUTION Pioneer recommends the use of à mirror reversed images, othenvise the appear reversed 9 immediately verify whether the display changes to a rear iew camera image when the shift lever Is moved to REVERSE (R) from another position When the screen changes 10 ful-screen rear view camera image during normal driving, switch to the opposite setting in "Camera Polarity Setting rear view camera activation Display the “System” setting screen. Displaying the “System” setting sereen on page 24 Touch [Camera Settings]. Touch [Back Camera Input] to switch “On” or “Off” (default). sn v= Setting the polarity of the rear view camera This function is available when ‘Back Camera Input" is
Ag rear view came Display the “System” setting screen. Displaying the “System” setting sereen on page 24
° tivation on page 24
Touch [Camera Polarity]. Battery (default The polarity of the connected lead is positive. Ground The polarity of the connected lead is negative. To display ‘Rear View’ at all times, "Rear View” needs to be setlo "On 1 Press 2 Touch [Rear View] to switch “On” or “Off” (default). If no operations are performed for seven seconds on the AV operation screen, the camera view will appear automatically To setthe rear view camera for Rear View mode, set ‘Back Camera Input’ 10 "On 2 Setting rear view camera activation on page 24 You can set the safe mode that regulate operating some func: tions only when you stop your vehicle in a safe place and apply te parking brake. 1 Display the “System” setting screen. © Displaying the “System” setting screen on page 24 Touch [Safe Mode] to switch “On” (default) or “off”. © 1fine embedded language andthe selected language setting are not the same, text information may not display proper. © Some characters may not be displayed properiy 1 Display the “System” setting screen. © Displaying the “System” setting screen on page 24 2 Touch [System Language]. 3 Touch the language that you want to use. Display the “System” setting screen. Displaying the “System” selling screen on page 24 Touch [Beep Tone] to switch “On"(default) or “off”.
I you feel that the touch panel keys on the screen deviate from te actual positions that respond to your touch, adjust the response positions of the touch panel screen. 9 This setting is available only when you stop your vehicle in à safe place and apply the parking brake:
D EEE 9 Do not use sharp pointed tools such as a ballpoint or mechanical pen, which could damage the screen. 9 Do not turn off the engine while sang the adjusted position data. Display the “System” setting screen. Displaying the “System” setting screen on page
2 Touch [Touch Panel Calibration].
Touch four corners of the screen along the arrows. 4 Press % The adju 5 Press # once again. Proceedo 16-point adjustment 6 Gently touch the center of the “+” mark dis- played on the screen. The target indicates the order. = When you press tion returns. = When you press and hold #, the adjustment is canceled. 7 Press and hold # The adju Setting the dimmer trigger ment results are saved the previous adjustment posi ment results are saved. 9 This setting is available only when you stop your vehicle in a safe place and apply the parking brake: Display the System” setting screen. ying the “System” setting screen on page Touch [Dimmer Settings]. Touch [Dimmer Trigger]. Touch the item. Auto (default) Switches the dimmer to on or of automatically according ta your vehicle's headlight turning on or off © Manual Switches the dimmer to on or off manual. © Time Sitches the dimmer to on or of at the time you adjusted
Setting the dimmer duration in day or night M You can use this function when “Dimmer Trigger” is set to Manual D This setting is a s and le only when you stop your vehicle in a pply the parking brake. Display the “System setting screen. Displaying the “System” setting screen on page 24 Touch [Dimmer Settings]. Touch [Day/Night] to switch the following en 6
Turns the dimmer manual to of © Night Turns the dimmer manual to on. Setting the dimmer duration splay the “System” setting screen. 3 Displaying the “System” selling screen on page 24 2 Touch [Dimmer Settings]. 3 Touch [Dimmer Duration]. The “Duration Setting” screen appears. 4° Touch the time display to activate the adjust- ment mode. Touch the graph to set the You can also set the dimmer duration touching immer duration.
Each touch of [or [1 moves the cursor back- ward or forward in the 15 minute width. The default setting is 18:00:00 (6:00 PM-6:00 AM) When the cursors are placed on the same point, the dimmer available time is 0 hours. When the cursor for off time setting is placed on the left end and the cursor for on time setting is
placed on the right end, the dimmer available time is 0 hours. When the cursor for on lime seing is pl and the cursor for af time setting is the dimmer available time is 24 hours.
don the left end d on the right end. = _ The time display of the dimmer duration adjusting bar is depending on the clock display setting © Setting the lime and date on page 33 You can adjust the picture for each source and rear view camera ACAUTION For safety reasons, you cannot use some of while your vehicle is in motion. To enable the: must stop in a safe place and apply the parking brake. Refer Lo Impartant Information for the User {a separate manual) 1 Display the screen you wish to adjust. 2 Display the “System” setting screen. Displaying the “System” setting seréen on page 24
3 Touch [Picture Adjustment].
Touch the item to select the function to be adjusted. © Brightness: Adjusts the black intensity © Contrast Adjusts the contrast
0 +24) 0 +24) Color Adjusts the co Hue: Adjusts the tone of color (which color is emphasized, red or green). (-24 to +24) © Dimmer Adjusts the brightness of the display. (+1 to +48) =_ With some pictures, you cannot adjust Hue and Color. 1 saturation. (-24 to +24) When you touch [Rear View], the mode changes to the picture adjustment for rear view. By touch- ing [Source], you can return to the picture adjust- ment for AV source. 5 Touch[{| [>] [4] [vit adjust. The adjustments of “Brightness", “Contrast" and “Dimmer" are stored separately when your
D EEE vehicle's headlights are off (daytime) and on (nighttime). “Brightness" and “Contrast" are switched auto- matically depending on whether the vehicle's headlights are on or off. “Dimmer" can be changed the setting or the time to switch it to on or off. he dimmer on page 25 The setting contents can be memorized separately.
| Audio adjus 1 Press 2 Touch [®), and then The “Audio” setting Screen appears This function is available when ‘Rear Speaker is set to Full. and ‘Preout” 15 set 10 Rear 1 Display the “Audio” setting screen. 3 Displaying Îhe “Audio” selting screen on page 27 2 Touch [Fader/Balance]. 3 Touch [Ælor[vlto adjust the front/rear speaker balance. 4 Touch [<lor[]to adjust the left/right speaker balance. Front15" lo “Rear15” is displayed as {he front/rear speaker
balance moves from the front to rear 9 “Lefti5" to “Right15” is displayed as the lefright speaker
balance moves fram the left to right The default setting is *F/R O L/R 0 *_ You can also setthe fader/balance by touching the point on the displayed table. This function is available when “Rear Speaker” and *Preout are set 0 ‘Subwoofer Settings Display the “Audio” setting screen. Displaying the “Audio” setting screen on page 27
Touch [or [®]to adjust the left/right speaker balance. 9 “Left15" to "Right15" is displayed as the left/right speaker balance moves from {he le to right The delault setting is "LR 0 You can also set the balance by touching the point on the displayed table. SLA (source level adjustment) lets you adjust the volume level of each source to prevent radical changes in volume when switch ing beteen sources Settings are based on the FM tuner volume level, which remains unchanged This function is not available when the FM tuner i as the AV source. Compare the FM tuner volume level with the level of the source you want to adjust. 2 Display the “Audio” setting screen. 2 Displaying the “Audio” selting screen on page 27 3 Touch [Source Level Adjuster]. 4 Touch[Alor[Y]to adjust the source volume. G_lyou directly touch the area where he cursor can be moved the SLA setting will be changed ta the value of the touched point 9 #4" to "4" is displayed as the source volume is increased or
decreased. D The default setting is "© This function compensates for deficiencies in the low-frequency and high-frequency ranges at low volume. © This function is not available while you make or receive using the hands-free function. Display the “Audio” setting screen. Displaying the “Audio” setting screen on page 27 Touch [Loudness]. Touch the item. The following items are available: Off (default), Low. Mid, High This product D which sn v= equipped with a subwoofer output mec n be turned on or off. 1 Display the “Audio” setting screen. 2 Displaying Îhe “Audio” selling screen on page 27 2 Touch [Subwoofer] to switch “On” (default) or “off”. This function is Using the subwoof ailable only when “Subwoofer” is ‘On ufput on page 27 Display the “Audio” setting screen. Displaying the “Audio” setting screen on page 27 Touch [Subwoofer Settings]. Touch Æ] or [&1to turn the subwoofer phase to normal or reverse. Touch [or[]to adjust the subwoofer level between -24 and 6. 5 Touch [<lor[>]to adjust the subwoofer frequency. The following items are available: 80Hzideiaul), SOHz, 63Hz 80Hz, 100Hz, 125Hz. Turn the source off. CSA
Display the “Audio” set Displaying the “Audio” setting s Touch [Rear Speaker]. Touch to switch “Full” (default) or “Subwoofer Settings”. When this function is set to “Subwoofer Settings”, “Preout” is fixed to “Subwoofer Settings". When ‘Rear Speaker” is sel 10 "Subwoofer Settings”, this set ting is fixed to “Subwoofer Settings” 1 Display the “Audio” set 2 Displaying the “Audio” setting s 2 Touch [Preout] to switch “Subwoofer Settings”(default) or “Rear”. g screen. een on page 27 8e UN = g screen. on page 27
| Audio adjustmen Display the “Audio” setting screen. Displaying the “Audio” setting screen on page 27 Touch [Bass Booster]. Touch to select the bass boost level from 0 to +6. 1 Display the “Audio” setting screen. 3 Displaying Îhe “Audio” selting screen on page 27 2 Touch [High Pass Filter]. 3 Touch the item. The following items are available: Offidetault), SOHz, 63Hz, 80Hz, 100Hz, 125Hz Recal| CEST g equalizer curves There are seven stored equalizer curves that you can easily recall at any time. Here is a list of the equalizer curves: The isplay the “Audio” setting screen. isplaying the “Audio” selting screen on page 27 Touch [Graphic EQ]. Touch the equalizer you want. default setting is “Powerful @ S:Bass is a curve in which only lowrpitched sound is boosted © Powerful is a curve in which lowr and high-pitched sounds are boosted. © Natural is a cure in which lowr and high-pitched sounds are slightiy boosted. © Vocalis a curve in which the midrange, which is the human osted e lat curve in which nothing is boostec. © Customi is an adjusted equalizer curve that you create. If you select this curve, the effect is applied to all AV sources. © Customzis an adjusted equalizer curve that you create. If you select this curve, the effect is applied to all AV sources.
Customizing the equalizer curves lected equaliz an be made with a 9 you make adjustments when a curve *S.Bass”, "Powerful Natural”, “Vocal”, or “Flat” is seiected, the equalizer curve settings will be changed to “Custom1” mandatorily 9 you make adjustments when the “Custom2” curve is selected for example, the “Custom2” curve will be updated 7 “Customi” and Custom2' curves can be to all sources, 1 Display the “Audio” setting screen. © Displaying the “Audio” setting screen on page
Touch [Graphic EQI. Select a curve that you want to use as the basis of customizing. 4 Touch the frequency for wi adjust the level. G lyou trail a finger across the bars of multiple equalizer bands, the equalizer curve settings will be set to the value of the tou \ bar h you want to red point on &+
| Theme A theme color can be selected from 3 di 1 Display the “Theme” screen. CLEA 2 Touch [Theme]. 3 Touch the color you want.
bu] Setting up the video player You can assign the top-prioriy language to the top-priority sub- title, audio and menu in initial playback. If the selected language is recorded on the disc, subtitles, audio and menu are displayed or output in that language: G_ This setting is available when the selected source is “Disc CD". Video CD' or "DVD: Setting the subtitle language You can set a desired subtitle language. When available, the subtitles will be displayed in the selected language.
1. Display the “Video Setup” screen.
E] »\# 8 O 2 Touch [DVD/DivX Setup]. 3 Touch [Subtitle Language]. The pop-up menu ap 4° Touch the desired language. Wnen you select Others”, a language code inpul screen is shown. Input the four-digit code of the desired language then touci *_fthe selected language is not available, the lan- guage specified on the disc is displayed *_ You can also switch the subtitle language by touching the switch subtitle languages key during playback. = The setting made here will not be affected even if the subtitle language is switched during playback using the switch subtitle languages key. Set: g the au: language You can set the preferred audio language. 1 Display the “Video Setup” screen. Ge #4 2 Touch [DVD/DivX Setup]. 3 Touch [Audio Language]. The pop-up menu appears. 4 Touch the desired language. When you select Others”, a language code input shown, Input ne four-digit cock touch
of the desired language then *_Ifthe selected language is not available, the lan- guage specified on the disc is displayed *_ You can also switch the audio language by touching the switch audio languages key during playback. = _ The setting made here will not be affected even if the audio language is switched during playback using the switch audio languages key. Setting the menu language You can set th on a disc are displa splay the “Video Setup” screen. EG] »% + © 2 Touch [DVD/DivX Setup]. 3 Touch [Menu Language]. The pop-up menu appears. red language in which the menus recorded
4_ Touch the desired language. When you select Others”, a language code input shown, Input ne four-digit cock touch of the desired language then *_Ifthe selected language is not available, the lan- guage specified on the disc is displayed The angle icon can be set so it appears on scenes where the angle can be swit 9 This setting is available when the selected source is “Disc CD”, Video CD' or DVD’ 1 Display the “Video Setup” screen. CE] + % + 0 Touch [DVD/DivX Setup]. Touch [Multi Angle] repeatedly until the desired setting appears. fau: Turns the multi-angle setting on. © Off: Turns the muiti-angle setting of. Some DVDAVidea dises let you use parental lock to set restric- ildren c violent or adult-oriented 1 sel he parental lot as et a parental lock level and then play à di {uring parental lock, code number input indications may be displayed. In this case, playback will begin when the cor le number is input 9 This setting is available when the selected CD”, Video CD' or DVD’
bu] Setting up the video player
Touch [0] to [9] to input a four-digit code number. Touch the following key. Registers the code number set the level. nd you can now 6 Touch any number between [1] to [8] to select the desired level. © (81: Enables playback of the entire disc (initial setting) © Uito 12}: Enabies playback of discs for children and non
adult oriente discs. {1}: Enables only playback of discs for children. Touch the following key. Sets the parental lock level 9 We recommend to keep a record of your code number in case you forget it. The parental lock level is recorded on the disc. You can con firm it by looking at the disc package, the included literature or the disc itself. You cannot use parental lock with discs that do not feature a recarded parental lock level. 1 With some discs, parental lock operates to skip certain scenes only, after which normal playback resumes. For details, refer to the disc's instructions. This setting is available when the selected source is “Dise” or
1. Display the “Video Setup” screen.
EG] + #% + © 2 Touch [DivX Subtitle] to switch “Original” (default) or “Custom”. If you want to play DivX® VOD (video on demand) content on th product, you must first register this product with your DivX VOD content provider. You do this by generating a DisX VOD registra tion code, which you submit to your provider Keep a record ofthe code as you will need it when you register this product to the DivX VOD provider This setting Is available when the selected source is "Disc CD". Video CD' or "DVD' 1 Display the “Video Setup” screen. EG] + #% + © 2 Touch [DVD/DivX Setup]. 3 Touch [DivX® VOD]. The “DIVX® VOD” screen appears. 9 fa registration code has already been activated, it cannot be displayed 4 Touch [Registration Code]. Your 10-igit registration code is displayed Ti Make a note of the code as you will need it when you deregis ter from a DiuX VOD provider. A registration code registered with a deregistration code can be deleted This setting is available when the selected sourci CD". Video CD' or "DVD' 1 Display the “Video Setup” screen. Œ] + #14 © 2 Touch [DVD/DivX Setup]. 3 Touch [DivX® VOD]. The "DIVX® VOD” screen appears. 4 Touch [Deregistration Code]. Your -digit deregistration code is displayed. Ti Make a note of the code as you will need it when you deregis ter from a DiuX VOD provider. is Disc When a DVD disc with à DVD menu is inserted, this product will the menu automatically and start playback from the first chapter of the fist title. 9 Some DVDs may not operate proper. IFthis function is not fully operabie, turn this function aff and start playback. This setting is available when the selected source is “Disc CD”, Video CD' or DVD’ 1 Display the “Video Setup” screen. (:] »# #0 2 Touch [DVD/DivX Setup]. 3 Touch [DVD Auto Play] repeatedly until the desired setting appears. © Of (cefaulh: Turns the DVD Auto Play setting of © On: Turns the DVD Auto Play setting on When you connect a rear view camera to this product, select the suitable video signal setting: 9 You can operate {his function on for the video signal input to he AV input 1 Display the “Video Setup” screen. CE] + % + 0 2 Touch [Video Signal Setting]. 3 Touch [Camera]. The pop-up menu appears. 4° Touch the item you want to set. © Auto (default: Adjusts the video signal setting automatically PAL: Sets the video signal to PAL NTSC: Sets the video signal to NTS PAL-M: Sets the video signal to PALM PAL-N: Sets the video signal to PAL-N SECAM: Sets the video signal to SECAM
bn] Favorite menu Registering your favorite menu items in shorteuts allows you to quichly jump t the registered menu screen by a simple touch on he “Favorites” screen Up to 12 menu items can be registered in the 1° Display the “Settings” screen. GJ+% 2 Touch the star icon of the menu item that you want to add to the favorite menu. The star icon for the selected menu is filed in "To cancel the registration, touch the star icon in the menu column again. 1 Display the “Favorites” screen. 1 Display the “Favorites” screen. C] +44 10 2 Touch and hold the favorite menu column you want to remove. The selected menu item is removed from the “Favorites” screen. *_ You can also remove a shorteut by touching the Star icon in the registered menu column
bn] Common operatio ock display Displays the time and date setting screen 2 Setting the time and date on page 33
2) Screen display mode key
Changes the wide g the wide screen mode on pa 1 Touch the current time on the screen. 2 Touch [Ælor [to setthe correct time and date. You can operate the following items: Year, month, date, hour, can change the time display format ta “12hour” (default) or "24hour change the order of date displ fonth-dayÿ-year. format: Daÿ-manth You can set the screen size for the video and JPEG/BMP images. 9 The default setting is “Full”, and for JPEG/BMP images is Normal When there are touch panel keys on the screen, images are layed with the “Full” mode regard 1 Touch the screen display mode key. The appearance of tnis key changes according to the current 2 Touch the desired mode. © rul
A 43 picture is enlarged in the hor enabling you to enjoy an imag Zoom A 43 picture is enlar cally and horizontal without any omissions. d'in the same proportion both vert Normal A43 picture layed normal}, without changing its: proportion. You cannot operate this function while driving Different settings can be stared for each video source. When a video is viewed in a wide screen mode that does not match its original aspect ratio, it may appear different The vidk will appear coarser when viewed in "Zoom mode.
You can restore settings or recorded content to the default set Resets various settings registered to this produet 9 The settings configured on the Theme” screen are not Method 2: Initialize from the “System” menu Method 3: Press the RESET button 2 Resetting the microprocessor on page 4 Restoring the default settings 9 This setting is available only when you stop your vehicle in a e and apply the parking brake: ACAUTION Do not turn off the engine while restoring the settings. 1 Display the “System” setting screen. CCE AUET 15]. A message confirming whether to initilize the settings appears. 3 Touch [Restore]. The source is lurned off and the Bluetooth connection is disconnes 2 Touch [Restore Se
If you have problems operating this prodi tion. The most common problems are lis likely causes and solutions. If a solution to your probl be found here, contact your dealer or the nearest authorized Pioneer service facility ct, refer to this sec: Problems with the AV screen CD or DVD playback is not possibl — The disc is inserted upside down. — Insert the disc with the label upward or otherwise damaged — Insert a normal, round disc. — The flles on the disc are in an irregular # — Check the file format c format cannot be played back — Check what y The screen is covered by a caution message and fhe video cannot be shown. — The parking brake lead is not connected or applied — Connect the parking brake lead correctiy, and apply the parking brake. —+ Thé parking brake interlock is activated. — Park your vehicle in a safe place and apply the parking brake. ‘The audio or video sKips. — This product is not firmly secured. — Secure this product firm No sounds are produced. The volume level will not les are not connected correct rrectiy 9 Stil, Slow motion, or frame-bÿ frame playb» — There is no sound during still, slow motion, or frame-by: frame playback with DVD Video. —_ The system is paused or performing, fast reverse or forward during the disc playback — Forthe media other han music: sound on fast reverse or forward. DA), there is no The icon © is displayed, and operation is impossible. — The operation is not compatible with the video configuration: — This operation is not possible. (For example, the DVD playing does not feature that angle, audio system, subtitle language, etc.) re stops (pauses) and this product cannot be operated. — The reading of data is impossible during disc playback — Stop playback once, then restart Strefched, wifh an incorrect aspect setting is incorrect for the display propriate setting for that image. Aparentallock message is displayed and DVD playback is not possible. — The parental lock is on. — Turn the parental k off or change the level The parental lock for DVD playback cannot be canceled. The code number is inc — input the cor Playback is not wi Tanguage and subtiile language settings selected in “DVD/DivX Setup”. —. The DVD playing does not feature dialog or subtiles in the language selected in "DVD/DIvX Setup’ Switching to a selected language is not possible if the language selected in DVD/DivX Setup” is not record onthe extremely unclear/distorted and dark during playback. — The disc features a signal to prohibit copying. (Some discs may have this.) s product is compatible with the copy guard system, the picture may suffer from analog copy proteci horizontal stipes or other imperfections when a disc with hat kind of protection signal is viewed on some displays. “This is not a malfunction. iPod cannot be operated. — The iPod is frozen — Reconnect the iPod with the USB interface cable for iPod iPhone. — Update the iPod software version. — An error urred. — Reconnect the iPod with the USB interface cable for iPod iPhone. — Park your vehicle in a safe place, and turn off the engine. Turn he ignition key back Lo off (ACC OFF). Then restart 198 engine, and turn the port {is product back on. Update the bles are not connx — Connect the cab d software version. ted correctiy s correctly Sound from Ihe IPod cannot be heard. —_ The audio output direction may switch automatically when the Bluetooth and USB connections are used at the same time. — Use the iPod to change the audio output direction Problems with the phone screen possible because the touch panel Keys for inacti —. Your phone is out of range for service. — Retry after re-entering the range for service. tion between the cellular phone and this product cannot be established now. — Perform the connection process. Problems with the Application screen Abrack screen 5 displayed. operating an application, he application was ended on the smartphone side. e play the Top menu screen. —_ The smartphone OS may be awaiting screen operation: — Stop the vehicle in a safe place and check the screen on he smartphone. The scres — Park your vehicle in ignition switch Siteh to on (AC safe place, and then turn off ne OFF). Subsequently, turn the ignition C ON) agair Ts displayed, but operation does not work at all.
The smartphone was not charged. — Charging Stopped because the temperature of the sman phone rose due to prolonged use ofthe smartphone during charging — Disconnect the smartphone from the cable, and wait unti he smartphone cools dowr —_ More battery power was consumed than was gained from charging — This problem may be resolved by stopping any unn sary services on the smartphone. When problems occur with this product, an error message appears on the display. Refer to the table belowr to identify the problem, then take the suggested corrective action. If the error rsists, record the error message and contact your dealer or your nearest Pioneer service center. Common AMP Error —_ This product fais to incorrect: he protect — Check the speaker connection. Ifthe faits to disappear even after the engine is switched off/on, contac your dealer or an authorized Pioneer Service Station for Product overheat. System will be shut down automatically in 1 minute. Restart the product by ACC Off/On may fix this problem. If this message keep showing up, itis possible that some problem occurred in the product. —+ The temperature is too high for his product to operate. — Follow the instructions displayed on the screen. I this does not solve the problem, cont authorized Pioneer Station for ct your dealer or an Disc Error 02 XX e the disc. c is loaded upside down. — Check that the dise is loaded correcth} — There is an electrical or mechan s the RESET button Different Region Disc —_ The disc does not have the same region number as this product — Replace the DVD with one bearing the correct region number Unplayable Disc — This type of disc cannot be played on this produc — Replace the disc with one that can be played on this product Unplayable File — This type of file cannot be played on this product. ect a file that can be played Skipped — Theinserted disc contains DRM protected files. — The protected files are skipped. Protect — Allthe files on the inserted disc are embedded with DRM. — Replace the disc. TEMP — The temperature of this product is outside the normal operat ing range — Wait until this product returs to a temperature within the rating limits. TRI DIX rental as expired. nserted disc contains expired DivX VOD content an be played USB storage device Error-02 — Communication failed —— Turn the ignition switch OFF and back ON. — Disconnect the USB storage device. — Change to a different source. Then, return to te USB orage device. Unplayable File — This type of file cannot be played on this product — Select a file that can be pl — Security for the connected USE storage device is enabled! — Follow the USB storage device instructions. security Skipped —_ The connected USB storage device contains DRM protected files. — The protected files are skipped: Protect — Allthe files on the connecte embedded with DRM. — Replace the USB storage device. storage device are incompatible USE connected USB storage device is not supported by this
isconnect your device and replace it with a com USB storage devic Video resolution not supported —. Files that cannot be played on this product are included in the fil. ect a file that can be played Unable to write to flash memory. —_ The playback history for VOD contents cannot be — Rety — Ifthe message appears frequenti} consult your des Your device is not authorized to play this DivX protected video. —_ This product's DiX registration code has not been autho- rized by the DivX VOD contents provider — Register this product to the DivX VOD contents provider Video frame rate not supported —+ DivX les frame rate is more than 30 fps; ect a file that can be played. Audio Format not supported — This type of file is not supported on this product Ject a file that can be pla CREUSE —+ The USB connector — Check that the L in something or damaged! connected USB storage device consumes maximum allowable current — Disconnect the USB storage device and do not use it. Turn the ignition switch to OFF Înen to ACC or ON and then connect B storage device.
more than Video resolution not supported that cannot be played on this product are included in the fil. — Select af that can be played.
USB was disconnected for device protection. Do not re- insert this USB memory into the unit, Press reset to restart USB memory. — The USB connector or USB cable is short-circuited — Check that the USB connector or USB cable is not caugh in something or damaged —_ The connected USB storage device consurmes more than maximum allowable current — Disconnect the USB storage device and do not use it. Tum he ignition switch to OFF Een to ACC or ON and then connect a compliant USB storage device E interface cable for Pod / IPhone is short-circuited. nfirm that the USB intertace cable for iPod / iPhone or USB cable is not caught in something or damaged Audio Format not supported — This type of file is not supported on this product ct file that can be played. iPod Error-02-6X + iPod failure — Disconnect the cable from the iPod. Once the iPod's main menu is displayed, recannect the etit Error-02 —+ The iPod firmware version is old! — Update the iPod version Bluetooth Error-10 —. The power failed for the Bluetooth module of this produc — Turn the ignition switch to OFF and then to ON. the error message is stil displayed after performing the above action, please contact your dealer or an authorized Pioneer Service Station. Some basic précautions are neces discs sary when handling your Built-in drive and care @ use on, shaped disc @ Do not use cracked, chipped, warped, or otherwise dises as they may damage the builin drive nventional, fully circular discs. Do not use Do not use 8-em dises or an adapter for that can be printed on label surfaces, check the instructions and the warnings of the discs. Depending on the discs, inserting and ejecting may not be possible. Using such dises may result in damage to this: equipment. © Do not attach labels, write on or apply chemicals to the surface of the di © Donot attach commercially available labels or other mater. to the discs. © clean a disc, wipe it with a soft cloth, moving outward m the center. © Condensation may temporarily impair the buil-in drive's: performance. © Playback of discs may not be possible because of disc characteristics, disc format, recorded application, playback environment, storage condition © Road shocks may interrupt d © Read the pr playback before using them. Ami nt conditions for playing a disc © Atextremely high temperatures, a temperature cutout protects this product by switching it off automatically © Despite our careful design of the product, small scratches that do not affect actual operation may appear on the disc uit of mechar or handling of the di malfunction of this product and tear. DVD-Video al wear, ambient conditions This is not a sign of ne nsider it ta be normal wear VIDEO © is a trademark of DVD Format/Loge Licensing Corporation. © itis not possible to play DVD-Audio discs. This DVD drive may not be bearing the marks shown above.
comPacT DIGITAL AUDIO AVCHD recorded discs This unit is not compatible with discs recorded in AVCHD {Advanced Video Codec High Definition] format. Da not insert ANCHD discs. Ifinserted, the disc may not be ejectedl Playing DualDisc © DualDises are two-sided dises that have a recordable CD for audio an one side a ordable DVD for video on the other © Playback of the DVD side is possible with this product However, since the CD side of DualDiscs is not phys compatible with the general CD standard, it may not be pos. sible to play the CD side with this product oading and ejecting of a DualDisc may res X problems on this: me c may become Stuck n the disc-loading slot and will not eject, To pre: we recommend you refrain from using DualDisc with this product © Peace refer tothe tion about DualDis nt this, manufacturer for more detailed informa: Dolby Digital This product will down-mix Dolby Digital signals interally and 1e sound will be output in sterec. 9 Manufactured under license from Dolby Laboratories. Dolby and the double-D symbol are trademarks of Dolby Laboratories,
DOLBY. DIGITAL Compatibility Common notes about disc ibilit, ions of this product may not be available for some di Compatibility with all discs is not guaranteed. His not possible to playback DVD-ROM/DVD-RAM discs. © Playback of discs may become impossible with direct expo- sure to sunlight, high temperatures, or depending on the storage conditions in the vehicle. DVD-Video discs © DVD Video dises that have incompatible region numbers cannot be played on this DVD drive, The region number of the player can be found on this product's chassis. DVD-R/DVD-RW/DVD-R SL (Single Layer)/DVD-R DL (Dual Layer) discs © Unfinalized discs which have been recorded with the Video format (idea mode) cannot be played back. © Discs which have been recorded with the Video Recording format (VR mode) cannot be played back © DVD-R DL (Dual Layer) discs which have been recorded with Layer Jump recording cannot be played back. @ For detailed information about recording mode, please contact the manufacturer of media, recorders, or writing software. CD-R/CD-RW discs © Uniinalized discs cannot be played back, © it may not be possible to playback CD-R/CD-RW disc recorded on a music CD recorder or a computer because of disc characteristics, scratches or dirt on the dise, or dir scratches or condensation on the lens of the butin drive. © Piayback of discs recorded on a computer may not be pos- sible, depending on the recarding device, writing software, their settings, and other environmental factor © Piease record with the correct format, (For detail, ples contact manufacturer of media, recorders, or writing software) © Titles and other text information recorded on a CD-R/CI disc may not be displayed by this product (in the case of audio data (CD-DA)) © Read the precautions with CD-R ihem. Common notes about the USB storage device © Do not ave the USB storage device in any location with high temperatures © Depending on the kind of the USB storage device you use {nis product may not recognize the storage device or files may not be played back prapery. € text information of some audio and video files may not ly displayed File extensions must be used proper}. There may be à slight delay when starting playback of files rage device with complex folder hie S may vary depending on the kind of an USB star age device. ‘© 1imay no e possible tale some muse les rom USB use of file characteristics, file format, recorded applica Lion, playback environment, storage conditions, and s0 on. RW dises before using
USB storage device compatibility with {his 1, refer to Specifications on page 42. not connect a USB storage device to this product via. aUSB hub. © Faritioned storage device is not compatible with this ce when driving. Do not e device fall onto the floor, where may me jammed under the brake or gas pedel. © There maybe a slight delay when starting playback of audio fes encoded with image data. © Some USE connected toth generate noise on the radio. © Donot connect anything other than the USB storage device. The sequence of audio iles on USB storage device For USB storage device, the sequence is different from that of USB storage device s product maÿ Handling guidelines and supplemental information © This product is not compatible with the Multi Media MMC) © Copyright protected files cannot be played back Common notes about DivX files Notes specific to DivX files © Oniy DivX les downloaded from Divx partner sites are quar anteed for proper operation, Unauthorized DX files maÿ not operate proper © DRM rental les cannot be operated until playing back is started © Mis product corresponds to a DivX ile display of up to 1 590 minutes 43 seconds. Search operations beyond this time imit are prohibited. © Dix VOD file playback requires supplying the ID code of this product to the DivX VOD provider reter to Displaying yoi
Regarding the ID code, DivX VOD registration code on page details on the Divx video versions hat can be played on this product, refer to Specifications on page 42. © For more details about DivX, visit the following site: httpy/hidiux com, VX subtitle files © Srt format subtite iles with the extension "st" can be used! © Oniy one subtile file can be used for each DiuX file. Multiple subitle files cannot be associated. tit files that are named with the same character string as the DivX file before the extension are associated with the Dix file. The character strings before the extension must be exactly the same, However, ifthere is only one DivX file and one subtitie fie in a single folder, the files are associated even ifthe file names are not the same. © The subtile file must be stored in thé DivX fil. mme folder as the © Unto 255 subtile files may be used. Any more subite files will not be recognized © Unto 64 characters can be used forthe name of the subttle file, including the extension. more than 64 char are used for the file name, the subtile file may not be recognized. © Te character code forthe subtile file should comply with 1S0-8889-1. Using character may cause the characters Lo be displayed © Te subtities may not be dis characters in the subtile file © For materials that use a high transfer rate, th video may not be completely synchronized Jayed correct ifthe displayed clude control code. bites and
@ multiple subtiles a: short time frame, such as 0. be displayec play within a very s, the subtiles may not General Maximum playback t Maximum playback t me of audio file stored in the disc: 60 h me of audio file stered on an USE stor age device: 7.5 h (450 minutes) CD-R-RW File system: IS9660 level 11509660 level 2.Rameo, Jeliet/UDF 1.02/1.50/2.00/2.01/2 Maximum number of olders: 300 Maximum number of files: Playable file types: MP3, WMA, AM MPEG2, MPEG4
ot compatible with the following: MP3i (MP3 ive), mp3 PRO, au playlist 2 Hz, 44.1 KH2,48 kHz KHz, 44.1 kH248 kHz USE storage de File extension: mp ID: Ver. 1.0, 1.1 & This product is not compatible with the following: Windows: Media” Audio 9 Professional, Lossless, Voice CD-R-RW File extension: wma Bitrate: 5 kbps to Sampling frequency 8
DVD-R/R SL/R DL/ DVD-RW
File extension: avr Bitrate: 5 kbps to Sampling frequency: USE storage de File extension: wma Bit rate: 5 kbps to 320 kbps (CR), VER Sampling frequency 8 kHz to 48 kHz WAV compatibility B The sampling frequency shown in the display may be rounded. USE storage device File extension: wav Format: Linear PCM (LI Sampling frequency. 16 kHz to 48 kHz antization bits: 8 bits and 16 bits AAC compatibility B This product plays back AAC files encoded by Tunes. CD-R-RW File extension Sampling frequency:
DVD-R/R SLR DL) DVD-RW
Fille extension: méa Bit rate: 8 kbps to (CR) Sampling frequency: 8 kHz to 44.1 kHz USE storage de File extension: méa Bitrate: 8 kbps to Sampling frequency 8 k DivX compatibility & This product is not compatible with the following: DivX Ultra format, DivX files without video data, DivX files encoded with M (Linear PCM) audio codec nding on the file information composition, such as the number of audio streams, there may be a slight delay in the Start of playback on discs: If file contains more than end Some special operations may be prohibited bec composition of DivX files. with high transfer rates may not be play rectiy. The standard transfer rate is 4 Mbps for CDS and 10.08 Mbps for DVDs. E Divkflles on the USB storage device cannot be played CD-R-RW File extension: avi/.divx Profile (DivX version): Home Theater V GB, playback st Ver 4 xNer 5X Bit rate (MP3): 8 k 20 kbps Samghing frequency (MP): 16 Hz to 48 kHz for emphasis) Maximum image size: KHz, 44.1 kHz, Maximumn file s
File extension: avi/.divx Profile (DivX version): Home Theater V Ver 4 xNer 5X Samplng frequency (PS: 16 to 48 kHz for emphasis) Maximurn im Maximumn file s je size: 720 pixels x 576 pixels Video files compatil
pending on the created or on the contents may not be played back pr ment in which the file w le. This product may not operate correct application used to encode WMA fik on the version of Windows Media” Player use WMA files, album names and other text informa: may not be correctly displayed & There may be a slight delay when starting playback of audio files encoded with image data. This product is not compatible with packet write data transfer. y, depending on the
B This product can recognize up to 32 characters, beginning with the first character, including extension for the file and folcier name. Depending on the display area, this prodi may y to display them with a reduced font size. However, the maximum number of the characters that you can display varies according to the width of each character and of ne display area. Folder selection sequence or other operations may be aitered, depending on he encoding or writing software. Regardless of the length of blank section between the songs of original recording, compressed audio discs play with a short pause between songs.
Format: MPEG-4 Compatible video codec: MPEG-4 Compatible audio codec: Linear PCM(LPCM) MP3 Maximum resolution: 720 pixels x 480/576 pixels: Maximum Frame rate: 30 fps E Files may not be able Lo be played back depending on the bit rate. Empt Format: MPEG-4 Compatible video codec: MPEG-4 Compatible audio codec: AAC Maximum resolution: 720 pixels x 480/ Maximum Frame rate: 30 fps B Files may not be able Lo be played back depending on the bit rate. 576 pixels mov Format: MPEG-4 Compatible video codec: MPEG-4 Compatible audio codec: AAC/Linear PCM(LPCM) MP3 Maximum resolution: 720 pixels x 480/76 pixels Maximum Frame rate: 30 fps B Files may not be able Lo be played back depending on the bit rate. Example of a hierarchy B This product assigns folder numbers, The user cannot assign folder numbers. Copyright (c) 1987, 1993, 1994 The Regents of the University of California. AI rights reserved. Redistribution and use in source and binary forms, with or without modification, are permitted provided that the following conditions are met
1. Redistributions of source code must retain the above copy
right notice, this list of conditions and the following disclaimer.
2. Redistributions in binary form must reproduce the above copy-
right notice, this list of conditions and the following disclaimer in the documentation and/or other materials provided with the distribution.
3. All advertising materials mentioning features or use of this
software must display the follwing acknowledgement This preduct includes software developed by the University of California, Berkeley and its contributors.
4. Neither the name of the University nor the names of its con.
tributors may be used to endarse or promote products derived from this software without specific prior written permission. THIS SOFTWARE 1S PROVIDED BY THE REGENTS AND CONTRIBUTORS ‘AS IS" AND ANY EXPRESS OR IMPLIED WARRANTIES, INCLUDING, BUT NOT LIMITED TO, THE IMPLIED
WARRANTIES OF MERCHANTABILITY AND FITNESS FOR À
PARTICULAR PURPOSE ARE DISCLAIMED. IN NO EVENT SHALL THE REGENTS OR CONTRIBUTORS BE LIABLE FOR ANY DIRECT. INDIRECT, INCIDENTAL, SPECIAL, EXEMPLARY,
OR CONSEQUENTIAL DAMAGES (INCLUDING, BUT NOT
LIMITED TO, PROCUREMENT OF SUBSTITUTE GOODS OR SERVICES; LOSS OF USE, DATA, OR PROFITS: OR BUSINESS INTERRUPTION) HOWEVER CAUSED AND ON ANY THEORY OF LIABILITX WHETHER IN CONTRACT, STRICT LIABILITY OR TORT UNCLUDING NEGLIGENCE OR OTHERWISE) ARISING IN ANY WAY OUT OF THE USE OF THIS SOFTWARE, EVEN IF ADVISED
OFTHE POSSIBILITY OF SUCH DAMAGE
O Bluetooth The Bluetooth® word mark and logos are registered trademarks owned by Bluetooth SIG, Inc. and any use of such marks by PIONEER CORPORATION is under license, Other trademarks and trade names are those of their respective owners. Windows Media is either a registered trademark or trademark of Microsoft Corporation in the United States and/or other ountries. This product includes technology owned by Microsoft Corporation and cannot be used or distributed without a license from Microsoft Licensing, Inc:
DIVX. DivX Certified” devices have been tested for high-quality DivX* {ivx, avi) video playback. When you see the DivX logo, you know you have the freedom to play your favorite DivX movies. DivX®, DivX Certified” and associated logos are trademarks of DivX, LLC and are used under license. This DivX Certified” device has passed rigorous testing to ensure it plays DivX video. To play purchased DivX movies, first register your devic: divr.com. Find your registration code in the DivX VOD se: your device setup menu, 3 Displaying your DivX VOD registration code on page 3 ‘AAC is short for Advanced Audio Coding and refers to an audio compression technology standard used with MPEG-2 and MPEG-4. Several applications can be used to encode AAC files, but file formats and extensions differ depending on the applica- tion which is used to encode. This unit plays back AAC files encoded by iTunes. atvod jon of © Pioneer accepts no responsibility for data lost from an iPod, even if that data is lost while using this product Piease back up your IPod data regular}. © Do not ave the iPod in direct sunlight for extended amounts of time. Extended exposure ta direct sunight can result in iPod malfunction due to the resulting high temperature. © Do not leave the iPod in any lo temperatures. cation with high
@ Eirmiy secure the iPod when dring. Do not let the iPod fall onto the floor, where it may become jammed under the brake or gas pedal For details, refer to the iPod manuals. iPod and iPhone Made for iPod ÜiPhone Made for iPod” and “Made for iPhone” mean that an electronic accessory has been designed to connect specifically to iPod or iPhone, respectively, and has been certified by the developer to meet Apple performance standards. Apple is not responsible for the operation of this device or its compliance with safety and regulatory standards. Please note that the use of this accessory with iPod or iPhone may affect wireless performance. iPhone, iPod, iPod classie, IPod nano, and iPod touch are trade. marks of Apple Inc. registered in the LS. and other countries Lightning Lightning is a trademark of Apple Inc: App Store App Store is à service mark of Apple Inc. ios IOS is a trademark on which Cisco holds the trademark right in {he US and certain other countries. iTunes ilunes is a trademark of Ap other countries. GIMPORTANT Requirements to access app-based connected content senices using this product @ Latest version of the Pioneer compatible connected content application(s) for the smartphone, available from 1e service provider, downloaded to your smarphone. @ A current account with the content service provider. © Smartphone Data Plan Note: the Data Plan for your smartphone does not pro vide for unlimited data usage, additional charges from your carrier may apply for accessing app-based connected content via 36, EDGE and/or LTE (46) networks. @ Connection to the Internet via 36, EDGE, LTE (4G) or Wi-Fi network ‘© Ontionai Pioneer adapter cable con this product lations: S Lo app-based connected content will depend on the availability of cellular and/or Wi-Fi network coverage for the purpose of allowing your smartphone te connect ta the Internet © Service availability may be geographically limited to the region. Consult he connected content service provider for additional information © ability of this product to access connected content is subject lo change without notice and could be affected by any of the following: compatibility Issues with future firmware versions of smartphone; compatibilty Issues with future versions of the connected content application(s) for the smartphone: changes to or discontinuation of the connected Content applicatian(s) or service by ts provider. Remember that use of this system for commercial or public view ing purposes may constitute an infringement on the author's rights as protected by the Copyright Lawr ing your iPhone to
This item incorporates copy nolegy that is pro: tected by LS. patents and other Intellectual property rights of Rovi Corporation, Reverse engineering and dis: prohibited. sembly are Supply of this product only conveys a license for private, non ommercial use and does not convey à license nor imply any right to use this product in any commercial (Le. revenue-gener ating) real time broadcasting (terrestrial, satellite, cable and/or any ather media), broadcasting/streaming via internet, intranets: and/or other networks or in other electronic content distribution systems, such as pay-audio or audio-on-demand applications. An independent license for such use is required. For details, please visit http} mpalicensing.com. Handling the LCD screen © en the LCD screen is subjected to direct sunlight for a long period of time, it will become very hot, resulting in pos- sible damage to the LCD screen. When not using this prod uet, avoid exposing it to direct sunlight as much as possible. © Te LCD screen should be used within the temperature fictions on page 42. 1 use the LED screen at temperatures higher or lower than the operating temperature range, because the LCD Screen may not operate normally and could be damaged © Te LCD screen is exposed in order to increase its wisibility within the vehicle. Please do not press strongly on it as this may damage it © Donot push the LCD screen with excessive force scratch it © Nevertouch the LCD screen with anything bx finger when operating the touch panel functions. screen can scratch easily. s this may Liquid crystal display (LCD) screen @_1fine LCD screen is near the vent of an air conditioner, make sure that air from the air conditioner is not blowing on it Heat from the heater may break the LCD screen, and cool air from he cooler may cause moisture to form inside this product, resulting in possible damage.
© Small black dots or white dots (bright dots) may appear on the LCD screen, These are due to the characteristics of the LCD screen and do not indicate a malfunction © The LCD screen will be difficult to see if it is exposed to direct sunlight. When using a cellular phone, keep the antenna of the ce! lular phone away from the LCD screen to prevent disruption ofthe video in the form of disturbances such as spots or colored stripes. Maintaining the LCD screen © {en removing dust from or cleaning the LCD screen, first turn this product of and then wipe the screen with a soft dry cloth © \nen wiping the LCD s reen, take care not to scratch the surface. Do not use harsh or abrasive chemical cleaners: Alight emitting diode is used inside the display to illuminate the LCD soreer © Atiou temperatures, using the LED backlight may increase image quality because of the of the LCD screen. Image quality will improve in temperature with an increai @ The product ifetime of ine LED bacHlight is more than 10 000 hours. However. it may decrease if used in high temperatures, © i'tne LED backight reaches the end o ts product lfetime the screen will become dimmer and the image will ne longer be visible, In that lease consult your dealer orthe nearest authorized Pioneer Service Station General Rated power source 144VDC (108 V to 15.1 V allowable) Grounding system. Negative type Maximum current consumption 104 Dimensions (W x H x D} 78 mm x 100 mm X 157 mm 188 mm X 118 mm X 17 mm Chassis Bmm x 100 mm X 165 mm Nose 171 mm x 97 mm x 9 mm
imple Profile Bluetooth (awH-2708) Version Bluetooth 3, ed Output power dim ac Power class 2) FM tuner Frequency range Usable sensithity jgnal-to-noise ratio MW tuner Frequency range Usable sensithity jgnal-to-noise ratio LW tuner Frequency range Usable sensithity jgnal-to-noise ratio E Specifications and design are subject to pe tions without notice due ta improvements.
TE Jui LD IR SEL ui : 852-288-6188 © 2014 PIONEER CORPORATION. All rights reserved.