
GUSSOFEN G1 - GUSSOFEN AUSTRO FLAMM - Free user manual and instructions
Find the device manual for free GUSSOFEN G1 AUSTRO FLAMM in PDF.
| Product type | Wood stove |
| Brand | AUSTRO FLAMM |
| Model | GUSSOFEN G1 |
| Height | 677 mm |
| Width | 400 mm |
| Depth | 595 mm |
| Weight | 85 kg |
| Flue diameter | 120 mm |
| Nominal heat output | 6 kW |
| Maximum heat output | 8 kW |
| Minimum heat output | 3 kW |
| Heated volume | 48 – 124 m³ |
| Authorized fuels | Dry natural wood, wood briquettes |
| Maximum fuel quantity | 1.6 kg |
| Efficiency | Compliant with EN 13240 (class 1) |
| Safety distance front (without protection) | > 800 mm |
| Safety distance side (without protection) | > 700 mm |
| Safety distance rear (without protection) | > 400 mm |
| Material | Steel, cast iron, ceramic glass |
| Warranty | 2 years |
| Maintenance | Annual cleaning by a specialist, regular chimney sweeping |
| Spare parts available | Seals, refractory ceramics, glass door, varnish |
Frequently Asked Questions - GUSSOFEN G1 AUSTRO FLAMM
User questions about GUSSOFEN G1 AUSTRO FLAMM
0 question about this device. Answer the ones you know or ask your own.
Ask a new question about this device
Download the instructions for your GUSSOFEN in PDF format for free! Find your manual GUSSOFEN G1 - AUSTRO FLAMM and take your electronic device back in hand. On this page are published all the documents necessary for the use of your device. GUSSOFEN G1 by AUSTRO FLAMM.
USER MANUAL GUSSOFEN G1 AUSTRO FLAMM
As a stove of construction type 1, it is possible to connect it to the flue pipe of an existing other stove or another hearth for solid fuels, as long as the chimney complies with DIN 4705, Part 3.
| TECHNICAL DATA | |
| Height | 677 mm |
| Width | 400 mm |
| Depth | 595 mm |
| Weight | 85 kg |
| Flue pipe outlet diameter | 120 mm |
| Nominal thermal output (EN 13240) | 6 kW |
| Maximum thermal capacity | 8 kW |
| Smallest heating capacity | 3 kW |
| Room heating capacity (depending on building insulation) | 48 – 124 m3 |
| Exhaust values for multiple use of the chimney in accordance with DIN 4705, Part 3 and for the calculation of the chimney measurements in accordance with DIN 4705, Part 2 | ||
| Fluegas mass flow | closed | 6 g/s |
| Fluegas temperature | closed | 330 °C |
| Minimum feed pressure Nominal thermal output | closed | 12 Pa |
| at 0.8 times n. ther. outp. | 10 Pa | |
2. IMPORTANT INFORMATION
The installation and operation information given here is of general nature. National and European standards, local and building regulations as well as fire prevention laws must be observed during the operation of the stove.
General safety instructions for the operation of your stove
- Thoroughly read the entire manual before starting up your stove and observe the caution notices.
- Your heating unit may not be moved without approved means of transport with sufficient load-bearing capacity.
- Your heating unit is not suitable to be used as a stand or as a ladder.
- The burning of fuel releases thermal energy that leads to a substantial heating up of the surface of the heating unit, the doors and operating handles mounted on the door, door glass, flue pipe and in some cases the front wall of the heating unit. Do not touch any of these surfaces without respective protective clothing or without the help of accessories such as heat-resistant gloves or a cold hand.
- Make your children aware of this particular danger and keep them at a distance from the heating unit whenever it is in operation.
- Only burn approved fuels and materials listed in the chapter "Clean Burning".
- The burning or placing of flammable or explosive materials, such as empty spray cans and such like into the firebox as well as the storage of such materials in the immediate vicinity of your heating unit is strictly forbidden due the danger of explosion.
-
Do not wear loose or flammable clothing when adding fuel to the fire.
-
Placing non-heat-resistant objects on the heating unit or in the vicinity of the heating unit is forbidden.
- Do not lay laundry onto the stove for drying. Laundry hung up to dry must be kept at a safe distance from the stove because of the danger of fire.
- The woodstove G1 is not suitable for long term heating.
- During the operation of your heating unit it is forbidden to use flammable or explosive materials in the same or an adjacent room to the one in which your heating unit is located.
Setting up your stove
Required safety distances (Minimum distances - see name plate - in Fig. 2)
with protection shield or convection cladding
a > 800 mm b > 700 mm c > 400 mm
without protection shield or convection cladding:
a > 800 mm b > 300 mm c > 300 mm
(a - toward the front in the radiated area)
(b-to the side)
(c-to the back)
Make sure that the room in which the stove is set up has at least one door or window into the outside or is directly adjacent to such a room. Other fireplaces and extractor hoods must not be operated in the same room as the stove.
Floor load capacity
Make sure that the load capacity of the supporting construction is sufficient to carry the weight of the entire unit, before the heating unit is installed.
Combustion air
Being the user of the stove you must take care of a sufficient combustion air supply. Sealed-up windows and doors may not allow a sufficient combustion air supply or disturb the draught behaviour of your stove. Please ensure the additional supply of fresh
combustion air if necessary. For details please consult your specialist retailer.
Stove pipe connection
For your own safety stringent laws apply for connecting the stove pipes to the chimney. Your professional dealer or distributor knows these laws. Please have your certified retailer carry out the connection of your stove.
Initial startup of your stove
Your stove was treated with a special environmentally friendly lacquer. The lacquer surface is still soft when the stove is delivered. The lacquer will harden when your stove is used for the first time. The lacquer surface must not be touched when it is heated for the first time. The stove must be initially heated at a high temperature for at least 1.5 hours. Visible vapors may appear during the hardening of the lacquer. Therefore it will be necessary to open the windows during the initial operation in order let the vapors escape into the outdoors.
PLEASE TAKE NOTE: It takes several heating sessions before for your stove releases only the pleasant smell of burning wood.
Approved fuels
Dry, well cured and natural wood (hardwood preferred), wood briquettes.
Maximum amount of fuel
Maximum amount of fuel to be added: appr. 1,6 kg wood or appr. 1,6 kg wood briquettes. Larger amounts of fuel can lead to overheating and thus damage the stove.
Clean burning
The wood must be dry (relative wood moisture < 15% ) and untreated. The right amount of wood must be burned in order to ensure a clean fire that releases only small amounts of emissions.
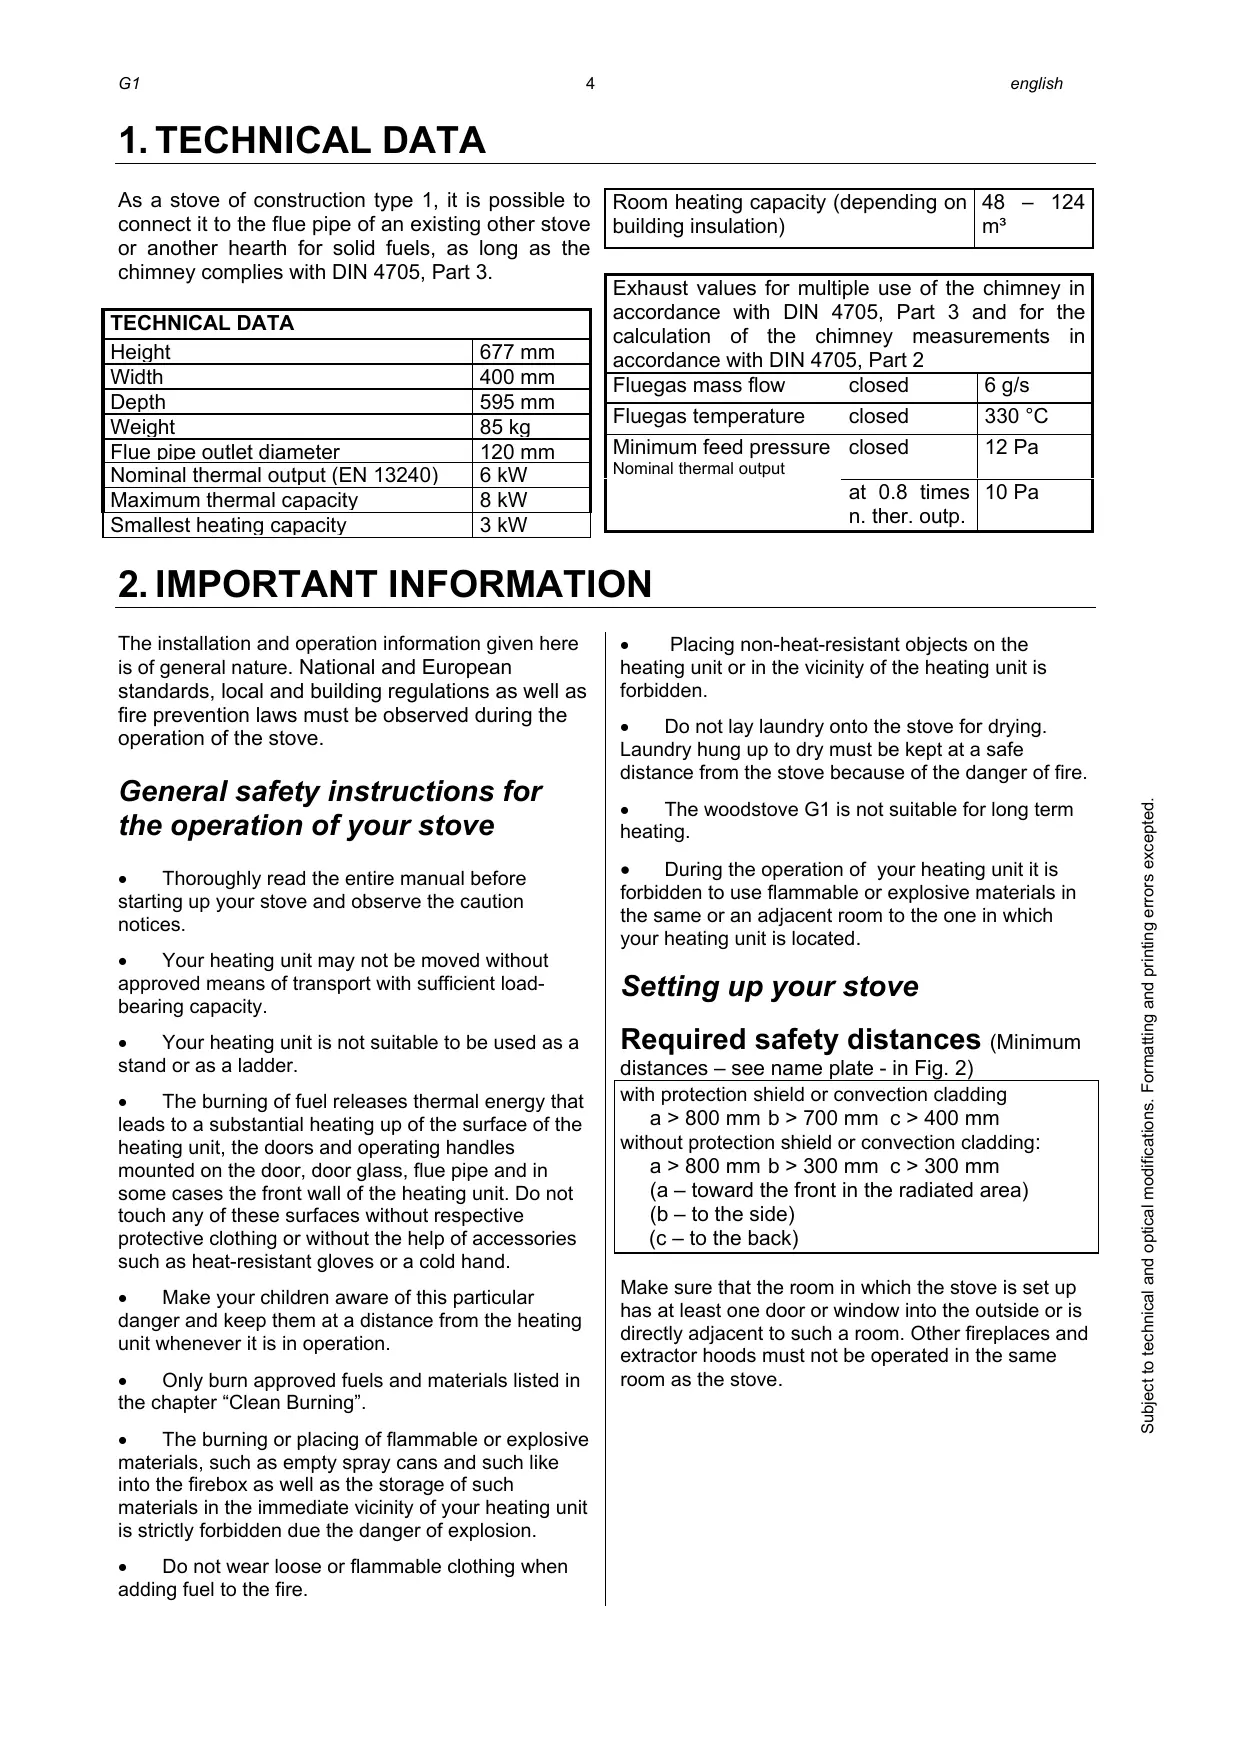
Making a fire
Prepare everything you need for starting the firesoft wood chips, igniter materials (such as Austroflamm lighter), wood. Figure 1 provides a good overview of the quantity of the materials you will need.
Open the primary and secondary air all the way. Move both sliders. See figure 2.
Open the stove door.
Put ignition aid on the floor of the firebox.
Lay soft wood chips onto the paper.
Lay one or two logs of wood on the wood chips.
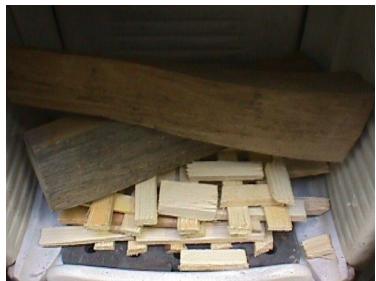
Figure 3: Igniting the Fire
Light the ignition aid. Close the firebox door. As soon as the chips burn well, close the primary air supply. See Figure 2.
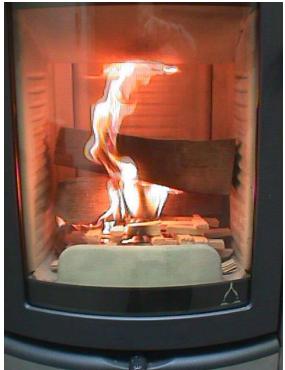
Figure 4: Close the Primary Air
As soon as the wood logs are burning well too, you can regulate the heating capacity with the secondary air slider. (slider set to the maximum ("AUF") setting produces maximum heat – see figure 2.)
When adding wood to the fire, follow the same procedure as when igniting the fire: Open primary air, open secondary air, carefully open firebox door, lay wood on the fire, close the firebox door. Wait until the added wood catches fire and is burning. Then close the primary air. Subsequently regulate the fire with the secondary air supply.
Heating in between seasons
Heating the stove in between seasons, when the outside temperatures are higher, the flue gases may not be able to escape completely and this may lead to disturbances in the chimney draught, especially if the temperatures are rising suddenly. The stove has to be charged with less wood and the primary air has to be increased so that the wood can burn down faster (with visible flames) and thus the chimney flue can stabilize.
Chimney fire
A Chimney fire may occur, due to sooting and deposits in the chimney, if wrong or humid fuel is used. Close all air inlets on the fireplace/chimney immediately and call the fire brigade. Please have an expert inspect your chimney for cracks and airtightness after the burning out of the chimney.
4. THE MOST IMPORTANT SPARES—OVERVIEW
Gaskets
| Description | Nr. drawing | Part number |
| Flat gasket 8 x 2 x 400 mm | 21 | 710096 |
| Flat gasket 8 x 2 x 81 mm | 23 | 710096 |
| Round gasket d= 10 x 1100 mm | 20 | 710319 |
Keramott
| Description | Nr. drawing | Part number |
| G1 keramott base | 3 | 716213 |
| G1 keramott wood retainer | 9 | 716249 |
| G1 keramott lateral front left | 8 | 716215 |
| G1 keramott lateral rear left | 7 | 716211 |
| G1 keramott rear | 4 | 716214 |
| G1 keramott lateral front right | 6 | 716247 |
| G1 keramott lateral rear right | 5 | 716248 |
| G1 baffle plate | 1 | 716054 |
| G1 vermiculite baffle plate | 2 | 716210 |
Other parts
| Description | Nr. drawing | Part number |
| G1 door glass | 22 | 716063 |
| Stove lacquer | -- | 650002 |
| Igniter | -- | 640162 |
| Glass cleaner ½ litre | -- | 640070 |
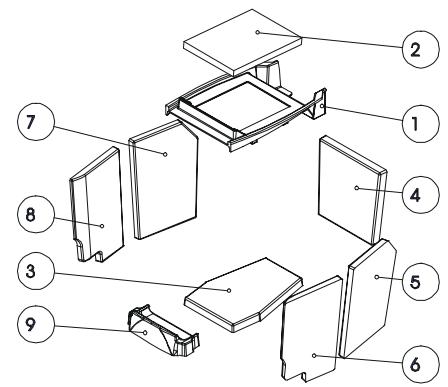
Keramott numbering = order of installation

Accessories
You can obtain floor plates made of glass or steel, hearth accessories or care products from your certified dealer.
IMPORTANT: Have defective parts replaced by your certified dealer only. This will guarantee that your stove functions properly and safely.
The fireplace must not be amended.
Maintenance
To clean the glass, please use a specialized product such as Thermohit glass cleaner. Lacquered surfaces are to be cleaned only with a cloth (may be damp). Special cleaning agents should also be used for stainless steel surfaces.
Cleaning
The stove, flue outlets and smoke pipes should be cleaned and inspected for deposits every year – if necessary more often, e.g. after the cleaning of the chimney. The chimney also has to be cleaned regularly by the chimneysweeper. Your chimneysweeper will inform you of the necessary inspection intervals. An expert should inspect the stove annually.
1. DATI TECHNICI
We guarantee full functionality of all AUSTROFLAMM stove components made of steel or cast iron for a full two years from the date of purchase. Steel and cast-iron components which show defect in materials or workmanship during the guarantee period shall be replaced with new components.
We do not guarantee wearable components (such as Keramott, gaskets, floor grid), surface coatings, lacquer, glass and ceramics.
Conditions of the Guarantee:
- Your AUSTROFLAMM stove was installed by a certified professional and is operated in accordance with the operator's manual.
- Claims to the guarantee shall be subject to a completely filled-out Guarantee Card and submittal of the original invoice issued by a certified AUSTROFLAMM sales agent.
IMPORTANT: Our guarantee includes free shipping of new components. Work and travel times are not included. Unwarranted claims shall be re-invoiced to the operator.
In the event of claims to the guarantee, separate here and present this proof of purchase to your certified AUSTROFLAMM dealer.
GARANTIE / GUARANZIA / GARANTIE
Handlerstempel / Dealer's Stamp / Timbro concessionario / tampon du concessionnaire
Kaufdatum / date of purchase / Data d'acquisto / date d'achat

Kunde / Customer / cliente / client
Marke
Stamp
Francobollo
affranchir
an/ to /per/pour