DATADESK 80 - Office accessory DICOTA - Free user manual and instructions
Find the device manual for free DATADESK 80 DICOTA in PDF.
| Product Type | Transport case for portable printer and laptop |
| Brand | DICOTA |
| Model | DATADESK 80 |
| Category | Office accessory |
| Estimated dimensions | Approximately 480 x 350 x 100 mm |
| Estimated weight | Approximately 2.5 kg |
| Power supply | 220 V mains via supplied power cable |
| Main functions | Transport and organization of a portable printer (Canon i80/iP90) and a laptop with storage for cables, accessories and printed paper |
| Printer compatibility | Canon i80 / iP90 |
| Laptop compatibility | Check www.dicota.com or your dealer |
| Delivery contents | 1 220 V plug, 1 swivel-angle USB cable, 8 self-adhesive 3M Velcro strips, 4 plastic wedges for computer fixation, 2 keys |
| Fixation options | By plastic wedges with Velcro strips or Velcro strips directly on the flip-down lid |
| Interior storage | Printer location, compartments for CD-ROM, paper, connectors and cable accessories |
| Printer-computer connection | By supplied USB cable or by Bluetooth (internal interface or PC Card/Compact Flash reader) |
| Maintenance and cleaning | Clean with a soft dry cloth. Avoid solvents and water. |
| Usage safety | Use on a stable surface, must open the lid before use, do not expose to intense heat source or direct sunlight, let cool after intensive use before closing |
| Spare parts and repairability | Spare parts are not described in the manual. Contact DICOTA after-sales service. |
| General information | Manual available in French, German, English. Free download at notice-facile.com. |
Frequently Asked Questions - DATADESK 80 DICOTA
User questions about DATADESK 80 DICOTA
0 question about this device. Answer the ones you know or ask your own.
Ask a new question about this device
Download the instructions for your Office accessory in PDF format for free! Find your manual DATADESK 80 - DICOTA and take your electronic device back in hand. On this page are published all the documents necessary for the use of your device. DATADESK 80 by DICOTA.
USER MANUAL DATADESK 80 DICOTA
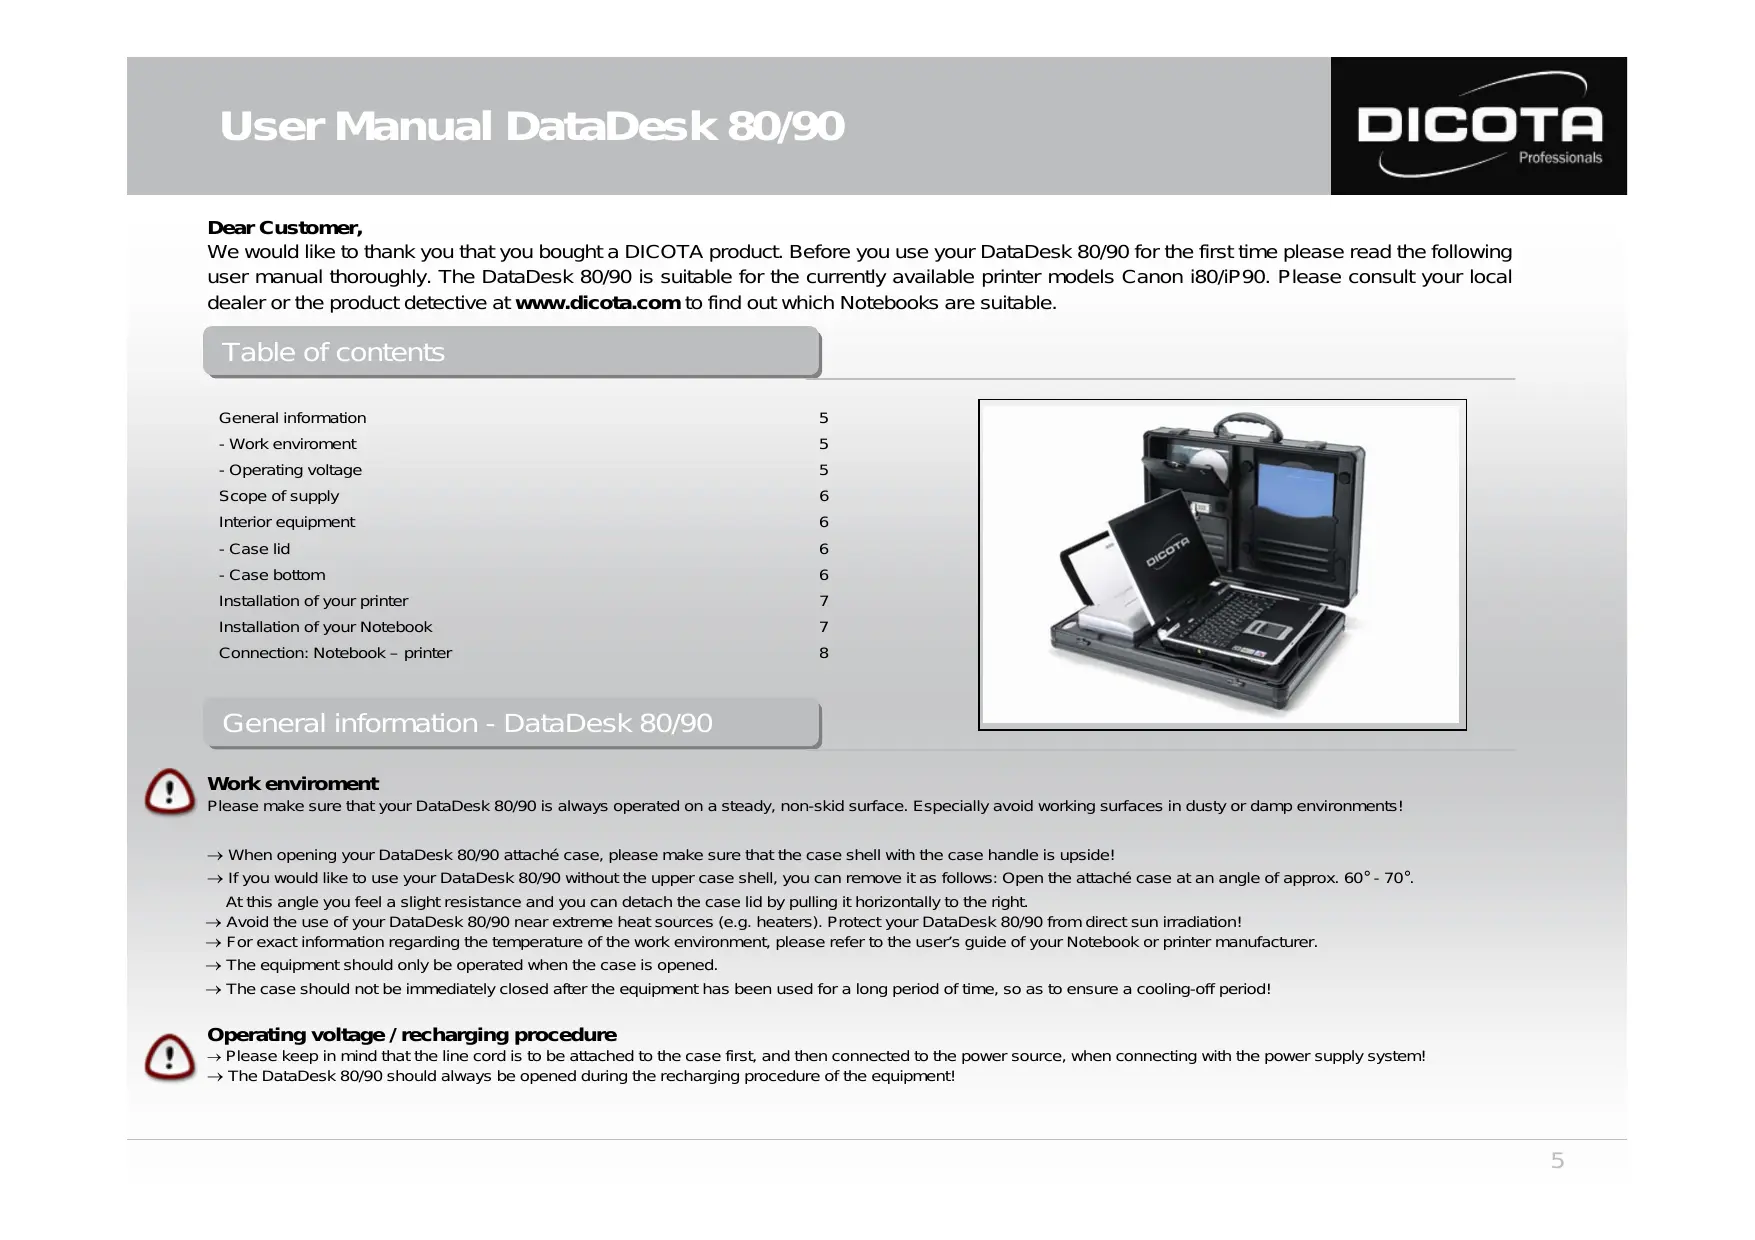
We would like to thank you that you bought a DICOTA product. Before you use your DataDesk 80/90 for the first time please read the following user manual thoroughly. The DataDesk 80/90 is suitable for the currently available printer models Canon i80/iP90. Please consult your local dealer or the product detective at www.dicota.com to find out which Notebooks are suitable.
Table of contents
General information 5
- Work environment 5
- Operating voltage 5
Scope of supply 6
Interior equipment 6
-Case lid 6
- Case bottom 6
Installation of your printer 7
Installation of your Notebook 7
Connection: Notebook - printer 8
General information - DataDesk 80/90

Work enviroment
Please make sure that your DataDesk 80/90 is always operated on a steady, non-skid surface. Especially avoid working surfaces in dusty or damp environments!
→ When opening your DataDesk 80/90 attaché case, please make sure that the case shell with the case handle is upside!
→ If you would like to use your DataDesk 80/90 without the upper case shell, you can remove it as follows: Open the attaché case at an angle of approx. 60^ - 70^ .
At this angle you feel a slight resistance and you can detach the case lid by pulling it horizontally to the right.
Avoid the use of your DataDesk 80/90 near extreme heat sources (e.g. heaters). Protect your DataDesk 80/90 from direct sun irradiation!
→ For exact information regarding the temperature of the work environment, please refer to the user's guide of your Notebook or printer manufacturer.
The equipment should only be operated when the case is opened.
→ The case should not be immediately closed after the equipment has been used for a long period of time, so as to ensure a cooling-off period!

Operating voltage / recharging procedure
Please keep in mind that the line cord is to be attached to the case first, and then connected to the power source, when connecting with the power supply system!
The DataDesk 80/90 should always be opened during the recharging procedure of the equipment!
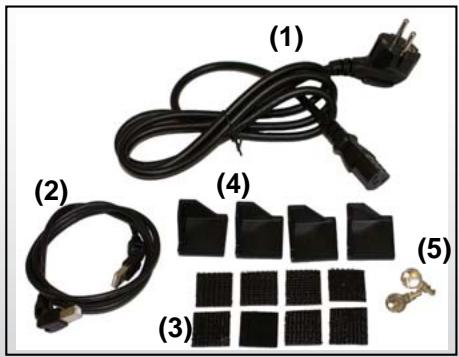
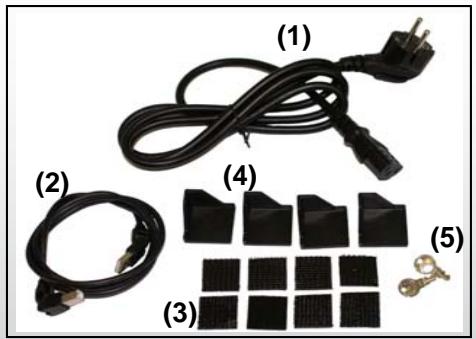
Scope of supply - DataDesk 80/90
(1) 1 × 220 ~V - IEC plug
(2) 1 × USB printer cable (360° pivotable)
(3) 8 × 3M Velcro - pads (self-adhesive)
(4) 4 × Synthetic corners for Notebook fastening
(5) 2xkeys
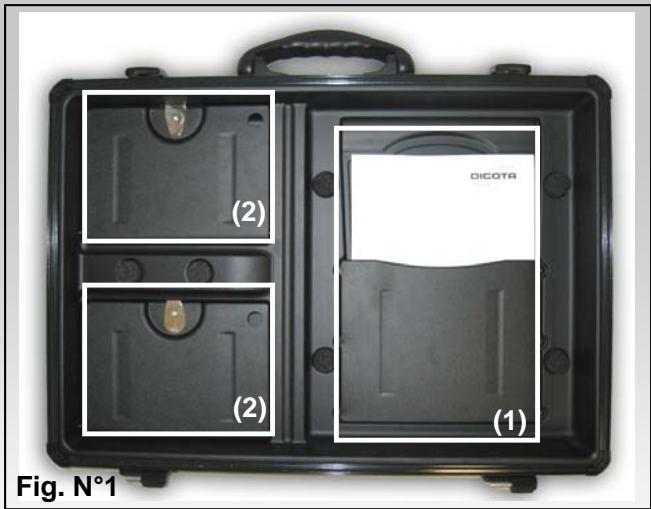
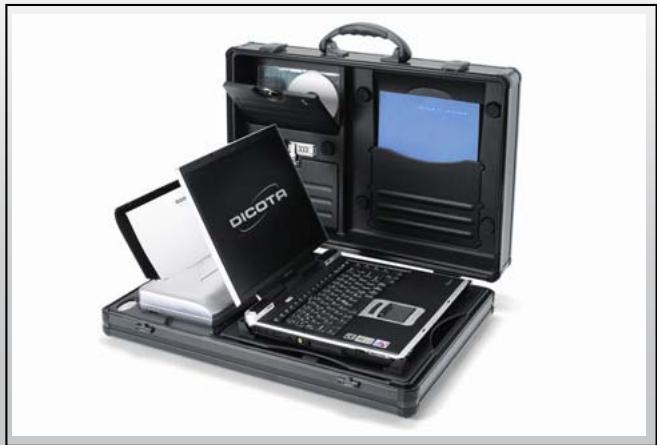
Interior equipment - DataDesk 80/90
Case lid (Fig. 1)
(1) Document / printer paper compartment
(2) Accessory compartment
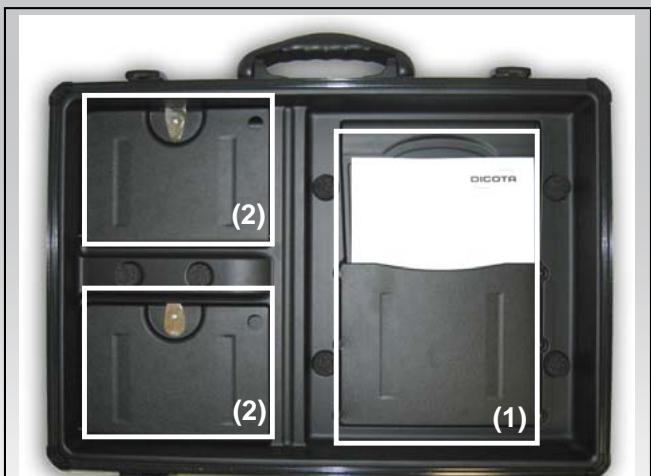
Fig. 1
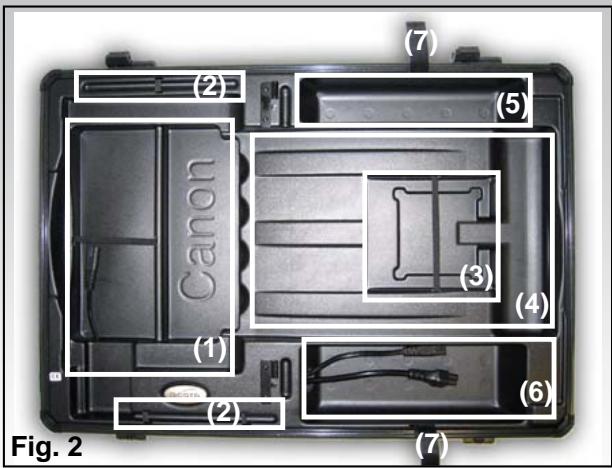
Case lid (Fig. 2)
(1) Fit for your printer (Canon i80/iP90)
(2) Cable routing help
(3) Stow-away pocket for CD-ROM, 3,5 FDD, etc.
(4) Stow-away pocket for printed paper
(5) Stow-away pocket for Notebook power supply with plug for a Euro 8-socket (with / without ground wire)
(6) Stow-away pocket for printer power supply with plug for a Euro 8-socket (with / without ground wire)
(7) Notebook strap
(8) Flap lid (not seen in Fig.2)
Installation of your mobile printer
Open your DataDesk 80/90.
1) Remove the flap lid from the bottom part of the case, which functions as your Notebook workspace.
2) Place the printer power supply in the front pocket of the bottom part of the case (Fig.2, pocket No. 6).
3) Now connect the Euro 8 plug with the 220V socket of the power supply (Fig.2, in pocket No. 6). Secure the printer power supply with the two Velcro straps!
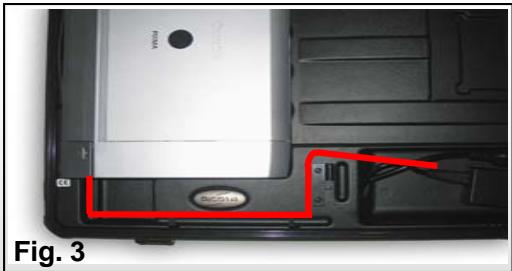
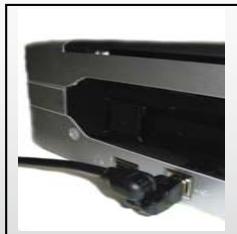
4) Route the printer power cable through the designated groove (under the flap lid) and sideways past the printer (Fig. 3).
Pay attention to a clean cable routing to prevent damaging the printer cable (e.g. by pinching it off)!
5) The power supply outlet plug is now connected to the printer.
Installation of your Notebook
1) Place the Notebook power supply in the rear pocket of the bottom part of the case.
2) Now connect the 220V plug with the Notebook's power supply.
3) Route the low voltage power supply outlet cable beneath the flap lid through the designated groove, so that the cable can not be damaged when the lid is closed!
4) The power supply outlet plug is now connected with the Notebook.
Now you have two options of fastening your Notebook:
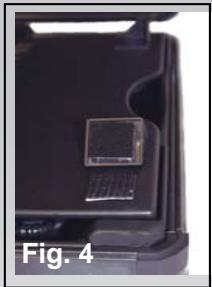
1) Either you use the four synthetic corners which are provided within the scope of supply and fasten them by using the eight self-adhesive 3M Velcro pads (Fig. 4) or
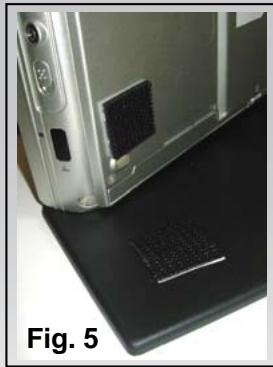
2) you use the self-adhesive 3M Velcro pads and adhere these in pairs directly onto the case lid and the bottom side of your Notebook (Fig. 5).

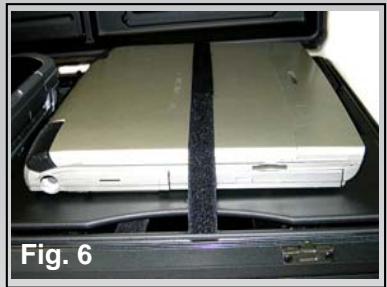
During transport always fasten your Notebook with the Velcro strap (transport protection) on the upper side of the flap lid (Fig. 6)
Connection: Notebook - printer
Two options of connecting Notebook and printer:
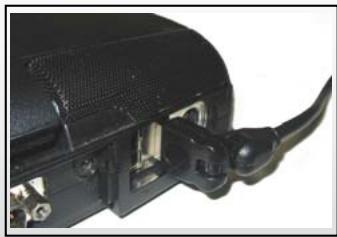
(1) Connect your Canon i80/iP90 and your Notebook by using the USB cable which is provided in the scope of supply.
Ensure a clean cable routing here as well! Either route the USB printer cable around or underneath the printer.
Furthermore, make sure that the USB printer cable does not interfere with the printer paper output, thus preventing paper jams!
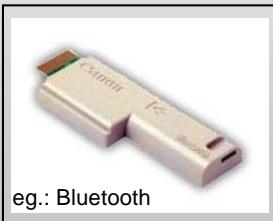
2) Data transfer between printer and Notebook via Bluetooth: Bluetooth is a new radio standard for cableless data transfer. The Notebook establishes the data connection via Bluetooth through an internal interface or a PC card module. The printer can be connected with a compact flash module, for example.

CAUTION!
Make sure that no cables are pinched when closing the case!
Cher/Chere client(e),
(1) Compartment papier et documents
(2) Compartment accessoires mobiles