
16-H - Wood stove accessory STUV - Free user manual and instructions
Find the device manual for free 16-H STUV in PDF.

| Product Type | Base for wood stove |
| Brand | STUV |
| Model | 16-H |
| Compatibility | Stuv 16-cube (serial numbers: 16/58 from no. 90817, 16/68 from no. 95166, 16/78 from no. 81637) |
| Material | Painted steel (uncured paint, fragile) |
| Adjustable feet | Yes, 4 feet for leveling |
| External air intake | Optional, kit available (duct, flexible hose, clamps, nuts) |
| Installation | Before installing the fireplace; requires compliance with safety distances and floor load capacity |
| Package contents | 1 base, 4 M6x16 hex head screws; optional: external air intake kit |
| Safety | Check floor strength; handle with care (fragile paint); report transport damage within 48 hours |
| Warranty | Coverage for transport damage subject to reporting within 48 hours |
| Manufacturing | Belgium by Stuv SA |
| Maintenance | Gentle cleaning; avoid scratching the paint |
Frequently Asked Questions - 16-H STUV
User questions about 16-H STUV
0 question about this device. Answer the ones you know or ask your own.
Ask a new question about this device
Download the instructions for your Wood stove accessory in PDF format for free! Find your manual 16-H - STUV and take your electronic device back in hand. On this page are published all the documents necessary for the use of your device. 16-H by STUV.
USER MANUAL 16-H STUV
This accessory has been designed to offer you maximum comfort and safety.
It has been manufactured with the greatest of care.
If however you should find the slightest dissatisfaction with it, please contact your supplier.
PRESENTATION OF THE PRODUCT
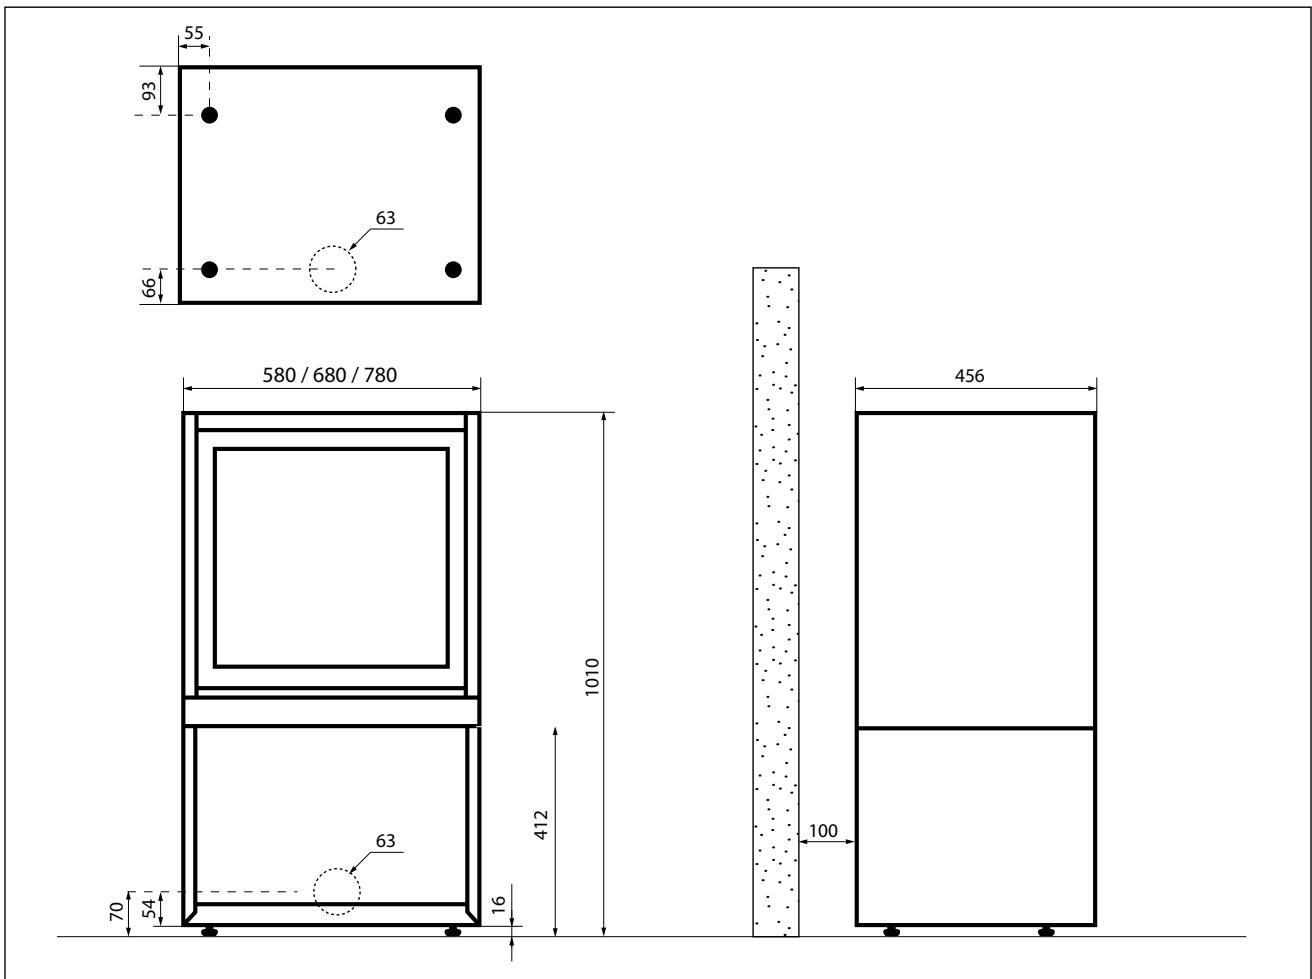
Dimensions
Recommendations
Read the installation instructions and directions for use before installation and actual usage.
This accessory (base) has been designed for the Stuv 16-cube only.
The guarantee only covers damage incurred during transport if it is reported within 48 hours of delivery and a complaint is made upon receipt.
The installation of the stove compatible with this accessory, surrounding materials must adhere to
the installation document of the Stuv 16-cube, all regulations (local and national) and all standards (national and European).
The bases are compatible with the 16-cube from the following serial numbers:
- 16/58-cube: from no.90817
- 16/68-cube: from no.95166
- 16/78-cube: from no.81637
This base has to be installed before the installation of the stove itself.
Use the adjustable feet to install at the right level.
Please note: it is preferable to install the outside air inlet kit before installing the stove. The stove has to be dismantled if installation is carried out the other way around.
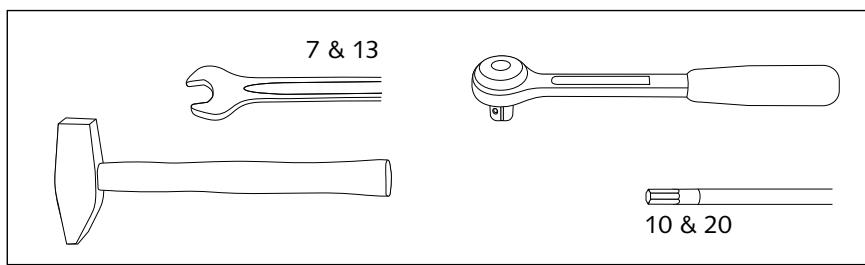
Tools
Air inlet for combustion
The stove requires air for combustion.
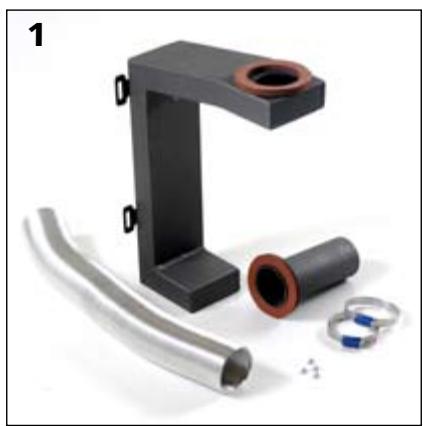
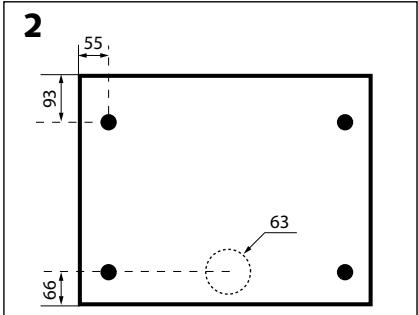
During installation with the outside air inlet kit [photo 1], check the inlet axes using the reference measurements [diagram 2]. The air inlet kit cannot be installed without dismantling the stove.
Ensure you do not crush the duct during assembly.
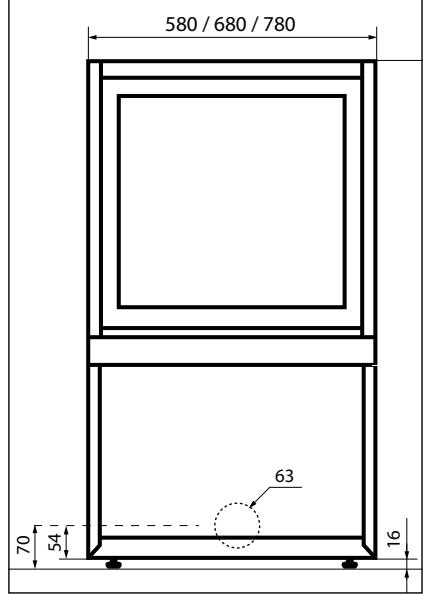
Bearing capacity
Ensure the resistance of the floor is sufficient to support the stove and his base. Consult a specialist if in doubt.
Unpacking
Please note!
The paint of the base is not oven-baked and is therefore relatively fragile. Handle the base with care during installation.
List of contents
- 1 base (for 16/58: ref 13010012, for 16/68: ref 13010013, for 16/78: ref 13010014)
- 4 x M6x16 screws with hexagonal head
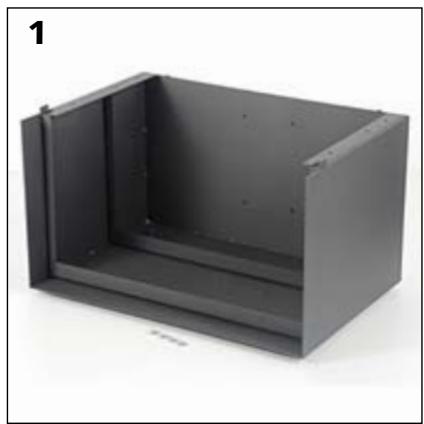
Optional: outside air inlet for 16-cube base:
- 1 air inlet duct
- 1 union
- 1 piece of flexible tubing
- 2 clamp collars
- 4 M4 nuts
Installation
Preparation of the support plate and the base of the Stuv 16-cube
Unpack the Stuv 16-cube (see pages 8 and 9 of the installation instructions for the 16-cube)
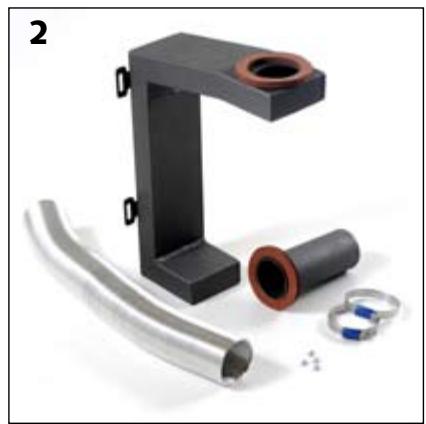
Take the support plate and the 4 adjustable feet.
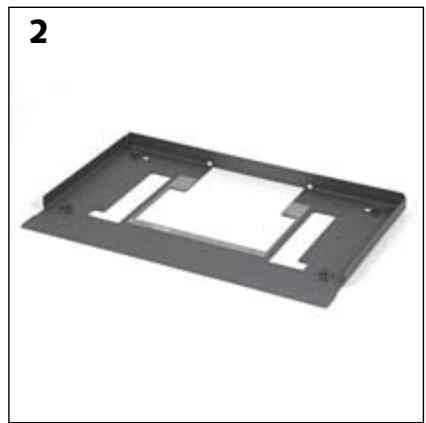
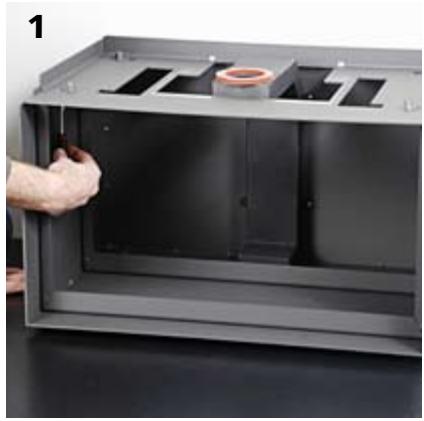
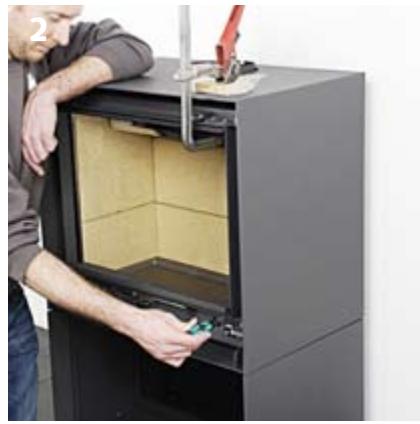
Using a size 3 Allen key, remove the plug from the air inlet and the flaps at the front and back of the support plate [photos 1 & 2]. These parts are not used in installation.
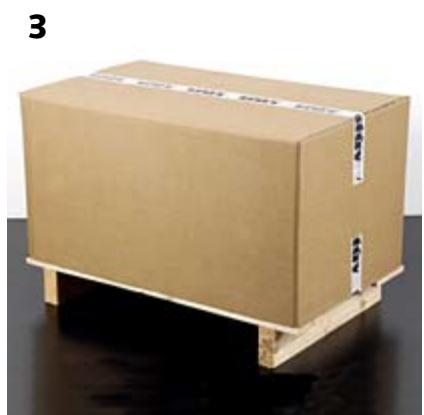
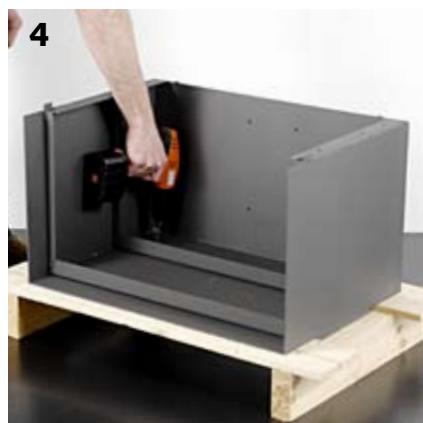
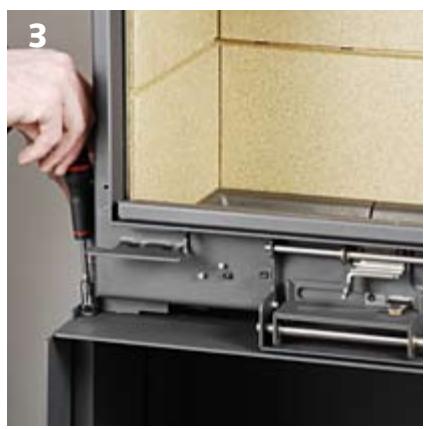
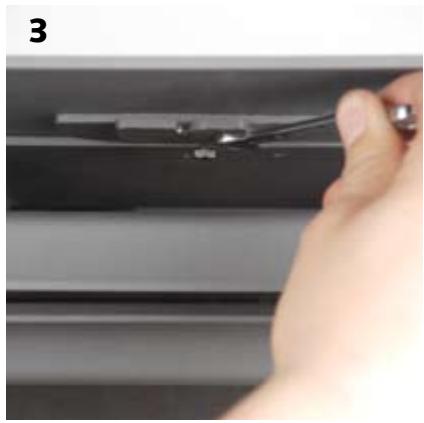
Remove the packaging from the base of the Stuv 16-cube [photo 3]. Using the screwdriver (T x 20 head), unscrew the base from the wooden palette [photo 4].
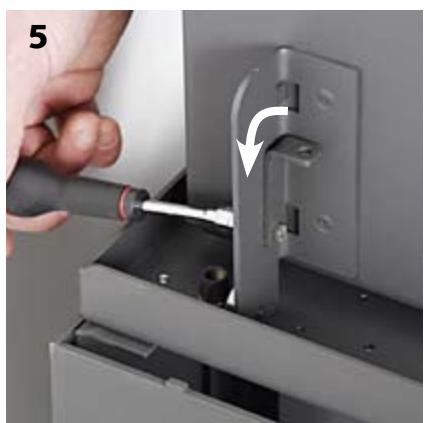
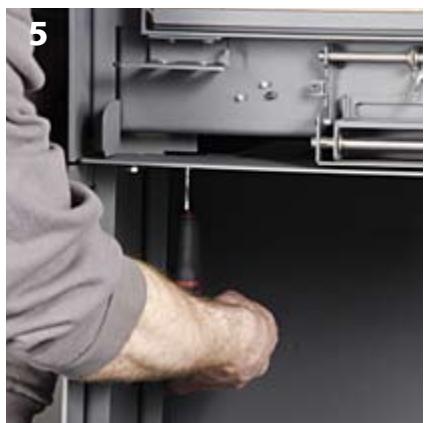
Put protection on the floor and turn the base on its back and screw the 4 adjustable legs tight to the base [photo 5].
Preparation of the outside air inlet kit (optional)
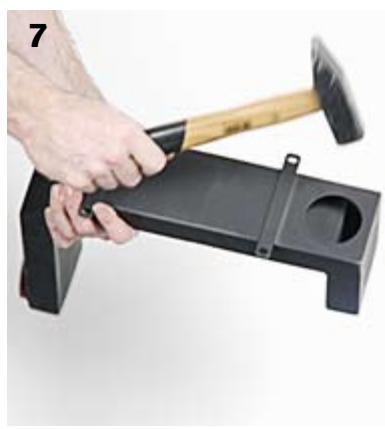
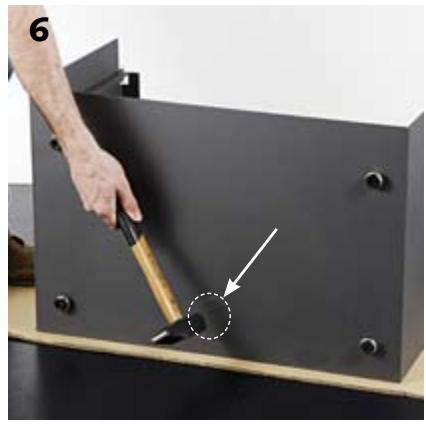
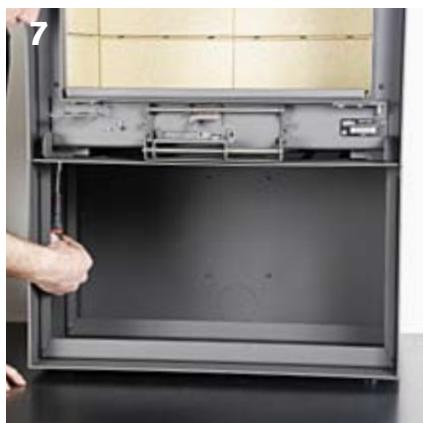
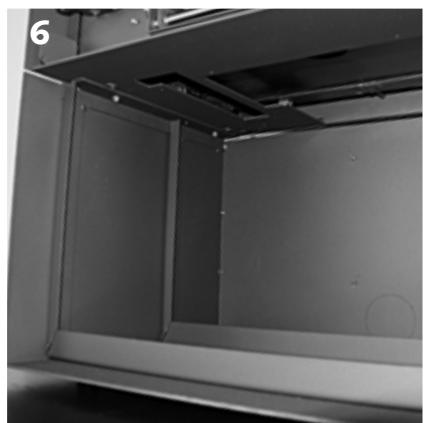
Using a hammer, remove the lower or back plug from the base depending on the configuration required [photo 6]. Do the same for the air inlet duct depending on the configuration required [photo 7].
Put the base into its definitive position.
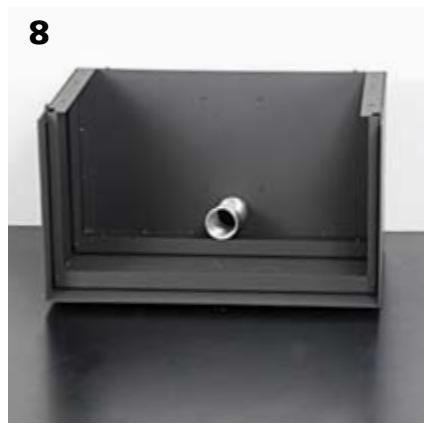
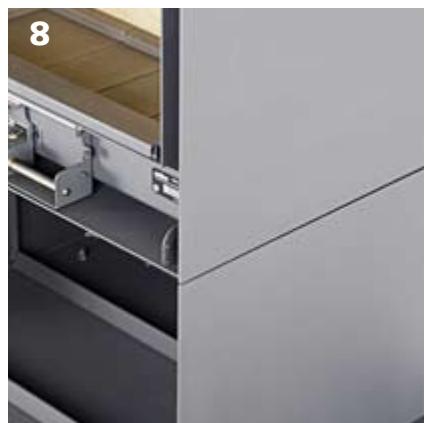
Feed the flexible tubing of the air inlet into the hole in the base [photo 8].
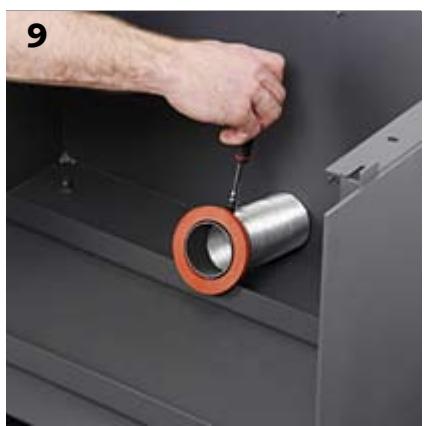
Slide the clamp collar around the flexible tubing. Insert the union into the flexible tubing up to the stopper. Using the size 7 key, screw the collar to connect the unit [photo 9].
In case of back airflow, recover the cap you removed from the base in item [6], and put it on the precut at the base's bottom (between the channel and the base). This cap is used as spacer [photo 10].
Put the air inlet duct into position.
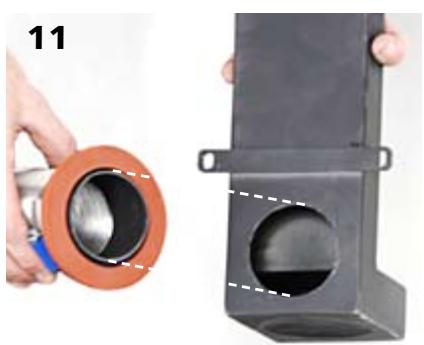
Ensure the union, which fits into the duct, is fully inserted [photo 11].
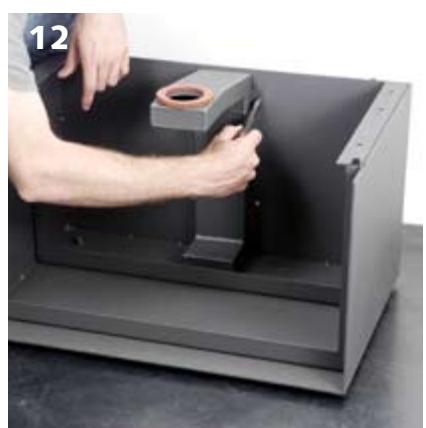
Attach the duct using the 4 M4 nuts [photo 12].
Unless already done, put the base on its feet. Put it into its definitive position. Check the safety distance from combustible materials. For the distance at the front, refer to the installation instructions for the StUV 16-cube.


Positioning the support plate and the stove
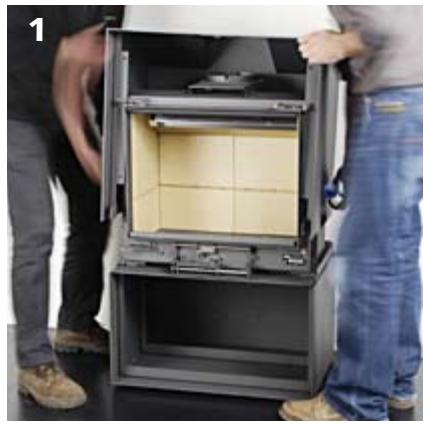
Position the support plate on the base. Pre-screw - screw in the M6x16 screws with hexagonal heads without tightening in order to be able to adjust the parts [photo 1].
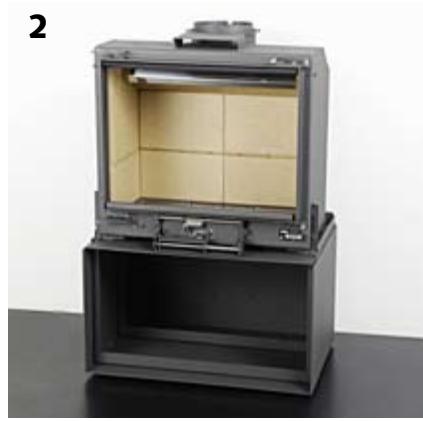
Position the stove on the support plate [photo 2].
Attachment of the link lugs "stove - support plate"
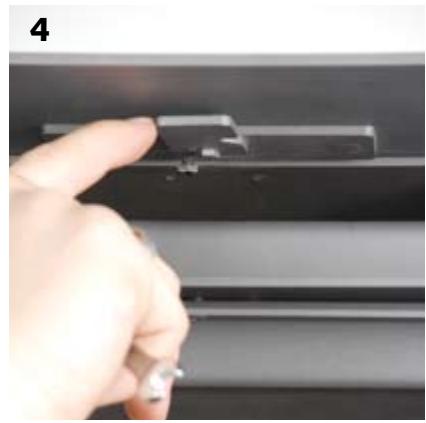
Using the M5x12 screws with hexagonal heads, screw in the 2 link lugs at the front - left and right - [photo 3].
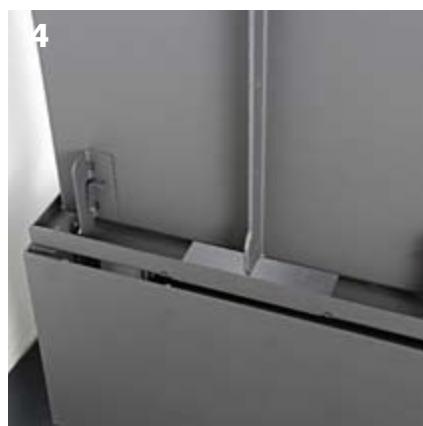
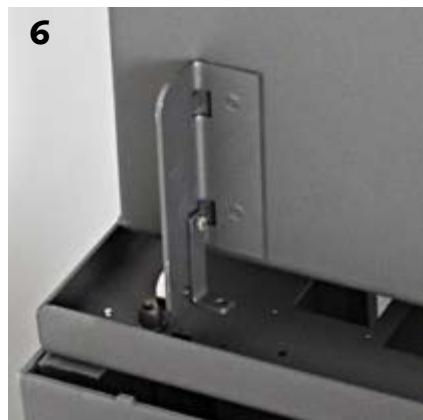
Untighten the 2 link lugs at the back [photos 4 & 5].Gently tilt the stove forwards so that the lugs at the back are vertical [photo 6].
Retighten the rotation axis and attach with the 2 M5x12 screws with hexagonal heads.
Positioning of the stove cover
Using the handles provided, place the cover onto the stove [photo 1]. Centre the cut-out part in the cover in line with the stove's smoke outlet.
Attach the cover with the 4 screws at the front [photo 2] starting with the screws at the back. To line up the holes you could use a clamp (do not scratch the cover).
The upper part of the cover has to be connected with the stove: a bolt is provided for this purpose [photos 3 & 4].
- remove the hexagonal screw from the bolt [photo 3]
- swivel it 3/4 of a turn [photo 4] and retighten the screw.
Alignment of the cover of the stove with the base
Check the adjustment at the back, along the depth and then laterally. Adjust if necessary.
Using a size 10 key, screw the back of the base to the stove from inside the base [photo 5].
Adjust the front if necessary and screw in the front of the base, again from the inside of the base.
For assembly, refer to the installation instructions for the Stuv 16-cube from page 13.

B-5170 Bois-de-Villers (Belgium)
info@stuv.com - www.stuv.com

Stúv stoves are designed and
manufactured in Belgium by Stuv sa
B-5170 Bois-de-Villers (Belgium)
info@stuv.com - www.stuv.com
Stúv reserves the right to make changes without prior notice. These instructions
have been produced with the greatest of care. However, we do not accept
responsibility for any errors that may have been made.
Editor: Gérard Pitance - rue Jules Borbouse 4 - 5170 Bois-de-Villers - Belgium
Printed on 100% recycled paper