
LEX 2 150-7 - Orbital sander FESTOOL - Free user manual and instructions
Find the device manual for free LEX 2 150-7 FESTOOL in PDF.
| Product Type | Pneumatic Orbital Sander |
| Brand | Festool |
| Model | LEX 2 150-7 |
| Sanding Pad Diameter | 150 mm |
| Sanding Stroke | 7 mm |
| Rotation Speed | 6500 - 8000 rpm |
| Number of Strokes | 13000 - 16000 rpm |
| Speed Adjustment | Continuous via dial |
| Drive Type | Rotary vane pneumatic motor |
| Operating Pressure | 6 bar (max 6.5 bar) |
| Air Consumption at Rated Load | 390 l/min |
| Compressed Air Connection | Festool IAS 2 system (supply, return, extraction) |
| Weight | 1.3 kg |
| Sound Pressure Level | 70 dB(A) |
| Vibrations (typical value) | 4.5 m/s² (uncertainty K=1.5 m/s²) |
| Compatible Materials | Wood, plastic, metal, stone, composite, paint, varnish, filler |
| Dust Extraction System | Integrated, direct extraction at pad |
| Abrasive Type | Hook and loop (Stickfix) |
| Cleaning of Extraction Channels | Recommended once a week |
| Lubrication | 1 to 2 drops after prolonged idleness |
| Motor Vane Replacement | Approximately every 500 operating hours |
| Warranty | 24 months in the European Union (subject to conditions) |
Frequently Asked Questions - LEX 2 150-7 FESTOOL
User questions about LEX 2 150-7 FESTOOL
0 question about this device. Answer the ones you know or ask your own.
Ask a new question about this device
Download the instructions for your Orbital sander in PDF format for free! Find your manual LEX 2 150-7 - FESTOOL and take your electronic device back in hand. On this page are published all the documents necessary for the use of your device. LEX 2 150-7 by FESTOOL.
USER MANUAL LEX 2 150-7 FESTOOL
REACH for Festool products, their accessories and consumables - REACH is a European Chemical Directive that came into effect in 2007. As "downstream users" and product manufacturers, we are aware of our duty to provide our customers with information. We have set up the following website to keep you updated with all the latest news and provide you with information on all the materials used in our existing products.
Compressed air eccentric sander
Technical data
| Sanding pad diameter | |
| - LEX 2 125 | 125 mm |
| - LEX 2 150 | 150 mm |
| - LEX 2 185 | 185 mm |
| Drive | Compressed-air vane motor |
| Operating pressure (flow pressure) | 6 bar |
| Speed | |
| - LEX 2 125/3, LEX 2 125/7, LEX 2 150/3, | |
| - LEX 2 150/7, LEX 2 185/7 | 6500 - 8000 rpm |
| - LEX 2 150/11 | 6000 - 7000 rpm |
| Working strokes | |
| - LEX 2 125/3, LEX 2 125/7, LEX 2 150/3, | |
| - LEX 2 150/7, LEX 2 185/7 | 13000 - 16000 rpm |
| - LEX 2 150/11 | 12000 - 14000 rpm |
| Sanding stroke | |
| - LEX 2 125/3, LEX 2 150/3 | 3 mm |
| - LEX 2 125/7, LEX 2 150/7, LEX 2 185/7 | 7 mm |
| - LEX 2 150/11 | 11 mm |
| Air consumption at nominal load | 390 l/min |
| Weight | |
| - LEX 2 125, LEX 2 150 | 1.3 kg |
| - LEX 2 185 | 1.4 kg |
The specified illustrations can be found at the beginning of the operating instructions.
Symbols

Caution. Danger!

Read the operating instructions/notes

Wear ear protection!
1 Use for intended purpose
As specified, the machines are designed for sanding wood, plastic, metal, stone, composite, paintwork, filler and similar materials.
Material containing asbestos must not be processed with these tools.

The user is liable for damage and injury resulting from incorrect usage!
2 Safety instructions
2.1 General safety instructions

Warning! Before setting up, using, repairing and servicing this air tool or replacing accessory parts, you must have read and
understood all safety instructions and information. Ignoring warning notes and instructions may result in serious injuries.
Keep all of the attached documents and pass on the documentation if the machine changes ownership.
a. Keep your place of work tidy. Untidiness in working areas increases the risk of an accident.
b. Please take your surroundings into consideration. Do not leave pneumatic tools out in the rain. Keep work area well lit.
Never use pneumatic tools in the vicinity of flammable liquids or gases.
c. Keep away from children. Do not allow others to touch the pneumatic tool or the compressed-air hose.
Keep others away from your work area.
d. Store your pneumatic tools safely. Unused pneumatic tools should be stored in a dry, inaccessible or locked location, out of the reach of children.
e. Use the correct pneumatic tool. Do not use the pneumatic tool for purposes for which it was not intended.
f. Wear suitable work clothes. Do not wear loose fitting clothing or jewellery. They can get entangled in moving parts.
Rubber gloves and non-slip footwear are recommended for outdoor work. Long hair should be protected with a hair net.
g. Wear safety goggles. You should also wear a face mask for work which produces dust.
h. Connect a dust extractor. Make sure that available dust extraction equipment is connected and used correctly.
Observe the regional safety regulations for hazardous dusts and vapours.
Operate and service the air tool as described in the recommendations included in these instructions and use accessories and attachments from Festool to minimise the release of dust and vapours into the atmosphere.
In dusty environments, make sure that the dissipation of exhaust air does not disturb the dust.
i. Do not use the compressed-air hose for purposes for which it was not intended. Never carry the pneumatic tool by the compressed-air hose.
Protect the compressed-air hose from heat, oil and sharp edges.
Never direct the air flow towards yourself or other persons.
j. Secure the workpiece. Use clamping devices or a vice to hold the workpiece firmly.
These clamp the workpiece more securely than with hands and also allow both hands to be free to operate the pneumatic tool.
k. Avoid abnormal postures. Maintain a safe stance and keep your balance at all times.
l. Take care of your tools. Keep your tools clean and sharp for safe and efficient work. Follow the maintenance instructions and tips on changing tools. Check the compressed-air hose regularly and if it becomes damaged, have it replaced by an approved specialist. Keep handles dry and free of oil and grease.
m. Disconnect the compressed-air hose from the compressed-air supply. If the pneumatic tool is idle, prior to maintenance and when changing tools such as saw blades, drill bits, cutting tools.
n. Remember to remove keys. Check that the key and adjustment tools have been removed before switching the tool on.
o. Avoid unintentional starting. Do not carry a pneumatic tool that is connected to a compressed-air supply with your finger on the trigger. When connecting the compressed-air hose to a compressed-air supply, make sure that the switch is not activated.
p. Stay alert. Keep your eyes on your work. Use common sense. Do not use the pneumatic tool if you are not able to concentrate properly. Operating and maintenance personnel must be physically strong enough to handle the size, weight and power of the machine.
q. Check the pneumatic tool for possible damage. Before continuing to use the pneumatic tool, carefully examine safety devices and slightly damaged components and make sure that they function correctly and as specified. Check whether moving components function correctly and do not seize, and whether any components are damaged.
All components must be fitted correctly and meet all requirements to ensure that the pneumatic tool operates correctly.
Damaged safety devices and parts should be repaired or replaced by an authorised service centre unless otherwise specified in the operating instructions. Damaged switches must be replaced by an authorised service centre.
Do not use pneumatic tools with faulty switches (machine cannot be switched on or off).
r. Caution! Only use accessories and auxiliary devices that are listed in the operating manual or that are recommended by the manufacturer (catalogue).
Using other tools or accessories can pose a risk of injury.
s. Have your pneumatic tool repaired by a qualified specialist. This pneumatic tool corresponds to the relevant safety regulations. Re-
pairs should only be carried out by a qualified specialist. The operator is otherwise at risk of an accident.
t. Only trained and qualified persons are permitted to set up, adjust and operate this air tool. Persons without the relevant qualifications and training are more likely to cause accidents.
u. This air tool may not be modified. Modifications may reduce the effectiveness of safety devices and pose a greater risk to operating personnel.
v. Hold the machine correctly. Prepare to counteract normal or sudden movements - hold the machine with both hands.
2.2 Machine-related safety instructions
- The manufacturer's handling and processing instructions must be observed without fail if explosive or self-igniting dusts are likely to occur during sanding.
- If dust dangerous to health is produced during sanding, the machine should be connected to an appropriate extraction device and the safety regulations that apply to the working material should be observed.
- The operating pressure should not exceed 6.5 bar.
- The machine should only be operated with sand-paper. Grinding wheels and parting grinder discs are not permitted.
- Onlywork with correctly processed compressed air. Using the Festool service unit VE guarantees this.
- Only use original Festool accessories.
- Wear suitable protection such as ear protection, safety goggles, a dust mask for work which generates dust, and protective gloves when working with raw materials and when changing tools.
- The permissible rotational speed of the accessory must be at least as high as the maximum speed specified on the machine. Accessories that rotate faster than the permissible level can rupture.
- Proceed with caution in unfamiliar surroundings that may contain electricity or other supply cables that harbour hidden dangers. Make sure that there are no electrical cables, gas pipelines or similar that, if damaged, could pose a hazard when the machine is used.
2.3 Residual risks
In spite of compliance with all relevant design regulations, dangers may still present themselves when the machine is operated, e.g.:
- Workpiece parts being thrown off,
- Parts of damaged tools being thrown off,
-
Noise emission,
-
Sawdust emission.
2.4 Noise and vibration information
Typical values established in compliance with EN ISO 15744/EN ISO 8662:
| Sound pressure level | 70 dB(A) |
| Measured acceleration | |
| LEX 2 125/7, LEX 2 185/7 | < 2,5 m/s2 |
| LEX 2 125/3, LEX 2 150/3 | = 3,0 m/s2 |
| LEX 2 150/11 | = 4,0 m/s2 |
| LEX 2 150/7 | = 4,5 m/s2 |
| Uncertainty | K = 1,5 m/s2 |

The noise level can exceed 85 dB(A) during work.
Wear ear protectors!
The emission values specified (vibration, noise) were measured in accordance with the test conditions stipulated in EN ISO 15 744/EN ISO 8662 and are intended for machine comparisons. They are also used for making preliminary estimates regarding vibration and noise loads during operation. The emission values specified refer to the main applications for which the air tool is used. If the air tool is used for other applications, with other tools or is not maintained sufficiently prior to operation, however, the vibration and noise load may be higher when the tool is used. Take into account any machine idling times and downtimes to estimate these values more accurately for a specified time period. This may significantly reduce the load during the machine operating period.
3
Compressed-air supply and commissioning
Make sure that the pneumatic tool is switched off when you connect the compressed-air supply.
3.1 Compressed-air processing
The Festool service unit VE should always be used to ensure that Festool pneumatic tools function correctly.
Consisting of a filter, control unit, condensation drain and lubricator, the service unit cleans and lubricates the compressed air and keeps it free of condensation.
Here, the lubricator should be set so that a drop is applied to the compressed air approx. every 7-10 minutes.
Damage that occurs as a result of incorrect compressed-air processing is excluded from warranty claims.
We recommend a service unit with a 3 / 8" connector, when up to two Festool pneumatic tools are used.
A compressor that supplies at 500 ~l / min and at an operating pressure of 6 bar should be used to supply compressed-air.
The diameter of the piping system must be sufficiently large (at least 9mm ).
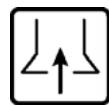
3.2 IAS 2 hose connector
The eccentric sander is a pneumatic tool for connection to the Festool IAS 2 system.
This hose system combines three functions in one hose:
- Compressed air supply (1.1)
- Exhaust air extraction (1.2)
- Dust extraction (1.3)
Connection and disconnection - see Fig. 3.
3.3 Commissioning
Pressing the lever (2.1) switches on the pneumatic tool.
Releasing the lever switches the machine off again.
4
Machine settings

The machine should always be disconnected from the compressed air supply before any work is carried out on the machine.
4.1 Speed adjustment
You can regulate the rotational speed steplessly between 6500 and 8000 rpm or 6000 and 7000 rpm (LEX 2 150/11) using the adjusting wheel [2.2]. This enables you to optimise the cutting speed to suit the material.
4.2
Suction unit
Sanding dust is extracted through the extraction channels in the sanding pad directly to the material removal point. To guarantee optimized dust extraction, we recommend using Festool extractors with automatic switch-on/switch-off device for compressed-air machines.

In order to prevent damage to the pneumatic motor, dust extraction must not be carried out on the pneumatic tool when it is at standstill.
4.3
Sanding pads

The sanding pads are different in weight, depending on their diameter. Fitting sanding pads of incorrect size causes excessive vibration of the machine.
Only use sanding pads with an undamaged burr layer.
The sanding pads are available in three degrees of hardness to suit the type of application:
- Hard: high edge strength, for removing coarse
material from surfaces and for sanding edges.
- Soft: universal for coarse and fine sanding, with elastic structure for even and curved surfaces.
- Super soft: high elasticity, for smooth fine sand-ing of moulded parts, curves, radii.

Do not use super soft pads with the Lex 2 150/11!
Do not use on edges.
Assembly - see Fig. 4. Make sure the position of the positive-fit supports of the sanding pads (4.1) and the machine (4.2) is congruent.
4.4 Abrasive
Self-adhesive abrasives, such as Stickfix sand-paper, and sanding cloths can be affixed to the Stickfix sanding pads.
The abrasives are simply pressed onto the sanding pads and removed after use.

The abrasives must be affixed concentrically and the holes aligned with those on the sanding pad.
5 Maintenance and care

The machine should always be disconnected from the compressed air supply before any work is carried out on the machine.
Any maintenance or repair work requiring the motor housing to be opened may only be carried out by an authorised service workshop.
5.1 Vanes
We recommend that the vanes on the motor be replaced after approx. 500 operating hours.
5.2 Sanding pad brake
The collar (5.1) makes contact with the sanding pad, thus preventing the sanding pad from vibrating uncontrolledly.
This collar wears out over time and must be replaced should brake fading occur. The sanding pad must be removed for this. You can then remove the collar from the snap-on fastener (5.2) and replace it with a new one.
5.3 Lubrication
If the machine is not used for longer periods, e.g. for a weekend, introduce 1 or 2 drops of lubricating oil into the compressed-air supply (5.3) on the machine prior to use.
5.4 Replacing the silencer
The silencer on the IAS 2 connecting piece must be replaced at regular intervals to maintain the power of the pneumatic tool.
5.5 Cleaning the extraction channels
We recommend that the extraction channels in the machine (5.4) be cleaned using a small pipe-cleaner brush or a cloth once a week (especially when sanding resin filler).
6 Accessories, tools
Use only original Festool accessories and Festool consumable material designed for this machine because these system components are designed specifically for the machine. Using accessories and consumable material from other suppliers will most likely affect the quality of your working results and limit any warranty claims. Machine wear or your own personal workload may increase depending on the application. Protect yourself and your machine, and preserve your warranty claims by always using original Festool accessories and Festool consumable material!
7 Disposal
Do not throw the tool in your household waste!
- Dispos of machines, accessories and packaging at an environmentally responsible recycling centre. Observe the valid national regulations.
8 Warranty
Our equipment is under warranty for at least 12 months with regard to material or production faults in accordance with national legislation. In the EU countries, the warranty period is 24 months (an invoice or delivery note is required as proof of purchase). Damage resulting from, in particular, normal wear and tear, o-overloading, improper handling, or caused by the user or other damage caused by not following the operating instructions, or any fault acknowledged at the time of purchase, is not covered by the warranty. Damage caused by the use of non-original accessories and consumable material (e.g. sanding pads) is also excluded. Complaints will only be acknowledged if the equipment has not been dismantled before being sent back to the suppliers or to an authorised Festool customer support workshop. Store the operating instructions, safety notes, spare parts list and proof of purchase in a safe place. In addition, the manufacturer's current warranty conditions apply.
Note
We reserve the right to make changes to the technical data contained in this information as a result of ongoing research and development work.
3.2 Raccordement Tuyau IAS 2
6 Accessoires, outfits
8 Ansvar for mangler
5.5 YnCTKa BbITaXHbIX KaHaJIOB
Pekomehnyetcpa3BHeJeHIO (ocobHNO npi
IINFOBAHHCINTeTnueCKHX IaKLeBOK) IpOCHuaTb
BbITJXHbIE KaHaJIbIB MaUNHe (5.4)c NOMOu bEO
epUHKa HNI KUCKa TKAHN.
6 PrnHaIeXHocTH, HNCTpyMeHTbI
NcnoIb3yIte TOLbKO npedHa3HaueHHbIe IJRA daHHO MaIHHKOpnIHNaIbHbIE OCHACTKY n paCXoHbIE MaTePnaJIbFestool, TaK KaK 3TN KOMNOHeHTb ONTImaJIbHO COIacOBaHbIMekdyco6oB. B clyuae NcnoJIb3OBAHINr OCHACTKN pACXODHbIX MaTePnaIbOB dpyHX nPOIN3BO-DHTeJeCLeDyET PrnHMaTb BO BHIMAHne BO3MOJHOCTb CHNXEHNr KauEcTBa paOToBn I ORpaHnueHn ITO rapaHTnHbIM O6aTeJIbCTBaM. B 3aBNCIMOCTHn OT BVda pa6OT 3TO MOKeT PrnBeCTN K BoJee INTEHCNB-HOMy N3HOCy MaIHHKII INI K YBEInuEHNIHO HaPy3Kn HA pyKn. POnToMv DJIr TORO, UTO6bl C6epeYb CBOIN CNJIbI, ONTImaJIbHO HcNoJIb3OBAtB peCypc MaIHHNK II OBeCeNeITb HAnExKHocTb rapaHTnHbIX O6aTeJIbCTB, PpIMHeHrTe ToJIbKO OpnIHNaJIbHbIE OCHACTKY n paCXoHbIE MaTePnaJIbFestool!
7 ytnlnaeia
He BbI6paCbIbAaIe aIppaT BMeCTe C 6bITOBbIMn OToxOamn! OBeCneBte 6e3OpacHyo IJra OkpyXaIOUe cpebl yTNIIN3aUIO aIIppaTa, OChAcTKn I yPakOBKn. Co6JIIOaIte DeIcTBYIOUne HaUNoHaalbHbIe npedPiNcaHnIy.
8 TapaHTN
Для наших пиборов Мblпрededoctabлием rapаHTIO, pacnpoctpaHIOUOcH Na DeΦeKtBI MaTePnAJa I npO3BOODCTBA, COJIaCHO 3akOHODaTeJIbHbIMпрEDINscaHnM, DeIcTBYIOUIM B KOHKpeTHo CTpaHe. MInHMaJIbHbI cPoK DeIcTBNlra papaTNI 12 MeCauE.ДлЯ cTpaHyacTHNi EC cPoK DeIcTBNlra rapaHTNI COCTaBJIeT 24 MeCauZ (при прдьВLEHn YeKa ИПи HaKlaIHO). RapaHTN He pacnpoctpaHraTeC H Na NOBpeJDeHnI, NOJIyueHHbIe B pe3yIbTaTe eCTeCTBeHHOTo N3HOCA/ NcNoJIb3OBaHnI, NepeRpy3Kn, HeHaIJIeKaUeTo NcNoJIb3OBaHnI, NOBpeJKeHnI IO BnHE NOJIb3OBaTeJIaII INI prN cNoJIb3OBaHnI BOppeKn PyKOBoDCTBy I O KScJIpyaTaUHN, JIbO N3BeCTHbIe Ha MOMENT POKyIKN (uYeHka TOBapA). NcKlIoUaTeC TAKKe yUepe6, Bbl3BaHbI INcNoJIb3OBaHnE M HeOpIHNaHbHO OCHACTKN I paCXODHbIX MaTePnaIOB (HaNPmEp, IJIINΦOBAJIbHbIX TapeJOK). ПрTeH3N INpIHMaHOTCr TOLbKO B TOM Clyuae, ecIIN Prp6op DoCTaBJIeN K IocTaNkU Ky IINI aBTOpN3OBaHHbIceBVCNbI ueHTp Festool B Hepa3O6paHHom BIne. CoXpaHryTe PyKOBoDCTBO I O KScJIpyaTaUHN, INCTpyKUIN ITOTEXNKe 6e3OnaCHO T IOBapHbI ueK. B OcTAJIbHom DeIcTBOBaTb COJIaCHO COOTBEcTBYIOUIM UcIOBnM IIpeDIOCTaBLeHnI rapaHTN n3rOTOBHTeJI.
Примechанe:ВCBЯЗиСпоctяНьIMN CCCLEДОВАнЯМИ HOBыIMТexHnueckIMNpa3pa6OTkAmNФиMa OCTaBJIeT 3a COбОйпраBO Ha BHeceHne ИЗMeнeнь В TeXnueckNeхapakTeprnCTnK.