
IMAGEDRIVE - Disk image creation tool NERO - Free user manual and instructions
Find the device manual for free IMAGEDRIVE NERO in PDF.

User questions about IMAGEDRIVE NERO
0 question about this device. Answer the ones you know or ask your own.
Ask a new question about this device
Download the instructions for your Disk image creation tool in PDF format for free! Find your manual IMAGEDRIVE - NERO and take your electronic device back in hand. On this page are published all the documents necessary for the use of your device. IMAGEDRIVE by NERO.
USER MANUAL IMAGEDRIVE NERO
Copyright and Trademark Information
The Nero ImageDrive manual and all its contents are protected by copyright and are the property of Nero AG. All rights reserved. This manual contains material that is protected by internationally valid copyright. No part of this manual may be reproduced, transmitted or transcribed without the express written permission of Nero AG.
Nero AG rejects any claims that transcend the clauses of the guarantee rights. Nero AG does not undertake any liability for the correctness of the content of the Nero ImageDrive manual. The contents of the software supplied, as well as of the Nero ImageDrive manual, may be changed without prior warning.
All trade names and trademarks are the property of their respective owners.
The trademarks mentioned here are named for information purposes only.
Copyright © 2007 Nero AG and its licensors. All rights reserved.
REV 1.0, SW 3.0.0.12
Contents
1.1 About the manual 4
1.2 About Nero ImageDrive 4
2.1 System requirements 5
2.1.1 Operating systems supported 5
2.2 Minimum requirements 5
2.3 Formats supported 5
1 General information 4
2 Technical information 5
3 Launching the program 6
3.1 Launching Nero ImageDrive via Nero StartSmart 6
3.2 Launching Nero ImageDrive directly 6
4 Working with Nero ImageDrive 7
4.1 Program interface 7
4.2 Sample applications 8
5 Enabling Nero ImageDrive 9
6 Enabling drives 10
7 Mounting images 11
7.1 Mounting images with Nero ImageDrive 11
7.2 Mounting images from Microsoft Windows ExplorerTM 12
7.3 Mounting images with command line input 13
8 List of figures 14
9 Index 15
10 Contact 16
1 General information
1.1 About the manual
This manual is intended for all users who want to find out how to use Nero ImageDrive. It is task-based and explains how to achieve a particular objective on a step-by-step basis.
In order to make best use of this manual, please note the following conventions:
| Symbol | Meaning |
| ○ | Indicates warnings, preconditions or instructions that have to be followed strictly. |
| ○ | Indicates additional information or advice. |
| 1. Start ... | A number at the beginning of a line indicates a request for action. Carry out these actions in the order specified. |
| → | Indicates an intermediate result. |
| → | Indicates a result. |
| OK | Indicates text passages or buttons that appear in the program interface. They are shown in bold face. |
| Chapter | Indicates references to other chapters. They are executed as links and are shown in red and underlined. |
| [...] | Indicates keyboard shortcuts for entering commands. |
1.2 About Nero ImageDrive
Nero ImageDrive allows you to set up a virtual drive. The virtual drive is visible in Microsoft Windows Explorer™ and can be used just like a real drive. Instead of an actual disc, you mount images in the virtual drive. An image file is a file that contains an image of a complete CD or DVD and can be created in Nero Burning ROM, for example. From the virtual drive, you can open, display, and execute files and programs, depending on the contents of the mounted image. Nero ImageDrive provides fast drive simulation.
Nero ImageDrive can automatically mount images at startup. You can also mount images from Microsoft Windows Explorer™ or by entering a command line.
Nero ImageDrive supports up to two drives simultaneously for CD and DVD disc types and NRG and ISO image formats.
2 Technical information
2.1 System requirements
2.1.1 Operating systems supported
Nero ImageDrive works on the following operating systems:
Microsoft® Windows® 2000 (with at least Service Pack 4 installed)
Microsoft Windows XP (with at least Service Pack 2 installed)
Microsoft Windows Media Center Edition
Microsoft® Windows Server® 2003 (with at least Service Pack 1 installed)
In addition, Microsoft® DirectX® 9.0c (or higher) must be installed on your operating system. The latest version of DirectX® can be downloaded from the Internet under http://www.microsoft.com/windows/directx and installed.
2.2 Minimum requirements
Main memory: 128 MB
Hard drive: Up to 9 GB for DVD images

Installation of the latest WHQL-certified drivers is recommended. WHQL stands for Windows Hardware Quality Labs and means that the device driver certified by Microsoft® is compatible with Microsoft® Windows® and the relevant hardware.
2.3 Formats supported
Nero ImageDrive supports the following formats:
| Image file formats | Image disc types |
| •NRG | •CD |
| •ISO | •DVD-ROM |
3 Launching the program
3.1 Launching Nero ImageDrive via Nero StartSmart
To launch Nero ImageDrive via Nero StartSmart, proceed as follows:
- Click on the Nero StartSmart icon.
The Nero StartSmart window is opened.
- Click on the arrow button in the left margin of the window.
The extended area is opened.
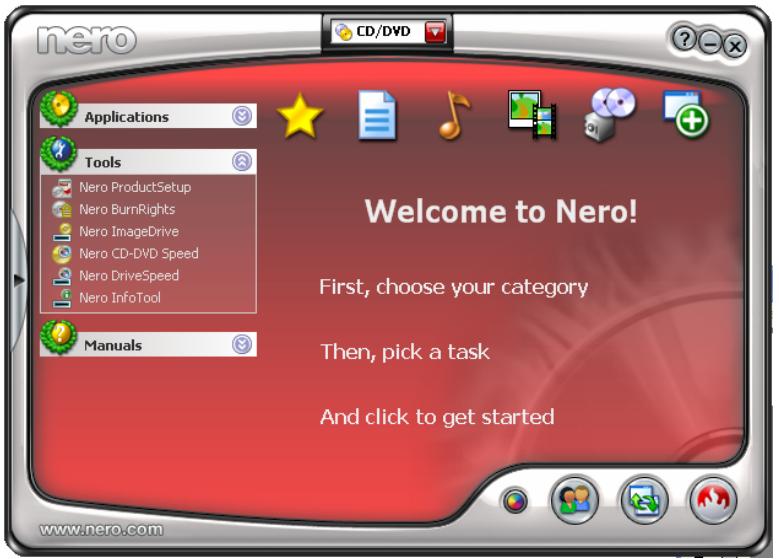
Fig. 1: Nero StartSmart
- Select the Nero ImageDrive entry in the Applications list box.
The Nero ImageDrive window is opened.
You have launched Nero ImageDrive via Nero StartSmart.
3.2 Launching Nero ImageDrive directly
To launch Nero ImageDrive directly, proceed as follows:
- Select Start (Start icon) > (All) Programs > Nero 7 (Premium) > Tools > Nero ImageDrive.
The Nero ImageDrive window is opened.
You have launched Nero ImageDrive.
4 Working with Nero ImageDrive
4.1 Program interface
The Nero ImageDrive program interface is the starting point for enabling Nero ImageDrive, configuring up to two virtual drives, and mounting image files.
Nero ImageDrive has up to three tabs: the Options tab is always available, while the First drive and Second drive tabs are only displayed when the corresponding drives are enabled.
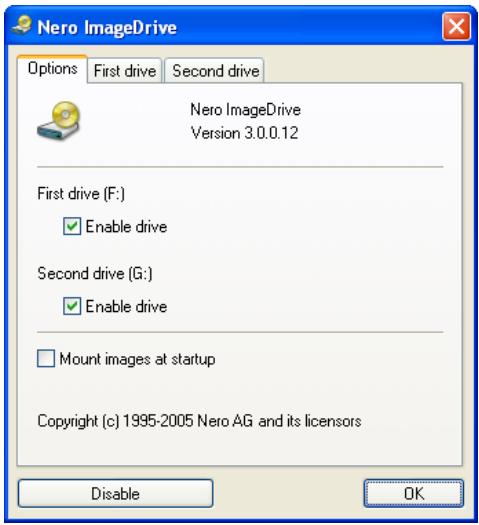
Fig. 2: Options tab
The following input options are available:
| Enable/ Disable | Enables/disables Nero ImageDrive (see Enabling Nero ImageDrive). |
| OK | Applies any changes and closes Nero ImageDrive. |
| Options tab | |
| Enable first/second drive | Enables the first/second virtual drive (see Enabling drives). |
| Mount images at startup | Mounts image files automatically at startup. |
| First and Second drive tabs | |
| Image | Displays the file name of the currently or most recently mounted image. |
| ... | Displays the Open Image window where you can select an image file. |
| Show Image Info | Opens the Information window which provides information about the mounted image file, such as the name, date, and size. |
| Eject | Disables the image (corresponds to ejecting a disc). Once the image is disabled, the Load button is displayed. |
| Load | Mounts the image that is displayed in the Image display panel. Once the image is mounted, the Eject button is displayed. |
4.2 Sample applications
Nero ImageDrive is a virtual drive that can load images. An image or image file is a virtual image of a CD or DVD. Nero ImageDrive allows you to treat images like discs and open files or run programs from the virtual drive (which you can find in Microsoft Windows Explorer™).
Nero ImageDrive is ideal for applications such as:
- Loading the image of a game CD in Nero ImageDrive to eliminate the annoying spin-up noise when the game is launched.
- Loading frequently used discs, such as a telephone book CD, as an image in Nero ImageDrive so that the CD does not have to be inserted each time you want to use it.
- Creating an image of a video or slide show that you are creating with Nero Vision, for example, so that you can test it with Nero ImageDrive first.

You can create images with Nero Burning ROM (from data on the computer or as a copy of an inserted disc) as well as with applications such as Nero Vision or Nero Recode.

Nero Burning ROM is a full-featured burning program. Nero Burning ROM is part of the Nero 7 Suite and is automatically installed with Nero 7. For more information, see the Nero Burning ROM manual.

Nero Vision is a program for capturing, creating, and burning videos. Nero Recode is a video converter. Both applications are part of the Nero 7 Suite and are automatically installed with Nero 7. For more information, see the Nero Vision and Nero Recode manuals.
5 Enabling Nero ImageDrive
Nero ImageDrive is initially disabled by default. The first time you launch the program you must enable it. You can then use the features of Nero ImageDrive. To enable Nero ImageDrive, proceed as follows:
- Launch Nero ImageDrive (see Launching the program).
A dialog box is displayed that asks you if you would like to enable Nero ImageDrive.
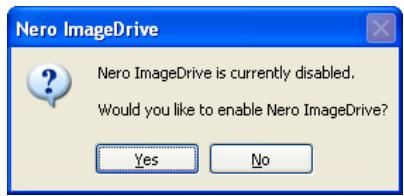
Fig. 3: Enable Nero ImageDrive dialog box
- Click on the Yes button.
Nero ImageDrive is enabled. A dialog box advising you that you must restart your computer for the changes to take effect is displayed.
- Click on the OK button.
The dialog box is closed.
- Restart your computer.
The enable process is continued. A dialog box is displayed during this process. Nero ImageDrive opens once this process is complete.
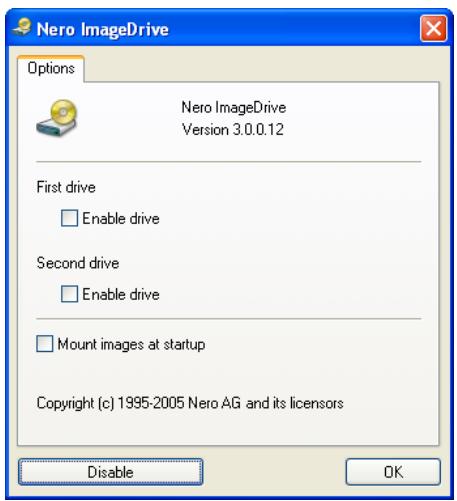
Fig. 4: Nero ImageDrive
You have enabled Nero ImageDrive. You can now use Nero ImageDrive and enable virtual drives.

If you no longer want to use Nero ImageDrive, you can disable it with the Disable button.
6 Enabling drives
After you have enabled Nero ImageDrive, you can use it to configure up to two virtual drives. To do so, proceed as follows:
-
Launch Nero ImageDrive (see Launching the program).
-
To enable the first drive, check the First drive > Enable drive box.
The virtual drive is enabled and the first available drive letter is assigned to it. The drive letter is displayed in parentheses after First drive. The First drive tab is generated.
- To enable the second drive, check the Second drive > Enable drive box.
The virtual drive is enabled and the first available drive letter is assigned to it. The drive letter is displayed in parentheses after Second drive. The Second drive tab is generated.
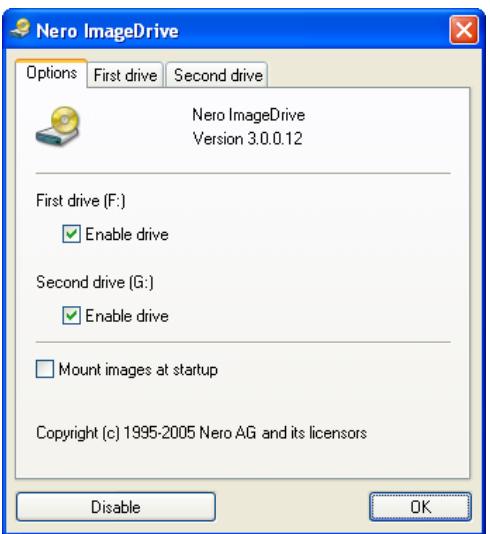
Fig. 5: Nero ImageDrive with two enabled drives
You have enabled the drives. The virtual drives are now available on your computer and are displayed in Microsoft Windows Explorer™.
7 Mounting images
7.1 Mounting images with Nero ImageDrive
An image or image file is an individual file on the hard drive that contains an image of a complete disc. An image, therefore, is a virtual disc that you can burn to a real disc with Nero Burning ROM, for example. With the Nero ImageDrive virtual drive, you can load the image (mount the virtual disc) and read or run it.
The following requirement must be satisfied:
A virtual drive must be enabled.
To mount the image, proceed as follows:
- Launch Nero ImageDrive (see Launching the program).
- Click on the tab of the drive you want.
- Click on the ... button.
The Open Image window is displayed. - Select the image file you want and click on the Open button.
The image file is mounted and the file name is displayed in the Image display panel. A Microsoft Windows Explorer™ window is opened and displays the contents of the virtual drive.
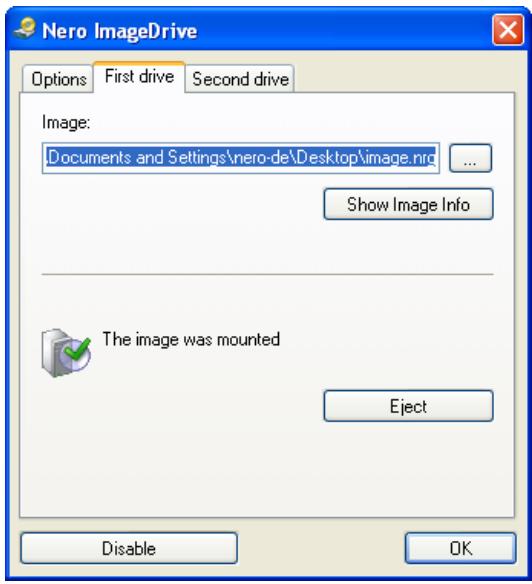
Fig. 6: Mounted image file
- To view more information about the image file, click the Show Image Info button.
The Information dialog box appears displaying the name, creation date, number of tracks, disc type, and size of the image.
-
If you would like the image to be automatically mounted when the computer starts up:
-
Click on the Options tab.
- Check the Mount images at startup box.
You have mounted an image in the virtual drive and can now use it whenever you want. Click on the Eject button to disable the image again.

You can enable (mount) a disabled (ejected) image file again quickly with the Load button.
7.2 Mounting images from Microsoft Windows Explorer™
You can also mount an image from Microsoft Windows Explorer™ by double-clicking on a virtual drive (as long as a virtual drive is enabled). This only works for the first of a maximum of two configured drives, however.
In order to be able to mount an image from Microsoft Windows Explorer™, you must specify that image files should be opened with Nero ImageDrive. To do so under Windows XP, for example, proceed as follows:
- Right-click on an image file to open the context menu.
- Select Open With > Choose Program.
The Open With window is displayed.
- Select Nero ImageDrive from the Programs list.
If Nero ImageDrive does not appear in the list, click on the Browse button and select Nero ImageDrive.
-
Check the Always use the selected program to open this kind of file box.
-
Click on the OK button.
The image is mounted in the first virtual drive.
In future, image files of this type will be mounted in a virtual drive when you double-click on the image.
7.3 Mounting images with command line input
You can also mount an image in a virtual drive with a command line input (as long as a virtual drive is enabled). This only works for the first of a maximum of two configured drives, however.
One possible application would be to save the commands for mounting different images as batch files (.bat) so that you can quickly switch between the different images without having to open Nero ImageDrive.
The following commands are available:
| cd "\\Path_to/ImageDrive\\"ImageDrive "Path_to/Image\image.nrg" | Mounts the specified image file. Instead of Path_to/ImageDrive, enter the path to the Nero ImageDrive program folder (e.g. Program Files\Nero\Nero 7\Nero ImageDrive). Instead of Path_to/Image, enter the path to the image file. Be certain to append the file name and extension (image.nrg in our example) as well. |
| cd "\\Path_to/ImageDrive\\"ImageDrive "" | Ejects the image file. |
8 List of figures
Fig. 1: Nero StartSmart. 6
Fig. 2: Options tab
Fig. 3: Enable Nero ImageDrive dialog box.. 9
Fig. 4: Nero ImageDrive 9
Fig. 5: Nero ImageDrive with two enabled drives. 10
Fig. 6: Mounted image file 11
9 Index
C
Command line input. 13
Contact 16
Conventions. 4
D
Disable 9
Disk type. 5
Drive enable. 10
E
Enable 7,9
F
File format. 5
Formats supported 5
1
Image
create 8
disable 12
eject. 7, 12
load. 7
mount 11
mount at startup 7, 12
mount from MS Windows Explorer. 12
mount with command line. 13
open 7
showinfo. 7
L
Launching .6
N
Nero Burning ROM 8
Nero ImageDrive starting directly.. 6
starting via StartSmart. 6
Nero Recode. 8
Nero Vision 8
0
Operating system. 5
R
Requirements 5
S
Show Image Info. 11
System requirements. 5
T
Tab first/second drive. 7 Options . 7
Target group 4
U
Usage example.. 8
User interface . 7
10 Contact
Nero ImageDrive is a Nero AG product.
nero
IMAGE DRIVE
Nero AG
Copyright © 2007 Nero AG and its licensors. All rights reserved.