
W-865R - Tape Recorder TEAC - Free user manual and instructions
Find the device manual for free W-865R TEAC in PDF.


| Product Type | Double cassette deck (recorder/player) |
| Brand | TEAC |
| Model | W-865R |
| Tracks | 4 tracks, 2 stereo channels |
| Heads | Record/play head × 1 (per deck), erase head × 1 (per deck) |
| Motor | DC servo (capstan) |
| Tape speed | 4.8 cm/s (normal), 9.5 cm/s (high speed) |
| Pitch control | ±10% (±2%) |
| Fast winding time | Approx. 110 s (C-60 cassette) |
| Wow and flutter | 0.09% (WRMS) ±0.1% |
| Frequency response | 30 Hz - 19 kHz (metal), 30 Hz - 18 kHz (chrome), 30 Hz - 17 kHz (normal) |
| Signal-to-noise ratio | 59 dB (without Dolby), 69 dB (with Dolby, CCIR-ARM) |
| Noise reduction | Dolby B, HX Pro |
| Special features | Normal/high speed dubbing, parallel recording, continuous recording, synchronized reverse, CPS, Intro Check, Blank Scan, timer |
| Inputs | Line (RCA, 100 mV/50 kΩ), Mic (mono 6.35 mm, 0.38 mV/200 kΩ) |
| Outputs | Line (RCA, 0.46 V/50 kΩ), Headphones (stereo 6.35 mm, 0.95 mW/8 Ω) |
| Remote control | Infrared, AA batteries (included), range < 5 m |
| Power supply | 230 V AC, 50 Hz (European model); 120/230 V selector |
| Power consumption | 22 W |
| Dimensions (W × H × D) | 435 × 127 × 292 mm |
| Weight | 4.0 kg |
| Maintenance | Clean heads, pinch rollers and capstans every 10 hours of use |
| Safety | Class I, grounded; do not expose to water; sufficient ventilation space |
| Included accessories | RC-615A remote control, batteries × 2, RCA cables × 2, instruction manual, warranty card |
Frequently Asked Questions - W-865R TEAC
User questions about W-865R TEAC
0 question about this device. Answer the ones you know or ask your own.
Ask a new question about this device
Download the instructions for your Tape Recorder in PDF format for free! Find your manual W-865R - TEAC and take your electronic device back in hand. On this page are published all the documents necessary for the use of your device. W-865R by TEAC.
USER MANUAL W-865R TEAC
CAUTION: TO REDUCE TH
E RISK OF ELECTRIC SHOCK, DO NOT REMOVE COVER (OR BACK). NO USER-SERVICEABLE PARTS INSIDE. REFER SERVICING TO QUALIFIED SERVICE PERSONNEL.

The lightning flash with arrowhead symbol, within an equilateral triangle, is intended to alert the user to the presence of uninsulated "dangerous voltage" within the product's enclosure that may be of sufficient magnitude to constitute a risk of electric shock to persons.

The exclamation point within an equilateral triangle is intended to alert the user to the presence of important operating and maintenance (servicing) instructions in the literature accompanying the appliance.
IMPORTANT SAFETY INSTRUCTIONS
CAUTION
- Read all of these Instructions.
- Save these Instructions for later use.
- Follow allWarnings and Instructions marked on the audio equipment.
1) Read Instructions — All the safety and operating instructions should be read before the product is operated.
2) Retain Instructions — The safety and operating instructions should be retained for future reference.
3) HeedWarnings — All warnings on the product and in the operating instructions should be adhered to.
4) Follow Instructions — All operating and use instructions should be followed.
5) Cleaning — Unplug this product from the wall outlet before cleaning. Do not use liquid cleaners or aerosol cleaners. Use a damp cloth for cleaning.
6) Attachments — Do not use attachments not recommended by the product manufacturer as they may cause hazards.
7) Water and Moisture — Do not use this product near water — for example, near a bath tub, wash bowl, kitchen sink, or laundry tub; in a wet basement; or near a swimming pool; and the like.
8) Accessories — Do not place this product on an unstable cart, stand, tripod, bracket, or table. The product may fall, causing serious injury to a child or adult, and serious damage to the product. Use only with a cart, stand, tripod, bracket, or table recommended by the manufacturer, or sold with the product. Any mounting of the product should follow the manufacturer's instructions, and should use a mounting accessory recommended by the manufacturer.
9) A product and cart combination should be moved with care. Quick stops, excessive force, and uneven surfaces may cause the product and cart combination to overturn.
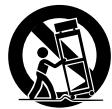
10) Ventilation — Slots and openings in the cabinet are provided for ventilation and to ensure reliable operation of the product and to protect it from overheating, and these openings must not be blocked or covered. The openings should never be blocked by placing the product on a bed, sofa, rug, or other similar surface. This product should not be placed in a built-in installation such as a bookcase or rack unless proper ventilation is provided or the manufacturer's instructions have been adhered to.
11) Power Sources — This product should be operated only from the type of power source indicated on the marking label. If you are not sure of the type of power supply to your home, consult your product dealer or local power company. For products intended to operate from battery power, or other sources, refer to the operating instructions.
12) Grounding or Polarization — This product may be equipped with a polarized alternating-current line plug (a plug having one blade wider than the other). This plug will fit into the power outlet only one way. This is a safety feature. If you are unable to insert the plug fully into the outlet, try reversing the plug. If the plug should still fail to fit, contact your electrician to replace your obsolete outlet. Do not defeat the safety purpose of the polarized plug.
13) Power-Cord Protection — Power-supply cords should be routed so that they are not likely to be walked on or pinched by items placed upon or against them, paying particular attention to cords at plugs, convenience receptacles, and the point where they exit from the product.
14) Outdoor Antenna Grounding — If an outside antenna or cable system is connected to the product, be sure the antenna or cable system is grounded so as to provide some protection against voltage surges and built-up static charges. Article 810 of the National Electrical Code, ANSI/NFPA 70, provides information with regard to proper grounding of the mast and supporting structure, grounding of the lead-in wire to an antenna discharge unit, size of grounding conductors, location of antenna-discharge unit, connection to grounding electrodes, and requirements for the grounding electrode.
Note to CATV system installer:
This reminder is provided to call the CATV system installer's attention to Section 820-40 of the NEC which provides guidelines for proper grounding and, in particular, specifies that the cable ground shall be connected to the grounding system of the building, as close to the point of cable entry as practical.
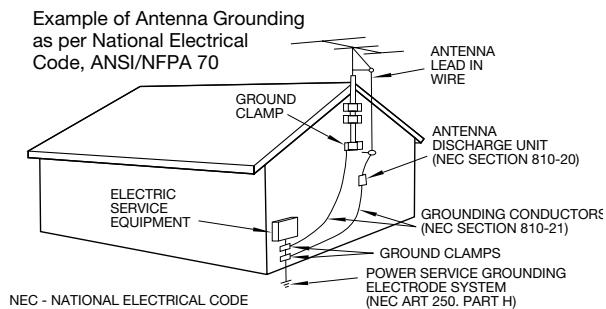
15) Lightning — For added protection for this product during a lightning storm, or when it is left unattended and unused for long periods of time, unplug it from the wall outlet and disconnect the antenna or cable system. This will prevent damage to the product due to lightning and power-line surges.
16) Power Lines — An outside antenna system should not be located in the vicinity of overhead power lines or other electric light or power circuits, or where it can fall into such power lines or circuits. When installing an outside antenna system, extreme care should be taken to keep from touching such power lines or circuits as contact with them might be fatal.
17) Overloading — Do not overload wall outlets, extension cords, or integral convenience receptacles as this can result in risk of fire or electric shock.
18) Object and Liquid Entry — Never push objects of any kind into this product through openings as they may touch dangerous voltage points or short-out parts that could result in a fire or electric shock. Never spill liquid of any kind on the product.
19) Servicing — Do not attempt to service this product yourself as opening or removing covers may expose you to dangerous voltage or other hazards. Refer all servicing to qualified service personnel.
20) Damage Requiring Service — Unplug this product from the wall outlet and refer servicing to qualified service personnel under the following conditions:
a) when the power-supply cord or plug is damaged.
b) if liquid has been spilled, or objects have fallen into the product.
c) if the product has been exposed to rain or water.
d) if the product does not operate normally by following the operating instructions. Adjust only those controls that are covered by the operating instructions as an improper adjustment of other controls may result in damage and will often require extensive work by a qualified technician to restore the product to its normal operation.
e) if the product has been dropped or damaged in any way.
f) when the product exhibits a distinct change in performance _ this indicates a need for service.
21) Replacement Parts — When replacement parts are required, be sure the service technician has used replacement parts specified by the manufacturer or have the same characteristics as the original part. Unauthorized substitutions may result in fire, electric shock, or other hazards.
22) Safety Check — Upon completion of any service or repairs to this product, ask the service technician to perform safety checks to determine that the product is in proper operating condition.
23) Wall or Ceiling Mounting — The product should be mounted to a wall or ceiling only as recommended by the manufacturer.
24) Heat — The product should be situated away from heat sources such as radiators, heat registers, stoves, or other products (including amplifiers) that produce heat.
WARNING: TO PREVENT FIRE OR SHOCK HAZARD, DO NOT EXPOSE THIS APPLIANCE TO RAIN OR MOISTURE.
CAUTION
- DO NOT REMOVE THE EXTERNAL CASES OR CABINETS TO EXPOSE THE ELECTRONICS. NO USER SERVICEABLE PARTS ARE WITHIN!
-
IF YOU ARE EXPERIENCING PROBLEMS WITH THIS PRODUCT, CONTACT TEAC FOR A SERVICE REFERRAL. DO NOT USE THE PRODUCT UNTIL IT HAS BEEN REPAIRED.
-
Do not expose this apparatus to drips or splashes.
- Do not place any objects filled with liquids, such as vases, on the apparatus.
- Do not install this apparatus in a confined space such as a book case or similar unit.
- The apparatus draws nominal non-operating power from the AC outlet with its POWER switch in the off position.
- The apparatus should be located close enough to the AC outlet so that you can easily grasp the power cord plug at any time.
- An apparatus with Class I construction shall be connected to an AC outlet with a protective grounding connection.
For U.S.A.
This equipment has been tested and found to comply with the limits for a Class B digital device, pursuant to Part 15 of the FCC Rules. These limits are designed to provide reasonable protection against harmful interference in a residential installation. This equipment generates, uses, and can radiate radio frequency energy and, if not installed and used in accordance with the instructions, may cause harmful interference to radio communications. However, there is no guarantee that interference will not occur in a particular installation. If this equipment does cause harmful interference to radio or television reception, which can be determined by turning the equipment off and on, the user is encouraged to try to correct the interference by one or more of the following measures:
- Reorient or relocate the equipment and/or the receiving antenna.
- Increase the separation between the equipment and receiver.
- Connect the equipment into an outlet on a circuit different from that to which the receiver is connected.
- Consult the dealer or an experienced radio/TV technician for help.
CAUTION
Changes or modifications to this equipment not expressly approved by TEAC CORPORATION for compliance will void the user's warranty.
Table of Contents
Thank you for choosing TEAC. Read this manual carefully to get the best performance from this unit.
Before Use 4
Handling Cassette Tapes 5
Connections 6
Using the Remote Control Unit 7
Identifying the Parts 8
Display 10
Playback (either TAPE I or TAPE II) 11
ContinuousPlayback. 13
Blank Scan 13
Song Search 14
Intro Check. 15
Recording (either TAPE I or TAPE II) 16
Mic Mixing Recording 18
Continuous Recording 19
Dubbing (from TAPE I to TAPE II). 20
Parallel Recording 20
Editing during Dubbing (only at normal speed) 21
Synchro Reverse Dubbing (from TAPE I to TAPE II) 22
Timer-ControlledPlayback and Recording 24
Troubleshooting 25
Maintenance. 26
Specifications 27
Before Use
Read this before operation
- As the unit may become warm during operation, always leaves sufficient space around the unit for ventilation.
- The voltage supplied to the unit should match the voltage as printed on the rear panel. If you are in any doubt regarding this matter, consult an electrician.
- Choose the installation location of your unit carefully. Avoid placing it in direct sunlight or close to a source of heat. Avoid locations subject to vibrations and excessive dust, heat, cold or moisture.
- Do not place the unit on any other electronic components.
- Do not open the cabinet as this might result in damage to the circuitry or electrical shock. If a foreign object should fall into the unit, contact your dealer or service company as soon as possible.
- When removing the power plug from a wall outlet, always pull directly on the plug. Do not pull on the line cord.
- Do not attempt to clean the unit with chemical solvents as this might damage the finish. Use a clean, dry, lint-free cloth.
- Keep this manual in a safe place for future reference.
Caution
- Do not open the cassette or pull the tape out of the cassette.
- Do not touch the tape surface.
- Do not use or store the tape in a humid or dusty place.
- Keep the tape away from any magnetic sources, such as speakers or TVs, otherwise noise may be produced during playback or important recordings may be erased.
Cassette tapes that you should not use
Poor performance, errors, or malfunctions may result if you use any of the tapes described below. Some of these tapes may also cause tape clog problems that can damage the tape transport mechanism.
Cassettes that are imperfectly shaped
Do not use a deformed cassette or one that has unstable tape movement or makes a strange sound during fast-forward or rewind.
Long play tapes
Do not use C-120 or longer tapes. These tapes are very thin and can easily stretch or get tangled in the tape transport mechanism.
Endless tapes
Do not use these tapes because they can easily get tangled in the tape transport mechanism.
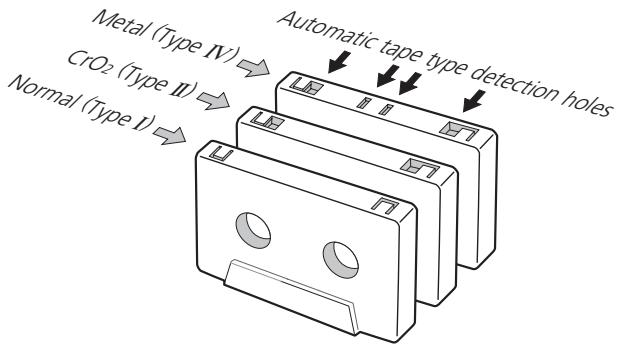
Automatic tape type detection function
This cassette deck can detect what type of tape is being used based on the detection holes in the cassette shell. Be sure to use cassettes with detection holes.
- With this cassette deck, you can play back normal (Type I), chrome (Type II) and metal (Type IV) tapes. For recording, use normal (Type I) or chrome (Type II) tapes.
- Each deck (TAPE I and TAPE II) is equipped with its own auto tape type detection function, so you can use different types of tape at the same time.
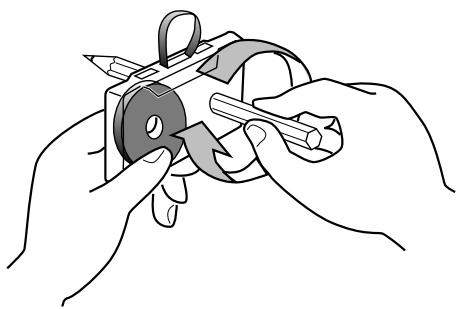
Tape slack
Slack can cause the tape to get tangled in the capstan or other rotating parts. To prevent this, take up all tape slack using a pencil or the like inserted into the reel hole.
Accidental erasure prevention tabs
Tabs on top of the cassette shell allow you to prevent important recordings from being erased by mistake. There are two tabs on each cassette shell: one for side "A" and the other for side "B".
Once these tabs have been removed using a screwdriver or the like, there is absolutely no chance of the recording function being activated.
Accidental erasure prevention tab for side "A"
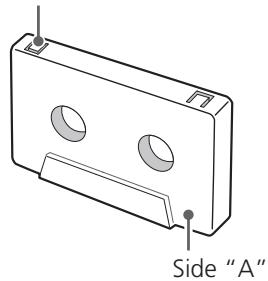
To record on a cassette whose tab has been broken off, stick a piece of adhesive tape over the hole. Be careful not to block the tape type detection holes.
Dolby NR
Dolby NR is designed to reduce tape hiss, a noise introduced during the recording and playback processes. This cassette deck is equipped with Dolby B-type Noise Reduction.
The Dolby NR system affects both recording and playback quality. In playback, be sure to set the DOLBY NR switch to the same position used when the recording was made.
Manufactured under license from Dolby Laboratories.
HX Pro headroom extension originated by Bang and Olufsen.
Dolby, HX Pro, and the double-D symbol are trademarks of Dolby Laboratories.
Precautions
- Plug the power cord into an AC outlet only after having made all other connections.
- Read the instructions of each component you intend to use with this unit.
Voltage Conversion
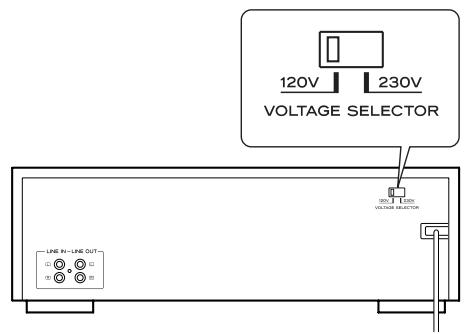
(General export models only)
Be sure to remove the power cord from the AC outlet before repositioning the voltage converter switch.
- Locate the voltage selector on the rear panel.
- Using a flat-bladed screwdriver, set to the appropriate 230V or 120V position according to your area.
IN NORTH AMERICA USE ONLY ON 120 V SUPPLY.
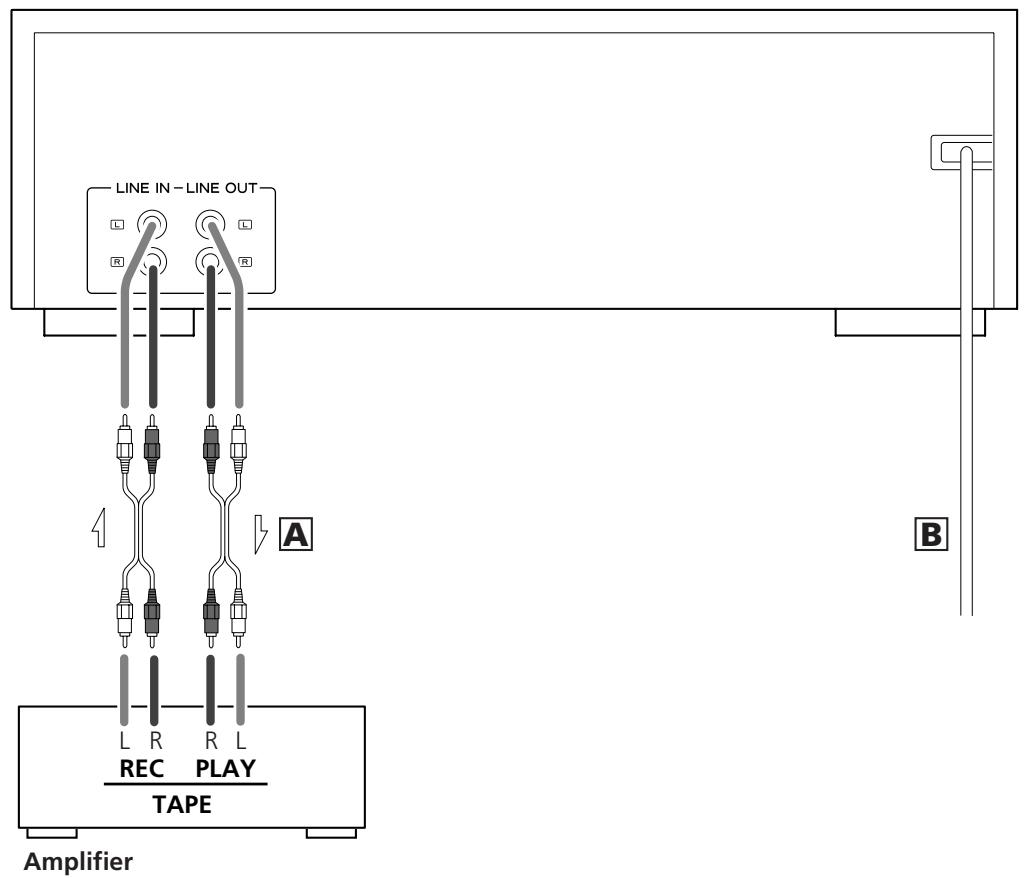
A LINE IN and LINE OUT jacks
Use the supplied RCA cables to make connections between this unit and your amplifier. Make sure to connect:
White plug to White jack (L: left channel)
Red plug to Red jack (R: right channel)
- Plugs must be firmly inserted into the corresponding jacks. Do not bundle the RCA cables together with the power cord and speaker cables. Doing so will degrade sound quality or generate noise.
B AC power cord
Plug this AC power cord into an AC wall socket.
- Be sure to connect the power cord to an AC outlet which supplies the correct voltage.
- Hold the power plug when plugging or unplugging the power cord. Never pull or yank on the power cord.
- Unplug the power cord when you are not going to use the unit for some time.
Cautions when using the remote control unit
- Point the remote control unit at the remote sensor of the cassette deck and operate the remote control unit at a distance of no more than 5 meters. Do not place objects between the remote control unit and remote sensor.
- Direct sunlight or very bright light will reduce the sensitivity of the remote sensor. If this is the case, use the control buttons on the cassette deck instead of the remote buttons.
- It is possible that other infrared-ray-sensitive equipment nearby may malfunction when you operate the remote control.
Loading batteries into the remote control unit
Remove the lid of the battery compartment, load two "AA" sized batteries in the indicated directions, and then replace the lid. When inserting batteries, be sure to observe proper polarity (+ and -).
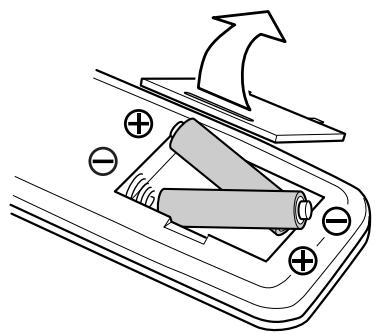
If you have to put the remote control unit quite close to the remote sensor or if any remote buttons do not work, then the batteries are no longer fit for use and must be replaced. Be sure to always replace both batteries at once.
Important Cautions for Handling Batteries
Improper battery use can result in leakage or rupture. Observe the following instructions:
- Load the batteries in the correct direction as indicated in the battery compartment.
- Do not mix old and new batteries, or mix different types or brands of battery.
- Do not heat, disassemble, or throw batteries into fire or water.
- Do not store or carry batteries together with other small metal objects. Doing so can cause battery shorting, leakage or rupture.
- Do not try to recharge dry batteries.
- When the cassette deck is not going to be used for a long time (more than one month), take the batteries out of the battery compartment.
- If leakage into the battery compartment is observed, wipe up any liquid inside the compartment and load new batteries.
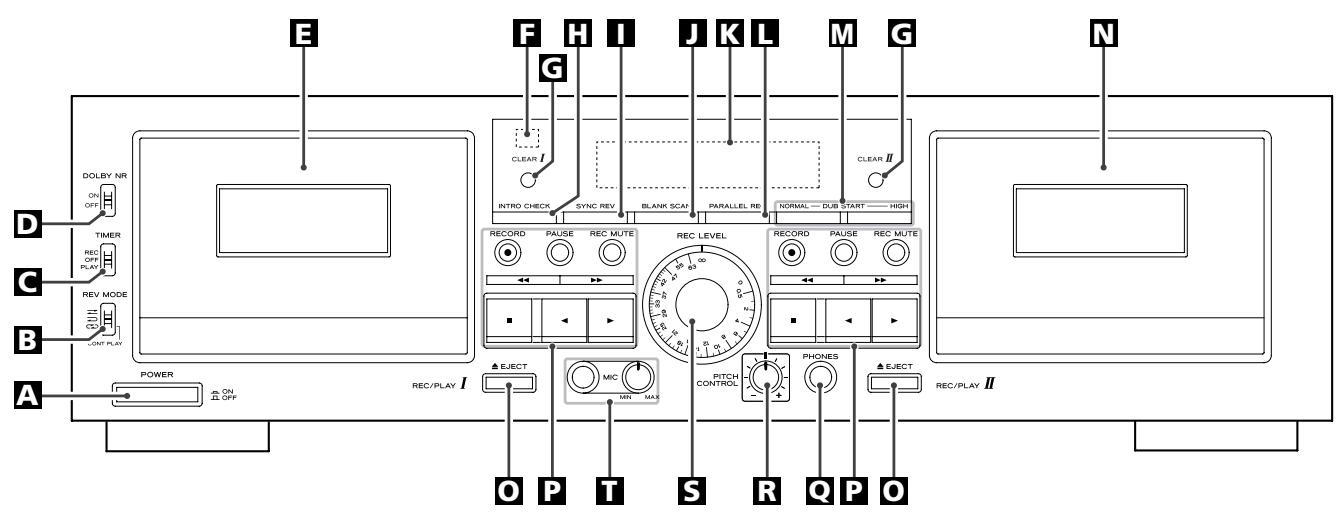
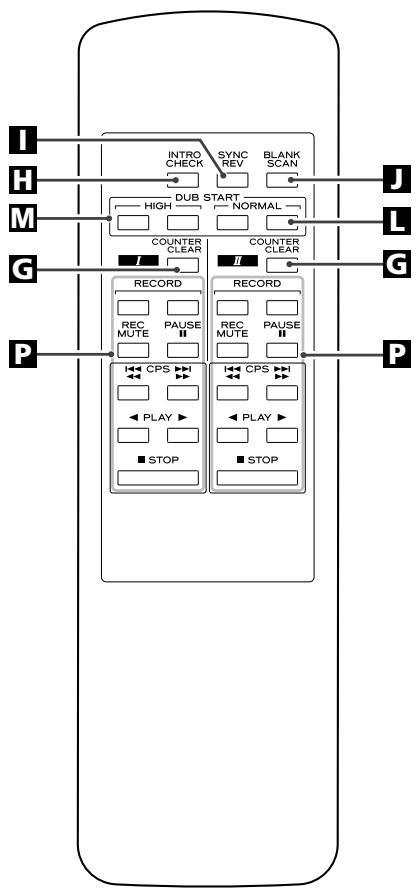
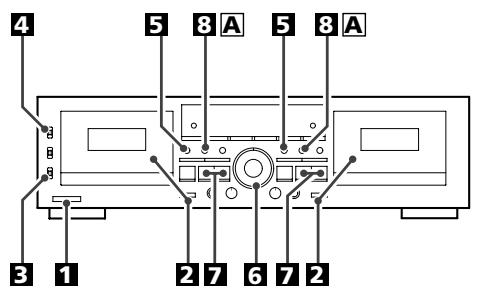
In this manual we only refer to the buttons on the cassette deck itself. However, their remote counterparts can be used in the same way.
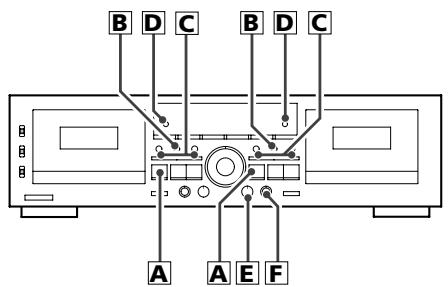
A Power switch
This switch toggles the unit on/off.
The equipment draws nominal non-operating power from the AC outlet with its POWER switch in the OFF position.
B Reverse mode switch (REV MODE)
This switch is used to switch between reverse modes.
TIMER switch
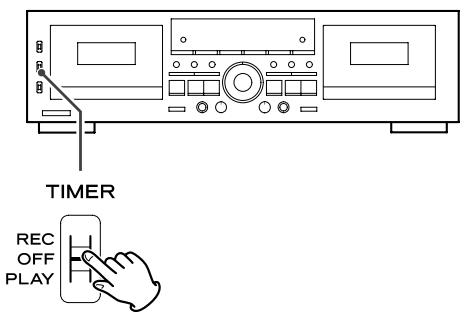
This switch is provided for use with a commercially available audio timer, to allow timer controlled recording or playback. Normally, leave this switch to the OFF position.
DOLBY NR switch
This switch toggles the Dolby Noise Reduction system on/off. In playback you need to set this switch to the same position as when the recording was made.
E TAPE I compartment
F Remote sensor
This receives remote commands. When using the remote control unit, point it at this sensor.
Counter clear buttons (CLEAR I and CLEAR II)
Pressing these buttons reset the tape counter readings for TAPE I and TAPE II, respectively.
INTRO CHECK button
Pressing this button allows you to identify recorded segments by listening to the first 15 seconds of each segment.
Synchro reverse button (SYNC REV)
Pressing this button activates the synchro reverse dubbing function.
BLANK SCAN button
This button toggles Blank Scan on/off.
K Display
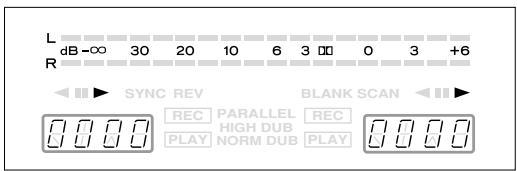
This shows tape counters, level meters, etc.
L Parallel record button (PARALLEL REC)
This button lets you simultaneously record on both decks.
M Dubbing start button (DUB START)
This button is used when copying the contents of a tape from TAPE I to TAPE II, either at normal or high speed.
On the remote control unit a pair of buttons is provided for each speed. You need to press both buttons at the same time.
N TAPE II compartment
EJECT buttons
Pressing these buttons opens the TAPE I and TAPE II compartments.
Tape transport control buttons
RECORD
Pressing this button shifts the corresponding deck to recordpause mode.
When you use the remote control unit, you need to press a pair of buttons at the same time to shift either deck to record-pause mode.
PAUSE
Pressing this button temporarily stops playback or recording.
Recording mute (REC MUTE)
This button is for creating the 4-second blank space needed for proper operation of the Computational Program Search (CPS) function.
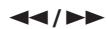
Fast-forward/Rewind

Stop of playback/record

Reverse side play/Forward side play
Q Headphones jack (PHONES)
Plug your headphones into this jack.
PITCH CONTROL
This control is used to vary the playback speed.
REC LEVEL control
This control is used to adjust the recording level.
MIC jack and level control
Insert your microphone into this jack and use the knob to adjust the level of mic input.
- The MIC jack is mono. You cannot use a stereo microphone with this cassette deck.
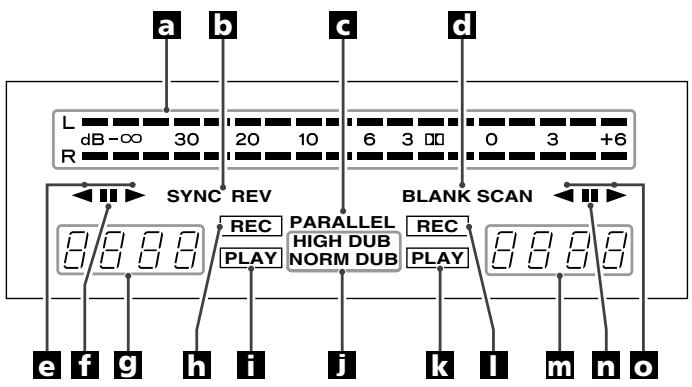
a Peak level meter
This shows recording and playback levels.
SYNC REV
This indicator lights when the synchro reverse dubbing function is switched on.
PARALLEL
This indicator lights to indicate parallel recording is taking place.
BLANK SCAN
This indicator lights to indicate the corresponding function is switched on.
Playback/recording direction indicator of TAPE I deck
Pause indicator
This indicator lights when the TAPE I deck is temporarily stopped.
Tape counter of TAPE I deck
The tape counter indicates the relative position of the tape. You can reset the counter to zero whenever you want.
During a CPS function, the tape counter shows "CP" and your specified number of songs to skip ahead or back.
Record indicator
This indicator lights when the TAPE I deck is in record mode.
1 Play indicator
This indicator lights when the TAPE I deck is in play mode.
1 Dubbing indicator
"NORMAL DUB" lights during normal speed dubbing, and "HIGH DUB" lights during high speed dubbing.
K Play indicator
This indicator lights when the TAPE II deck is in play mode.
Record indicator
This indicator lights when the TAPE II deck is in record mode.
Tape counter of TAPE II deck
The tape counter indicates the relative position of the tape. You can reset the counter to zero whenever you want.
During CPS operation, the tape counter shows "CP" and the number of songs you have specified to skip ahead or back.
Pause indicator
This indicator lights when the TAPE II deck is temporarily stopped.
Playback/recording direction indicator of TAPE II deck
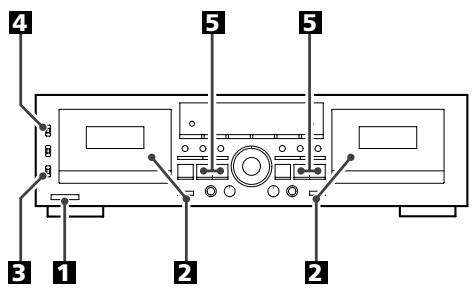
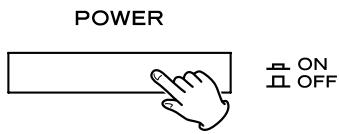
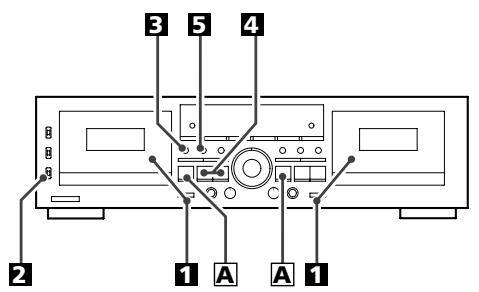
Switch on the power.
2 Load a pre-recorded tape into the TAPE I or II deck.
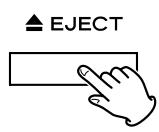
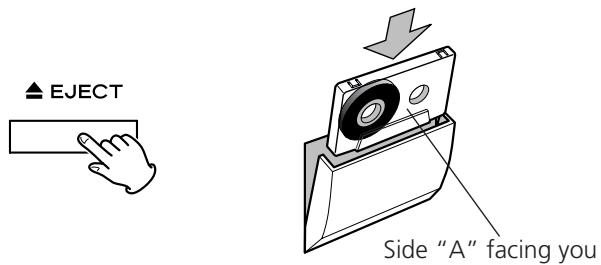
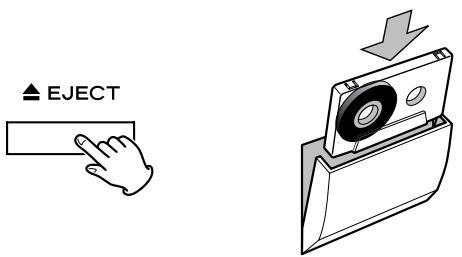
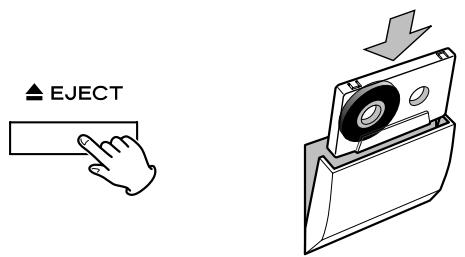
Press the EJECT button (▲) to open the cassette compartment. Insert the cassette tape with its open edge facing down, the desired side facing you. Then, close the cassette compartment by pushing on its front part.
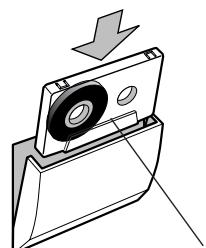
Side "A" facing you
- This cassette deck can play back Normal (Type I), Chrome (Type II) and Metal (Type IV) tapes.
For the sake of simplicity, we refer to the tape side facing you as Side "A" and to the tape side facing away as Side "B". When you insert a cassette with Sides "A" and "B" reversed, Side "A" should read Side "B" and Side "B" should read Side "A".
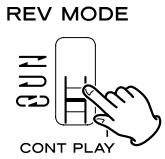
3 Select a reverse mode setting using the REV MODE switch.
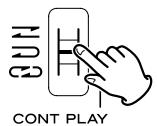
REV MODE
You have a choice of three settings:
One way mode
Set the switch to this position to play back only one side.
Set the switch to this position to play back both sides of the tape in one session. When playback reaches the end of side “A”, the playback direction is automatically reversed, and playback continues on side “B”.
CD:Repeatmode
Set the switch to this position and both sides of the tape are played back as many as 5 times.
4 Set the DOLBY NR switch.
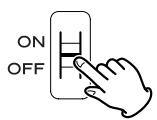
DOLBY NR
Set the switch to the ON position when playing back tapes recorded with Dolby NR.
To play tapes recorded without Dolby NR, set the switch to the OFF position.
Press the play button (or

: Pressing this button starts playback from side "A".Playback stops when reaching the end of side "A" if the reverse mode is set to . If the reverse mode is set to , playback continues on side "B", stopping at the end of side "B". If the reverse mode is set to , playback cycles through both tape sides 5 times.
: Pressing this button starts playback from side "B". Playback stops when reaching the end of side "B" if the reverse mode is set to either or . If the reverse mode is set to ① ,side "B" is played back,and then playback cycles through both tape sides 4 times.
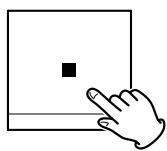
A To stop playback
Press the stop button (■).
B To stop playback temporarily
Press the PAUSE button.
To resume playback, press the PAUSE button again, or press the play button (or).

PAUSE
- While playback is paused, pressing the play button whose direction is opposite to the indicator (▲ or ▲) on the display, will switch the playback direction. This does not release the pause function. Press PAUSE or the same play button (▲ or ▲) again to start playback on the other side of the tape.
Press the or button while in stop mode to fast wind the tape.

Fast forward/Rewind
To stop the fast winding tape, press the stop button (■).
Press the CLEAR I or II button to reset the tape counter to 0000. You can use this function for easy relocation of any desired point on the tape.
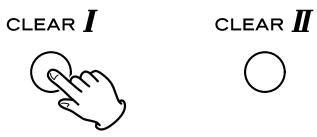
D Tape counter
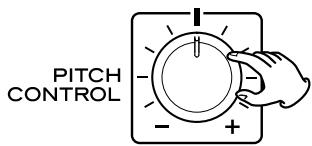
E Pitch control (TAPE I deck only)
This control varies the pitch of the music during playback. (This control does not work during recording or dubbing.)
F To listen through headphones
Turning the pitch control knob clockwise increases the playback speed and raises the pitch up to +10% .
Turning the pitch control knob counterclockwise reduces the playback speed and lowers the pitch by a maximum of -10% .
Plug your headphones into the PHONES jack, and put on the headphones.
Plugging into the PHONES jack does not disable the line outputs.
CAUTION
There is no level control for the headphones output. Beware that sudden loud sounds may occur depending on recorded material. You should avoid prolonged exposure to high volume sound as this can damage your hearing.
ContinuousPlayback
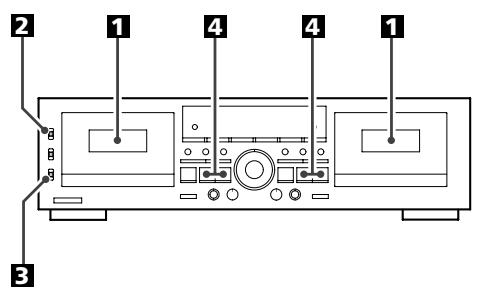
Continuous playback can be performed between TAPE I and TAPE II. When one tape is played back to the end, the other tape automatically starts playback, in a relay fashion.
1 Load pre-recorded tapes into the TAPE I and TAPE II compartments.
2 Set the Dolby NR switch.
Always set the Dolby NR switch to the same position that was used for recording.
Set the REV MODE switch to the (CONT PLAY) position.
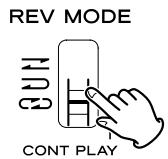
4 Press the play button (or ) of the deck you want to start first.
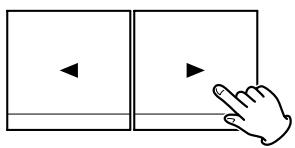
You can start continuous playback from either TAPE I or TAPE II.
Playback cycles through four tape sides as follows:
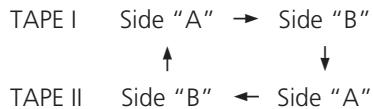
Playback will automatically stop when both sides of both tapes have been played back 5 times continuously.
Blank Scan
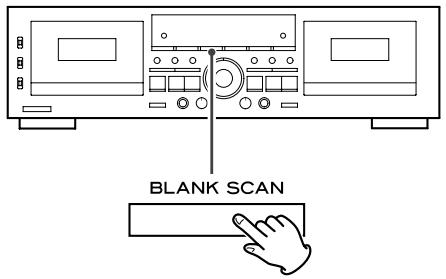
The Blank Scan function detects 10 seconds or more of blank and skips over it.
To activate this function, press the BLANK SCAN button followed by the desired play button (or).
- The BLANK SCAN indicator lights when this function is activated.
- To disable this function, press the BLANK SCAN button again. The indicator turns off.
- Very quiet passages in music are likely to be identified as blanks. If you are worried about this, switch off Blank Scan.
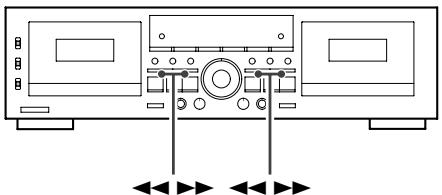
This cassette deck is equipped with the Computational Program Search (CPS) function. This function detects blank spaces (longer than 4 seconds) between songs and fast-winds the tape in the forward or backward direction skipping over the specified number of songs, thus allowing direct access to the beginning of a desired song. CPS can skip up to 20 songs ahead of or behind the current song.
When you press the or button during playback, the tape counter reads "CP 01" and the tape starts running at high speed in the pressed direction. Each time you press the same direction button, the displayed number increases by one integer. The number decreases as you press the opposite direction button.
- If you are listening to a song and want to go back to the previous song, press the locator button opposite to the playback direction twice. Pressing it just once will take you back to the beginning of the current song. Each additional press of the button will take you back one song.

Display of TAPE I
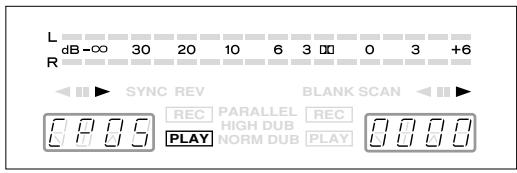
The search range varies depending on REV MODE switch settings.
: Only one side of tape
Both sides of the tape when searching in the same direction as playback OR Only one side of the tape when searching in the opposite direction as playback
CD: Both sides followed by the first side (side “A” → side “B” → side “A” if CPS is started when the tape's forward side (facing you) is playing; or side “B” → side “A” → side “B” if CPS is started when the tape's reverse side (facing away) is playing)
- The CPS function may not work properly if blanks between songs are less than 4 seconds long or contain noise.
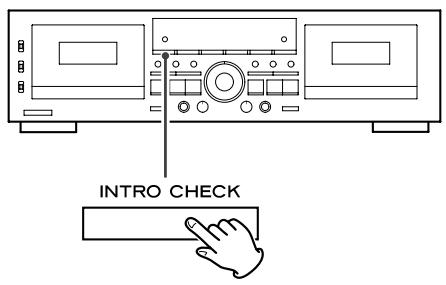
Intro Check plays the first 15 seconds of each song, allowing you to quickly find the song you are looking for.
Press the INTRO CHECK button during playback or stop. The tape will fast wind in the same direction as playback. When you find the desired song, press the INTRO CHECK button again to start playback.
The Intro Check range varies depending on REV MODE switch settings:
: Checks one side of the tape
: Checks both sides of the tape
C: Checks both sides of tape then double checks the first side (side “A” → side “B” → side “A” if Intro Check is started on the tape's forward side (facing you); or side “B” → side “A” → side “B” if Intro Check is started on the tape's reverse side (facing away)
The tape automatically stops upon completion of the check operation.
- Make sure that the TAPE I compartment is empty when starting Intro Check on TAPE II.
- The tape counter reports how many songs have been intro-checked so far.
- Activating the Intro Check function during normal playback will cause it to skip to the next song: playback of the current song is interrupted midway.
- The Intro Check function may not work properly if blanks between songs are less than 4 seconds long or contain noise.
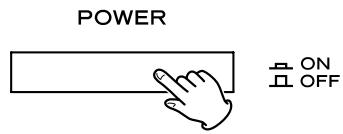
1 Turn on the power.
2 Load a tape for recording.
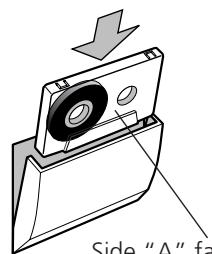
Side "A" facing you
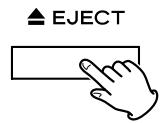
Press the EJECT button (▲) to open the cassette compartment. Insert the cassette tape with its open edge facing down, side "A" facing you. Then close the cassette compartment by pushing in the cassette door until it clicks shut.
- If the erasure prevention tabs of the loaded cassette tape have been broken off, stick a piece of adhesive tape over the hole(s).
- With this cassette deck you can use Normal (Type I) and Chrome (Type II) tapes for recording.
Set the REV MODE switch.
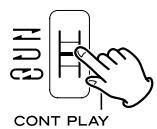
REV MODE
: Set to this position to record on one side only.
or : Set to either of these positions to record on both sides.
4 Set the DOLBY NR switch.
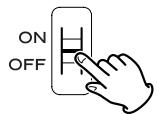
DOLBY NR
Set the switch to ON to record with Dolby Noise Reduction. Set to OFF to record without Dolby Noise Reduction.
Press the RECORD button.

RECORD
The deck enters the record-pause mode. "I" and "REC" will light on the display.
6 Adjust the recording level.
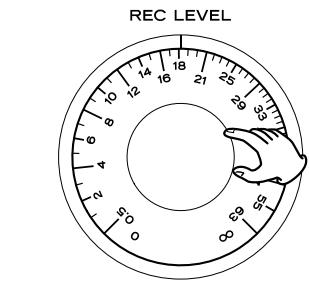
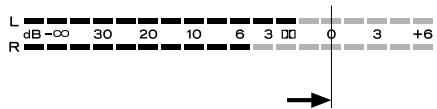
Start playback of your recording source and set the REC LEVEL control knob so that the level meter indicates "0 dB" at peaks.
7 Set the recording direction.
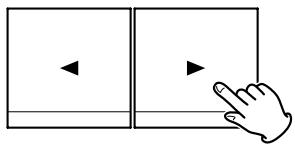
Recording is made in the direction indicated by the play/record direction indicator (▲ or ▲). To change this direction, press the opposite direction play button (▲ or ▲).
Be careful not to press play button whose arrow points in the same direction as the indicator. Doing so will start recording.
3 When everything is ready, start recording by pressing the PAUSE button or the play button whose arrow points in the same direction as the indicator.

PAUSE
- To record on both tape sides, set the REV MODE switch to "→" or "C3" and press the forward play button (▶). If you press the reverse play button (▲), recording will be done only on side "B".
- To stop recording, press the stop button (■).
To stop recording temporarily
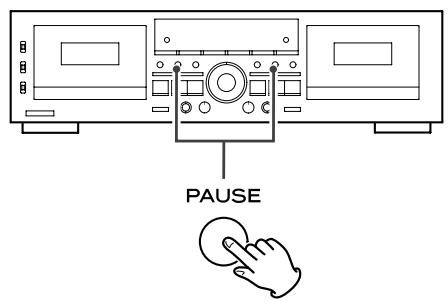
Press the PAUSE button to stop recording temporarily. A second press of the button resumes recording.
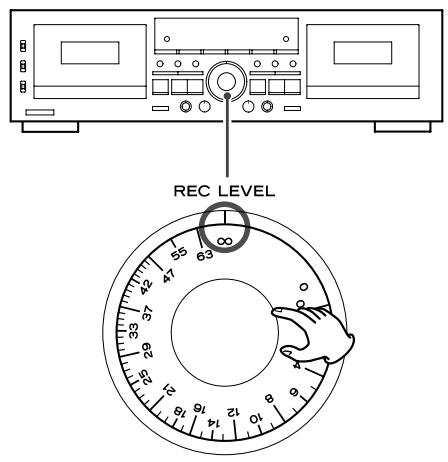
To Erase Recordings
When you make a recording, the tape is overwritten (previous recording is erased). To erase a tape without making a new recording, set the REC LEVEL control to the minimum () position and press the RECORD button followed by the play button ( or ).
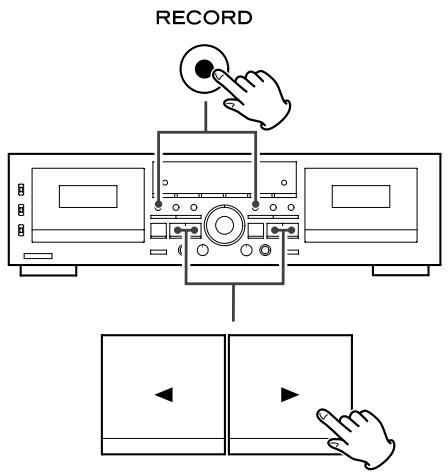
Quick Record Start
Hold down the RECORD button and press the play button (or ) corresponding to the direction you want the tape to run.
Recording Silence
Use this function to create blanks between songs for proper operation of the Computamatic Program Search (CPS) function.
Press the REC MUTE button when recording reaches the desired point. No signal is recorded for about 4 seconds and then the deck enters the record-pause mode. To resume recording, press the PAUSE button.
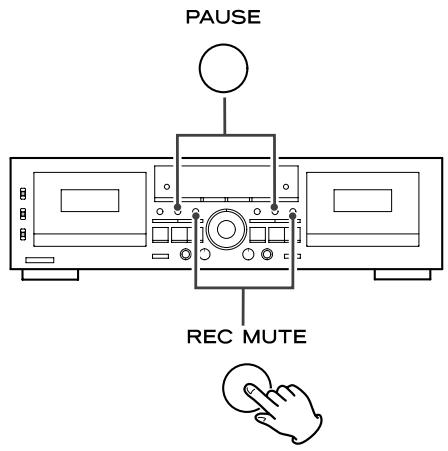
To create a blank of more than 4 seconds long
Hold down the REC MUTE button for the desired length of time. When you release the button, the deck enters the record-pause mode.
To create a blank of less than 4 seconds long
Press the PAUSE button within 3 seconds of pressing the REC MUTE button.
- If you press the REC MUTE button when the deck is in the record-pause mode, no signal is recorded for about 4 seconds, and then the deck shifts back to the record-pause mode.
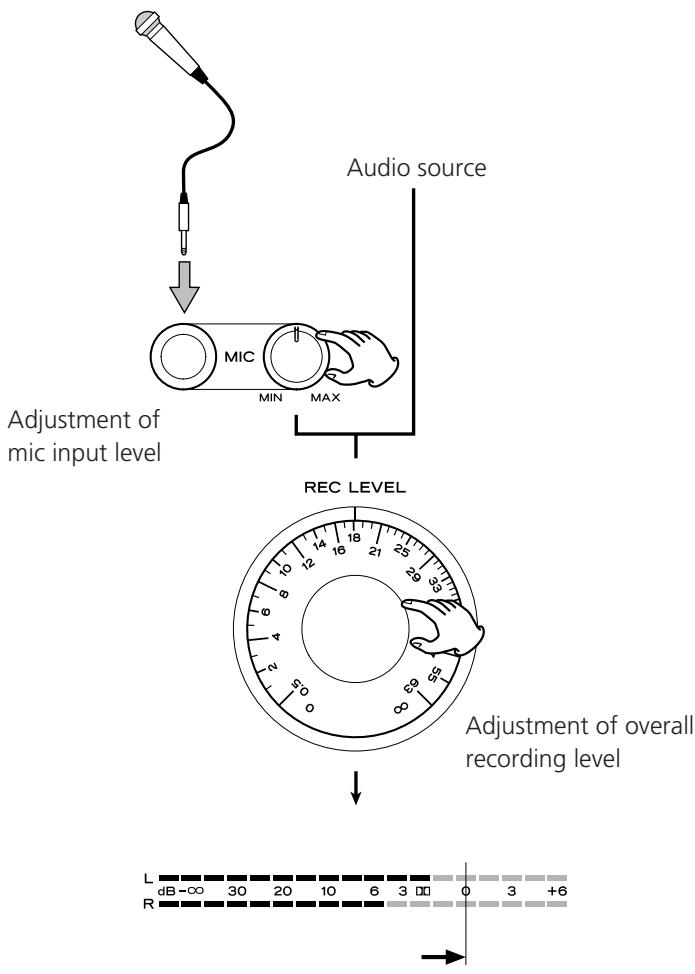
This function allows you to record your voice and another audio source together on a cassette tape.
- The mic sound is fed into both the Left and Right channels so it is located in the center of the stereo image.
- You have the choice of either selecting the audio source you want on the amplifier connected to the LINE IN jacks of the deck, or plugging the desired source directly into the deck's LINE IN jacks.
- To prevent feedback (howling), disable the speaker outputs from the amplifier. Use headphones to monitor recording.
- This cassette deck is not compatible with stereo mics. Always use a mono mic.
Adjusting Mix Recording Level
To record a mix of voice and another audio source, you need to adjust the mic input level and then fine tune the overall recording level.
- Plug your microphone into the MIC jack on the front panel.
- Start playing the audio source, switch the deck into the record-pause mode (by pressing the RECORD button), and temporarily adjust the REC LEVEL control to a relatively low level.
- Speak into the mic and adjust the MIC level control to get the optimum balance between your voice and the other source.
- Fine tune the overall recording level using the REC LEVEL control so that the level meter reads 0 dB at peaks.
- When everything is ready, start recording as instructed earlier in this manual.
This function allows you to make uninterrupted recordings on both sides of two tapes.
1 Load cassette tapes for recording into the TAPE I and TAPE II compartments.
2 Set the REV MODE switch to the "CDO" (CONT PLAY) position.
- Set the DOLBY NR switch to the ON position if you want to.
Press the TAPE I deck's RECORD button.

The deck enters the record-pause mode. "I" and "REC" will light on the display. Now adjust the recording level and any other settings, as required.
4 Check the recording direction.
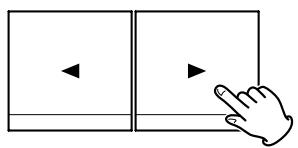
If an indicator is lit which points in the direction opposite to the one desired, change the direction by pressing the opposite direction play button (or).
Be careful not to press play button whose arrow points in the same direction as the indicator. Doing so will start recording.
Recording is done in this order:
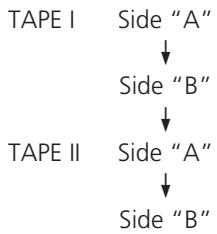
You can start recording from side "B" of TAPE I. But if you do so, side "A" of this tape is not recorded: when recording reaches the end of side "B", the TAPE II deck starts recording.
- The TAPE II deck always starts recording from side "A".
Start recording.
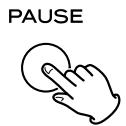
Recording starts when you press the PAUSE button or the play button whose arrow points in the same direction as the indicator on the TAPE I deck.
When recording is finished on the TAPE I deck, the TAPE II deck automatically starts recording.
- The transition from TAPE I to TAPE II takes several seconds.
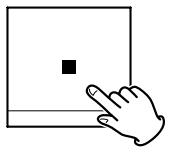
A To stop recording
Press the stop button (■) of the deck which is currently recording.
Parallel Recording
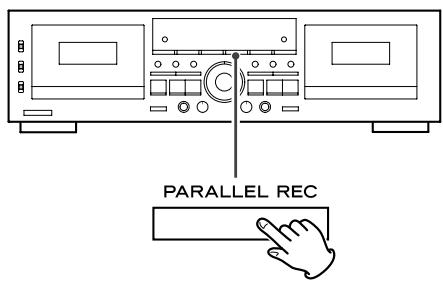
This function allows you to record the same material simultaneously on both TAPE I and TAPE II.
Load tapes into both decks and press the PARALLEL REC button to start recording.
- Before starting recording, check and correct the following by performing steps 1 - 7 on page 16.
Record direction, Reverse mode setting, Dolby NR setting, Recording level, etc.
When everything is ready, get back into stop mode if the deck is in another mode.
- During parallel recording, the PARALLEL indicator is lit on the display.
- During parallel recording, only the following buttons work:
TAEP I deck: Stop (■)
TAPE II deck: PAUSE, REC MUTE, stop (■)
- Pressing the stop button (■) on either deck stops both tapes at once.
Dubbing (from TAPE I to TAPE II)
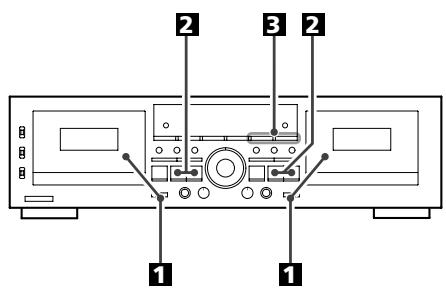
Insert a cassette tape for playback into the TAPE I compartment and a cassette tape for recording into the TAPE II compartment.
2 Set the tape transport direction on both decks.
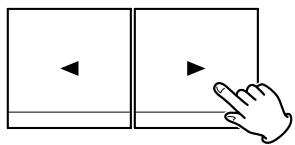
If the play/record direction indicator (or on the display points in the direction opposite to the one desired, press the PAUSE button followed play button (or corresponding to the desired direction.
After changing the tape transport direction, be sure to press the stop button (■) to get out of the pause mode.
- Be careful not to press play button whose arrow points in the same direction as the indicator. Doing so will start playback.
- Set the REV MODE switch as required.
- You don't need to adjust the recording level or set the Dolby NR system, as both depend on the pre-recorded source tape.
Press either DUB START button to start dubbing.
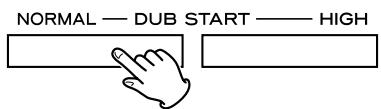
For normal speed dubbing, press the NORMAL button.
For high-speed dubbing, press the HIGH button.
High-speed dubbing makes a copy at approximately two times the normal speed. We recommend normal speed dubbing for best audio quality.
Editing during Dubbing (only at normal speed)
- During dubbing, either the NORM DUB or HIGH DUB indicator lights steadily on the display.
- During normal speed dubbing, only the following buttons work:
TAPEIdeck:STOP
TAPE II deck: PAUSE, REC MUTE, STOP (■)
During high-speed dubbing, only the stop button (■) works.
- Pressing the stop button (■) on either deck stops both tapes at once.
- Neither DUB START button works immediately after the tape is fast-forwardsed or rewound to the end. Wait for 5 seconds or more before pressing the button.
- During dubbing, the pitch control does not work.
- Recording level adjustment is not necessary for dubbing, as the recording level is set to the level of the pre-recorded tape. Operating the REC LEVEL control, before or after starting dubbing, has no effect at all.
- If a nearby television set is switched on during high-speed dubbing, a high-pitched interference noise may be recorded on the tape. To avoid this, either perform dubbing at normal speed, or turn off the television.
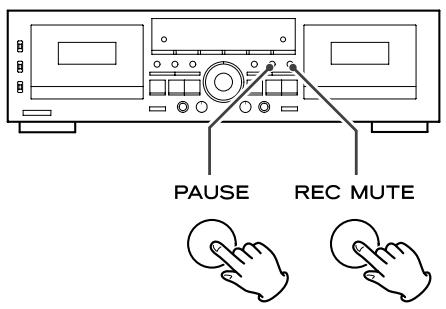
You can prevent unwanted songs or unnecessarily long blanks from being dubbed, or you can create blanks between songs.
- At the desired point during dubbing, press the PAUSE button on the TAPE II deck. The TAPE II deck only enters the pause mode, allowing you to let unwanted songs go by.
To create a 4-second blank between songs, press the REC MUTE button on the TAPE II deck. The TAPE II deck temporarily stops after recording no signal for 4 seconds. - The TAPE I deck continues playback when the TAPE II deck is in pause mode.
- To resume dubbing, press the PAUSE button on the TAPE II deck.
When you use this dubbing function and a shorter tape reaches the end of side "A", it momentarily stops until the other tape reaches the end of side "A". Then both tapes automatically switch over to side "B" and recording and playback re-start simultaneously.
If TAPE I is shorter than TAPE II:
- When TAPE I reaches the end of side "A", TAPE I stops and TAPE II enters the "blank recording" mode.
- When TAPE II reaches the end, both TAPE I and II are reversed simultaneously. TAPE I starts reverse play and TAPE II resumes recording.
- When TAPE I reaches the end of side "B", both TAPE I and II stop simultaneously.
If TAPE I is longer than TAPE II:
- When TAPE II reaches the end of side "A", TAPE II enters the record-pause mode, while TAPE I continues playback.
- When TAPE I reaches the end, TAPE I starts reverse play and TAPE II starts recording.
- When TAPE II reaches the end of side "B", both TAPE I and II stop simultaneously.
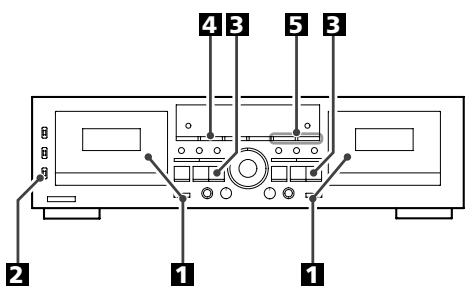
Insert a cassette tape for playback into the TAPE I compartment and a cassette tape for recording into the TAPE II compartment.
2 Set the REV MODE switch to the two-way () position.
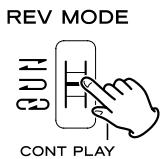
3 Check the recording direction of both decks.
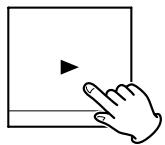
If the reverse direction indicator (▲) lights on the display, press the PAUSE button followed by the forward play button (▶). Then, be sure to press the stop button (■) to get out of the pause mode.
- Be careful not to press play button whose arrow points in the same direction as the indicator. Doing so will start playback.
- You don't need to adjust the recording level or set the Dolby NR system, as both depend on the pre-recorded source tape.
4 Press the SYNC REV button.
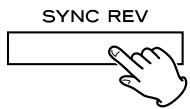
The SYNC REV indicator will light on the display.
- The SYNC REV button does not work if the reverse mode is set to any positions other than “ ” or if the transport direction of both decks is not set to forward () .
Press either DUB START button to start dubbing.
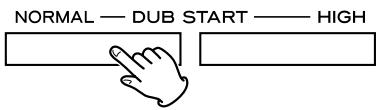
For normal speed dubbing, press the NORMAL button.
For high-speed dubbing, press the HIGH button.
High-speed dubbing makes a copy at approximately two times the normal speed. We recommend normal speed dubbing for best audio quality.
During dubbing, either the NORM DUB or HIGH DUB indicator lights steadily on the display.
- During normal speed dubbing, only the following buttons work:
TAPEI deck: STOP (■)
TAPE II deck: PAUSE, REC MUTE, STOP (■)
During high-speed dubbing, only the stop button (■) works.
- Pressing the stop button (■) on either deck stops both tapes at once.
- Neither DUB START button works immediately after the tape is fast-forwarded or rewound to the end. Wait for 5 seconds or more before pressing the button.
- During dubbing, the pitch control does not work.
- Recording level adjustment is not necessary for dubbing, as the recording level is set to the level of the pre-recorded tape. Operating the REC LEVEL control, before or after starting dubbing, has no effect at all.
- If a nearby television set is switched on during high-speed dubbing, a high-pitched interference noise may be recorded on the tape. To avoid this, either perform dubbing at normal speed, or turn off the television.
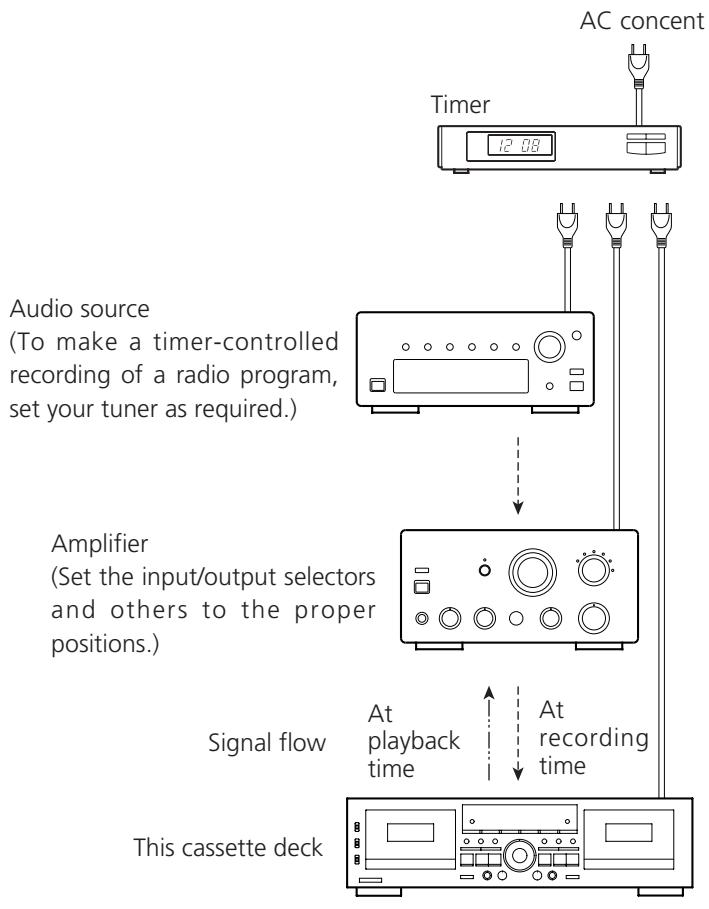
Connecting a commercially available timer to your audio setup lets you wake up to your favorite cassette tape, or start recording at specified times.
Refer to the illustration below, and connect your audio components.
Timer-ControlledPlayback
- Connect this unit and stereo system to a commercially available audio timer.
- Set the power switch of all components to ON.
-
Load a prerecorded cassette tape in TAPE I or II.
-
You can also insert tapes into both decks. In this case, TAPE I starts first.
-
Set the REV MODE switch to the required position.
-
To let both decks play continuously, set the REV MODE switch to the "CONT PLAY" position.
-
Set the DOLBY NR switch.
- Set the TIMER switch to the PLAY position.
- Set the audio timer to the required start (power on) and stop (power off) times. When this setting is completed, the power to all components will be switched off.
When a preset start time is reached, power will be supplied and playback will start automatically.
- Playback automatically starts also by simply pressing on the POWER switch of this deck. When you don't use the timer, set the TIMER switch to the OFF position.
- Playback always starts from side "A".
Timer-Controlled Recording
(Example: Recording a broadcast program)
- Connect this unit and stereo system to a commercially available audio timer.
- Set the power switch of all components to ON.
- Load a recordable cassette tape(s) in TAPE I or II (or both decks for continuous recording).
- Set the REV MODE switch to the required position.
- For continuous recording on both decks, set the REV MODE switch to the "CONT PLAY" position.
- Set the DOLBY NR switch as required.
- Tune in a broadcasting station to be recorded.
- Press the RECORD button of the deck to be recorded to set the deck to the record-pause mode.
- Adjust the recording level.
- Set the TIMER switch to the REC position.
- Set the audio timer to the required start (power on) and stop (power off) times. When this setting is completed, the power to all components will be switched off.
When the preset start time is reached, power will be supplied and recording will start automatically.
- Recording automatically starts also by simply pressing on the POWER switch of this deck. When you don't use the timer for a while, be sure to set the TIMER switch back to the OFF position to prevent accidental erasure of your important tape.
- Recording always starts from side "A".
If you think that there is something wrong with this cassette deck, make the checks listed below before contacting a repair service. In some cases the problem may lie with another component. Check all components.
If the problem cannot be solved with any of the following checks, contact your nearest TEAC authorized service center or your dealer for help.
Cannot switch on the power.
Check the connection to the AC power supply. Check and make sure the AC source is not a switched outlet and that, if it is, the switch is turned on. Make sure there is power to the AC outlet by plugging another item such as a lamp or fan into the outlet.
No sound
Check the connection to the amplifier.
Check the amplifier settings.
The remote control does not work.
Check that the deck is powered on.
If the batteries have run out, replace both batteries.
If there are obstacles between the deck and remote control, remove them. Point the remote control at the remote sensor of the deck from a distance of less than 5 meters.
If the remote sensor of the deck is exposed to direct sunlight or very bright light, the remote control may not work. If this is the case, use the control buttons of the deck itself instead.
Noisy playback
- Keep away from equipment that generates a magnetic field, such as a TV or microwave oven.
Transport control buttons don't work.
Load a cassette tape if not loaded.
If a cassette tape is loaded, reinsert it.
The cassette compartment does not close.
The cassette is not properly loaded. Reinsert it.
Poor sound quality
Clean the heads.
Check that the Dolby NR switch is set to the same position as when recording was made.
Cannot record.
If the erasure prevention tabs on top of the cassette are broken off, cover the holes using pieces of adhesive tape.
Check the connection to the amplifier and to the source equipment.
Set the amplifier input/output selectors correctly.
Check the recording level setting.
Playback speed seems somewhat fast or slow.
Check the pitch control setting.
Auto reverse does not occur
Set the REV MODE switch to "D" or "C".
If the REV MODE switch is set to “ ”, start playback from the tape side facing you (side “A”).
Synchro reverse dubbing is not possible.
Set the REV MODE switch to the “ ” position.
Load cassettes into both decks.
Set the tape transport direction to on both decks.
Continuous play/record is not possible.
Set the REV MODE switch to the "COP" position.
Load cassettes into both decks.
To make a continuous recording, start with TAPE I.
This cassette deck operates on a delicate microcomputer and there may be occasions when the deck does not function as expected because of external noise or interference. Problems you encounter on such occasions may be cured by turning off the power, waiting for 1 minute or more, then turning the power back on.
If the surface of the deck becomes soiled, wipe it clean with a dry, soft cloth. To remove stubborn dirt, wipe with a cloth slightly moistened with a solution of mild detergent and water, then moisten a cloth with water, wring it well, and rub over the surface.
Do not allow the deck to remain in contact with rubber or vinyl products for a long period of time, as these could damage the surface finish.
Never use volatile cleaners like thinners, benzine or alcohol because they will damage the surface finish.
CAUTION:
For safety, always unplug the power cord before performing any maintenance.
Cleaning the heads
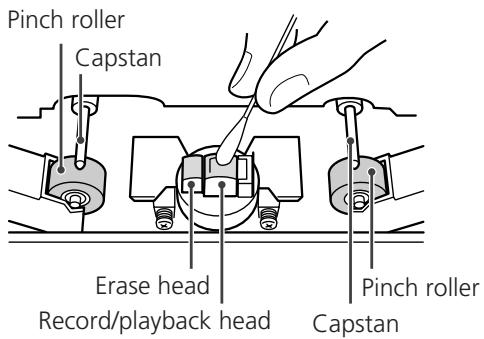
If the head section gets dirty, the recording quality will deteriorate, resulting in degraded playback sound or "drops" in sound. Also, if the tape transport path gets dirty, the tape may get entangled in the rotating parts. It is therefore recommended that the heads, pinch rollers and capstans be cleaned regularly at intervals of 10-hour use with a cotton swab moistened with a commercially available, appropriate cleaning liquid.
NOTE:
Do not make a recording or play back tape when the tape transport path is wet with cleaning liquid, as this could cause the tape to jam or clog.
For European customers Disposal of your old appliance
- When this crossed-out wheeled bin symbol is attached to a product it means the product is covered by the European Directive 2002/96/EC.
- All electrical and electronic products should be disposed of separately from the municipal waste stream via designated collection facilities appointed by the government or the local authorities.
- The correct disposal of your old appliance will help prevent potential negative consequences for the environment and human health.
- For more detailed information about disposal of your old appliance, please contact your city office, waste disposal service or the shop where you purchased the product.
Track System. 4-track, 2-channel stereo
Heads Construction. Record/playback head x 1 (each deck)
Erase head x 1 (each deck)
Tape Speed 4.8 cm/sec
9.5 cm/sec (high-speed dubbing mode)
Pitch Control ± 10% (± 2%)
Fast Winding Time approximately 110 sec (C-60 tape)
Motor. DC servo motor (capstan)
Wow and Flutter . 0.09% (WRMS) ± 0.1%
Frequency Response (Overall)
Metal tape (Type IV, playback only) 30 Hz-19 kHz
Chrome tape (Type II) 30 Hz-18 kHz
Normal tape (Type I). 30 Hz-17 kHz
Signal to Noise Ratio (Overall) . . . . . 59 dB (Dolby NR OFF, nominal recording level)
69 dB (Dolby NR ON, CCIR-ARM)
Line Input (RCA jack) 100 mV (input impedance 50k ohms)
Mic Input (mono 1/4" Phone jack). . . . . . . . . . . . . . . . . . . . . . . . . . . . . . . . . . . . . . . . . . . . . . . . . . . . . . . . . . . . . . . . . . . . . . . . . . . . . . . . . . . . . . . . 0.38 mV (input impedance 200k ohms)
Line Output (RCA jack) . 0.46 V (load impedance 50k ohms or more)
Headphones Output (stereo 1/4" Phone jack) .0.95 mW/8 ohms
Power Requirements
U.S.A./Canada Model 120 V AC, 60 Hz
General Export Model 120 V/230 V AC, 50-60 Hz
European model 230 V AC, 50 Hz
Korea model. 220 V AC, 60 Hz
Power Consumption 22 W
Dimensions (including protruding parts) 435 (W) x 127 (H) x 292 (D) mm
(17 1/8" × 5" × 11 1/2")
Weight 4.0 kg (8 13/16 lbs)
Standard Accessories
Remote control unit (RC-615A) x 1
Remote control battery ("AA") x 2
User's manual x 1
Warranty card x 1
Stereo RCA cable x 2
- Illustrations in the manual may not be exactly the same as the product.
- Specifications and design are subject to change without notice or obligation.
Table des matieres
Lecture (TAPE I ou TAPE II) 35
Lecture en continue 37
Scan des blancs. 37
TAPE I cassetteholder
F Afstandsbedieningsensor
TAPE I deck: stoptoets (■)
TAPE II deck: PAUSE, REC MUTE dempingstoets en stoptoets (■)
TAPE I deck: stoptoets (■)
TAPE II deck: PAUSE, REC MUTE dempingstoets en stoptoets (■)
Wiskop x 1 (in elk deck)
Chroomband (Type II) 30 Hz - 18 kHz
Normale band (Type I) 30 Hz - 17 kHz
This appliance has a serial number located on the rear panel. Please record the model number and serial number and retain them for your records.
- IMPORTANT SAFETY INSTRUCTIONS
- Note to CATV system installer:
- WARNING: TO PREVENT FIRE OR SHOCK HAZARD, DO NOT EXPOSE THIS APPLIANCE TO RAIN OR MOISTURE.
- CAUTION
- For U.S.A.
- Table of Contents
- Thank you for choosing TEAC. Read this manual carefully to get the best performance from this unit.
- Before Use
- Read this before operation
- Cassette tapes that you should not use
- Cassettes that are imperfectly shaped
- Long play tapes
- Endless tapes
- Automatic tape type detection function
- Tape slack
- Accidental erasure prevention tabs
- Dolby NR
- Precautions
- Voltage Conversion
- A LINE IN and LINE OUT jacks
- B AC power cord
- Cautions when using the remote control unit
- Loading batteries into the remote control unit
- Important Cautions for Handling Batteries
- A Power switch
- B Reverse mode switch (REV MODE)
- TIMER switch
- DOLBY NR switch
- E TAPE I compartment
- F Remote sensor
- Counter clear buttons (CLEAR I and CLEAR II)
- INTRO CHECK button
- Synchro reverse button (SYNC REV)
- BLANK SCAN button
- K Display
- L Parallel record button (PARALLEL REC)
- M Dubbing start button (DUB START)
- N TAPE II compartment
- EJECT buttons
- Tape transport control buttons
- RECORD
- PAUSE
- Recording mute (REC MUTE)
- Q Headphones jack (PHONES)
- PITCH CONTROL
- REC LEVEL control
- MIC jack and level control
- a Peak level meter
- SYNC REV
- PARALLEL
- BLANK SCAN
- Playback/recording direction indicator of TAPE I deck
- Pause indicator
- Tape counter of TAPE I deck
- Record indicator
- Play indicator
- Dubbing indicator
- K Play indicator
- Tape counter of TAPE II deck
- Playback/recording direction indicator of TAPE II deck
- Load a pre-recorded tape into the TAPE I or II deck.
- Select a reverse mode setting using the REV MODE switch.
- One way mode
- CD:Repeatmode
- Set the DOLBY NR switch.
- Press the play button (or
- ContinuousPlayback
- To stop recording temporarily
- To Erase Recordings
- Quick Record Start
- Recording Silence
- To create a blank of more than 4 seconds long
- To create a blank of less than 4 seconds long
- Adjusting Mix Recording Level
- Parallel Recording
- Load tapes into both decks and press the PARALLEL REC button to start recording.
- Dubbing (from TAPE I to TAPE II)
- Editing during Dubbing (only at normal speed)
- If TAPE I is shorter than TAPE II:
- If TAPE I is longer than TAPE II:
- Press the SYNC REV button.
- Press either DUB START button to start dubbing.
- Timer-ControlledPlayback
- Timer-Controlled Recording
- (Example: Recording a broadcast program)
- Cannot switch on the power.
- No sound
- The remote control does not work.
- Noisy playback
- Transport control buttons don't work.
- The cassette compartment does not close.
- Poor sound quality
- Cannot record.
- Playback speed seems somewhat fast or slow.
- Auto reverse does not occur
- Synchro reverse dubbing is not possible.
- Continuous play/record is not possible.
- CAUTION:
- Cleaning the heads
- NOTE:
- For European customers Disposal of your old appliance
- Table des matieres
- TAPE I cassetteholder
- F Afstandsbedieningsensor
Brand : TEAC
Model : W-865R
Category : Tape Recorder