
ULG 350 A1 LAMINATOR - Laminator UNITED OFFICE - Free user manual and instructions
Find the device manual for free ULG 350 A1 LAMINATOR UNITED OFFICE in PDF.
| Product type | Laminator |
| Brand | UNITED OFFICE |
| Model | ULG 350 A1 |
| Power supply | 220-240 V~ 50 Hz, 350 W |
| Power consumption | 1.6 A |
| Laminating speed (A4, 80 microns) | Approximately 40 seconds |
| Laminating speed (A4, 125 microns) | Approximately 51 seconds |
| Maximum pouch width | 230 mm |
| Pouch thickness (hot lamination) | Max 125 microns |
| Pouch thickness (cold lamination) | Max 200 microns |
| Included pouch sizes | A4, A5, business cards (10 each, 80 microns) |
| Functions | Hot lamination, cold lamination, integrated cutter |
| Cutting capacity (guillotine) | Max 3 sheets of 80 g/m² |
| Protection class | II (double insulation) |
| Continuous operating time (KB) | 2 hours |
| Required cooling time | 1/2 hour |
| Safety | Anti-jam function (ABS), ready indicator light, automatic shutdown in case of jam |
| Roller cleaning | Self-cleaning: insert a folded A4 sheet without pouch |
| Warranty | 3 years |
Frequently Asked Questions - ULG 350 A1 LAMINATOR UNITED OFFICE
User questions about ULG 350 A1 LAMINATOR UNITED OFFICE
0 question about this device. Answer the ones you know or ask your own.
Ask a new question about this device
Download the instructions for your Laminator in PDF format for free! Find your manual ULG 350 A1 LAMINATOR - UNITED OFFICE and take your electronic device back in hand. On this page are published all the documents necessary for the use of your device. ULG 350 A1 LAMINATOR by UNITED OFFICE.
USER MANUAL ULG 350 A1 LAMINATOR UNITED OFFICE
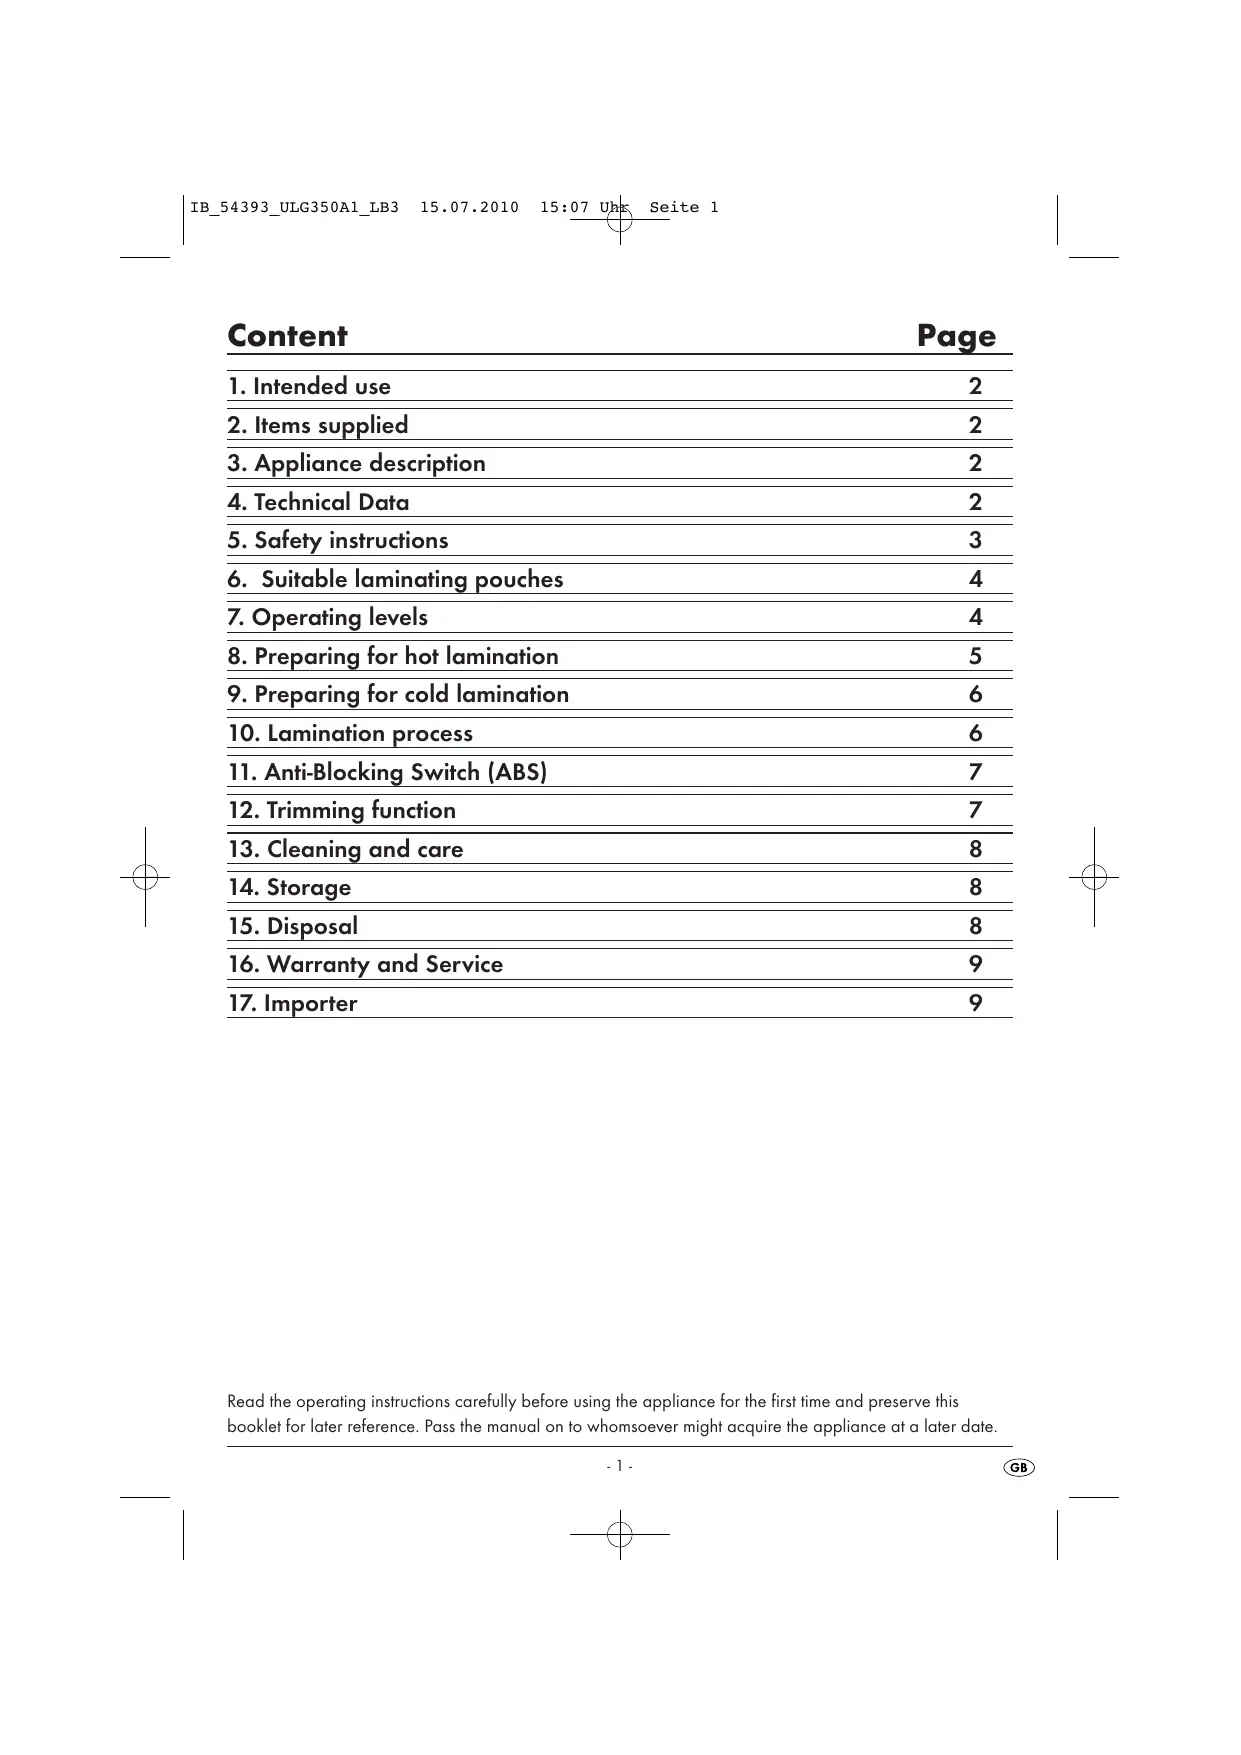
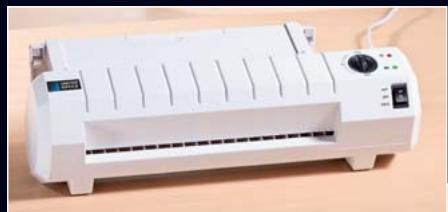
Laminator ULG 350 A1
GB Laminator
IE Operating instructions
F Laminoointilaite
Käytööhje
SE Lamineringsapparat
Bruksanvisning
DK Lamineringsmaskine
- Intended use 2
- Items supplied 2
3.Appliance description 2 - Technical Data 2
- Safety instructions 3
- Suitable laminating pouches 4
- Operating levels 4
8.Preparing for hot lamination 5
9.Preparing for cold lamination 6 - Lamination process 6
- Anti-Blocking Switch (ABS) 7
- Trimming function 7
- Cleaning and care 8
- Storage 8
- Disposal 8
- Warranty and Service 9
- Importer 9
Read the operating instructions carefully before using the appliance for the first time and preserve this booklet for later reference. Pass the manual on to whomsoever might acquire the appliance at a later date.
1. Intended use
This laminator is intended exclusively for use in private households and for the hot and cold lamination of documents printed on paper or cardboard. Additionally, the documents can be trimmed. It is NOT intended for use with any other materials. It is also NOT intended for commercial or industrial applications.
The warranty does not provide compensation for damage caused by improper use of the appliance!
2. Items supplied
1x Laminator
10x Laminating pouches DIN A4 for hot laminating (80 micron)
10x Laminating pouches DIN A5 for hot laminating (80 micron)
10x Laminating pouches for hot lamination of business cards (80 micron)
1 x Operating Instructions
3. Appliance description
Pouch guide (rear)
Cutting rail
3 Cutting head
Pouch format lock
Slot for manual pouch input
ON/OFFIndicatorlamp
Indicator lamp "Ready" OK
3 Selector switch for hot and cold lamination (HOT and COLD)
Anti-Blocking switch and pouch thickness switch
10 Pouch ejector slot (front)
1 Document support
12 Trimming attachment
4. Technical Data
Nominal voltage: 220 - 240 V~ 50 Hz
Current demand: 1,6 A
Power consumption: 350 W
Laminating speed:
| Foil size | 80 micron | 125 micron |
| A4 | approx. 40 s | approx. 51 s |
| A5 | approx. 29 s | approx. 36 s |
Pouch width: Max. 230 mm
Pouch thickness for hot lamination:
max. 125 micron
Pouch thickness for cold lamination:
max. 200 micron
Protection class: II/回
CO time: 2 hours
Cooling time: 1/2 hour
After two hours of operation the appliance must be allowed to cool down for at least a 1/2 hour.
Trimming capacity of the trimming attachment 17: max. 3 sheets of 80g / m^2
CO Time
The C.O. Time (Continuous Operation) details how long an appliance may be used without the motor overheating and being damaged. After the appliance has run for this period it must be switched off until the motor has cooled itself down.
5. Safety instructions
- This appliance is not intended for use by individuals (including children) with restricted physical, physiological or intellectual abilities or deficiencies in experience and/or knowledge unless they are supervised by a person responsible for their safety or receive from this person instruction in how the appliance is to be used.
- Children should be supervised to ensure that they do not play with the appliance.
- Unplug the power cable after every use and before cleaning, so as to prevent the appliance from inadvertently switching itself on.
- Check the appliance and all parts for visible damages. The safety concept can work only if the appliance is in a faultless condition.
- Never perform hot lamination on flammable, heat-sensitive and/or meltable materials and do not laminate drawings on temperature-sensitive paper or material that will undergo changes in colour or quality when subjected to heat.
-
Never laminate valuable or unique documents. Although the laminator satisfies all predominant safety norms and standards, errors can never be completely discounted - as with all electrical appliances. Errors with the laminator can result in damage to the document being laminated.
-
Do NOT laminate any document which, together with the laminating pouch, would have a thickness of more than 1,0 ~mm . Should you do so, the laminating pouch could cant itself inside the laminating appliance. This would damage the laminating pouch, the document being laminated as well as the laminator.
- Do not use an extension cable. Place the appliance where the mains power socket is easily accessible, so that in the event of an emergency the plug can be quickly withdrawn.
- Do not use an external timing switch or a separate remote control system to operate the appliance.
- Place the appliance where the power wall socket is easily accessible, so that in the event of an emergency the plug can be quickly withdrawn.
Risk of electrical shock!
- Connect the appliance to a mains power socket with a mains voltage of 220 - 240V 50Hz
- Do not take the appliance into use if the power cable or the plug is damaged.
- Arrange for defective power plugs and/or cables to be replaced at once by qualified technicians or our Customer Service Department.
- NEVER immerse the appliance in water. Wipe it only with a damp cloth.
- Do not expose the appliance to rain and never use it in a humid or wet environment.
- Ensure that the power cable never becomes wet during operation.
- Unplug the appliance immediately after use. The appliance is free of electricity only when you remove the plug from the mains power socket.
- Do not open the housing or attempt to repair the appliance yourself. Should you do so, device safety can no longer be assured and the warranty will become void.
Risk of fire!
- Do not use the appliance in the vicinity of hot surfaces.
- Do not place the appliance at locations exposed to direct sunlight.
This could lead to overheating and cause irreparable damage.
- Do not leave the appliance unattended when in use.
- NEVER cover the ventilation slits on the top of the appliance while it is switched on.
RISK OF INJURY!
- Keep children away from the connecting cable and the appliance. Children frequently underestimate the dangers of electrical devices.
- Ensure that the appliance stands with a safe and secure positioning.
- Do not operate the appliance if it has sustained a fall or is damaged. Arrange for the appliance to be checked and, if necessary, repaired by a qualified expert.
- Some parts of the appliance become very hot during operation. To avoid burns, do not touch these parts.
6. Suitable laminating pouches
- For hot lamination you can use pouches with a width of up to 230mm and a maximum thickness of 125 micron.
- Please note that each laminating pouch may only be used once.
For hot lamination, use only laminating pouches that are expressly designated for hot lamination.
For cold lamination, use only laminating pouches that are expressly designated for cold lamination.
Take note that the laminating pouches included with the laminator are intended exclusively for hot lamination.
7. Operating levels
| Position of selector switch ⑧ | Position of pouch thickness switch ⑨ | Laminating foil thickness |
| HOT | 80 | >60 - 80 |
| HOT | 125 | 85 - 125 |
| Cold | 125 | to 200 |
Tip: For high-gloss photos, you should select the switch position "125" as well as the appropriate pouch thickness.
8. Preparing for hot lamination
Insert the pouch guide 1 into the holes provided on the rear of the laminator.
If not already done, fold the trimming attachment 2 down.
Pull the document support 1 out, so that the document can be pulled in straight into the slot for manual pouch input 5.
Insert the laminator plug into a mains power socket.
Ensure the appliance has a stable positioning.
Switch the appliance on by placing the selector switch for hot and cold lamination 8 at "HOT". The red ON/OFF indicator lamp 1 6 now glows.
Activate the pouch thickness switch 9 only when the appliance is switched on. Otherwise, the appliance could be irreparably damaged.
Place the pouch thickness switch 9 at the desired pouch thickness (80 or 125 micron). The laminator now heats itself up to the operating temperature.
The laminator has reached its operating temperature as soon as the green LED indicator light "Ready" OK glows.
① Attainment of the operating temperature is indicated by the lighting up of the green LED indicator lamp "Ready" OK 7. For a more uniform laminating result we recommend, especially for thinner foils (below 125 Micron) and after adjustment to a different foil thickness, to first wait an additional 2-3 minutes before beginning with lamination.
Lay the document to be laminated into a laminating pouch of the appropriate size.
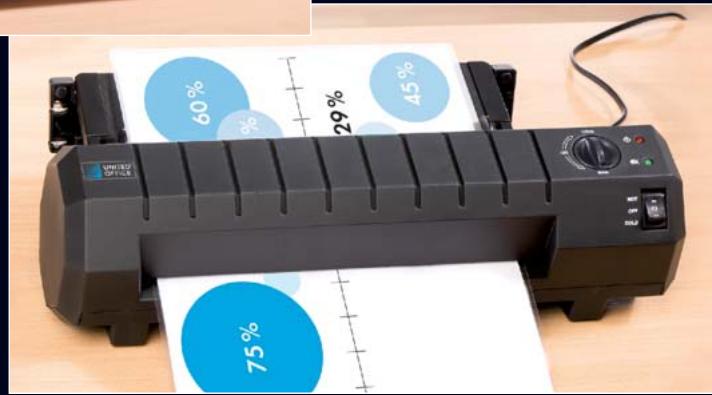
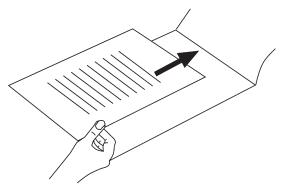
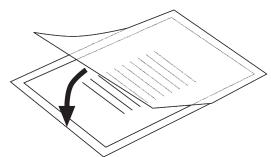
① Make certain that all corners of the document have at least two millimetres of space to the edge of the laminating pouch, as shown in Fig. 1. Make certain that you use only one pouch for laminating. First open it up, as shown in Fig. 2.
For information about the lamination process, please read section 10.
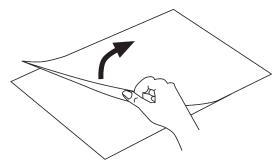
Fig. 2
9. Preparing for cold lamination
If you have previously performed hot lamination:
After hot laminating, allow the laminator to cool down completely before beginning with cold lamination. Remember, the rollers inside the laminator will still be hot. These can damage the laminating pouch and the document to be laminated!
Insert the pouch guide 1 into the holes provided on the rear of the laminator.
If not already done, fold the trimming attachment 2 down.
Pull the document support 10 out, so that the document can be pulled in straight into the slot for manual pouch input 5.
Insert the laminator plug into a mains power socket.
Ensure the appliance has a stable positioning.
① Hinweis: For cold lamination, ALWAYS place the pouch thickness switch 9 at 125 microns.
Switch the appliance on by placing the selector switch for hot and cold lamination 8 at "COLD". The red ON/OFF indicator lamp 6 and the green indicator lamp "Ready" OK now glow.
Lay the document to be laminated into a laminating pouch of the appropriate size.
Make certain that all corners of the document have at least two millimetres of space to the edge of the laminating pouch, as shown in Fig. 1.
Make certain that you use only one pouch for laminating. First open it up, as shown in Fig. 2.
For information about the lamination process, please read section 10.
10. Lamination process
Lay the laminating pouch onto the pouch guide ①. Lay the right or left edge of the laminating pouch against the pouch format lock ④ (closed side leading). Slide the pouch format lock ④ together until the selected format size is reached. This prevents the laminating pouch from being pulled in at an angle.
① Should the laminating pouch be pulled in at an angle, use the "Anti-Blocking Funktion" as described in chapter 11.
Now slide the laminating pouch slowly into the slot for manual pouch input 5.
When you have slid the laminating pouch several centimetres into the slot 5, it will start to be pulled in automatically. Release the laminating pouch as soon as you notice it being pulled in automatically.
① Ensure there is at least 30~cm of open space in front of the laminator. If you do not, the laminating pouch will not be completely ejected from the laminator after lamination. This could damage the laminated pouch.
The completed laminated pouch is ejected from the pouch ejector slot 10 of the laminator.
1 Only after hot lamination: When the finished laminated pouch is discharged from the pouch ejector slot of the appliance, it is hot and can easily change its shape. For this reason, allow the laminated pouch to cool down for at least one minute before touching it. To improve the lamination result, you can weigh a still hot laminated pouch down with a book, a file folder or any other heavy, flat object. This helps achieves a flat and flawless surface.
11. Anti-Blocking Switch (ABS)
At the start of the lamination process, the pouch may be pulled in at an angle or jam itself inside the appliance.
Turn the anti-blocking switch (ABS) 9 to the position ABS.
The laminate pouch is not pulled any further in.
Remove the laminate pouch.
Turn the anti-blocking switch (ABS) back to the desired foil thickness.
Re-start the lamination process.
12. Trimming function
Should you wish to use the trimming function on the pouch guide 1, dismantle the pouch guide 1.
If not already done, place the trimming attachment 12 so that it forms a level surface with the pouch guide 1.
Slide the cutting head 3 to the end stop (the cutting head 3 can be slid to both ends of the cutting rail 2).
Flap the cutting rail 2 upwards with the rounded grip and position the document on the pouch guide ①. Restrain the document by sliding the pouch format locks 4 together until they touch both sides of the document.
Use the markings on the measurement table to align the document precisely.
Flap the cutting rail 2 downwards so that it engages.
Hold the paper in a secure position with your left hand.
To trim, press the cutting head 3 down with the right hand and then slide it with one pull or push over the document.
13.Cleaning and care
Potentially fatal electrical shock:
- Never open the appliance housing. There are no user-serviceable elements inside.
- Never submerge the appliance into water or other liquids!
Cleaning the housing:
① Clean the surface of the housing with a slightly moistened cleaning cloth.
First remove the plug.
Allow the appliance to cool down completely.
Ensure that no moisture can permeate into the appliance.
Cleaning the interior of the appliance:
With every lamination, contaminants are deposited on the rollers inside the laminator. Over time, this reduces the performance of the laminator. You should therefore clean the rollers inside the laminator after use.
Prepare the appliance as described in Chapter 8 "Preparing for hot lamination", up to the point where the green indicator lamp "Ready" OK glows.
Then run a sheet of DIN A4 paper, folded in the middle (maximum thickness 1.0 ~mm ) ...
- without a laminating pouch and
with the fold first
... slowly into the slot for manual pouch input 5.
Release the sheet as soon as you notice it being pulled in automatically.
- The contaminants on the rollers inside the laminator are now transferred to this sheet of paper. The paper will be discharged from the pouch ejector slot 10 of the laminator.
Repeat this cleaning process several times. Use a fresh clean sheet of paper each time. When you no longer see any contaminants on the paper, the rollers inside the laminator are clean.
14. Storage
Allow the appliance to cool down completely before putting it into storage.
① Do not store the laminator in damp locations where moisture could enter inside the appliance. (E.g. cellars)!
15. Disposal

Do not dispose of the appliance with your normal domestic waste. This product is subject to the provisions of European Directive 2002/96/EC.
Dispose of the appliance through an approved waste disposal centre or at your community waste facility. Observe the currently applicable regulations. In case of doubt, please contact your waste disposal centre.

Dispose of all packaging materials in an environmentally friendly manner.
16. Warranty and Service
The warranty for this appliance is for 3 years from the date of purchase. The appliance has been manufactured with care and meticulously examined before delivery. Please retain your receipt as proof of purchase. In the event of a warranty claim, please make contact by telephone with our Service Department. Only in this way can a post-free despatch for your goods be assured.
The warranty covers only claims for material and manufacturing defects, but not for transport damage, for wearing parts or for damage to fragile components, e.g. buttons or batteries. This product is for private use only and is not intended for commercial use. The warranty is void in the case of abusive and improper handling, use of force and internal tampering not carried out by our authorized service branch. Your statutory rights are not restricted in any way by this warranty.
The warranty period will not be extended by repairs made under warranty. This applies also to replaced and repaired parts. Any damage and defects extant on purchase must be reported immediately after unpacking the appliance, at the latest, two days after the purchase date. Repairs made after the expiration of the warranty period are subject to payment.
GB DES UK LTD
Tel.: 0871 5000 700 (£ 0.10 / minute)
e-mail: support.uk@kompernass.com
IE Kompernass Service Ireland
Tel.: 1850 930 412 (0,082 EUR/Min.)
Standard call rates apply. Mobile operators may vary.
e-mail: support.ie@kompernass.com
Cyt Kompernass Service Cyprus
Tel.: 800 9 44 01
e-mail: support.cy@kompernass.com
17. Importer
KOMPERNASS GMBH
BURGSTRASSE 21
D-44867 BOCHUM, GERMANY
www.kompernass.com