
T-R650 - CD player TEAC - Free user manual and instructions
Find the device manual for free T-R650 TEAC in PDF.


| Product Type | CD player with FM/AM tuner |
| Brand | TEAC |
| Model | T-R650 |
| Dimensions (W × H × D) | 435 × 85 × 295 mm |
| Weight | 3.2 kg |
| Power supply | AC 230 V, 50 Hz |
| Power consumption | 9 W (standby: 0.5 W) |
| FM tuning range | 87.50 – 108.00 MHz (50 kHz steps) |
| AM tuning range | 522 – 1,629 kHz (9 kHz steps) |
| Preset stations | 30 FM and 30 AM |
| RDS functions | Yes (PTY, RT, CT, TA) |
| Daily timer | Yes |
| Sleep timer | Yes (10 to 90 minutes) |
| Connectivity | Stereo RCA audio output, FM 75 Ω antenna socket, AM antenna socket, remote control socket |
| Included accessories | AM loop antenna, FM wire antenna, remote control connection cord, stereo RCA cable, instruction manual, warranty card |
| Care and cleaning | Clean with a soft cloth and a diluted neutral solution. Do not use solvents (thinner, benzene, alcohol). |
| Safety | Do not expose to water, do not open the case, use the mains plug as the disconnection device, do not block ventilation slots. |
| Spare parts and repairability | Antennas and remote control cord available. For any repairs, contact the dealer or TEAC after-sales service. Do not attempt to repair yourself. |
| General information | Operating temperature: +5 °C to +35 °C. Storage temperature: -20 °C to +55 °C. |
Frequently Asked Questions - T-R650 TEAC
User questions about T-R650 TEAC
0 question about this device. Answer the ones you know or ask your own.
Ask a new question about this device
Download the instructions for your CD player in PDF format for free! Find your manual T-R650 - TEAC and take your electronic device back in hand. On this page are published all the documents necessary for the use of your device. T-R650 by TEAC.
USER MANUAL T-R650 TEAC
The lightning flash with arrowhead symbol, within an equilateral triangle, is intended to alert the user to the presence of uninsulated "dangerous voltage" within the product's enclosure that may be of sufficient magnitude to constitute a risk of electric shock to persons.

The exclamation point within an equilateral triangle is intended to alert the user to the presence of important operating and maintenance (servicing) instructions in the literature accompanying the appliance.
IMPORTANT SAFETY INSTRUCTIONS
1) Read these instructions.
2) Keep these instructions.
3) Heed all warnings.
4) Follow all instructions.
5) Do not use this apparatus near water.
6) Clean only with dry cloth.
7) Do not block any ventilation openings. Install in accordance with the manufacturer's instructions.
8) Do not install near any heat sources such as radiators, heat registers, stoves, or other apparatus (including amplifiers) that produce heat.
9) Do not defeat the safety purpose of the polarized or grounding-type plug. A polarized plug has two blades with one wider than the other. A grounding type plug has two blades and a third grounding prong. The wide blade or the third prong are provided for your safety. If the provided plug does not fit into your outlet, consult an electrician for replacement of the obsolete outlet.
10) Protect the power cord from being walked on or pinched particularly at plugs, convenience receptacles, and the point where they exit from the apparatus.
11) Only use attachments/accessories specified by the manufacturer.
12) Use only with the cart, stand, tripod, bracket, or table specified by the manufacturer, or sold with the apparatus. When a cart is used, use caution when moving the cart/ apparatus combination to avoid injury from tip-over.
13) Unplug this apparatus during lightning storms or when unused for long periods of time.
14) Refer all servicing to qualified service personnel. Servicing is required when the apparatus has been damaged in any way, such as power-supply cord or plug is damaged, liquid has been spilled or objects have fallen into the apparatus, the apparatus has been exposed to rain or moisture, does not operate normally, or has been dropped.
- Do not expose this apparatus to drips or splashes.
- Do not place any objects filled with liquids, such as vases, on the apparatus.
- Do not install this apparatus in a confined space such as a book case or similar unit.
- The apparatus draws nominal non-operating power from the AC outlet with its POWER or STANDBY/ON switch not in the ON position.
- The apparatus should be located close enough to the AC outlet so that you can easily reach the power cord plug at any time.
- The mains plug is used as the disconnect device, the disconnect device shall remain readily operable.
- If the product uses batteries (including a battery pack or installed batteries), they should not be exposed to sunshine, fire or excessive heat.
- Caution should be taken when using earphones or headphones with the product because excessive sound pressure (volume) from earphones or head-phones can cause hearing loss.
WARNING: TO PREVENT FIRE OR SHOCK HAZARD, DO NOT EXPOSE THIS APPLIANCE TO RAIN OR MOISTURE.
CAUTION
DO NOT REMOVE THE EXTERNAL CASES OR CABINETS TO EXPOSE THE ELECTRONICS. NO USER SERVICEABLE PARTS ARE WITHIN!
- IF YOU ARE EXPERIENCING PROBLEMS WITH THIS PRODUCT, CONTACT TEAC FOR A SERVICE REFERRAL. DO NOT USE THE PRODUCT UNTIL IT HAS BEEN REPAIRED.
Contents
Thank you for choosing TEAC. Read this manual carefully to get the best performance from this unit.
Before use 3
Connection 4
Connecting Antennas. 5
Parts Identification 6
Basic operations 7
Listening to FM/AM 8
Preset Tuning 9
Preset Tuning (Remote Control) 11
RDS 13
PTY Search. 14
Setting the Clock. 16
Setting the Daily Timer 16
Sleep timer 18
Troubleshooting 19
Specifications 20
Before use
Read this before attempting any operations.
- The voltage supplied to the unit should match the voltage as printed on the rear panel. If you are in any doubt regarding this matter, consult an electrician.
- Choose the installation location of your unit carefully. Avoid placing it in direct sunlight or close to a source of heat. Also avoid locations subject to vibrations and excessive dust, heat, cold or moisture.
- Do not place the unit on an amplifier/receiver.
- Do not open the cabinet as this might result in damage to the circuitry or electrical shock. If a foreign object should get into the unit, contact your dealer or service company.
- When removing the power plug from the wall outlet, always pull directly on the plug, never yank the cord.
- Do not attempt to clean the unit with chemical solvents as this might damage the finish. Use a clean, dry or slightly damp cloth.
- Keep this manual in a safe place for future reference.
Maintenance
If the surface of the unit gets dirty, wipe with a soft cloth or use diluted neutral cleaning liquid. Be sure to remove any fluid completely. Do not use thinner, benzine or alcohol as they may damage the surface of the unit.
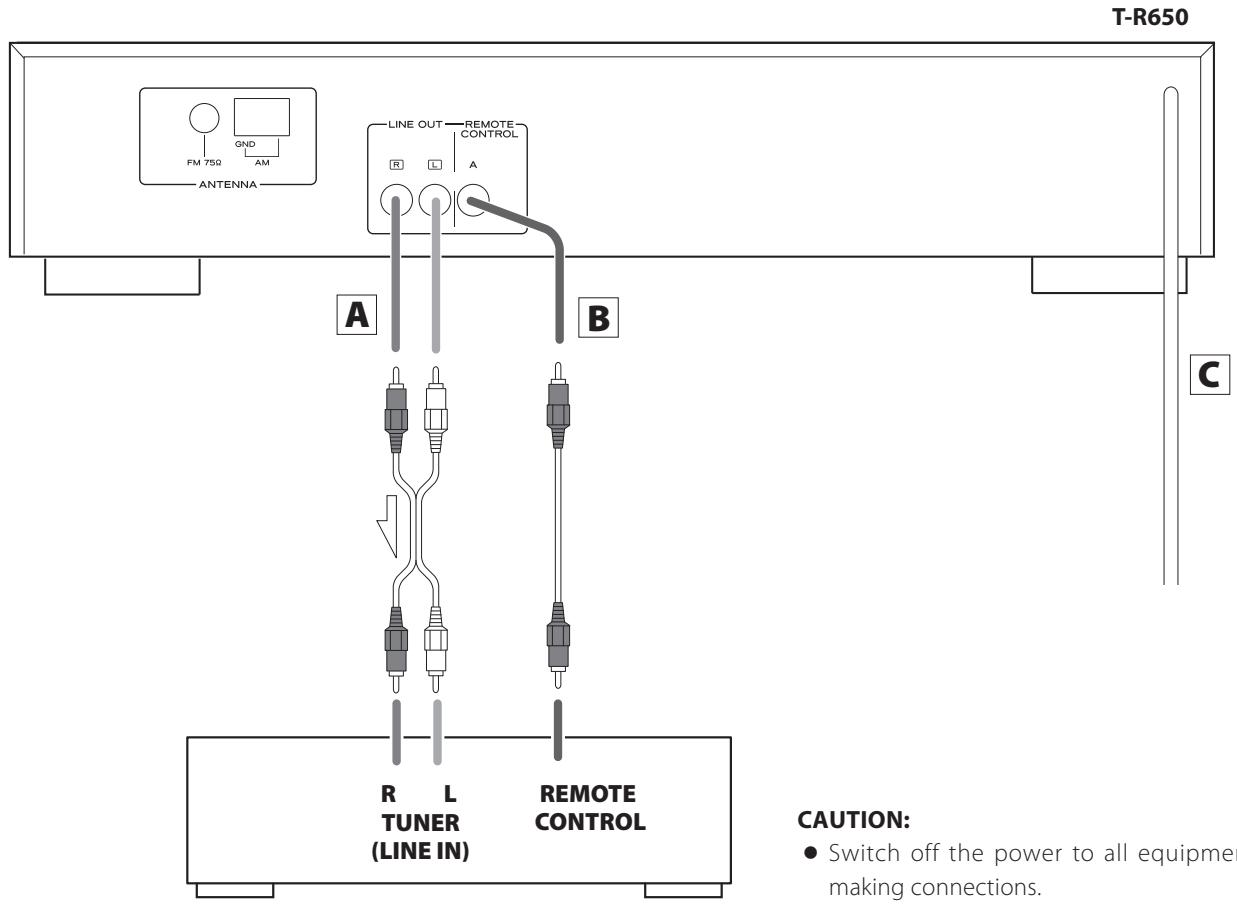
Amplifier (A-R650)
CAUTION:
- Switch off the power to all equipment before making connections.
- Read the instructions of each component you intend to use with this unit.
A LINE OUT jacks
These jacks transmit an analog 2-channel audio signal. Connect these jacks to the TUNER jacks of the amplifier (A-R650) with a stereo RCA pin cable.
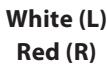
Make sure to connect the cable as follows: white plug white jack (L: left channel) red plug red jack (R: right channel)
White (L) Red (R)

- Be sure to insert each plug securely. To prevent hum and noise, avoid bundling the signal interconnection cables together with the AC power cord or speaker cables.
B REMOTE CONTROL jack
If you have TEAC A-R650, connect this jack to the A-R650's remote control jack with remote control connection cord. Convenient system control operations are available.
- When you tune in a station, the input selector of the A-R650 is set to "TUNER" automatically.
When you want to use the remote control functions, connect the REMOTE CONTROL jack of each component by a remote control connection cord.
- You can use the remote control unit UR-431 (provided for A-R650). Aim the remote control unit at the A-R650 to operate this unit.
Note:
The remote control unit is not provided for this unit.
AC power cord
After all other connections are complete, connect the plug to the AC wall socket.
- Be sure to connect the power cord to an AC outlet which supplies the correct voltage.
- Hold the power plug when plugging or unplugging the power cord.
AM Indoor Loop Antenna
The high-performance AM loop antenna provided with this unit is sufficient for good reception in most areas.
To stand the loop antenna on a surface, fix the claw to the slot in the antenna base.
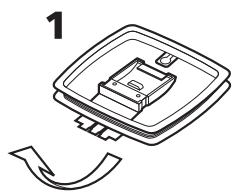
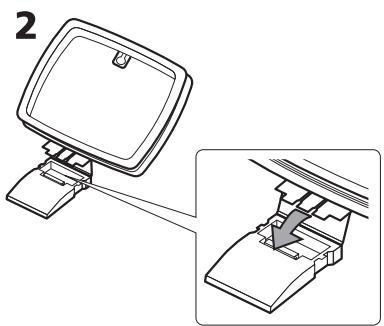
Connect the loop antenna's wires to the AM antenna terminals.
- Make sure to connect the black wire to the GND terminal.
Place the antenna on a shelf or hang it on a window frame, etc., in the direction which gives the best reception. Keep all other wires such as power cords, speaker wires or interconnected wires as far away as possible from the antenna.
AM Outdoor Antenna
If the AM loop antenna provided does not deliver sufficient reception (often due to being too far from the transmitter or in a concrete building, etc.), it may be necessary to use an outdoor AM antenna.
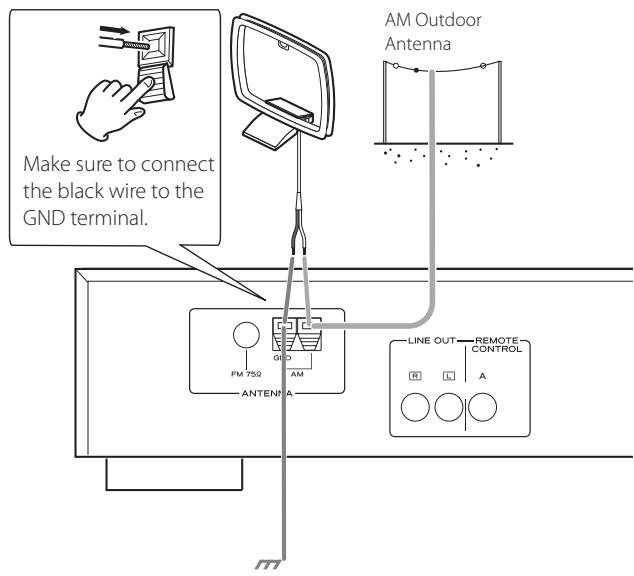
Use either a high quality commercially available AM antenna or, if not available, an insulated wire more than 5m long, strip one end, and connect this to the terminal as shown.
The antenna wire should be strung outdoors or indoors near a window. For better reception, connect the GND terminal to a reliable ground.
- Even when using an outdoor AM antenna, do not disconnect the AM loop antenna.
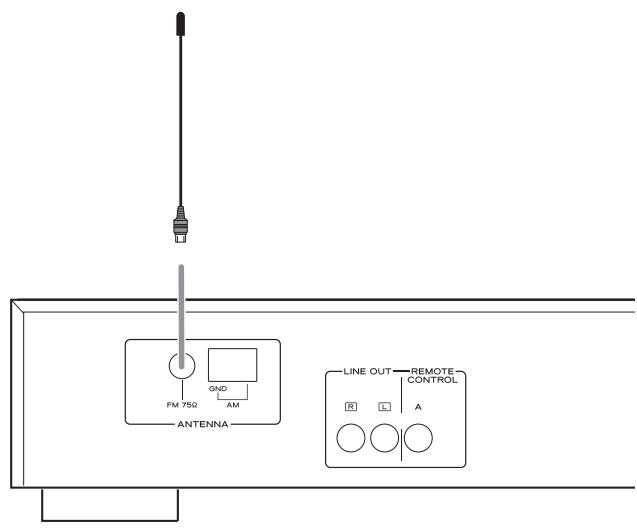
FM Indoor Antenna
Connect the lead-type FM antenna to the FM 75 socket, extend the lead and tune in your favourite station (see page 8).
Adjust the antenna in a suitable location like a window frame or wall which gives the best reception and then fix the antenna in that position with thumbtacks or the like.
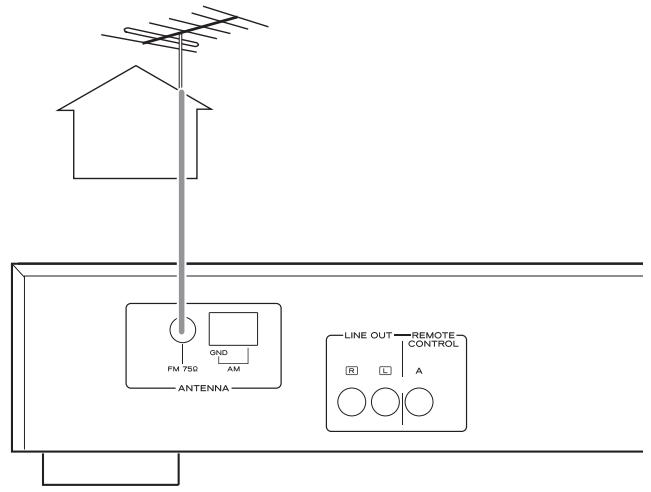
FM Outdoor Antenna
In an area where FM signals are weak, it will be necessary to use an outdoor FM antenna. Generally, a 3-element antenna will be sufficient; if you live in an area where the FM signals are particularly weak, it may be necessary to use one with 5 or more elements.
- Disconnect the FM indoor antenna when using an outdoor antenna.
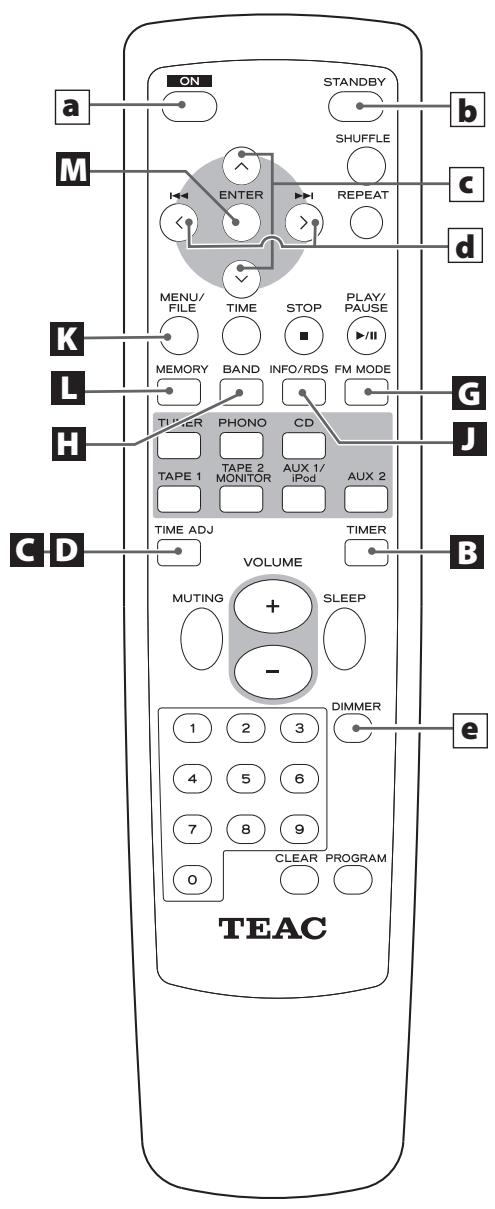
UR-431
Remote control unit provided with A-R650
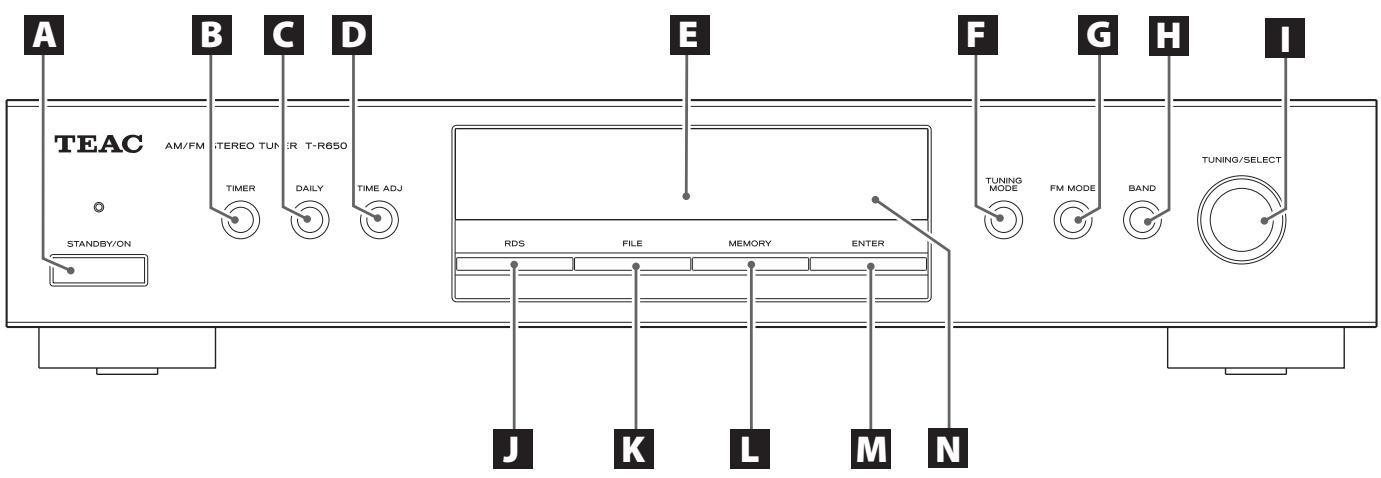
A STANDBY/ON
Press this button to turn the unit on or put in the standby mode. The standby indicator lights red when the unit is in the standby mode. When the unit is turned on, it goes out.
B TIMER
Press this button to turn on or off the timer function.
C DAILY
Press this button to set the timer.
On the remote control, press and hold the TIME ADJ button for more than 2 seconds.
D TIME ADJ
Press this button to adjust the clock.
Display
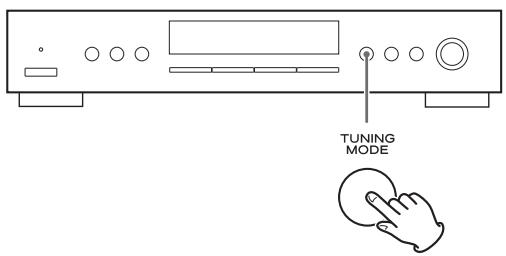
TUNING MODE
Press this button to change the tuning mode.
FM MODE
In FM mode, use this button to select stereo or monaural.
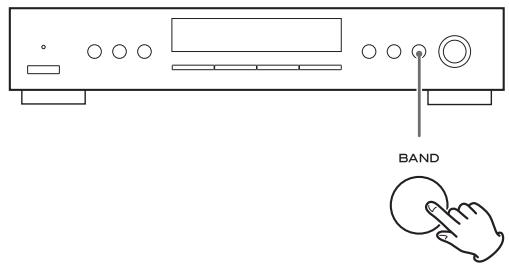
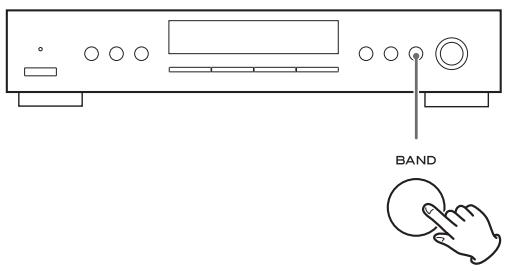
BAND
Press this button to select FM or AM.
TUNING/SELECT
Turn this knob to tune in a station, to select a preset station, or to select a menu item.
RDS
Press this button to select the RDS mode.
K FILE
Use this button to assign names to the preset stations.
L MEMORY
Press this button to store preset stations into memory.
M ENTER
Press this button to enter your selection.
Remote sensor
When using the remote control unit, point it towards the remote sensor.
Remote control unit (provided with A-R650)
aON
Press this button to turn the unit on.
b STANDBY
Press this button to turn the unit standby mode.
C
Manual tuning UP DOWN button (AM/FM)
Use this button to tune in a station and select the preset number for the station at manual preset.
d
(Preset tuning UP DOWN button (AM/FM))
Use this button to select the preset number for the station.
e DIMMER
Press this button to dim the display.
Note:
The remote control unit is not provided for this unit.
How to turn the unit on or off
Press the STANDBY/ON button to turn the unit on.
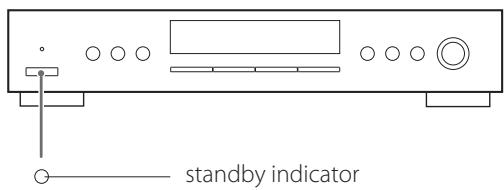
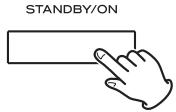
The standby indicator goes out.
Dimmer
Each time you press the DIMMER button, the display changes as follows:
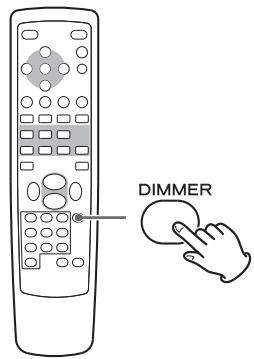
Normal Dimmed Display off
This function is available only when the REMOTE CONTROL jack of the T-R650 and the A-R650 are connected with a remote control connection cord.
1 Select FM or AM by pressing the BAND button repeatedly.
2 Select the desired tuning mode.
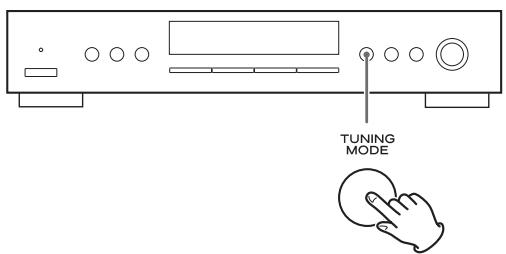
Each time the TUNING MODE button is pressed, the tuning mode changes as follows:
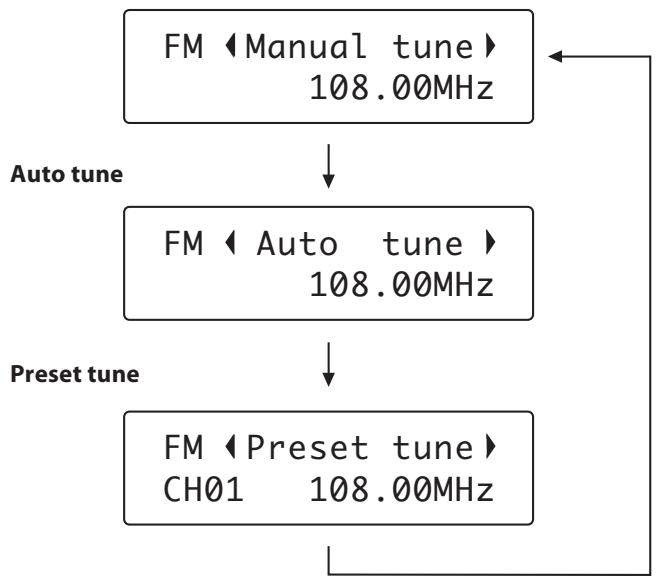
Manual tune
3 Select the station you want to listen to.
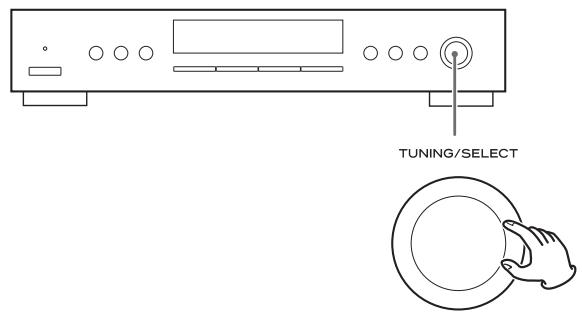
Manual tuning mode
Turn the TUNING/SELECT knob until the station you want to listen to is found.
The frequency changes by a fixed step (FM: 50 kHz steps, AM: 9 kHz steps).
Auto tuning mode
Turn the TUNING/SELECT knob to begin auto tuning.
When a station is found, the unit tunes in the station automatically. Repeat this step until the station you want to listen to is found.
- Press the ENTER button to stop the auto tuning. (on the front panel of the unit)
- Use the TUNING button (A × ) when using the remote control unit.
Preset tuning mode
See page 9 to 13.
FM Mode
Pressing the FM MODE button alternates between Stereo mode and Mono mode.
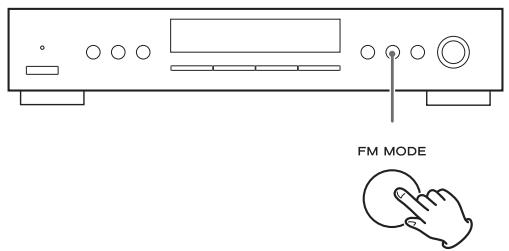
Stereo:
FM stereo broadcasts are received in stereo and "Stereo" is displayed.
Mono:
Select this mode when the signal is weak. Reception will be forced monaural, reducing unwanted noise.
Manual Preset
You can store up to 30 FM and 30 AM stations.
1 Select AM or FM by pressing the BAND button repeatedly.
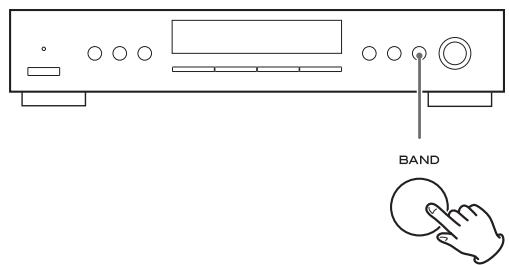
2 Tune in the station you want to store.
See the previous pages for the procedure of tuning.
Press the MEMORY button.
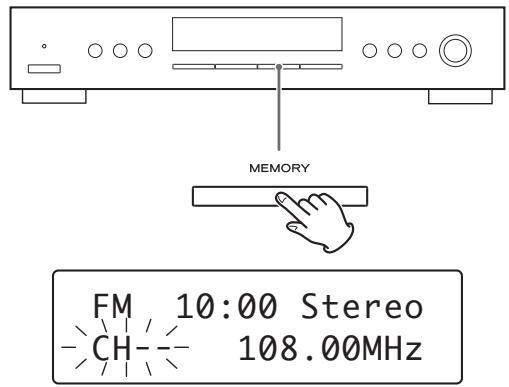
- If you do not operate within 4 seconds after pressing the MEMORY button, presetting will be cancelled.
4 Within 4 seconds, select the preset number for this station.
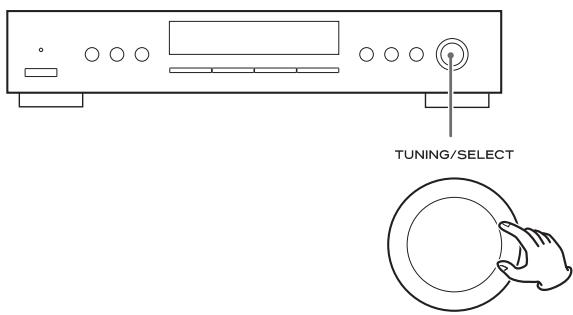
Turn the TUNING/SELECT knob.
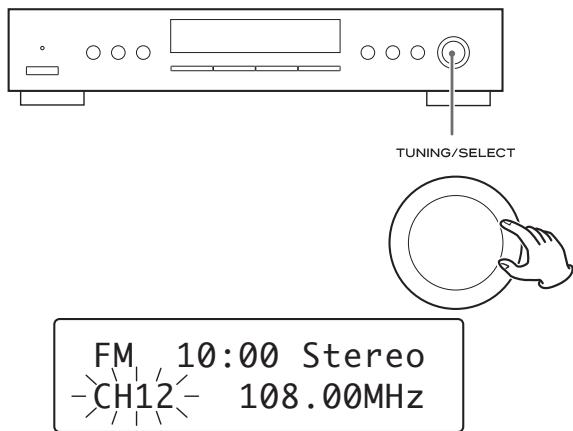
5 Within 4 seconds, press the MEMORY button.
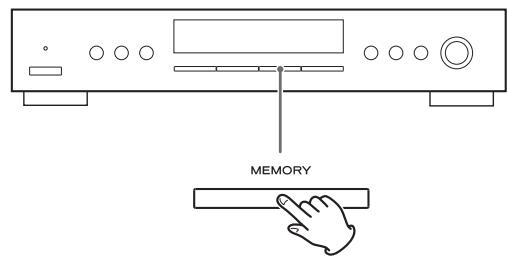
The station is stored.
- To store more stations, repeat steps 2 to 5.
Presetting Automatically
1 Select FM or AM by pressing the BAND button repeatedly.
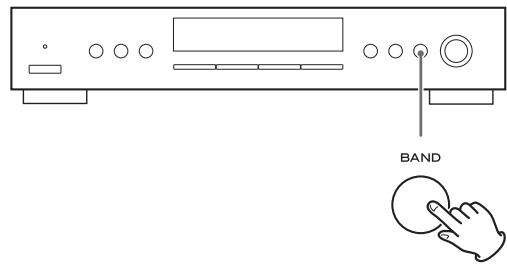
Press and hold the MEMORY button for more than 2 seconds.
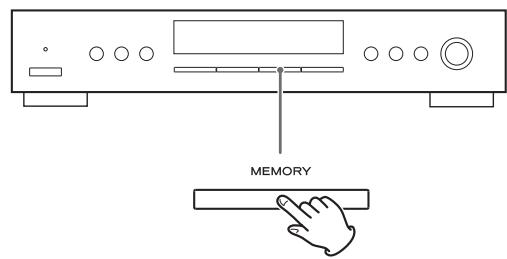
Up to 30 of the best received stations in your area will be stored automatically.
How to select preset stations (FM/AM)
1 Select AM or FM by pressing the BAND button repeatedly.
2 Select the preset tuning mode.
Press the TUNING MODE button repeatedly until "Preset tune" is displayed.
FM〈Preset tune〉
CH01 108.00MHz
3 Select a preset channel by turning the TUNING/SELECT knob.
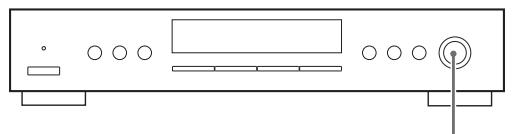
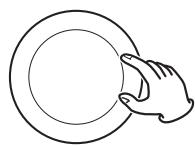
TUNING/SELECT
The selected preset channel is tuned in.
You can assign names to the preset stations. (Up to 4 characters)
When the FILE button is pressed, the assignned name is displayed instead of the clock. Press the FILE button again to return to the nomal display (clock).
Assigning the Names to the Preset Stations
1 Select a preset channel you want to assign the name in the "Preset tune" mode.
- Or you can assign the name to the current tuned station, and preset it into the memory.
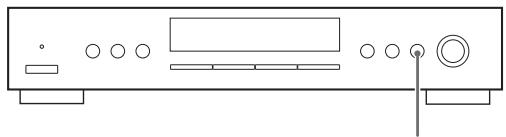
BAND
Hold down the FILE button for more than 1.5 seconds.
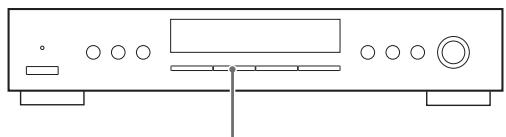
FILE
FM 03:01
CH09 92.50MHz
"----" appears, and the first " - " flashes on the display.
3 Select a character using the TUNING/SELECT button.
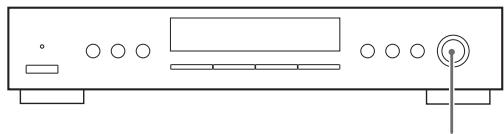

TUNING/SELECT
Available characters:
ABCDEFGHIJKLMNOPQRSTUVWXYZ[]
NCSBUGCEF$±°AAEIEILOUURC SZL'
AEEIIOUUAAYQRCSZF ^ % &'()*+,-.
/0123456789=?@
Preset Tuning 1 (Remote Control)
4 Press the ENTER button.
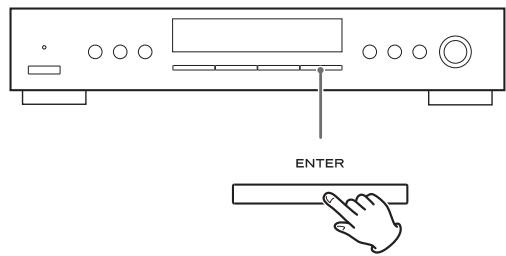
The next " - " flashes.
Up to 4 characters can be used per station.
Repeat steps 3 and 4 to input characters.
Press the MEMORY button.
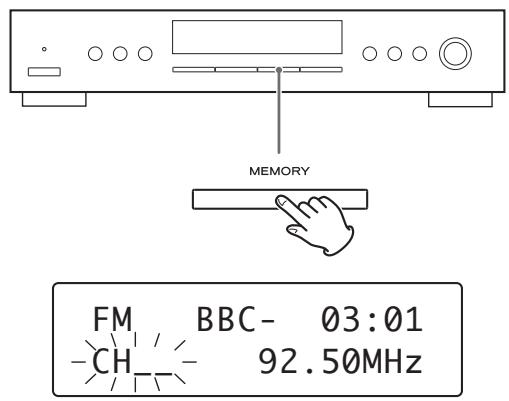
"CH—" flashes.
6 Select a preset channel to store the station using the TUNING/SELECT knob.
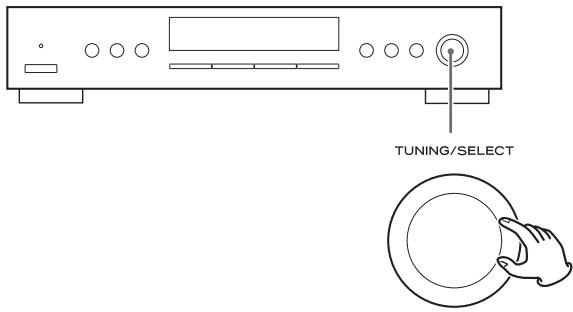
7 Press the MEMORY button.
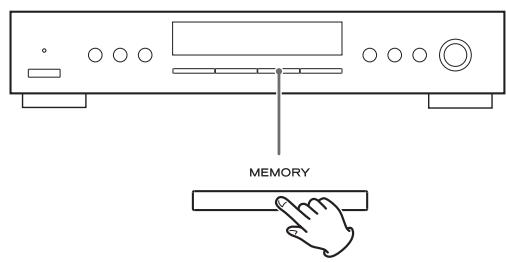
The assigned name is kept in memory.
If the old name is in memory, it will be overwritten.
Manual Preset
You can store up to 30 FM and 30 AM stations.
1 Select AM or FM by pressing the BAND button repeatedly.
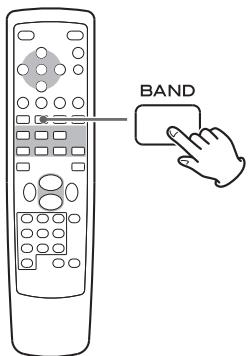
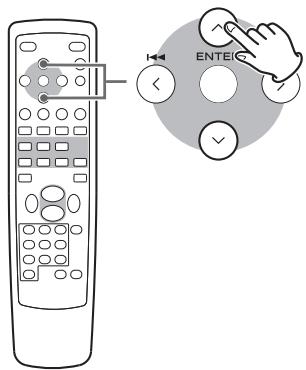
Press the or button to select the station you want to store.
Press the MEMORY button.
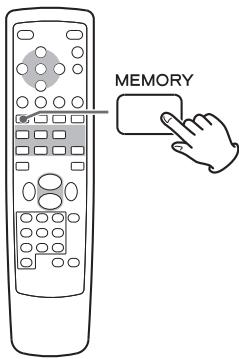
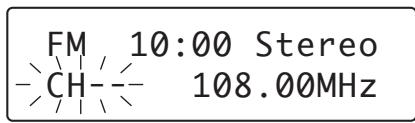
- If you do not operate within 4 seconds after pressing the MEMORY button, presetting will be cancelled.
4 Within 4 seconds, press the or button to select the preset number for this station.
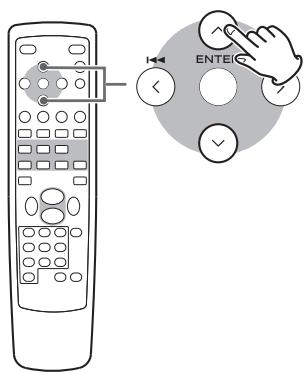
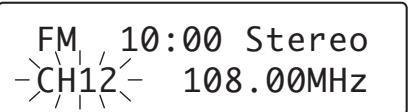
You can also use the numeric buttons.
- When you use the numeric buttons, press the TUNER button of the remote control first.
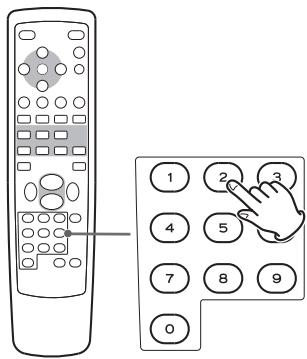
For instance, to select preset number 25, first press the TUNER button, and then press "2" and "5".
To select numbers less than 10, press "0" and then the number. As an example, to select number 5, press "0" and "5". (Optionally, you may press just the number "5" and then wait a few seconds.)
Within 4 seconds, press the MEMORY button.
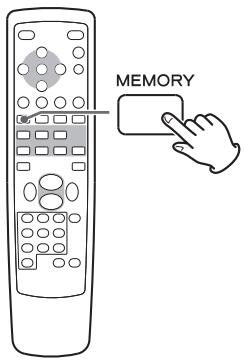
The station is stored.
- To store more stations, repeat steps 2 to 5.
Presetting Automatically
1 Select FM or AM by pressing the BAND button repeatedly.
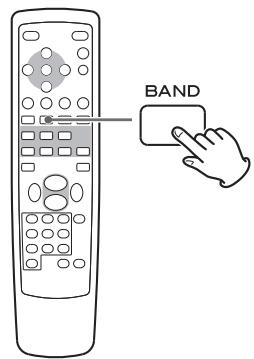
Press and hold the MEMORY button for more than 2 seconds.
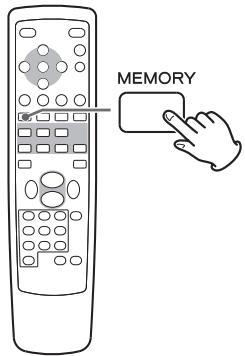
Up to 30 of the best received stations in your area will be stored automatically.
How to select preset stations
1 Select AM or FM by pressing the BAND button repeatedly.
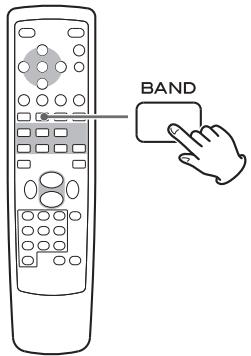
2 Select a preset channel by the numeric buttons.
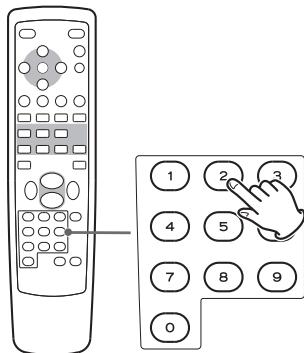
The selected preset channel is tuned in.
For instance, to select preset number 25, first press the TUNER button, and then press "2" and "5".
To select numbers less than 10, press "0" and then the number. As an example, to select number 5, press "0" and "5". (Optionally, you may press just the number "5" and then wait a few seconds.)
The Radio Data System (RDS) is a broadcasting service which allows stations to send additional information along with the regular radio programme signal.
RDS works on the FM waveband in Europe only.
1 Tune in an FM station (see page 8).
Press the RDS MODE button.
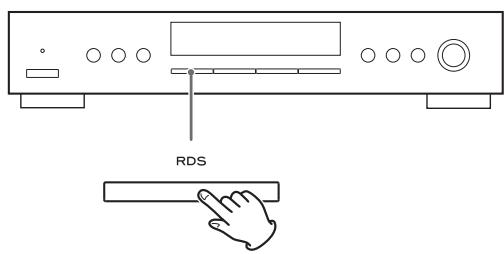
Each time the RDS MODE button is pressed, the RDS mode is changed as follows:
PS (PROGRAM SERVICE)
When you select PROGRAM SERVICE, "PROGRAM SERVICE" will blink for about 3 seconds and then the programme service name or a station's name will be displayed. If there is no programme service data, the frequency will be displayed.
PTY(PROGRAMTYPE)
When you select PROGRAM TYPE, "PROGRAM TYPE" will blink for about 3 seconds and then the programme type will be displayed.
RT (RADIO TEXT)
When you select RADIO TEXT, "RADIO TEXT" will blink for about 3 seconds and then the news of stations composed of up to 64 symbols will be displayed.
If there is no radio text data, RDS mode will be automatically switched to PROGRAM SERVICE mode.
TA (TRAFFIC ANNOUNCER)
When you select TRAFFIC ANNOUNCE, "TRAFFIC ANNOUNCE" will blink for 3 seconds and then the unit searches for a traffic announcement.
- When a traffic programme is found, the TRAFFIC ANNOUNCER mode is switched to PROGRAM SERVICE mode.
If the station currently selected is transmitting a traffic program signal, the RDS mode will be switched to PROGRAM SERVICE mode without searching for a traffic program.
CT (CLOCK TIME)
Displays the information about times provided from the station. When you select CLOCK TIME, "CLOCK TIME" will blink for about 3 seconds and then the clock time will be displayed.
The clock setting of this unit is automatically adjusted according to the CLOCK TIME (CT) data.
If you tune in an RDS station broadcasting incorrect CT data, the clock might be wrongly adjusted, and that may eventually affect the timer operation.
When you do not want the clock of this unit to be set according to the CT data, turn off the auto clock adjustment.
- No matter which RDS mode is selected, the unit receives CT data and adjusts the clock.
To turn off the auto clock adjustment, press and hold the RDS MODE button for more than 8 seconds.
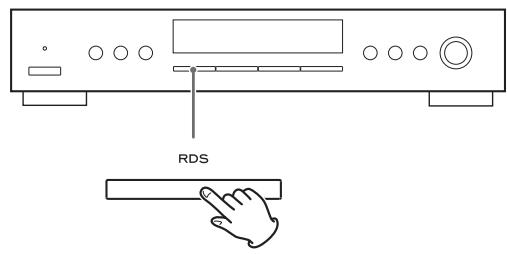
- To turn on the auto clock adjustment again, press and hold the RDS MODE button for more than 8 seconds.
- When the auto clock adjustment is turned off, CLOCK TIME is not displayed.
You can search for stations by programme type.
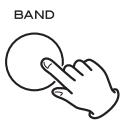
1 Select FM by pressing the BAND button repeatedly.
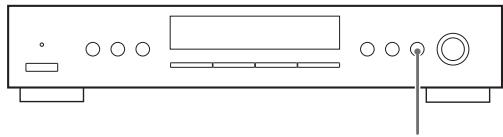
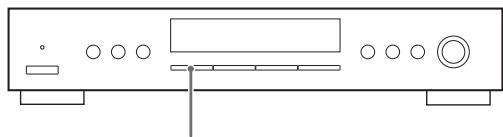
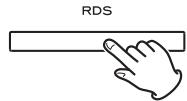
Press the RDS MODE button for more than 2 seconds.
3 Select the desired programme type (PTY).
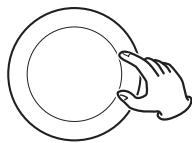
Turn the TUNING/SELECT knob to select an item
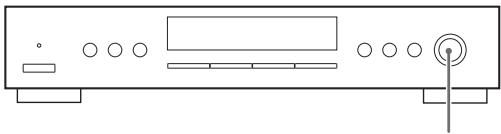
TUNING/SELECT
Select your desired one from among 31 kinds of PTY programmes. The programme type will blink.
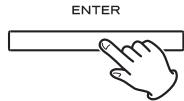
4 Press the ENTER button.

Searching starts.
- When the broadcast whose programme type you have selected is found, searching stops and the programme type will be displayed.
- If the broadcast of selected programme type is not found during PTY Search, it will stop at the beginning frequency.
- If you want to stop searching, press the RDS MODE button.
31 kind of PTY programmes:
News:
brief announcements, events, public opinion, reports, actual situations.
Current Affairs:
a kind of suggestion including practical announcements other than news, documents, discussion, analysis and so on.
Information:
daily information or reference such as weather forecast, consumer guide, medical assistance and so on.
Sport:
sports related programmes.
Education:
educational and cultural information.
Drama:
all kinds of radio concert and serial drama.
Cultures:
all aspects of national or local culture including religious events, philosophy, social science, language, theatre, and so on.
Science:
programmes on natural science and technology.
Varied Speech:
popular programmes such as quiz, entertainment, private interview, comedy, satire and so on.
Pop Music:
programme on commercial, practical and popular songs, and sale volume of discs, etc.
Rock Music:
practical modern music generally composed and played by young musicians.
Easy Listening:
popular music usually lasting for less than 5 minutes.
Light Classics M:
classical music, instrumental music, chorus, and light music favoured by non-professionals.
Serious Classics:
orchestra including great operas, symphony, chamber music and so on.
Other Music:
other music styles (Rhythm & Blues, Reggae, etc.).
Weather & Meter:
weather reports, forecast.
Finance:
financial reports, commerce, trading.
Children's Progs:
children's programmes.
Social Affairs:
social affairs.
Religion:
religious programmes.
Phone In:
programme in which the public expresses its view by phone.
Travel & Touring:
travel reports.
Leisure & Hobby:
programmes concerning recreational activities.
Jazz Music:
jazz music.
Country Music:
country music.
National Music:
national music.
Oldies Music:
music from the so-called golden age of popular music.
Folk Music:
folk music.
Documentary:
documentaries.
Alarm Test
Alarm-Alarm!
a programme notifying an emergency or a natural disaster.
Setting the Clock
- The unit uses the 24-hour clock.
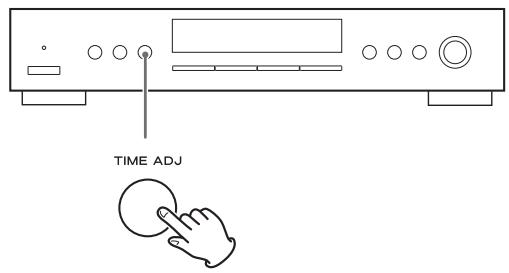
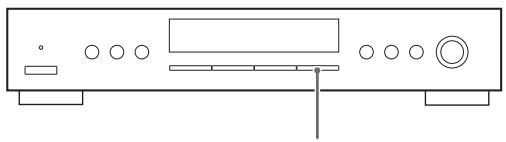
Press the TIME ADJ button.
C-time 00:00:00
CH12 108.00MHz
The hour value flashes.
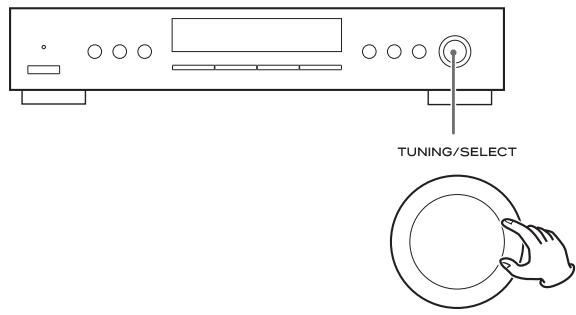
2 Turn the TUNING/SELECT knob to set the current hour, and press the ENTER button.

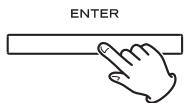
C-time 10:00:00
CH12 108.00MHz
The hour is set, and the minute value flashes.
3 Turn the TUNING/SELECT knob to set the current minute, and press the ENTER button.
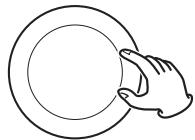
TUNING/SELECT

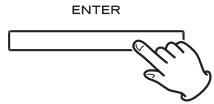
The clock starts from 00 second.
Setting the Daily Timer 1
This function is available only when REMOTE CONTROL jacks of the T-R650 and the A-R650 are connected with a remote control connection cord.
- Adjust the clock before setting the timer.
Press the DAILY button.
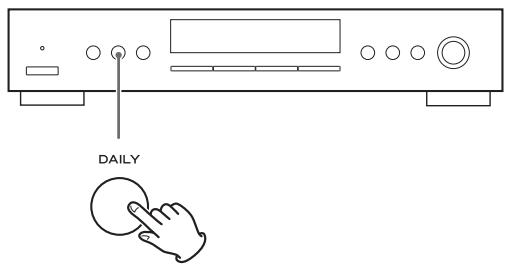
On time 00:00:00
CH12 108.00MHz
"On time" appears on the display, and the hour value flashes.
- When you use the remote control, press the TIME ADJ button for 2 or more seconds.
Turn the TUNING/SELECT knob to set the start time (hour), and press the ENTER button.
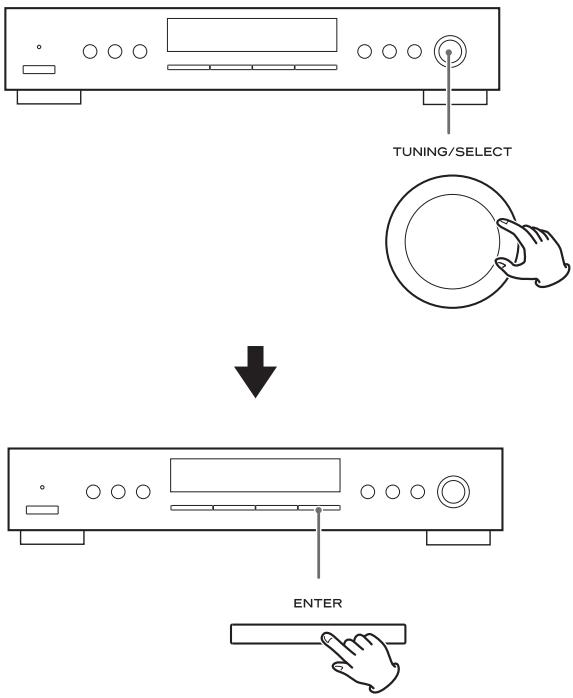
On time 07:00:00
CH12 108.00MHz
The hour is set, and the minute value flashes.
Turn the TUNING/SELECT knob to set the start time (minutes), and press the ENTER button.
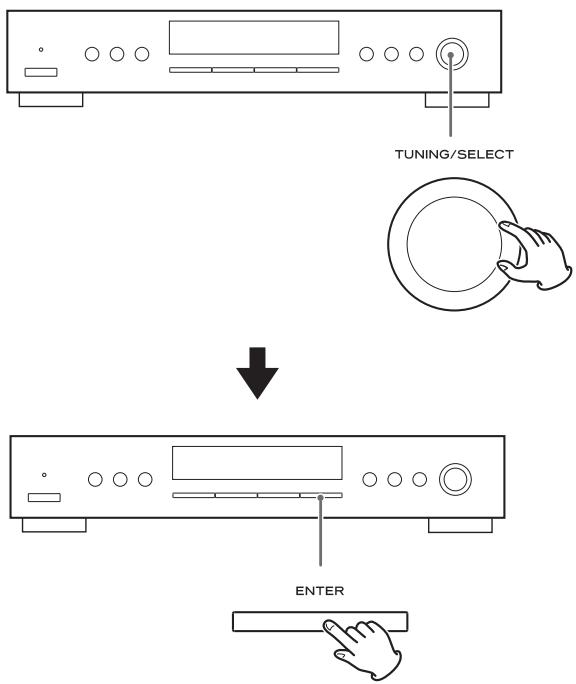
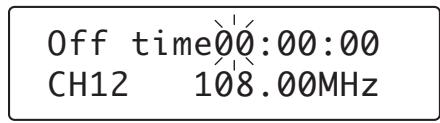
The on-time is set. "Off time" appears on the display, and the hour value flashes.
4 Turn the TUNING/SELECT knob to set the stop time (hour), and press the ENTER button.
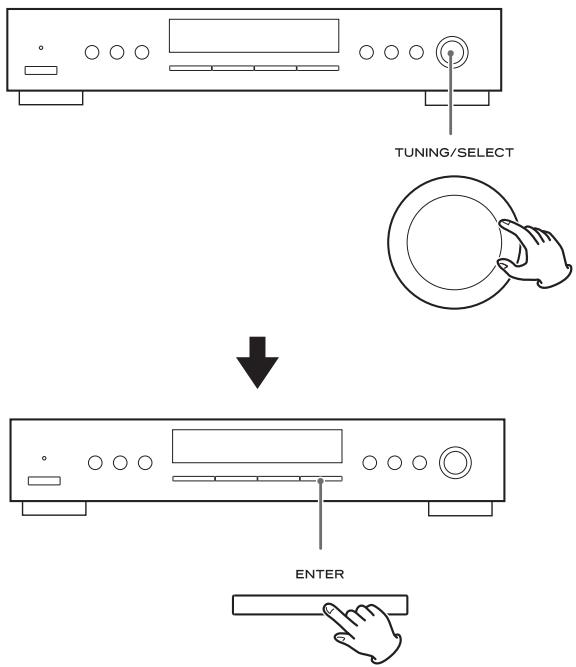
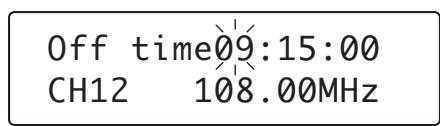
The hour is set, and the minute value flashes.
5 Turn the TUNING/SELECT knob to set the stop time (minutes), and press the ENTER button.
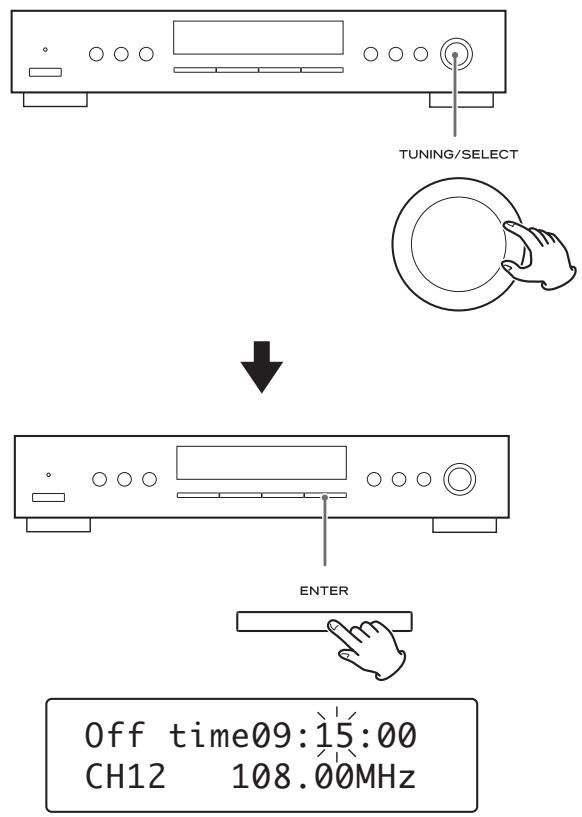
Now the timer setting is stored in memory.
Setting the Daily Timer 2
To turn on the timer
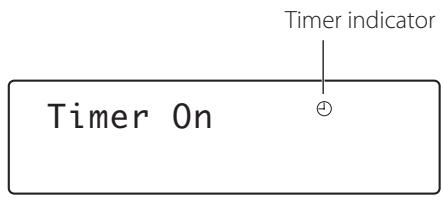
Press the TIMER button repeatedly until "Timer On" is displayed.
The timer indicator () is appeard right side on the display.
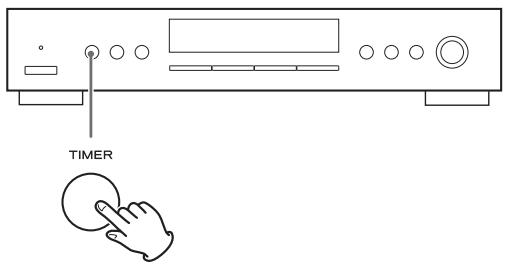
On A-R650, select "TUNER" by tuning the INPUT SELECTOR (or pressing one of the TUNER button of remote control unit of A-R50).
Press the STANDBY/ON button of the remote control unit of A-R650 to turn all the units standby.
- When the timer is turned on and the source is AM or FM, the timer indicator lights up on the display of this unit.
- When the on-time comes, all the units connected by remote control cords turn on together. On this unit the last station is turned in, and on the A-R650, the last source is selected.
- When the off-time comes, all the units connected by remote control cords turn into standby.
- After setting timer, it is possible to turn on or turn off the timer when in the standby mode by pressing timer button.
To turn off the timer
Press the TIMER button repeatedly until "Timer Off" is displayed.
Timer indicator () is disappeared on the display.
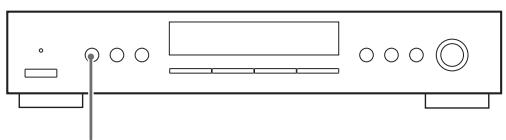
TIMER
Sleep timer
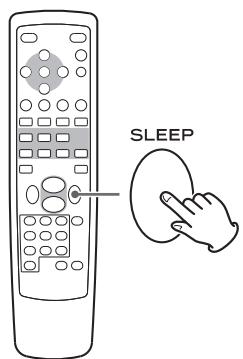
This function is available only when the REMOTE CONTROL jack of the T-R650 and the A-R650 are connected with a remote control connection cord.
The power can be switched off after a specified amount of time.
Press the SLEEP button repeatedly until desired time appears on the display.
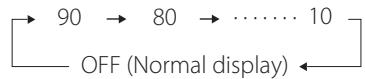
SL: 90 (80, 70 60, 50, 40, 30, 20 or 10)
The power will be switched off 90 (80, 70, 60, 50, 40, 30, 20 or 10) minutes later.
Normal display
The sleep timer is off.
- If you want to check the remaining time, press the SLEEP button once. The remaining time will be displayed for 2.5 seconds, and return to the normal display.
If you experience any problems with the unit, please take a moment to look through this chart and see if you can solve the problem yourself before you call your dealer or a TEAC service centre.
No power
Check the connection to the AC power supply. Check and make sure the AC source is not a switched outlet and that, if it is, the switch is turned on. Make sure there is power to the AC outlet by plugging another item such as a lamp or fan.
No sound
Check the connection to the amplifier.
Check the operation of the amplifier.
Cannot listen to any station, or signal is too weak.
Make sure the antenna is properly connected.
Tune in the station properly.
Install the antenna again after relocating it to a better reception position.
An external antenna may be required.
Sound is noisy.
Place the antenna as far away from a TV or a CD player as possible.
If a TV or a CD player is near the unit, turn it off.
Though the broadcast is stereo, it sounds monaural.
Press the FM MODE button.
If normal operation cannot be recovered, unplug the power cord from the outlet and plug it again.
To reset your unit to the factory default
If your unit is not working properly, it might help to reset it to the factory default.
This will clear your settings (including pass keys) and other user settings (preset stations etc.).
Hold on TIMER button and Band button for a few seconds.
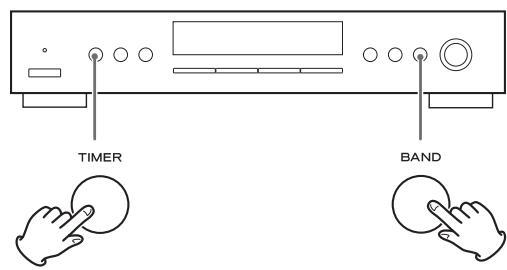
T-R650 will be factory default setting.
Specifications
FM Tuner
Tuning range 87.50 - 108.00 MHz (50 kHz steps)
Useable sensitivity. 6 dBμ
Harmonic distortion. 0.8% (Mono)
1.2% (Stereo)
Signal-to-Noise ratio 70 dB (Mono)
65 dB (Stereo)
Stereo separation 35 dB (1 kHz)
Preset stations 30
AM Tuner
Tuning range 522 - 1,629 kHz (9 kHz steps)
Usable sensitivity. 55 dBμ
Harmonic distortion. 1.5% (at 74 dBu)
Signal-to-Noise ratio 45 dB (at 80dB
Preset stations 30
General
Power Requirement.. AC 230 V, 50 Hz
Power Consumption 9 W (Standby: 0.5W)
Dimensions (W× H× D) 435x85x295mm
Weight (Net) 3.2 kg
Operating temperature +5^ + 35^
Operating humidity. 5% - 85% (no condensation)
Storage temperature. -20^ + 55^
Accessories
AM Loop Antenna x 1
FM Lead-type Antenna x 1
Stereo RCA cable x 1
Remote control connection cord x 1
Owner's Manual (this document) x 1
Warranty Card
- Design and specifications are subject to change without notice.
- Weight and dimensions are approximate.
- Illustrations may differ slightly from production models.
For European Customers
Information for Users on Collection and Disposal of Old Equipment and used Batteries
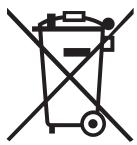
These symbols on the products, packaging, and/or accompanying documents mean that used electrical and electronic products and batteries should not be mixed with general household waste. For proper treatment, recovery and recycling of old products and used batteries, please take them to applicable collection points, in accordance with your national legislation and the Directives 2002/96/EC and 2006/66/EC.
By disposing of these products and batteries correctly, you will help to save valuable resources and prevent any potential negative effects on human health and the environment which could otherwise arise from inappropriate waste handling.
For more information about collection and recycling of old products and batteries, please contact your local municipality, your waste disposal service or the point of sale where you purchased the items.
Information on Disposal in other Countries outside the European Union
These symbols are only valid in the European Union. If you wish to discard these items, please contact your local authorities or dealer and ask for the correct method of disposal.
Note for the battery symbol (bottom right two symbol examples):
This symbol might be used in combination with a chemical symbol. In this case it complies with the requirement set by the Directive for the chemical involved.
13/14
Pb
Sommaire
Extinction differee. 36
Dépannage 37
31 types de programme PTY:
News (nouvelles) :
emissions sportives.
Education :
informations culturelles et educatives.
Drama (théâtre) :
Travel & Touring (voyages):
Cultures (culturas):
Varied Speech (hablados various):
Children's Progs (programas infantiles):
De frequently verandert in stappen (FM: sskip the blue words 50 kHz, AM: 9 kHz).
SL:90 (80, 70, 60, 50, 40, 30, 20 of 10)
De T-R650 schakelt na 90 (80, 70, 60, 50, 40, 30, 20 of 10) minutes automatisch uit.
Normaal display
This appliance has a serial number located on the rear panel. Please record the model number and serial number and retain them for your records.
- IMPORTANT SAFETY INSTRUCTIONS
- CAUTION
- Contents
- Thank you for choosing TEAC. Read this manual carefully to get the best performance from this unit.
- Before use
- Read this before attempting any operations.
- Maintenance
- CAUTION:
- A LINE OUT jacks
- B REMOTE CONTROL jack
- Note:
- AC power cord
- AM Indoor Loop Antenna
- AM Outdoor Antenna
- FM Indoor Antenna
- FM Outdoor Antenna
- A STANDBY/ON
- B TIMER
- C DAILY
- D TIME ADJ
- Display
- TUNING MODE
- FM MODE
- BAND
- TUNING/SELECT
- RDS
- K FILE
- L MEMORY
- M ENTER
- N Remote sensor
- Remote control unit (provided with A-R650)
- aON
- b STANDBY
- C
- Manual tuning UP DOWN button (AM/FM)
- d
- (Preset tuning UP DOWN button (AM/FM))
- e DIMMER
- How to turn the unit on or off
- Dimmer
- Manual tuning mode
- Auto tuning mode
- Preset tuning mode
- Stereo:
- Mono:
- Manual Preset
- Tune in the station you want to store.
- Presetting Automatically
- How to select preset stations (FM/AM)
- Select the preset tuning mode.
- Assigning the Names to the Preset Stations
- Available characters:
- Preset Tuning 1 (Remote Control)
- Press the ENTER button.
- Press the MEMORY button.
- Select a preset channel to store the station using the TUNING/SELECT knob.
- Press the MEMORY button.
- Select AM or FM by pressing the BAND button repeatedly.
- Press the or button to select the station you want to store.
- How to select preset stations
- PS (PROGRAM SERVICE)
- PTY(PROGRAMTYPE)
- RT (RADIO TEXT)
- TA (TRAFFIC ANNOUNCER)
- CT (CLOCK TIME)
- kind of PTY programmes:
- News:
- Current Affairs:
- Information:
- Sport:
- Education:
- Drama:
- Cultures:
- Science:
- Varied Speech:
- Pop Music:
- Rock Music:
- Easy Listening:
- Light Classics M:
- Serious Classics:
- Other Music:
- Weather & Meter:
- Finance:
- Children's Progs:
- Social Affairs:
- Religion:
- Phone In:
- Travel & Touring:
- Leisure & Hobby:
- Jazz Music:
- Country Music:
- National Music:
- Oldies Music:
- Folk Music:
- Documentary:
- Alarm Test
- Alarm-Alarm!
- Setting the Clock
- Press the TIME ADJ button.
- Turn the TUNING/SELECT knob to set the current hour, and press the ENTER button.
- Turn the TUNING/SELECT knob to set the current minute, and press the ENTER button.
- Setting the Daily Timer 1
- Press the DAILY button.
- Setting the Daily Timer 2
- To turn on the timer
- To turn off the timer
- Sleep timer
- Normal display
- No power
- No sound
- Cannot listen to any station, or signal is too weak.
- Sound is noisy.
- Though the broadcast is stereo, it sounds monaural.
- To reset your unit to the factory default
- Specifications
- FM Tuner
- AM Tuner
- General
- Accessories
- For European Customers
- Information for Users on Collection and Disposal of Old Equipment and used Batteries
- Information on Disposal in other Countries outside the European Union
- Note for the battery symbol (bottom right two symbol examples):
- Sommaire
- types de programme PTY:
- News (nouvelles) :
- Education :
- Drama (théâtre) :
- Travel & Touring (voyages):
- Cultures (culturas):
- Varied Speech (hablados various):
- Children's Progs (programas infantiles):
Brand : TEAC
Model : T-R650
Category : CD player