
ALEOR 300 - Cordless phone ORANGE - Free user manual and instructions
Find the device manual for free ALEOR 300 ORANGE in PDF.
User questions about ALEOR 300 ORANGE
0 question about this device. Answer the ones you know or ask your own.
Ask a new question about this device
Download the instructions for your Cordless phone in PDF format for free! Find your manual ALEOR 300 - ORANGE and take your electronic device back in hand. On this page are published all the documents necessary for the use of your device. ALEOR 300 by ORANGE.
USER MANUAL ALEOR 300 ORANGE
natural_image
Warning symbol with exclamation mark inside a triangle (no text or numbers)Charge handset(s) for 24 hours before use.
This equipment is not designed for making emergency telephone calls when the power fails
Aleor 300
text_image
Diagram showing electrical plug connections with labeled parts and directional arrows indicating connection points.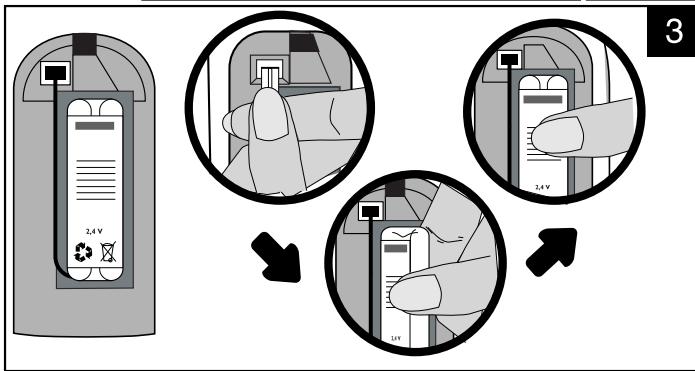
text_image
2.4V 3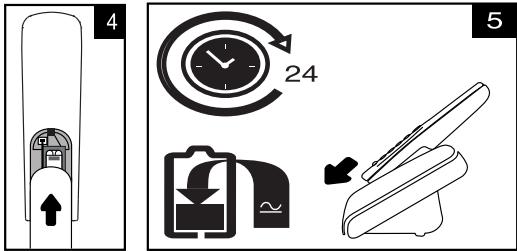
text_image
4 24 ~ 5Vice President & General Manager DECT & Home Telephony
Environment & Safety
◆ Safety information : This equipment is not designed for making emergency calls when the power fails. An alternative should be made available for access to emergency calls.
Power requirements : The product requires an electrical supply of 220-240 volts, single phase alternating current, excluding IT installations defined in standard EN 60-950.
♦ WARNING ! The electrical network is classified as dangerous according to criteria in the standard EN 60-950. The only way to power down this product is by unplugging the power supply from the electrical outlet. Ensure the electrical outlet is located close to the apparatus and is always easily accessible.
Telephone connection : The voltage on the network is classified as TNV-3 (Telecommunication Network Voltages, as defined in the standard EN 60-950). Following a power cut, date and time settings, as well as the call in progress are lost.
◆ Safety precautions : Do not allow the handset to come into contact with liquids. Do not open the handset or the base station. This could expose you to high voltages. Do not allow the charging contacts or the battery to come into contact with conductive materials.
◆ Environmental care : Please remember to observe the local regulations regarding the disposal of your packaging materials, exhausted batteries and old phone and where possible promote their recycling.
- You can install your product immediately and start using the phone after charging it for 24 hours.
- In case you need to change the battery pack, always use a NiMH AAA 600 x 2 rechargeable battery pack.

multihandset packs
The information included in this manual is also valid if you have bought an Aleor 300 multihandset pack.
Philips has marked the battery and packaging with standard symbols designed to promote the recycling and appropriate disposal of your eventual waste.

Batteries should not be disposed of with general household waste.

A financial contribution has been paid to the associated national recovery & recycling system.
text_image
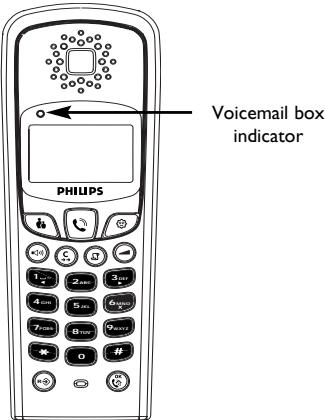
Voicemail box indicator PHILIPSAleor 300
Keypad

Talk key
p 5


Phonebook keys
p 6

Call log key
p 6

Redial list & correction key
p 5

Validation and intercom key
p 8

Loudspeaker key
p 5

Programming and recall type key
p 9

Volume key
p 5
Screen Icons
Handset ringer settings p 9
Handset registering / unregistering p 10
f Technical settings p 10
Battery charge status : ➕️ ⇌️ charge in progress - ⚙️ fully charged - ⏰ low p 4
Call log / Voicemail Box p 6
Loudspeaker p 5
Friend phonebook p 6
Call in progress - Internal call p 8
Family phonebook p 6
Y Base / Handset link p II
text_image
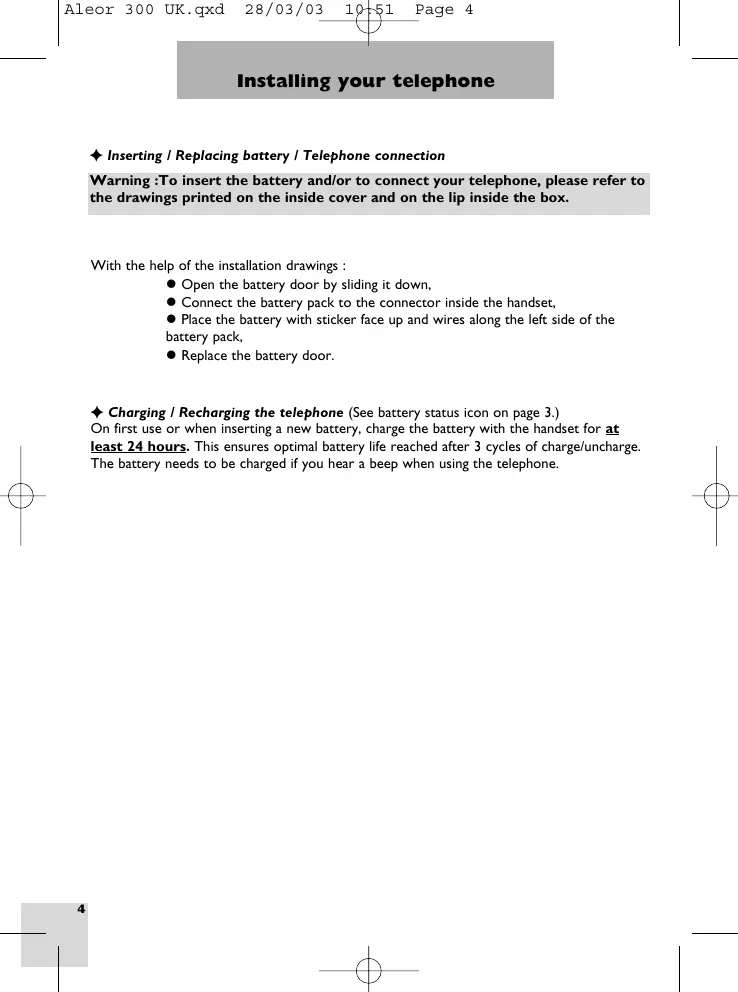
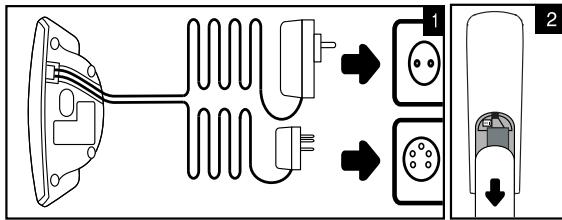
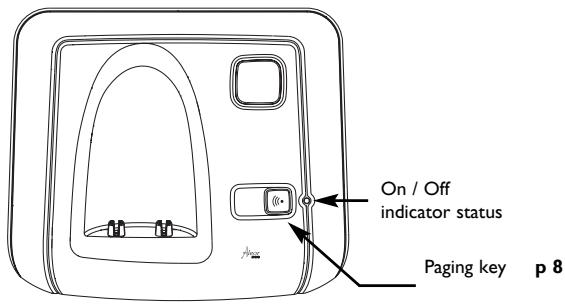
On / Off indicator status Paging key p 8◆ Inserting / Replacing battery / Telephone connection
Warning :To insert the battery and/or to connect your telephone, please refer to the drawings printed on the inside cover and on the lip inside the box.
With the help of the installation drawings :
- Open the battery door by sliding it down,
- Connect the battery pack to the connector inside the handset,
- Place the battery with sticker face up and wires along the left side of the battery pack,
- Replace the battery door.
♦ Charging / Recharging the telephone (See battery status icon on page 3.)
On first use or when inserting a new battery, charge the battery with the handset for at least 24 hours. This ensures optimal battery life reached after 3 cycles of charge/uncharge.
The battery needs to be charged if you hear a beep when using the telephone.

Making a call
◆ Answering a call / Hanging up


answer the call.
To end the conversation, press the key again or replace the handset on the base station.
◆ Calling directly


dial the phone number.
♦ Predialling the number before calling
Dial the phone number


◆ Calling from a phonebook

or


or


to scroll through the list
♦ Adjusting the volume (earpiece or loudspeaker)


Using handsfree on the handset
♦ Activating / Deactivating the loudspeaker


/

Warning : Handsfree activation could suddenly increase the volume in the earpiece to a very high level. Make sure the handset is not too close to your ear.

flashes
on an
incoming call.
To correct entries use

3 volume levels are available for both the earpiece and the loudspeaker.

Using the Redial list and Correction key
◆ Accessing / exiting the redial list


or

/
to scroll through the redial list

to exit
◆ Calling a number from the redial list


or


to scroll through the redial list
♦ Deleting a number from the redial list


or


to delete the current entry
to scroll through the redial list
The redial list contains the last 5 numbers called : from the latest to the oldest.
♦ Storing one of the redial list numbers into one of your phonebooks

flowchart
graph LR
    C["C"] --> 1["1"]
    1 --> or["or 3DEF"]
    or --> 3["3DEF"]
    3 --> 2["or"]
    2 --> beep["beep"]
    beep --> enter["enter"]
    enter --> OK["OK"]
to scroll through the redial list the name
◆ Number correction

corrects :
● a digit when predialling,
● a digit or a character when entering names in the phonebooks.
A long press on Ⓒ aborts any procedure in progress.


Creating and changing phonebook entries
The telephone has two phonebooks :

A 20-entry family phonebook (see VIP feature p.9)

A 20-entry friends phonebook. (see VIP feature p. 9)
♦ Creating an entry
Each entry contains a name (max.10 characters) and a number (max. 16 digits).
I. Enter the phone number and press 📁 or 🌐.
Note : To insert a pause, long press on # .
- Enter the name and press OK to validate.
◆ Changing an entry (name)

flowchart
graph LR
    A["or"] --> B["1"]
    B --> C["or 3DEF"]
    C --> D["C"]
    D --> E["C"]
    E --> F["OK"]
to scroll through the list
to modify the name
◆ Changing an entry (number)

flowchart
graph LR
    A["or"] --> B["1"]
    B --> C["3"]
    C --> D["OK"]
    D --> E["C"]
    E --> F["C"]
    F --> G["OK"]
to scroll through the list
to modify the old number
♦ Deleting an entry

flowchart
graph LR
    A["or"] --> B["1"]
    B --> C["or"]
    C --> D["3 DEF"]
    D --> E["OK"]
    E --> F["6 MNO X"]
    F --> G["OK"]
to scroll through the list
to delete the entry

Using the call log
This feature is available if you have registered to the caller identification service with your operator.
The call log stores the last 10 external calls received :
- answered calls
* Subject to a subscription with your operator.
You can also create an entry from the redial list and the call log*.
Press

or

to
access or exit the phonebooks.
- unanswered calls
- Voicemail box service information*
* Subject to a subscription with your operator..
◆ Accessing / exiting the call log


or

/

to exit
◆ Consulting the call log
The screen can either display :
● the caller's number*
- the caller's name (if known in the phonebook, or if sent by the network)*
● stars if it is an unidentified call**
● dashes if non recognised number
You can display, the phone number, the time and date of the call by
pressing OK
Press OK to return to consulting mode.
* Subject to a subscription with your operator for the Caller Line Identification and/or Name Display services.
** Withheld caller identification
◆ Calling a number from the call log


or


to scroll through the log
♦ Deleting an entry from the call log


or


beep


to exit
♦ Storing one of the log numbers into your phonebooks


or


or

beep

enter


to scroll through the log
the name
Note : If the handset indicator and the 🏠 icon keep on flashing after having
consulted all the messages on your Voicemail box and after having read all the call log entries, you can switch them off by deleting the call log entry which corresponds to the Voicemail box message.

and the
handset
indicator flash if there is a new message on the
Voicemail box.
Time and date depends on the network.

is
displayed if a message has been left on the operator mail box.
This function can only be used with a multi-handset configuration. It allows you to make free internal calls and transfer external calls from one handset to another.
◆ Internal call

short press to call all the handsets in idle mode.

long press, enter the handset number (1 to 4) to call the selected handset in idle mode.
* If the handset does not belong to the Aleor 300 range, this function may not be available.
Press OK or to answer or hang up the internal call.
◆ Fast call transfer
During a call in progress you can transfer the call without waiting for the other handset to pick up: OK → 📞.
All the handsets ring.
◆ Call transfer to a specific handset
During a call in progress you transfer the call to a specific handset :
Long press on OK → enter the handset number (1 to 4) → 📞
Intercom & call transfer is only possible with handsets* registered to the same base station.
During transfer, the person on hold will hear music.
4 handsets can be registered to the same base station.

Paging
This feature allows you to locate the handset(s).
Press ☐ on the base station. Press any key on the handset to stop ringing once relocated or press ☐ again.
All the subscribed handsets ring.

Programming the phone
To enter the programming mode press

Icons representing the menus will then be displayed on the screen :

Volume and melody settings (VIP melodies*)

Handset registering

Other settings
Once the menu is selected with in the selected menu.

and

keys, press

to enter
Use

and

to
navigate within the menus.
Icons : flashing to select the menu and steady on once entered in the menu.
Note : Each menu has one or several options. The options will appear on the screen one after the other by pressing OK. To exit the programming mode at any time press R or C (long press).

Handset ringer Settings


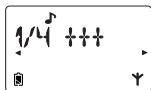
◆ Ringer Volume (option I out of 4 :1/4)
Scroll through the different volume settings using

or

keys. Press

to validate your choice.
◆ Handset Melody (option 2/4)
Scroll through the 7 different melodies using

or

keys. Press

to validate.
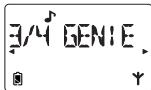
◆ Friends phonebook (VIP) Melody* (option 3/4)
Scroll through the 7 different melodies using

or

keys. Press

to validate.
♦ Family phonebook (VIP) Melody* (option 4/4)
Scroll through the 7 different melodies using

or

keys. Press

to validate.
text_image
1/4 +++ 圆 Y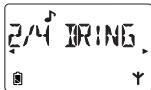
text_image
2/4 IR!ING.Y
text_image
3/4 GENIE.
text_image
4/4 PARTYY
A VIP melody can be associated to each phonebook. When ringing, the VIP melody helps you identify the caller's group.
is blinking when selecting the friends phonebook melody.
is blinking when selecting the family phonebook melody.
* Subject to a subscription with your operator to the Caller Line Identification service.

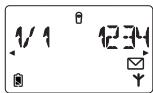
Handsets registering / unregistering (💡 ➤ 🔒 ➤ ⏻)
4 handsets can be registered to the base station. A handset can only be associated with 1 base station.
To register another handset, first enter registration mode by unplugging and plugging back in the power adapter to the electricity supply.
text_image
1/1 12:34Once the 📄 menu is selected, enter the RC* code written under the base and press OK to confirm.
Warning : If you wish to associate another handset than a Aleor 300 to the Aleor 300 base stations, make sure that these handsets are GAP compliant otherwise it will not operate properly.
◆ To unregister the handset you use

flowchart
graph LR
    A["R"] --> B["9WXYZ"]
    B --> C["4GHI"]
    C --> D["enter the RC code*"]
    D --> E["OK"]
◆ To unregister all the handsets (except the handset you are using)

flowchart
graph LR
    A["R"] --> B["9WXYZ"]
    B --> C["5JKL"]
    C --> D["enter the RC code*"]
    D --> E["OK"]
Warning : Once unregistered, the handset is no longer operational.
*RC code (Registration Code) is written under the base.

Technical settings (country dependent)
To enter the following settings :

flowchart
graph LR
    A["R"] --> B["1"]
    B --> C["or"]
    C --> D["3"]
    D --> E["或"]
    E --> F["OK"]
To scroll through the menus
Press ⬇ to exit the programming option.
◆ Changing recall type (flash setting)
The use of some services accessed with Ⓗ (call waiting, call forward...) will depend on the flash setting (Short/Long) according to your installation type (Public, PABX).

text_image
1 or 3 DEF to choose between Short or Long → OKShort. Long.
♦ Telephone troubleshooting.....
| PROBLEMS | CAUSES | SOLUTIONS |
| - No dialling tone when pressing [8C×7] . | - The base station is not properly connected to electricity or to the telephone sockets.- Too far from the base station- Battery pack is low (low battery icon is displayed). | - Check the connections.(inside cover).- Move closer to the base- Charge battery pack. (inside cover). |
| - icon is blinking. | - The handset is not registered.- The handset is out of range. | - Register the handset to the base station. (p 10)- Move closer to the base station. |
| - When the handset is placed on the charging unit, no beep is heard. | - The handset is not placed correctly on the base station charging unit.- Charging contacts are dirty. | - Take the handset off the base station and put it back again.- Clean them with a clean and dry cloth. |
| - Battery icon remains empty although the handset has charged for 24 hours. | Handset battery pack is defective. | Please contact your PHILIPS dealer in order to purchase new rechargeable battery pack. |
| - No symbol on the display. | Battery pack is uncharged. | Make sure your product is plugged in. (inside cover).Charge battery pack. (inside cover). |
| - A phonebook entry has not been memorised. | The phonebook you wish to use is full. | Delete some entries to free memory space. |
| - Bad audio quality (crackles, muted, echo, etc.). | - Interference from nearby electrical appliance.- Base station installed in a room with thick walls.- You are using the handset too far from the base station. | - Try to plug the base station in elsewhere.- Install the base station in a different room.- Move closer to the base station. |
| - Caller display does not work. | Service not activated. | Check your subscription with your operator. |
♦ Declaration of Conformity :
We,
PCE
DECT & Home Telephony
Route d'Angers
72081 Le Mans Cedex 9
France
Declare that the product Aleor 300 is in compliance with ANNEX III of the R&TTE-Directive
1999/5/EC and then with the following essential requirements :
Article 3.1 a : (protection of the health & the safety of the user)
EN 60950 (2000)
Article 3.1 b : (protection requirements with respect to electromagnetic compatibility)
ETSI EN 301 489-6 V1.1.1 (09/2000) & ETSI EN 301 489-1 V1.3.1 (09/2001)
Article 3.2 : (effective use of the radio spectrum)
EN 301 406 (2001)
The presumption of conformity with the essential requirements regarding Council Directive 1999/5/EC is ensured.
Date : 27/03/03
Le Mans

Vice President & General Manager DECT & Home Telephony
The product can only be connected to the analogue telephone network in the countries indicated on the back cover of this manual.
The CE marking certifies compliance with technical regulations in accordance with the Directive 1999/5/EC for the safety of the user, electromagnetic perturbations and for radio spectrum.
© 2003
Philips Consumer
Electronics
DECT & Home Telephony
All rights reserved
Printed in France
www.philips.com


F
3111 285 21051
GB