
HEAVY DUTY 2024.11.11 - Washing machine BLAUPUNKT - Free user manual and instructions
Find the device manual for free HEAVY DUTY 2024.11.11 BLAUPUNKT in PDF.
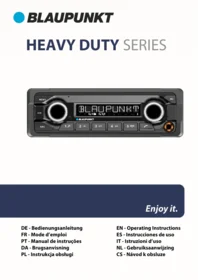


| Product type | Car radio with CD player, Bluetooth and DAB/DAB+ radio (depending on model) |
| Brand | BLAUPUNKT |
| Model | HEAVY DUTY 2024.11.11 |
| Analog radio | FM 87.5 - 108 MHz and medium wave (AM) |
| Digital radio | DAB/DAB+ with frequency range 174.928 - 239.200 MHz (channels 5A to 13F), depending on model |
| USB playback | Front and rear USB port, compatible with FAT16/FAT32/exFAT, formats MP2, MP3, WMA, APE, FLAC, AAC, MP4, WAV |
| CD playback | Audio CD and CD/RW with MP3 and WMA files, depending on model |
| Bluetooth connectivity | Audio streaming (A2DP), hands-free kit (HFP), phonebook download (PBAP) |
| AUX input | 3.5 mm stereo jack, front or rear depending on model |
| Microphone input | 6.3 mm mono jack, on models without CD player |
| Preamp outputs | Front/rear RCA outputs and dedicated subwoofer output |
| Display | LCD screen with adjustable backlight, customizable colors |
| Power supply | 12 V or 24 V depending on version, current consumption < 10 A |
| Mounting | 1-DIN format, installation in a standard mounting slot with supplied frame |
| Included accessories | External microphone, ISO A/B cable, DIN-ISO antenna adapter, removal tool |
| Safety | Automatic shutdown after 1 hour of operation without ignition, automatic mute |
| Cleaning | Use only a dry, soft, lint-free cloth |
| Warranty | Subject to applicable legal provisions and dealer warranties |
| Service | Contact via Blaupunkt dealer or www.blaupunkt.com |
Frequently Asked Questions - HEAVY DUTY 2024.11.11 BLAUPUNKT
User questions about HEAVY DUTY 2024.11.11 BLAUPUNKT
0 question about this device. Answer the ones you know or ask your own.
Ask a new question about this device
Download the instructions for your Washing machine in PDF format for free! Find your manual HEAVY DUTY 2024.11.11 - BLAUPUNKT and take your electronic device back in hand. On this page are published all the documents necessary for the use of your device. HEAVY DUTY 2024.11.11 by BLAUPUNKT.
USER MANUAL HEAVY DUTY 2024.11.11 BLAUPUNKT
EN - Operating Instructions
PTY TYPES (PTY LISTE):
PTY LANG (PTY SPRACHE):
DAB SERVICE SCAN (DAB SERVICE SUCHE):
DIAL NEW NUMBER (NEUE NR. WAEHLEN)
DELETE P-BOOK (T-BUCH LOESCHEN):
ANTENNA/SCHALTAUSGANG (REMOTE):
1. Car radio – controls


① MENU button: Short press: Opens/closes the menu (see chapter SETTINGS | MENU) Long press: Recording with memory function (P-SCAN) for VHF/DAB
② Left button/knob: Rotation: Volume increase/decrease Short press: Switches on the car radio during operation: Mute or pause playback, depending on the sound source Long press: Turns off the car radio
③ Hands-free system microphone It is active only when no external microphone is connected ▶ Never insert objects into the hole, this is not a RESET button!
④ IR sensor: Receiver for optional infrared remote control units.
⑤ LC display: Displays information including the current station, track, time or setting options
⑥ CD slot (models with a CD drive): For inserting CD discs
Only commercially available CDs can be used (no CD singles, no CDs with adapters, no CDs with different shapes)
⑦ Right button/knob: Rotation: Depending on the source and the function mode, search, station change, track change, rewind, etc. In the menu, switches between setting options Short press: Switches over to the second or third function.
If no command is entered for approximately 15 seconds, the standard function is reactivated. In the Option selection/Option confirmation Long press: Track or station playback (SCAN) function (depending on the selected source) In the menu, in the USB playback mode, etc., delete one step/level back/input
⑧ MIC button (models without CD drive): Short press: Activates/deactivates the microphone input Long press: Microphone gain setting EJECT button, ejects CDs (models with CD drive): Ejecting the inserted CD
⑨ USB port protected against dust: Dust cover folding to the right to open. USB memory stick or Apple device connector used for music playback
⑩ Microphone/AUX connector (model-dependent): Microphone: 6.3 mm, mono (with dust cover) AUX: 3.5 mm, stereo
⑪ Telephone handset: "Accept" button: Short press: Answering calls/number dialling Long press: Programmable softkey option (see BLUETOOTH LOUDSPEAKER DEVICE chapter) "End call" button: Short press: End/reject a call Long press: ./.
⑫ Station buttons: Short press: Selects a station or a stored telephone number or the displayed secondary function/special function such as track searching (browsing), play/pause, repeat function, shuffle playback, depending on the selected source Long press: Memory function for radio stations and telephone numbers
⑬ SRC button: Short press: Audio source selection, toggles between the individual sound sources.
Some sound sources can be deactivated, see chapter SETTINGS | MENU Long press: Source-specific functions, Travelstore in VHF, station list update in DAB.
⑭ Decorative surrounding frame covering holes for the unlocking tool, see chapter ASSEMBLY | REMOVAL | CONNECTIONS
⑮ DIS button: Short press: Switches the display between different information such as time, station name, radio text, song information, etc. depending on the selected source Long press: Toggling between the display brightness settings (if the brightness is set to MANUAL in the menu, see chapter "SETTINGS | MENU")
2. Controls – remote control (optional)
The car radio can be operated remotely using the remote control sensor built into the front end. This is possible using the remote control available as an accessory for the car radio (order number 1 101 402 001 001) or the older Blaupunkt remote controls (RC-08, RC-09, RC-10, RC-10H, RC-12H).
Visual contact between the sensor in the radio and the transmitting eyelet of the remote control unit must be ensured. Please note that the steering wheel-mounted remote control may not work properly depending on its position.

① On/off button:
Switches the car radio on/off.
Use the remote control to turn on the car radio only when the ignition is active. This function increases the resting current consumption of the car radio and thus it cannot be used without the ignition active in order to protect the vehicle battery.
② Volume/mute or pause buttons, depending on the audio source
③ Multi-function buttons to control source-specific functions.
④ SRC (source/audio source):
Audio source selection: toggles between the individual audio sources.
Some sound sources may be deactivated, see chapter SETTINGS | MENU.
⑤ DIS button:
Switches the display between different information such as time, station name, radio text, song information, etc. depending on the selected source
⑥ MENU button:
Opens/closes the menu
(see chapter SETTINGS | MENU)
⑦ Memory buttons 1-6:
Select a station or a stored telephone number or the displayed secondary function/special function such as track search (browsing), play/pause, repeat function, shuffle playback, depending on the selected source
Not all functions/memory are available depending on the model
⑧ Phone buttons
Call answering/dialling and ending/rejecting a call.
3. Congratulations on your purchase
Congratulations on the purchase of your new Blaupunkt car radio. We hope you will enjoy using it.
Before using the car radio for the first time, read these user manual carefully to familiarise yourself with its functions.
However, if unexpected problems are experienced, consult this User Manual to see if you can solve them.
Please also read the TROUBLESHOOTING section at the end of this User Manual.
Your Blaupunkt dealer and Blaupunkt Service will be happy to help you if you cannot solve a problem. Our contact information can be found at www.blaupunkt.com.
This User Manual may apply to different models with different features. Some features and options may not be available in your unit or may vary between specific models.
We reserve the right to introduce technical changes to improve the car radio, which may result in differences compared to the features specified in this User Manual.
Contents
- Car radio – controls
- Controls – remote control (optional)
- Congratulations on your purchase
- Safety rules
- General Information | Package Contents | Software Update
- Switching On/Off | Adjusting Volume
- Analogue radio: VHF/Medium Wave (FM/AM)
- Digital radio: DAB/DAB+ (depending on the model)
- Playback from external devices/media: USB
-
Playback from external devices/media: CD (depending on model)
11/ Playback from external devices/media: iPod/iPhone -
Playback from external devices and media: AUX
- Playback from external devices/media: Microphone (depending on model)
- Bluetooth® Connection Setup
- Bluetooth® Audio Streaming
- Bluetooth® hands-free system
- Sound settings
- Clock
- Steering Wheel Remote Control (SWC)
- Settings | Menu
- Installation | Removal | Connections
- Useful information | Technical data
- Troubleshooting
4. Safety rules
Safety rules
The car radio has been manufactured according to the current state of the art and specified safety guidelines. However, hazards may occur if the safety instructions in this User Manual are not followed.
This manual is intended to familiarise the user with the functions of the car radio.
- Read this User Manual carefully before using your car radio.
- Keep the User Manual in a place that is accessible to all users.
- When passing the car radio on to someone else, include this User Manual.
- Follow the manuals of the devices (if any) used together with the car radio.
- If a problem occurs, stop using the unit.
Symbols
The following symbols are used throughout this User Manual.

WARNING! Warns of injuries

CAUTION! Warns of the risk of damage to the DVD/CD drive or media in use

WARNING! High volume warning

The CE marking certifies conformity with EU directives
Hint. Specific features which should be observed when using the car radio.
- List
Traffic safety
Follow the traffic safety guidelines provided below.

Use the car radio in a way which never prevents you from operating your motor vehicle safely.
Using the car radio functions while driving can distract you from the situation on the road and lead to a serious accident!
Avoid all activities distracting from the situation on the road or operation of the vehicle while driving. To use such functions, stop in a suitable place, apply the handbrake and operate the car radio while the vehicle is stationary.

Always listen to the radio at moderate volume to protect your hearing and be able to hear sound warning signals (like police horns). During muting intervals (e.g. when toggling through the sound sources), no change in volume adjustment can be heard. Do not increase the volume during these intervals.
General safety precautions
Do not attempt to modify or open the car radio. There are no user-serviceable parts inside. Do not insert any objects into the openings of the car radio or screw unsuitable screws into the housing. Devices with a CD/DVD drive use a Class 1 laser that can damage your sight.
Intended use:
This car radio is intended for installation and operation in a motor vehicle with 12 V or 24 V supply voltage and must be installed in a DIN slot. Observe the operating limits of your car radio. The car radio is intended for private, non-commercial use.
Have repairs and, if necessary, installation done by a professional.
5. General Information | Package Contents | Software Update
Declaration of Conformity
Blaupunkt Competence Center Car Multimedia Evo Sales GmbH hereby declares that the car radio complies with the essential requirements and other relevant provisions of Directive 2014/53/EU and the RoHS Directive 2011/65/EU. The Declaration of Conformity can be found on the Internet at www.blaupunkt.com. If it is not available on the website, please contact us.
Trademark notice
All other trademarks and their logos, brand or company names have been used for identification purposes only and are the property of their respective owners.
Cleaning
Solvents, cleaning and abrasive agents, as well as cockpit sprays, air fresheners and plastic care products can contain substances that will damage the surface of your car radio. Use only a dry or slightly damp, lint-free and soft cloth to clean the car radio.
Disposal

Do not dispose of the used device with the household waste! Use the available waste return and collection systems to dispose of your old device and its accessories.
Package contents
The package includes the following items:
- Car radio
- User Manual
- External microphone
- Dust cover for the microphone socket
• ISO A/ ISO B connecting cable
• DIN-ISO antenna adapter - Assembly frame - removal tool
Recommended or required accessories (not included in the scope of supply):
• Infrared remote control: 1 101 402 001 001
• RC-24 wired remote control: 2 010 024 000 000
• DAB windscreen antenna: 2 006 021 000 000
• Active/passive antenna splitters
- Vehicle-specific adaptor/mounting frame
For more information on the accessories suitable for your vehicle, contact your specialist dealer or the vehicle manufacturer.
Software update
The car radio software can be updated from external storage media. Update instructions and further information are included with the update. Updates can be obtained from the technical support department.
Please provide as many details about issues encountered with your radio as possible when requesting an update from Blaupunkt. Technical support also requires information about the currently installed software version (see chapter SETTINGS | MENU).
If the car radio is working properly, an update is not necessary; any update also carries some risk of errors introduced during it. Despite careful testing, on rare occasions new or different bugs may appear or functions may be altered in an undesirable way.
Do not upload software from third-party sources to the car radio, as this may render the device inoperable.
- Individual options and functionalities of the car radio may be different from those specified in the manual, as they may have been changed, added or even removed as a result of future development of the software. This is not a defect nor a reason for complaint regarding the radio.
6. Switching On/Off | Adjusting Volume
Switching on/off using the button/knob
To switch on the radio, briefly press the left button/knob.
To switch off the radio, press and hold the left button/knob for one second.
Remember that it may take a few seconds after turning the radio on before it can be operated and turned off again, as the internal start processes are still active in the background.
The radio may also be switched on with ignition off – the display will briefly show 1 HOUR ON/1
STUNDE.
The radio automatically shuts down after one hour to protect the vehicle battery.
The automatic shut down function can be disabled if, for example, the ignition plus is not available in the vehicle. However, this involves the risk of the car radio draining the battery if the user forgets to switch it off. See chapter SETTINGS | MENU.
Turning on/off using the vehicle ignition
If the ignition is turned off while the unit is turned on, it will automatically turn off and on again the next time the ignition is turned on.
If the car radio was turned off by pressing the left button/knob, it will remain permanently turned off after the ignition is turned on/off, until it is manually turned on again.
If this feature does not work as described, the car radio has not been properly connected.
During an active call, the device delays switching off until the call ends.
Volume adjustment
The volume can be adjusted using the left button/knob, from 0 (no sound) to 50 (full volume).
The unit displays the volume level set for a few seconds after a change.
Depending on the setting, the car radio saves the last volume or the preset volume when it is turned on again (see chapter SETTINGS | MENU).
Setting the playback volume:
During music playback, turn the left button/knob to set the volume.
Setting the volume of traffic announcements: During a traffic announcement, turn the left button/knob to change the volume; this value is automatically stored and can be changed in the settings (see chapter SETTINGS | MENU).
Traffic announcements should be given priority, see chapter CAR RADIO CONTROLS or SETTINGS | MENU
Setting the Bluetooth ® (telephone) volume: During a telephone call, turn the left button/knob to set the volume. This value is stored automatically and can be changed in the settings (see chapter SETTINGS | MENU).
Additionally and if needed, the call volume of the and the ringtone volume can also be adjusted using a cell phone – refer to the phone manufacturer's manual.
- Microphone sensitivity can also be adjusted, see chapter SETTINGS | MENU.
Muting the car radio (Mute)
Briefly press the left button/knob to mute the unit or unmute with the last used volume setting. The car radio displays MUTE (STUMM). Media playback is paused and resumes when the mute function is cancelled.

Always listen to the radio at moderate volume to protect your hearing and be able to hear warning sound signals (police, emergency services, fire brigade). During muting intervals (e.g. when toggling through the sound sources), no change in volume adjustment can be heard. Do not increase the volume during these intervals.
7. Analogue radio: VHF/Medium Wave (FM/AM)
Analogue radio signal transmission paths, such as FM radio from 87.5-108 MHz, are the 'classic' broadcast frequencies, widely used throughout the world.
Stations are broadcast in analogue (FM= frequency modulation, MW/ AM= amplitude modulation).
With weak or fluctuating signals, the stereo sound fades with VHF radios, stations are played in mono and the reception is noisy.
Stations can often be received on different frequencies, depending on the region. Depending on the reception quality, car radios can automatically change frequency if the station provides the necessary RDS information and the transmission signals are of sufficient strength to receive and process RDS information. Information such as station name, radio text, content and time can also be transmitted via RDS.
Playing VHF/MW radio
Use the SRC button or the FM button to select one of the FM1, FM2, FMT, AM or AMT memory levels.
Some memory levels are inactive depending on the setting; for example, only the FM1 memory level is active. For information on customisation, see chapter SETTINGS | MENU.
There are 5 presets available on each memory level.
Tuning into radio stations
Station tuning can be started by briefly turning the right button/knob. The tuning stops automatically at the next station found.
Tuning sensitivity can be set in the settings, see chapter SETTINGS | MENU.
A frequency can also be set manually if the broadcast signal from the desired station is very weak and the tuning fails to stop at the expected frequency. To do this, briefly press the right button/knob once. The display will show MANUAL. Turn the right button/knob until the desired frequency is set.
If to button is pressed for approx. 15 seconds, the car radio will resume automatic tuning and the display will briefly read AUTO.
PTY Search
If the PTY (programme type | MENU) function is enabled (see chapter "SETTINGS"), the PTY function can also be selected by pressing the right button/knob.
By turning the right knob, stations with the appropriate PTY code can be searched (for PTY type pre-selection, see chapter SETTINGS | MENU).
If to button is pressed for approx. 15 seconds, the car radio will resume automatic tuning and the display will briefly read AUTO.
Storing and selecting saved radio stations
You can save your favourite stations in the station memory using the 1-5 buttons.
Each memory level can store up to 5 stations. Set the desired station as described above. To save the station, press the memory button for more than one second, a beep will confirm that the station has been saved. Release the button again after the beep.
By briefly pressing one of the memory buttons 1-5, a previously stored station can be called up.
Additional functions
Automatic station storage presets (Travelstore)
In the memory levels marked with T (FMT, AMT), the user can store up to 5 stations with the best signal strength using the automatic tuning function (Travelstore).
To do this, select the desired memory level using the SRC button and press the SRC button again for more than one second; the display shows T-STORE until the process is complete.
If you run Travelstore at a different memory level the system will automatically switch to the
Travelstore memory level and automatically activate it in the settings if necessary. Only the stations at the Travelstore memory level are saved/changed.
Playing saved stations (P-SCAN)
You can play all stations at the selected memory level.
To do this, press the MENU button for more than one second, the display will show P-SCAN and a flashing memory location/radio station.
P-SCAN continues until the function is cancelled by pressing any button.
The SCAN time can be adjusted in the menu, see chapter SETTINGS | MENU
Playing the available stations (SCAN)
Press and hold the right button/knob for more than one second and the display will show SCAN and the current station. SCAN continues until the function is cancelled by pressing any button.
The SCAN time can be adjusted in the menu, see chapter SETTINGS | MENU
Display change
By pressing and holding the DIS button, the display can be switched between various information:
- Station designation
- PTY (programme type)
- Radio text
• Memory space/memory level + frequency
• Memory space/memory level + time
The availability of display functions depends on the selected band, station and reception quality. As a general rule, the unit always displays the frequency, station name, followed by information defined using the DIS button when the station is changed.
Additional features or options:
See chapter SETTINGS | MENU.
8. Digital radio: DAB/DAB+ (depending on the model)
Digital Audio Broadcasting (DAB or DAB+) is the digital successor to analogue VHF broadcasting. Digital transmission (DAB is based on MPEG-1 Audio Layer 2 (MP2), the newer DAB+ is based on HE AAC v2) results in some differences compared to familiar analogue VHF radio:
Several stations are digitally encoded in one channel (one frequency) and broadcast in a compressed form - so-called MULTIPLEXES (also called programme packages).
The radio stations in a specific MULTIPLEX are called SERVICES (= radio stations and/or data services).
In Germany, for example, MULTIPLEXES are available regionally from public broadcasters; moreover, there are currently two MULTIPLEXES that can be received throughout Germany:
DR DEUTSCHLAND and ANTENNE DE.
MULTIPLEXES can often be received in the same channel throughout the broadcasting area through transmitters in different locations (shared RF network) and there is no need to change a channel to enjoy continued service. This gives more room for additional program providers. The stations do not generate noises known from VHF; a station is either heard with a consistent quality or is not audible at all when error correction is no longer able to reconstruct the signal, this is accompanied by short, so-called "gurgling" or "chirping" noises.
Playing DAB/DAB+ radio
Use the SRC button to select one of the memory levels DAB1, DAB2 or DAB3.
Some memory levels are inactive depending on the setting; for example, only the DAB1 memory level is active. For information on customisation, see chapter SETTINGS | MENU.
There are 5 presets available on each memory level.
Stations can be selected using the selection modes described below using the right button/knob; you can switch between selection modes by briefly pressing the right button/knob.
If no signal is input for approximately 15 seconds, the car radio returns to the standard mode
The standard mode can be set using the DAB MODE(DAB MODUS) option, see chapter SETTINGS | MENU.
The car radio is factory set to the selection mode LIST(LISTE).
LIST (LISTE) selection mode:
By turning the right button/knob, you can scroll up (clockwise) or down (counterclockwise) in alphabetical order through all the stations known from the car radio. Once the desired station has been found and confirmed by pressing the right button/knob or without further data input, the radio will switch to the selected/displayed station.
The station list can be updated by pressing and holding the SRC button or selecting the menu option DAB SERVICE SCAN(DAB SERVICE
SUCHE). The car radio will display SCAN and update the list of stations, unavailable or incorrect stations will be removed from the list and newly found stations will be added. Do not interrupt the SCAN. This does not affect the station memory.
The list mode shows all stations in alphabetical order that are known to the car radio.
Stations which are not currently available can also be displayed. The display will show a NO SIGNAL (KEIN SIGNAL) message. Stations may also be displayed twice if they are broadcast in different channels or gaps are present in the list.
SERVICE (SENDER) selection mode:
By turning the right button/knob, you can scroll through the stations in the current multiplex.
Once the desired station has been found and no further data is input, the radio will switch to the selected/displayed station.
After passing the first or last station of the current multiplex, the display will show <<< or >>> and the selection option will be briefly delayed to allow easier navigation. You can turn the right button/knob in the opposite direction without delay to stay in the current multiplex, or take another step in the same direction to automatically search for the previous (<<<) or the next (>>>) received multiplex and play the last or first station in it.
When <<< or >>> is reached, the device briefly stops the search to enable easier navigation.
ENSEMBLE selection mode:
Next, turn the right button/knob in the desired direction to find the multiplex in the lower or higher channels. The display shows the current
channel during the search until you find a new multiplex.
This search function works in the same way as the search function which is activated when scrolling through stations on the <<</>> display in SERVICE selection mode; it is only used to find another multiplex more quickly without the need to scroll through all the channels in the current programme package.
PTY selection mode:
If the PTY (programme type | MENU) function is enabled (see chapter "SETTINGS"), the PTY function can also be selected by pressing the right button/knob.
By turning the right knob, you can scroll through all stations known to your car radio with the corresponding PTY code (for pre-selection of the PTY type, see chapter SETTINGS | MENU).
Once the desired station has been found and no further data is input, the radio will switch to the selected/displayed station.
Storing and selecting saved radio stations
You can save your favourite stations in the station memory using the 1-5 buttons.
Each memory level can store up to 5 stations. Set the desired station as described above. To save the station, press the memory button for more than one second, a beep will confirm that the station has been stored. Release the button again after the beep.
By briefly pressing one of the memory buttons 1-5, a previously stored station can be called up.
Additional functions
Playing saved stations (P-SCAN)
You can play all stations at the selected memory level.
To do this, press the MENU button for more than one second, the display will show P-SCAN and a flashing memory location/radio station.
P-SCAN continues until the function is cancelled by pressing any button.
The SCAN time can be adjusted in the menu, see chapter SETTINGS | MENU
Playing the available stations (SCAN)
Press the right button/knob for more than one second, the station list will be updated and the display will show SCAN and the current station.
SCAN continues until the function is cancelled by pressing any button.
The SCAN time can be adjusted in the menu, see chapter SETTINGS | MENU
Display change
By pressing and holding the DIS button, the display can be switched between various information:
- Station name (service)
- PTY (programme type)
- Multiplex name (program package)
- Memory/memory level + channel
- Radio text
• Memory/memory level + time
The display function availability depends on the station. When a station is changed, the device always first displays the multiplex (if it was changed), the station name and then the information defined using the DIS button.
Additional features or options:
See section SETTINGS | MENU
9. Playback from external devices/media: USB
USB data media (USB sticks) can be connected to the car sound system via the USB port and the media files contained therein can be played, provided that the data media and files are compatible with the car sound system.
Data media/media types used:
- USB storage media with FAT16, FAT32, exFAT file system
- File formats: MP2, MP3, WMA, APE, FLAC, AAC, MP4, WAV (except for: Hi-Res and copy-protected audio files)
- Blaupunkt cannot guarantee the correct operation of all media files/data media available on the market or created by Blaupunkt, including those mentioned above.
- Using Hi-Res audio files may slow down the device or lead to incorrect playback.
It is not possible to connect MP3 players/mobile phones to play music via direct access to the memory of the MP3 player/mobile phone.
The USB port of the car radio can also be used for charging external devices, like smartphones.
Manufacturer-specific fast charging features are not supported. It cannot be guaranteed that every device can be charged, and this may also depend on the USB cable used. Use cables without a data transmission function.
The car radio is equipped with two USB ports:
- USB1: A USB port behind the flip cover on the front of the car radio (see chapter "CAR RADIO CONTROLS")
- USB2: • USB port in the rear of the car radio (see chapter INSTALLATION | REMOVAL | CONNECTIONS)
Connecting USB data media / USB media playback
When using the front USB port: The dust cover opens to the right/by folding it to the side.
Carefully plug the USB medium into the USB interface without forcing or bending the USB medium.
The radio will automatically switch to the USB playback mode. The data on the USB medium will be loaded and the playback will begin with the first media file recognised by the radio.
If a USB data medium has already been connected, switch to the USB source with the SRC button. Data will be loaded, playback will start from the last file played.
USB playback
- By turning the right button/knob, you can switch between tracks, forward and backward.
- If you press the right button/knob once
(CUE/REW (SPULEN) appears on the display), you can fast-forward and rewind tracks by turning the right button/knob. Rotating again in the same direction stops the fast forwarding/rewinding.
- If you press the right button/knob again (the display shows FOLDER (VERZEICHINS)), you can change the directory by turning the right button/knob.
If no command is entered for approximately 15 seconds, the standard function is reactivated.
Additional functions
Track playback function (SCAN):
Press the right button/knob for more than one second and the display will show SCAN and the current track. SCAN continues until the function is cancelled by pressing any button.
The SCAN time can be adjusted in the menu, see chapter SETTINGS | MENU
The following functions can be used with the memory buttons:
- Button 1 (title search):
Use the right button/knob to navigate through the folders and files on the storage medium and select titles.
The display at the bottom will show a magnifying glass symbol and, depending on the displayed content, a folder (directory) symbol or a note symbol (music file).
<< appears at the end of the list. Select << on the display to move up/down one level; this function can also be activated at any time by pressing and holding the right button/knob.
Directories without playable files are not displayed. To cancel the title search, press button 1 again
- Button 2 (pause):
Pauses playback. You can pause playback by muting the car radio (see section CAR RADIO CONTROLS).
- Button 3 (repeat function):
Possible options: RPT TRACK (RPT TITEL), RPT DIR (RPT VERZ) or RPT OFF (RPT AUS). The corresponding playback mode is indicated during the switching and shown by symbols on the display.
- Button 4 (random playback):
Possible options: MIX ALL (MIX ALLE), MIX DIR (MIX VERZ) or MIX OFF (MIX AUS). The corresponding playback mode is indicated during the switching and shown by symbols on the display.
Changing the display
By pressing and holding the DIS button, the display can be switched between various information:
• Information about multimedia files, such as file name, directory, playback time, ID3 information
- Time
The availability of display functions depends on the media files used. When a song is changed, the device always displays the folder first (if changed), the file name and then the information defined using the DIS button.
Removing USB storage media
Never attempt to remove the storage media without first turning off the car radio, otherwise the data on the storage medium can be corrupted.

Increased risk of injury due to protruding USB sticks!
In the event of an accident, protruding parts can cause injury.
It is recommended to use the physically smallest USB storage media available.
10. Playback from external devices/media: CD (depending on model)
The CD drive can be used to play optical data media, provided they are compatible with the car radio, as well as files.
Data media/media types used:
- Commercially available music CDs, 12 cm diameter
• CD/CD-R/CD-RW data discs, 12 cm diameter - File formats: MP3, WMA (except copying-protected audio files)
- Blaupunkt cannot guarantee the correct operation of all media files/data media available on the market or created by Blaupunkt, including those mentioned above.
- Using Hi-Res audio files may slow down the device or lead to incorrect playback.
- Use only CDs with the Compact Disc logo to ensure correct operation of the device.
If problems with re-writable CDs/DVDs occur, we recommend writing data on them at a lower speed or using other media.
Inserting/starting CD playback

Risk of damage to the CD drive!
CDs with non-circular contours, 8 cm diameter CDs (mini CDs), damaged CDs or
CDs with labels must not be used. We accept no liability for damage to the drive caused by unsuitable CDs.
Insert the CD into the CD slot with the printed side up (see chapter CAR RADIO CONTROLS) until a slight resistance is felt. The CD will be pulled automatically in and the playback will start.
Do not interfere with or support the automatic feeding of the CD.
If you have already inserted a CD, switch to the CD source using the SRC button.
CD playback
- By turning the right button/knob, you can switch between tracks, forward and backward.
- If you press the right button/knob once (CUE/REW (SPULEN) appears on the display), you can fast-forward and rewind tracks by turning the right button/knob. Rotating again in the same direction stops the fast forwarding/rewinding.
- When using CDs, you can change the folder by pressing the right button/knob again (FOLDER (VERZEICHNIS) appears on the display) and turning the right button/knob.
If no command is entered for approximately 15 seconds, the standard function is reactivated.
Additional functions
Track playback function (SCAN):
Press the right button/knob for more than one second and the display will show SCAN and the current track. SCAN continues until the function is cancelled by pressing any button.
The SCAN time can be adjusted in the menu, see chapter SETTINGS | MENU
The following functions can be used with the memory buttons:
- Button 1 (title search):
Use the right button/knob to navigate through the folders and files on the storage medium and select titles.
The display at the bottom will show a magnifying glass symbol and, depending on the displayed content, a folder (directory) symbol or a note symbol (music file).
<< appears at the end of the list. Select << on the display to move up/down one level; this function can also be activated at any time by pressing and holding the right button/knob.
Directories without playable files are not displayed. To cancel the title search, press button 1 again
- Button 2 (pause):
Pauses playback. You can pause playback by muting the car radio (see section CAR RADIO CONTROLS).
- Button 3 (repeat function):
Possible options: RPT TRACK (RPT TITEL), RPT DIR (RPT VERZ) or RPT OFF (RPT AUS). The corresponding playback mode is indicated during the switching and shown by symbols on the display.
- Button 4 (random playback):
Possible options: MIX ALL (MIX ALLE), MIX DIR (MIX VERZ) or MIX OFF (MIX AUS). The corresponding playback mode is indicated during the switching and shown by symbols on the display.
Changing the display
By pressing and holding the DIS button, the display can be switched between various information:
• Information about multimedia files, such as track number, file name, directory, playback time, ID3 information
- Time
The availability of display functions depends on the media files used. When a track is changed, the device always displays the folder first (if changed), the file name/track number and then the information defined using the DIS button.
Ejecting a CD
Press the eject button [▲] to eject the inserted CD.
Ejecting the CD must not me impeded or assisted.
11/ Playback from external devices/media: iPod/iPhone
Apple iPod/iPhone operation
The iPod/iPhone function allows direct access to the active music player on the Apple device.
This car radio has two USB ports compatible with Apple iPod/iPhone.
- Find the USB port behind the flip cover on the front of the car radio (see chapter CAR RADIO CONTROLS)
- USB port in the rear of the car radio (see chapter INSTALLATION | REMOVAL | CONNECTIONS)
Due to licensing regulations, only newer Apple® devices with a Lightning or USB-C connector (iAP2 protocol) are supported, the car radio is not compatible with older devices using a 30-pin connector (iAP1 protocol).
Connecting an iPod®/iPhone® / Starting playback
When using the front USB port: The dust cover opens to the right/by folding it to the side. Carefully insert the USB plug into the USB socket without using force or tilting the USB plug. The radio will automatically switch to iPod®/iPhone® mode. Playback starts from the last file played on the iPod/iPhone or with media playback from the last application used.
If an iPod ® / iPhone ® has already been connected before, switch to the IPOD source using the SRC button. Data will be loaded, playback will start from the last file played.
IPod® / iPhone playback
- By turning the right button/knob, you can switch between tracks, forward and backward.
If you press the right button/knob once
(CUE/REW (SPULEN) appears on the display), you can fast-forward and rewind tracks by turning the right button/knob. Rotating again in the same direction stops the fast forwarding/rewinding.
If no command is entered for approximately 15 seconds, the standard function is reactivated.
Additional functions
Track playback function (SCAN):
Press the right button/knob for more than one second and the display will show SCAN and the current track. SCAN continues until the function is cancelled by pressing any button.
The SCAN time can be adjusted in the menu, see chapter SETTINGS | MENU
The following functions can be used with the memory buttons:
- Button 2 (pause):
Pauses playback. You can pause playback by muting the car radio (see chapter CAR RADIO CONTROLS).
- Button 3 (repeat function):
Possible options: RPT TRACK (RPT TITEL), RPT
ALL (RPT ALLE) or RPT OFF (RPT AUS). The corresponding playback mode is indicated during the switching and shown by symbols on the display.
- Button 4 (random playback):
Possible options: MIX ALL (MIX ALLE) or MIX OFF (MIX AUS). The corresponding playback mode is indicated during the switching and shown by symbols on the display.
Changing the display
By pressing and holding the DIS button, the display can be switched between various information:
• Information on multimedia files
- Time
The availability of display functions depends on the media files used.
The functionality and control via radio may change and not all the features described may be available depending on the Apple device you are using and the media playback applications available on it.
Removing the iPod®/iPhone®
Do not remove the data media without first turning off the radio, otherwise the device or the data stored on it may be damaged.
12. Playback from external devices and media: AUX
AUX mode
The radio is provided with an AUX port.
Model without a CD drive, with microphone input:
- AUX port in the rear of the car radio (see chapter INSTALLATION | REMOVAL | CONNECTIONS)
CD model without microphone input:
- AUX port in front of the car radio (see chapter CAR RADIO CONTROLS)
Connect the desired device, such as an external CD player, MP3 player or cassette player, using the appropriate adapters from the accessory range.
Select the AUX source with the SRC button. If necessary, adjust the volume on the external device if the output of it is adjustable.
In models without a CD, the AUX function must be activated in the menu to use it, see chapter SETTINGS | MENU. Models with an AUX connector in the front have an automatic detection function.
To prevent damage to the radio or malfunctioning of the car radio, use only undamaged plugs and cables.
13. Playback from external devices/media: Microphone (depending on model)
Microphone mode
Models without a CD drive are equipped with a microphone port, allowing, for example, announcements to be made in coaches or other vehicles carrying passengers.
- Microphone in the front of the car radio (see chapter CAR RADIO CONTROLS)
Plug in the microphone, remove the dust cover from the port beforehand if necessary and stow it away at a safe place.
To switch the microphone on/off, select the MICROPHONE source using the MIC button. The device displays MIX ON (MIX AN) or MIX OFF (MIX AUS). Press the MIC button for more than one second to call up the MIC GAIN microphone gain setting, use the right knob to adjust the microphone gain as required.

Higher risk of injury from protruding audio jacks!
In the event of an accident, protruding
parts can cause injury.
For this reason, it is recommended to use the smallest possible jacks or angled jacks.
14. Bluetooth® Connection Setup
Bluetooth®
The Bluetooth ® function allows mobile phones and media players with Bluetooth ® to be connected wirelessly to the car radio for calls and music playback (Bluetooth ® audio streaming).
When a compatible device is connected to the car radio, the functions described in the following sections can be used.
Hands-free calling via the radio is also available when the car radio is switched off but the ignition is switched on. When the ignition is switched on, the radio connects to the mobile phone and, when an incoming call is received, the car radio automatically switches on so that the call can be answered. This function can be deactivated, see chapter SETTINGS | MENU.
Establishing a Bluetooth® connection
Switch on the car radio, open the Bluetooth® settings from the Bluetooth® device and search for available devices. Connect the found car radio according to the procedure described in the Bluetooth® device manual.
After a successful connection is established, the car radio briefly displays CONNECTED
(VERBUNDEN), followed by the name of the connected device, and the small Bluetooth® symbol on the display lights up.
- Confirm any prompts on your phone immediately, otherwise some features may be limited, unavailable, or the pairing process may fail. - This process is required only once, the devices will automatically reconnect when they are in range. - At the time of marketing of this unit, extensive testing of Bluetooth® features was conducted with various smartphones and media players to ensure the highest possible compatibility. However, some features may be limited or not work at all, depending on the device in use. In case of such problems, please check if an update is available for your device or car radio.
If the car radio or a connected Bluetooth® device has received an update, the Bluetooth® connection should be completely deleted and re-established in the event of problems.
The car radio remembers the last 5 Bluetooth ® devices and automatically reconnects to the most recently connected and available Bluetooth ® device. Before connecting another Bluetooth ® device, disconnect the already connected device. The automatic reconnection of the last 5 Bluetooth ® devices after switch-on takes less time for the last Bluetooth ® device connected to the car radio than for other previously connected Bluetooth ® devices.
- Other Bluetooth® devices (such as Bluetooth® headphones or receivers) that are used with the phone for hands-free calling or music streaming should be switched off when the phone is connected to the radio to avoid possible conflicts or malfunctions.
15. Bluetooth® Audio Streaming
The mobile phone must be connected to the car radio, see chapter - BLUETOOTH® CONNECTION SETUP.
The connected Bluetooth® device must support A2DP and AVRCP functions to play (stream) music through the car radio and control playback.
Start Bluetooth® playback (audio streaming)
To start playback, switch to the BT STREAM audio source using the SRC button.
- By turning the right button/knob, you can switch between tracks, forward and backward.
- If you press the right button/knob once (CUE/REW (SPULEN) appears on the display), you can fast-forward and rewind tracks by turning the right button/knob. Rotating again in the same direction stops the fast forwarding/rewinding.
If playback does not start or is started by wrong application on the phone, start/select the appropriate audio player on the connected cell phone you want to use the streaming broadcast with. The car radio does not affect the selection of the application from which music will be played on the mobile phone.
- Depending on the application used in the phone, some playback functions may be unavailable.
Volume can be adjusted in the connected Bluetooth® device, if the sound is too quite or too loud compared to other sound sources in the car audio system (The use of this function depends on the connected Bluetooth® device).
It is not possible to stream media from this car radio via Bluetooth® to another device (like Bluetooth® speakers), as this car radio only supports Bluetooth® audio signal reception.
Additional functions
The following special functions can be activated/deactivated using station button 2 :
- PLAY/PAUSE
- You can pause playback by muting the car radio (see chapterCAR RADIO CONTROLS).
Playback function (SCAN)
Press the right button/knob for more than one second and the display will show SCAN and the current track. SCAN continues until the function is cancelled by pressing any button.
The SCAN time can be adjusted in the menu, see chapter SETTINGS | MENU
Display change
By pressing and holding the DIS button, the display can be switched between different information:
The availability of display features will vary with the media files or the connected external device/app.
16. Bluetooth® hands-free system
The mobile phone must be connected to the car radio, see chapter - BLUETOOTH® CONNECTION SETUP.
The connected Bluetooth® device must support HFP and PBAP functions in order to make calls and download the phone book via the car radio.
Before the phone book can be used, it should be uploaded using the function DOWNLOAD P-BOOK (T-BUCH LADEN).
Incoming calls
Incoming calls are indicated by a ringtone and a message on the car radio display.
A call can be answered or rejected using the ANSWER/DIAL and REJECT/END CALL buttons.
Outgoing calls
Calls can be made in several ways using the
BLUETOOTH menu:
PB SEARCH (TB SUCHE)
Use the right button/knob to search for and select the first letter and then an entry from the phone book transferred from the mobile phone.
PHONEBOOK (TELEFONBUCH)
Use the right button/knob to search for and select an entry from the phone book transferred from the mobile phone.
VOICEDIAL (SPRACHWAHL)
Selecting this function activates the phone's voice assistant to perform a function, such as dialling a phone number.
For information on the functions and activation of the voice assistant, refer to your cell phone manual.
■ Voice dialling/recognition is performed/processed by the voice assistant on the connected phone, not by the car radio. It can be used to activate functions on the mobile phone, but the car radio itself cannot be operated.
DIAL NEW NUMBER (NEUE NR. WÄHLEN):
The number to be dialled can be entered using the right button/knob.
Briefly press the button/knob to move to the next digit.
If an incorrect entry is made, the last digit can be deleted by pressing and holding down the right button/knob.
Press the ANSWER/DIAL button to dial the number after it has been completely entered.
Using the phonebook of a connected phone
The DOWNLOAD P-BOOK (T-BUCH LADEN) and DELETE P-BOOK (T-BUCH LÖSCHEN) options the phone book of the currently connected phone to be used on the car radio.
To access the phone book, the phone must be connected.
If the message PHONEBOOK FULL
(TELEFONBUCH VOLL) appears, delete the phone book of the phone which is no longer used. To do this, connect the relevant phone to the car radio and delete the phone book with DELETE P-BOOK (T-
BUCH LÖSCHEN) or remove the phone completely from the car radio with the PHONE LIST
(TELEFON-LISTE) option.
It may be necessary to allow access to the phone book on the mobile phone.
- Access to the numbers of a connected phone is device-specific and may not be supported depending on the phone in use.
Storing a phone number/Dialling a stored number
A manually entered number (see the DIAL NEW NUMBER (NEUE NR WAEHLEN) section above) can be stored by pressing and holding one of the memory buttons (1-5). Once the number has been stored, the name can be entered using the right button/knob. To save after entering a name, press and hold the desired save button (1-5) again until the number save is confirmed with the OK button. Press the ANSWER/DIAL button and then the memory button (1-5) to call up the stored number. The number will be dialled when the ANSWER/DIAL button is pressed again.
The stored numbers will be available on all connected telephones.
17. Sound settings
In the AUDIO (KLANG) menu, parameters of the sound can be set.
18. Clock
The car radio has an internal clock.
The time can be shown on the display by pressing and holding the DIS button until the desired information is displayed.
Second function of the "ANSWER" button (SOFTKEY)
The ANSWER/DIAL button can be assigned in the menu to a desired function to activate it without having to call up the Bluetooth menu. The selected function can be activated by pressing and holding the ANSWER/CALL button. Possible options:
PB SEARCH (TB SUCHE), PHONEBOOK (TELEFONBUCH), VOICEDIAL (SPRACHWAHL) and DIAL NEW NUMBER (NEUE NR. WÄHLEN). See chapter SETTINGS | MENU and the previous OUTGOING CALL section.
For details of the setting elements and their functions, see chapter SETTINGS | MENU.
The time can also be displayed when the car radio is switched off.
To display the time when the car radio is turned off, the vehicle's ignition must be on, whereas if the ignition is turned off, the display is turned completely off to reduce power consumption.
For information on settings and other clock options, see chapter SETTINGS | MENUS.
19. Steering Wheel Remote Control (SWC)
With this car radio, you can freely assign the steering wheel remote control buttons (if available and compatible) to existing functions in the car radio's SWC configuration.
The following functions are available:
SOURCE (QUELLE):
Selects the audio source/memory level of the car radio
Analogue radio: Station search, pressing and holding the manual tuning button. DAB radio: Scrolls through the list of stations, press and hold to Search services/multiplexes. Media playback: Change title, press and hold to Change catalogue.
MUTE (STUMM):
Mutes the car radio.
ACCEPT/REJECT (BT ANNEHMEN/BT ABLEHNEN):
Accepts/rejects a phone call
DISPLAY (ANZEIGE):
Switches over the display.
PRESET+/PRESET- (SPEICHER+/SPEICHER-):
Changes memory during radio operation, press and hold to Search List of stations.
During media playback Change title, press and hold to Change directory)
Storing functions
- Open the car radio settings using the MENU button.
- Use the button/knob under VARIOUS (VERSCHIEDENES) to select the SWC option.
- Select the desired function to be programmed and confirm it by pressing the right button/knob
to start the programming procedure.
- The car radio will now await signal from the remote control at the steering wheel and displays the message PRESS BUTTON AT STEERING WHEEL FOR 1SEC (TASTE FUER 1 SEKUNDE DRUECKEN).
- Press the desired button on the remote control at the steering wheel for at least one second.
- If the button is programmed correctly, the display will show OK. Repeat the procedure if the radio displays FAIL (FEHLER) or does not respond.
- Repeat this procedure for all buttons to be programmed.
If storing is not possible even after several attempts or is not performed correctly, check the radio connections or the compatibility of the interface used. If the FAIL (FEHLER) is always displayed, the error has likely occurred in the remote control or the interface. If the radio does not respond at all, make sure that the remote control/interface is (properly) connected.
All buttons must always be fully programmed in a single operation; any previous button programming is completely deleted when a new button is programmed.
The programmable SWC interface of the radio includes analogue steering wheel presets. The car radio works with analogue remote controls that activate functions through different resistance values (resistive matrix) at the connector (up to two control lines).
Some remote controls are directly compatible, others require an SWC interface. Steering wheel remote controls using the CAN bus cannot be connected without an interface.
For more information on the accessories suitable for your vehicle, contact your specialist dealer or the vehicle manufacturer.
20. Settings | Menu
Select the settings by pressing the MENU button. Turn the right button/knob to navigate through the settings.
Once <<< at the end of a category is reached, the selection option is briefly delayed to allow better navigation.
To select or change an option, select it by pressing the right button/knob, change the option by turning the right button/knob and confirm the setting by pressing the right button/knob again.
Press the MENU button to exit the settings.
The settings are divided into various categories, which are described on the following pages.
TUNER (RADIO)
In this submenu, you can define settings for the radio receiver.
See also chapter ANALOGUE (FM/MW) RADIO OPERATION i DIGITAL RADIO OPERATION.
TRAF:
Enable/disable prioritisation of traffic announcements.
When this function is activated, the radio will switch to the station last heard, and then, return to the previously active sound source, when it receives a traffic announcement. When the function is active, a small symbol with three vehicles appears on the display. TRAFFIC (VERKEHR) appears on the display during a traffic announcement.
This feature must be supported by the radio station.
The volume change during a traffic announcement will be applied to future traffic announcements. To adjust the volume, see the VOLUME (LAUTSTAERKE) menu option.
If the reception of a station is interrupted, the radio automatically seeks a new station with traffic information.
Enabling this feature also limits searching to the stations that support it.
The current traffic announcement can be interrupted by pressing the SRC button.
REG:
When this function is on, only stations with the same regional programme are selected if automatic station switching is required due to poor reception.
The RDS AF function must be set to ON (EIN), the function must be supported by the radio station.
PTY:
When this function is enabled, the PTY function is also available by pressing the right button/knob to search for a specific type of station/music genre.
PTY TYPES (PTY LISTE)
Active only when PTY is ON (EIN).
Selects the station type/music genre for the PTY function.
PTY LANG (PTY SPRACHE)
Active only when PTY is ON (EIN).
Setting the PTY language.
this only affects the display of the PTY types, not station selection or other settings.
SENS HI/LO (EMPF +/-):
Set the VHF search sensitivity, HI (+) also searches for stations with weak signal, LO (-) only searches for local stations with strong signal.
HICUT (HICUT):
Improves the sound of weak/distorted VHF station signals (in the case of noises/interference), you can automatically lower the treble range according to the reception strength by activating this function.
RDS AF:
When this function is active, the radio automatically switches to the best transmission frequency (alternative frequency).
This feature must be supported by the radio station.
FM PRESETS (FM SPEICHEREBENEN):
Turns memory levels or FM2, FMT, AM, AMT sources on/off. If the SRC button is inactive, the corresponding memory level cannot be selected with the SRC button.
DAB PRESETS (DAB SPEICHEREBENEN)
Activates/deactivates memory levels DAB2, DAB3. If the SRC button is inactive the corresponding memory level cannot be selected with the SRC button.
DAB MODE:
Determines the function of the right button/knob in the DAB mode. Options: LIST (LISTE) (default setting) or SERVICE. See DIGITAL RADIO OPERATION for function description.
DAB SERVICE SCAN (DAB SERVICE SUCHE)
Updates the station list. The car radio will display SCAN and update the list of stations, unavailable or incorrect stations will be removed from the list and newly found stations will be added. This does not affect memory locations.
- Scanning of the service can also be started by pressing and holding the SRC button.
SERVICE LINK:
Depending on the setting, the car radio switches to an alternative DAB channel (DAB setting), to alternative VHF frequencies (FM setting) or both (ALL setting) to continue playing the selected service if DAB reception is poor.
SERVICE NAME:
DAB station names are provided by broadcasters in two variants. Specify whether the station name should be displayed with 8 or 16 characters.
The alphabetical sorting of the station list is always based on the 16-digit station name. If the display is set to 8 characters, this can lead to sorting discrepancies!
AREA (REGION):
Sets the reception region where the radio is used.
<<<
Back to Main Menu
AUDIO (KLANG):
In this submenu, you can adjust the sound individually.
BASS (TIEFEN):
Boosts or reduces low frequency range. Individual adjustment for each sound source.
TREBLE (HOEHEN):
Boosts or reduces high frequency range. Individual adjustment for each sound source.
BAL (BALANCE):
Balance adjustment (left/right speaker).
FADER:
Balance adjustment (front/rear speakers).
LOUD:
Loudness On/Off (bass enhance)
SOUND (KLANG):
Activates POP, ROCK and CLASSIC preset sounds.
If a sound preset is active, the BASS (TIEFEN)/TREBLE (HÖHEN) and EQUALIZER settings do not function function and are deactivated.
EQUALIZER:
Semi-parametric 3-band equalizer. The frequency can be set and affects TREBLE (HOEHEN), MIDDLE (MITTEN) and BASS (TIEFEN).
FREQ: Frequency setting
GAIN: Frequency increase/decrease
Q-FA: Filter quality (MIDDLE
(MITTEN)/BASS (TIEFEN) only)
When the equalizer is on, the BASS
(TIEFEN)/TREBLE (HÖHEN) and SOUND
(KLANG) settings do not function and are disabled.
SUB-OUT:
Adjustment of the output level (GAIN) and crossover frequency (FREQ) of the subwoofer output.
AMP:
Setting for the switching signal delay for external amplifiers (prevention/reduction of clicking during switching on)
MIXGAIN:
Microphone input gain setting
- Also available by pressing and holding the MIC button
<<<
Back to main menu
DISPLAY (ANZEIGE):
In this submenu, you can define settings for the display.
DIM MAN/AUTO:
Manual/automatic switching of the button and display brightness.
- AUTO: The DIMMER/BELEUCHTUNG (KI.58) input (see chapter INSTALLATION REMOVAL | CONNECTIONS) automatically toggles the display brightness between the preset DAY (TAG) and NIGHT (NACHT) values depending on the lighting in the vehicle.
- MAN (MANUELL): Pressing and holding the DIS button toggles between the preset DAY and NIGHT values.
- DAY (TAG): Sets the display brightness for the day.
• NIGHT (NACHT): Sets the display brightness for the night.
SCROLL:
Scrolls through the information on the display if it is longer than can be displayed (text scrolling).
- AUS (OFF): Information scrolling is disabled
• 1X: Permission to view information once
• ON (AN): Permission for continuous viewing of information
LANGUAGE (SPRACHE):
Language selection of the car radio menu. Available languages: DEUTSCH, ENGLISH.
COLOR (FARBE)
Colour selection on the LC display. Seven pre-set colours are available: GREEN (GRÜN), YELLOW (GELB), RED (ROT), VIOLET (LILA), BLUE (BLAU), SKYBLUE (HIMMELBLAU), WHITE (WEISS).
<<<
Back to main menu
VOLUME (LAUTSTAERKE):
In this submenu, you can adjust volume settings for the car radio.
ON VOLUME (AN LAUTST)
Select whether the car radio should be started with the last used volume LAST VOL (LETZTE LAUTSTÄRKE), or with the preset value AN VOL (ON VOL).
The starting volume is always limited to max. 30.
TA VOL:
Sets the volume of traffic announcements.
If the volume of the active traffic announcement is adjusted, this setting will be updated or overwritten.
HF VOL:
Sets the volume of the hands-free system.
If the volume is adjusted during a phone call, this setting will be updated or overwritten.
BEEP:
Audible feedback (beep) setting when a key is pressed.
Station saving is always confirmed with a sound signal, even if the BEEP option is set to OFF (AUS).
The key audio signal is only played by the internal output stage of the car radio, but not by the preamplifier outputs.
<
Back to main menu
CLOCK (UHR)
In this submenu, you can adjust clock settings.
CLOCK (UHR)
Switches ON (AN) / OFF (AUS) the time display when the car radio is switched off. When the car radio is turned off and the ignition is turned on, the display shows the clock.
MODUS:
Toggles between the 12/24 hour display.
SET 00:00
Manual time setting.
Turn the right button/knob to the left to set minutes, turn the right button/knob to the right to set hours.
If the AUTO is active, the manually set time is overwritten.
AUTO:
Activates automatic time settings using the radio data signal.
<<<
Back to main menu
BLUETOOTH®
In this submenu, you can define settings for the Bluetooth® function. See also BLUETOOTH® HANDS-FREE SYSTEM:
PB SEARCH (TB SUCHE)
Name searching in the phonebook
PHONEBOOK (TELEFONBUCH)
Calls up a phonebook transferred from a cell phone.
SOFTKEY: Configures the secondary function of the ""Answer Call" button.
Available options:
PB SEARCH (TB SUCHE)
PHONEBOOK (TELEFONBUCH)
VOICEDIAL (SPRACHWAHL)
DIAL NEW NUMBER (NEUE NR. WAEHLEN)
DELETE P-BOOK (T-BUCH LOESCHEN):
Deletes the phone book on the car radio.
DOWNLOAD P-BOOK (T-BUCH LADEN)
Loads a phonebook from a cell phone.
VOICEDIAL (SPRACHWAHL)
Starts the voice assistant on the connected phone.
DIAL NEW (NEUE NR WAEHLEN):
Manual entering the phone number to be dialled.
MICROPHONE LEVEL (MIKROFON
PEGEL):
Sets the microphone sensitivity from 1 (insensitive) to 3 (sensitive).
The microphone sensitivity cannot be changed during a call; the setting applies to both the internal and external microphone.
<<<
Back to main menu
VARIOUS (DIVERSES):
You can adjust various settings in this menu.
DEMO:
Enable/disable the demo function. If no button is pressed for a certain period
of time, the radio function display appears and the display colour changes continuously.
AUX:
Activation/deactivation of the AUX input (activation/deactivation of selection availability using the SRC button, only models with rear AUX input).
SCAN:
Sets the playback function time (4/8/12/16/60 seconds).
SWC:
Stores the steering wheel remote control (see chapter "STEERING WHEEL REMOTE CONTROL (SWC)").
ACC DETECTION (ZUENDPLUS ERKENNUNG):
Disables detection of the ignition plus signal (ACC/ignition plus (KI.15) for the following functions:
- The car radio does not automatically switch off after an hour when operating without the ignition plus.
- Bluetooth pairing does not take place when the car radio is switched off and the ignition is active.
The car radio will continue to respond to the ignition plus signal to switch on/off and display the clock (if activated).
- Deactivating this function involves the risk of the car radio discharging the battery if you forget to switch it off
VERSION:
Requests car radio software version.
NORMSET:
Restores the car radio to factory settings. When this option is selected, the car radio will restart with the factory settings (no updates will be cancelled).
<
Back to main menu
<<<
Leaving the menu
21. Installation | Removal | Connections
Installation guide
Install the unit only if you have experience installing car radios and are familiar with the vehicle's electrical system. Follow the information specified at the car radio connections. The car radio may be connected using appropriate adapters only; ensure that all wires carry signals or voltages with the correct levels. The plugs in the vehicle must not be connected directly to the car radio without further testing.
The installation of the car radio must not interfere with or prevent deployment of airbags and other safety devices and/or vehicle controls. Before installing the car radio, disconnect the vehicle battery (its negative terminal / ground); otherwise malfunctions or damage to the car radio or onboard electronic systems may occur. Follow the vehicle manufacturer's safety instructions (for the airbags, alarm system, on-board computer, immobiliser unit, etc.).
Depending on the model, any transport protection such as securing screws must be removed from the CD/DVD drives before the car radio is installed.
Check whether there are labels on the car radio indicating such safety features.
To remove the car radio and also to remove the mounting frame before installing the car radio, insert the unlocking tool into the side openings (see section CAR RADIO CONTROLS) until it clicks into place. Now carefully pull the car radio out of the mounting slot or remove the mounting frame from the car radio.
The car radio mounting frame must be inserted into the appropriate 1-DIN radio mounting socket in the vehicle. The protrusions in the installation mounting frame must be bent outwards at the appropriate points to secure the mounting frame to the radio's mounting slot in the car. Then connect the car radio and insert it into the frame until it clicks into place. When inserting the car radio, do not exert pressure on the controls or the display/display frame.
Optional and dedicated connection adapters and/or installation accessories, such as mounting frames, covers, etc. may be required, depending on the car in which the car radio is to be installed. OEM-specific features, such as vehicle-integrated displays or on-board computer controls, are not supported.
The OEM remote steering wheel control is only supported if suitable adapters or interfaces are available, see chapter STEERING WHEEL REMOTE CONTROL (SWC)
Installation errors may result in damage to the car radio or on-board electronic systems.
Ensure that no cables or plugs have been damaged during installation and removal. Damaged plugs or cables must not be reused.
The car radio housing gets hot during operation; make sure that no wiring touches the housing.
Installation in an environment with high humidity and/or dirt levels may result in malfunctions or failure of this car radio.
If you need help installing the car radio, consult a car Hi-Fi audio system specialist.
Blaupunkt assumes no liability or grants no warranty for damage caused by incorrect and/or unprofessional installation, operation or servicing by the user and any consequences thereof.

B A
| A | B | ||
| 1 | NC/free | 1 | RR+ speaker(s) |
| 2 | Mute (active ground) | 2 | RR- speaker(s) |
| 3 | NC/free | 3 | RF+ speaker(s) |
| 4 | BATT/battery (Cl. 30) | 4 | RF- speaker(s) |
| 5 | Antenna power/trigger output (remote) | 5 | LF+ speaker(s) |
| 6 | Dimmer/Lighting (Cl. 58) | 6 | LF- speaker(s) |
| 7 | ACC/ignition + (Cl. 15) | 7 | LR+ speaker(s) |
| 8 | GND/ground (Cl. 31) | 8 | LR- speaker(s) |

Identification and explanation of connections
① DAB antenna: SMB connector with 12 V phantom power supply (max. 150 mA)
② AUX INPUT: Connection of an external sound source (depending on model)
③ USB: Rear USB port (REAR USB)
④ SWC: Connection to the steering wheel remote control – an external adapter/interface may be required, see chapter STEERING WHEEL REMOTE CONTROL (SWC)
⑤ EXT-MIC: Connection for an external microphone, switching takes place automatically when an external microphone is connected
⑥ Terminal strip with section A (power supply), section B (loudspeaker) and radio fuse (flat car fuse, 10 A, red)
⑦ PREAMP-OUT RR, FR, RL, FL (left to right): Preamp outputs for connecting an external amplifier
⑧ SUB/SW: Subwoofer output for connecting an active subwoofer
⑨ FM/AM antenna: DIN connector
MUTE/STUMM: Mutes the car radio by contacting the ground.
BATT/BATTERIE (KI.30): Battery, permanent power supply from the vehicle battery.
ANTENNA/SCHALTAUSGANG (REMOTE): Power supply switching for active antennas or control voltage for external amplifiers/subwoofers (12 V, max. 150 mA).
DIMMER/BELEUCHTUNG (KI.58): Vehicle lighting input, required for automatic switching of button/display brightness and night-time appearance of the car radio (red illumination of the left button/knob when the car radio is switched off). This input requires 0 V (off)/5-30 V (active). PWM signals can cause the display to flicker and must not be used in this case.
ACC/ZÜNDPLUS (KI.15): Switches the ignition plus from the ignition lock
GND/MASSE (KI.31): Ground.
The devices in this series are available with different operating voltages, so make sure that the vehicle's electrical system provides the correct voltage to avoid damage to the unit.
Even in models with 24 V operating voltage, the outputs for antennas and amplifiers have an output voltage of 12 V.
This car radio does not support CD changers, interfaces or other components compatible with older Blaupunkt car radios.
Make sure that the ignition and continuous plus are connected correctly; otherwise, the car radio may increase the current consumption and/or fail to power off completely. This may result in battery drain and/or failure, failure of on-board electronic systems or other external elements!
22. Useful information | Technical data
Warranty
Standard national statutory provisions and, depending on the country/vendor, extended warranties may apply.
If you have any questions, please contact your Blaupunkt dealer.
Service
If a repair service is required, please contact the specialist dealer from whom the product was purchased directly. Information on service partners in your country can also be found at www.blaupunkt.com.
Technical data
| FM frequency range: | 87.5–108 MHz |
| DAB frequency range: | 174.928–239.200 MHz (channel 5 A-13 F) |
| Speaker impedance: | ≥ 4 Ohms/channel |
| Supply voltage | |
| Operating voltage (model-dependent): | |
| 12 V (14.4 V) | |
| 24 V (28.8 V) | |
| Current consumption | |
| Facility name: | < 10 A |
| Off (ACC off): | < 5 mA |
| Inputs/outputs | |
| Antenna/amplifier: | 12 V, max. 150 mA |
| DAB antenna: | 12 V, max. 150 mA |
| USB port: | 5 V max. 1 A |
| Pre-amplifier output: | 2 Vss |
| Dimmer input: | 0 V (off)/5-30 V (on) |
23. Troubleshooting
Malfunctions and possible remedies are listed below.
If you continue to experience problems with this car radio, contact your dealer or Blaupunkt Service. If problems occur, have the car radio checked or installed by a qualified specialist.
Most problems occur due to incorrect connection and operation.
Read the User Manual carefully and completely.
Some items may not apply to your model because the relevant feature or option is not available.
- Once fitted, the airbag indicator lights on the dashboard come on / speedometer stops working / car radio locks up and displays PHONE or TELEPHONE etc.:
The car radio was connected incorrectly or the wires were damaged. Immediately disconnect the vehicle battery and remove the car radio.
Have the installation carried out by a qualified specialist.
- The car radio does not turn on / the car radio displays 1 HOUR / 1 STUNDE after turning on and turns off after 1 hour:
The ignition plus is not wired or is inactive. Check the connections.
- The display flickers at high sound volume / the car radio turns off altogether:
Check the cross section of the power supply cable. Have the installation carried out by a qualified specialist.
• Audio playback problems, failure of individual or all channels:
Check the wiring of the loudspeakers and the loudspeakers, no cable must be in contact with the ground, the individual channels must not drop below the given minimum impedance (see technical specification).
• The remote control does not work:
Remove the small plastic film from the battery compartment.
Check that the battery is seated correctly.
Point the remote control directly at the car radio.
This feature is not available with all models.
- The car radio does not turn on / does not respond to ignition / always turns off automatically after a certain period of time / cannot be turned on without ignition:
Is the ignition plus wired correctly? The ignition plus must switch properly between 0 V/full voltage, no residual voltage may be present at the ignition plus with the ignition off.
Check that the car radio is connected correctly. Under no circumstances should vehicle plugs be connected directly to the car radio without first checking the PIN-by-PIN assignment.
Have the installation carried out by a qualified specialist.
- Settings and/or preset stations are lost; the clock time is not displayed properly:
The car radio generally stores the settings permanently, even when the power supply is off. However, some settings are not permanently stored until the car radio is turned off properly, so make sure you properly turn off your car radio. The features such as the clock time, last source selected, or last USB/CD file/track played back require continuous power supply. For proper operation, the car radio must be properly connected to a continuous power source which should never be interrupted.
- The car radio does not receive radio signal or reception is poor:
Check the antenna for your reception area.
Check if a phantom power supply adapter is required.
Is the antenna installed correctly? Many antennas require connection to the ground (the car chassis). Stick-on window antennas must not be installed on windows covered with steam.
LED lights or other electrical components may interfere with radio reception, so look for these and remedy them.
When using the car radio for the first time, make sure the radio is set to the correct radio region (see chapter SETTINGS | MENU).
- NO SIGNAL or NO SERVICE is suddenly displayed in the DAB source mode:
The current multiplex (program package) reception is too weak and audio signal decoding is not possible. Select another multiplex/change location/check the DAB antenna.
The radio suddenly displays the SEEK PI (SUCHE PI)/SEEK TP (SUCHE TP) message or changes stations during operation:
Check your antenna and car radio settings. If necessary, deactivate the alternative frequency (AF) feature (see chapter SETTINGS | MENU). Poor reception may result in a station change if traffic announcement prioritisation is enabled.
- The car radio displays station name incorrectly / does not display the station name in the radio mode:
Set up the display as described in the manual. Check the reception (check the antenna).
Note: Some radio stations broadcast additional data instead of the RDS station name; this is beyond the control of the radio unit.
- USB, CD, DVD, SD or other storage media do not work:
Check if other storage media work properly, format your storage medium, or try playing different files.
Check the radio for CD/DVD drive transport protection and remove it before installation.
- The inserted CD is ejected momentarily each time the unit is switched on, and then reinserted after a short time:
The device is not connected to the fixed plus correctly, the drive is ejected for initialisation each time it is reconnected.
- Mobile phone does not charge or charges slowly via the USB port:
This depends on the actual mobile phone and the cable used; some manufacturer-specific fast charging features might not be supported.
- Bluetooth® problems (the phone book is not displayed, the telephone does not connect, the recipient cannot be heard):
Please note that automatic reconnection only works correctly if the radio is correctly connected to ACC/ignition plus (terminal 15) and BATT/battery (terminal 30).
Check for software updates for your mobile phone and/or car radio.
Reset the car radio using NORMSET (see chapter SETTINGS | MENU) or press the RESET button (depends on the model, see chapter CAR RADIO CONTROLS).
Remove the car radio from the Bluetooth device list on your phone and pair again. Confirm all access right prompts on the mobile phone by selecting "Yes".
Try using a different phone.
- Bluetooth® playback is quite or inaudible:
Depending on the model, the phones save volume levels for different connected devices and different applications separately. In this case, provoke the audio output of the application with too low volume (start playing the music from the corresponding application or navigation message) and adjust the volume on the phone during playback. (Operation of this function may depend on the connected Bluetooth® device).
• The caller does not hear me:
Check if the external microphone is connected correctly.
Check the microphone setting in the Bluetooth® settings (if available).
Try using a different phone.
- SUB-OUT or its setting options in the car radio do not work (depending on the model):
Make sure the subwoofer is properly connected to the SUB-Out connector of the car radio; otherwise the options in the relevant sound settings do not have any effect.
- The fault/malfunction I am experiencing is not specified here. A car radio feature does not work as expected / the car radio does not respond as expected:
Reset the car radio using NORMSET (see chapter SETTINGS | MENU) or press the RESET button (depending on the model).
Have the installation carried out by a qualified specialist.
Contact the service. Remember: Provide a precise description of the problem and the software version currently installed on the car radio when contacting the service (information on how to check the software version, see chapter SETTINGS | MENU)
PTY TYPES (PTY LISTE):
PTY LANG (PTY SPRACHE):
DIAL NEW NUMBER (NEUE NR. WAEHLEN)
DELETE P-BOOK (T-BUCH LOESCHEN) :
ANTENNA/SCHALTAUSGANG (REMOTE) :
PTY TYPES (PTY LISTE):
PTY LANG (PTY SPRACHE):
DAB SERVICE SCAN (DAB SERVICE SUCHE):
DIAL NEW NUMBER (NEUE NR. WAEHLEN)
DELETE P-BOOK (T-BUCH LOESCHEN):
ANTENNA/SCHALTAUSGANG (REMOTE):
PESQUISA PB (TB SUCHE):
As opções DOWNLOAD P-BOOK (T-BUCH LADEN) e DELETE P-BOOOK (T-BUCH LÖSCHEN)
PTY LANG (PTY SPRACHE):
DAB SERVICE SCAN (DAB SERVICE SUCHE):
PESQUISA PB (TB SUCHE):
Pesquisar o nome na lista telefónica.
PHONEBOOK (TELEFONBUCH)
DIAL NEW NUMBER (NEUE NR. WAEHLEN)
APAGAR P-BOOK (T-BUCH LÖSCHEN):
Apagar a lista telefónica do autorrádio.
DOWNLOAD P-BOOK (T-BUCH LADEN):
ANTENNA/SCHALTAUSGANG (REMOTE):
PTY TYPES (PTY LISTE):
PTY LANG (PTY SPRACHE):
DAB SERVICE SCAN (DAB SERVICE SUCHE):
DIAL NEW NUMBER (NEUE NR. WAEHLEN)
DELETE P-BOOK (T-BUCH LOESCHEN):
ANTENNA/SCHALTAUSGANG (REMOTE):
PTY TYPES (PTY LISTE):
PTY LANG (PTY SPRACHE):
DAB SERVICE SCAN (DAB SERVICE SUCHE):
DIAL NEW NUMBER (NEUE NR. WAEHLEN)
DELETE P-BOOK (T-BUCH LÖSCHEN):
ANTENNE/SCHALTAUSGANG (REMOTE):
PTY TYPES (PTY LISTE):
PTY LANG (PTY SPRACHE):
DAB SERVICE SCAN (DAB SERVICE SUCHE):
DIAL NEW NUMBER (NEUE NR. WAEHLEN)
DELETE P-BOOK (T-BUCH LOESCHEN):
ANTENNA/SCHALTAUSGANG (REMOTE):
PTY TYPES (PTY LISTE):
PTY LANG (PTY SPRACHE):
DAB SERVICE SCAN (DAB SERVICE SUCHE):
DIAL NEW NUMBER (NEUE NR. WAEHLEN)
DELETE P-BOOK (T-BUCH LOESCHEN):
ANTENNA/SCHALTAUSGANG (REMOTE):
PTY TYPES (PTY LISTE):
PTY LANG (PTY SPRACHE):
DAB SERVICE SCAN (DAB SERVICE SUCHE):
DIAL NEW NUMBER (NEUE NR. WAEHLEN)
DELETE P-BOOK (T-BUCH LOESCHEN):
ANTENNA/SCHALTAUSGANG (REMOTE):
DE, EN, FR, ES, PT, IT, DA, NL, PL, CS
Blaupunkt HEAVY DUTY SERIES
Technical changes, errors and misprints excepted.
C€
Blaupunkt Competence Center Car Multimedia
Evo-Sales GmbH
Hastenbecker Weg 33
All rights reserved. This material may be reproduced, copied or distributed for personal use only.
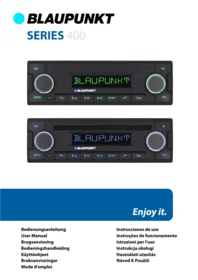
- PTY TYPES (PTY LISTE)
- PTY LANG (PTY SPRACHE)
- DAB SERVICE SCAN (DAB SERVICE SUCHE)
- DIAL NEW NUMBER (NEUE NR. WAEHLEN)
- DELETE P-BOOK (T-BUCH LOESCHEN)
- ANTENNA/SCHALTAUSGANG (REMOTE)
- CAR RADIO – CONTROLS
- CONTROLS – REMOTE CONTROL (OPTIONAL)
- CONGRATULATIONS ON YOUR PURCHASE
- CONTENTS
- SAFETY RULES
- SYMBOLS
- TRAFFIC SAFETY
- USE THE CAR RADIO IN A WAY WHICH NEVER PREVENTS YOU FROM OPERATING YOUR MOTOR VEHICLE SAFELY
- GENERAL SAFETY PRECAUTIONS
- GENERAL INFORMATION | PACKAGE CONTENTS | SOFTWARE UPDATE
- DECLARATION OF CONFORMITY
- TRADEMARK NOTICE
- CLEANING
- DISPOSAL
- PACKAGE CONTENTS
- SOFTWARE UPDATE
- SWITCHING ON/OFF | ADJUSTING VOLUME
- SWITCHING ON/OFF USING THE BUTTON/KNOB
- STUNDE
- TURNING ON/OFF USING THE VEHICLE IGNITION
- VOLUME ADJUSTMENT
- MUTING THE CAR RADIO (MUTE)
- ANALOGUE RADIO: VHF/MEDIUM WAVE (FM/AM)
- PLAYING VHF/MW RADIO
- TUNING INTO RADIO STATIONS
- PTY SEARCH
- STORING AND SELECTING SAVED RADIO STATIONS
- ADDITIONAL FUNCTIONS
- AUTOMATIC STATION STORAGE PRESETS (TRAVELSTORE)
- PLAYING SAVED STATIONS (P-SCAN)
- PLAYING THE AVAILABLE STATIONS (SCAN)
- DISPLAY CHANGE
- ADDITIONAL FEATURES OR OPTIONS
- DIGITAL RADIO: DAB/DAB+ (DEPENDING ON THE MODEL)
- DR DEUTSCHLAND AND ANTENNE DE
- PLAYING DAB/DAB+ RADIO
- LIST (LISTE) SELECTION MODE
- SERVICE (SENDER) SELECTION MODE
- ENSEMBLE SELECTION MODE
- PTY SELECTION MODE
- PLAYBACK FROM EXTERNAL DEVICES/MEDIA: USB
- CONNECTING USB DATA MEDIA / USB MEDIA PLAYBACK
- USB PLAYBACK
- CHANGING THE DISPLAY
- REMOVING USB STORAGE MEDIA
- INCREASED RISK OF INJURY DUE TO PROTRUDING USB STICKS
- PLAYBACK FROM EXTERNAL DEVICES/MEDIA: CD (DEPENDING ON MODEL)
- INSERTING/STARTING CD PLAYBACK
- RISK OF DAMAGE TO THE CD DRIVE
- CD PLAYBACK
- EJECTING A CD
- PLAYBACK FROM EXTERNAL DEVICES/MEDIA: IPOD/IPHONE
- APPLE IPOD/IPHONE OPERATION
- CONNECTING AN IPOD®/IPHONE® / STARTING PLAYBACK
- IPOD® / IPHONE PLAYBACK
- REMOVING THE IPOD®/IPHONE®
- PLAYBACK FROM EXTERNAL DEVICES AND MEDIA: AUX
- AUX MODE
- PLAYBACK FROM EXTERNAL DEVICES/MEDIA: MICROPHONE (DEPENDING ON MODEL)
- MICROPHONE MODE
- BLUETOOTH® CONNECTION SETUP
- BLUETOOTH®
- ESTABLISHING A BLUETOOTH® CONNECTION
- BLUETOOTH® AUDIO STREAMING
- START BLUETOOTH® PLAYBACK (AUDIO STREAMING)
- PLAYBACK FUNCTION (SCAN)
- BLUETOOTH® HANDS-FREE SYSTEM
- INCOMING CALLS
- OUTGOING CALLS
- PB SEARCH (TB SUCHE)
- PHONEBOOK (TELEFONBUCH)
- VOICEDIAL (SPRACHWAHL)
- DIAL NEW NUMBER (NEUE NR. WÄHLEN)
- USING THE PHONEBOOK OF A CONNECTED PHONE
- STORING A PHONE NUMBER/DIALLING A STORED NUMBER
- SOUND SETTINGS
- CLOCK
- SECOND FUNCTION OF THE "ANSWER" BUTTON (SOFTKEY)
- STEERING WHEEL REMOTE CONTROL (SWC)
- THE FOLLOWING FUNCTIONS ARE AVAILABLE
- SOURCE (QUELLE)
- MUTE (STUMM)
- ACCEPT/REJECT (BT ANNEHMEN/BT ABLEHNEN)
- DISPLAY (ANZEIGE)
- PRESET+/PRESET- (SPEICHER+/SPEICHER-)
- STORING FUNCTIONS
- SETTINGS | MENU
- TUNER (RADIO)
- TRAF
- REG
- PTY
- SENS HI/LO (EMPF +/-)
- HICUT (HICUT)
- RDS AF
- FM PRESETS (FM SPEICHEREBENEN)
- DAB PRESETS (DAB SPEICHEREBENEN)
- DAB MODE
- SERVICE LINK
- SERVICE NAME
- AREA (REGION)
- AUDIO (KLANG)
- BASS (TIEFEN)
- TREBLE (HOEHEN)
- BAL (BALANCE)
- FADER
- LOUD
- SOUND (KLANG)
- EQUALIZER
- SUB-OUT
- AMP
- MIXGAIN
- DIM MAN/AUTO
- SCROLL
- LANGUAGE (SPRACHE)
- COLOR (FARBE)
- VOLUME (LAUTSTAERKE)
- ON VOLUME (AN LAUTST)
- TA VOL
- HF VOL
- BEEP
- CLOCK (UHR)
- MODUS
- SET
- AUTO
- DOWNLOAD P-BOOK (T-BUCH LADEN)
- DIAL NEW (NEUE NR WAEHLEN)
- MICROPHONE LEVEL (MIKROFON
- PEGEL)
- VARIOUS (DIVERSES)
- DEMO
- AUX
- SCAN
- SWC
- ACC DETECTION (ZUENDPLUS ERKENNUNG)
- VERSION
- NORMSET
- INSTALLATION | REMOVAL | CONNECTIONS
- INSTALLATION GUIDE
- B A
- IDENTIFICATION AND EXPLANATION OF CONNECTIONS
- USEFUL INFORMATION | TECHNICAL DATA
- WARRANTY
- SERVICE
- TECHNICAL DATA
- TROUBLESHOOTING
- SETTINGS AND/OR PRESET STATIONS ARE LOST; THE CLOCK TIME IS NOT DISPLAYED PROPERLY
- THE CAR RADIO DOES NOT RECEIVE RADIO SIGNAL OR RECEPTION IS POOR
- NO SIGNAL OR NO SERVICE IS SUDDENLY DISPLAYED IN THE DAB SOURCE MODE
- THE RADIO SUDDENLY DISPLAYS THE SEEK PI (SUCHE PI)/SEEK TP (SUCHE TP) MESSAGE OR CHANGES STATIONS DURING OPERATION
- THE CAR RADIO DISPLAYS STATION NAME INCORRECTLY / DOES NOT DISPLAY THE STATION NAME IN THE RADIO MODE
- USB, CD, DVD, SD OR OTHER STORAGE MEDIA DO NOT WORK
- THE INSERTED CD IS EJECTED MOMENTARILY EACH TIME THE UNIT IS SWITCHED ON, AND THEN REINSERTED AFTER A SHORT TIME
- MOBILE PHONE DOES NOT CHARGE OR CHARGES SLOWLY VIA THE USB PORT
- BLUETOOTH® PROBLEMS (THE PHONE BOOK IS NOT DISPLAYED, THE TELEPHONE DOES NOT CONNECT, THE RECIPIENT CANNOT BE HEARD)
- BLUETOOTH® PLAYBACK IS QUITE OR INAUDIBLE
- THE CALLER DOES NOT HEAR ME
- PESQUISA PB (TB SUCHE)
- AS OPÇÕES DOWNLOAD P-BOOK (T-BUCH LADEN) E DELETE P-BOOOK (T-BUCH LÖSCHEN)
- APAGAR P-BOOK (T-BUCH LÖSCHEN)
- ANTENNE/SCHALTAUSGANG (REMOTE)
Brand : BLAUPUNKT
Model : HEAVY DUTY 2024.11.11
Category : Washing machine