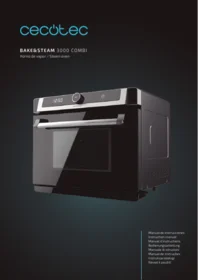
Bakesteam 3000 Combi - Cooker CECOTEC - Free user manual and instructions
Find the device manual for free Bakesteam 3000 Combi CECOTEC in PDF.


User questions about Bakesteam 3000 Combi CECOTEC
0 question about this device. Answer the ones you know or ask your own.
Ask a new question about this device
Download the instructions for your Cooker in PDF format for free! Find your manual Bakesteam 3000 Combi - CECOTEC and take your electronic device back in hand. On this page are published all the documents necessary for the use of your device. Bakesteam 3000 Combi by CECOTEC.
USER MANUAL Bakesteam 3000 Combi CECOTEC
Safety instructions 8
-
Parts and components 45
-
Before use 45
-
Operation 46
-
Cleaning and maintenance 52
-
Troubleshooting 52
-
Technical specifications 54
-
Disposal of old electrical appliances 54
-
Technical support and warranty 54
SOMMAIRE
Read these instructions thoroughly before using the appliance. Keep this instruction manual for future reference or new users. All safety instructions should be closely followed when using the appliance.
Make sure that the mains voltage matches the voltage stated on the rating label of the appliance and that the outlet is grounded.
Do not immerse the cord, plug, or any non-removable part of the product in water or any other liquid. Do not expose the electrical connections to water. Make sure your hands are dry before handling the plug or switching on the appliance.
Do not unplug the device when it is being used.
If the product falls accidentally in water, unplug it immediately. Do not reach into the water!
Check the power cord regularly for visible damage. No user-serviceable parts inside. If the cord is damaged, it must be replaced by the official Technical Support Service of Cecotec, in order to avoid any type of danger.
Do not use the appliance if its cord, plug, or housing is damaged, nor after it malfunctions or has been dropped or damaged in any way.
Do not twist, bend, strain, or damage the power cord in any way. Protect it from sharp edges and heat sources. Do not let it touch hot surfaces. Do not let the power cord hang over the edge of table or countertop.
Pull from the plug, not the cord, to disconnect it from the outlet. This appliance is intended for home use only. Any other use will void the warranty. It is not suitable for commercial or industrial
use. Do not use it outdoors.
Place the appliance on a dry, stable, flat, heat-resistant surface. Do not use the appliance under the following circumstances: On or near a gas or electric hob, in heated ovens, or near open flames.
On soft surfaces (such as carpets) or where it may tip over during use.
Outdoors or in areas with high humidity levels.
The temperature of accessible surfaces may be high while in use and could cause burns. Do not touch hot surfaces while in use or immediately after. Use handles or gloves.
Allow a 10 cm distance from the device's sides, back and top to the walls or other objects. Do not cover the appliance while in use.

Do not leave the appliance unattended while in use.
Steam at high temperature will be released when the device's door is opened during and after the cooling process of the product. A safe distance shall be kept in order to avoid scalding. Ensure that the appliance is switched off before replacing the lamp to avoid the possibility of electric shock.
Do not overfill the water tank, do not exceed the MAX. mark.
Do not share an outlet with other high-power electrical devices to avoid the risk of fire caused by a circuit overload.
The appliance is not intended to be operated by means of an external timer or separate remote-control system.
Do not use any accessory that has not been recommended by the manufacturer, as they might cause injuries or damage.
Extreme caution must be used when moving an appliance containing hot oil or other hot substances.
Allow the appliance to cool down before disassembling or assembling the device.
Unplug it from the mains supply when you finish using it or
when you leave the room.
Do not heat food in sealed containers such as sealed bottles, boxed milk, etc. as these could explode.
Do not try to repair the product by yourself. Contact the official Technical Support Service of Cecotec.
Cleaning and maintenance must be carried out according to this instruction manual to make sure the appliance functions properly. Turn off and unplug the appliance before moving and cleaning it.
The cleaning and maintenance of the appliance should not be carried out by children without supervision.
Do not wash the appliance in dishwashers.
Store the appliance and its instruction manual in a safe and dry place when not in use.
No liability is accepted for any eventual damage or personal injuries derived from misuse or non-compliance with this instruction manual.
The appliance is not intended to be used by children under the age of 8. It can be used by children over the age of 8, as long as they are given continuous supervision.
This appliance is not intended to be used by persons with reduced physical, sensory, or mental capabilities, or lack of experience or knowledge, unless they have been given supervision or instruction concerning the use of the appliance in a safe way by a person responsible for their safety, and understand the hazards involved.
Supervise young children to make sure that they do not play with the appliance. Close supervision is necessary when the appliance is being used by or near children.
Keep the appliance and its cord out of reach of children under the age of 8.
INSTRUCTIONS DE SÉCURITÉ
- Control panel
- Grill
- Baking tray
- Water tank
- Handle
- Door
- Water tray
- Main body
- Knob
- Glove
Display icons key
| Fig. 3. | Steam |
| Fig. 4. | Grill |
| Fig. 5. | Grill & steam |
| Fig. 6. | Air fryer |
| Fig. 7. | Menu |
| Fig. 8. | Defrost |
| Fig. 9. | Ferment |
| Fig. 10. | Cleaning |
| Fig. 11. | Empty tank |
| Fig. 12. | Preheat |
| Fig. 13. | OK |
| Fig. 14. | Child lock |
Fig. 15
2. BEFORE USE
Take the product out of the box.
Remove all packaging materials, rating labels and transport protectors before plugging the
device. Keep the original box.
Make sure all parts and components are included and in good conditions. If any visible signs of damage are observed, contact Cecotec's Technical Support Service immediately.
3. OPERATION
Assembly of the tray
Fig. 16.
There are 4 layers inside the oven cavity to insert the tray. When introducing it, make sure to keep the bulge downward and then slide the tray until completely in. Choose the position of the tray according to the type of food or recipe.
Control panel
Fig. 2.
- On/off
- Settings/Child lock
- Start/Pause
On/off
Once the device is turned on, it will beep, and the light indicator will turn on. Then, press the On/off key to enter the Function selection mode.
If no key is pressed within 5 minutes, the current settings will be cancelled, and the device will return to standby mode.
Pause
The cooking process can be paused either by pressing the Start/Pause knob or by opening the door straight away. In case the Start/Pause knob has been pressed, press it again to continue cooking. If the door has been opened, simply close it again and the oven will automatically continue operating.
Time and temperature adjustment
The Start/Pause knob can be used to adjust time and temperature.
After setting the desired function or menu, press the knob and rotate it to set the time. Once time has been set, rotate it again to set the temperature. Then, press the knob to confirm the settings.
Settings
While the Steam, Grill, Grill & steam and Air fryer modes are activated, the Child lock icon will light up. Press the Child lock icon, the time LED icon and the Start/Pause icon in the knob will blink. Turn the knob to adjust temperature and time and then press the Start/Pause knob to
confirm. The light indicator of the Start/Pause knob will blink for 5 seconds while settings are saved. Under the mentioned modes, time and temperature can be adjusted during operation.
When the Menu function is selected, the Settings/Child lock icon will light up. Adjust time according to the amount of food. Select the desired recipe. Once the Settings/Child lock icon turns off, time will be saved and will not be modified.
Child lock
Fig. 14.
While any of the modes or functions are running and the Settings/Child lock icon is lighted up, hold down this key for 3 seconds to activate the Child lock function. The Child lock icon will light up. Hold down the same key for 3 seconds de cancel the function.
Start/stop knob
Press the knob to start or pause operation.
Rotate the knob clockwise to select the desired function or mode: Steam, Grill, Steam & grill, Air fryer, Menu, Cleaning, Defrost or Ferment.
Rotate the knob to adjust time and temperature under any of the before mentioned functions or modes.
When the Start/Pause icon in the knob blinks, press the knob to confirm or turn it to adjust settings.
The Start/Pause icon will remain lighted up during operation.
Display
Steam
Fig. 3.
The Steam function is used for steaming food. The default time and temperature are 30 mins and 100 °C.
Select this mode, the Steam icon and the Start/Pause icon will light up. Press the knob to confirm and enter the Settings function.
Rotate the knob to set the time, from 1 minute to 2 hours. Press the knob to confirm. Rotate the knob to set the temperature from 100 °C to 110 °C. Once both time and temperature are set, press the Start/Pause knob to start operation. The time countdown will be displayed.
Grill
Fig. 4.
When this function is activated, the top and bottom heating elements operate at the same time. It includes a preheating cycle which is run before food is put inside the oven. The default
time and temperature are 30 min and 180 °C.
Rotate the knob to set the time, from 1 minute to 2 hours. Press the knob to confirm. Rotate the knob to set the temperature from 100 °C to 230 °C. Once both time and temperature are set, press the Start/Pause knob to start operation.
When it starts grilling, the Preheating icon will light up indicating the preheating cycle has begun. When preheating is finished, the Preheating icon will turn off and the device will beep 10 times indicating food can be introduced in the oven. The device will start grilling automatically.
Grill & steam
Fig. 5.
This function mainly consists of grilling, and during grilling, the oven generates some steam, so food is well done and tender at the same time. The default time and temperature are 30 min and 180 °C.
Rotate the knob to set the time, from 1 minute to 2 hours. Press the knob to confirm. Rotate the knob to set the temperature from 120 °C to 230 °C. Once both time and temperature are set, press the Start/Pause knob to start operation.
Air fryer
Fig. 6.
Under this mode, the back heater of the oven is activated, and food is cooked through convection. The default time and temperature are 30 min and 180 °C.
Rotate the knob to set the time, from 1 minute to 2 hours. Press the knob to confirm. Rotate the knob to set the temperature from 100 °C to 230 °C. Once both time and temperature are set, press the Start/Pause knob to start operation.
When it starts operating, the Preheating icon will light up indicating the preheating cycle has begun. When preheating is finished, the Preheating icon will turn off and the device will beep 10 times indicating food can be introduced in the oven. The device will start air frying automatically. The time countdown will be displayed.
Menu
Fig. 7.
The menu has 31 different recipes.
When the menu key is pressed, the Menu icon and the Start/Pause icon will blink. Press the Start/Pause knob to enter the menu. The display will show "F-00". Rotate the knob to select the desired recipe "F-01" "F-02" .... "F-31" and press the Start/Pause knob to confirm.
Once the menu has been set and the device has started operating, the Settings/Child lock icon will light up. The time and temperature for the preset recipes can only be adjusted while this icon is blinking. Once the icon stops blinking, time and temperature cannot be adjusted
until the program finishes.
Defrost
Fig. 8.
When the Defrost function is activated, the Defrost icon and the Start/Pause icon will blink. Press the Start/Pause knob to confirm. The default time and temperature are 20 min and 55°C.
Rotate the knob to set the time, from 5 minutes to 2 hours. Press the knob to confirm. Rotate the knob to set the temperature from 50 °C to 60 °C. Once both time and temperature are set, press the Start/Pause knob to start operation. The time countdown will be displayed.
Ferment
Fig. 9.
When the Ferment function is activated, the Ferment icon and the Start/Pause icon will blink. The default time and temperature are 40 min and 40 °C.
Rotate the knob to set the time, from 5 minutes to 2 hours. Press the knob to confirm. Rotate the knob to set the temperature from 30 °C to 50 °C. Once both time and temperature are set, press the Start/Pause knob to start operation.
Cleaning
Fig. 10.
When the Cleaning function is activated, the Cleaning icon and the Start/Pause icon will blink. Press the knob to confirm and select the cleaning mode: "C-1" or "C-2".
C-1: Clean the steam generator from scale in 50 min.
C-2: Clean cavity or disinfect the appliance. 25 min at 100 °C.
How to clean scale with C-1
When the heating pipe in the steam oven has been run for 100 hours, the system will remind the user to remove the scale from the evaporating heater. The descaling function can also be activated automatically and manually when desired. The Cleaning icon will light up when the function is activated.
The descaling mixture (water and descaling product) must be prepared according to the mixing ratio of 1:8. Mix it and pour it into the tank. Make sure the mixture in the water tank is not lower than the MIN. mark and does not exceed the MAX. Mark.
20 minutes before the descaling cycle ends, the device will remind you to pull out the tank, drain the descaling product and replace it with clean water. The Cleaning icon will blink, and the device will beep. As soon as the tank is replaced, the device will resume the cycle. 10 minutes before the descaling cycle ends, the device will remind you to pull out the tank and replace with clean water. As soon as the tank is replaced, the device will resume the cycle.
Once the cycle is completely finished, the Cleaning icon will light up.
Empty tank warning
Fig. 11.
When the tank runs out of water, the device will stop operating, will beep 10 times and the Empty tank icon on the display will start blinking. Once water in the tank is refilled, the device can continue working.
Warning: The water tank must be filled every time the oven is used, even if the steam function is not to be used. Without water in the tank, the device will not operate.
Preheating
Fig. 12.
The Preheating icon will light up during the preheating process under the previously mentioned functions and will turn off the oven has reached the set temperature.
OK
Fig. 13.
When a program or function is completed, the display will show "END", the OK icon will light up and the oven will beep 10 times.
Note: The inside light will turn on for 3 minutes when the oven starts operating, when the door is open or when the knob is rotated.
Menu recipes
| Code | Food type | Heating time (min) | Heating temperature (°C) | Food weight (g) |
| F-01 | Steam vegetables | 16 | 100 | 600 |
| F-02 | Steam rice | 50 | 100 | 200 |
| F-03 | Steam fish | 20 | 100 | 600 |
| F-04 | Steam shrimp | 15 | 100 | 500 |
| F-05 | Steam crab | 30 | 100 | 800 |
| F-06 | Steam eggs | 18 | 100 | 300 |
| F-07 | Steam chicken | 30 | 100 | 800 |
| F-08 | Steam papaya | 35 | 100 | 400 |
| F-09 | Roast chicken | 45 | 230 | 1000 |
| F-10 | Roast steak | 13 | 230 | 600 |
| F-11 | Roast muttons | 35 | 200 | 600 |
| F-12 | Roast ribs | 20 | 210 | 500 |
| F-13 | Roast salmon | 22 | 210 | 400 |
| F-14 | Roast chicken legs | 26 | 210 | 750 |
| F-15 | Roast chicken wings | 23 | 210 | 500 |
| F-16 | Roast saury | 20 | 220 | 600 |
| F-17 | Roast chips | 18 | 220 | 500 |
| F-18 | Roast shrimp | 15 | 180 | 400 |
| F-19 | Roast sausages | 13 | 200 | |
| F-20 | Roast bacon | 11 | 200 | |
| F-21 | Pizza | 22 | 180 | |
| F-22 | Mini pizza | 18 | 180 | |
| F-23 | Baguette bread | 16 | 180 | |
| F-24 | Chiffon cake | 50 | 150 | |
| F-25 | Yogurt cheesecake | 60 | 150 | |
| F-26 | Puff | 32 | 180 | |
| F-27 | Cookies | 14 | 180 | |
| F-28 | Egg tart | 22 | 180 | |
| F-29 | Roast almond | 10 | 140 | |
| F-30 | Roast walnut | 12 | 160 | |
| F-31 | Yoghurt | 480 | 45 |
Note: These data are approximate and will depend on different factors.
4. CLEANING AND MAINTENANCE
Take off the plug and cool down before cleaning.
When cleaning, wash the interior and exterior with soft cotton (or sponge) with neutral cleaner.
Then wash with clean water. Do not use hard brush or any others to wash, so as not to scrape the interior surface of the oven.
Do not use toxic and abrasive cleaners such as gasoline, polishing powder or solvent.
The water tank shall be cleaned and wiped gently with a soft cloth. After wiping or cleaning the inner wall, install the water tank in its original place.
After cooking is completed, empty the residual water in the water holder.
The sealing surface of the oven door shall be cleaned frequently and wiped with a soft dry cloth.
The grill is dishwasher safe.
If the steam oven is not going to be used for a long time, disconnect it from the power supply and clean the cavity.
Unplug the device when replacing the bulb.
Store the device in a safe, dry place.
- TROUBLESHOOTING
| Error | Possible cause | Solution |
| E01 | Back temperature sensor error | Turn the oven off, open the door and allow it to cool down for 10 minutes. If the problem continues, contact the Technical Support Service of Cecotec. |
| E02 | Back temperature sensor short-circuit | Turn the oven off, open the door and allow it to cool down for 10 minutes. If the problem continues, contact the Technical Support Service of Cecotec. |
| E03 | Top temperature sensor error | Turn the oven off, open the door and allow it to cool down for 10 minutes. If the problem continues, contact the Technical Support Service of Cecotec. |
| E04 | Top temperature sensor short-circuit | Turn the oven off, open the door and allow it to cool down for 10 minutes. If the problem continues, contact the Technical Support Service of Cecotec. |
| E05 | Top steamer sensor error | Contact the Technical Support Service of Cecotec. |
| E06 | Top steamer sensor short-circuit | Contact the Technical Support Service of Cecotec. |
| The display does not turn on | The device is not connected properly to the power supply. | Disconnect and connect it again. |
| The inside light does not turn on | The bulb is damaged. Poor contact. | Replace the bulb. Contact the Technical Support Service of Cecotec. |
| The fan does not work | Poor contact. Fan is damaged. | Contact the Technical Support Service of Cecotec. |
| No response from buttons | The PCB is damaged. The display is damaged. | Contact the Technical Support Service of Cecotec. |
| No steam | The water pipe is blocked. The device is faulty. The water intake system is damaged. | Contact the Technical Support Service. |
| The device does not work | The door is not closed properly. The door contact or sealing is damaged. | Close the door properly. Make sure the tank is full and properly installed. Contact the Technical Support Service of Cecotec. |
| Steam leakage from the oven door | The door is not closed properly. The door contact or sealing is damaged. There is too much steam inside the oven. This is normal. | Close the door properly. Contact the Technical Support Service of Cecotec. |
6. TECHNICAL SPECIFICATIONS
Model: Bake&Steam 3000 Combi
Product reference: 02218
1900-2200 W, 220-240 V\~, 50/60 Hz
Made in China | Designed in Spain
7. DISPOSAL OF OLD ELECTRICAL APPLIANCES
The European directive 2012/19/EU on Waste Electrical and Electronic Equipment (WEEE), specifies that old household electrical appliances must not be disposed of with the normal unsorted municipal waste. Old appliances must be collected separately, in order to optimise the recovery and recycling of the materials they contain and reduce the impact on human health and the environment.
The crossed out “wheeled bin” symbol on the product reminds you of your obligation to dispose of the appliance correctly.
Consumers must contact their local authorities or retailer for information concerning the correct disposal of old appliances and/or their batteries.
8. TECHNICAL SUPPORT AND WARRANTY
This product is under warranty for 2 years from the date of purchase, as long as the proof of purchase is submitted, the product is in perfect physical condition, and it has been given proper use, as explained in this instruction manual.
The warranty will not cover the following situations:
The product has been used for purposes other than those intended for it, misused, beaten, exposed to moisture, immersed in liquid or corrosive substances, as well as any other fault attributable to the customer.
The product has been disassembled, modified, or repaired by persons, not authorised by the official Technical Support Service of Cecotec.
Faults deriving from the normal wear and tear of its parts, due to use.
The warranty service covers every manufacturing defects of your appliance for 2 years, based on current legislation, except consumable parts. In the event of misuse, the warranty will not apply.
If at any moment you detect any problem with your product or have any doubt, do not hesitate to contact Cecotec Technical Support Service at +34 963 210 728.
1. PIÈCES ET COMPOSANTS
Img. 1
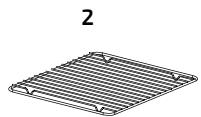
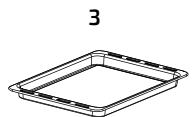

Fig./Img./Abb./ Rys. / Obr. 1

Fig./Img./Abb./Rys. / Obr. 2

Fig./Img./Abb./ Rys. / Obr. 3

Fig./Img./Abb./ Rys. / Obr. 4

Fig./Img./Abb./ Rys. / Obr. 5

Fig./Img./Abb./ Rys. / Obr. 6

Fig./Img./Abb./ Rys. / Obr. 7

Fig./Img./Abb./ Rys. / Obr. 8

Fig./Img./Abb./ Rys. / Obr. 9

Fig./Img./Abb./ Rys. / Obr. 10

Fig./Img./Abb./ Rys. / Obr. 11
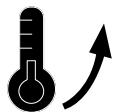
Fig./Img./Abb./ Rys. / Obr. 12

Fig./Img./Abb./ Rys. / Obr. 13

Fig./Img./Abb./ Rys. / Obr. 14

Fig./Img./Abb./ Rys. / Obr. 15


Fig./Img./Abb./ Rys. / Obr. 16
www.cecotec.es
Quart de Poblet, Valencia (Spain)
IC01200617

Brand : CECOTEC
Model : Bakesteam 3000 Combi
Category : Cooker