Twistice 2600 - Washing machine CECOTEC - Free user manual and instructions
Find the device manual for free Twistice 2600 CECOTEC in PDF.


User questions about Twistice 2600 CECOTEC
0 question about this device. Answer the ones you know or ask your own.
Ask a new question about this device
Download the instructions for your Washing machine in PDF format for free! Find your manual Twistice 2600 - CECOTEC and take your electronic device back in hand. On this page are published all the documents necessary for the use of your device. Twistice 2600 by CECOTEC.
USER MANUAL Twistice 2600 CECOTEC
Safety instructions 9
-
Parts and components 38
-
Before use 38
-
Operation 39
-
Cleaning and maintenance 41
-
Troubleshooting 42
-
Technical specifications 43
-
Disposal of old electrical and electronic appliances 44
-
Technical support and warranty 44
-
Copyright 44
-
Simplified EU Declaration of Conformity 44
SOMMAIRE
Read these instructions thoroughly before using the appliance. Keep this instruction manual for future reference or new users.
- All safety instructions must be closely followed when using the appliance.
- Do not store explosive substances such as aerosol cans with flammable propellant in this appliance.
- This appliance is designed for domestic use only and is not intended for bars, restaurants, farmhouses, hotels, motels and offices.
- Children from 3 to 8 years old are not allowed to load or unload refrigeration appliances.
-
To avoid food contamination, please follow the instructions below:
-
Opening the door for a long period of time may cause a significant increase in temperature in the appliance's compartments.
- Regularly clean the surfaces that might be in contact with food and accessible evacuation systems.
- Clean the water tank if it hasn't been used for 48 h; rinse the distribution system connected to the water distribution network if water has not been withdrawn for 5 days.
- If the refrigerator appliance remains empty for a long period of time, unplug it, defrost it, clean it, dry it, and leave the door open to prevent interior mould formation.
- WARNING: when positioning the appliance, make sure that the power cable does not get trapped or damaged.
- WARNING: do not place multiple mobile sockets or mobile power supplies on the rear of the appliance.
- WARNING: keep the appliance ventilation grilles or the cabinet for built-in installation free from any obstruction.
- WARNING: do not use mechanical devices or similar to accelerate the defrosting process other than those recommended by the manufacturer.
- WARNING: do not use electrical devices inside the food-preservation compartment unless they're of a type recommended by the manufacturer.
- WARNING: do not damage the refrigeration circuit.
- Remove all packing materials and carefully check the appliance to ensure that it is in good condition and that the main body, power cable, and plug are not damaged.
- Do not get the cable, plug, or ventilation outlets wet. Do not immerse the appliance in water or other liquids to avoid electric shocks.
- If the cable is damaged, it must be replaced by the manufacturer, the supplier, or qualified personnel to avoid hazards.
- Unplug the appliance from the mains before cleaning and after every use.
- Do not turn the appliance upside down or tilt it more than 45° .
- This appliance can be used by children aged 8 years and above and people with reduced physical, sensory, or mental capabilities or lack of experience and knowledge if they have been given supervision or instruction concerning use of the appliance in a safe way and understand the hazards involved. Children must not play with the appliance.
Cleaning and user maintenance should not be carried out by unsupervised children.
- Do not use the appliance near naked flames or working hobs or stoves.
- Do not use the appliance outdoors.
- The refrigerant and blowing insulation gas are flammable: dispose of the appliance only at an authorised waste disposal facility. Do not expose the appliance to flames.
- WARNING: This appliance must not be connected to multi-socket power strips, extension cords or multiple power supplies.
- WARNING: Do not expose the appliance to fire, as some of its components may release hazardous or flammable substances when burning, such as refrigerant gases or plastic materials.

This symbol indicates that the refrigerant (R290) is flammable.
Warning: Risk of fire/flammable materials
The refrigerant isobutene (R290), a natural gas with a high level of environmental compatibility, is used in the cooling circuit of the appliance. However, it is flammable. Make sure that none of the components of the cooling circuit are damaged during the transport and installation of the appliance.
- If the cooling circuit is damaged:
- Avoid exposing the appliance to fire or sources of ignition.
- Ensure that the room in which the appliance is located is fully ventilated.
- Before using the appliance for the first time, wait 2 hours and keep the lid open during this time.
- Do not use purified water to prepare slushies.
- Make sure that the mains voltage matches the voltage specified on the appliance and that the earth connection of the mains plug is in good condition.
- Do not flip the appliance upside down or tilt it more than 45° .
- Keep the appliance at least 8 cm away from other objects to ensure good heat dissipation.
- Do not use accessories that are not recommended by Cecotec.
- Do not press the power button too often (wait at least 5 minutes) to avoid damage to the compressor.
- Do not use the appliance outdoors.
- Do not put your fingers into any openings of the appliance; doing so may cause damage.
INSTRUCTIONS DE SÉCURITÉ
- Handle
- Tank
- Evaporator
- Main body
- Water tank
- Control panel
- Trim
- Drip tray
- Top lid
- Mixing paddle
- Locking piece
Fig. 2
- Progress status indicator
- Thickness level knob
- Wine programme
- Slush programme
- Frappé programme
- Child Lock function icon
- Power icon
- Thickness level indicator
- Beer programme
- Mixed drinks programme
- Cleaning programme
- Start/pause icon
NOTE:
The graphics in this manual are schematic representations and may not exactly match the product.
2. BEFORE USE
- This appliance is packaged in a way as to protect it during transport. Take the appliance out of its box and remove all packaging materials. You can keep the original box and other packaging elements in a safe place to prevent damage to the appliance if you need to transport it in the future. If you wish to dispose of the original packaging, make sure all packaging materials are recycled accordingly.
- Make sure all parts and components are included and in good conditions. If there is any piece missing or in bad conditions, contact the official Cecotec Technical Support Service immediately.
Box content
- Slush machine
- Instruction manual
- Do not remove the serial number of the appliance in order to keep a correct traceability of it in case of assistance.
3. OPERATION
Note: Before using the appliance for the first time, clean all parts that may come into contact with the liquid. Before cleaning, make sure that the power cord plug is disconnected from the power socket. When using the appliance, keep it flat on a level surface to ensure that the compressor operates properly.
a. When using the appliance for the first time, fit the handle and drip tray as shown in figure 3:
a1. Press the handle against the base. Make sure it is fitted correctly (paying attention to the back and front). Fig. 3
a2. Once the drip tray lid is attached, place the drip tray on the appliance as shown in figure 4.
b. Before switching on the appliance, make sure that the mixing paddle and the tank are correctly fitted and fixed in place.
Figure 5 shows the tank in an unlocked state, while figure 6 shows the tank in a locked state.
Drinks preparation
- Before pouring the ingredients, make sure that the tank is correctly fitted. Remember to fit the handle and drip tray the first time you use the appliance. Once all parts are in place, open the top lid to pour in the ingredients, as shown in figure 7. Please note that the liquid level must be above the minimum and below the maximum, as shown in figure 8, where these positions are indicated.
Fig. 8 key:
- Maximum liquid level
-
Minimum liquid level
-
Then close the tank lid.
-
a. Plug the appliance into the mains. Once plugged in, press the power icon. The icon of the
ENGLISH
selected programme will light up. The icons of the non-selected programmes will also light up, but more faintly.
b. Press the icon of the desired programme.
c. You can select the thickness level by pressing the + or - icons. The thickness level indicator consists of 5 bars. If more bars appear on the display, the lower the temperature setting. Each time you press the - icon, a bar will disappear. On the other hand, each time you press the + icon, a bar will appear. The first time you use the appliance, the default thickness level will be 3 bars. Then you switch it on again, the setting selected previously will be displayed.
d. To start the appliance, press the start/pause icon. When this happens, the icon of the selected programme will be brighter than the other programmes. After 10 seconds of operation, the Child Lock function will be activated. When this happens, all icons (except for the Child Lock function) will stop working. To deactivate this function, press and hold the Child Lock function icon for 3 seconds. After this time, this icon will turn off and the other icons will work again.
e. Press the start/pause icon to pause the appliance or to start it again. To switch off, press the power icon.
f. When the appliance is switched on, the following symbol will appear on the display:

- When the preparation is ready, a beep will sound for 3 seconds, and the display will show "100%". The appliance will enter standby mode but will maintain the selected temperature. Then place a glass under the spout and pull the handle to dispense the preparation.
- If you do not perform any other operation, the appliance will continue in standby mode.
- Cleaning the appliance: Once you have dispensed the preparation, press and hold the Child Lock function icon for 3 seconds to deactivate the lock and then switch off the appliance by pressing the power icon. To clean the appliance, fill the tank with water up to the maximum level. Please note that the temperature of the poured water must not exceed 50 °C. Once this step has been completed, switch on the appliance and select the Cleaning programme. By default, this programme lasts 4 minutes. After cleaning, empty the water from the tank. If you notice that the tank is not completely clean after this time, run the Cleaning programme again.
Protection systems
a. Motor protection system: To prevent damage to the motor (as the process becomes harder and harder), the motor will automatically shut down when necessary.
b. Compressor protection system: To prevent the compressor from switching off and on frequently during the cooling process, it will take 3 minutes to start up. However, if you unplug the power cord for 20 seconds and then plug the appliance back in and switch it on, the compressor will start immediately, i.e. it will not wait for 3 minutes.
c. Tank fall protection system: In order to prevent the compressor or the mixing paddle from causing injury if the tank is pulled out or falls down, when this happens, the appliance will stop automatically, and the code 'OP' will be shown on the display.
Tips
- Do not overfill the tank, as the ingredients expand as the drink preparation begins. Note that the level of the liquid poured into the tank must be above the minimum level mark and below the maximum level mark (figure 8). The appliance will provide better performance if you fill the tank to the maximum level mark.
- The preparation time of the drink varies due to various factors, such as room temperature, initial temperature of the ingredients, sugar content and the selected thickness level.
- The percentage of sugar content of the ingredients must be higher than 6%. For the preparation of alcoholic drinks, the percentage of alcohol in the ingredients must be greater than 2% and less than 16%. If you pour an ingredient whose alcohol percentage is not within this range, ice will form on the evaporator and on the mixing paddle, which will damage the machine.
- Pouring pre-cooled ingredients can improve the performance of the machine.
- If you use natural fruit juices, filter them to prevent the solid parts from clogging the dispenser and damaging the machine.
- While the machine is preparing a drink, do not switch it off.
- If you use the machine for a long period of time or if you place it in a damp place, condensation droplets may form in the tank. This is a normal phenomenon.
4. CLEANING AND MAINTENANCE
Before starting cleaning, make sure that the appliance is switched off and disconnected from the power supply.
Use a soft, damp cloth to clean the machine's housing, avoiding the use of abrasive products that may damage the surface.
Avoid using abrasive cleaning products or harsh chemicals that may damage the machine's surface.
Disassembling the appliance
Before disassembling the appliance, fill the tank with tap water and run the Cleaning programme as described above. Once the cleaning process has finished, dispose of the water.
-
Then, disconnect the appliance from the mains and put the locking piece in the unlocked position (as shown in figure 6). Remove the tank and mixing paddle. Clean these parts and dry them thoroughly.
-
Also remove the drip tray and dispose of any liquid that may be inside. Then, wash it and dry it with a cloth.
ENGLISH
- Clean the evaporator and rear sealing gasket with a cloth. Please note that the sealing gasket cannot be removed or disassembled, otherwise the appliance may leak water.
Cleaning
The tanks and mixing paddle can be washed in the dishwasher. However, if you wish, you can wash them by hand following the following steps:
- Fill a washing-up bowl with about 8 l of warm water (about 40-50 °C) and some mild detergent. Follow the manufacturer's instructions to prevent excess detergent from damaging parts.
- Use a suitable cleaning brush to wash the parts.
- Then rinse them under running water.
- Clean the sealing gasket at the rear of the evaporator with a soft brush.
- Finally, dry all parts with a cloth or allow them to air dry.
Maintenance
Warning: Unplug the appliance before cleaning to avoid electric shock.
- Clean the tank, drip tray and mixing paddle regularly after use to prevent unpleasant odours.
- Clean the appliance lids with a damp cloth. During cleaning, make sure not to get the power cable, plug or ventilation openings wet. Do not immerse the appliance in water or any other liquid.
5. TROUBLESHOOTING
| Problem | Possible causes | Solutions |
| The mixing paddle struggle to rotate. | The ingredients you have used do not have enough sugar, which causes the evaporator to freeze. The drink is too thick. | Use ingredients that contain a higher sugar content. |
| Check that the mixing paddle is correctly fitted and not deformed. | Fit the mixing paddle correctly. | |
| The mixing paddle is deformed. | Replace the mixing paddle with a new one. To do so, please contact the official Cecotec Technical Support Service. | |
| The code “OP” appears on the display. | The tank is not fitted correctly. | Remove the tank and put it back correctly. If the problem persists, contact the official Cecotec Technical Support Service. |
| The code “E1” appears on the display. | The sensor has short-circuited. | Switch off the appliance and unplug it from the mains. Then plug it in and switch it back on. If the problem persists, contact the official Cecotec Technical Support Service. |
| The code “E2” appears on the display. | The sensor circuit is open. | Switch off the appliance and unplug it from the mains. Then plug it in and switch it back on. If the problem persists, contact the official Technical Support Service of Cecotec. |
| The code “E3” appears on the display. | A problem has occurred with the motor or Hall sensor. | Switch off the appliance and unplug it from the mains. Then plug it in and switch it back on. If the problem persists, contact the official Technical Support Service of Cecotec. |
6. TECHNICAL SPECIFICATIONS
Product reference: EU01_109564
Product: Twist&Ice 2600
Voltage: 220 - 240 V
Frequency: 50 / 60 Hz
Power: 220 W
Refrigerant/load: R290 / 23 g
Insulation type: Cyclopentane / C5H10
The appliance power consumption when off is 0.4 W, following the guidelines of EN 50564:2011 and the European regulations 1275/2008/EC and 801/2013/EC. For this purpose, the appliance is connected to the mains without performing any function. The switch/knob of the appliance was set to the OFF position.
ENGLISH
Technical specifications may change without prior notification to improve product quality. Made in China | Designed in Spain
7. DISPOSAL OF OLD ELECTRICAL AND ELECTRONIC APPLIANCES
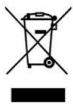
This symbol indicates that, according to the applicable regulations, the appliance and/or batteries must be disposed of separately from household waste. When this product reaches the end of its shelf life, you should dispose of the cells/batteries/accumulators and take them to a collection point designated by the local authorities.
For detailed information on how to properly dispose of electrical and electronic appliances and/or batteries, consumers should contact their local authorities.
Compliance with the above guidelines will help protecting the environment.
8. TECHNICAL SUPPORT AND WARRANTY
Cecotec shall be liable to the end user or consumer for any lack of conformity that exists at the time of delivery of the product under the terms, conditions and deadlines established by the applicable regulations.
Repairs should be carried out by qualified personnel.
If at any moment you detect any problem with your product or have any doubt, do not hesitate to contact the official Cecotec Technical Support Service at +34 96 321 07 28.
9. COPYRIGHT
The intellectual property rights over the texts in this manual belong to CECOTEC
INNOVACIONES, S.L. All rights reserved. The contents of this publication may not, in whole or in part, be reproduced, stored in a retrieval system, transmitted, or distributed by any means (electronic, mechanical, photocopying, recording or similar) without the prior authorization of CECOTEC INNOVACIONES, S.L.
10. SIMPLIFIED EU DECLARATION OF CONFORMITY
CE Cecotec Innovaciones hereby declares that this appliance complies with the essential requirements and other relevant provisions of the regulations applicable in the European Union. This appliance has been designed, manufactured and
tested to meet the required safety and quality standards. The full text of the EU Declaration of Conformity can be found on the following website: https://cecotec.es/es/information/declaration-of-conformity
1. PIÈCES ET COMPOSANTS
Img. 1
Fig./Img./Abb./Afb./ Rys. 1
1
2
3
4
5
6

8
8
8
8
8
8
8
8
8
8
8
8
8
8
8
8
8
8
8
8
8
8
8
8
8
8
8
8
8
8
8
8
8

Fig./Img./Abb./Afb./Rys. 2
Fig./Img./Abb./Afb./Rys. 3
Fig./Img./Abb./Afb./Rys. 3
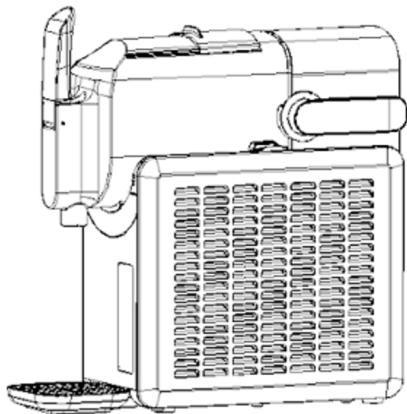
Fig./Img./Abb./Afb./Rys. 4

Fig./Img./Abb./Afb./ Rys. 5

Fig./Img./Abb./Afb./Rys. 6
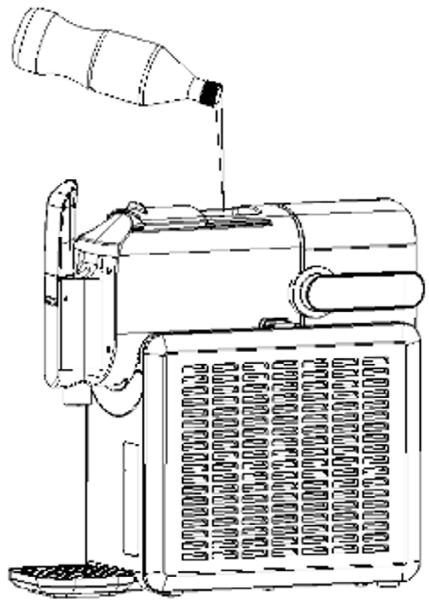
Fig./Img./Abb./Afb./Rys. 7
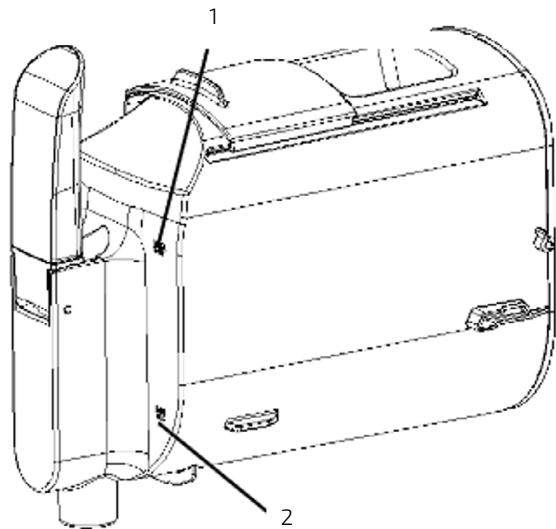
Fig./Img./Abb./Afb./ Rys. 8
www.cecotec.es
- SOMMAIRE
- INSTRUCTIONS DE SÉCURITÉ
- FIG. 2
- NOTE
- BEFORE USE
- BOX CONTENT
- OPERATION
- DRINKS PREPARATION
- FIG. 8 KEY
- ENGLISH
- PROTECTION SYSTEMS
- TIPS
- CLEANING AND MAINTENANCE
- DISASSEMBLING THE APPLIANCE
- CLEANING
- MAINTENANCE
- TROUBLESHOOTING
- TECHNICAL SPECIFICATIONS
- DISPOSAL OF OLD ELECTRICAL AND ELECTRONIC APPLIANCES
- TECHNICAL SUPPORT AND WARRANTY
- COPYRIGHT
- SIMPLIFIED EU DECLARATION OF CONFORMITY
- PIÈCES ET COMPOSANTS
- IMG. 1
Brand : CECOTEC
Model : Twistice 2600
Category : Washing machine