
C610N - Color laser printer OKI - Free user manual and instructions
Find the device manual for free C610N OKI in PDF.



| Product type | Color laser printer |
| Brand | OKI |
| Model | C610N |
| Print speed (black & white) | Up to 22 pages per minute (A4) |
| Print speed (color) | Up to 22 pages per minute (A4) |
| Print resolution | Up to 1200 x 600 dpi |
| Monthly duty cycle | Up to 50,000 pages |
| Standard memory | 128 MB (expandable) |
| Connectivity | USB 2.0, Ethernet 10/100 Base-TX |
| Supported paper sizes | A4, A5, A6, B5, Letter, Legal, Envelopes |
| Main tray capacity | 250 sheets (standard) |
| Multi-purpose tray capacity | 100 sheets |
| Dimensions (W x D x H) | 435 x 509 x 424 mm |
| Weight | Approx. 25 kg |
| Power supply | 220-240 V AC, 50/60 Hz |
| Average power consumption | Approx. 650 W (printing), 95 W (standby) |
| Noise level (printing) | Approx. 52 dB |
| Main features | Color laser printing, multi-purpose tray, memory expansion via SD card |
| Maintenance and cleaning | Clean the rollers and drum with a lint-free cloth. Access consumables through the front and side covers. |
| Safety | Cover locking function, automatic shutdown in case of overheating |
| Spare parts and repairability | Maintenance kits and consumables available (drum, toner, fuser unit) |
| General information | Network-ready printer. Optional SD card installation for storage and secure printing. |
Frequently Asked Questions - C610N OKI
User questions about C610N OKI
0 question about this device. Answer the ones you know or ask your own.
Ask a new question about this device
Download the instructions for your Color laser printer in PDF format for free! Find your manual C610N - OKI and take your electronic device back in hand. On this page are published all the documents necessary for the use of your device. C610N by OKI.
USER MANUAL C610N OKI
The optional SD card enables collating of printed pages and can be used to store overlays and macros, fonts, and secure or proof documents waiting to be printed.
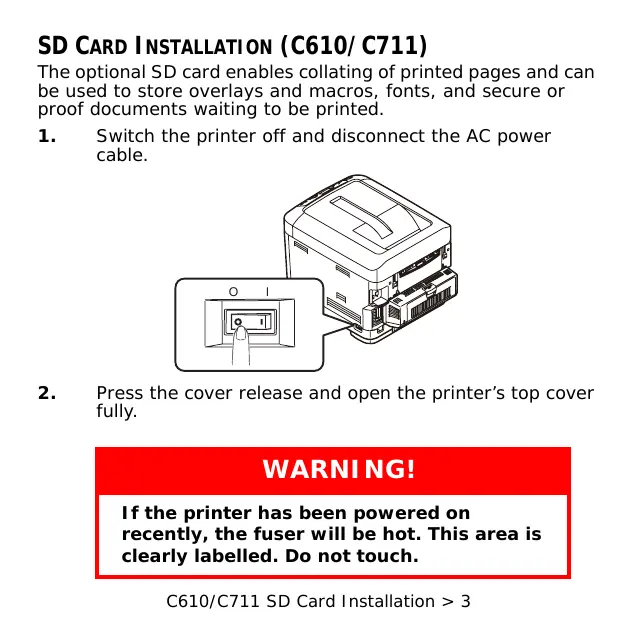
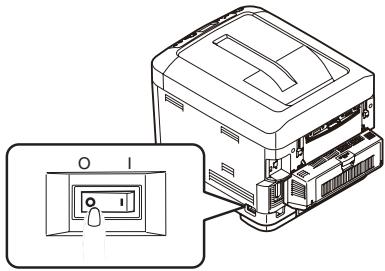
- Switch the printer off and disconnect the AC power cable.
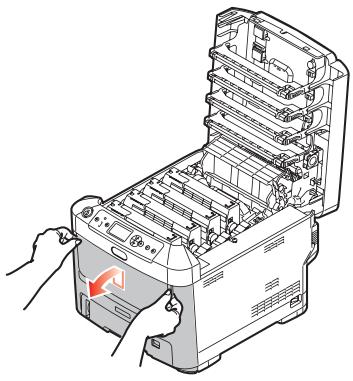
- Press the cover release and open the printer's top cover fully.
WARNING!
If the printer has been powered on recently, the fuser will be hot. This area is clearly labelled. Do not touch.
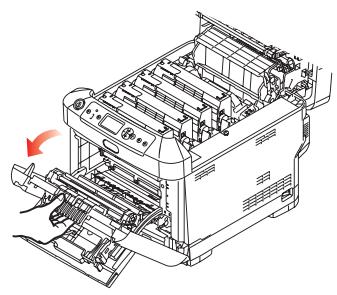
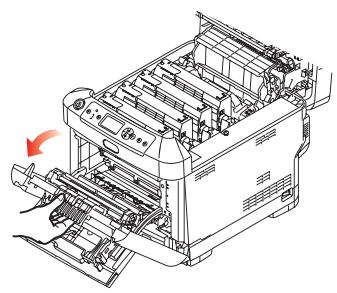
3. Pull down the MP Tray using the depressions. Lift the front cover release lever and lower the front cover.
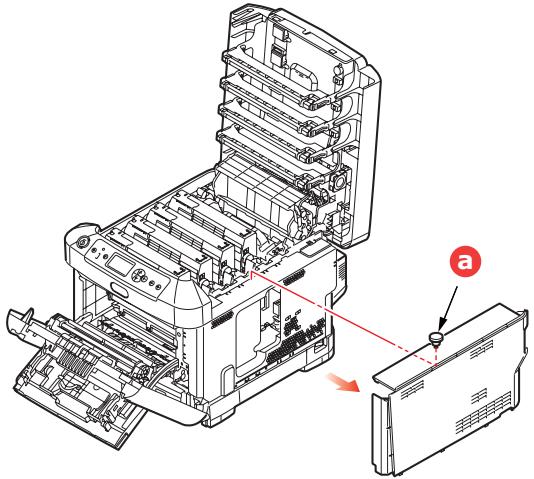
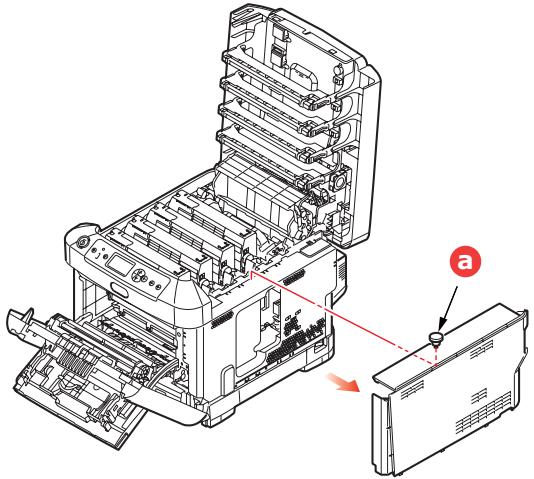
- Loosen the screw (a) securing the right-hand side cover. Lift the edge of the side cover slightly and pull the cover away from the printer at the top. Lift the cover slightly to detach it from the printer. Place it safely to one side.
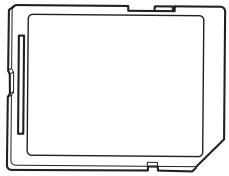
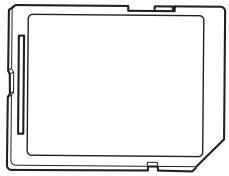
- Notice that the SD card has one champered corner.
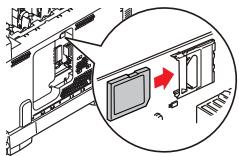
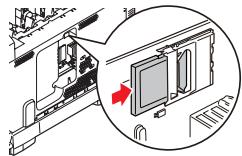
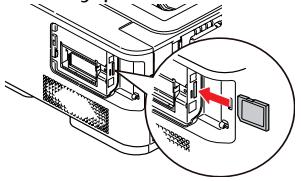
- Gently push the SD card into the slot as shown.
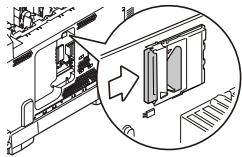
-
Locate the retaining clips at the bottom of the side cover into their rectangular holes near the bottom of the printer.
-
Close the top of the side cover up to the printer and refit the securing screw loosened in step 4.
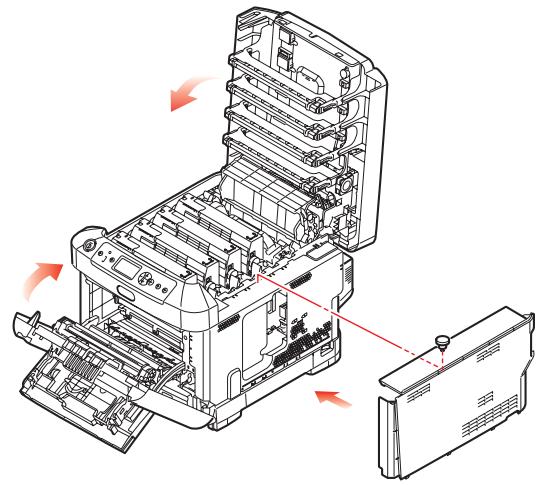
- Close the front cover and the top cover, pressing down firmly at each side to latch it closed.
-
Reconnect the AC power cable and switch the printer on.
-
When the printer is ready, print a menu map as follows:
(a) Press the Enter button.
(b) Press the Menu down button then the Enter button to select the Print Information menu.
(c) Select Configuration with the Enter button.
(d) Press the Enter button once more to execute the Configuration menu.
(e) When the Configuration map is printed, press On Line to exit the menu system. Examine the first page of the menu map. This should now indicate that the SD card is installed.
CARTE SD (C610/C711)
The optional SD card enables collating of printed pages and can be used to store overlays and macros, fonts, and secure or proof documents waiting to be printed.
- Switch the printer off and disconnect the AC power cable.
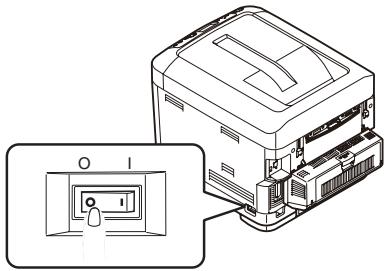
- Press the cover release and open the printer's top cover fully.
WARNING!
If the printer has been powered on recently, the fuser will be hot. This area is clearly labelled. Do not touch.
3. Pull down the MP Tray using the depressions. Lift the front cover release lever and lower the front cover.
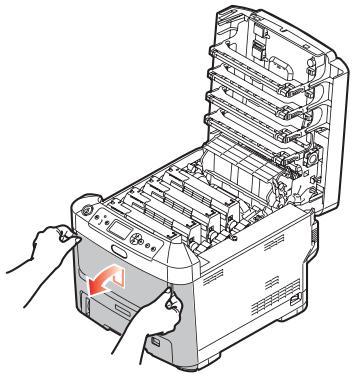
- Loosen the screw (a) securing the right-hand side cover. Lift the edge of the side cover slightly and pull the cover away from the printer at the top. Lift the cover slightly to detach it from the printer. Place it safely to one side.
- Notice that the SD card has one champered corner.
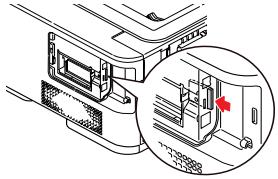
- Gently push the SD card into the slot as shown.
-
Locate the retaining clips at the bottom of the side cover into their rectangular holes near the bottom of the printer.
-
Close the top of the side cover up to the printer and refit the securing screw loosened in step 4.
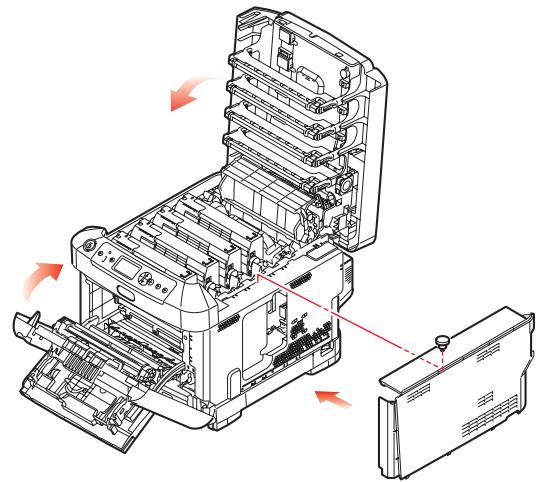
- Close the front cover and the top cover, pressing down firmly at each side to latch it closed.
-
Reconnect the AC power cable and switch the printer on.
-
When the printer is ready, print a menu map as follows:
(a) Press the Enter button.
(b) Press the Menu down button then the Enter button to select the Print Information menu.
(c) Select Configuration with the Enter button.
(d) Press the Enter button once more to execute the Configuration menu.
(e) When the Configuration map is printed, press On Line to exit the menu system. Examine the first page of the menu map. This should now indicate that the SD card is installed.
CARTE SD (C530 UNIQUEMENT)
Brand : OKI
Model : C610N
Category : Color laser printer