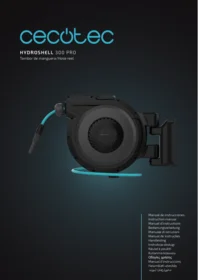
Hydroshell 300 Pro - Washing machine CECOTEC - Free user manual and instructions
Find the device manual for free Hydroshell 300 Pro CECOTEC in PDF.


| Brand | Cecotec |
| Model | Hydroshell 300 Pro |
| Product type | Wall-mounted hose reel with soap gun |
| Hose length | 30 m |
| Box contents | 30 m hose reel, soap gun, hose nozzle, instruction manual |
| Included accessories | Mounting bracket, retaining screws, 5 self-tapping screws, 5 plastic wall plugs |
| Mounting | Wall mounting on a vertical surface (pillar, concrete, steel structure) |
| Installation | Drilling 5 holes of Ø 12 mm, depth 60 mm |
| Recommended installation height | About 1 meter from the ground |
| Connection | Water supply via tap; open the tap after connecting the hose |
| Soap gun | Included for soap application |
| Hose nozzle | Included |
| Maintenance | Rinse the hose and reel after use, check the connections and screws |
| Installation safety | Detect cables/pipes before drilling; use wall plugs suitable for the wall; wear goggles and gloves |
| Repairability | Contact the official Cecotec after-sales service if a part is missing or defective |
| Power supply | Hydraulic connection, no electrical power required |
Frequently Asked Questions - Hydroshell 300 Pro CECOTEC
User questions about Hydroshell 300 Pro CECOTEC
0 question about this device. Answer the ones you know or ask your own.
Ask a new question about this device
Download the instructions for your Washing machine in PDF format for free! Find your manual Hydroshell 300 Pro - CECOTEC and take your electronic device back in hand. On this page are published all the documents necessary for the use of your device. Hydroshell 300 Pro by CECOTEC.
USER MANUAL Hydroshell 300 Pro CECOTEC
- Parts and components 9
- Installation 10
- Operation 10
- Cleaning and maintenance 11
- Troubleshooting 11
- Recycling 11
- Copyright 12
- Simplified EU Declaration of Conformity 12
SOMMAIRE
EN · The coding in this manual is generic and applies to all code variants of the appliance.
es/information/declaration-of-conformity
Please read these operating instructions carefully and take note of the information provided. Use these instructions to familiarise yourself with the product, its proper use, and safety instructions.
1. PARTS AND COMPONENTS
Fig. 1
- Hose reel (x1)
- Mounting bracket (x1)
- Retaining screw (x1)
- Self-tapping screws (x5)
- Plastic wall plugs (x5)
Note:
The graphics in this manual are schematic representations and may not exactly match the product.
2. BEFORE USE
- This appliance comes in a packaging designed to protect it during transport. Remove the appliance from its box. You can keep the original box and other packaging materials in a safe place to prevent damage to the appliance if you need to transport it in the future. If you wish to dispose of the original packaging, make sure all items are recycled properly.
- Check that all parts and components are included and in good condition. If any of them are missing or damaged, please contact Cecotec's Official Technical Support Service immediately.
Box content:
- 30 m hose reel
- Soap spray gun
- Hose nozzle
- Instruction manual
- Do not remove the product's serial number in order to keep proper traceability if technical assistance is required.
3. INSTALLATION
The hose reel must be installed exclusively on a vertical surface such as concrete pillars, concrete walls, or steel structures.
- Choose a suitable location near a water outlet.
- Use the mounting bracket as a template to mark the position of the screws and drill five holes ( 12 mm/0.47 in, Depth: 60 mm/2.36 in) in the wall. Fig. 2
- Secure the bracket with the four self-tapping screws. Fig. 3
- Attach the reel to the mounting bracket. Fig. 4 and 5
Important note:
- The hose reel must always be installed horizontally on a vertical surface.
- It is recommended to mount the reel approximately 1 metre above ground level for ease of use.
Warnings:
- Before drilling, use a cable and pipe detector to verify there are no hidden utilities in the wall.
- Use appropriate wall plugs for the wall type to ensure a secure fixing.
- Ensure the mounting surface can support the weight of the reel when the hose is full of water.
- Use appropriate tools and protective equipment (goggles and gloves) during installation.
- Check all bolts and screws are properly tightened before use.
4. OPERATION
- Connection: Connect the hose to the water supply and turn on the tap.
- Unwinding: Pull the hose to the desired length and stop at any point.
- Rewinding: Guide the hose end back to the reel. Turn off the tap and loosen the main hose connector.
Warnings:
- Do not exceed the recommended maximum pressure to avoid damage.
- Keep the hose reel out of the reach of children.
- Make sure to drain water completely if the reel will not be used for an extended period, especially during winter.
5. CLEANING AND MAINTENANCE
Cleaning
- Reel exterior: Clean the reel's housing with a damp cloth. Do not use abrasive cleaners that could damage the surface.
- Avoid internal water: Do not clean the reel's interior with water to prevent damage to the mechanism.
Maintenance
- Water pressure: When not in use, shut off the water source and open the nozzle to release residual pressure.
- Chemical substances: Do not use the hose to transport chemical or corrosive substances
- Long-term storage: If not using the reel for an extended period, store it in a cool, dry place to extend its service life.
- Regular inspection: Periodically check mounting points and hose connections to ensure they are in good condition.
- Extreme temperatures: Avoid leaving the reel exposed to extreme temperatures to prevent damage.
- Periodic checks: Perform regular checks of the rewinding mechanism to ensure smooth operation.
6. TROUBLESHOOTING
| Problem | Possible cause | Solution |
| The hose does not retract. | The hose is improperly stacked. | Pull out the entire hose and allow it to return slowly to the reel while guiding it with your hands. |
| The spring is fatigued. | Recharge the spring by turning it 1-2 turns: remove the small cap, use a spanner to hold the preload wheel slot, unscrew the four wheel screws, then turn it 1-2 turns clockwise, tighten the screws and replace the cap (Fig. 5). |
7. RECYCLING
The product must be disposed of separately from household waste.
When this product reaches the end of its useful life, it should be taken to a suitable place for recycling. For detailed information on the most appropriate way to dispose of the product, the consumer should contact the local authorities.
Compliance with the above guidelines will help to protect the environment.
Information regarding national packaging recycling systems and their marking can be found on our website.
8. COPYRIGHT
The intellectual property rights over the texts in this manual belong to CECOTEC INNOVACIONES, S.L. All rights reserved. The content of this publication may not, either in part or in its entirety, be reproduced, stored in a retrieval system, transmitted or distributed by any means (electronic, mechanical, photocopying, recording or similar) without prior authorisation from CECOTEC INNOVACIONES, S.L.
9. SIMPLIFIED EU DECLARATION OF CONFORMITY

Cecotec Innovaciones hereby declares that this appliance complies with the essential requirements and other relevant provisions of the regulations applicable in the European Union. This appliance has been designed, manufactured and tested in compliance with required safety and quality standards. The full text of the EU Declaration of Conformity can be found on
the following website: https://cecotec.es/es/information/declaration-of-conformity
https://storececotec.de/de/information/declaration-of-conformity
declaration-of-conformity
declaration-of-conformity
declaration-of-conformity
information/declaration-of-conformity
Fig./Img./Abb./Afb./Rys.1
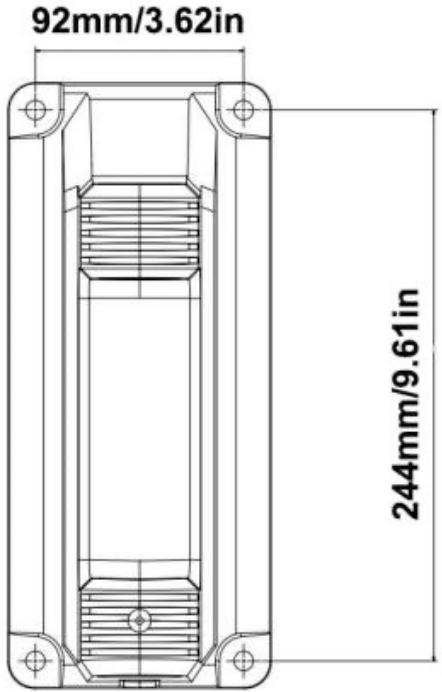
Fig./Img./Abb./Afb./Rys. 2

Fig./Img./Abb./Afb./Rys. 3
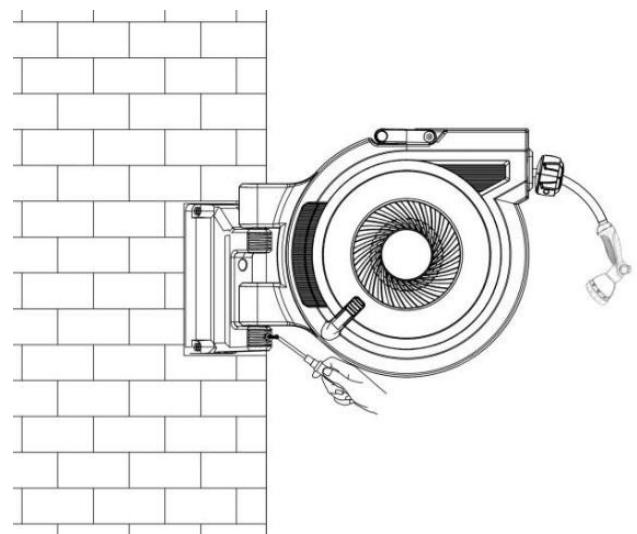
Fig./Img./Abb./Afb./Rys. 5

Fig./Img./Abb./Afb./Rys. 4

Fig./Img./Abb./Afb./Rys. 6
www.cecotec.es

Brand : CECOTEC
Model : Hydroshell 300 Pro
Category : Washing machine