
CYBORG KEYBOARD V 7 - Gaming Keyboard SAITEK - Free user manual and instructions
Find the device manual for free CYBORG KEYBOARD V 7 SAITEK in PDF.

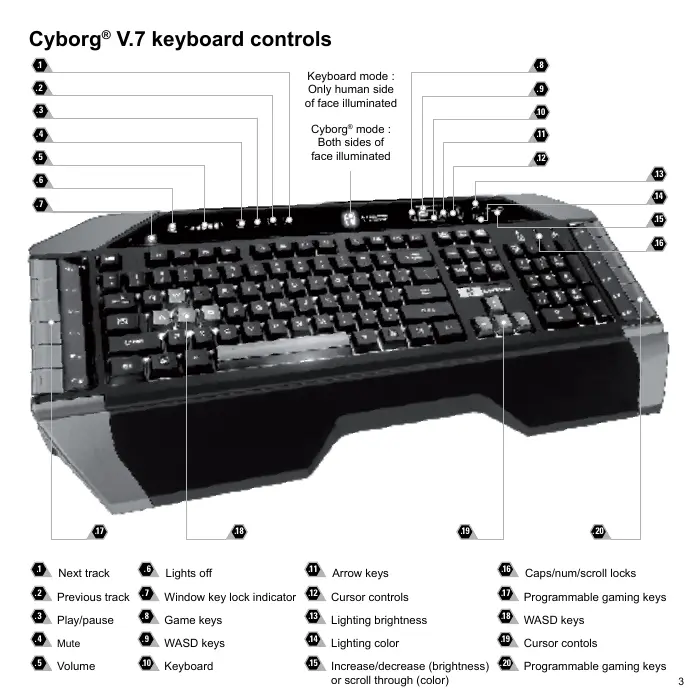


| Product Type | Gaming Keyboard |
| Brand | Saitek |
| Model | Cyborg Keyboard V7 |
| Category | Gaming Keyboard |
| Backlighting | Independent per zone, 3 colors (red, green, amber) |
| Programmable Keys | 12 Cyborg keys |
| Wrist Rest | Adjustable |
| Connectors | USB, audio input/output, microphone |
| Gold-plated connectors | Yes (USB and audio) |
| System Compatibility | Windows XP, XP64, Vista, 7 |
| Power | USB |
| Main Functions | Normal and Cyborg mode, multimedia controls, Windows key lock, settings memory |
| Maintenance | Clean with a soft, dry cloth |
| Safety | Do not expose to moisture or liquids |
| General Information | Made in China, © 2010 Mad Catz |
Frequently Asked Questions - CYBORG KEYBOARD V 7 SAITEK
User questions about CYBORG KEYBOARD V 7 SAITEK
0 question about this device. Answer the ones you know or ask your own.
Ask a new question about this device
Download the instructions for your Gaming Keyboard in PDF format for free! Find your manual CYBORG KEYBOARD V 7 - SAITEK and take your electronic device back in hand. On this page are published all the documents necessary for the use of your device. CYBORG KEYBOARD V 7 by SAITEK.
USER MANUAL CYBORG KEYBOARD V 7 SAITEK
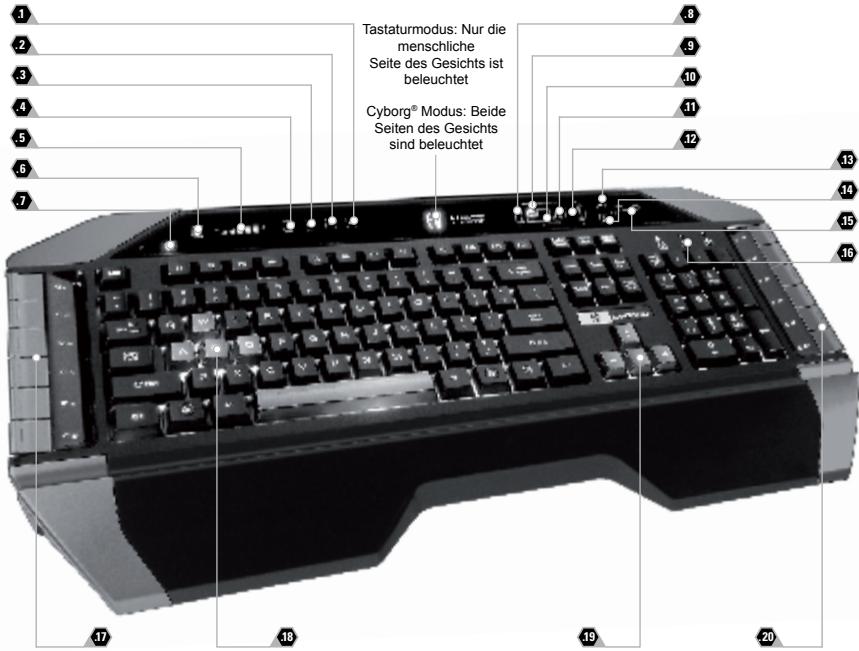
1 Next track
Previous track
Play/pause
Mute
Volume
Lights off
7 Window key lock indicator
Game keys
WASD keys
10. Keyboard
10 Arrow keys
12 Cursor controls
19. Lighting brightness
1 Lighting color
15 Increase/decrease (brightness) or scroll through (color)
Caps/numScroll locks
17 Programmable gaming keys
WASD keys
19 Cursor controls
20 Programmable gaming keys
Cyborg® V.7 keyboard
Congratulations on purchasing your Cyborg® V.7 keyboard. As well as being a high performance office tool the Cyborg® V.7 keyboard is designed specifically for gaming and includes the following features:
- Independent backlighting - set different colours and brightness for the key gaming areas of the keyboard
- Tri-colour backlighting - choose from shades of red, green and amber
Key illumination settings ensure colours remain even after a system reboot - Enhanced multiple key presses in gaming areas for complex in-game commands
- Cyborg® keys - 12 programmable keys for all your favourite macros and commands
- Hard wearing, metal-plated key caps in key gaming areas
- Touch-sensitive, backlit dashboard panel to control lighting and media commands
- Cyborg® Mode - instantly disable the Windows keys and configure the colour and brightness of your gaming keys at the touch of a button
Pass-through USB, audio and microphone sockets - Adjustable wrist rest and keyboard rake angle (front and back)
Gold-plated connectors for USB and audio
The two keyboard modes - Normal and Cyborg® mode - are selected by pressing the Cyborg® head icon on the control panel.
Normal Mode
This is indicated by the left half of the Cyborg® head icon illuminated. The media keys, brightness and colour controls, and keyboard lights on/off icon are also illuminated dimly. When in normal mode only the colour and the brightness of the keyboard can be changed and game keys are not lit.
Cyborg Mode
This is indicated by the whole Cyborg® head icon illuminated. Everything that is lit in Normal mode plus the Widows key lock indicator and icons to select lighting for the individual key areas (Game keys, WASD, QWERTY, Arrow keys, Num-pad) are also lit.
The Num pad, Game keys, WASD keys and Arrow keys all have independent controlled coloured lighting in Cyborg® mode.
The Cyborg® keyboard also includes 12 gaming keys which are programmable using Cyborg® Smart Technology software and media keys for controlling music or video tracks. The WASD, cursor, Cyborg® and NumPad keys can be lit independently from the rest of keyboard to highlight commonly used gaming keys.
Installing your Cyborg® V.7 keyboard
-
First plug the USB cable marked "K/B" into one of your PC's free USB ports. If you intend to use headphones, speakers, headset or microphone, also plug the pink and green mini jackplugs into the corresponding audio in and out sockets of your PC. Now plug your headset, speaker cables etc into the pink audio in and green audio out sockets at the rear right side of your keyboard.
-
The Cyborg® keyboard's second USB cable marked "Ext" functions as a USB extension. Plug the cable into one of your PC's free USB ports and then plug a USB device directly into the USB port on the rear right side of the keyboard. The USB device will now communicate directly with your PC.
-
To change the lighting settings of your Cyborg® keyboard, first select either Normal mode or Cyborg® mode by pressing the Cyborg® face on the keyboard's control panel. In Normal mode you can only change the colour and the brightness of the whole keyboard (Game keys are not lit). To change the colour of the lighting, press the colour icon and then press "+" or "-" to scroll through the colours. To change the brightness of the lighting, press the brightness icon and then increase or decrease the brightness by pressing "+" or "-"
In Cyborg® mode, you can change the lighting colour and brightness of specific areas of your keyboard. Select Cyborg® mode by pressing the Cyborg® face. Now, select the part of the keyboard for which you want to change the lighting effects and change the colour by pressing the colour icon on the control panel and then pressing "+" or "-" to scroll through the colours. To change the brightness of the lighting, press the brightness icon and then increase or decrease the brightness by pressing "+" or "-" Each time you want to change the brightness of a particular area of the keyboard, select the area by pressing the control panel, and then repeating the above steps to change colour or brightness. The colour settings you choose will remain even after a system reboot or unplugging the keyboard.
Please note:
The Cyborg® keyboard's 12 programmable keys and volume light indicators will not function until you have installed the keyboard drivers. Please install the Cyborg® keyboard drivers and Smart Technology software for complete functionality.
System Compatibility
PC running Windows XP/XP64/Vista/7 (all versions)
Software installation for users of Windows XP, XP64, Vista and 7 (all versions)
A) Drivers Only
- With your computer switched on, close down any programs that are currently running and insert the Installation CD into your CD-ROM drive.
- When the Introduction Screen appears, click Install Software to continue. If the C D does not run automatically, select Start from the Windows® Taskbar, then Run and type D:\Setup.exe and click OK - where D:\ is letter of your CD-ROM drive. For Vista/7 users, the screen will ask Do you want to run this file? Press Run. A screen will now appear saying A program needs your permission to continue. Press Continue.
- When the Welcome screen appears, click Next to continue.
- After reading the Disclaimer, select the I accept the terms of the Disclaimer option and click Next to continue.
- At the Registration screen, select Check this box to register now and follow the on-screen instructions, or you can choose to select this option later.
- Click on Finish to complete the installation.
B) Drivers and Programming Software
Follow points 1 - 6 of the install procedure in A), then at the Software Setup screen, select Install the Cyborg® ST Programming Software and click Next. For Vista/7 users, the screen will once again ask Do you want to run this file? Press Run. A screen will now appear saying A program needs your permission to continue. Press Continue. In the following Software Setup screen, click Next and follow the on-screen instructions. At this point Vista/7 users will be asked to install the Programming Support Bus and XP users asked to install the Programmable Support for Mouse, HID-compliant mouse, Programmable Support for Keyboard and HID Keyboard Device (these are what Windows calls the Programming elements of your keyboard). Continue to click on Next and Finish to accept the installation.
Upon completion of the installation, you have the option to Run Profile Editor, which will give you a view of the programming environment. If you do not wish to see the Profile Editor at this point, just uncheck the box and click on Finish to complete the installation.
Important Information
Driver updates
From time to time there may be updates to the driver and programming software for this product. You can check for the latest software updates by visiting the Cyborg® website (www.cyborggaming.com) and clicking on Downloads. A drop down menu will appear. Select Drivers and Software.
Cyborg® V.7 keyboard controls
© 2010 Mad Catz Interactive Asia Limited (MCIA). Cyborg, the Cyborg logo, Mad Catz and the Mad Catz logo are trademarks or registered trademarks of Mad Catz, Inc and/or its affiliated companies. The shape and design of this product are a trade dress of Mad Catz and/or MCIA. All other trademarks or registered trademarks are the property of their respective owners. Made in China. All rights reserved. Product features, appearance and specifications may be subject to change without notice. Please retain this information for future reference.
Mad Catz is a publicly traded company on the TSX/AMEX, symbol MCZ.

- Cyborg® V.7 keyboard
- Normal Mode
- Cyborg Mode
- Installing your Cyborg® V.7 keyboard
- Please note:
- System Compatibility
- Software installation for users of Windows XP, XP64, Vista and 7 (all versions)
- A) Drivers Only
- B) Drivers and Programming Software
- Important Information
- Driver updates
- Cyborg® V.7 keyboard controls
Brand : SAITEK
Model : CYBORG KEYBOARD V 7
Category : Gaming Keyboard