
IHR 10.30 - Frying Pan Cylinda - Free user manual and instructions
Find the device manual for free IHR 10.30 Cylinda in PDF.
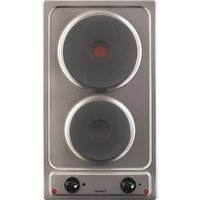


| Product Type | Frying Pan |
| Brand | Cylinda |
| Model | IHR 10.30 |
| Material | Stainless Steel |
| Diameter | 30 cm |
| Height | 6 cm |
| Handle Material | Stay-cool Bakelite |
| Hob Compatibility | Gas, Electric, Ceramic, Induction |
| Coating | Non-stick PTFE-free ceramic coating |
| Oven Safe | Up to 180°C |
| Base Thickness | 3 mm heavy-gauge Aluminium base for even heat distribution |
| Dishwasher Safe | Yes |
| Care Instructions | Hand wash recommended to prolong coating life |
| Lid Included | No |
| Weight | Approx. 1.5 kg |
| Country of Origin | Sweden |
| Warranty | Limited OEM warranty |
| Repairability | Handle and base replaceable via service centers |
Frequently Asked Questions - IHR 10.30 Cylinda
User questions about IHR 10.30 Cylinda
0 question about this device. Answer the ones you know or ask your own.
Ask a new question about this device
Download the instructions for your Frying Pan in PDF format for free! Find your manual IHR 10.30 - Cylinda and take your electronic device back in hand. On this page are published all the documents necessary for the use of your device. IHR 10.30 by Cylinda.
USER MANUAL IHR 10.30 Cylinda
IO-000138A / 8039286
Elektroskandia Sverige AB, Cylinda, 191 83 Sollentuna
Cylinda
år efter år
IH 10.30
Cylinda
år efter år
Fig. 5 A

C


Kokzoner
This hob combines exceptional ease of use with excellent effectiveness. Once you have read the instructions, operating the appliance will not be a problem.
Before packing each hob is subjected to rigorous safety and operational testing in our quality control facilities.
Please carefully read this User Manual before using the appliance for the first time. By following all instructions contained in this manual you will avoid improper use of the appliance.
Please keep this User Manual in a safe place for future use. Please follow all instructions and recommendations of this User Manual in order to avoid an accident.
Important!
The appliance may only be operated when you have read and understood this manual thoroughly.
The appliance is designed solely for cooking. Any other use (eg heating) is incompatible with the appliance's intended purpose and can pose a risk to the user.
The manufacturer reserves the right to introduce changes which do not affect the operation of the appliance.
CONTENTS
Basic Information....16
Safety instructions....18
Product Characteristics....21
Specification....21
Installation....22
Operation....24
Cleaning and maintenance....27
Warranty....28
Warning: The appliance and its accessible parts become hot during use. Care should be taken to avoid touching heating elements. Children less than 8 years of age shall be kept away unless continuously supervised.
This appliance can be used by children aged from 8 years and above and persons with reduced physical, sensory or mental capabilities or lack of experience and knowledge if they have been given supervision or instruction concerning use of the appliance in a safe way and understand the hazards involved. Children shall not play with the appliance. Cleaning and user maintenance shall not be made by children without supervision.
Warning: Unattended cooking on a hob with fat or oil can be dangerous and may result in fire.
NEVER try to extinguish a fire with water, but switch off the appliance and then cover flame e.g. with a lid or a fire blanket.
Warning: Danger of fire: do not store items on the cooking surfaces.
The appliance is not intended to be operated by means of an external timer or separate remote-control system.
You should not use steam cleaning devices to clean the appliance.
- Ensure that children do not play with the appliance.
- Make sure that the power cords of other equipment do not touch any hot surfaces of the appliance.
- Plug of the power cord must be accessible after appliance has been installed.
- Do not install the appliance near the cooling equipment.
- Do not leave the appliance unattended while cooking. Oil and fats may ignite due to overheating.
- In the event the appliance is damage, do not used it until it is repaired.
- Persons without proper qualifications and training must not make any alterations or repairs of the appliance.
- In case of any technical defect, immediately unplug or disconnect the appliance (as explained above) and refer the defect to service to be repaired.
- Using the appliance for cooking and baking results in the emission of heat and moisture in the room in which it is installed. Make sure that kitchen is well ventilated. Natural ventilation openings or forced mechanical ventilation (exhaust hood) should be available.
- Prolonged intensive use of the appliance may require additional ventilation, for example, opening a window or a more effective ventilation, such as increasing efficiency of mechanical ventilation, if applicable.

Using the energy in a responsible manner not only saves money, but also helps protect the environment. Therefore, let's try to save electricity! Just follow these tips:
- Use the correct cookware.
Cookware with flat and a thick base can save up to 1/3 of electricity. Please remember to cover cookware with the lid, otherwise electricity consumption increased four times!
- Match the size of the cookware to the cooking zone.
Cookware base should never be smaller than cooking zone.
• Always keep the cooking zones and cookware bases clean.
Dirt prevents proper heat transfer. burnt stains can be often removed only with agents harmful to the environment.
- Avoiding unnecessary lifting the lid to peek into the pot.
- Turn off the appliance in time and use the residual heat.
For long cooking times, switch off heating zones 5 to 10 minutes before finishing cooking. This can save up to 20% of electricity.
- Do not install the hob in the immediate vicinity of refrigerator / freezer.
The electricity consumption is then unnecessarily increased.

The appliance was packed to protected it from damage during transport. After unpacking, please dispose of all elements of packaging in a way that will not cause
damage to the environment.
All materials used for packaging the appliance are environmentally friendly; they are 100% recyclable and are marked with the appropriate symbol.
Important! Keep the packaging material (bags, Styrofoam pieces, etc.) out of reach of children during unpacking.
DISPOSAL

This marking means that the appliance must not be disposed of together with other household waste after it has been used.
The user is obliged to hand it over to waste collection centre collecting used electrical and
electronic goods. The collectors, including local collection points, shops and local authority departments provide recycling schemes.
Proper handling of used electrical and electronic goods helps avoid environmental and health hazards resulting from the presence of dangerous components and the inappropriate storage and processing of such goods.
Electric hob type IH10.30

1, 2 - cooking zones
3 - knobs
4 - pilot light
Fig.1
Specification
- Voltage rating 230 V \~50 Hz
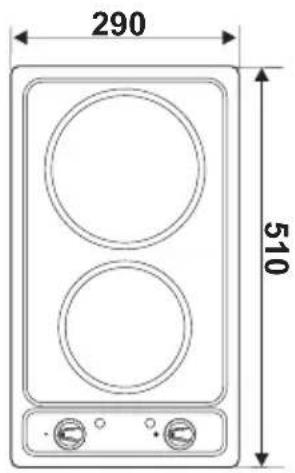
- Dimensions 510 x 290 x 40 mm
- Hob weight 8 kg
hob is equipped with:
Standard cooking zones ∅ 180 – 2000 W
∅ 145 - 1000 W
Hob installation
- Prepare opening in the worktop with dimensions shown on the assembly drawing (Fig. 2).
- Ensure minimum clearance of 80mm below the hob to allow proper air circulation and prevent overheating.
- Connect the appliance to electricity mains Plug in accordance with the instructions in the manual.
- Loosely attach fixing brackets to the bottom of the hob.
- Remove dust from the worktop, insert hob into the opening and press in firmly.
- Position fixing brackets (Fig.3) perpendicularly to the hob's edge and tighten firmly.
Installing hob in the opening
Fig. 2

Mounting fixing brackets in worktop
Location and dimensions of terminal block compartment
Fig. 3

Electrical connection
The hob has a permanent power cord with an earthing lead. It can be only connected to an earthed 230 V \~ 50 Hz socket. The electrical system to which the appliance is to be connected must be protected with a 16 A fuse.

Please carefully read this user manual and follow all instructions. Information concerning the hob can be found on the rating plate.

Switch on the appliance:
Activate the selected cooking zone (1,2) by turning knob (3). Pilot light will come on (4). The heat setting can be adjusted by turning the knob as required. The heat setting of the cooking zones can be adjusted in steps by turning the knobs. This allows efficient use of the electricity according to user's needs and helps prevent wasting electricity.
What to do before using your electric hob for the first time?
Before first use, heat up the cooking zones for 4 minutes without cookware.

Switch on the ventilation in the room or open a window, as the appliance could emit an unpleasant smell during first use.
How to use the heating plate
Save energy by using the appropriate cookware. Properly selected cookware must have a flat and solid base, and its diameter must match the diameter of the cooking zone, which results in a better heat transfer (Fig. 4)

Fig.4

Fig.5 A

C
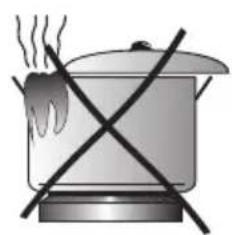
How is energy lost?
Fig. 5 A - Cookware is smaller than the cooking zone
Fig. 5 B - Cookware has a concave base
Fig. 5 C – Lid lets heat escape
Tips to follow:
- Do not operate a cooking zone without cookware
• Cookware to be placed on a cooking zone must have a clean and dry base - Never cook food in plastic cookware
- Do not place plastic products, such as spoons, forks, etc. on a hot hob
- Always use cookware with a lid, and make sure that lid does not protrude outside the pot's rim and condensation does not leak on the hob.
- Protect cooking zones against corrosion,
- Turn off the cooking zones approximately 5 minutes before removing cookware.
The symbols by the knobs indicate which knob operates each cooking zone.
The cooking zone is off if:
- "0" on the knob is aligned with the vertical line marked on the control panel, when heat settings are marked on the knob.
- "0" on the control panel is aligned with the marker on the knob, when heat settings are marked on the control panel.
The heat setting can be adjusted by turning the knob clockwise or anticlockwise. Pilot light comes on to indicate a cooking zone operates.

Fig. 6
| Knob setting | Example of cooking application |
| 3 | MAX. Fast heating up, fast cooking, frying |
| • | Grilling meat, fish |
| 2 | Slow frying |
| • | Cooking soups, larger dishes |
| 1 | Stewing vegetables, slow cooking |
| • | MIN. Warming up |
| 0 | Switch off |
OPERATION

General information on using cooking zones
Depending on the type of electric hob, it can be equipped with standard or fast cooking zones.
Cooking and frying on the standard and fast cooking zones
Fast cooking zones have greater power than standard cooking zones. For easy distinction they are marked with a red ring. The ring could gradually burn out.
Cooking
Set the knob to 3 to bring food to the boil. Set the knob to 1 to continue cooking and then increase or reduce power as required. (See table).
Frying
Set the knob to 3 to preheat oil. Place food to be fried in the pan and set the knob to 2. Then increase or reduce power as required.
CLEANING AND MAINTENANCE
Proper routine maintenance and cleaning of the appliance can significantly extend its trouble-free operation.

Before cleaning, turn off the hob (all knobs set to „0“) and wait until it cools down. To clean the hob, only use a damp cloth with a little washing-up liquid added. Never use abrasive or caustic cleaning agents. Do not use steam cleaning equipment for cleaning.
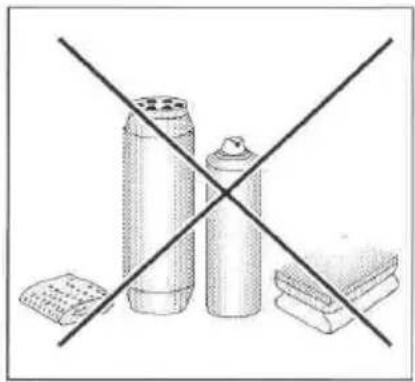

Cooking zones
- From time to time a lukewarm heating plate should be covered with a thin layer of an available lubricating agent,. It is recommended to use engine oil applied for sewing machines or bicycles. Do not apply edible oil, because its salt contents may damage the plates. Dried up spillage on the surface or rim of the plates should be removed with a dry pad or brush. Do not use abrasives, because they may cause the forming of rust on the plates. By no means rub the plates with abrasive paper. Take care not to let salt drop on the plates. It dissolves in water poducing ugly rust spots. Use only dry pots and do not put wet lids on the plates. The enamel parts of the cooker can be wiped with a gentle rinsing solution and dried with a soft cloth. Spillage can be wiped during cooking with a dry cloth, to prevent building up of hard to clean burnt deposits. Chrome plated parts (e.g. rings around heating plates can be easily polished with a soft cloth).
Warranty
Warranty services according to the warranty card.
The producer shall not be held liable for any damages caused by improper operation of the product.
Please enter the type and factory number of the plate from the rating plate
Type....
IO-000138A / 8039286
(09.2016 / v1)
- CYLINDA
- KOKZONER
- IMPORTANT
- CONTENTS
- DISPOSAL
- ELECTRIC HOB TYPE IH
- SPECIFICATION
- HOB INSTALLATION
- INSTALLING HOB IN THE OPENING
- MOUNTING FIXING BRACKETS IN WORKTOP
- LOCATION AND DIMENSIONS OF TERMINAL BLOCK COMPARTMENT
- ELECTRICAL CONNECTION
- SWITCH ON THE APPLIANCE
- WHAT TO DO BEFORE USING YOUR ELECTRIC HOB FOR THE FIRST TIME
- HOW TO USE THE HEATING PLATE
- HOW IS ENERGY LOST
- TIPS TO FOLLOW
- OPERATION
- GENERAL INFORMATION ON USING COOKING ZONES
- COOKING AND FRYING ON THE STANDARD AND FAST COOKING ZONES
- COOKING
- FRYING
- CLEANING AND MAINTENANCE
- COOKING ZONES
- WARRANTY
Brand : Cylinda
Model : IHR 10.30
Category : Frying Pan