
LETRATAG QX50 - Labeler DYMO - Free user manual and instructions
Find the device manual for free LETRATAG QX50 DYMO in PDF.
| Product Type | Portable Electronic Label Maker |
| Brand and Model | DYMO LETRATAG QX50 |
| Power Supply | 5 AA alkaline batteries (1.5 V) |
| Display | 9 characters with function indicators |
| Buffer Memory | Up to 70 characters for 20 labels |
| Print Formats | Thin, normal, wide, large characters (B) |
| Print Styles | 6 different styles |
| Frames and Underlining | 8 options: square, rounded, shaded, spiky, zigzag, crocodile, underlined, normal |
| 2-Line Printing | Yes (except with large characters or vertical text) |
| Number of Copies | Up to 9 continuous copies |
| Adjustable Label Length | From 2 mm to 300 mm (in 2 mm increments) |
| Available Symbols | 24 symbols including currencies (€, £, $, ¥, etc.) |
| Supported Languages | English, French, Spanish, and all diacritical marks |
| Adjustable Print Contrast | 5 levels |
| Compatible Ribbon Cassettes | Paper, plastic, metal, textile (4 m or 2 m) |
| Maintenance and Cleaning | Regular cleaning of the print head with the supplied accessory |
| Safety | Do not use the tape cutter during printing; remove batteries if not used for extended periods |
| Auto Power Off | After 2 minutes of inactivity |
Frequently Asked Questions - LETRATAG QX50 DYMO
User questions about LETRATAG QX50 DYMO
0 question about this device. Answer the ones you know or ask your own.
Ask a new question about this device
Download the instructions for your Labeler in PDF format for free! Find your manual LETRATAG QX50 - DYMO and take your electronic device back in hand. On this page are published all the documents necessary for the use of your device. LETRATAG QX50 by DYMO.
USER MANUAL LETRATAG QX50 DYMO
Electronic Labelmaker
Instructions for Use
Thank you for choosing the DYMO LetraTag for your labeling needs.
Install Batteries
- On the back of the unit, push the tab and lift the battery compartment cover off (fig. A).
- Match the + and - marks on the batteries to the + and - marks in the battery compartment case and insert 5 "AA" alkaline batteries. Start with the single battery in the upper slot, then slide the second and third under the bridge. Slot in the fourth and fifth batteries.
- Press the battery cover back into place. Remove the batteries if the unit is to remain unused for an extended period of time.
Inserting the Tape Cassette
- Press the tab on the front side of the cassette cover (figure B) and open cover. Insert the cassette, the cassette inserts with the tape exiting to the top of the machine. Gently press on the center of the tape until it clicks into position.
- Close the cassette cover.
Display
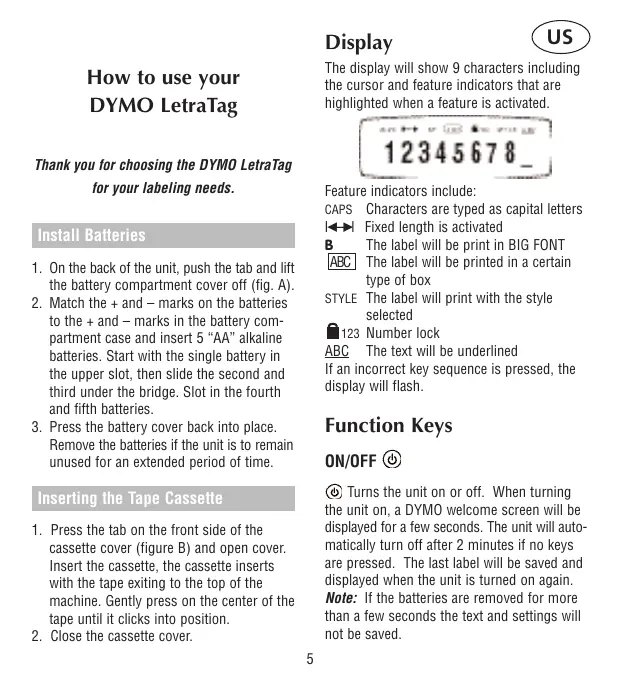
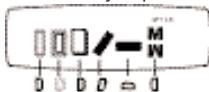
The display will show 9 characters including the cursor and feature indicators that are highlighted when a feature is activated.
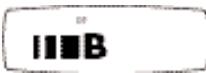
Feature indicators include:
CAPS Characters are typed as capital letters
Fixed length is activated
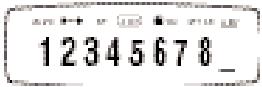
B The label will be print in BIG FONT
ABC The label will be printed in a certain type of box
STYLE The label will print with the style selected
123 Number lock
ABC The text will be underlined
If an incorrect key sequence is pressed, the display will flash.
Function Keys
ON/OFF
Turns the unit on or off. When turning the unit on, a DYMO welcome screen will be displayed for a few seconds. The unit will automatically turn off after 2 minutes if no keys are pressed. The last label will be saved and displayed when the unit is turned on again.
Note: If the batteries are removed for more than a few seconds the text and settings will not be saved.
CANCE
The key enables you to exit from a menu or to cancel an action.
Note: The printing function can not be cancelled.
DELETE
Press the key to delete the character on the left of the cursor.
CLEAR
Press the Key and the key to clear off the text from the display. This also will restore the style and size to the default settings.
NUMBER LOCK
While this feature is active, only numbers will be typed.
SIZE
- Press the Size Key to display the size menu:
I narrow (condensed)
normal
wide (extended)
B big font (full print height)
- Use the and of the Navigation Key to scroll the cursor to the size desired.
- Press to select or press Key to exit menu and return to prior setting.
- If Big Font is selected, B will be shown on the display.
- Label prints in selected size.
Note: For 2-line labels, each size will be half
their normal height. Big Font size is not available for 2-line labels.
STYLE

- Press Key to display the Style menu; which shows 6 style options :
- Use the and of the Navigation Key to scroll the cursor to the style desired.
- Press to select a style or press OK Key to exit menu and return to prior setting.
- The label prints in the selected style. Each style is independent and cannot be combined with other styles or with Big Font setting.
BOX/UNDERLINE
- Press the o/- Key to display the box/ underline menu which shows 8 box options:
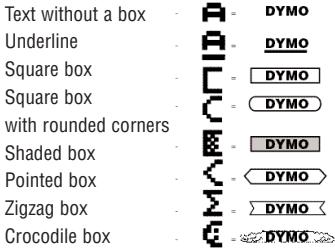
-
Use the and of the Navigation Key to scroll the cursor to the desired box or underline selection.
-
Press to select or press Key to exit menu and return to prior setting.
- The ABC will be highlighted on the display to show feature is activated.
- Text will print on the label in the selected format.
Note: The underline and box settings cannot be combined or used with the Big Font size selection.
EXTENDED MEMORY --II--
Adding to the buffer/ label breaks
The extended memory can store up to 70 characters for a maximum of 20 labels.
- Press and hold the Key and the Key to insert a label break.
- The --ll-- will show on the display in between the labels to indicate the beginning/end of each label that is stored in the memory.
- Press the key to move to the beginning of the buffer or + to move to the end of the buffer.
The labels will remain in the memory buffer, even if the unit is turned off. If you try to type when the memory buffer is full, the message ERROR 4 will be displayed. Delete part or all of the text in the buffer in order to store a new label in the memory.
- To clear the entire memory buffer, press the + .
REVIEW
This feature allows you to review all the text/labels stored in the extended memory.
-
Press Key and Key.
-
The text will scroll across the display.
- Press Key to exit.
LENGTH
Length is automatically set based on the text entered, but length can be adjusted if desired.
- Press and hold the GAP Key and the GCP Key to set a fixed length.
- The screen will display X.X inches (or XX mm depending on the language selected, see languages on page 8).
- The lenght of the label can be increased or decreased in steps of 0.1 inches or 2mm by using the or arrows on the Navigation Key. The maximum length is 12 inches or 300mm . Press when the correct length is selected.
- The fixed length indicator will highlight on the display. If the selected length is too short for the label, the display will flash ERROR 5.
- To return to automatic length default setting, press and hold the Key and the Key.
Note: For a fixed length label the text is always centered.
TEXT
FIRST LINE SECOND LINE
COPIES
9 copies of a label can be printed at one time.
- Enter the text for the label.
-
Press and hold the Key and the Key.
-
The screen will display n = 1 .
- Use the or arrows on the Navigation Key to set the desired number of copies (1-9).
- Once you have entered the correct number of copies press and the labels will print the text. The labels will print in one continuous label with a vertical chain mark to indicate where to manually cut the labels.
FEED
Additional blank label tape (1/2 inch or 12mm) will exit from the unit when the Key and the Key are pressed.
SYMBOLS
- Press the Sym Key.
- The display will show: A and 7 symbols.
- Use the Navigation Key to cursor to the desired symbols. The or arrows will scroll through the various symbol rows.
- Once the cursor is under the desired symbol, press to enter it into text. The last symbol row selected will be displayed the next time the symbol menu is entered.
| 1 | 2 | 3 | 4 | 5 | 6 | 7 | |
| A | ⊗ | ||||||
| B | ← | ||||||
| C | ■ | ||||||
| D | ■ | ||||||
| E | ⊗ | ||||||
| F | ★ | ||||||
| G | € | £ | $ | € | ¥ | ||
| H | ” | - | = | < | > | ||
| I | () | [ | ] | # | ° |
Changing the Language
The labelmaker default setting is English with additional international character sets that can be accessed by selecting a different language. The selection of a language defines which diacritical characters (see next section), measurement setting and currency symbols can be accessed.
For example, if Spanish is selected then the diacritical characters for Spanish will be available first with the measurements in millimeters and the currency pesos.
To change the language setting:
- Press the Key and key
- An abbreviation of the language will appear.
$$ \begin{array}{l} \mathrm {U S} = \quad \text {E n g l i s h} \ F = \quad F r e n c h \ E = \text {S p a n i s h} \ \mathrm {U N I} = \quad \text {A l l D i a c r i t i c a l C h a r a c t e r s} \ \end{array} $$
- Use the or arrows on the Navigation Key to scroll to the desired language.
- Press to select.
- To return to English setting repeat steps 1-4.
Diacritical Characters/Accented Characters Many diacritical marks (accented characters) and extra characters relevant to a specific language setting are stored and can be accessed by selecting a language.
Once a specific language set is selected, the diacritical and extra characters are accessed for the specific language as follows: If the key is tapped repeatedly within a short time, you can scroll through a list of all the diacritical characters for that letter.
As an example, pressing "E" repeatedly in the French-language selection will scroll through e - - - . If you wait for more than one second, the character will be selected and the cursor will move to the next position on the display. In addition, the currency key will operate in the same way. This offers an easy access to the most commonly used currency symbols quickly.
Note: When the batteries are removed the language setting will default to English.
TWO LINE LABEL
A second line of text can be added to your label by pressing to select.
If the display shows: abc 123
the label will print as:
Abc
123
Note: Big Font and vertical styles are not available in 2-line printing, ERROR 6 will flash if Big Font or vertical are active when 2-line printing is selected.
Printing Your Label
PRINT PREVIEW
Preview label before printing by pressing and holding the Key and Key. The label text will scroll across the display once. You can also scroll manually through the label using the or arrows on the Navigation Key. If you want to edit the label, use the navigation Key to move the cursor through the text to the place you want, then type or delete.
PRINTING A LABEL
Type in the text for your label and press OK Key.
PRINTING A LABEL FROM THE MEMORY
- Press and hold the Key and to view the labels stored in memory.
- Use the or arrows on the Navigation Key to position cursor inside the text of the label desired to print.
- Press . During printing the message PRINT... will be displayed.
CUTTING THE LABEL
After the label is printed use the cutter button on the left-hand side of the unit and press inwards, towards the machine (see Figure E). DO NOT PUSH THE CUTTER BUTTON WHILE THE LABEL IS BEING PRINTED, THIS WILL CAUSE LABELS TO JAM AND DAMAGE THE UNIT. Labels have easy peel split back tape for easy removal of the tape backing.
PRINT CONTRAST
- Press Key and the Key simultaneously.
- The display will show the 5 contrast symbols.
- Use the and arrows on the Navigation Key to select a lighter or darker setting.
- Press to select desired contrast setting.
Troubleshooting
Problem
Solution
Error 1
Tape jammed or low battery
Remove cassette to clear the tape jam Replace batteries
Error 2
Big Font cannot be selected with characters in memory
Select another format
Error 3
Big Font cannot be selected w underline/2 line or lower case
Select another format
Error 4
Memory buffer is full
Delete some or all of the buffer text
Error 5
Text is bigger than defined length
Choose a longer label length
Error 6
2 line cannot be selected with the format
Select another format
Display Blinks
The cursor cannot move further
Wrong key pressed in editing mode
to the left or right
Wrong key pressed in menu
No display
No response from keys
Check that machine is on
Check batteries and replace
No printing or poor text
Check batteries and replace if necessary
Check installation of cassette
Clean printhead (see cleaning)
CLEANING
To ensure optimum print quality, check and clean the print head regularly by using the cleaning tool supplied. See figure D.
DYMO label cassettes for the LetraTag
| Type: | Paper | Plastic | Metallic | Iron-on |
| Length: | 13ft | 13ft | 13ft | 6.5ft |
| White | 10697 | ----- | ----- | ----- |
| Pearl White | ----- | 91331 | ----- | ----- |
| HyperYellow | ----- | 91332 | ----- | ----- |
| Cosmic Red | ----- | 91333 | ----- | ----- |
| Acid Green | ----- | 91334 | ----- | ----- |
| Ultra Blue | ----- | 91335 | ----- | ----- |
| Smiles (Yellow)---- | ----- | 91336 | ----- | |
| Feet (Blue) | ----- | 91337 | ----- | ----- |
| Party | ----- | 91340 | ----- | ----- |
| Christmas | ----- | 91256 | ----- | ----- |
| Silver | ----- | ----- | 91338 | ----- |
| Green | ----- | ----- | 91339 | ----- |
| Clear | ----- | 16952 | ----- | ----- |
| Iron-on | ----- | ----- | ----- | 18771 |
Assorted Pack 12331:
1 x paper white
1 x plastic white
1 x metallic silver