
MPC2000 - Sampler AKAI - Free user manual and instructions
Find the device manual for free MPC2000 AKAI in PDF.


| Product Type | Sampler / Sequencer |
| Brand | AKAI |
| Model | MPC2000 |
| Dimensions (W x D x H) | 482 x 310 x 100 mm |
| Weight | 5.5 kg |
| Power Supply | Mains 220-240V AC, 50/60 Hz |
| Sampling Frequency | 44.1 kHz |
| Audio Resolution | 16-bit |
| Internal Memory | 2 MB |
| Expandable Memory | Up to 32 MB (72-pin SIMM) |
| Built-in Storage | 3.5" Floppy Disk Drive (1.44 MB) |
| MIDI Connectivity | In, Out, Thru |
| SCSI Connectivity | SCSI-1 Port (for hard drive or CD-ROM) |
| Audio Outputs | 8 Individual Unbalanced Outputs (6.35 mm jack) |
| Audio Inputs | 2 Unbalanced Inputs (6.35 mm jack) |
| Main Functions | Sampling, 64-track MIDI sequencing, sample editing, built-in effects (reverb, chorus, etc.) |
| Trigger Pads | 16 velocity-sensitive, backlit pads |
| Display | Backlit LCD 4 x 40 characters |
| Maintenance and Cleaning | Wipe with a soft, dry cloth. Do not use abrasive products. |
| Safety | Disconnect before any intervention. Do not expose to moisture. |
| Spare Parts and Repairability | Available: power supply, ribbon cables, buttons, connectors. Repair possible by an authorized technician. |
| General Information | Studio or live use. Ideal for hip-hop and electronic music production. |
Frequently Asked Questions - MPC2000 AKAI
User questions about MPC2000 AKAI
0 question about this device. Answer the ones you know or ask your own.
Ask a new question about this device
Download the instructions for your Sampler in PDF format for free! Find your manual MPC2000 - AKAI and take your electronic device back in hand. On this page are published all the documents necessary for the use of your device. MPC2000 by AKAI.
USER MANUAL MPC2000 AKAI
To prevent fire or shock hazard, do not expose this appliance to rain or moisture.
Operator's Manual
WARNING!!
To prevent fire or shock hazard, do not expose this appliance to rain or moisture.
1-En



CAUTION: TO REDUCE THE RISK OF ELECTRIC SHOCK DO NOT REMOVE COVER (OR BACK). NO USER-SERVICEABLE PARTS INSIDE. REFER SERVICING TO QUALIFIED SERVICE PERSONNE
THE SYMBOLS ARE RULED BY UL STANDARDS (U.S.A.)

The lightning flash with arrowhead symbol, within an equilateral triangle, is intended to alert the user to the presence of uninsulated "dangerous voltage" within the product's enclosure; that may be of sufficient magnitude to constitute a risk of electric shock to persons.
The exclamation point within an equilateral triangle is intended to alert the user to the presence of important operating and maintenance (servicing) instructions in the literature accompanying the appliance.
5B-En
WARNING
The MPC2000 is designed to be used in a standard household environment. Power requirements for electrical equipment vary from area to area. Please ensure that your MPC2000 meets the power requirements in your area. If in doubt, consult a qualified electrician or Akai Professional dealer.
120 VAC
@ 60 Hz for USA and Canada
220~240 VAC
@ 50 Hz for Europe
PROTECTING YOURSELF AND THE MPC2000
- Never touch the AC plug with wet hands.
- Always disconnect the MPC2000 from the power supply by pulling on the plug, not the cord.
- Allow only an Akai Professional dealer or qualified professional engineer to repair or reassemble the MPC2000. Apart from voiding the warranty, unauthorized engineers might touch live internal parts and receive a serious electrical shock.
- Do not put, or allow anyone to put any object, especially metal objects, into the MPC2000.
- Use only a household AC power supply. Never use a DC power supply.
- If water or any other liquid is spilled into or onto the MPC2000, disconnect the power, and call your dealer.
- Make sure that the unit is well-ventilated, and away from direct sunlight.
- To avoid damage to internal circuitry, as well as the external finish, keep the MPC2000 away from sources of direct heat (stoves, radiators, etc.).
- Avoid using aerosol insecticides, etc. near the MPC2000. They may damage the surface, and may ignite.
- Do not use denaturated alcohol, thinner or similar chemicals to clean the MPC2000. They will damage the finish.
- Modification of this equipment is dangerous, and can result in the functions of the MPC2000 being impaired. Never attempt to modify the equipment in any way.
- Make sure that the MPC2000 is always well-supported when in use (either in a specially-designed equipment rack, or a firm level surface).
-
In order to assure optimum performance of your MPC2000, select the setup location carefully, and make sure the equipment is used properly. Avoid setting up the MPC2000 in the following locations:
-
In a humid or dusty environment
- In a room with poor ventilation
- On a surface which is not horizontal
- Inside a vehicle such as a car, where it will be subject to vibration
- In an extremely hot or cold environment
WARNING
THIS APPARATUS MUST BE EARTHED
IMPORTANT
This equipment is fitted with an approved non-rewireable UK mains plug.
To change the fuse in this type of plug proceed as follows:
1) Remove the fuse cover and old fuse.
2) Fit a new fuse which should be a BS1362 5 Amp A.S.T.A or BSI approved type.
3) Refit the fuse cover.
If the AC mains plug fitted to the lead supplied with this equipment is not suitable for your type of AC outlet sockets, it should be changed to an AC mains lead, complete with moulded plug, to the appropriate type. If this is not possible, the plug should be cut off and a correct one fitted to suit the AC outlet. This should be fused at 5 Amps.
If a plug without a fuse is used, the fuse at the distribution board should NOT BE GREATER than 5 Amp.
PLEASE NOTE: THE SEVERED PLUG MUST BE DESTROYED TO AVOID A POSSIBLE SHOCK HAZARD SHOULD IT BE INSERTED INTO A 13 AMP SOCKET ELSEWHERE.
The wires in this mains lead are coloured in accordance with the following code:
As the colours of the wires in the mains lead of this apparatus may not correspond with the coloured markings identifying the terminals in your plug, please proceed as follows:
The wire which is coloured GREEN and YELLOW must be connected to the terminal which is marked with the letter E or with the safety earth symbol 1三 or coloured GREEN or coloured GREEN and YELLOW.
The wire which is coloured BLUE must be connected to the terminal which is marked with the letter N or coloured BLACK.
The wire which is coloured BROWN must be connected to the terminal which is marked with the letter L or coloured RED.
THIS APPARATUS MUST BE EARTHED
Ensure that all the terminals are securely tightened and no loose strands of wire exist.
Before replacing the plug cover, make certain the cord grip is clamped over the outer sheath of the lead and not simply over the wires.
6D-En
VENTILATION
Do not prevent the unit's ventilation, especially by placing the unit on the soft carpet, in a narrow space, or by placing objects on the unit's chassis—top, side, or rear panels. Always keep the unit's chassis at least 10 centimeters from any other objects.
31C-En
CHANGES OR MODIFICATIONS NOT EXPRESSLY APPROVED BY THE MANUFACTURER FOR COMPLIANCE COULD VOID THE USER'S AUTHORITY TO OPERATE THE EQUIPMENT.
32-En
FCC WARNING
This equipment has been tested and found to comply with the limits for a Class B digital device pursuant to Part 15 of the FCC rules. These limits are designed to provide reasonable protection against harmful interference in a residential installation. This equipment generates, uses, and can radiate radio frequency energy and, if not installed and used in accordance with the instructions, may cause harmful interference to radio communications. However, there is no guarantee that interference will not occur in a particular installation. If this equipment does cause harmful interference to radio or television reception, which can be determined by turning the equipment off and on, the user is encouraged to try to correct the interference by one or more of the following measures:
Reorient or relocate the receiving antenna.
- Increase the separation between the equipment and receiver.
- Connect the equipment into an outlet on a circuit different from that to which the receiver is connected.
- Consult the dealer or an experienced radio/TV technician for help.
21B-En
This digital apparatus does not exceed the Class B limits for radio noise emissions from digital apparatus set out in the Radio Interference Regulations of the Canadian Department of Communications.
27-En
COPYRIGHT NOTICE
The AKAI MPC2000 is a computer-based device, and as such contains and uses software in DISKs and ROMs. This software, and all related documentation, including this Operator's Manual, contain proprietary information which is protected by copyright laws. All rights are reserved. No part of the software or its documentation may be copied, transferred or modified. You may not modify, adapt, translate, lease, distribute, resell for profit or create derivative works based on the software and its related documentation or any part there of without prior written consent from AKAI Electric Co. Ltd, Tokyo, Japan.
WARRANTY
AKAI Electric Co. Ltd. warrants its products, when purchased from an authorized "AKAI professional" dealer, to be free from defects in materials and workmanship for a period of 12 (twelve) months from the date of purchase. Warranty service is effective and available to the original purchase only, and only on completion and return of the AKAI Warranty Registration Card within 14 days of purchase.
Warranty coverage is valid for factory-authorized updates to AKAI instruments and their software, when their installation is performed by an authorized AKAI Service Center, and a properly completed Warranty Registration has been returned to your "AKAI professional" dealer.
To obtain service under this warranty, the product must, on discovery of the detect, be properly packed and shipped to the nearest AKAI Service Center. The party requesting warranty service must provide proof of original ownership and date of purchase of the product.
If the warranty is valid, AKAI will, without charge for parts or labor, either repair or replace the defective part(s). Without a valid warranty, the entire cost of the repair (parts and labor) is the responsibility of the product's owner.
AKAI warrants that it will make all necessary adjustments, repairs and replacements at no cost to the original owner within 12 (twelve) months of the purchase date if:
1) The product fails to perform its specified functions due to failure of one or more of its components.
2) The product fails to perform its specified functions due to defects in workmanship.
3) The product has been maintained and operated by the owner in strict accordance with the written instructions for proper maintenance and use as specified in this Operator's Manual.
Before purchase and use, owners should determine the suitability of the product for their intended use, and owner assumes all risk and liability whatsoever in connection therewith. AKAI shall not be liable for any injury, loss or damage, direct or consequential, arising out of use, or inability to use the product.
The warranty provides only those benefits specified, and does not cover defects or repairs needed as a result of acts beyond the control of AKAI, including but not limited to:
1) Damage caused by abuse, accident, negligence. AKAI will not cover under warranty any original factory disk damaged or destroyed as a result of the owner's mishandling.
2) Damage caused by any tampering, alteration or modification of the product: operating software, mechanical or electronic components.
3) Damage caused by failure to maintain and operate the product in strict accordance with the written instructions for proper maintenance and use as specified in this Operator's Manual.
4) Damage caused by repairs or attempted repairs by unauthorized persons.
5) Damage caused by fire, smoke, falling objects, water or other liquids, or natural events such as rain, floods, earthquakes, lightning, tornadoes, storms, etc.
6) Damage caused by operation on improper voltages.
IMPORTANT NOTE: This warranty becomes void if the product or its software is electronically modified, altered or tampered with in any way.
AKAI shall not be liable for costs involved in packing or preparing the product for shipping, with regard to time, labor, or materials, shipping or freight costs, or time or expense involved in transporting the product to and from AKAI Authorized Service Center or Authorized Dealer.
AKAI will not cover under warranty an apparent malfunction that is determined to be user error, or owner's inability to use the product.
THE DURATION OF ANY OTHER WARRANTY, WHETHER IMPLIED OR EXPRESS, INCLUDING BUT NOT LIMITED TO THE IMPLIED CONDITION OF MERCHANTABILITY, IS LIMITED TO THE DURATION OF THE EXPRESS WARRANTY HEREIN.
AKAI hereby excludes incidental or consequential damages, including but not limited to:
1) Loss of time.
2) Inconvenience
3) Delay in performance of the Warranty.
4) The loss of use of the product.
5) Commercial loss.
6) Breach of any express or implied warranty, including the Implied Warranty of Merchantability, applicable to this product.
Table of Contents
Chapter 1: Introduction 1
Features 2
Panel Descriptions 4
Front Panel 4
Rear Panel 7
Handling Floppy Disks 8
The Disk Drive 8
Taking care of your Disks 9
Chapter 2: The Basics 11
Hooking Up Your System 12
The Terms Used in MPC2000 13
Sequence 13
Track 13
Song 14
Sound 14
Drum Pads 14
Note Number. 14
Program 15
Operating the Front Panel and Screen 16
The Cursor, Cursor Keys, Data Fields 16
The Numeric Keypad and DATA Wheel 16
The Function Keys 17
Basic Functions 18
Loading the Operating System 18
Loading and Playing Programs 18
Playing the Drum Pads, the PAD BANK, & FULL LEVEL Keys .... 19
Selecting Programs 20
The NOTE VARIATION Slider, ASSIGN and AFTER keys 20
The ASSIGN Key 21
The AFTER key 22
The 16 LEVELS key 23
Chapter 3: Recording Sequences 25
How Sequences are Organized 26
Bar.Beat Tick 27
Examples of Sequence Recordings 28
Example 1: Recording a Drum Pad Performance 28
Example 2: Recording a Loop 30
Example 3: Multi-track Recording 32
The MAIN SCREEN 34
Selecting a Sequence 34
Next sequence function 34
Renaming a Sequence 35
Deleting a Sequence 35
Copying a Sequence 36
Setting the Tempo 37
Tempo Change Window 37
Entering and Modifying a Tempo Change 38
Selecting a Tempo Source 39
Setting the Time Correct (Quantization) 40
Setting the Beat 41
Setting the Number of Bars 42
Setting the Loop 44
Setting the Count 45
Selecting a Track 46
Renaming a Track 46
Deleting a Track 47
Copying a Track 47
Turning the Track ON or OFF 48
Setting the Track Type 48
Setting the Track's MIDI Channel 49
Settings for MIDI Reception 49
MIDI Filter Function 51
Sending the All Note Off 51
Multiple Track Real-time Recording 52
Editing the Velocity 53
Setting the Program Change Transfer 54
Locating with the DATA Wheel 55
Units Used to Locate a Point 55
The Main Screen Function Keys 56
The Play/Record Keys and the Locate Keys 57
The AUTO PUNCH Function 59
Chapter 4: Editing Sequences 61
Overview 62
Erasing Data with the ERASE Key 62
Erasing a Note in Real Time 62
Using the ERASE Page to Erase Data 62
Step Editing 64
Step Editing Screen 64
The Event Display 66
Operating the List Display 66
Selecting and Editing Multiple Events 67
Copying an Event 68
Deleting an Event 68
Pasting an Event 68
Inserting an Event 68
Step Recording 69
The Editing Screen 70
Copying an Event 70
Copying by Bar 72
Rearranging the tracks 73
Transposing a Track 74
Sequence Preferences 75
Chapter 5: Song Mode 77
Overview 78
Song Mode 79
Selecting a Song 79
Renaming a Song 79
Deleting a Song 80
Copying a Song 81
Setting the Tempo. 82
Setting the Loop 83
Creating a Song 84
Selecting a Step and Changing a Sequence 85
Repeating a Sequence 85
Deleting a Step 86
Inserting a Step 86
Setting the Locate Point 87
Converting a Song to a Sequence 88
Chapter 6: Creating and Editing Programs 89
What Are Programs? 90
Creating a program 92
Selecting a Program and Assigning a Sound 93
Selecting Programs 93
Renaming Programs 94
Deleting a Program 94
Newly Creating Programs 95
Copying Programs 95
Assigning Notes to DRUMS PAD 96
The Pad Assign Mode and Initialize 97
Assigning Sounds to Notes 98
The Program Sound Generation Mode 98
Editing Note Parameters 100
Selecting Programs 100
Selecting Notes 100
Copying the Note Parameter 101
Setting the Envelope 101
Setting the Filter 103
Setting the Pitch 104
Setting the Voice Overlap 105
The MIDI Settings of the Sampler 106
Chapter 7: Mixer Functions 107
Stereo Output Mixer 108
Setting the Volume 108
Setting the Pan 109
Setting the Volume or Pan Together 109
Setting the Para Out and Effect Send (Option) 110
Assigning Para Out 110
Setting the Send Level 111
Setting the Para Out and Send Level Together 111
Setting the Volume or Pan for Each Note 112
Setting Up the Mixer 113
Setting the Effects 114
Chapter 8: Creating and Editing Sounds 115
Sampling a New Sound 116
Editing a Sound 121
Selecting a Sound 121
Renaming or Displaying the Specification of the Sound .... 121
Deleting a Sound 122
Copying a Sound 122
TRIM Mode 123
Deleting Unnecessary Samples 124
Finely Adjusting the Start Point 124
Finely Adjusting the End Point 125
LOOP Mode 126
Finely Adjusting the Loop Point 127
znEDIT Mode 128
Finely Adjusting the Start Point of a Zone 130
Finely Adjusting the End Point 131
Setting the Sound Parameters 132
Beat Loop Function 133
Chapter 9: Disk Operation 135
Overview 136
The Device:Field 136
The Device Icons 136
Before Proceeding to Use a Floppy Disk 137
Getting a Disk 138
Formatting a Floppy Disk 138
Formattinq a SCSI Drive 139
Saving the Data 140
Saving Across Multiple Floppy Disks 144
Copying a System Disk 145
Starting the MPC2000 from a SCSI Drive 146
The Auto-load Functions of the .APS and .ALL Files 146
Loading Files 147
Deleting a File from the Disk 152
Chapter 10: MIDI/SYNC Mode,OTHER Mode 153
MIDI/SYNC Mode 154
Synchronizing the MPC2000 with Other Sequencers 154
Synchronizing Another Sequencer or MTR to the MPC2000 156
OTHER Mode 158
OTHERS Screen 158
INIT Screen 159
VER. Screen 159
Appendix 161
Notes on Using SCSI Drives 162
Connecting an External SCSI Drive 162
SCSI Cables 162
SCSI ID 163
Termination 163
Cable Length 163
Installing the Options-To Service Technicians 164
Location of MPC2000 Option Board 164
To remove the cover: 165
To remove the operation panel: 165
Installing Memory Expansion 166
Technical Specifications 167
The MIDI Implementation Charts 169
Chapter 1
Introduction
Features
The following is a summary of some of the advanced features of the MPC2000.
General
Large 248× 60 dot LCD display with graphics.
- 6 function keys under the LCD display provide various functions on each page.
- Built-in 1.44 megabyte floppy disk drive to store both sequence and sound data.
- By pressing the OPEN WINDOW key at the parameter you want to edit, you are allowed to make more detailed parameter settings. It is not necessary to switch between different modes as in the case of conventional devices to make detail settings.
- Built-in SCSI interface for storing data to external hard disk.
Sampler
16-bit, 44.1kHz stereo sampling.
- High capacity sound memory: 2 megabytes standard (22 seconds mono or 11 seconds stereo), expandable to 32 megabytes with SIMM memory.
- Digital sampling input for direct recording from digital sources with IB-M208P (optional) board.
- 128 sounds (samples) may be held in memory at one time.
32 simultaneous playback voices.
- The envelope or filter can be set for each sound.
- Optional multi-effects generator EB16* for versatile effects.
- Sample files may be loaded from Akai S1000 and S3000 disks.
- IB-M208P (optional) enables you to mix and output internal sampler sounds from 8 individual outputs.
- A maximum of 24 programs (sound assignments and sound parameter settings) can be created.
- A selection between polyphonic (multiple sounds are overlaid when the same sound is played continuously) or mono (the second sound silences the first).
- It is possible to stop the playing of a sound with another sound. This is used to simulate the open close effect of the hi hat.
- It is possible to copy a part of a sound as a separate sound or paste a sound to a section of a sound. It is also possible to mute or reverse part of a sound.
- One MIDI note can play three sounds. The sounds can be played simultaneously, switched by velocity, or with the NOTE VARIATION slider.
- Loop settings can be made to a sound.
- The velocity can change the playback pitch..
- When phrase sampling, it is possible to calculate the tempo of the phrase from the length of the sound loop.
- Since the sound wave patterns are displayed, it is possible to edit the sound while watching the wave pattern. It is also possible to zoom the wave pattern.
Sequencer
- Loop recording function enables quick recording by looping short phrases.
- 10,000 note sequencer memory capacity. (1NOTE VARIATION = 2NOTE)
- 99 sequences may be held in memory at once. Each sequence contains 64 individual tracks,
- 2 independent MIDI output ports permit 32 simultaneous MIDI output channels.
- 2 mergeable MIDI inputs.
- The optional SMPTE boards* enable synchronization with SMPTE time codes.
- MTC (MIDI time code), MMC (MIDI machine control) compatible.
Data can be exported to or imported from standard MIDI files. - Step edit function enables you to edit individual events.
- The velocity of each track can easily be modified.
- It is possible to record to 16 MIDI channels at one time.
- Tap Tempo feature allows the playback tempo to be set by tapping a key in the time of 1/4-notes.
- Programmable tempo changes in mid-sequence or mid-song are supported.
- Auto Punch feature enables you to punch in or punch out automatically in the designated sequence.
- Swing feature enables you to add a swing-feel to the rhythm.
- 16 velocity- and pressure-sensitive front panel drum pads and 4 pad banks provide a total of 64 pad/bank combinations.
- The NOTE VARIATION slider controls the decay or filter value of the sound in real time.
- Since it is possible to convert MIDI sustain pedal data to note duration data, you can place sustain effects independently from the note data within a track.
- The note repeat function and the after touch function pads enable you to easily enter drum rolls and hi-hat beats.
-
The UNDO SEQ key enables you to undo sequence recordings or edits.
-
Not supported by V1.0 version software.
Panel Descriptions
Front Panel
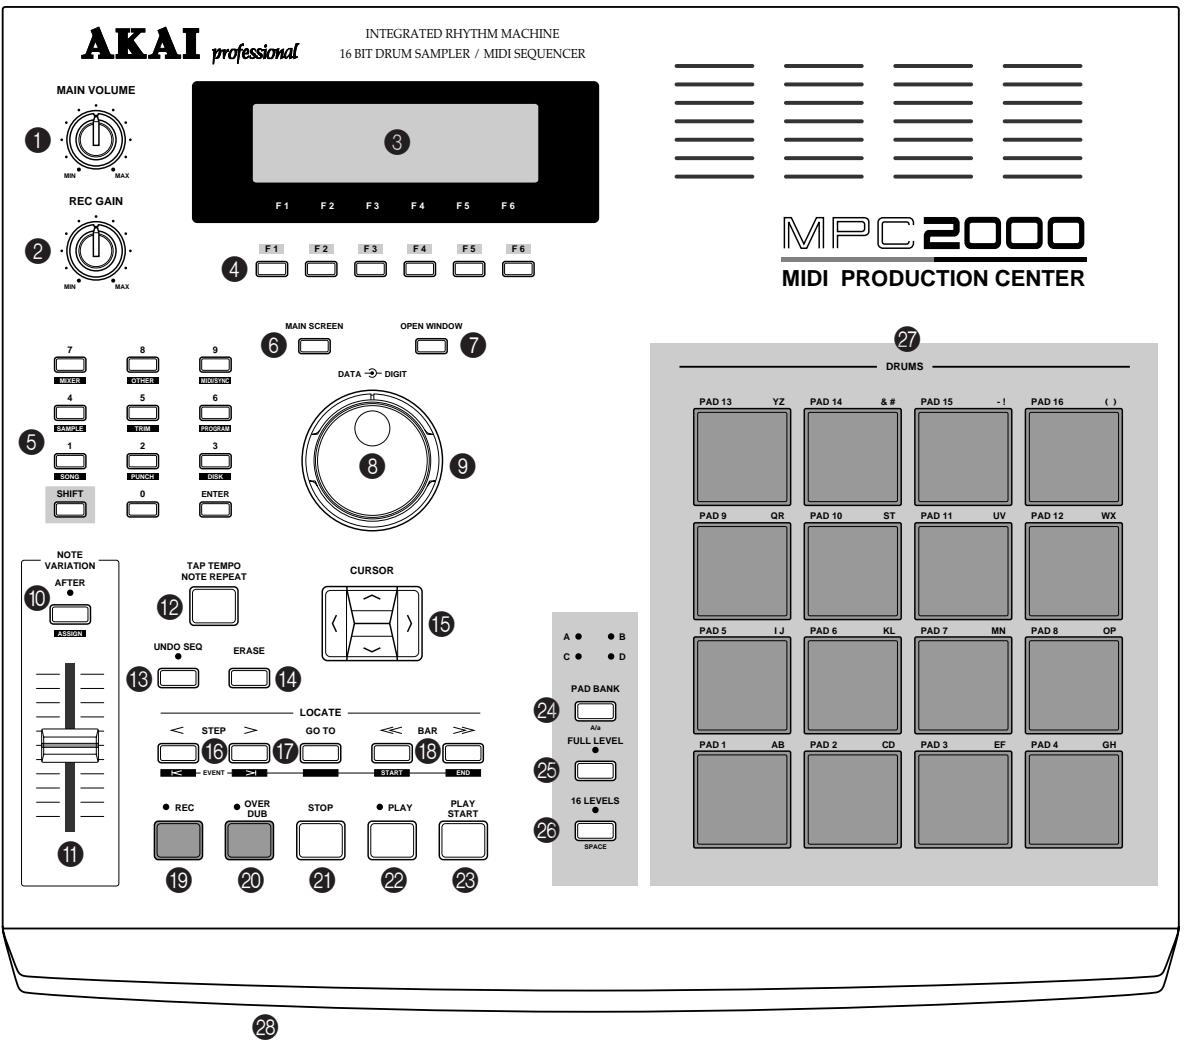
1 MAIN VOLUME knob
This adjusts the volume of the STEREO OUT and PHONES. However, this does not adjust the volume of the optional "assignable mix out."
2 REC GAIN knob
This adjusts the level of the sound coming from RECORD IN during a sampling.
LCD
This 248 × 60 dot display enable graphical display.
Function key
This key executes the function shown on the very bottom of the display. The function surrounded by a rectangular frame SIOI will be executed. EVENTS indicates the currently selected page. The reversed display EDIT indicates that you can jump to that page by pressing the corresponding key.
Numeric Pad / Mode key
This allows you to directly enter numeric data. Enter numbers with this key to a selected numeric field and press the ENTER key. If you are entering numbers with decimal value, enter the number ignoring the decimal point. (In the case of 120.5, enter 1205.) If you have made a mistake, it is possible to cancel by pressing the SHIFT key before the ENTER key. If you operate the CURSOR key, DATA wheel, or MAIN SCREEN key while you are entering with the numeric pad, the input is canceled and the data returns to the status before entry has been made. By pressing the numeric pad while holding the SHIFT key, the key functions as a Mode key and allows you to enter the mode indicated under the numeric pad key.
MAIN SCREEN key
This allows you to return from any page to the MAIN screen (initial screen). The MAIN screen is the basic screen used to record or play back a sequence.
7 OPEN WINDOW key
This displays the pages which allow you to set the details of the selected field.
DATA wheel
This allows you to change the numbers or data of the selected field. The data variably increases by rotating the wheel quickly. Also, rotate the DATA wheel while holding down the SHIFT key to set the contrast of the LCD. It is possible to change this regardless of the displayed mode.
DIGIT wheel
This allows you to select the digit you want to change when you are changing long digit numbers such as in the case of sample editing.
10 AFTER key
Normally, the NOTE VARIATION slider effect is valid when the drum pad is played or when the drum pad performance is recorded to a sequence. However, by turning this key on, it is possible to execute the NOTE VARIATION slider effect while the sequence is playing. This key also needs to be on when you are over dubbing only the NOTE VARIATION slider effect.
Press this key while holding down the SHIFT key to display the screen and set the parameter you want to change.
NOTE VARIATION slider
This enables you to change the parameter of the preset internal sound source in real time. Assign the parameters in the screen that appears by pressing the AFTER key while holding down the SHIFT key.
TAP TEMPO / NOTE REPEAT key
This allows a sequence to play at the tempo set by hitting the key.
Hold this key and press DRUMS PAD to successively play to the beat set at Timing on the MAIN screen. For example, if the Timing is set at 1/8, you can play the hi-hat at an eight beat by holding this key and pressing the DRUMS PAD assigned to the hi-hat. You can also press the DRUMS PAD harder for louder sounds or softer for softer sounds.
13 UNDO SEQ key
When you record and stop a sequence the light above this key will turn on. It is possible to return to sequence back to the state before recording by pressing the key and turning off the light. If the key is pressed again, the light will turn on and the state will return to the condition after the last recording. This is convenient to compare the recording with the previous, or to undo a poor recording. You can only use the UNDO SEQ key when you are recording or editing a sequence. You cannot use this key when you are editing a program or sound. The usage of the UNDO SEQ is also limited to the time just after a recording or edit. If you move to another mode or function screen, the UNDO SEQ will be disabled.
ERASE key
This is used to erase data on the selected track. By holding this key and pressing the DRUMS PAD of the sound you want to erase while dubbing over a sequence, you can erase the data as long as the PAD is pressed. In addition to drum tracks, you can erase the notes on a track of an external MIDI device by holding this key and pressing the note that needs to be erased on the MIDI keyboard.
The ERASE page will appear if you press this key while the sequence is not playing. This allows you to erase specific notes or lengths of data.
CURSOR key
This allows you to select the parameter field you want to edit. The currently selected field will be reverse displayed.
STEP < /> key
This locates the sequence point back and forth one step at a time. The step is set in Timing on the MAIN screen. When the Timing is OFF, you can move the locate by a clock. Press this key while holding GO TO key to locate each even on a track.
17 GO TO key
This key displays the locate page. By pressing the numeric pad keys 1 to 9, you can locate recorded points. Pick a point to record and display the Locate window by pressing the GO TO key and press STORE[F5]. By pressing any numeric key, you can record a locate point.
BAR << / >> key
This locates the sequence point by bars. Holding the GO TO key, press this key to locate the start or end point of the selected track.
REC key
While holding this key, press the PLAY key or the PLAY START key to begin the sequence recording. If there is data on the track, it will be erased by the new recording.
OVER DUB key
While holding this key, press the PLAY key or the PLAY START key to begin the sequence recording. The new recording is dubbed over the data on the track.
STOP key
This stops the playback or recording of a sequence.
2 PLAY key
This starts the sequence from the current point ("Now:" on the MAIN screen). It is also possible to start the sequence from the point where it had stopped or select "Now:" with the CURSOR key and set the point with the DATA wheel.
23 PLAY START key
This starts the sequence at the beginning.
PAD BANK key
This switches between the 16 DRUMS PAD. There are four banks from A to D and it is possible to use 64 different sounds by switching the banks. The light is on over the key of the currently selected bank.
FULL LEVEL key
When this key is pressed and the light is on, regardless of how hard the DRUMS PAD is hit the sound will always be generated at full velocity.
26 16 LEVELS key
The allows you to play a sound in 16 parameter levels of velocity, tone, attack, decay, or filter.
DRUMS PAD
This plays back other sounds including the drum within the memory. This corresponds to velocity, allowing you to change the velocity with the attack on the PAD. BY switching between the 4 banks with the PAD BANK key, it is possible to assign 64 different sounds.
FLOPPY DISK DRIVE
This is a floppy disk drive used to load or save sound data, sequence data or the operating system. Both 2HD and 2DD floppy disks can be used.
Rear Panel
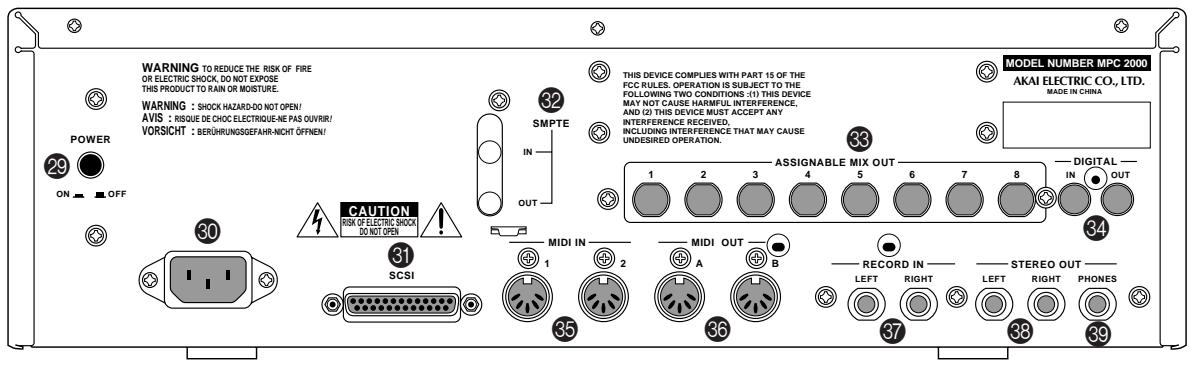
29 POWER
This is the ON/OFF power switch.
30 AC in
This is used to connect to a power source.
31 SCSI
This is a 25-pin SCSI interface. This connects a hard disk drive to load or save data.
SMPTE IN/OUT (option)
This is the SMPTE TIME CODE IN/OUT jack used to play in sync with a tape.
ASSIGNABLE MIX OUT (option)
This allows you to set separate outputs for each sound. By using an external mixer or effector, this enables you to conduct advanced mixing.
DIGITAL IN/OUT (option)
This allows you to sample data directly from an audio CD or DAT. It is also possible to record the entire digital data from this outlet to a hard disk recorder or DAT such as the AKAIDR4 or DR8.
5 MIDIN
This receives MIDI signals. It is possible to merge 1 and 2.
36 MIDI OUT
This sends MIDI signals. Since A and B are independent, it is possible to handle a total of 32 MIDI channels.
RECORD IN
This is the input jack used for sampling. This stereo phone jack enables you to change the balance of the input.
This is the main output jack.
STEREO OUT PHONES
This is connected to a stereo phone headset. The same sound is output to STEREO OUT LEFT and RIGHT.
Handling Floppy Disks
The Disk Drive
The 3.5 inch floppy disk drive will accept high density and low density disks.
Disks are inserted into the drive thus:
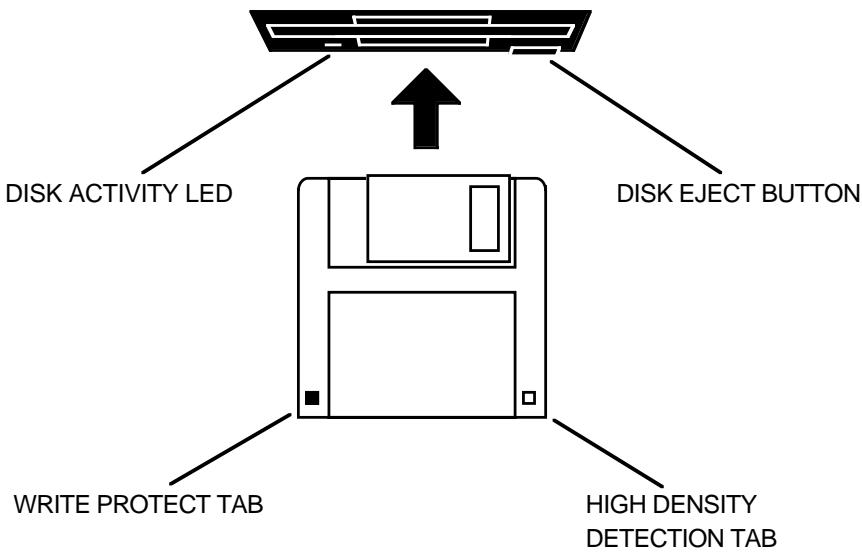
The label should be facing upwards when it is inserted (actually, it is physically impossible to insert disks the wrong way round without using an extreme amount of brute force!).
To eject the disk, simply press the DISK EJECT button. When a disk is loading, saving or formatting, the DISK ACTIVITY LED will be lit.
As a result, it is vital that you save your work to disk before turning the power off otherwise you will lose your work and, unless previously saved or backed up, it will be gone for ever. In fact, it is a good idea to regularly save your work as you are working. All good computer users do this and it prevents the accidental loss of data should power be accidentally removed from the instrument. This also serves as a form of 'undo' - if you make some kind of mistake in your programming and editing and can't fix it, you can load the last level of editing back into the sampler. It may be a bit tedious to keep stopping every now and then to save your work but it is better than losing some valuable sounds.
Taking care of your Disks
These floppy disks contain valuable sound data and, as such, should be treated with extreme care. Please observe the following points, therefore:
- Never slide the metal cover back and touch the disk. Finger marks may render the disk unreadable.
- Don't leave the disk in the drive wherever possible. When the disk is in the drive, the metal protective cover slides back exposing the actual disk inside and this makes the disk susceptible to picking up dust which may cause read errors.
- Do not leave your disks in a hot car.
- Do not place your disks next to any magnetic sources such as speakers, amplifiers, televisions, etc.. Also, try to avoid X-ray machines. At airports, it is sometimes possible to ask for your disks to be inspected by hand at security desks but, with the added security at airports these days, this may not be possible. Always check with the security officer though, just in case. Security X-ray machines are generally safe with disks, though. If in doubt, make backup copies which should be left at home.
Note: Some checked-in luggage is X-rayed by quite powerful machines that are not as safe as those that check hand luggage. It is probably best to take your disks as hand luggage.
- Do not leave your disks around when drinking liquids - one accidental spillage could ruin a lot of work!
- Always use high quality disks. Whilst cheap ones may be appealing, they are prone to errors more than good ones.
- Try to ensure that the write protect tab is switched on (i.e. the tab does not block the hole). This will prevent accidental erasure, formatting and loss of data. It may be a nuisance to try to write to the disk and find it write protected but it is less of a nuisance than accidentally over-writing a set of your favourite samples and programs!
- Try to get into the habit of labelling your disks - it will pay dividends in the end when you are searching for something.
- Invest in a sturdy carrying case for your floppies especially if you are a gigging musician. Heavy duty metal camera cases are ideal and some flight case manufacturers now make special heavy duty disk flightcases.
- Even if you are using a hard disk of any sort, please make sure you have backed up your work to floppy disks. It can be time consuming but it will be worth it if you ever have a problem with your hard disk!
Chapter 2
The Basics
Hooking Up Your System
The following diagram shows how to hook up the MPC2000 to a MIDI keyboard and two sound modules.
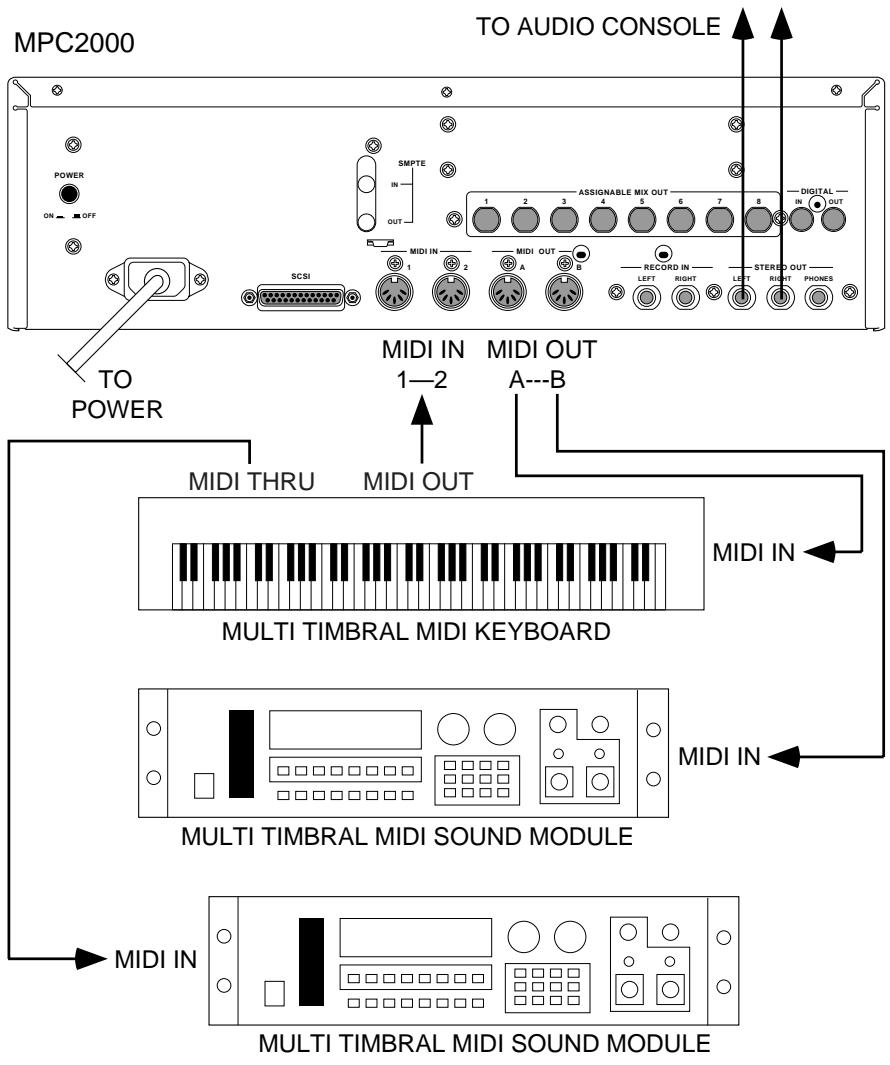
If you only want to use the MPC2000 as a drum machine for now, don't connect the MIDI keyboard, the sound modules, or make any MIDI connections. If you choose to connect an external MIDI device, connect the MIDI Output of the MIDI keyboard to MIDI Input of the MPC2000, and the MIDI Input of the MIDI sound source to MIDI Output of the MPC2000. MIDI Output provides an A or B Output. Normally use Output A when there is only one sound source. If you want to use a sound source from the connected MIDI keyboard, connect the MIDI keyboard MIDI Input to the MPC2000 MIDI Output. (In this case, it is necessary to turn the Soft thru function on the MPC2000 off. For details, refer to "Setting the Track's MIDI Channel" on page 49.) To connect multiple sound sources, use the MIDI THRU jacks of the MIDI device. Connect the MIDI Output of the MPC2000 to the MIDI Input of the first MIDI sound source. Connect the MIDI THRU of the first MIDI sound source to the second MIDI sound source, and so on. MIDI can handle up to 16 data channels, the MPC2000 has MIDI Output A and B each with 16 channels enabling you to handle 32 channels of data.
The Terms Used in MPC2000
Here are some definitions of terms used in the MPC2000 that you should know:
Sequence
A sequence is the most basic unit in creating data on the MPC2000. The performance data from a MIDI keyboard or pad is recorded on each track within a sequence. Each sequence has 64 tracks, each to which performance data can be recorded. It is possible to create up to 99 sequences.
| Track01 | Piano |
| Track02 | Bass |
| Track03 | Organ |
| : | |
| Track64 | (Unused) |
There are two main ways to create music data on the MPC2000. One way is to create a long sequence as a whole piece, the other way is to create short sequences for each part of the piece and play them sequentially using the Song feature. Therefore, a sequence can be a long piece of more than 100 bars, a two-bar drum loop, etc.
One sequence as a whole piece.

A multiple sequence piece (setting short sequences with the Song function).

Track
There are 64 tracks in a sequence to which individual performances can be recorded. For example, track 1 could be the piano, track 2 could be the bass, and track 3 the organ. Normally, each track is recorded one at a time. It is also possible to record a new track while playing the recorded tracks. Each track can be turn on or off individually. It is possible to record different piano solos to track 1 and track 2 and compare the combination with the other tracks. It is possible to select either a Drum track or MIDI track. It is possible to play the internal sampler from a drum pad and record it to the Drum track. If you are recording a piano or bass line from an external MIDI keyboard, set the track to MIDI.
Song
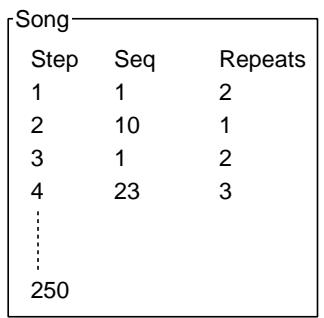
This function sequentially plays the data of a sequence. You can set the order or number of times to play the sequence. This is used to play multiple pieces consecutively, or to complete a song by arranging the sequence data for each part. In the MPC2000 there are 20 songs, each having up to 250 steps. A sequence is assigned to each step to create a song. In doing so, it is also possible to set each step to repeat a number of times.
Sound
Each individually sampled recording in the MPC2000 is called a sound. A sound can be recorded on the SIMPLE page or loaded from a floppy disk. The start of end of a sound can be changed or the looping of a sound can be set on the TRIM page. The sound is assigned to a note number and it is possible to set the envelope, filter, or pitch. Assign a note number to each pad to play the sound from the MPC2000 pad.
Drum Pads
Sounds are played by assigning them to a drum pad. It is possible to assign up to 64 sounds by combining the pads with the pad bank keys(16 pads x 4 pad banks). To play a sound from a pad, assign a sound to a note number then assign the note number to a pad. Details are described in the "Creating and Editing Programs" chapter. By playing a pad, it is also possible to send the MIDI note of the note number assigned to that pad from the MIDI output.
Note Number
This refers to the position (note) of the MIDI note event on the keyboard. For example, the note number for Middle C on the piano is 60. The lowest key on the piano is A-1 which is note number 21. On a MIDI track, the MIDI keyboard performance data is recorded as a note number. On a Drum track, the note number is used to play back the sound in the internal sample. If you play the pads and record to a drum track, the note numbers assigned to the pad will be recorded on the track. When you play back this track, the sound assigned to the note number is played back.
Program
A program is a collection of sounds assigned to 64 note numbers. It is possible to set the envelope or filter on each note number individually. It is possible to create 24 programs on the MPC2000.
The sound is played back by a pad or MIDI note only when it is assigned to a note number in a program. By assigning a note number to a pad, the sound assigned to that note number can be played from a pad. When a sequence is played back, the sound is played with the note data recorded on the track. (When the snare drum is assigned to note number 50, the snare drum is reproduced with the timing recorded on the note.)
You can instantly switch the program by selecting it in PROGRAM mode. It is also possible to use the MIDI program change feature to switch the program.
Operating the Front Panel and Screen
Before you can use the MPC2000, you must learn how to use the cursor keys, data fields, numeric key pad, and the Function keys.
Insert the system disk and turn the power on. After about half a minute, the LCD screen will display the following text:
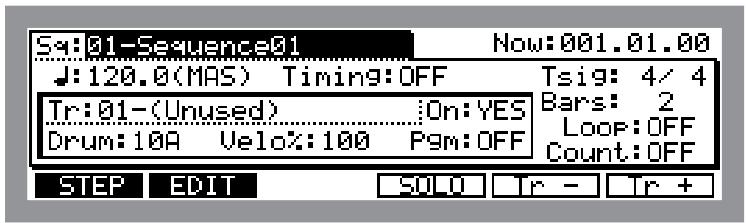
It is the main operating state of the MPC2000 and most playing and recording of sequences is done when this screen is in view. It will be discussed further in the chapter entitled "Recording Sequences." If at any time while operating the MPC2000 you are confused and want to return to this screen, press the MAIN SCREEN key.
The Cursor, Cursor Keys, Data Fields
Make sure that the Main screen is showing. If not, press MAIN SCREEN.
Notice that a part of the screen is displayed with black and white reversed. This is called the cursor. It is possible to move the cursor around the screen using the four gray direction keys located in the Cursor section of the panel. These four keys are referred to as the CURSOR LEFT, CURSOR RIGHT, CURSOR UP and CURSOR DOWN keys. Try moving the cursor around the LCD, then move it to the upper left corner.
Notice that the cursor does not move from letter to letter, but landing only in certain locations, usually to the right of a colon (:). These areas are called data fields and each one controls a specific parameter. For example, the upper left-most data field is called ^一4 (Sequence), an abbreviation for sequence. To the right of this field is another field containing the name for the selected sequence.
The Numeric Keypad and DATA Wheel
Make sure that the Main screen is displayed. If not, press the MAIN SCREEN key.
To change the data in a data field, move the cursor to the field and use the DATA wheel. By rotating the DATA wheel one click to the right when the cursor is in the data field, the number on the screen will increase. By rotating the DATA wheel one click to the left, the number on the screen will decrease. If you continuously rotate the DATA wheel, the numbers will continuously increase or decrease.
There are fields in the data field where you can enter the numbers directly from a numeric keypad. Move the cursor to the field, enter a new number from the numeric keypad, and press the ENTER key. For example, to change the tempo to 100.0, follow the steps below:
- Move the cursor to the : (Tempo) field.
- Enter 1000 (ignoring the decimal point) from the numeric keypad and press the ENTER key.
There are fields to select functions instead of entering numbers. Rotate the DATA wheel to select these functions. For example, move the cursor to the Timing field. Rotate the DATA wheel one click at a time and check the display change in the field. After you have finished, turn the field “OFF”.
The Function Keys
Make sure that the Main screen is showing. If not, press the MAIN SCREEN key.
Immediately below the LCD screen are six keys labeled F1, F2, F3, F4, F5 and F6. The functions of these keys change from one screen to another; these functions are always displayed on the lowest line of the screen. For example, while the Main screen is showing, the lowest line appears as:


When a function has a frame such as [50], the function will be implemented. When the function is reversed such as [EDIT], you can move to the page by pressing the corresponding function key. Press [EDIT][F2]. If only characters are displayed as in the case of EVENTS in [F1], the display will show that the page is currently selected. Most of the screen displays in the MPC2000 have function key functions, and the lowest line of each of these screens indicates the function of the six function keys while that screen is showing. Some screens have fewer than six active function keys and some have none.
Basic Functions
Loading the Operating System
To operate the MPC2000, it is necessary to load the operating system from the system disk. To load the operating system, insert the enclosed operation disk into the disk drive of the MPC2000 and turn the power on. When the power is turned on, the version number of the operating system will be displayed for several seconds and the main screen will appear.
Note: The MPC2000 requires operating system software to turn the power on in the same way as personal computers. Personal computers have operating systems on the hard disk which is automatically loaded when the power is turned on. In the case of MPC2000, the operating system software is stored on the system disk and it is always necessary to use the system disk when you are turning the power on. The system disk is essential in operating the MPC2000 and it is therefore recommended to have several copies of the operating system. The way to copy a system disk is described in the "Disk Operation" chapter of this manual.
Loading and Playing Programs
All sounds and programs are stored on the memory held in RAM and the data is therefore lost whenever the power is turned off. In order to play any sounds after turning the power on, you must load them in from the disk. The procedure for loading files from a disk is described in the "Disk Operation" chapter of this manual, but to get you started quickly, the following steps enable you to load a disk from the enclosed disk and play the sounds from drum pads:
- Insert "Disk#1 STANDARD SET" enclosed into the MPC2000. If the system disk is left in the disk drive, press the eject button to remove the system disk and insert "Disk#1."
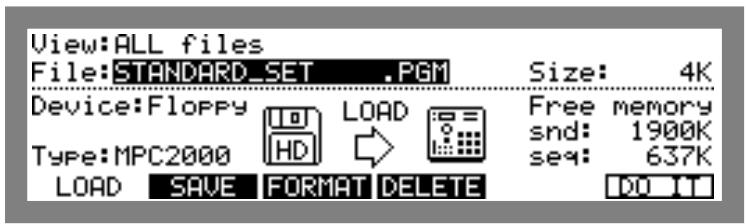
- Press the DISK key (3 on the numeric keypad) while holding down the SHIFT key.
-
Select "STANDARD_SET" with the DATA wheel and press DO IT[F6].
-
Press LOAD[F5] to load. The message "Loading..." will appear on the display. The screen will return to 2. when the loading is completed.
All the files are now loaded. Press the MAIN SCREEN key to return to the main screen.
Playing the Drum Pads, the PAD BANK, & FULL LEVEL Keys
Each recorded sample in the MPC2000 is called a sound. To hear some of the drum sounds you have loaded, play the 16 drum pads on the front panel. To hear other sounds, press the PAD BANK key once so that the [B] light above the key is lit, then play the pads again. The MPC2000 has four pad banks (A, B, C and D). To hear the sounds assigned to pad bank C, press the PAD BANK key again and play the pads, and do the same to hear bank D. Each time you press the PAD BANK key you change to the next pad bank, and with each bank the 16 pads play different sounds.
The 64 bank/pad combinations are as follows:
Drum pads in bank A: A01 through A16
Drum pads in bank B: B01 through B16
Drum pads in bank C: C01 through C16
Drum pads in bank D: D01 through D16
The 16 drum pads are dynamic—the harder you play them, the louder the sound will play. Press the FULL LEVEL key (the light goes on), and no matter how hard you play the pads, the sound will play at its maximum dynamic level. Press the FULL LEVEL key again to return to normal dynamic operation.
Selecting Programs
A program is an edited set with note number and sounds assigned to it. The MPC2000 can hold up to 24 programs. Each program has 64 sound assignments. If you change from one program to another, playing the four banks of pads will produce entirely different sounds.
When you just played the drum pads and heard the sounds, you were hearing the sounds assigned in Program 1. To change to Program 2:
- Press the PROGRAM key (or 6 on the numeric pad) while holding the SHIFT key. The following screen will appear:
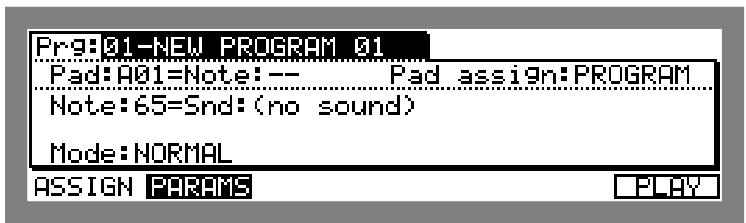
- Move the cursor to the ^ field. Select program 2 using the DATA wheel.
- Play the sounds in program 2: Select Pad Bank A and play the sounds, then select Pad Bank B and play the sounds, then play bank C, then bank D.
- Repeat step 3, except select program 3 and play the sounds. Repeat this procedure to hear the other programs.
- To return to the Main screen, press the MAIN SCREEN key.
The NOTE VARIATION Slider, ASSIGN and AFTER keys
The NOTE VARIATION slider can be used in real time to change the tuning, attack, decay, or filter value for a sound preassigned to a drum pad by moving the slider while playing the pad.
Here are some examples of uses of NOTE VARIATION slider:
- The slider can control decay for a hi-hat sound. This would simulate the action of a drummer's hi-hat pedal, changing the hi-hat decay time each time the pad is played. By using the decay switch feature in the program and setting the sound so it switches according to the decay value, it is possible to simulate a closed hi-hat gradually opening by moving the slider.
- The slider can be assigned to tuning for a tom tom sound. By moving the slider when playing the drum pad assigned to a tom tom sound, it is possible to change to tom tunings.
- The slider can control filter value for a sound containing a filter setting. This will change the sound of each time the note is played, to play analog synthesizer sample and hold filter effects.
NOTE VARIATION slider data is recorded on a sequence with the drum notes. For details about the data, please refer to "Step Edit" of the "Editing Sequences" chapter.
The ASSIGN Key
To assign a pad and parameter to the NOTE VARIATION slider, press the ASSIGN (AFTER) key while holding the SHIFT key. The following screen will appear:
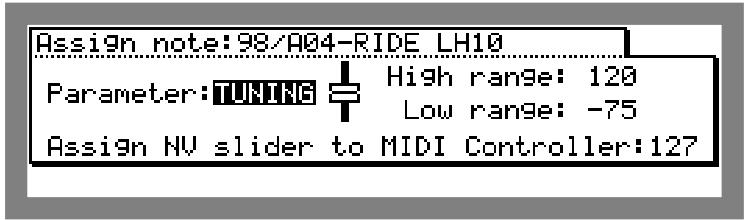
To assign the slider to a drum pad and parameter:
- Press the drum pad you want to assign (the note number, pad number and sound name of the pad you pressed will appear in the H3 sign note field). It is also possible to select the sound by selecting the Assign note field with the cursor and using the DATA wheel.
- Move the cursor to the Parameter field and select the desired parameter (TUNING, DECAV, ATTACK or FILTER) using the DATA wheel.
- Press the MAIN SCREEN key to return to the Main screen.
- Play the selected pad while moving the NOTE VARIATION slider. Each time the pad is played, the selected parameter (tuning, attack, decay or filter) will change according to the slider position.
- To turn the NOTE VARIATION slider off, press the ASSIGN (AF-TER) key while holding down the SHIFT key to display the assign screen, move the cursor to the Assign note field and turn the DATA wheel to the left until OFF appears.
Here is additional information about the four fields:
- Assign note:
This field contains the note number to which the slider is assigned (35-98). To change the assignment, press a drum pad. The pad number of the pad you pressed in the Assi g n note: field and the name of the sound currently assigned to the note number will appear. Alternately, you can change it by moving the cursor directly to the field and rotating the DATA wheel.
Parameter:
This field determines which of the four possible parameters the slider will control. The four choices are:
TUNING This slider changes the tuning of the sound. The tuning you get is based on the tuning that is set in the Tune parameter of the program.
DECAY This enables you to change the decay time with the slider. This changes regardless of the value set in the Decay parameter of the program.
ATTACK This enables you to change the attack time with the slider. This changes regardless of the value set in the Attack parameter of the program.
FILTER This enables you to change the cut off frequency of the sound with the slider. This changes the F^e = 4 value of the parameter in the program.
Low range: and High range:
These two fields control the range of the slider effect. The Low Range field determines the parameter value that will be produced when the pad is hit while the slider is at the bottom of its travel; the High Range field determines the parameter value that will be produced when the pad is hit while the slider is at the top of its travel. The parameter value consecutively changes in any position within the range. The available range for this field is determined by the parameter selected in the Parameter field.
TUNING: -120 ~ +120
ATTACK: 0 100
DECAY : 0 ~ 100
FILER : -50 ~ +50
Note: The attack or decay changes within the range of 0 and 5000msec.
The AFTER key
Normally, the slider only affects notes which are actually played have no effect on notes played back from sequences. However, if the AF-TER key is pressed (and the associated light goes on), the slider also effects the drum notes playing back from sequences. In this case, the function effects the drum note of the note number (drum pad) selected in the ASSIGN key's screen. Further, these NOTE VARIATION slider datum can be recorded if you are in Overdub mode.
To return to normal operation, press the AFTER key again and the light will go off.
The 16 LEVELS key
By using the 16 LEVELS function, you can play a sound in 16 parameter levels of velocity, tone, attack, decay, or filter.
To use the 16 LEVELS function, press the 16 LEVELS key and display the following screen.
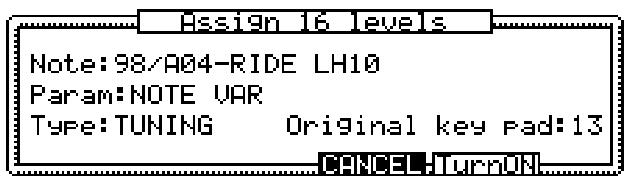
Note:
Use the 16 level feature to select the pads you are playing to 16 levels. Select the sound by directly playing the drum pad. It is also possible to move the cursor to the field and select the level with the DATA wheel.
Faram
When VELOCITY is selected, it is possible to apply 16 levels of velocity to the sound set in Note: The velocity is played the weakest on PAD1 and strongest on PAD16.
When NOTE VAR is selected, set the parameter with the following Type:
- Type:
This allows you to select the next parameter.
TUNING This allows you to play the sound set in Note at 16 levels of tuning. The original tuning is assigned to the pad set in the Original key Pad field and the tuning changes by half note.
DECAY This allows you to play the sound set in Note at 16 levels of decay time. The range of decay time is set on the assign screen of the note variation by pressing the ASSIGN (AFTER) key while holding down the SHIFT key.
ATTACK This allows you to set the attack time of a sound set in Note at 16 levels and play them. The range of attack time is set on the assign screen of the note variation by pressing the ASSIGN (AF-TER) key while holding down the SHIFT key.
FILTER This allows you to set the cut off frequency of the filter of a sound set in Note at 16 levels and play them. The range of cut off frequency is set on the assign screen of the note variation by pressing the ASSIGN (AFTER) key while holding down the SHIFT key.
After you have set the parameter, press TurrriH[F5]. The 16 LEVELS LED will light up and allow you to play using the 16 levels function.
If the 16 LEVELS key is press when the 16 LEVELS function is on, the 16 LEVELS LED will turn off and the 16 LEVELS function will be turned off.
Chapter 3
Recording Sequences
How Sequences are Organized
A sequence is the most basic unit in creating data on the MPC2000. The performance data from a MIDI keyboard or pad is recorded on each track within a sequence. Each sequence has 64 tracks, each to which performance data can be recorded. It is possible to create up to 99 sequences.
| Track01 | Piano |
| Track02 | Bass |
| Track03 | Organ |
| : | |
| Track64 | (Unused) |
There are two main ways to create music data on the MPC2000. One way is to create a long sequence as a whole piece, the other way is to create short sequences for each part of the piece and play them sequentially using the Song feature. Therefore, a sequence can be a long piece of more than 100 bars, a two-bar drum loop, etc.
One sequence as a whole piece.

A multiple sequence piece (setting short sequences with the Song function).

There are 64 tracks in a sequence to which individual performances can be recorded. For example, track 1 could be the piano, track 2 could be the bass, and track 3 the organ. Normally, each track is recorded one at a time. It is also possible to record a new track while playing the recorded tracks. Each track can be turn on or off individually. It is possible to record different piano solos to track 1 and track 2 and compare the combination with the other tracks. It is possible to select either a Drum track or MIDI track. It is possible to play the internal sampler from a drum pad and record it to the Drum track. If you are recording a piano or bass line from an external MIDI keyboard, set the track to MIDI.
In order for the sequencer to play external synthesizers, it must send its notes out using one of the 32 output MIDI channels (16 MIDI channels for each of the 2 MIDI output jacks). On the MPC2000, each track can be independently assigned to one of these 32 output MIDI channels.
Bar.Beat Tick
The sequencer of the MPC2000 divides the quarter note into 96 parts. Each one of these divisions is called a tick.
In many of the sequence editing screens it is necessary to enter the start and end of the region to be edited. This is done using the time field, containing a bar number, beat number, and tick number.
001.01.00 Bar Beat Tick
To specify the range of edit, select bar, beat, or tick with the cursor and set the value with the DATA wheel. The edit range set in the time field starts at the time entered on the right and continues to one tick before the time entered on the right. Therefore, if the settings were 001.01.00-003.01.00 then you cannot edit an event entered before 003.01.00. Also when you are editing each bar, the First bar: filed is the first bar and the Last bar: field will be the last bar edited. In this case, the bar set in the Last bar: field is included in the edit range. When the First bar: is set to one and the Last bar: to two, the data of the first and second bars will be edited.
Examples of Sequence Recordings
The MPC2000 is a sequencer with internal samplers. It is possible to simply use this as a rhythm machine, or as a sequencer connected to a MIDI device. It is also possible to set a loop to a sequence and repeatedly play a phrase. Here we will describe in detail simple ways to record sequences on the MPC2000.
Example 1: Recording a Drum Pad Performance
First record a drum pad performance on the MPC2000. This is the most basic way of using the MPC2000; as a rhythm machine.
- Turn the MPC2000 on and load the drum sounds from the enclosed sound disk. (Refer to the chapter "Disk Operation" for details on how to load the sounds.) When you have finished, check to see if the drum sounds can be played back by playing the drum pads.
- Press the MAIN SCREEN key and display the main screen. The recording and play back of a sequence will always be operated here.
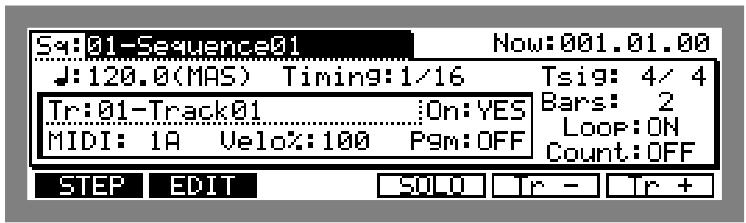
- Select the field with the CURSOR key, rotate the DATA wheel until it displays and select an unused sequence labeled (Unused).
- Select the track type field with the CURSOR key and rotate the DATA wheel to the right to select DriLir.
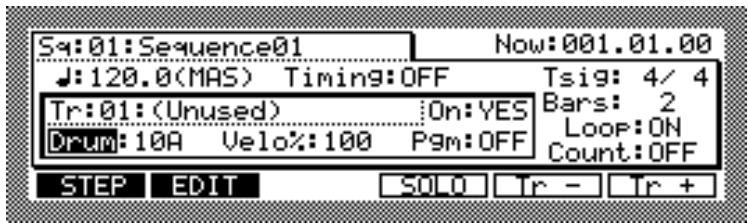
-
Select the Bars field with the CURSOR key and set the number of bars (length) you want to record with the DATA wheel.
-
Select the Loop field with the CURSOR key and rotate the DATA wheel to the left to set it OFF.
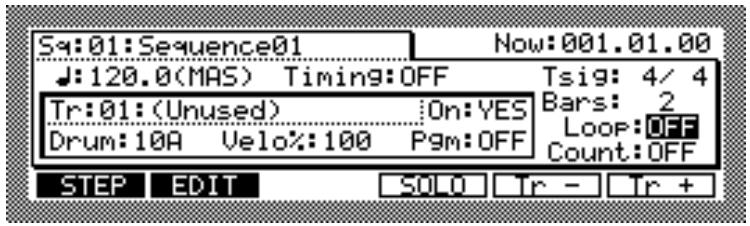
- Select the Count field with the CURSOR key and rotate the DATA wheel to the right to turn it ON.
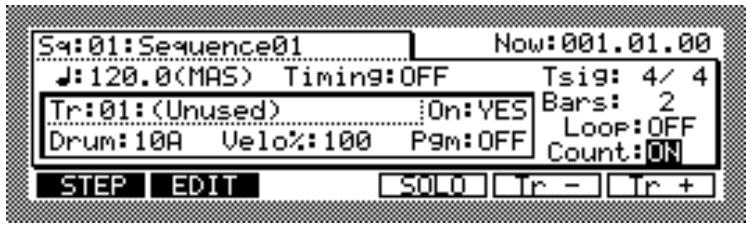
- Select the Count field and press the OPEN WINDOW key to open the Count/Metronome window.
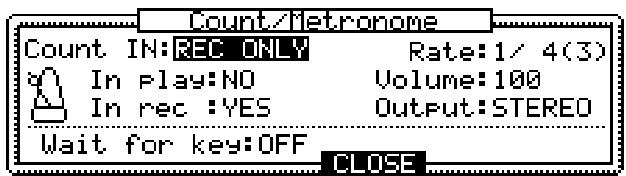
- Select the Count in field with the CURSOR key and select REC ONLY with the DATA WHEEL. Furthermore, select the Inrec field and rotate the DATA wheel to the right and set it to YES.
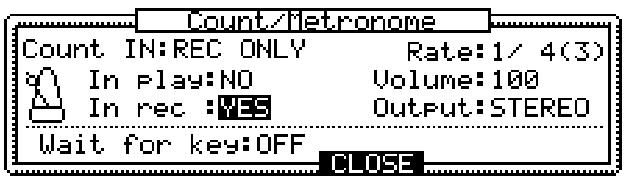
- Press CLOSE[F4], close the Count/Metronome window and return to the main window.
- Press the PLAY START key while holding down the REC key to start recording. After one bar count, the barbeat.tick numbers in the now field will start to increase. Play the drum pads to the click.
-
The recording will automatically stop when the number of bars set in step 5 have been recorded. To stop in the middle of a recording, press the STOP key. It is possible to play back the recorded sequence by pressing the PLAY START key.
-
To record again, press the PLAY START key while holding down the REC key again and start recording.
- To over dub a performance over a recorded sequence, press the PLAY START key while holding down the OVER DUB key.
Example 2: Recording a Loop
This allows you to repeatedly play a preset bar and dub sounds over it.
- Turn the MPC2000 on and load the drum sounds from the enclosed sound disk. (Refer to the chapter "Disk Operation" for details on how to load the sounds.) When you have finished, check to see if the drum sounds can be played back by playing the drum pads.
- Press the MAIN SCREEN key and display the main screen. The recording and play back of a sequence will always be operated here.
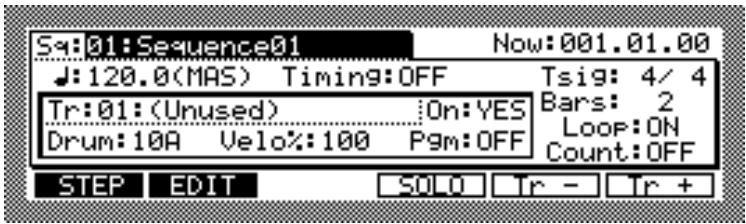
- Select the field with the CURSOR key, rotate the DATA wheel until it displays and select an unused sequence labeled (Unused).
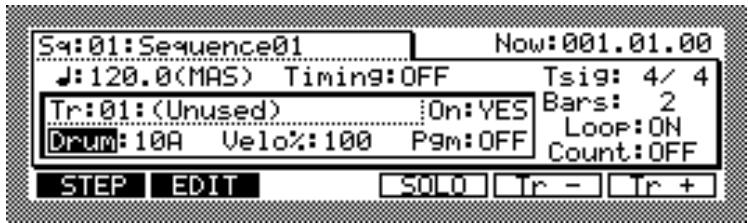
- Select the track type field with the CURSOR key and rotate the DATA wheel to the right to select Drlm
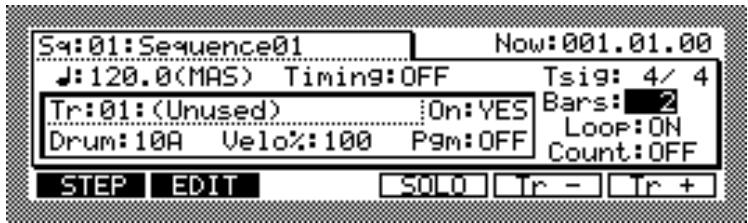
- Select the EARS field with the CURSOR key and set the number of bars to record with the DATA wheel. In this example, we will create a two-bar loop. Select "2" with the DATA wheel.
- Select the Loop field with the CURSOR key and rotate the DATA wheel to the right to turn it ON.
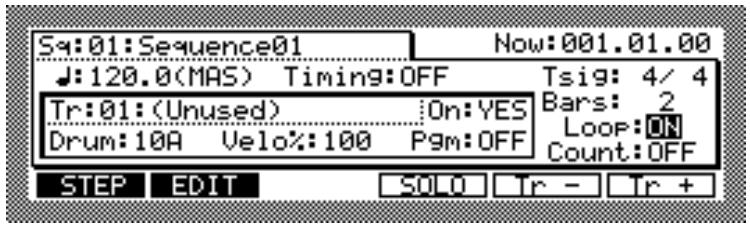
- When the Loop field is selected, press the OPEN WINDOW key to open the Loop window.
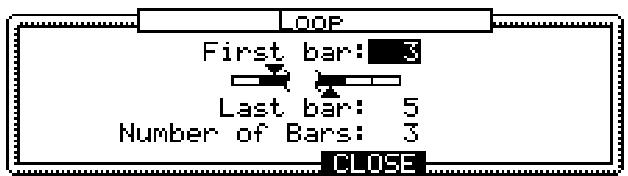
- Select the First Bar field with the CURSOR key and set the field to 1 with the DATA wheel.
- Select the Last bar field with the CURSOR key and set the field to END with the DATA wheel and close the Loop window by pressing CLOSE[F4].
- Select the Count field with the CURSOR key and rotate the DATA wheel to the right to turn it ON.
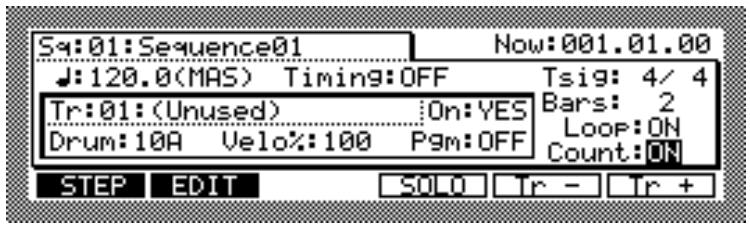
- When the Count field is selected, press the OPEN WINDOW key to open the Count/Metronome window.
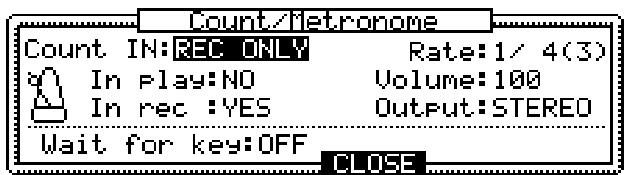
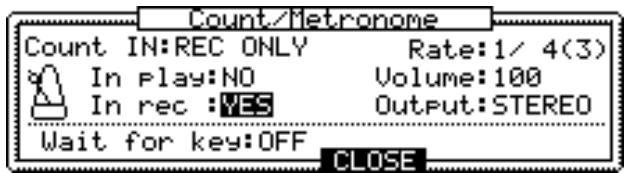
- Select the Count in field with the CURSOR key and select REC ONLY with the DATA wheel. Furthermore select the In rec field and set the function to YES by rotating the DATA wheel to the right.
- Press CLOSE[F4] to close the Count/Metronome window and you will return to the main window.
14.Start recording by pressing the OVER DUB key while holding down the REC key. After one bar count, the barbeat.tick numbers in the now field will start to increase. Play the drum pads to the click. When the two bars have been recorded, the numbers will automatically return to the first bar and the mode will return to overdub mode allowing you to repeatedly overdub. - To finish recording, press the STOP key. You can play back the sequence loop by pressing the PLAY START key.
Example 3: Multi-track Recording
This is an example of multi-track recording to the MPC2000 sequencer using an external MIDI sound source in addition to the internal drum sound source.
- Refer to the example on page 12 and connect the MIDI device to the MPC2000, turn the MPC2000 on and load the drum sounds from the attached sound disk. (Refer to the chapter "Disk Operation" for details on how to load the sounds.) When you have finished loading, check to see if the drum sounds can be played back by playing the drum pads.
- Use the drum pads to record the drum sound in the same manner as in Example 1.
- Select the Tr# field with the cursor and select a track which is not used by rotating the DATA wheel to the right.
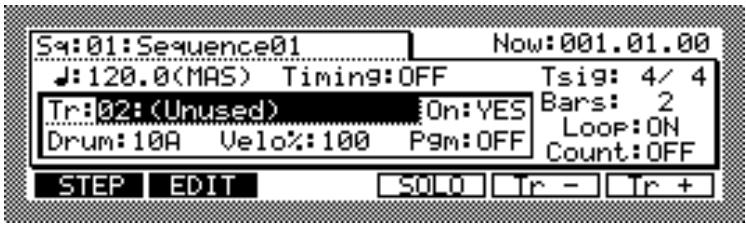
- Select the Track Type field with the cursor and select the MID by rotating the DATA wheel to the left.
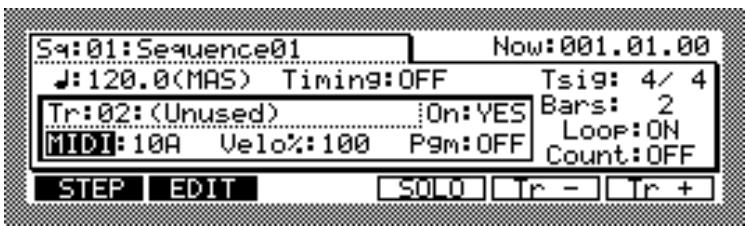
- Select the MIDI Channel field with the cursor and set the MIDI channel of the MIDI device with the DATA wheel.
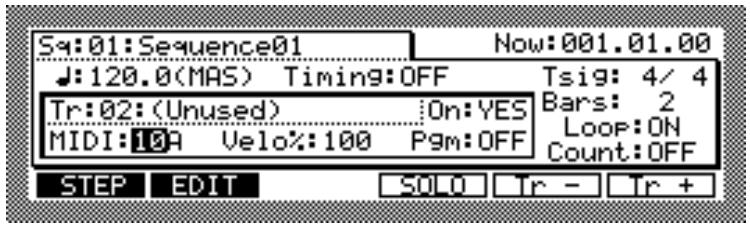
- Start recording by pressing the PLAY START key while holding down the REC key. After one bar count, the barbeat.tick numbers in the now field will start to increase. Play the MIDI device to the prerecorded drum sound.
- When the number of bars set have been recorded, the recording automatically stops. To stop in the middle of a recording, press the STOP key. You can play back the prerecorded sequence by pressing the PLAY START key.
- To record over again, begin to record by pressing the PLAY START key while holding down the REC key again.
- Repeat steps 3 to 8 and overdub the external MIDI device sound.
The MAIN SCREEN
After the system disk is inserted into the MPC2000 and the power is turned on, the LCD screen shows the following contents:
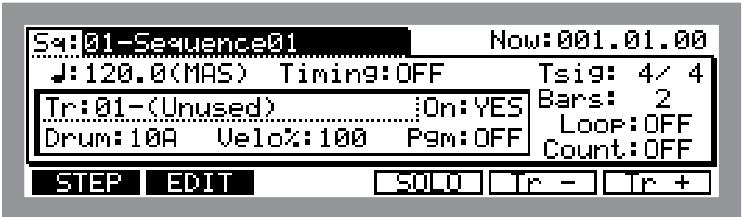
This is called the Main screen. It is the main operating screen of the MPC2000 and most playing and recording of sequences is done while this screen is showing. To return to this screen, press the MAIN SCREEN key. The following is an explanation of each of the data fields and function keys contained in this screen:
Selecting a Sequence
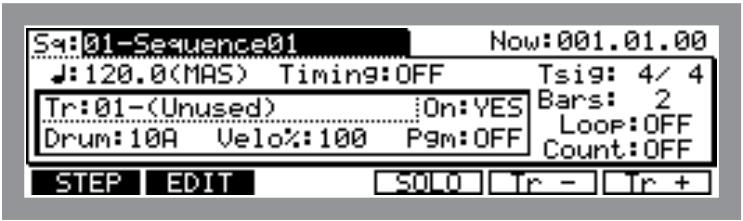
Move the cursor to the field and turn the DATA wheel to select the sequence. The sequence number and sequence name will appear. Unused) will appear when there is no data recorded to the sequence.
Next sequence function
When the cursor is in the ^ field while the sequence is playing, you can select the sequence to play next by rotating the DATA wheel. The following window appears when you rotate the DATA wheel.
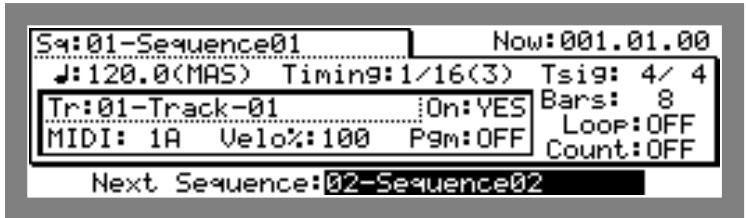
Select the sequence with the DATA wheel. In the above illustration, 02-Sequence02 is played back after 01-Sequence01 is played to the end. It is possible to play sequences consecutively in this manner. When you want to stop the next sequence function, select the number originally selected (the currently playing sequence in the Next Sequence field.
Renaming a Sequence
To open a Sequence window select the field and press OPEN WINDOW.
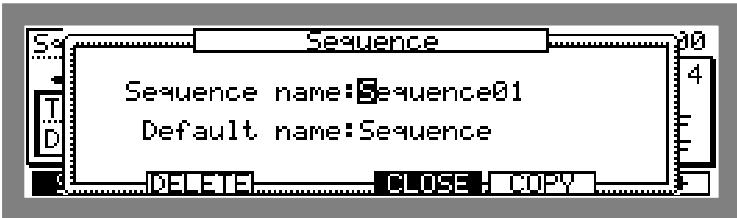
Seuence name:
Change the name of the sequence.
Move the cursor using CURSOR LEFT or RIGHT, or the DIGIT wheel and enter letters with the DATA wheel. It is also possible to directly enter letters from the DRUMS PAD. The letter shown on the top right of the pad will be entered when PAD is pressed. For example, A will be entered if you press PAD1 once and B if you press it again. Use the 16 LEVELS key to enter a space. To switch between lower and upper case keys, press the PAD BANK key.
Enter a name and press the ENTER key to confirm.
Note: If you do not press the ENTER key and move the Default Name field or other pages with the CURSOR DOWN key, the entered name will be ignored and the name will not change.
- Default name:
When you are recording a new sequence, the name set here will automatically be used. When a name is actually used for a sequence, the sequence number will be added after the name. For example, if the default name is set to "Sequence", the name will be "Sequence01" (01 is the sequence number).
The way to enter a name is the same as for Sequence name.
Deleting a Sequence
To open a Sequence window select the Sq: field and press OPEN WINDOW.
The Delete Sequence window will open when you press DELETE[F2].
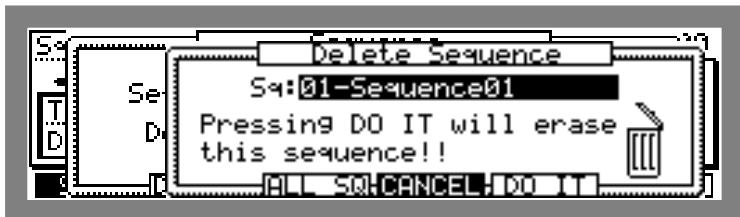
The selected sequence data will be erased if you press DQ IT[F5] and the sequence name will change to (Unused).
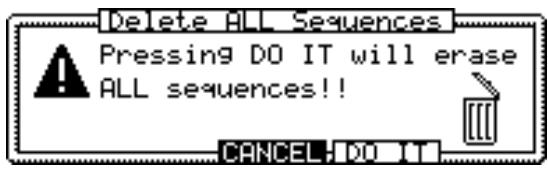
The following warning will appear if you press ALL SQ[F3] and all of the sequence data will be erased when you press DO IT[F5].
Copying a Sequence
To open a sequence window select a field and press the OPEN WINDOW key.
The Copy Sequence window will open when you press COPI [F5].
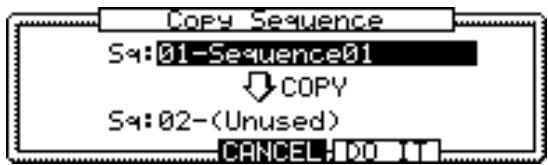
Select the copy source (top level) by pressing CURSOR UP and select the sequence you want to copy with the DATA wheel.
Select the copy destination (bottom level) by pressing CURSOR DOWN and select the sequence you want to copy the data to with the DATA wheel.
The sequence data will be copied when you press DQ IT[F5].
CAUTION: If there is data in the sequence you have selected as the destination, the data will be erased if you write over the data. Be careful when you are copying to a sequence with a name other than "Unused."
Setting the Tempo
Set the tempo of the sequence.
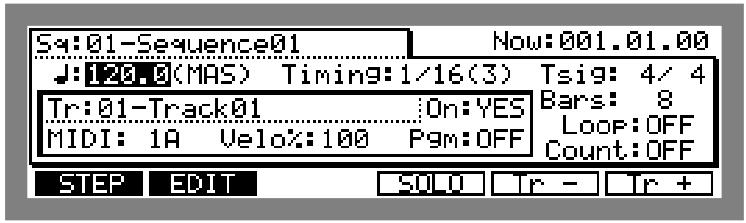
Move the cursor to a field and set the tempo by rotating the DATA wheel.
Enter 4 digits if you are using the numeric pad to enter. For example, to set the value to 120.5, enter "1205." In this case, the tempo is confirmed when the fourth digit is entered. To set the value to 88.5, enter "885" and press the ENTER key to confirm the entry.
Note: If you do not press the ENTER key and move to other fields or pages, the entered data will be ignored and the tempo will not change.
Tempo Change Window
Select a tempo field and open the Tempo Change window by pressing the OPEN WINDOW key.
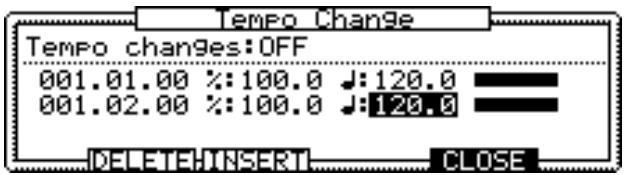
- Tempo Change:
Set the tempo change ON or OFF.
- barbeat.tick
This is the point where the barbeat.tick tempo change event is inserted.
Set the tempo change event to the ratio of the original sequence tempo set in the main screen.
Set the tempo change event using an absolute value.
CAUTION: The and the affect each other and the value of either will automatically change when a value is entered to one of the two.
Entering and Modifying a Tempo Change
To open a Tempo Change window select a tempo field and press the OPEN WINDOW key.
When a tempo change is not set, the following screen will appear:
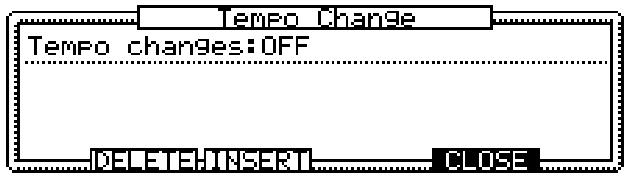
To enter a tempo change, press INSERT[F3] in the Tempo Change window.
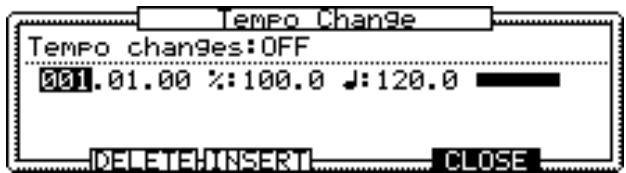
Select the barbeat.tick field and set the tempo change event point and set the tempo with 空 _ 一 ^ 一 or
The % : and ^ work together, so if you change the value of one, the other will change correspondingly.
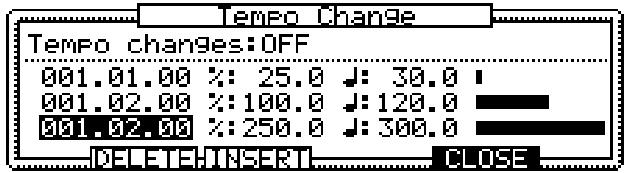
Note: When you are changing the tempo change event by selecting the barbeat.tick field where multiple tempo change events are entered, you cannot set an event time beyond the area directly before or after the data you are trying to change. For example, if there is a tempo change event on points 002.01.00 003.01.00 and 004.01.00, it is not possible to change the data before 002.01.00 or after 004.01.00 when you are changing 003.01.00.
To delete the tempo change event, select the tempo change event you want to delete with the CURSOR UP or DOWN key and press DELETE[F2].
When there are many tempo change events entered, it is possible to scroll the screen with the CURSOR UP or DOWN keys.
Selecting a Tempo Source
This allows the performance of each sequence to a set tempo or the master tempo set by MPC 2000.
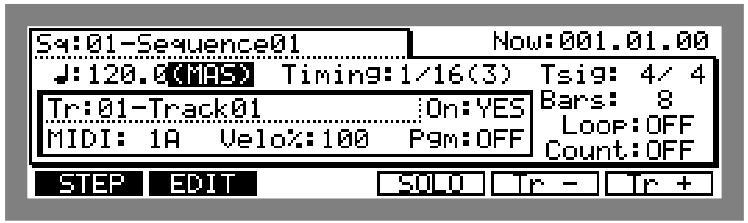
Move the cursor to the Tempo Source Field as shown above and set the tempo source with the DATA wheel.
·(SEQ)
Within each sequence is a unique tempo setting. When (SEO) is selected, the sequence's unique tempo is displayed in the Tempo field. It is possible to set this tempo to each sequence individually. When playing sequences, this is useful if you want each sequence to play at its preset tempo. The sequence's tempo is saved to disk along with sequence data when a sequence is saved.
·(MAS)
The master tempo is a single tempo setting that applies to all sequences and songs. When playing sequences this is useful if you always want each selected sequence to play at the same tempo. This tempo setting is not saved in the sequence file.
Setting the Time Correct (Quantization)
When data is recorded to a sequence in real-time, the note event is time corrected to the value specified here.
Also, when the bar, beat, or tick point is moved using the STEP < / > key, the value specified here is adapted.
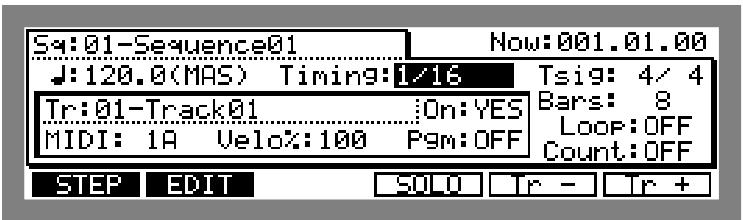
Select the Timir# field with the CURSOR and set the quantize rate by rotating the DATA wheel. The options are as follows:
OFF No timing correction. Moves the point by one tick each time the STEP < /> key is pressed.
1. All notes are moved to the nearest 1/8-note (48 tick).
1/8(3) All notes are moved to the nearest 1/8-note triplet (32 tick).
1.16 All notes are moved to the nearest 1/16-note (24 tick).
1/16(3) All notes are moved to the nearest 1/16-note triplet (16 tick).
1.32 All notes are moved to the nearest 1/32-note (12 tick).
1.32(3) All notes are moved to the nearest 1/32-note triplet (8 tick).
It is also possible to make fine adjustments in the following Time Correction window.
CAUTION: Timing Correct is only valid for note events. Control Change or Pitch Bend will not be time corrected.
To make fine adjustments in the Time Correct window, select the Timing field with the CURSOR key and press the OPEN WINDOW key.
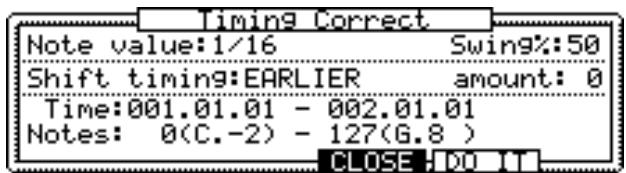
To time correct recorded data, set the following fields and press D0 I T [F5]. Only the track selected on the main screen will be time corrected.
Note Value:
This is the same as the Timing field on the Main screen.
Swing
This appears only when Note Value is set to 1/8 or 1/16. Shift the note events of the even beats at the ratio set here to swing the rhythm.
·Shift Timing:
This shifts the note event back or forth the number of ticks set in the amount. field below.
EARLIER shifts back
LATER shifts forth
amolrt.
This sets the volume of the shift timing. The maximum value varies depending on the Note Value settings. For example, if the Note Value is set at 1/16, the maximum amount is 12 which corresponds to half of the time correction value (24 ticks).
Time:
This sets the data range of the recorded data when the timing is corrected. The timing of any data not specified within this range will not be corrected.
Notes:
This sets the note range of the recorded data when the timing is corrected. The timing of the note not specified within this range will not be corrected.
Setting the Beat
This sets the beat of the sequence.
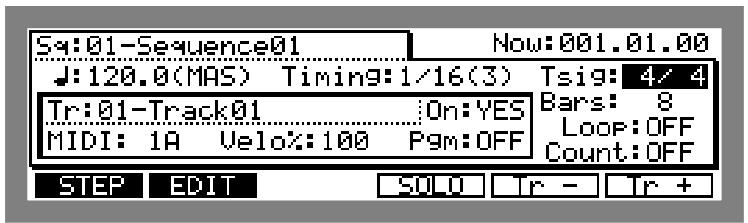
Select the Tis field with the CURSOR and rotate the DATA wheel to display the Change Tsig window.
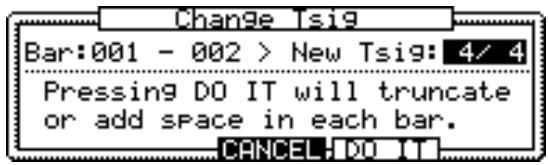
Use the CURSOR key and the DATA wheel to set the bar of which beat you want to change in the Bar# field and select the new beat you want to set in the New Tsi# field.
If the beat is set in the New Tsig field to extend the bar (i.e. 5/4), a blank space will appear at the end of each bar. Press D'O IT[F5] to execute the beat.
If the bar is shortened (i.e. 4/4 shortened to 3/4), the end of each bar is cut. Press DQ IT[F5] to execute the beat.
You can also display the Change Tsig window by pressing the OPEN WINDOW key when you are in the T i g field.
Setting the Number of Bars
Set the number of bars for each sequence.
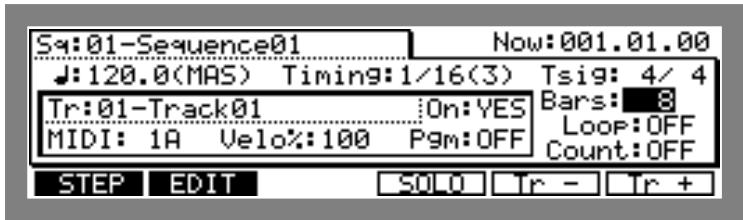
To display the Change Bars window select the Bar field with the CURSOR and rotate the DATA wheel.
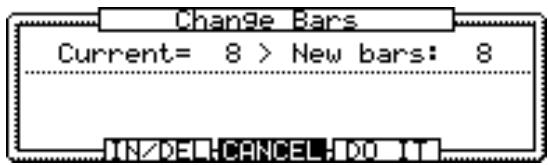
Continue to rotate the DATA wheel to set the number of bars.
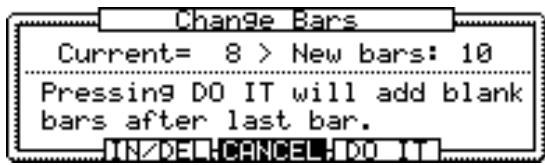
When the number of bars is increased, the message "The end of the sequence will have blank bars," will appear. Press DO IT[F5] to execute the sequence.
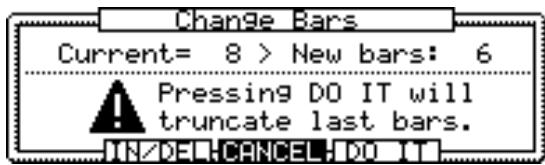
When the number of bars is decreased, the warning, "The end of each sequence will be cut," will appear. Press D'O IT[F5] to execute the sequence.
To insert or delete bars in the middle of the sequence, press the IN-DEL[F3] key.
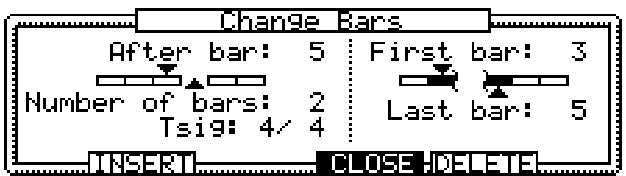
This window is divided into two functions. The left is the insertion and the right is the deletion settings.
Both fields function independently. To insert, set the left side and press INSERT[F2]. A blank bar(s) is inserted in the sequence. To delete, set the right side and press DELETE[F5]. A bar(s) in the sequence is deleted.
The following is a description of each field.
After bar:
Specify where to insert a bar. The new blank bar is inserted after the specified bar.
Number of bars:
Set the number of bars to insert.
-Tsig:
Set the beat of the bar to insert.
To insert a bar, press INSERT[F2] after completing the above settings.
First bar:
Specify the beginning of the bar(s) to delete.
Last bar:
Specify the end of the bar(s) to delete.
To delete the bar(s), press DELETE[F5] after completing the above settings.
Setting the Loop
Set the loop (repeated performance) of the sequence.
To repeatedly play the specified range until STOP is pressed, turn the loop ON and play the sequence. When the loop function is on, after the last bar has been recorded, the REC mode automatically changes to OVERDUB mode allowing you to play a sequence in a loop while over-dubbing.
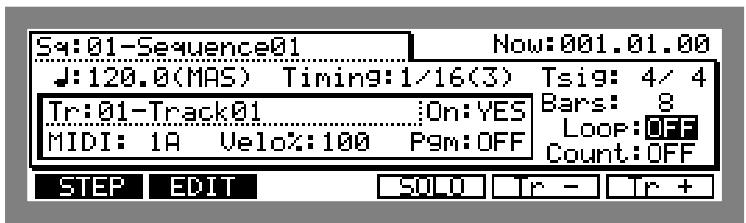
To set the loop ON or OFF, select the LoOP field with the CURSOR key and rotate the DATA wheel.
To set the range of the loop, press the OPEN WINDOW key.
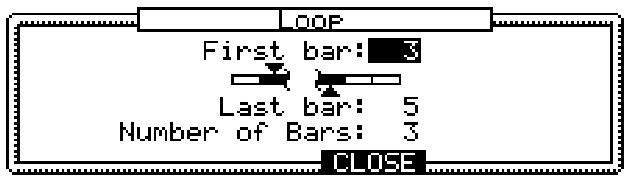
- First bar:
Specify the first bar of the loop.
Last bar
Specify the last bar of the loop. In this field, in addition to setting the bar number of a sequence, you can set the END. When END is set, the last bar of the sequence is simply set as the Last bar: even if you change the number of bars in a sequence in the Bar\$# field.
Number of bars:
This sets the range of the loop in number of bars. The number of bars to loop will be from the bar set in F i s t. b a r" to the bar set here.
CAUTION: The First bar and the Number of bars as well as the Last bar and the Number of bars affect each other. If you change the First bar or Last bar, the value of Number will change accordingly.
Also, by changing the Number of bars, the value of Last bar will change accordingly.
Setting the Count
This sets the metronome on or off.
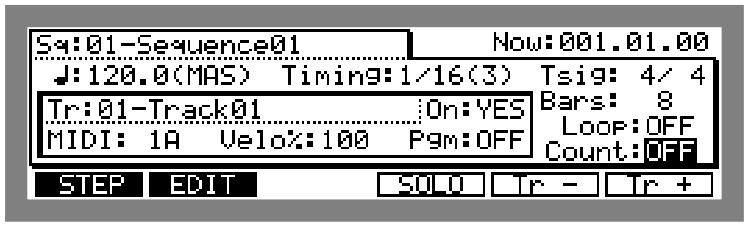
Select the Count field with the CURSOR key and set the count ON or OFF by rotating the DATA wheel. TO finely adjust the count, press the OPEN WINDOW key and open the Count/Metronome window.
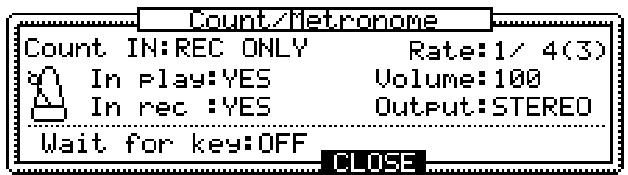
- Count IN:
This sets the count down before the beginning of a sequence.
OFF Will not count down.
REC+PLAY Counts down before both recording and playing.
REC ONLY Counts down only before recording.
In Play:
This turns the metronome click ON or OFF while you are playing a sequence.
In rec:
This sets the metronome to click during a recording.
-Rate:
This sets the note value of the metronome. For example, to play at quarter notes, set is to 1/4 and for eight notes to 1/8.
Volume:
This sets the volume of the metronome.
OutPut:
This sets the output of the metronome to either STEREO OUT or INDIVIDUAL OUT. INDIVIDUAL OUT is only valid when the optional IB-M208P is installed.
Wait for keys:
Set this ON to start a sequence recording with MIDI signals from external devices such as MIDI keyboards.
When the Wait for key: is on, the recording will not start when you press the REC key and PLAY key, but will be in stand-by mode. The recording starts when the MPC2000 receives a MIDI signal from an external MIDI keyboard. In this case, the first MIDI signal received to start recording will be ignored.
This is convenient when MPC2000 and the MIDI keyboard are located away from each other during a recording.
Selecting a Track
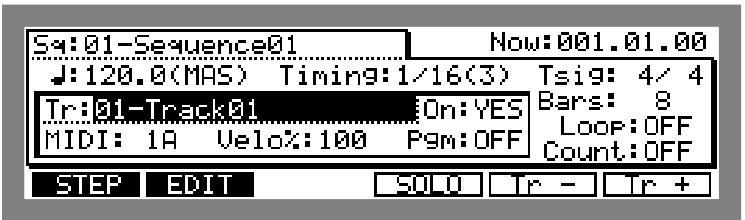
Move the cursor to the Tr# field and select the track by rotating the DATA wheel. The name and number of each track will appear.
Renaming a Track
To open the Track window, select the Tr field and press the OPEN WINDOW key.
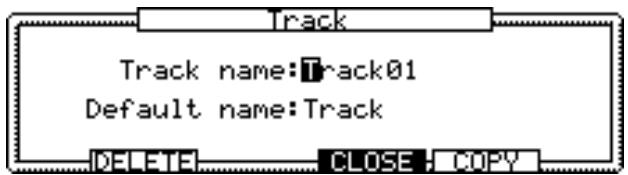
Track name:
This changes the name of the track.
Move the cursor using CURSOR LEFT or RIGHT keys, or the DIGIT wheel and enter letters with the DATA wheel. It is also possible to directly enter letters from the DRUMS PAD. The letter shown on the top right will be entered when PAD is pressed. For example, A will be entered if you press PAD1 once and B if you press it again. Use the 16 LEVELS key to enter a space. To switch between lower and upper case keys, press the PAD BANK key.
Enter a name and press the ENTER key to confirm.
Note: If you do not press the ENTER key and move the Default Name field or other pages with the CURSOR DOWN key, the entered name will be ignored and the name will not change.
- Default:
This sets the default name of the track. It is possible to set a default track name to each track.
Enter the name in the same way as Track name.
Deleting a Track
In the main screen, open Track window, select the Tr# field and press the OPEN WINDOW key.
To open the Delete Track window, press DELETE[F2].
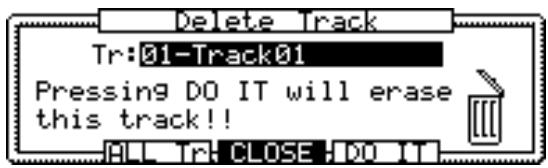
To erase the data of the selected track, press DQ IT[F5].
When you press HLL Tr[F3], the following warning will appear and will erase all track data when DO IT[F5] is pressed.
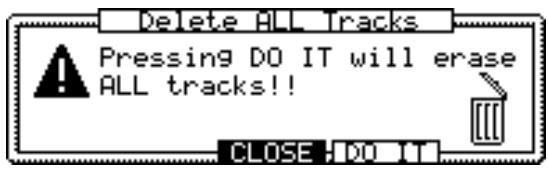
Copying a Track
In the main screen, open Track window, select the Tr# field and press the OPEN WINDOW key.
To open the Copy Track window, press COPY[F5].
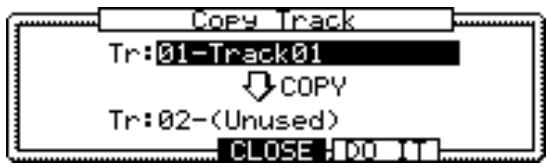
Select the copy source (top level) by pressing CURSOR UP and select the track you want to copy with the DATA wheel.
Select the copy destination (bottom level) by pressing CURSOR DOWN key and select the track you want to copy the data to with the DATA wheel.
To copy the data, press DQ IT[F5].
CAUTION: If there is data in the track you have selected as the destination, the data will be erased if you write over the data.
Turning the Track ON or OFF
This sets the track ON or OFF.
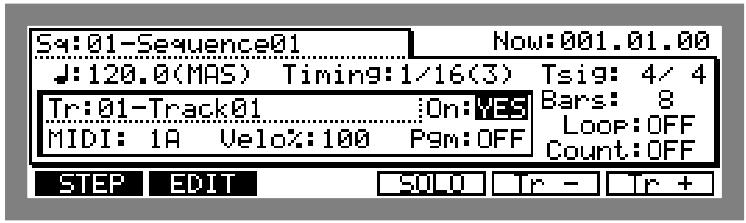
Select the On field with the CURSOR key and rotate the DATA wheel to select YES or NO. YES will turn the track ON and play the track. NO will not play the track.
Setting the Track Type
This sets the track to either the sound source within MPC2000 or other external MIDI devices.
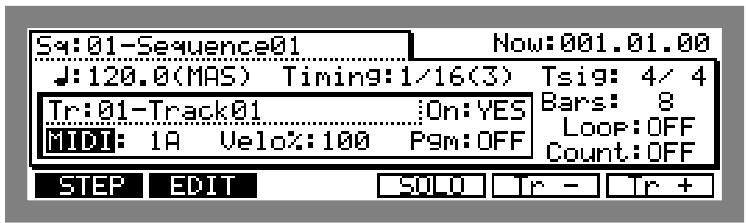
Select the field as shown below with the CURSOR key and select between MIDI and DTM by rotating the DATA wheel.
MIDI Allows data input from devices such as MIDI keyboards and uses the track to play the sound source of external MIDI devices.
DrLm Allows data input from DRUMS PAD and uses the track to play the internal sound source.
Setting the Track's MIDI Channel
This sets the MIDI channel of the selected track.
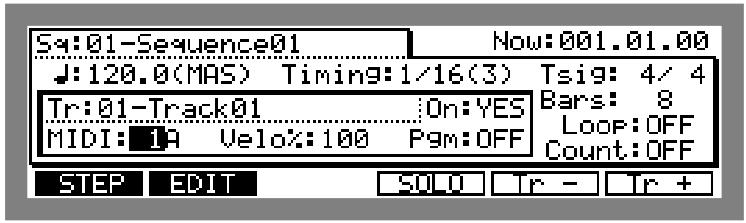
Select the field as shown below with the CURSOR key and rotate the DATA wheel to select the MIDI channel.
Select between OUTPUT A or B in the field on the right side of the numeric field.
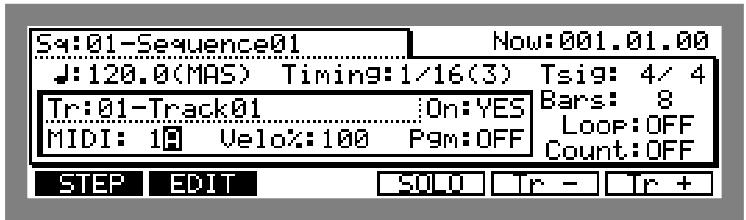
For example, in the setting shown above, the data of track 01 which is currently selected sends data from MIDI OUT A as MIDI channel 1 data.
Set the MIDI channel to the connected MIDI sound source. For example, if the MIDI channel of the external MIDI sound source you want to play is set to five, you can use track data to play the MIDI sound source by setting the MIDI channel of the track to five. The drum tracks are normally used to play the internal sampler, but if a MIDI channel is set will output MIDI data from this channel. If you do not want to output the drum track data in MIDI format, set the MIDI channel off.
Settings for MIDI Reception
To display the MIDI Input window, select a MIDI channel field and press the OPEN WINDOW key.
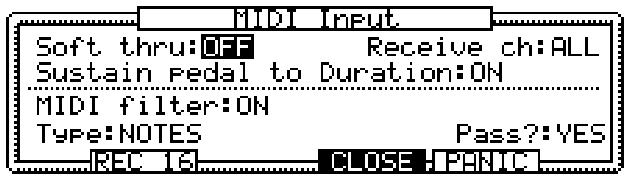
- Soft thru: Set the MIDI data received by MIDI IN to be sent out through MIDI OUT.
Receive ch:
Set the receiving MIDI channel. All the other data that has not been set to a MIDI channel is ignored. Set this to ALL to receive all MIDI channel data.
Sustain Pedal to Duration:
When performances from devices such as the MIDI keyboard are recorded to the sequencer, the sustain pedal message (control number 64) is recorded with the note data, but the following issues arise.
- If you delete or erase a section of the sequence that contained a Sustain Off message, all notes after that location will be sustained until the next Sustain On message.
- When multiple tracks are set to the same MIDI channel and one track only contains sustain pedal data, the other track(s) set to the same MIDI channel will also have sustain effects.
- If you merge a track with sustain pedal information into a track without sustain pedal information, notes on the resultant track will be sustained.
- If you overdub notes into a track containing sustain pedal information, the new notes will be sustained.
The MPC2000 solves these problems by specially processing sustain pedal messages. If the Sustain Pedal to Duration field is set to ON, when the MPC2000 receives a Sustain On message during record, it will NOT record it. Instead, it will be converted to Note ON/OFF data. As a result, the duration of the note on the recorded track becomes longer.
There are some situations in which converting sustain pedal to duration of the note is undesirable:
- Depending on the settings and specifications of the MIDI sound source when the duration of a note is too long and exceeds the number of voices that can be sounded, new notes may be ignored and may not generate a sound.
- Depending on the settings of the MIDI sound source, MIDI control number 64 may be used for messages other than sustain.
In this case, by turning this field off, you can record a sustain pedal message (control number 64).
MIDI Filter Function
This sets the MPC2000 to receive or not receive a MIDI event.
-MIDI filter:
This is the on or off setting for the entire MIDI filter function. When this is off, all MIDI events will be received regardless of the settings in the Type and Pass fields.
- Type:
Set the type of MIDI event. The following MIDI events can be filtered. For details on MIDI events, read a MIDI guide book.
NOTES, PITCH BEND, PROG(ram) CHANGE, CH(annel) PRESSURE, POLY PRESS(ure), EXCLUSIVE, CONTROL:ALL (Change all of the controls), Control Change #000 ~ #127
·Pass?:
This sets the reception of a MIDI event selected in T#FE#. Set this to YES to receive MIDI events set in T#FE and NO to ignore the events.
Sending the All Note Off
When a sound generated by a MIDI device connected to the MIDI OUT jack of MPC2000 does not stop, send an "All note off" or "All reset control" MIDI event from MPC2000 to force the sound to stop.
To display the MIDI Input window, select a MIDI channel field and press the OPEN WINDOW key.
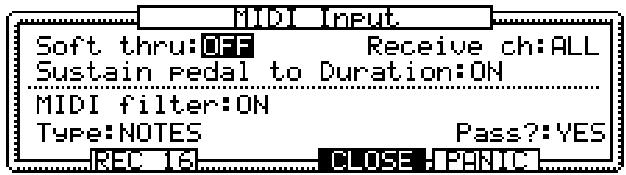
By pressing FANIC[F5], the "All note off" or "All reset control" MIDI event will be sent through MIDI OUT.
Multiple Track Real-time Recording
MPC2000 receives data from devices such as an external MIDI sequencer making it possible to record real-time on the 16 tracks of each MIDI channel. In this case, tracks 1 to 16 will be automatically assigned to MIDI channels 1 to 16 respectively.
To display the MIDI Input window, select the MIDI channel field and press the OPEN WINDOW key.
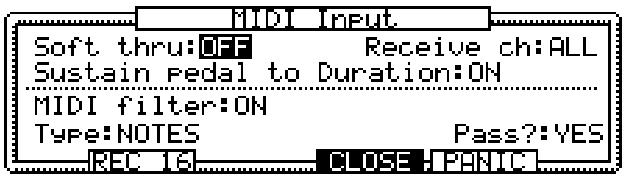
To display the Record All 16 Channels window, press REC 16[F2].
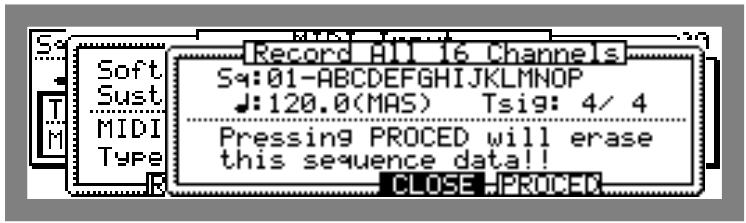
54
Selects the sequence to record the data.
Sets the tempo of the sequence.
-Tsij
Sets the beat of the sequence.
In order to record at a more precise timing when you are receiving and using data from another sequencer, it is necessary to synchronize the MIDI signals. For details, refer to the chapter "MIDI/SYNC Mode".
After each setting, press PROCED[F5]. The data of the selected sequence will be erased and the 16 channel real-time recording window will appear.
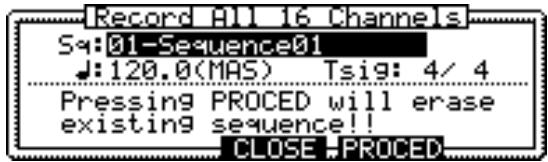
Each parameter cannot be set in this window.
To start recording, press the PLAY key while holding the REC key. If you are recording in sync to the MIDI clock of an external sequencer, start it while holding the REC key on the MPC2000.
CAUTION: Take note that if you record on multiple tracks in real-time, all of the track data in the sequence selected in the _i=1^n field will be erased.
Editing the Velocity
This adjusts the velocity of the data that is recorded on the selected track when the sequence is played.
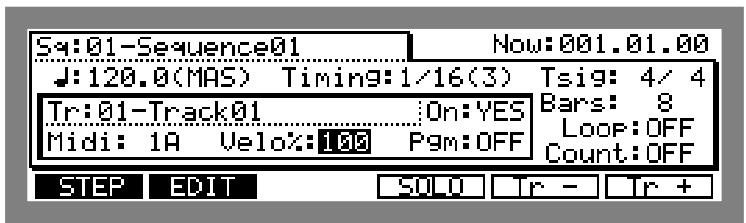
Select the Velcro field with the CURSOR key and set the incremental or decremental ratio of the velocity with the DATA wheel.
CAUTION: This setting will not directly edit the recorded data. The velocity will increase or decrease to the ratio set here only during the play back. Also, the data with maximum (127) velocity will no be affected by values set over 100% .
To edit the velocity of prerecorded data, use the Edit Velocity window.
To display the Edit Velocity window, select the velocity field and press the OPEN WINDOW key.
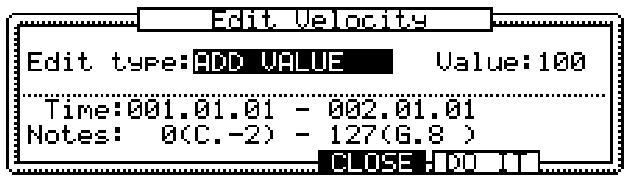
To directly change the velocity of recorded data, set the following fields and press D O I T[F5].
- Edit type: Select the method of changing the velocity.
ADD VALUE Adds the set Value to the current velocity.
SUB VALUE Subtracts the set Value from the current velocity.
MULT VAL: Increases or decreases the set Value ratio (percentage) against the current velocity.
SET TO VAL Sets all of the velocity values uniformly to the set Value#.
- Value:
Sets the value of the edit method selected in Edit type:
Time:
Specifies the data range to be edited when the velocity of recorded data is edited. Any data not specified within this range will not be edited.
Notes:
Specifies the note range to be edited when the velocity of recorded data is edited. Any note not specified within this range will not be edited.
Setting the Program Change Transfer
When a sequence is selected, it is possible to send a program change to each track in addition to the program change event within a track.
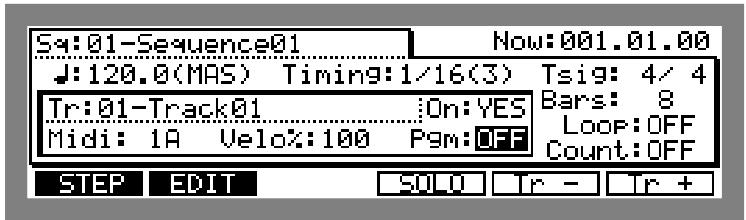
Select the F#m field with the CURSOR key and set the program number you want to set with the data wheel. The program change will not be sent if it is set OFF.
To display the following window, select the field and press the OPEN WINDOW key.
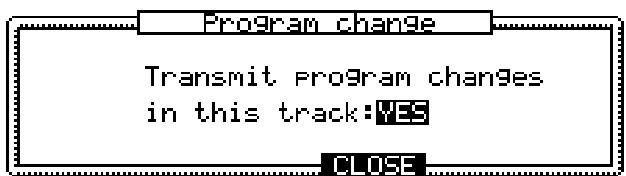
Set the field to enable or disable the transfer of program change recorded on the selected track. When this is set OFF, the program change will not be sent even if there is a program change on the track.
Locating with the DATA Wheel
You can locate a point in the sequence with the DATA wheel.
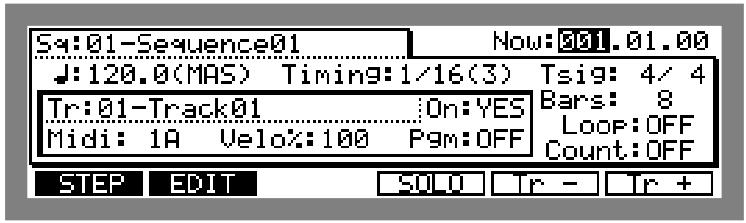
To locate, select the NoField field with the CURSOR key and increase or decrease the number with the DATA wheel. The other increments or decrements in the Beat.tick field are determined by the settings in the Timing field on the main screen.
Units Used to Locate a Point
The Now field allows you to switch and display the bar/beat/clock and hour/minute/second.
Select the Now field and press the OPEN WINDOW key.
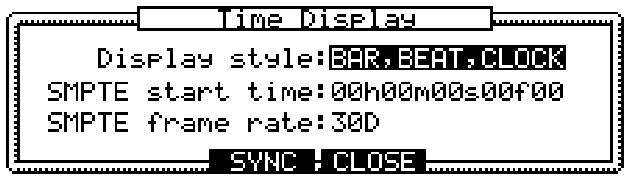
- Display style:
Select BAR, BEAT, CLOCK to display the bar, beat, and clock.
Select HOUR, MIN, SEC to display the hour, minute, and second.
- SMPTE start time:
Select HOUR, MIN, SEC in Display styles to start the time display on the main screen from the time set in this field. This can also be used to synchronize MTC (MIDI time code) or SMPTE time codes.
- SMPTE frame rate:
This sets the frame rate of the time code used to synchronize the MTC or SMPTE code. Synchronization is described in "MIDI/SYNC Mode".
The Main Screen Function Keys
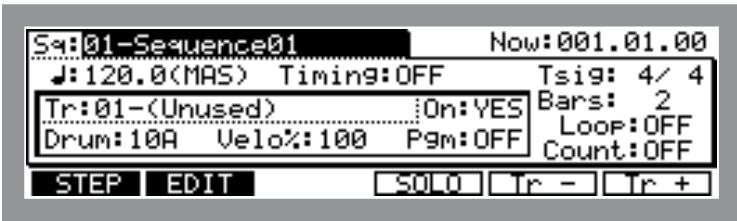
STEP
This displays the step edit page which allows you to edit on sequence data at a time.
EDIT
This edits or sets other elements of a sequence.
5010
This enables you to play only the currently selected track. The 50LO display blinks when you press the key and enables solo playing. Press it again to turn it OFF, enabling all tracks to play.
Tr- Tr+
Select the track with this function key. It is not necessary to move the cursor to the ^一 field.
The Play/Record Keys and the Locate Keys
These ten keys operate similarly to the transport keys on a tape recorder, with some very useful additions:
- The PLAY START key:
This key causes the currently selected sequence to begin playing from the first bar.
- The PLAY key:
This key causes the sequence to start from the current position displayed in the field in the Main screen.
- The STOP key:
This key causes the sequence to stop playing or recording.
The OVERDUB key:
While holding this key, press PLAY to overdub new notes to the currently selected track, without erasing existing notes. While Overdub mode is active, the light above the OVERDUB key is on.
It is also possible to enter Overdub mode by pressing the OVERDUB key while holding down the PLAY key while a sequence is playing. To cancel Overdub mode, press the OVERDUB key again and the light above the key will turn off.
The REC key:
While holding this key, press PLAY to enter Record mode. New notes can be recorded into the currently selected track while existing notes are erased, just as with a tape recorder. While Record mode is active, the LED above the REC key is on.
It is also possible to enter Record mode by pressing the RECORD key while holding down the PLAY key while a sequence is playing. To cancel Record mode, press the RECORD key again and the light above the key will turn off.
- The BAR << / >> Keys:
By pressing this key, you can move the sequence position back or forth by one bar. Also to move to the beginning of the sequence press the BAR << key while holding down the GO TO key and to move to the end of the sequence press the BAR >> key while holding down the GO TO key.
- The STEP < / > Keys:
By pressing this button, you can move the sequence position back or forth by setting a number on the Timing field in the main screen. For example, when the Timing is set to 1/16, you can move back 24 ticks every time you press STEP>. If you press this button while holding down the GO TO key, you can locate the position directly before or after an entered event.
The GOTO Key:
This key is used to instantly move to a specific position within the sequence. When pressed, the following screen is displayed:
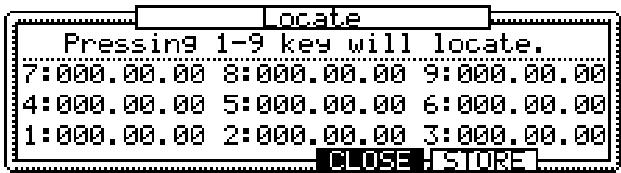
You can store a locate point to a memory on numeric pad keys 1 to 9. The Locate window will display the point stored on each key. By pressing the numeric pad key when this window is displayed will allow you to move the point.
To store a point to a memory, display the point in the Now# filed of the Main screen and press the GOTO key and press STORE[F5] when the Locate window appears. To store to a memory in real-time during play back, press STORE[F5] at the point to store.
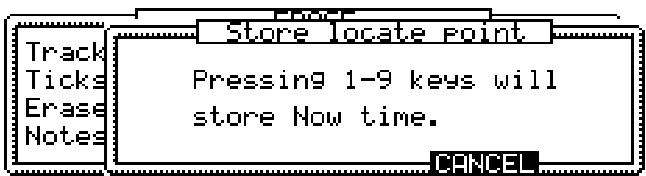
Press the number on the numeric pad when the Store Locate Point window is displayed.
CAUTION:The Store Locate Point window cannot be opened during playback, even if you press the GO TO key.
The AUTO PUNCH Function
The Auto Punch function allows Overdub or Record modes to be entered and exited automatically at preset points while playing. This can be very useful at times such as when you want to execute a very tight punch-in and there isn't enough time to get from the MPC2000 to the MIDI keyboard to play the new notes after the punch-in. The Auto Punch function allows you to punch in automatically, allowing you to concentrate on your performance.
While holding the SHIFT key, press the PUNCH key (2 on the numeric pad) and set the auto punch.
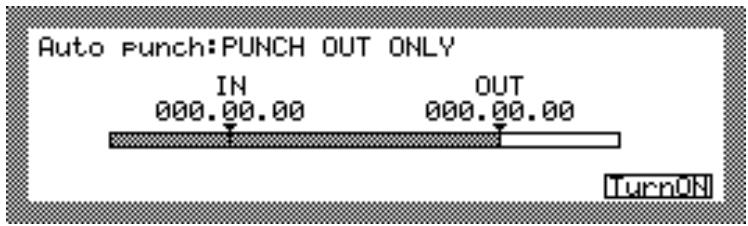
Auto Punch
There are three auto punch modes:
PUNCH IN ONLY
This allows you to automatically punch in only. To stop the recording, press the STOP key.
PUNCH OUT ONLY
This allows you to automatically punch out only. To start recording, press the PLAY or PLAY START key while holding down the REC or OVER DUB key.
PUNCH IN OUT
Both the punch-in and the punch-out is executed automatically.
IN/OUT
Sets the auto punch in or out points.
To execute an auto punch, press TurnOn[F6]. The display returns to the main screen and the following appears at the bottom in standby mode.
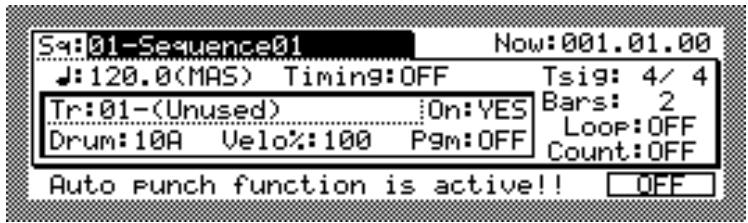
While holding the REC or OVERDUB key, press PLAY or PLAY START key to start recording.
The punch in or out will automatically start at the set point and enables you to record your performance.
To cancel auto punch, press OFF[F6] and return to the Main screen.
Chapter 4
Editing Sequences
Overview
There are three ways to edit a sequence. The first is to erase unnecessary note data using the ERASE key. The second is to display and edit each note or event. The third is to specify the bar or note range and edit the data together.
Erasing Data with the ERASE Key
To erase data with the ERASE key, you can play back a sequence and erase a random note, or display the note or event and erase them individually.
Erasing a Note in Real Time
It is possible to erase a random note data while you are playing back a sequence in Overdub mode.
- Select the track with the data you want to erase on the MAIN screen.
- Either press the PLAY or PLAY START key while holding the OVER DUB key or press the OVERDUB key during playback to switch to Overdub mode.
- Locate the data you want to erase, and while holding the ERASE key, press the DRUMS PAD assigned to the sound.
Besides erasing the drum track you can erase notes by continuously pressing the note on the MIDI keyboard while holding this key.
Using the ERASE Page to Erase Data
When a sequence is not playing, press the ERASE key to display the ERASE page. You can select and erase specific notes or data sections.
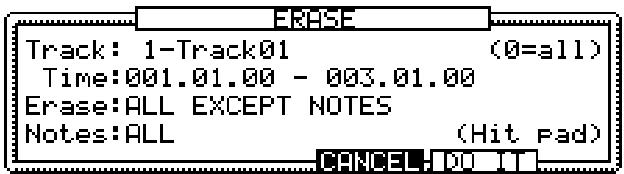
Track:
This specifies the track you want to erase. If you set this to 0, it will mean that all tracks are selected.
Time: This sets the range you want to erase.
- Erase: Select from the following three event types to erase:
ALL EVENTS
This erases all the events within the range selected in the Time field. For note events, only the notes set in the Notepad field below are erased.
ALLEXCEPT
This erases the events except the selected events. When ALL EXCEPT is selected, the field on the right enables you to select the event. The events selected here will not be erased. For note events, the notes set in the Note field below are erased. When notes are selected in the field where events are selected, the Note field will not appear and all the data except the notes will be erased.
ONLY ERACE
This erases only the selected events. When ONLY ERASE is selected, the field on the right enables you to select an event. Only the event selected here will be erased. The Note field will appear only when NOTES is selected in the event selection field. When NOTES is selected, only the notes set here are erased.
- Notes: This field sets the notes you want to erase.
On the Step Edit screen, you can finely edit MIDI data on a track or enter data one at a time from the DRUMS PAD or MIDI keyboard.
Step Editing Screen
Press STEP[F1] on the MAIN screen to display the Step Edit screen. You can efficiently display the event you want to edit and edit efficiently.
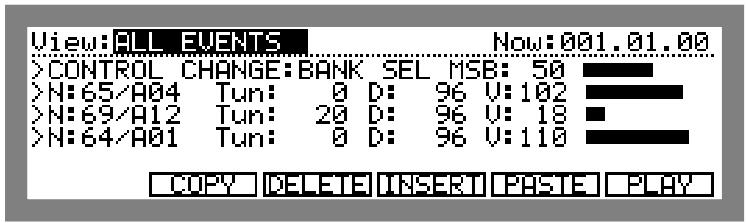
View
This specifies the type of listed events.
| ALL EVENT | Displays all of the events recorded on a track. |
| NOTES: | Displays only the notes. By selecting NOTES, the note range setting field will also appear. The notes of the range specified here will be displayed. |
| PITCH BEND | Displays only the pitch bend data. |
| CTRL: | Displays only the control change data. By selecting CTRL, the field to select the control change number will also appear. This field will only display the control change event selected in this field. When FILL is selected, all of the control change events will be displayed. |
| PROG CHANGE | Displays only the program change data. |
| CH PRESSURE | Displays only the channel pressure data. |
| POLY PRESS | Displays only the poly pressure data. |
| TEMPO CHANGE | Displays only the tempo change data. |
| EXCLUSIVE | Displays only the exclusive data. |
i. Open the Step Edit Option window by selecting a field and pressing the OPEN WINDOW key.
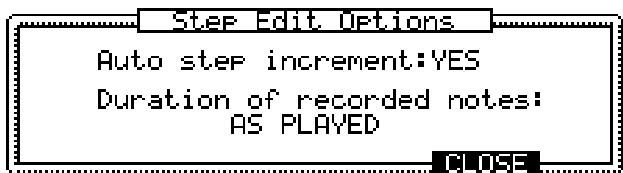
- Auto step increment:
After entering data in step input, you can automatically move a sequence according to the value set in the Timing field on the main screen each time an event is entered from a pad or MIDI keyboard.
Setting this to YES will move the sequence according to the settings in the Timing field after the DRUMS PAD or MIDI keyboard has been released (and the note off has been sent).
Duration of recorded notes:
During the step input, this sets the duration of the entered note to either the length of time the key is actually pressed or to a predetermined length.
AS PLAYED
The metronome will play from the moment the DRUMS PAD or MIDI keyboard is pressed until it is released.
TC VALUE:
Regardless of the time that the key is actually pressed, the duration will be the value set in the Timing field. When TC VALUE is selected, the percentage field will also appear. The duration is set against the Timing field by percentage. For example, if it is set to 50% , the duration is half the amount set in the Timing field and the result will be a staccato sound.
The Event Display
The note event displayed on the step edit screen will change depending on whether the selected track is a drum track or a MIDI track.
Drum track
N:64/A01 Tun: 0 D: 96 U:110
(With note variation)
N:64/A01 D: 96 U:110
(Without note variation)
This is the note number and the Drum Pad number assigned to it.
T.1.17: When the note variation function is used during a recording, this field will display the note variation data.
This is the duration (length of note on).
This is the velocity (how hard the note is played). The right side will display the velocity value in a bar chart.
MIDI Track
Note: 64< E.3> D: 96 U:110
This displays the note number and note name.
This is the duration (length of note on).
This is the velocity (how hard the note is played). The right side will display the velocity value in a bar chart.
Bend
BEND : 0
Control Change
CONTROL CHANGE: BANK SEL MSB: 50
Program Change
PROGRAM CHANGE: 1
Channel Pressure
CH PRESSURE : 50
Polyphonic Pressure
Operating the List Display
When many events are entered at one point and the whole list cannot be displayed, you can scroll the list with the CURSOR UP or DOWN key.
Press ^^[6] to generate the selected event.
Selecting and Editing Multiple Events
Multiple MIDI events on the display can be selected together with the CURSOR UP or DOWN key while holding the SHIFT key. In this case the parameter is reverse displayed in addition to the note number.
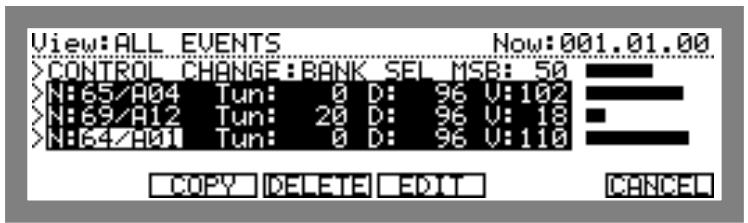
When multiple events are selected, EDIT appears in place of function keys INSERT and FASTE as shown above.
By pressing EDIT[F4] here, the Edit Multiple window corresponding to the field selected with the cursor will appear.
When a note number is selected,
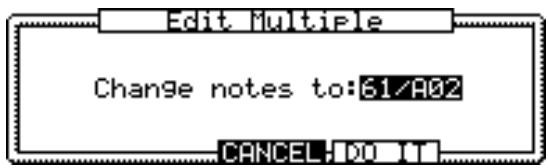
all the selected notes are changed to note number set here. Select the note number with the DATA wheel and press D0 IT[F5] to execute.
When parameters other than the note numbers are selected,
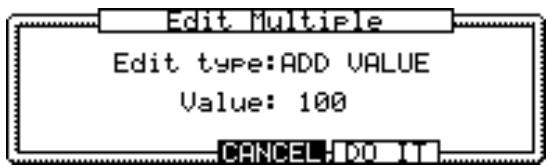
edit the value of the selected parameter by setting this window.
- Edit type:
Edit the selected parameters according to the following settings.
ADD VALUE This adds the value set in Value to the current value.
SUB VALUE This subtracts the value set in Value: from the current value.
MULTVAL This increases or decreases the current value by the percentage set in Value:
SET TO VAL This unifies all the parameters to the value set in Value#.
Value:
This sets the edit method selected in Edit type:
Copying an Event
To temporarily save the data on the clip board, select an event and execute Copy.
To execute Copy, press COPF [F2] after selecting the event.
Deleting an Event
To execute Delete, press DELETE[F3] after selecting the event.
Pasting an Event
To paste data which was copied to the clip board, specify the point to paste it in the Now field and press Paste[F5].
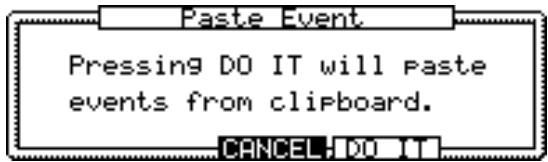
If multiple data with time ranges are saved on the clip board, the following screen will appear when you press Paste[F5].
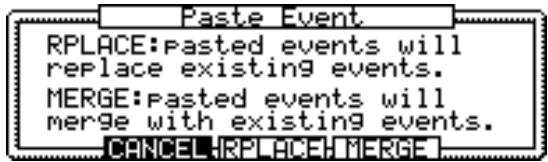
Press RPLACE[F4] to erase the data in the specified point and over write the contents of the clip board.
Press Merge[F5] to merge the data with existing data.
Inserting an Event
To insert an event, specify the point of insertion in the Now field and press INSERT[F4].
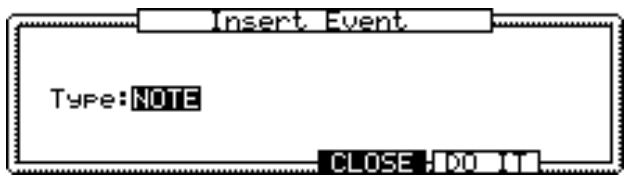
Select the type of event you want to insert from the following:
NOTE, NOTE+VARIATION, PITCH BEND, CONTROL CHANGE, PROGRAM CHANGE, CH PRESSURE, POLY PRESSURE, TEMPO CHANGE, EXCLUSIVE
When EXCLUSIVE is selected, a field displaying the byte volume of the exclusive message to be entered appears. Set the volume (byte) of the exclusive message you want to enter.
By pressing DIO IT[F5], you can return to the step edit screen. Since the event set in the Insert Event window will be inserted, set the parameter with the CURSOR key and the DATA wheel.
It is also possible to insert a note directly from a drum pad or keyboard. For details, refer to the following "Step Recording."
Step Recording
On the step edit page displayed by pressing STEP[F1] on the main screen, it is possible to use the drum pad or MIDI keyboard to step record.
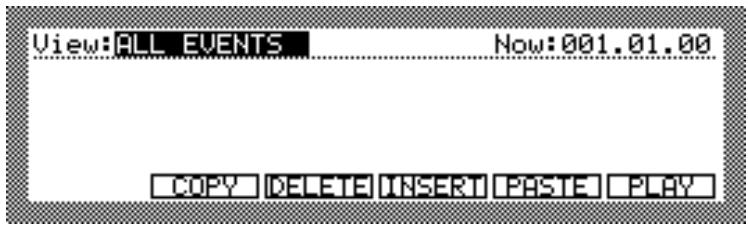
Set the point where you want to enter a note in the Now field and enter the note with a drum pad or a MIDI keyboard connected to the MIDI IN of the MPC2000. In doing so, the velocity (the strength of the note on) or the duration (length of the note) is affected by the entered data.
When the Auto Step Increment in the Step Edit Options window is set to YES during a step recording, the Now field points increase the amount set in the Timing field of the main screen each time a note is entered.
The Editing Screen
The editing screen allows you to copy an entire event within a sequence. It is also possible to rearrange the tracks, transpose, or set the preferences of a newly created sequence.
To display the editing screen, press EDIT [F2] in the main screen.
Copying an Event
First the event copy screen is displayed on the editing screen.
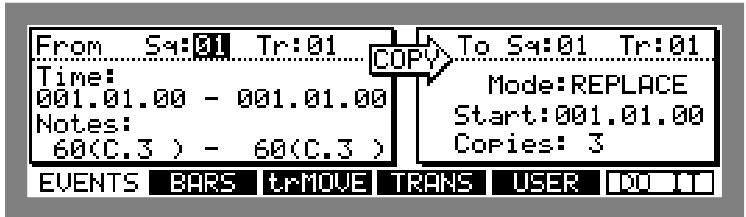
Set the range of the event copy source in the left window and set the copy destination in the right window.
Here it is possible to copy all of the events recorded in a sequence, but necessary to set a random pad for the drum track and a note range for the MIDI track.
Left Window
54
Select the copy source sequence. Here, only the sequence number will appear.
Tr
Select the copy destination track. Here, only the track number will appear.
Time:
Set the range of the event you want to copy.
Note:
Set the note of the copy destination. A pad number will appear if the track is set to a drum track, and a note range will appear if the track is set to a MIDI track. It is possible to directly set the destination from a drum pad or MIDI keyboard.
Right Window
54
This selects the copy source sequence. Here, only the sequence number will appear.
Tr
This selects the track of the copy destination. Here, only the track number will appear.
Mode:
This selects whether you will be writing over the copied data (REPLACE) or mixing the data (MERGE). When REPLACE is selected, the event in the copy destination is erased and is replaced with the copy source data. When MERGE is selected, the copy destination data and the copy source data is mixed.
- Start:
This specifies the point where you want to start copying. The copy source data will be copied at the point set here the number of times set in Copies below.
Copies:
This specifies the number of copies. From the point set in Start, the data will be repeated the number of times set here.
The track of the copy source and copy destination can be set at the same time in the Copy Events window.
When the or field is selected with the cursor, press the OPEN WINDOW key.
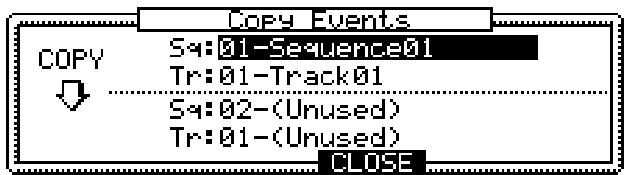
Select the sequence and track of the copy source at the top and select the copy destination at the bottom. Here, it is possible to check and select the sequence name and the track name.
Copying by Bar
It is possible to bundle the data on all of the tracks in a sequence and copy them by bar measures.
Press EDIT[F2] in the main screen and display the event copy screen and press BARS[F2].
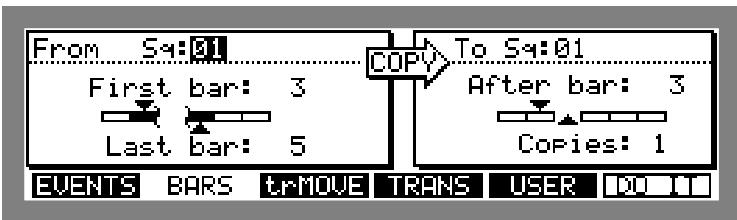
Set the range of bars to be the copy source in the left window and set the insert destination in the right window.
Here, all of the tracks in a sequence will be copied and inserted to the point set in the right window.
Left window
5
This selects the sequence of the copy source. Here only the sequence number is displayed.
First bar:
This specifies the first bar of the copy source sequence.
Last bar:
This specifies the last bar of the sequence of the copy source.
Right Window
·5
This selects the sequence of the copy destination. Here only the sequence number is displayed.
After bar:
Behind the bar set here, the data set in the left window is inserted the number of times set in Copies#. Here, the data will not be over written, but the inserted data will push back the initial data.
Copies:
This specifies the number of copies. The copy source data is repeated the number of times set here.
The sequence of the copy source and the copy destination can be set at the same time in the Copy Bars window.
When the = 1 field is selected with the cursor, press the OPEN WINDOW key.
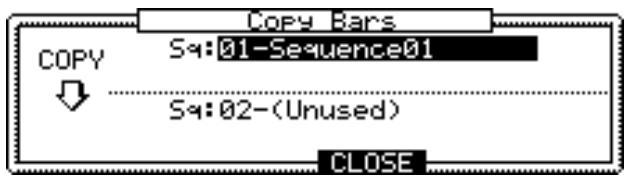
Select the sequence of the copy source on the top and select the copy destination on the bottom. Here it is possible to view and select the sequence name.
CAUTION: When you copy by bar, the data among corresponding tracks will be copied. For example, the data on track 1 will be copied to track 1 and track 2 to track 2 and so on.
Rearranging the tracks
This allows you to rearrange the tracks within a sequence.
In the main screen, press EDIT[F2] and display the Event Copy screen and press t.r-MOJE[F3].
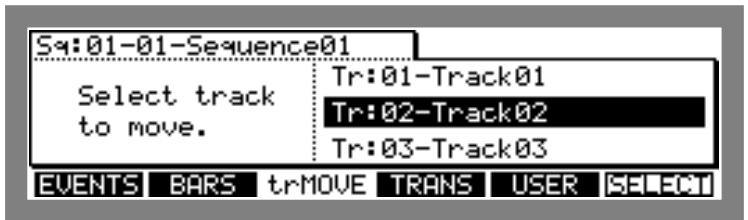
Select the sequence in the Sq: field and move the cursor to the field where the track is displayed using the CURSOR DOWN key. In doing so, the cursor will select the track which displays a list in the middle as shown below. Scroll the list with the DATA wheel, select the track you want to rearrange, and press SELECT[F6].
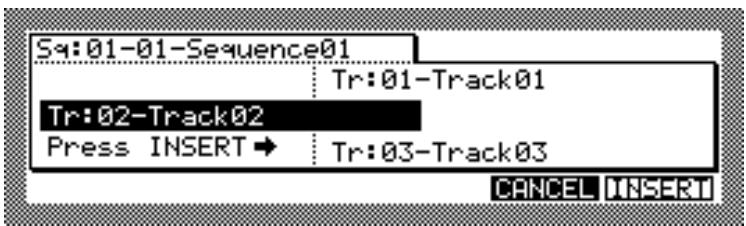
The selected track moves to the left. Here, if you rotate the DATA wheel again, the list on the right will scroll.
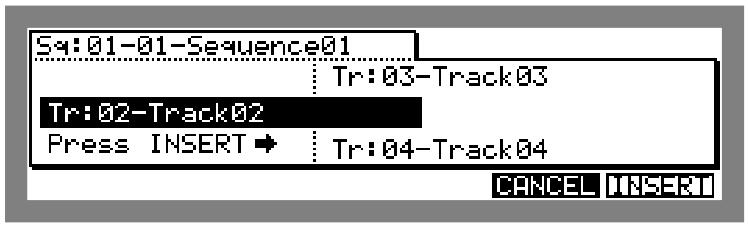
When the place you want to move is displayed, press INSERT[F6] to go back to the list on the right.
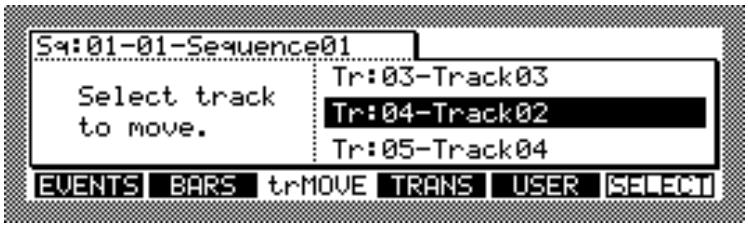
The track name remains the same and new track numbers are set in order.
Transposing a Track
This allows you to set the transposition of the data for each track. In the main screen, press EDIT[F2], display the Event Copy screen, and press TRAN[S4].
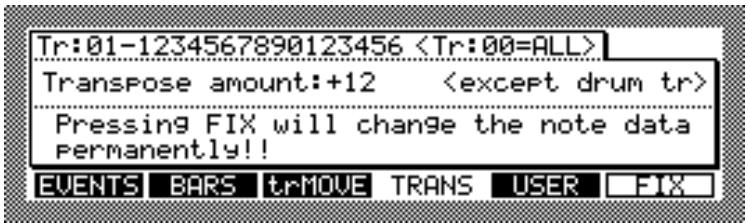
Tr
This selects the track you want to transpose. When this is set to 00, all the tracks will be transposed. The Drum tracks however, will not be affected by the transposition.
Transpose amount:
This sets the value of the transposition. It is possible to set a plus-minus twelve for each half tone. Plus twelve is one octave up and minus twelve is one octave down. The settings here do not directly change the data but only transpose the data when they are played back.
To transpose and change the data itself, press F I X[F6].
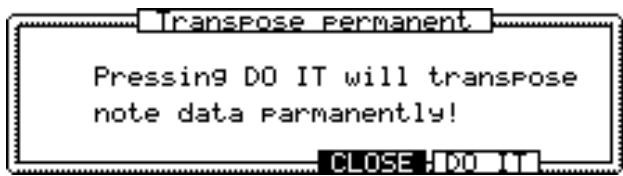
By pressing DQ IT[F5], the data is transposed according to the settings in Transpose amount:.
Sequence Preferences
This sets the preferences of the main screen when a sequence is newly created.
In the main screen, press EDIT[F2] and display the Event Copy screen and press USER[F5].
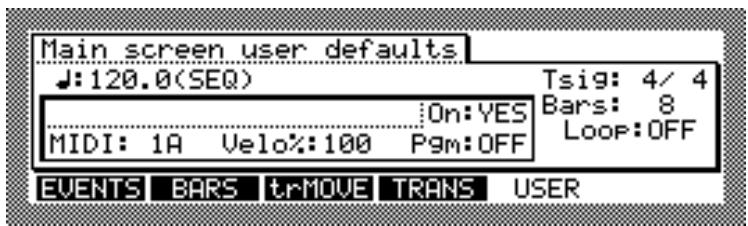
Select the field with the CURSOR key and set the parameter with the DATA wheel. The fields which are not displayed here cannot be changed.
For details regarding the parameter, refer to the item "Main Screen."
Chapter 5
Song Mode
Overview
When you are creating music data on the MPC2000, there are two main ways to create music data on the MPC2000. One way is to create a long sequence as a whole piece, the other way is to create short sequences for each part of the piece and play them sequentially using the Song feature.
The Song function sequentially plays the data of a sequence. You can set the order or number of times to play the sequence. This is used to play multiple pieces consecutively, or to complete a song by arranging the sequence data for each part. The following are the advantages to align the sequence data created for each part and complete a music piece:
- The song structure can be created very quickly.
- The content of the sections of the song can be changed very quickly.
A song in the MPC2000 consists of up to 250 steps, each of which contains the number of the sequence that will play at the step and the number of times the step will repeat before going on to the next step in the song.
The MPC2000 can hold up to 20 songs in memory at one time. Recording is not permitted in Song mode. Rather, the individual sequences must be recorded or edited while in the MAIN screen.
Song Mode
To display the Song mode screen, press the SONG key (or 1 on the numeric pad) while holding the SHIFT key. The Song Mode screen will appear:
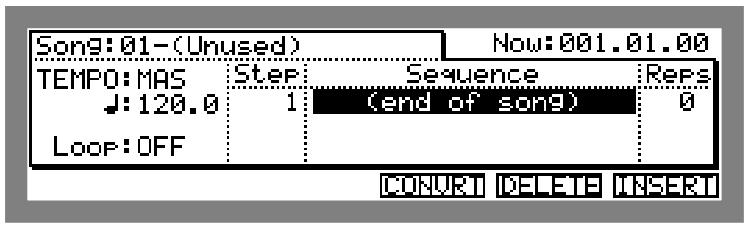
While this screen is showing, the MPC2000 is in Song mode, meaning that if play is entered, the active song will play instead of the active sequence.
All of the Play/Record keys except RECORD and OVERDUB keys operate on the active song. PLAY START plays the active song from the start; PLAY plays the active song from the current location in the field; the REWIND, FAST FORWARD, and LOCATE keys change the position within the song.
Selecting a Song
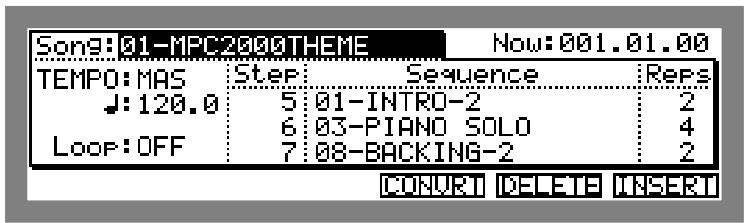
Move the cursor to the Song field and select a song by rotating the DATA wheel. The song number and song name will appear. If you have not created any data for the song, (Unused) will appear.
Renaming a Song
To open the Song window, select the song field and press the OPEN WINDOW key.
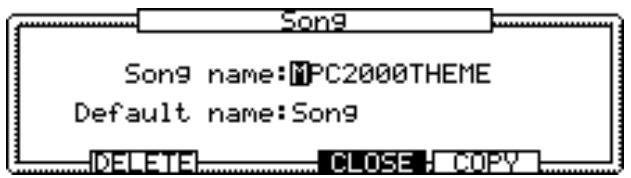
Song name:
Changes the name of the song.
Move the cursor with the CURSOR LEFT or RIGHT key, or the DIGIT wheel and enter the name with the DATA wheel. It is also possible to directly enter the name from the DRUMS PAD. The letter on the top right of the pad will be entered each time the PAD is pressed. For example, A is entered when PAD1 is pressed once and B when pressed again. It is possible to enter a space with the 16 LEVELS key. To switch between the upper and lower case keys, press the PAD BANK key.
Press the ENTER key after you have entered the name.
Note: If you do not press the ENTER key and move the Default Name field or other pages with the CURSOR DOWN key, the entered name will be ignored and the name will not change.
- Default name:
This sets the name that will automatically be used when data is entered into a new song (titled "Unused" Enter the name in the same way as for the Song name.
Deleting a Song
To open the Song window, select the Song field and press the OPEN WINDOW key.
To open the Delete Song window, press DELETE[F2].
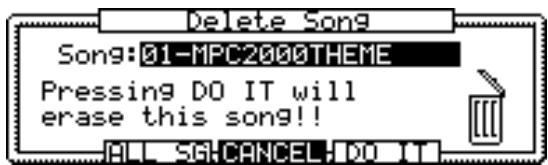
The data of the currently selected song is erased when DO IT[F5] is pressed and the song name changes to (Unused).
If you press ALL SG[F3] the following warning will appear and all of the song data will be erased if you press D0 IT[F5] here.
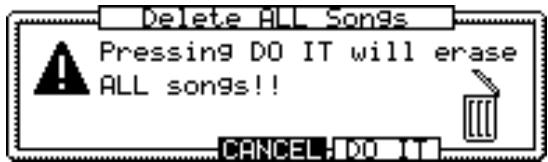
Copying a Song
To open the Song window, select the Song field and press the OPEN WINDOW key.
To open the Copy Song window, press COPY [F5].
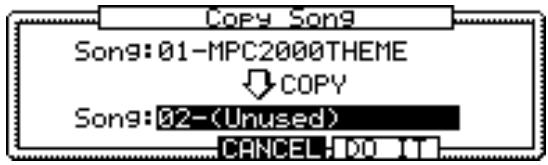
Select the copy source (top level) by pressing the CURSOR UP key and select the song you want to copy with the DATA wheel.
Select the copy destination (bottom level) by pressing the CURSOR DOWN key and select the song you want to copy the data to with the DATA wheel.
To copy the song data, press DQ IT[F5].
CAUTION: If there is data in the song you have selected as the destination, the data will be erased if you write over the data. Be careful when you are copying to a song with a name other than "Unused."
Setting the Tempo
This sets the tempo of the song.
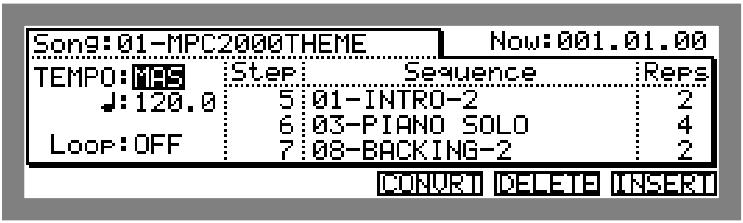
- TEMPO:
This sets the sequence to either be played in the specified tempo or the Master tempo.
Move the cursor to the TEMPO field and set the tempo source by rotating the DATA wheel.
SEQ The song will be played at the tempo specified in the sequence. In this case it is not necessary to change the tempo in the field.
MAS: The song will be played at the Master tempo specified in the field.
#
Set the tempo of the song if MAS is selected in the TEMPO field. Move the cursor to the field and set the tempo by rotating the DATA wheel.
Enter 4 digits if you are using the numeric pad to enter. For example, to set the value to 120.5, enter "1205." In this case, the tempo is confirmed when the fourth digit is entered. To set the value to 88.5, enter "885" and press the ENTER key to confirm the entry.
When SEQ is selected in the TEMPO field, you can not change the tempo. The current tempo specified to the sequence is displayed in this field.
To open the Tempo Change window, select the TEMPO or field and press the OPEN WINDOW key.

Specify whether the tempo change recorded within the sequence should be ignored.
If YES is selected, the tempo change in the sequence will be ignored. If NO is selected, the tempo change in the sequence becomes valid ant the tempo of the song will change according to the data.
Setting the Loop
This sets the loop (repeated performance) of the song.
To repeatedly play the specified range of the step until the STOP key is pressed, turn the loop ON and play the song.
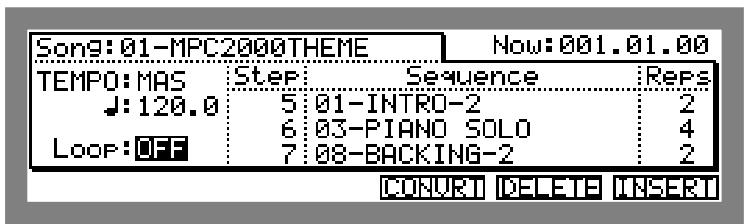
To set the loop ON or OFF, select the LooP field with the CURSOR key and rotate the DATA wheel.
To set the range of the loop, press the OPEN WINDOW key.
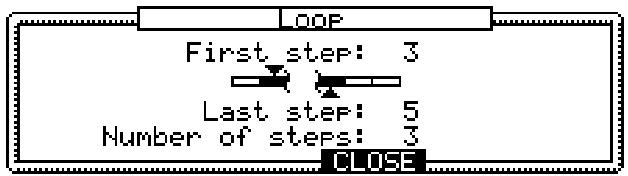
-First step:
Specify the first step of the loop.
Last step:
Specify the last step of the loop.
Number of steps:
This sets the range of the loop in number of steps. The song will loop from the step set in F i r*st. st.eF for the number of set bars.
CAUTION: The First step and the Number of steps as well as the Last step and the Number of steps affect each other. If you change the First step or Last step, the value of Number will change accordingly.
Creating a Song
To newly create a song, select an (Unused) song in the Song# field. Select (end of song) in the Sequence with the CURSOR key.
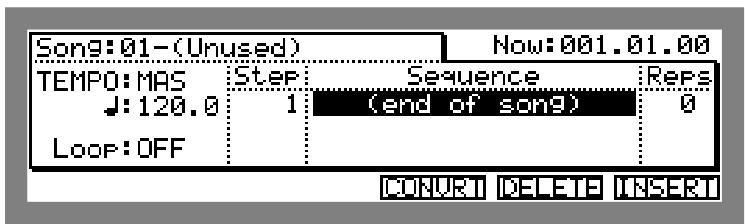
Select the sequence by rotating the DATA wheel. The sequence will be assigned to the first step of the song.
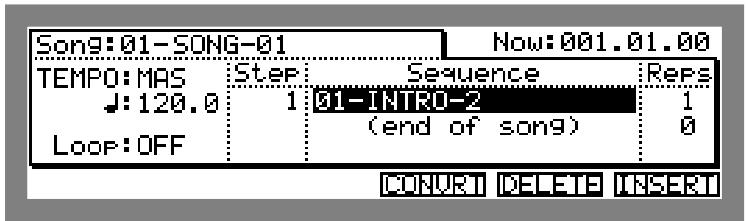
To select (end of song), press CURSOR DOWN key once.
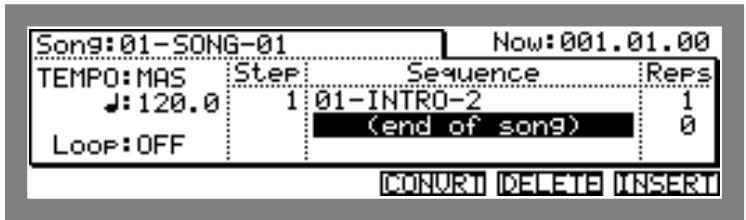
To select the sequence assigned to Step 2, rotate the DATA wheel.
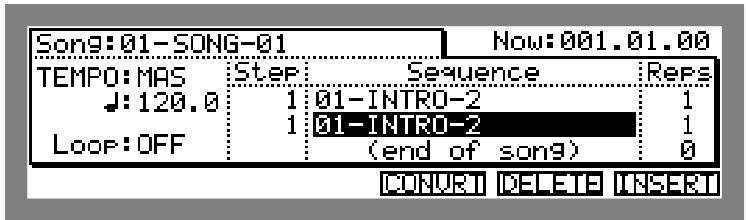
In the same way, assign sequences and increase the number of steps.
Selecting a Step and Changing a Sequence
Select the step number of the StEF field with the CURSOR key. If there are many steps, press the CURSOR UP or DOWN key many times to automatically scroll the screen.
It is also possible to select the step with the DATA wheel.
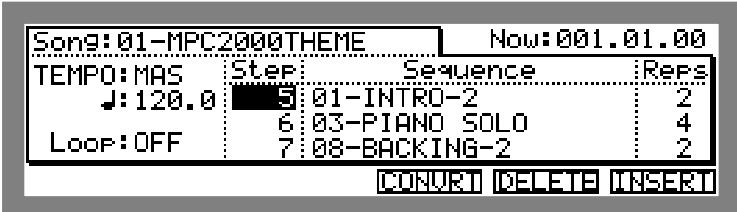
When you are changing a sequence assigned to a step, first select the Sequence with the CURSOR key. Select the sequence of the step you want to change with the CURSOR UP or DOWN key. If there are many steps, press the CURSOR UP or DOWN key many times to scroll the screen.
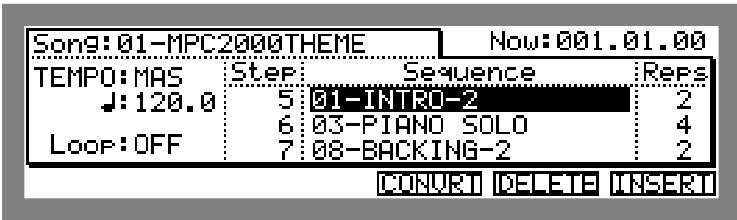
Change the sequence by rotating the DATA wheel.
Repeating a Sequence
The sequence assigned to the song can be repeated the number of specified times.
Select the Rep field of the sequence you want to repeat with the CURSOR key.
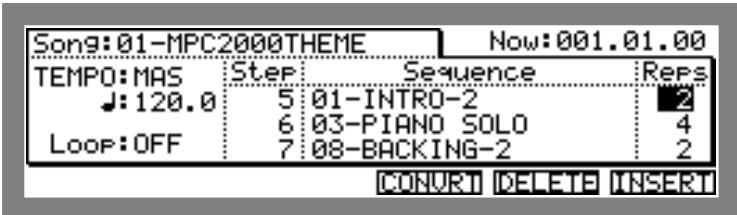
Set the sequence to the number of time to be repeated by rotating the DATA wheel.
CAUTION: If the number of repeats is set to 0, the sequences after the step will not be played.
Deleting a Step
Select the step number or sequence of the step you want to delete with the CURSOR key and press DELETE[F5].
When the delete is executed, the steps after the specified point will be moved up.
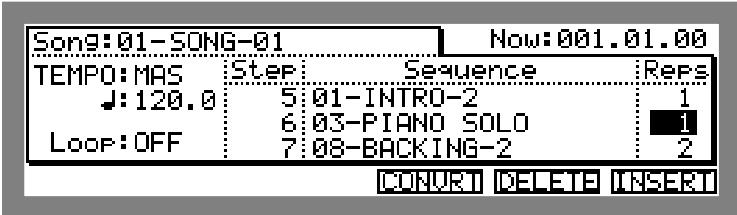
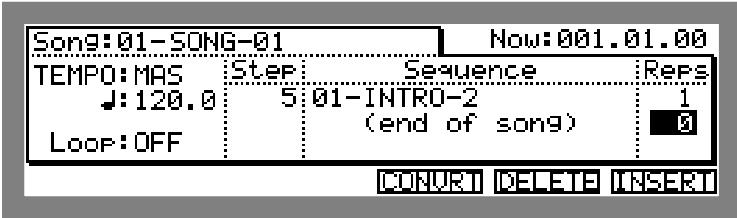
Inserting a Step
Select the step number or sequence of the step you want to insert with the CURSOR key and press INSERT[F6].
The steps after the selected will move one step back and sequence 01 will be inserted.
Select the Sequence of the inserted sequence and select a sequence by rotating the DATA wheel.
Setting the Locate Point
It is possible to locate in the field using the DATA wheel.
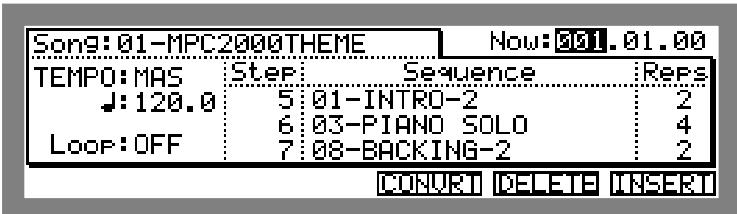
Select the field with the CURSOR key and increase or decrease the number with the DATA wheel to locate.
The now field allows you to switch and display the bar/beat/clock and hour/minute/second.
Select the field and press the OPEN WINDOW key.
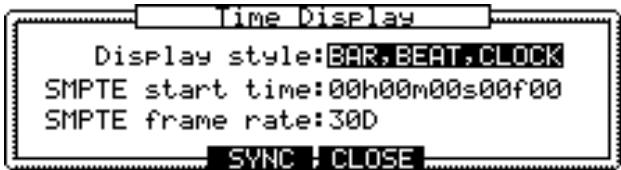
- Display style:
Select BAR, BEAT, CLOCK to display the bar, beat, and clock.
Select HOUR, MIN, SEC to display the hour, minute, and second. - SMPTE start time:
Select HOUR, MIN, SEC in Display Style to start the time display on the main screen from the time set in this field. This can also be used to synchronize MTC (MIDI time code) or SMPTE time codes.
- SMPTE frame rate:
This sets the frame rate of the time code used to synchronize the MTC or SMPTE code. Synchronization is described in "MIDI/SYNC Mode".
Converting a Song to a Sequence
Song mode is useful for quickly creating the format of a song. However, it is cumbersome compared to Sequence mode when fine-tuning the details of a complex song. It is therefore useful to create a song initially using Song mode, then convert that song into a long sequence. This allows you to use the more versatile sequence editing features to complete the song. The Convert Song to Sequence function does this conversion. All sequences in the song, including their designated repetitions, are copied end-to-end into the specified sequence. Note that track names, track status (Drum or MIDI), MIDI output channel assignments, MIDI program change assignments, stereo mixer settings, tuning settings, and tempo settings for the newly created sequence are taken from the first sequence in the song, and that the song's loop status is used for the new sequence's loop status.
To convert the song, press CONHURT[F4].

From song:
This selects the song to convert.
To sequence:
This selects the storage destination of the data converted to a sequence.
CAUTION: If there is data in the sequence you have selected as the destination, the data will be erased if you execute the convert. Be careful when you are converting to a sequence with a name other than "Unused."
Chapter 6
Creating and Editing Programs
What Are Programs?
A program is a collection of sounds assigned to 64 note numbers. It is possible to set the envelope or filter on each note number individually. It is possible to create 24 programs on the MPC2000.
The sound is played back by a pad or MIDI note only when it is assigned to a note number in a program. For example, when note number 36 is assigned to pad A02, it is possible to play the snare drum by playing pad A02 by assigning the snare drum sound to note number 36.
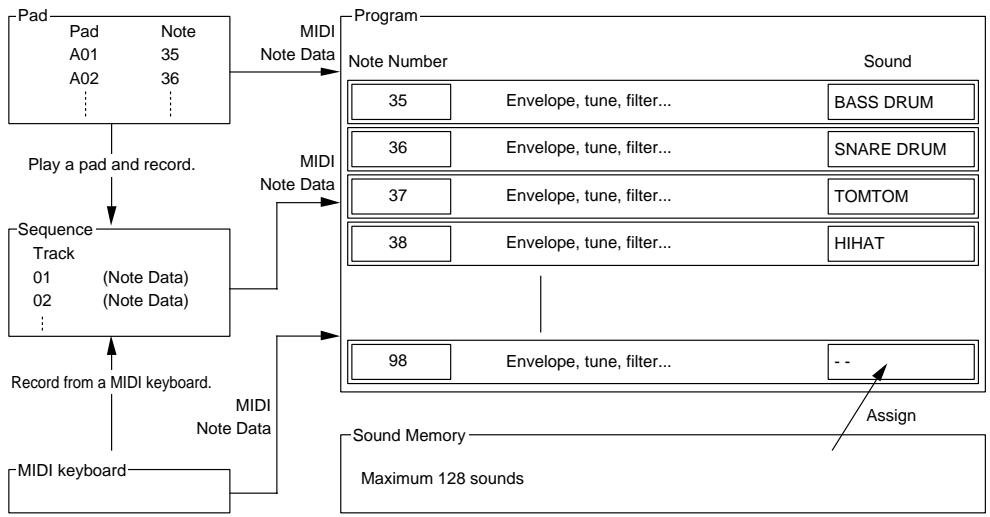
To play the pad like a rhythm machine and record the drum pattern, it is possible to record the timing of the pad being played as sequence by changing to sequence record mode and playing the pad. Here, the note number assigned to the pad will be played as a sequence instead of the original pad data. When the sequence is played back, the sound corresponding to the note data recorded on the track will play. (If a snare drum sound is assigned to note number 36, the snare drum sound will play back to the timing of the recording of the notes of note number 36 when the sequence is played.)
By selecting program in PROGRAM mode, it is possible to instantly switch the program. Also, it is possible to switch using MIDI program change.
The following is a graphical representation of how data is organized within programs:
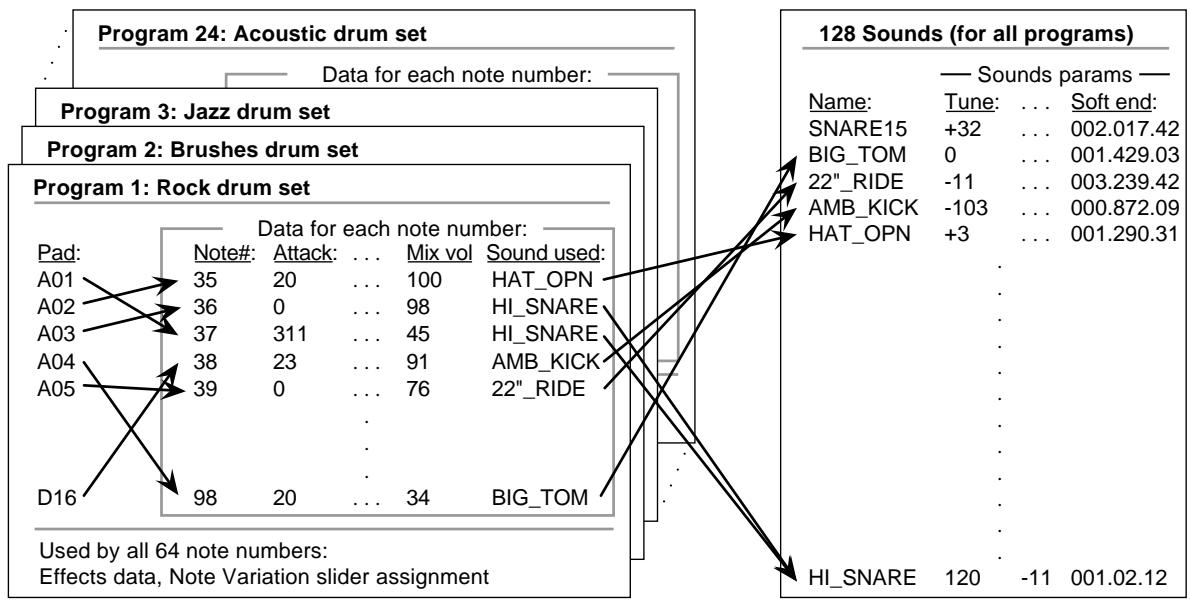
There are three screens in program edit mode and the following are the functions:
- Assign Screen
- Parameter Screen
- MIDI Screen
Assigns a note number to the pad, and a sound to the note number.
Edits the tone using the envelope, filter, etc.
Sets the MIDI of the internal sampler.
Creating a program
When the system disk is inserted into the MPC2000 and the power is turned on, the main screen appears in a few seconds. At this stage, if you press PROGRAM (6 on the numeric keypad) while holding down the SHIFT key, the Assign screen in Program Edit appears. The P3m field on the top displays 1-NEW PROGRAM 01. This means "The name of the first program selected is NEW PROGRAM 01." If many programs are loaded on the MPC2000, it is possible to select the program by moving the cursor to this field and rotateing the DATA wheel. To create an entirely new program, use the NEW PROGRAM01 and assign sounds to this program and edit it in various ways. The actual procedure is as follows:
- Load in from disk the sounds you intend to use in the program. (Refer to chapters "Creating and Editing Sounds" and "Disk Operation.")
- Press the PROGRAM key (6 on the numeric pad) while holding down the SHIFT key to display the Program Edit screen.
- Assign a note number to the drum pad. If you are not playing the MPC2000 from devices such as the MIDI keyboard, the default settings can be used.
- Assign a sound to a note number. This assigns the sound to the drum pad.
- Press PARAMS[F2] and display the parameter screen and set the parameter of the sound.
- Press the MIXER key (7 on the numeric pad) while holding down the SHIFT key to display the Mixer screen and set the volume or pan of the sound. If you have installed the optional 8 parallel out boards or effector boards, set these here also.
- Save the completed program to a disk.
Selecting a Program and Assigning a Sound
The screen to set the program consists of three types. A screen to assign the sound to the program, a screen to set the parameters of the program, and a screen to set the MIDI of the internal sampler.
First the screen which assigns the sound to the program is displayed when you press PROGRAM (or 6 on the numeric pad) while holding SHIFT.
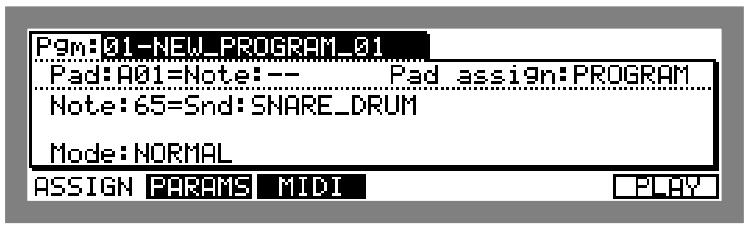
On this screen, it is possible to listen to the selected sound at its full velocity by pressing F'L_HY[F6].
Selecting Programs
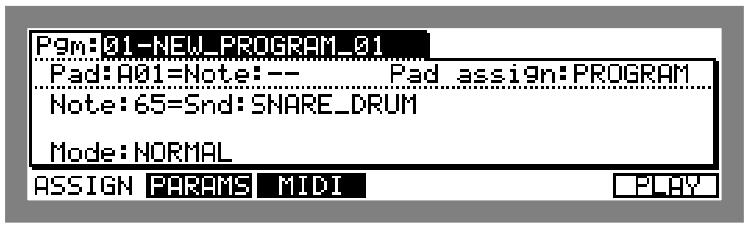
Move the cursor to the Pm field and select a program by rotating the DATA wheel. The program number and program name is displayed.
CAUTION: There is only one default for this program. When a new program is not being loaded from a disk or newly created, you cannot select other programs by rotating the DATA wheel.
Renaming Programs
To open the Program window, select the P3m field and press the OPEN WINDOW key.
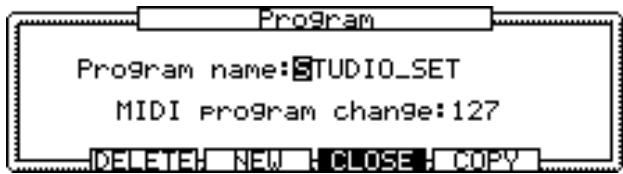
- Program name:
This changes the name of the program.
Move the cursor with CURSOR LEFT or RIGHT, or the DIGIT wheel and enter the name with the DATA wheel. It is also possible to directly enter the name from the DRUMS PAD. The letter shown on the top right of the pad will be entered when PAD is pressed. For example, A will be entered if you press PAD1 once and B if you press it again. Use the 16 LEVELS key to enter a space. To switch between lower and upper case keys, press the PAD BANK key.
Enter a name and press the ENTER key to confirm.
Note: If you do not press the ENTER key and move the Default Name field or other pages with the CURSOR DOWN key, the entered name will be ignored and the name will not change.
·MIDI Program Change:
This sets the program number. It is possible to switch the program with program change from external MIDI devices.
Deleting a Program
To open the Program window, select the Pm field and press the OPEN WINDOW key.
The Delete Program window will open if you press DELETE[F2].
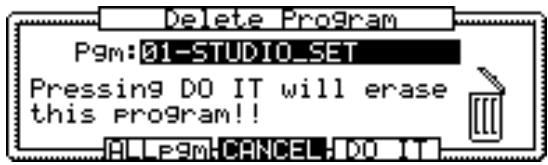
Select the program you want to delete in the F3m field and press DQ I T [F5] to delete the selected program.
When ALLPgm[F3] is pressed, the following warning window will appear and all of the programs will be erased when D0 IT[F5] is pressed.
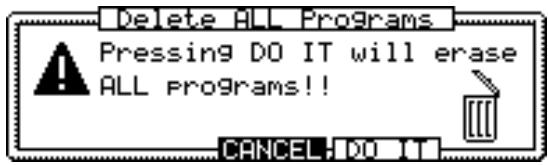
Newly Creating Programs
To open the Program window, select the Pm field and press the OPEN WINDOW key.
The Create New Program window will open if you press HEW[F3].
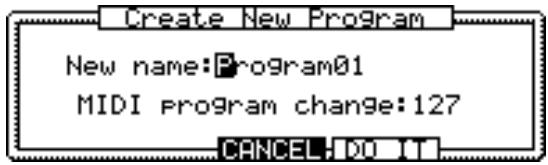
New name
This sets the name of the program. Refer to "Renaming a Program" on how to enter characters.
·MIDI Program Change:
This sets the program number. It is possible to switch the program with program change from external MIDI devices.
Copying Programs
To open the Program window, select the Pm field and press the OPEN WINDOW key.
The Copy Program window will open if you press COPF [F5].
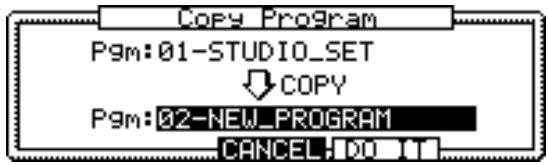
Select the program you want to copy the data to with the DATA wheel.
The program data will be copied if you press D0 IT[F5].
CAUTION: If there is data in the program you have selected as the destination, the data will be erased if you execute the copy. Be careful when you are copying to a program with a name other than "no program."
Assigning Notes to DRUMS PAD
You first must assign a note number to the DRUMS PAD.
Note numbers are assigned to all pads by the initial settings on the MPC2000. Unless there is a special requirement, it is not necessary to change the note assignments.
Select the Pad field with the CURSOR key and select the DRUMS PAD you want to assign by rotating the DATA wheel. You can also hit the DRUMS PAD and directly select the pad.
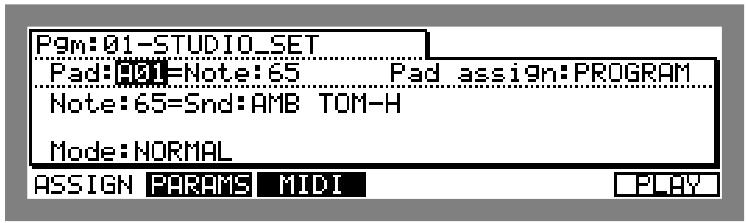
Select the Note on the right side by pressing CURSOR RIGHT key and set the note number you want to assign by rotating the DATA wheel.
You can change this field by playing a drum pad even when the cursor is on the Note field. This way, you are able to assign notes continuously without moving the cursor.
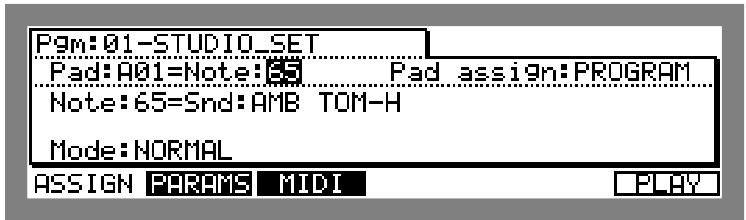
It is also possible to list the DRUMS PAD in Assignment View and assign them.
To display the Assignment View window, select the F#ad field or the Not field on the right and press the OPEN WINDOW key.
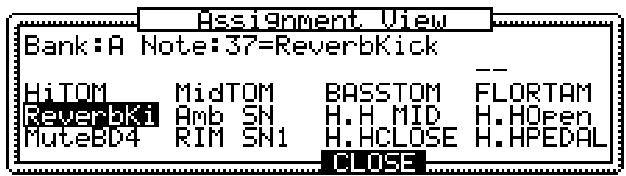
To assign a note, select the DRUMS PAD with the CURSOR key or by hitting the DRUMS PAD. The sound assigned to the selected note is displayed in Assignment View.
The Pad Assign Mode and Initialize
This allows you to select the pad assign mode in the Pad Assign field.
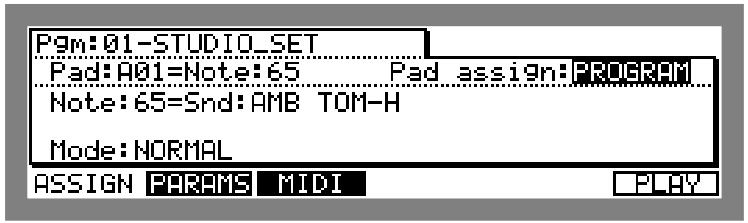
On the MPC2000, each program can have a pad assignment, but if you select MASTER in the Pad assign field, the pad assignment is stored as a master assign and can be adapted to other programs.
PROGRAM Stores the pad assigns for each program.
MASTER Adapts the master assign to the program.
CAUTION: The master pad assign can be changed from any program when MASTER is displayed in the Pad assign field, but note that the change will effect all the programs selected by MASTER.
To initialize a pad assign, select the Pad assign field and press the OPEN WINDOW key.
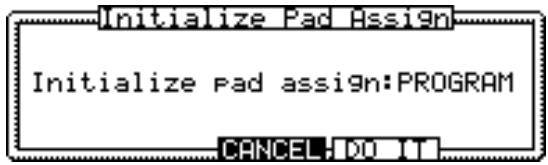
The pad assign of the currently selected program will be initialized if you select PROGRAM with the DATA wheel. By selecting MASTER, the master assigns are initialized and all the program assigns selected by MASTER are initialized.
To initialize, press D0 IT[F5].
Assigning Sounds to Notes
This assigns sounds to note numbers.
Select the Notes field in the middle left with the CURSOR key and select the note number you want to assign by rotating the DATA wheel.
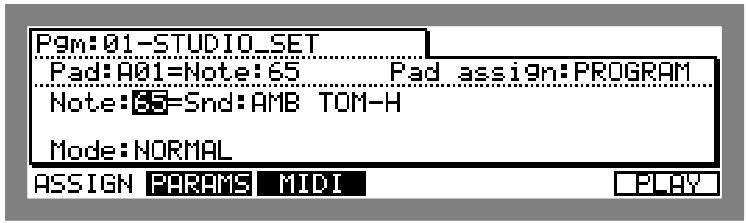
Select the Srid# field by pressing CURSOR RIGHT key and select the sound you want to assign by rotating the DATA wheel.
When the value in Fad field in Not field is changed, the note number assigned to that pad will automatically appear.
Even when the cursor is in the ^# field, it is possible to change the Pad field by playing the pad. When the Pad field is changed, the Note field will also automatically be changed. In this way, it is possible to continuously set the sound assignments without moving the cursor.
The Program Sound Generation Mode
However, by setting the sound generation mode, it is possible to generate up to three sounds simultaneously or switch the sound between velocity and decay.
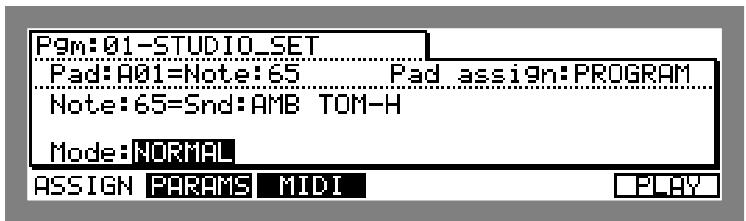
Select the mode field with the CURSOR key and select from the following four modes with the DATA wheel.
NORMAL
Only the sound in the Srid‡ field plays when the selected MIDI note number is received.
SIMULT
This plays up to three sounds together each time the note number specified in the Note field is received. When this option is selected, two Mode fields appear to the right of the Also Play note field. Select the notes you want to generate together with the DATA wheel. If you only want to add one sound, select either field and rotate the DATA wheel to the left until OFF is displayed. The following example generates a sound assigned to 36/A02 and 53/A16 over a sound assigned to MIDI note number 65.
| Note:65=Snd:AMB TOM-H | |
| Mode:SIMULT | Also Play note:36/A02 |
| Also Play note:53/A16 | |
VEL SW
The sound assigned to the program and the two sounds set here can be switched with strong or weak velocity. When this option is selected, two If Over fields appear to the right of the Mode field. When the velocity of the drum pads or the MIDI note on exceed these settings, the generated sound will switch. To switch between only two sounds, select either field and rotate the DATA wheel to the left until OFF is displayed. The following example generates MIDI note number 65 up to velocity 44 and 36/A02 between velocity 45 and 100, and 53/A16 over velocity 101.
| Note:65=Snd:AMB TOM-H If over:44,use:36/A02 Mode:VEL SW If over:100,use:53/A16 |
DCY SW
This switches between the sound assigned to the program and the two sounds set here using the value set in the Deca# field. When this option is selected, two If over fields appear to the right of the mode field. Set the decay value and note here. In the following example, the sound assigned to the selected note number generates MIDI note number 65 up to decay 44, 36/A02 between decay values 45 to 88, and 53/ A16 for velocity over 89.
| Note:65=Snd:AMB TOM-H If over:44, use:36/A02 Mode:DCY SW If over:88, use:53/A16 |
Normally the DECAY is assigned to the NOTE VARIATION slider and is used to switch the sound by changing the decay parameter with the NOTE VARIATION slider. For example, by using this as a hi-hat sound, you can switch between closed, half, and open sounds effectively.
Editing Note Parameters
This edits the note parameters assigned to the program.
Press PROGRAM (or 6 on the numeric pad) while holding SHIFT to display the program assign screen and press PARS [F2] to display the parameter screen.
Selecting Programs
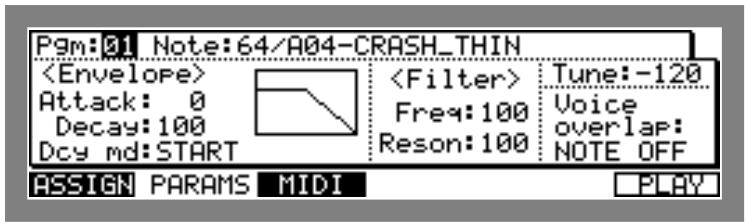
Move the cursor to the Pm field and select a program by rotating the DATA wheel.
It is possible to rename, delete, copy, or newly create a program using the Program window in the same way as the Assign screen. Please refer to page 91, 92.
Selecting Notes
This allows you to select the sound of the tone you want to edit.
Select the Note field with the CURSOR key and select the note you want to edit with the DATA wheel. The assigned sound name appears on the right of the note number. It is also possible to directly select the note by hitting the DRUMS PAD.
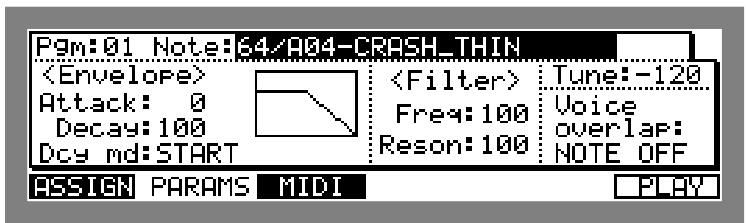
Copying the Note Parameter
The various settings you make on the parameter screen effect the note number. When a complicated edit is made on a note and you want to use this edit on another note, it is possible to copy the note parameters to another note.
To open the Copy Note Parameters window, select the Note field and press the OPEN WINDOW key.
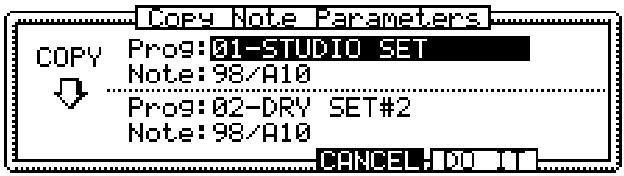
Select the top line with the CURSOR key and select the program with the note number and the sound of the copy source with the DATA wheel.
Select the bottom line with the CURSOR key and select the program with the note number and the sound of the copy destination with the DATA wheel.
Copy the note parameters by pressing DQ IT[F5].
Setting the Envelope
This edits the envelope of the sounds assigned to each note.
The envelope has the following three parameters. Select the parameter field you want to edit with the CURSOR key and set the number with the DATA wheel.
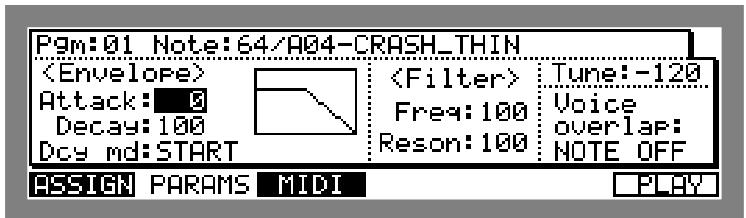
- Fittack:
This sets the attack time of the envelope. This is usually set to 0 for drum sound sources. The higher the value, the slower the sound envelopes.
Decau
This sets the decay time of the envelope. The larger the value the milder the sound decays.
·Dcymd:
This sets the type of decay.
END The decay ends at the end of the sample. The decay ends at the end of the sample. The starting point of the decay is determined by the settings in the Decay field. This is convenient in smoothly fading out the end of a sound. Also, when a sample is looped, the sample will decay according to the settings in the Decay field after NOTE OFF. (Here, the settings in the Voice overlap field is overridden by NOTE OFF regardless of the display. See page 105)
START The decay starts at the beginning of the attack time.
CAUTION: When the sample is short, the decay time will have higher priority than the attack time.
To display the following window, select the envelope field and press the OPEN WINDOW key.
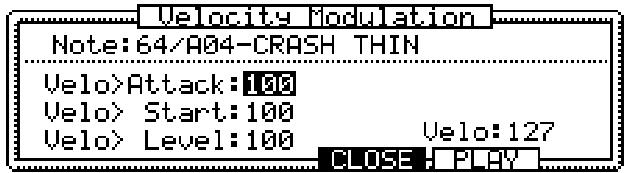
It is possible to set the ratio in which the envelope or volume changes according to the velocity.
- Velo > Attack:
This allows the velocity to control the attack time. The larger the value, the shorter the attack time becomes with the impact of the velocity. When this is set to 0, the attack is the same regardless of the velocity.
- Velo>Start:
This allows the velocity to control the starting point of the sample. The larger the value, the slower the start of the sample becomes as the velocity is weaker. When this is set to 0, the start is the same regardless of the velocity.
- Velo>Level:
This allows the velocity to control the volume. The larger the value, the louder the sample becomes with the impact of the velocity. When this is set to 0, the volume is the same regardless of the velocity.
Ve1o:
This field displays the velocity in real-time when the DRUMS PAD is hit.
Setting the Filter
This edits the filter of the sound assigned to each note.
The filter has the following two parameters. Select the parameter field you want to edit with the CURSOR key and set the value with the DATA wheel.
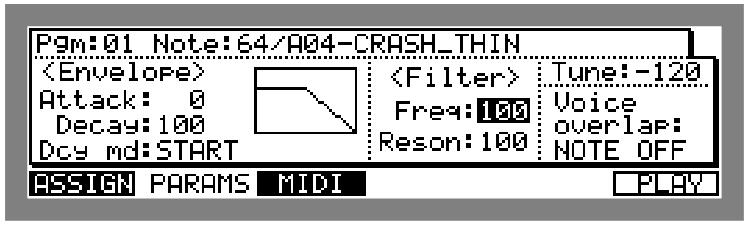
F
This sets the cut off frequency of the filter. The smaller the value, the more oblique the sound becomes.
- Reso:
This sets the resonance of the filter. The larger the value, the more emphasized the boarder of the cut off frequency is, creating a unique sound.
To display the following window, select the filter field and press the OPEN WINDOW key.
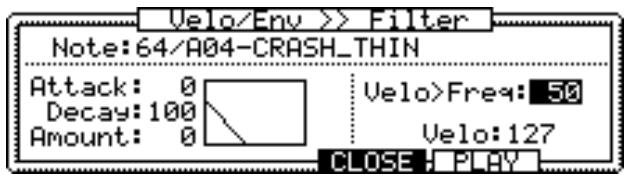
To set the ration in which the filter changes according to the settings of the filter envelope and velocity.
- Hitack:
This sets the attack time of the filter envelope. The larger the value, the more time it takes for the sound to clarify.
Decas
This sets the decay time of the filter envelope. The larger the value, the softer the decay of the cut off frequency becomes.
Amount:
This sets the depth of the filter envelope. The larger the value, the larger the effect of the filter envelope becomes. The envelope is disabled when it is set to 0.
- Velo >Free:
This allows the velocity to control the filter. The larger the value, the clearer the sound becomes when with the impact of the velocity. When this is set to 0, the tone is the same regardless of the velocity impact.
Veio:
This displays the velocity in real time when the DRUMS PAD is hit.
Setting the Pitch
This sets the pitch of the sound assigned to each note.
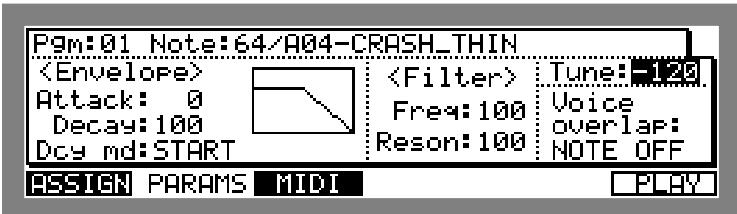
Select the TLine field with the CURSOR key and enter the number with the DATA wheel. It is also possible to enter directly with the numeric pad. In this case press ENTER after you have entered the number.
To display the following window, select the Ture field and press the OPEN WINDOW key.
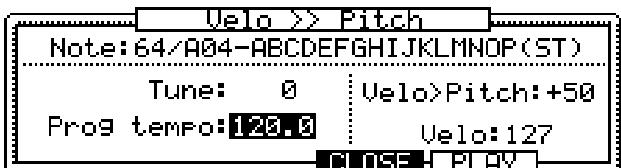
- TURINE: This is the same as the TURINE field on the previous screen.
- Prog tempo: This displays the change in tempo between the sample set in Trim mode and the Tune set here. It is not possible to change the value. This is convenient in matching the tempo of phrase samples such as the drum loop.
- VeloPitch: This allows the velocity to control the pitch. The larger the value, the higher the pitch becomes with the velocity impact. When this is set to a negative value, the pitch becomes lower as the velocity impact increases. When this is set to 0, the pitch does not change regardless of the velocity impact.
- Velo: This displays the velocity value in real-time by hitting the DRUMS PAD.
Setting the Voice Overlap
When the same note is repeatedly generated, this can be used to set whether the previous sound is canceled or overlapping.
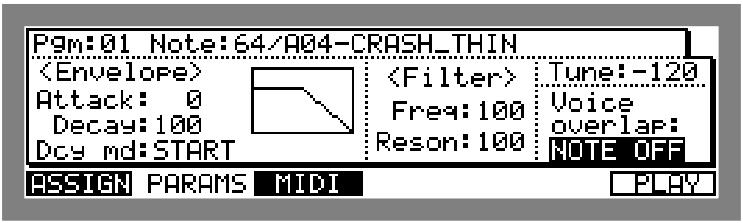
Select the Voice Overlap field with the CURSOR key and select one of the following three modes with the DATA wheel.
POLY Multiple plays of the sound are assigned to additional voices, allowing polyphonic overlap. This is useful for sounds like ride cymbals, for which you don't want new notes to cut off old ones.
MONO Multiple plays of the sound use the same voice, terminating and restarting playback of the sound (no polyphonic overlap). This is useful for producing stuttering effects.
NOTE OFF When the pad is released (or a MIDI Note Off message is received), the sound is terminated. When the sound field is set to END, the loop on sound is set to this mode.
Voice Overlap: To display the Mute off window, select a field and press the OPEN WINDOW key.
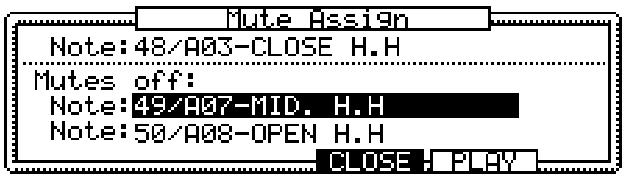
When either note set in the Note field on the bottom line is generated, the lower note is muted when a note displayed on the top line is generated. This is convenient when you want to stop the sound of an open hi-hat with a closed hi-hat.
To turn this function off, select the bottom field and select OFF by rotating the DATA wheel to the left.
The MIDI Settings of the Sampler
This sets the MIDI settings of the internal sampler.
Press the PROGRAM (6 on the numeric keypad) while holding the SHIFT key, display the Program Assign screen and press MIDI [F3] to display the Smpler MIDI setup page.
·MIDI Volume:
This sets whether or not to receive MIDI volume data. When RECIEVE is selected, it will receive the data and when Ignore is selected, will not receive the data.
Now vol:
This is the MIDI volume data value which the internal sampler last received. When the MIDI Volume# is set to RECIEVE, the volumem of the internal sampler is controlled by the MIDI volume data. If the MPC2000 recieves MIDI volume 0, the sampler will not generate any sound until a larger MIDI volume is received. (The level stays at 0.) Check this field when all the other settings are correct and the sampler does not generate a sound. If the MIDI volume data received is 0 or a small value, change the value in this field to a larger value.
Program change:
This sets whether or not to switch the program using the MIDI program change. When RECEIVE is selected, it will switch, and when ignore is selected, it will not switch.
- Local mode:
This separates the connection between the internal sampler and the drum pads. Set this OFF when you are not using the sequence function of the MPC2000 and using the pad and sampler with another sequencer. This way the drum pad data will not go to the sampler and will be output from the MIDI Output. The sampler will generate a sound from the data coming in from the MIDI Input.
Chapter 7
Mixer Functions
Stereo Output Mixer
The MPC2000 features a 64 channel stereo mixer which allows you to set the volume and pan for each of the 64 notes assigned to a program.
Set the stereo mixer on the Mixer screen which appears when MIXER (7 on the numeric pad) is pressed while holding down the SHIFT key.
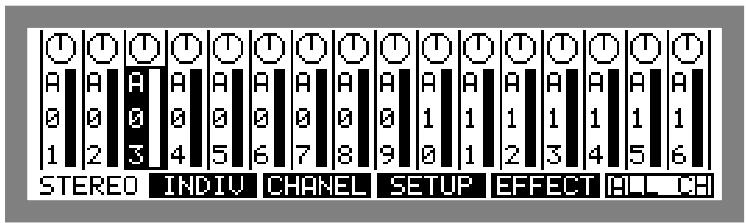
A graphical display of the stereo mixer appears. The above illustration displays the volume and pan corresponding to pad bank A (A01 to A16). To display other banks, press the PAD BANK key and switch the banks.
Setting the Volume
Select the channel of which volume you want to set with the CURSOR LEFT or RIGHT key. It is also possible to select a channel by hitting the drum pad. If the pan on the top is selected, use the CURSOR DOWN key to move the cursor to the volume field.
Set the volume with the DATA wheel. The graphical volume slider displayed on the screen will move up or down in correspondence to the value.
Setting the Pan
Move the cursor to the Pan field with the CURSOR UP key. Select the channel you want to set the pan to with the CURSOR LEFT or RIGHT key. It is also possible to select the channel by hitting the drum.
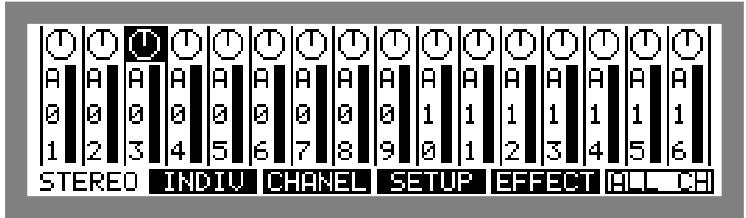
Set the pan with the DATA wheel. The graphical pan knob displayed on the screen rotates according to the value.
Setting the Volume or Pan Together
This allows you to adjust the volume or pan of all the channels of the selected bank together at the same ration.
Press HLL CH[F6] and select all the volume or pan settings in the displayed bank. The volume and pan can be switched with the CURSOR UP or DOWN key.
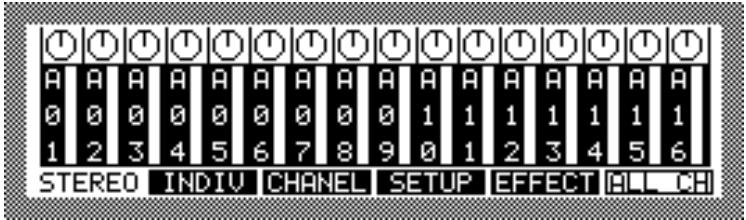
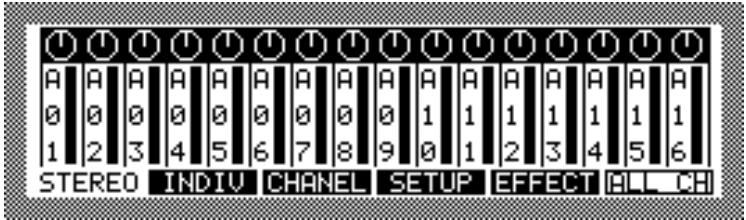
The value of the channels displayed will change at the same ration by rotating the DATA wheel.
Press FILL CH[F6] again to cancel all the selected channels.
Setting the Para Out and Effect Send (Option)
When the optional 8 Para Out Board (IB-M208P) or effect board (EB16) is installed, set the output of the sound or the effect send in the Individual Out screen.
CAUTION:If 8 Para Out Board (IB-M208P) or effect board (EB16) is not installed, nothing will change with the settings here. Furthermore, the effect board (EB16) does not comply with MPC2000 version 1.0
Press MIXER (7 on the numeric pad) while holding down the SHIFT key to display the Mixer screen and press INDIV[F2] to display the Individual Out screen.
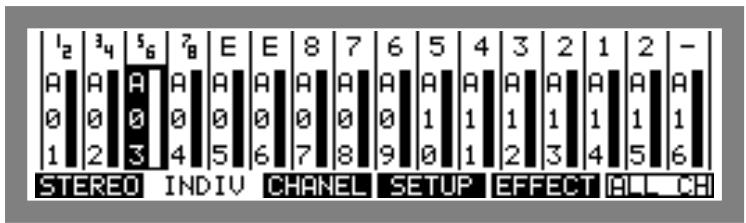
Set the output jack for the sound the top of the screen. Set the send level on the bottom of the screen.
In the same way as in the stereo mixer screen, you can switch the banks with the PAD BANK key.
Assigning Para Out
Move the cursor to the top with the CURSOR UP key. Use the CURSOR LEFT or RIGHT key to select the channel you want to set the output to. It is also possible to select the channel by hitting the drum pad.
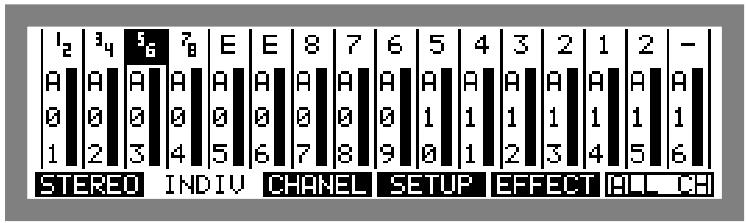
Select the output with the DATA wheel. The numbers one through eight correspond to each para out number. When the sound is in stereo, it is possible to select two digit numbers such as 12 or 34. The left sound will be output from one and three, and the right sound from two and four respectively. E will send effects.
CAUTION:If 8 Para Out Board (IB-M208P) or effect board (EB16) is not installed, nothing will change with the settings here. Furthermore, the effect board (EB16) does not comply with MPC2000 version 1.0
Setting the Send Level
Move the cursor to the Level field with the CURSOR DOWN key. Select the channel of which you want to set the volume with the CURSOR LEFT or RIGHT key. It is also possible to select the channel by hitting the drum pad.
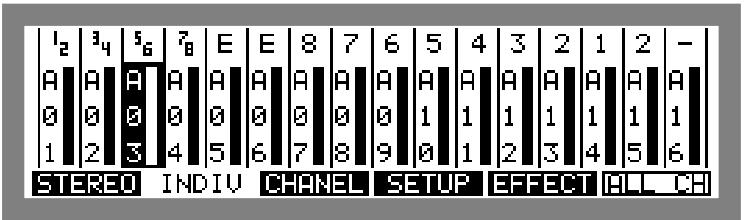
Set the level with the DATA wheel. Set the output level or the effect send level of the output set on the top of the screen. The graphical volume slider will move up or down according to the value.
Setting the Para Out and Send Level Together
This allows you to select all the channels of the selected bank and adjust the para out or level together at the same ration.
Press FILL CH[F6] and select all the para out or level settings in the displayed bank. The para out assignment and the level selection can be switched with the CURSOR UP or DOWN key.
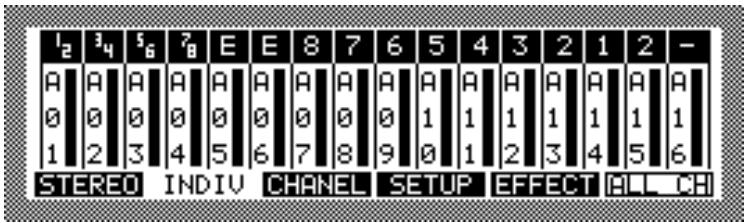
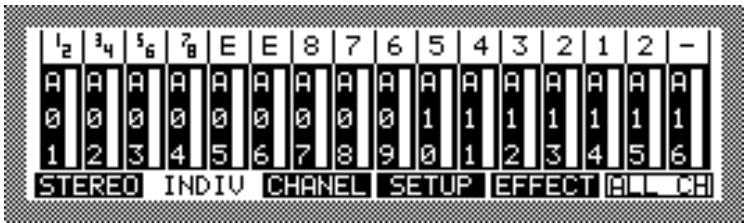
Rotate the DATA wheel to change the value of the displayed channel at the same ration.
Press CH[F6] again to cancel the selection of all the channels.
Setting the Volume or Pan for Each Note
Up to this section the volume or pan settings were set by displaying them together for each pad bank. It is also possible to display a list of parameters for each note.
Press MIXER (7 on the numeric pad) while holding down the SHIFT key to display the Mixer screen and press CHANNEL[F3] to display the Channel screen.
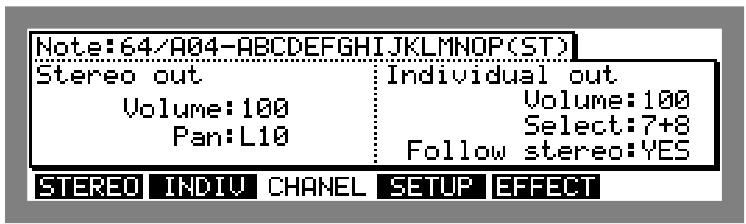
Select the field with the CURSOR key and select the note you want to edit with the DATA wheel. The assigned sound name appears to the right of the note number. It is also possible to directly select by hitting the drum pad.
- Stereo out
In the volume field and Pan field, set the volume and pan of STEREO OUT. These settings are synchronized with the Stereo Mixer screen settings.
Individual out
In the Select field set the para out or the effect send output and set the volume in the Volume field. These settings are synchronized with the Individual Out screen settings.
In the Follow stereo field, set whether the volume set in Stereo out affects the volume of Individual out. When this is set to NO, the Individual out volume will not be affected when the Stereo out volume is changed.
CAUTION: The settings in Individual out are not valid unless 8 Para Out Board (IB-M208P) or effect board (EB16) is installed. Furthermore, the effect board (EB16) does not comply with MPC2000 version 1.0
Setting Up the Mixer
Press MIXER (7 on the numeric pad) while holding down the SHIFT key to display the Mixer screen and press SETUP[F4] to display the Mixer Set Up screen.
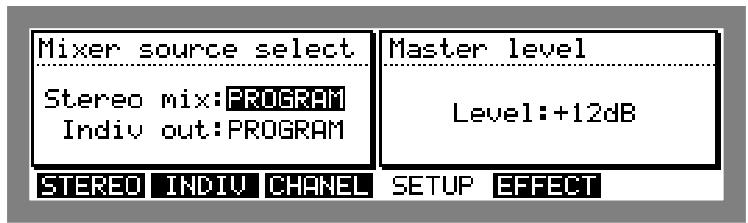
In the Mixer source select on the left, select whether you will set the mixer by program, by sequence, or master setting.
In the Stereo mix field set the Stereo Out mixer and in the Indiv out field the Para Out mixer. The following parameters that can be selected are the same for either one.
PROGRAM
This records the mixer or para out settings for each program. When you select this mode, the mixer or para out settings change to the settings recorded to each program.
MASTER
This records the mixer or para out settings within ALL PROGRAM (the data extension when saved is .APS) which applies to all programs and sequences. When you select this mode, the mixer or para out settings will not change when the program or sequence is modified and the MASTER settings will always be applied.
In Master level on the right, adjust the output level of the MPC2000.
It is possible to generate up to 32 sounds at one time on the MPC2000. Therefore there is a large difference in the output level when one sound is being played back compared to all 32 sounds played back at the same time. When you are using many sounds and playing them back at the same time, the volume might exceed the capacity level and the sound may become distorted. In such a case, it is possible to prevent the distortion by lowering the level in the Master Level field. When you are not using many sounds over each other, you will have less white noise if the level is increased.
Setting the Effects
When the effect board (EB16) is installed, press EFFECT[F5] to set the Effect screen. Since MPC2000 version 1.0 does not comply to effect board, the following screen will appear.
Effect board is
not installed!!
STEREO INDIV CHANEL SETUP
EFFECT
Chapter 8
Creating and Editing Sounds
Sampling a New Sound
On the MPC2000, sound sampling is done in 16-bit linear format at the full 44.1kHz sampling rate, as with compact discs.
CAUTION: As with all samplers, all sounds are lost when the power is removed. This means that you must load in sounds from a sounds disk every time the MPC2000 is turned on, and you must save any edited or newly sampled sounds to disk, or the changes will be lost!
To sample sounds, press the SAMPLE (or 4 on the numeric pad) while holding SHIFT and display the sampling screen.
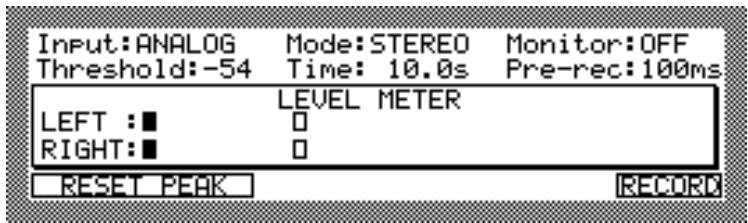
- Input:
You can choose from the following two sound sources.
ANALOG The recording source enters the rear panel analog RECORD IN jacks.
DIGITAL The recording source enters DIGITAL on the rear panel. This input can be connected to any 44.1kHz digital SP/DIF source such as a CD or DAT tapes recorded at 44.1kHz, but 48 kHz sources are not supported.
CAUTION: You can only choose DIGITAL when the optional IB-M208P is installed.
Modee
Set the mode to STEREO or MONO input.
MONO L Sampling is done in mono, using only the left RECORD IN (or the LEFT signal of DIGITAL IN). The mono signal is monitored at both the left and right sides of the stereo outputs, but the the level meter will only show the LEFT.
MONO R Sampling is done in mono, using only the right RECORD IN (or the RIGHT signal of DIGITAL IN). The mono signal is monitored at both the left and right sides of the stereo outputs, but the the level meter will only show the RIGHT.
STEREO Sampling is done in stereo, using both the LEFT and RIGHT RECORD IN (or the LEFT and RIGHT signals of DIGITAL IN).
Monitor:
This choice field has two options: ON and OFF. If ON, the signal from the sampling input is heard in the stereo mix outputs. If OFF, it is not. If you are sampling with a microphone in the same room as the speakers, select OFF to avoid audio feedback. Otherwise, select ON to hear the incoming signal in the stereo mix.
- Threshold:
This sets the threshold value at the beginning of the sampling. Once RECORD[F6] is pressed, the sampling starts when the enter signal exceeds the value set here. The threshold value is also displayed on the meter with a .
If the value set here is too large, the sampling will not start even if you enter a sound. If it is too small, a noise may cause the sampling to start. If this is set OFF at a set range between 0 and 63, the sampling will start the moment RECORD[F6] is pressed regardless of the input level.
Time:
This field is used to specify the sample time to be allocated to the sample, in seconds (and 0.1 seconds). Any number can be entered here up to the maximum available sampling time. In a non-expanded MPC2000, the maximum sampling time is 21.9 seconds mono or 10.9 seconds stereo. In a fully expanded MPC2000 (total 32 megabytes) the maximum sampling time is 356.4 seconds mono or 198.2 seconds stereo.
CAUTION: Although the maximum sampling time is limited only by memory capacity, the maximum sound file size that can be saved on a floppy disk is 16.4 seconds mono or 8.2 seconds stereo. If a sound is larger than this, it won't fit on a single floppy and the MPC2000 cannot split single sound files over two or more floppies. If you need to create longer sounds and save them to disk, it is necessary to use an external hard disk connected to the SCSI port.
Pre-rec
When sampling, it is possible to record sounds before the level threshold is exceeded. In this field, set that prerecord time, in milliseconds. For example, to record 10 milliseconds before the threshold is exceeded, enter 10 here. The default value here is 1 millisecond, which is an adequate value for sharp attack sounds like drums.
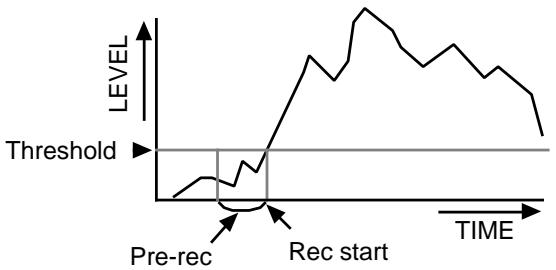
CAUTION: When played back, the sound starts playing from the point at which the threshold was exceeded because the Soft Start parameter (in the Edit a Sound screen) is automatically set to the first sample which exceeded the threshold. To hear the prerecord portion of the sound, you must set the Soft Start field to an earlier position within the sound.
LEVEL METER
While this screen is displayed, the meter will constantly display the level of the signal input. The threshold setting is graphically represented by a within the meter's range. In addition, a shows the highest peak level received since the last time the RESET PEAK[F1] was pressed.
If the recorded level is too large, the sampled sound will be distorted. On the other hand if it is too small, the white noise will stand out. When you are recording set the level to the maximum within the range where the meter does not entirely hit the limit. Set the level using the REC GAIN knob. It is not possible to change the level with the REC GAIN knob if you are recording digital input and DIGITAL is selected in the IRIFU field.

By pressing RESET PEAK[F1], the peak displayed on the LEVEL METER will be reset.
By pressing RECORD[F6], the MPC2000 will be on standby to record and the following will be displayed.
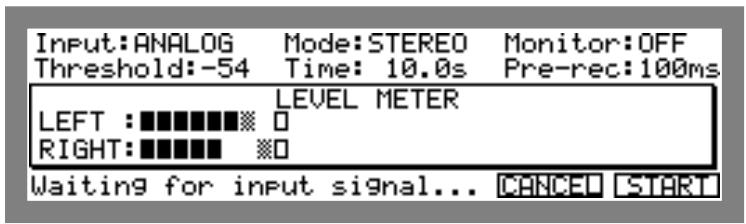
When a signal exceeding the threshold value is entered at this stage, the sampling will start.
To cancel the sampling during record standby mode or recording mode, press CANCEL[F5].
To manually start sampling before the value exceeds the threshold, press START[F6].
During the recording, the following display will appear.
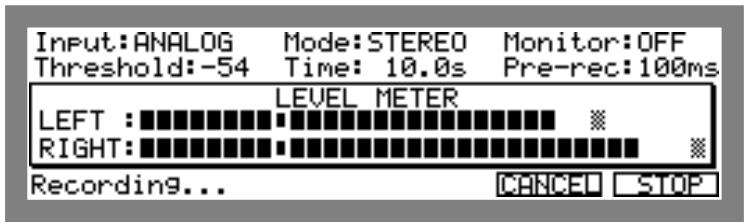
The sampling will end when the time set in Time# field is up. The sampling will also end when STOP[F6] is pressed during a sampling. The sampling will be interrupted when CANCEL[F5] is pressed and will return to the original display.
The following window will be displayed when the sampling is finished.
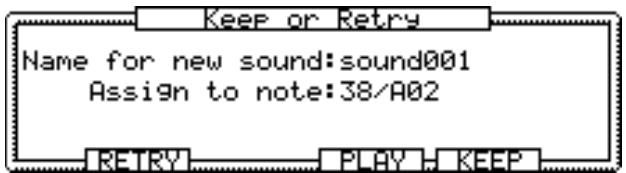
To listen to the sampled sound, press FLD.HY[F4].
When RETR[F2] is pressed, the sampled sound will be discarded and the display will return to the original display.
First set the following fields before saving a sampled sound:
Name for new sound:
This names the sampled sound.
Move the cursor with CURSOR LEFT or RIGHT key, or the DIGIT wheel and enter the name with the DATA wheel. It is also possible to directly enter the name from the DRUMS PAD. The letter shown on the top right of the pad will be entered when PAD is pressed. For example, A will be entered if you press PAD1 once and B if you press it again. Use the 16 LEVELS key to enter a space. To switch between lower and upper case keys, press the PAD BANK key.
Enter a name and press the ENTER key to confirm.
Note: If you do not press the ENTER key and move the Default Name field or other pages with the CURSOR DOWN key, the entered name will be ignored and the name will not change.
- Assign to note:
This assigns a sampled sound to DRUMS PAD. When the sampling is complete, it is possible to play the sound which has just been recorded with the pad. Select a field with the CURSOR key and select the note number of the DRUMS PAD you want to assign with the DATA wheel. It is also possible to select the field with the CURSOR key and directly assign the sound by hitting the DRUMS PAD. The note number of the DRUMS PAD will appear and the currently assigned sound will play. When you do not want to assign a sound to a pad, select OFF with the DATA wheel.
When KEEP[F5] is pressed, the sampled sound will be stored to the memory and the display will return to the original display.
By pressing the OPEN WINDOW key when the sample mode screen is displayed, the Sound memory window will appear regardless of the cursor position.

The available sampling time of the total memory capacity is displayed.
CAUTION: The RECORD IN jack on the rear panel are balanced inputs having a hot, cold and ground connection using a standard stereo phone jack:
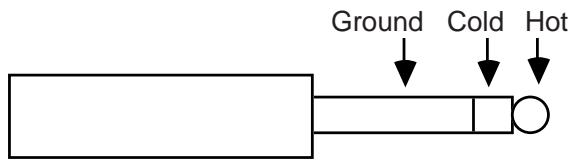
Standard mono phone plugs can also be used for sampling. The cold connection will simply connect to ground.
Editing a Sound
This allows you to edit a sound loaded from a disk or sampled and loaded from the memory.
By pressing TRIM (or 5 on the numeric pad), the TRIM mode screen appears.
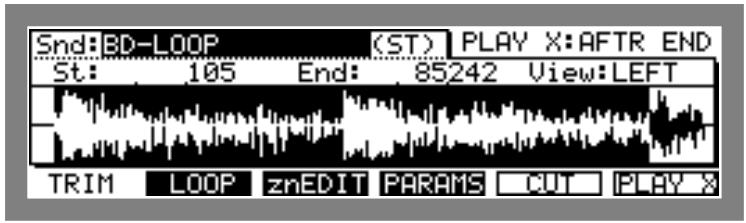
Selecting a Sound
Move the cursor to the field and select the sound by rotating the DATA wheel. In the case of stereo sampling, will appear after the sample name.
Renaming or Displaying the Specification of the Sound
To open the Sound window, select the Srid# field and press the OPEN WINDOW key.
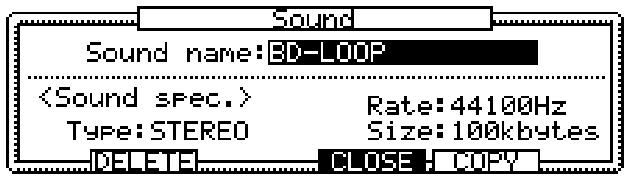
Sound name:
This changes the name of the sound.
Move the cursor with CURSOR LEFT or RIGHT key, or the DIGIT wheel and enter the name with the DATA wheel. It is also possible to directly enter the name from the DRUMS PAD. The letter shown on the top right of the pad will be entered when PAD is pressed. For example, A will be entered if you press PAD1 once and B if you press it again. Use the 16 LEVELS key to enter a space. To switch between lower and upper case keys, press the PAD BANK key.
Enter a name and press the ENTER key to confirm.
Note: If you do not press the ENTER key and move the Default Name field or other pages with the CURSOR DOWN key, the entered name will be ignored and the name will not change.
This displays the specifications of the currently selected sound. You cannot change the value here.
T'HF∈: Displays the stereo or monaural mode.
Rate: Displays the frequency of the sample.
Size: Displays the data size of the sound.
Deleting a Sound
To open the Sound window, select the Srid field and press the OPEN WINDOW key.
Press DELETE[F2] to open the Delete Sound window.
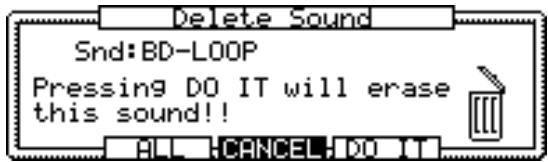
The selected sound will be erased from the memory if you select the sound you want to delete in the Srd: field and press DO IT[F5].
When you press FILL[F3], the following warning will appear and all the sounds will be erased from the memory when DO IT[F5] is pressed.
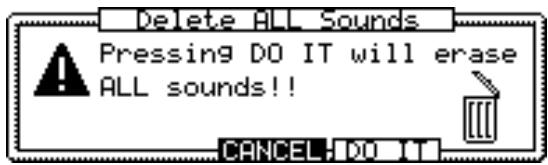
Copying a Sound
To open the Sound window, select the Srid field and press the OPEN WINDOW key.
Press COF' [F5] to open the Copy Sound window.
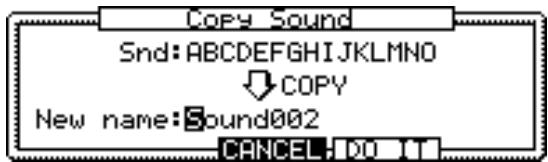
Name the sound to be newly copied with CURSOR LEFT or RIGHT key and the DATA wheel.
The sound is copied when D0 IT[F5] is pressed.
TRIM Mode
To play only the necessary parts of the sound, set the starting point and end point of the sound. The wave pattern of the entire sound is displayed. The area between the start and end points will be displayed in reversed black and white.
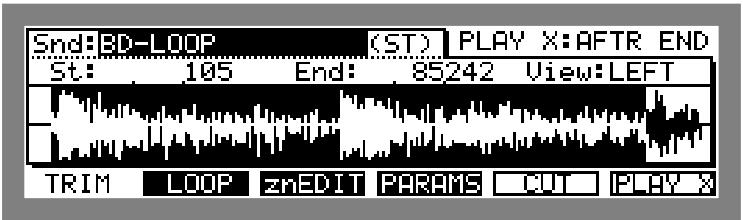
·5t.
Set the start point where you want to actually start generating the sample when you play back. Select the ^ field with the cursor and change the value with the DATA wheel. It is possible to change the value to an extremely large number by selecting the digit with the DIGIT wheel. It is also possible to directly enter a number with the numeric pad and confirm it by pressing the ENTER key.
End:
Set the end point where you want to actually end generating the sample when you play back. Select the Eric field with the cursor and change the value with the DATA wheel. It is possible to change the value to an extremely large number by selecting the digit with the DIGIT wheel. It is also possible to directly enter a number with the numeric pad and confirm it by pressing the ENTER key.
Uieo
If the sound is in stereo, select whether to display on LEFT or RIGHT.
To play back the currently selected sound at full velocity according to the PL_FY^ field on the top right of the screen, press F' [F6].
HLL This plays back the entire sound regardless of the start point or end point settings.
ZONE This plays back the range between the start and end point that has been set in the znEDIT screen.
BEFORE Zn This plays back the sound before the start point that has been set in the znEDIT screen.
AFTER Zn This plays back the sound after the start point that has been set in the znEDIT screen.
BEFOR ST This plays back the sound before the start point that has been set in the TRIM screen.
AFTER END This plays back the sound after the start point that has been set in the TRIM screen.
It is possible to adjust the start and end points while checking them.
Deleting Unnecessary Samples
To save memory space, it is possible to delete parts of the sample which will not actually be generated before the start point or after the end point.
In the TRIM mode screen, press CUT[F5] to display the CUT window.
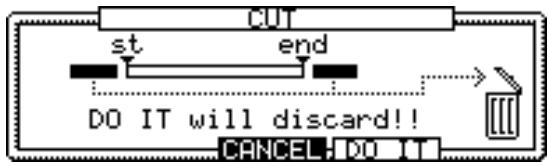
To delete the part, press D IT[F5].
Finely Adjusting the Start Point
Select the . field and press the OPEN WINDOW key to open the Start fine window.
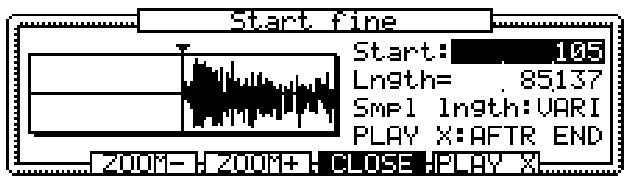
Here it is possible to finely adjust the start point.
- Start:
Set the start point. Change the value with the DATA wheel. It is possible to change the value to an extremely large number by selecting the digit with the DIGIT wheel. It is also possible to directly enter a number with the numeric pad and confirm it by pressing the ENTER key.
Lrath=
The length of the sample (from the start point to the end point) is displayed. You cannot change the value of this field.
-Smpl lnath:
This sets a fixed point from the start point to the end point or from the start point for the length of the sample.
VARI When the start point is changed, the end point remains fixed and the length of the sample changes.
FIX When the start point is changed, the length of the sample remains fixed and the end point moves.
It is possible to enlarge or reduce the sample wave display by pressing ZOOM+ [F3] or ZOOM- [F2]. Press ZOOM- [F2] to display the entire wave and set a rough start point then press ZOOM+ [F3] several times to make fine adjustments.
When PLAY [F6] is pressed, it is possible to play back the currently selected sound in full velocity according to the settings in the PLAY field. For details refer to "TRIM Mode."
Finely Adjusting the End Point
Select the End field and press the OPEN WINDOW key to open the End fine window.
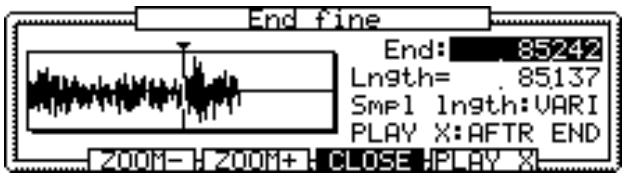
Here it is possible to finely adjust the end point.
End:
Set the end point. Change the value with the DATA wheel. It is possible to change the value to an extremely large number by selecting the digit with the DIGIT wheel. It is also possible to directly enter a number with the numeric pad and confirm it by pressing the ENTER key.
Length=
The length of the sample (from the start point to the end point) is displayed. You cannot change the value of this field.
-SmP1 1nath:
This sets a fixed point from the end point to the start point or from the end point for the length of the sample.
VARI When the end point is changed, the start point remains fixed and the length of the sample changes.
FIX When the end point is changed, the length of the sample remains fixed and the start point moves.
It is possible to enlarge or reduce the sample wave display by pressing + [F3] or - [F2] . Press - [F2] to display the entire wave and set a rough start point then press + [F3] several times to make fine adjustments.
When PLAY [F6] is pressed, it is possible to play back the currently selected sound in full velocity according to the settings in the PLAY field. For details refer to "TRIM Mode."
LOOP Mode
Set the loop of the sound. Set this mode to play loops such as a phrase sample.
Press TRIM (or 5 on the numeric pad) while holding SHIFT and display the LOOP mode screen by pressing LOOF[F2].
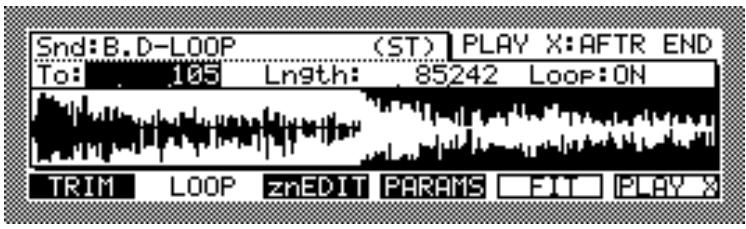
To:
This sets the turn of the loop. Select the T0# field with the cursor and change the value with the DATA wheel. It is possible to change the value to an extremely large number by selecting the digit with the DIGIT wheel. It is also possible to directly enter a number with the numeric pad and confirm it by pressing the ENTER key.
Length:
This sets the length of the loop. Select the Length field with the cursor and change the value with the DATA wheel. It is possible to change the value to an extremely large number by selecting the digit with the DIGIT wheel. It is also possible to directly enter a number with the numeric pad and confirm it by pressing the ENTER key.
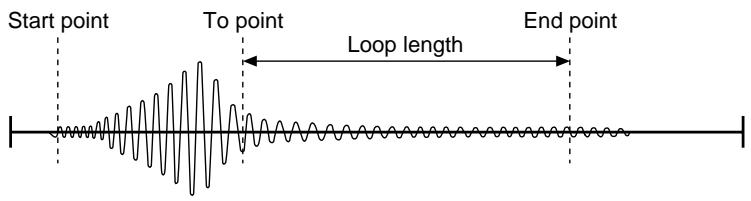
·Loop
This turns the loop ON or OFF.
Press F I T[F5] to display the Fit to length window.
This function enables you to set the loop to the same length as the sample set in TRIM mode. Press DQ IT [F5] in the Fit to length window to execute this function.
By pressing PLAY [F6] , the currently selected sound will play back at full velocity according to the settings in the PLAY field. For details refer to "TRIM Mode."
Finely Adjusting the Loop Point
Select the To field in LOOP mode or the Ln#th field and press the OPEN WINDOW key to open the Loop fine window.
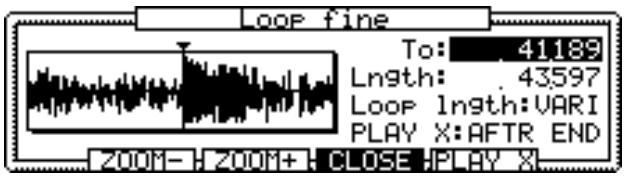
Here you can finely adjust the loop point.
·To:
This sets the point where the loop folds. Change the value with the DATA wheel. It is possible to change the value to an extremely large number by selecting the digit with the DIGIT wheel. It is also possible to directly enter a number with the numeric pad and confirm it by pressing the ENTER key.
Length:
This sets the length of the loop. Change the value with the DATA wheel. It is possible to change the value to an extremely large number by selecting the digit with the DIGIT wheel. It is also possible to directly enter a number with the numeric pad and confirm it by pressing the ENTER key.
- Loop Inirth:
This fixes the point (To point) where the loop folds at the end point or to the length of the loop.
UARI When the point where the loop folds is changed, the end point remains fixed and the length of the loop changes.
Fix When the point where the loop folds is changed, the length of the loop remains fixed and the end point moves.
It is possible to enlarge or reduce the sample wave display by pressing ZOOM+ [F3] or ZOOM- [F2]. Press ZOOM- [F2] to display the entire wave and set a rough point where the loop folds then press ZOOM+ [F3] several times to make fine adjustments.
When PLAY [F6] is pressed, it is possible to play back the currently selected sound in full velocity according to the settings in the PLAY field. For details refer to "TRIM Mode."
znEDIT Mode
This allows you to select and edit the sample zone.
·St.
This sets the first point in the zone to edit. Select the . field with the cursor and change the value with the DATA wheel. It is possible to change the value to an extremely large number by selecting the digit with the DIGIT wheel. It is also possible to directly enter a number with the numeric pad and confirm it by pressing the ENTER key.
End:
This sets the last point in the zone to edit. Select the End field with the cursor and change the value with the DATA wheel. It is possible to change the value to an extremely large number by selecting the digit with the DIGIT wheel. It is also possible to directly enter a number with the numeric pad and confirm it by pressing the ENTER key.
Uieo
This allows you to select between LEFT and RIGHT when the sound is stereo.
When PLAY [F6] is pressed, it is possible to play back the currently selected sound in full velocity according to the settings in the PLAY field.
HLL This plays back the entire sound regardless of the start point or end point settings.
ZONE This plays back the range between the start and end point that has been set in the znEDIT screen.
BEFOR Zn This plays back the sound before the start point that has been set in the znEDIT screen.
After Zn This plays back the sound after the start point that has been set in the znEDIT screen.
BEFOR ST This plays back the sound before the start point that has been set in the TRIM screen.
AFTER END This plays back the sound after the start point that has been set in the TRIM screen.
It is possible to adjust the start and end points while checking them.
Press EDIT[F5] to display the Zone edit window.
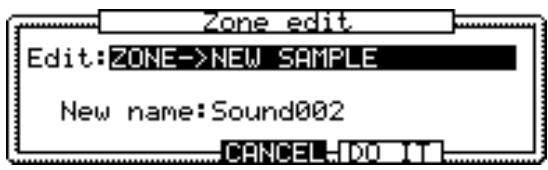
This edits the range selected on the ZONE mode screen according to the settings in the Edit field.
ZONE->NEW SAMPLE
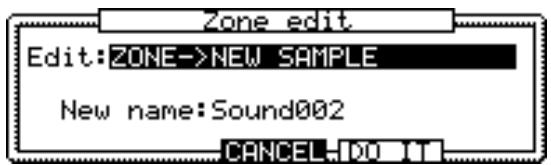
This creates a new sound by copying the range selected as a zone.
Set the sound name in the New name field and press DQ IT[F5] to execute.
INSERT Sound->ZONE START
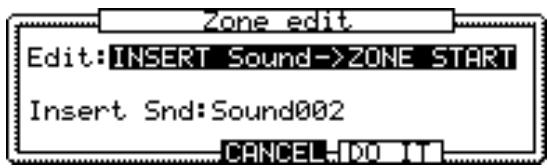
This inserts other sounds to the start point of the zone.
Select the sound you want to insert in the Insert. Snd: field and press D0 IT[F5].
DELETE ZONE
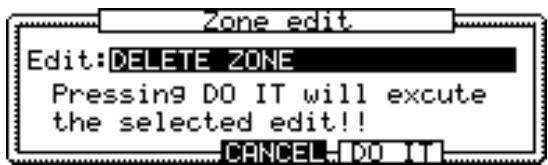
This deletes the range selected as a zone and moves the data after the end point towards the start point.
Press DQ IT[F5] to execute the DELETE ZONE command.
SILENCE ZONE
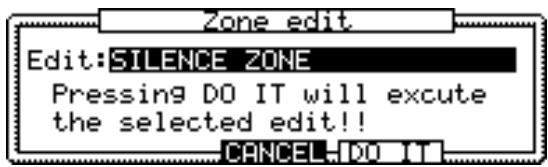
This erases and silences the range selected as a zone.
Press DQ IT[F5] to execute the SILENCE ZONE command.
REVERSE ZONE
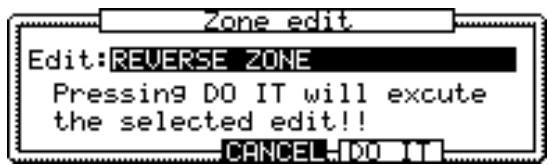
This reverses the range selected as a zone.
Press DQ IT[F5] to execute the REVERSE ZONE command.
Finely Adjusting the Start Point of a Zone
Select the - field in the znEDIT mode screen and press the OPEN WINDOW key to open the Zone start fine window.
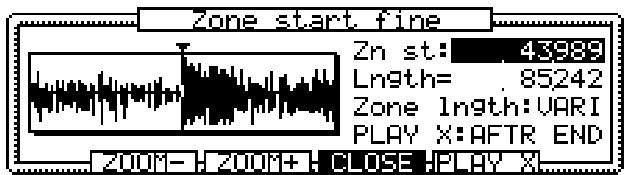
Here it is possible to finely adjust the start point of a zone.
·Zn st:
Set the start point of a zone. Change the value with the DATA wheel. It is possible to change the value to an extremely large number by selecting the digit with the DIGIT wheel. It is also possible to directly enter a number with the numeric pad and confirm it by pressing the ENTER key.
Lrath=
The length of the zone (from the start point to the end point) is displayed. You cannot change the value of this field.
·Zone 1nath:
This sets a fixed point from the start point to the end point or from the start point for the length of the zone.
VARI When the start point is changed, the end point remains fixed and the length of the zone changes.
FIX When the start point is changed, the length of the zone remains fixed and the end point moves.
It is possible to enlarge or reduce the sample wave display by pressing ZOOM+ [F3] or ZOOM- [F2]. Press ZOOM- [F2] to display the entire wave and set a rough start point then press ZOOM+ [F3] several times to make fine adjustments.
When PLAY [F6] is pressed, it is possible to play back the currently selected sound in full velocity according to the settings in the PLAY field. For details refer to "znEDIT Mode."
Finely Adjusting the End Point
Select the Erid: field in znEDIT mode and press the OPEN WINDOW key to open the Zone end fine window.
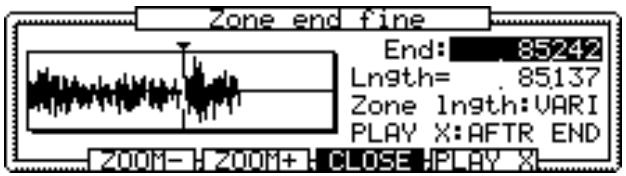
Here it is possible to finely adjust the end point.
End:
Set the end point. Change the value with the DATA wheel. It is possible to change the value to an extremely large number by selecting the digit with the DIGIT wheel. It is also possible to directly enter a number with the numeric pad and confirm it by pressing the ENTER key.
Length=
The length of the zone (from the start point to the end point) is displayed. You cannot change the value of this field.
- Zone 1nath:
This sets a fixed point from the end point to the start point or from the end point for the length of the zone.
VARI When the end point is changed, the start point remains fixed and the length of the zone changes.
FIX When the end point is changed, the length of the zone remains fixed and the start point moves.
It is possible to enlarge or reduce the sample wave display by pressing + [F3] or - [F2] . Press - [F2] to display the entire wave and set a rough start point then press + [F3] several times to make fine adjustments.
When PLAY [F6] is pressed, it is possible to play back the currently selected sound in full velocity according to the settings in the PLAY field. For details refer to "znEDIT Mode."
Setting the Sound Parameters
Set the sound parameters such as the volume or pitch of the sound. It is also possible to set the BEAT LOOP FUNCTION.
Press TRIM (or 5 on the numeric pad) while holding SHIFT and display the sound parameter screen by pressing PARAMS[F4].
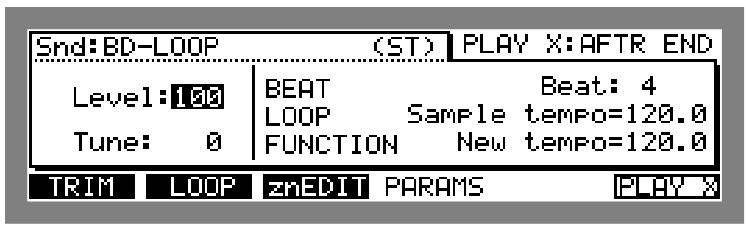
·Snd:
Use the DATA wheel to select the sound of which the parameters you want to set.
Level:
Sets the volume of the sound. Set the value with the DATA wheel or use the numeric pad to directly enter the number and confirm it by pressing the ENTER key.
Tune:
Sets the pitch of the sound. Changes made here will also change the length of the sound.
When PLAY [F6] is pressed, it is possible to play back the currently selected sound in full velocity according to the settings in the PLAY field. For details refer to "znEDIT Mode."
Beat Loop Function
Set the BEAT LOOP FUNCTION in the right side of the Sound Parameter Screen.
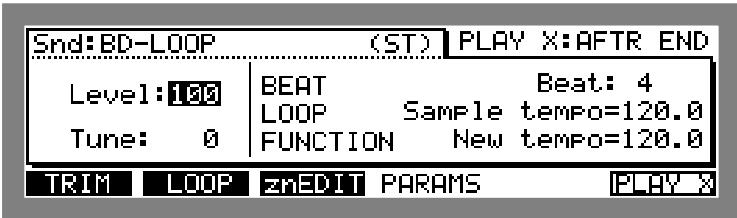
The BEAT LOOP FUNCTION executes phrase sampling and is used to synchronize the tempo of two phrase samples playing in a loop.
Phrases will start to slip out of synch when multiple phrase samples playing in a loop are overdubbed and played back in different tempo. In order to solve this, it is necessary to change the pitch of each sample and synchronize the tempo.
Since the Beat Loop function calculates the loop bar length, this setting does not affect one-shot sounds.
- Beat:
This sets the beat of the phrase sample playing in a loop. For example, in a four beat sample piece, if the length is four beats (to a bar), enter 4.
Sample tempo:
This synchronizes with the length of the loop. When the loop of the phrase sample is played to a precise beat, the original tempo of the sound is displayed.
New tempo:
The tempo of the sound is determined by the tune settings on the left. To synchronize the tempo with other sounds, refer to this field as you set the Tune® field on the left. To match the tempo of the two phrases, set New Tempo® in the Tune® field to the same value.
Chapter 9
Disk Operation
Overview
When the power of the MPC2000 is turned off, all of the data will be erased. If you have any necessary data, make sure you save the data to a disk before the power is turned off.
The MPC2000 data will be saved on the disk as a file and it is possible to name the file using up to 16 characters. There are mainly two types of disks that can be used for the MPC2000. One is the floppy disk using the internal floppy disk drive, and the other is a hard disk or other SCSI devices connected by SCSI jacks, including CD-ROM drives or MO disk drives.
The Device: Field
In disk mode, most of the screens contain a Device's field. This selects which disk to work on when you operate various functions in disk mode and should be set first.
The Device Icons
When you select the disk in the Device field in Disk mode, the following icons appear according to the type of disk selected.
Floppy

When Floppy is selected, the floppy icon appears. The display also indicates whether the disk is 2DD or 2HD.
Note: If the disk is not formatted, the MPC2000 will not be able to make an indication.
SCSI
There are various types of SCSI devices. The MPC2000 will display the icon according to the type of device connected to the MPC2000.

Other icons displayed are:

MPC2000

Delete. This appears when you are deleting a file or data.
Before Proceeding to Use a Floppy Disk
Do NOT press the disk eject button when you are using a floppy disk and the light of the disk drive on the front panel of the MPC2000 is on. The data or disk may be damaged or destroyed.
Formatting a Disk
In order to load or save a file to a floppy disk or an external SCSI drive, it is necessary to format the disk in order to use it with the MPC2000.
CAUTION:Once the disk is formatted, all the data within the disk will be erased.
Formatting a Floppy Disk
- Insert the floppy disk into the disk drive of the MPC2000 and press DISK (3 on the numeric keypad) while holding down the SHIFT key and enter Disk mode. The format screen will appear when you press FORMAT[F4].
- By selecting Floppy in the Device field, the following screen will appear.
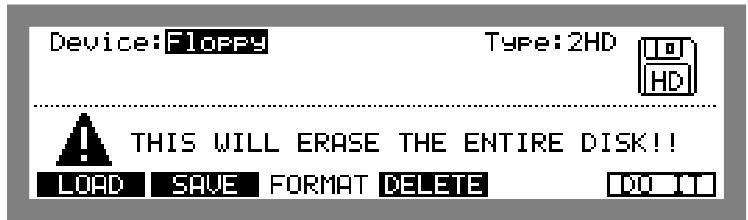
- Select the type of disk in the T HFE field. the MPC2000 can use both 2DD and 2HD floppy disks, but cannot differentiate between the two if the disk is not formatted. Make sure the correct type is selected in the T HFE field.
- By pressing D'O IT[F5], the following window appears.
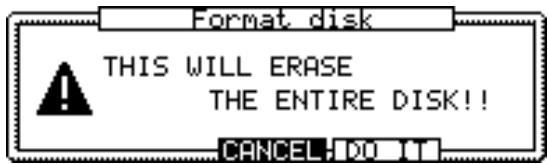
- By pressing D O I T[F5], the disk will be formatted.
Formatting a SCSI Drive
- Connect the MPC2000 to an external SCSI drive using SCSI connectors. For details on how to connect an external SCSI drive, refer to "Connecting an External SCSI Drive."
- Press DISK (3 on the numeric keypad) while holding down the SHIFT key to enter Disk mode. The format screen appears when you press FORMAT[F4].
- Select the ID of the SCSI drive in the Device field.
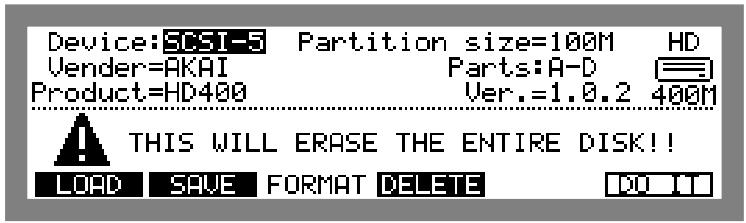
The Vendor = , Product = , Ver_n = fields will display the unique data of the selected disk drive. The total disk capacity will appear under the icon on the far right.
- Set the partitioning. When you are using a large disk such as a hard disk, it is easier to manage the files by dividing the disk space. The divided parts are called partitions and are named in alphabetical order. The Partition size = field will display each partition set in the Parts: field.
When A-A is selected in the Par-t. field, the disk will not be partitioned. When A-D is selected in the Par-t. field, the disk will be divided into four partitions: A, B, C, and D. The disk space will be equally divided. In the above illustration, the total disk space is 400 Mega, and therefore, each partition space is 100Mega.
If a disk such as a CD-ROM cannot be written to is selected in the Device* field, Disk write error will appear, and the disk will not be formatted.
Note: MPC2000 is not compatible with the 1024K sector MO disk.
Saving the Data
When the power of the MPC2000 is turned off, all of the data will be erased. If you have any necessary data, make sure you save the data to a disk before the power is turned off.
There are various types of files on the MPC2000 and are labeled by different extensions depending on the type of file.
ALL A file with 99 sequences and 20 songs.
SEQ A sequence file.
_.APS All of the program on the MPC2000 memory when saved. The sounds in the memory will be saved as a separate sound file when the APS file is saved. The APS only contains program data, but when a file is loaded, the sounds used by the program will be loaded as well.
___. PGM A program file. When a PGM file is saved, it will only contain program data, but when a file is loaded, the sounds used by the program will be loaded as well.
.SND A sound file.
- Press DISK (3 on the numeric keypad) while holding down the SHIFT key to enter disk mode. Press SAVE[F2] to display the save screen.
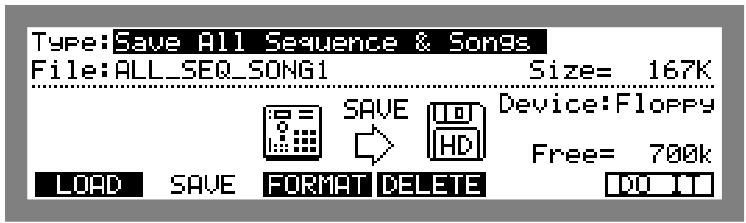
- Select the disk to which you will be saving the data in the Device field. If you are saving to a floppy disk, select FloPP. If you are saving the data to an external SCSI drive, select the appropriate SCSI ID.
Note: When SCSI is selected in the Device field, the screen will display a Part. field.
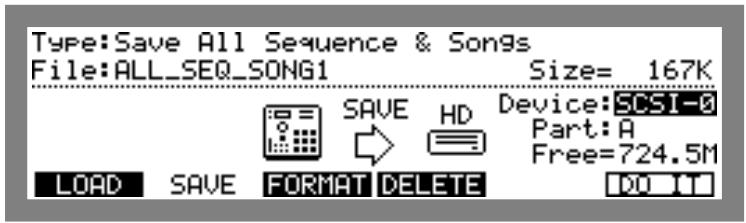
Select the partition you want to save.
- Select the type of data you want to save in the Type field. The operation will differ slightly depending on the selected type.
4-1. Save All Sequence & Songs
This saves all the sequence and song data on the MPC2000 memory.
Select Save All Sequence & Songs. The file name will appear in the File: field.
Press DQ IT[F6].
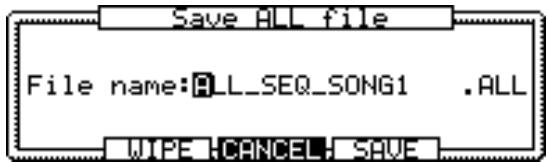
It is possible to change the file name you are saving in the F i l e* field.
Press the CURSOR LEFT or RIGHT key or use the DIGIT wheel to move the cursor and enter the characters using the DATA wheel. It is also possible to enter directly from a drum pad. When the pad is pressed, the letter displayed on the top right of the pad will be entered. For example, to enter A, press PAD1 once and to enter B, press PAD1 twice. It is possible to enter a space with the 16 LEVELS key. To switch between lower and upper case, press the PAD BANK key.
After entering a name, press the ENTER key to confirm. If you save without pressing the ENTER key, the entered name will be ignored and the file will be saved under the previous name.
4-2. Save a Sequence
This saves a sequence data within the MPC2000 memory. THE MPC2000 sequence data will be saved as a standard MIDI file. Select Save a Sequence and select the sequence you want to save in the File field.
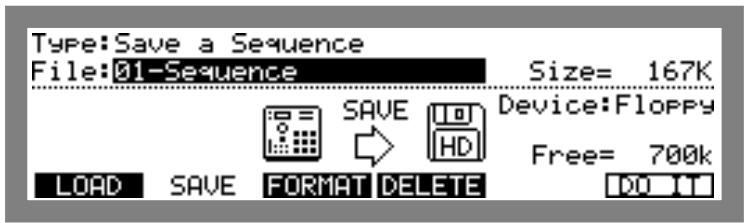
Press DQ IT[F6].
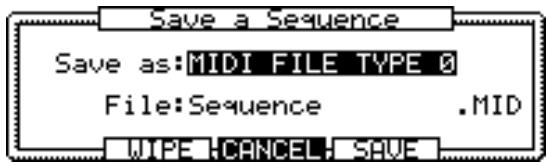
Select the type of standard MIDI file in the Save as field.
MIDI FILE TYPE 0
The sequence data will be saved together on one track. The MPC2000 proprietary track data such as the track name will be erased.
MIDI FILE TYPE 1
In contrast to MIDI FILE TYPE 0, the data saved in this format will reproduce the conditions of the data. Normally select TYPE 1.
The selected file name will appear in the F i 1 e: field.
4-3. Save All Program & Sounds
This saves all the programs and sounds within the MPC2000 memory.
Select Save All Program & Sounds. The File: field will display the file name to be saved.
Press DQ IT[F6].
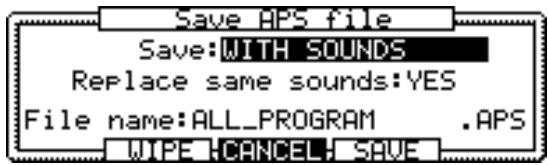
Select whether or not to also save the sound in the Save field.
When WITH SOUND is selected, the sound will also be saved.
If you select YES in the Replace Same sound field, the sound data saved will erase the file in the disk and save a new file if a sound file saved from the disk of the same name is found. If you select HQ, and a sound file saved from the disk has the same name, it will not be loaded.
It is possible to change the file name you are saving in the F i l e name^# field.
4-4. Save a Program & Sounds
This saves a program within the MPC2000 memory.
Select Save a Program & Sounds. Select the program you want to save in the File field.
Press DQ IT[F6].
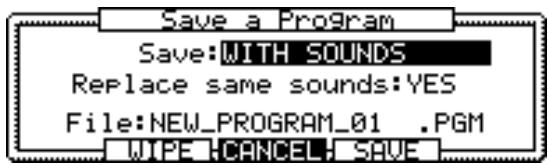
Select whether or not to also save the sound in the Save field.
When WITH SOUND is selected, the sound will also be saved.
If you select YES in the Replace Same sound field, the sound data saved will erase the file in the disk and save a new file if a sound file saved from the disk of the same name is found. If you select HQ, and a sound file saved from the disk has the same name, it will not be loaded.
The file name of the program being saved will appear in the File field.
4-5. Save a Sound
This saves each sound within the MPC2000 memory.
Select Save a Sound. Select the sound you want to save in the File: field.
Press DQ IT[F6].
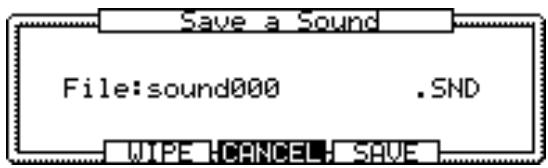
The file name of the sound being saved will appear in the F i l e: field.
Note: Copy Operating System requires different procedures and will be described separately.
5-1. Press WIFE[F3] to display the following window.
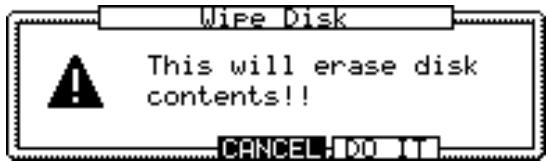
Press DQ IT[F5] to erase all the data on the disk and save.
5-2. Press SAUE[F5] to execute save.
Saving Across Multiple Floppy Disks
In cases such as Save All Program & Sounds, where a large quantity of data is being saved on a floppy disk, one disk may not be enough. In this case, the following window will appear when there is not enough space left on the disk after the first disk becomes full.
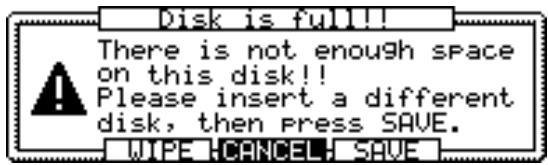
Insert a new floppy disk here. If it is possible to erase all the data on the newly inserted disk, press WIFE[F3]. The Wipe Disk window will appear, and by press DO IT[F5] the contents of the disk will be erased and the rest of the data will be saved. If you do not want to erase the contents of the newly inserted disk, press SATE[F5] on the Disk is full!! window to save the data to the remaining disk space.
When the Disk is full!! window is displayed, the Change disk to continue!! message will appear if you do not change the disk and press WIPE[F3] or SAVE[F5]. In this case, insert a new disk and press WIPE[F3] or SAVE[F5].
Note: If you are saving data to a SCSI drive, the disk must be MPC2000 formatted in order to save data from the MPC2000. You also cannot execute save if the disk selected in the Device field is a disk that cannot be written to such as the CD-ROM.
Copying a System Disk
The MPC2000 requires operating system software to turn the power on in the same way as personal computers. Personal computers have operating systems on the hard disk which is automatically loaded when the power is turned on. In the case of MPC2000, the operating system software is stored on the system disk and it is always necessary to use the system disk when you are turning the power on. The system disk is essential in operating the MPC2000 and it is therefore recommended to have several copies of the operating system.
The MPC2000 operating system file consists of MPC2000.EXE and the MPC2000.SYS. Both files are necessary in order to operate the MPC2000. These two files will be copied when you copy the system disk. These two files will be regarded as the "operating system files" hereunder in this manual.
Also, by copying the system on devices such as hard disks connected by a SCSI cable, it is also possible to start the MPC2000 from the hard disk.
CAUTION: Always copy the operating system from the floppy disk. It is not possible to copy the operating system copied to devices such as the hard disk using the MPC2000.
- Press DISK (3 on the numeric keypad) while holding down the SHIFT key to enter disk mode. The save screen will appear when SAVED [F2] is pressed.
- Select Copy Operating System in the Type field and insert the system disk you want to copy in the disk drive of the MPC2000. Press DO IT[F6] to load the operating system file.
Note: By pressing DO IT [F6], the MPC2000 will temporarily load the operating system file to a sequence memory. The following window will appear if there is no sequence memory space.
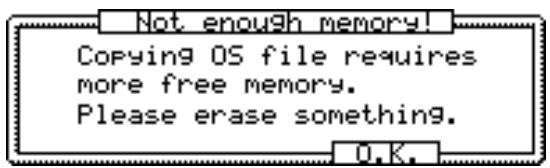
Press [F5] to return to the save screen in disk mode, delete sequence data from the memory and try again. If the operating system file cannot be found in the disk inserted to the disk drive, the message "wrong disk!!" will appear. Make sure you have chosen the correct disk and try again.
- Once the operating system file is loaded, the following window will appear.
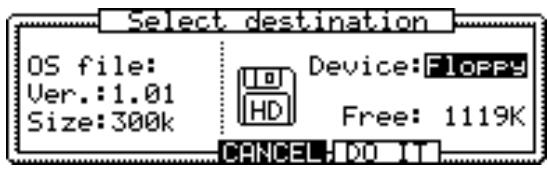
The left side of the window will display the data of the loaded operating system file.
Select the copy destination disk in the Device field.
Select FloPP in the Device field and press DO IT[F5] to display the following window.
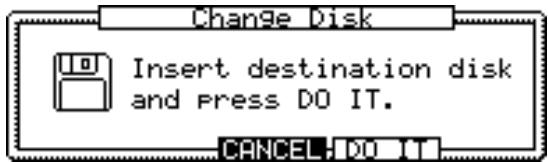
Remove the system disk and insert the copy destination disk into the MPC2000 disk drive.
Note: The copy destination disk must be formatted in advance.
When SCSI is selected in the Device field, press DQ IT[F5] to copy.
Starting the MPC2000 from a SCSI Drive
By copying the operating system file on an external SCSI drive such as a hard disk, it is possible to start the MPC2000 without a system disk floppy.
- Save the operating system to an external SCSI drive according to the aforementioned procedure.
By turning the power of the external SCSI drive on and turning the power of the MPC2000 on, the MPC2000 first searches the floppy disk and then the external drivers starting from SCSI ID 0.
The MPC2000 will start loading the operating system once the system file is found.
The Auto-load Functions of the .APS and .ALL Files
It is possible to store the operating system and other files on the same disk. By copying the operating system on a disk with .APS or .ALL files, it is possible to automatically load these files as the MPC2000 is starting after the system has been loaded from this disk.
Loading Files
The following files can be loaded from a disk on the MPC2000:
_SND Sound file.
SEQ Sequence file.
ALL All sequence and song files.
.MIDI Standard MIDI file.
.PGM Program file.
_____.APS Multiple programs.
.WAV PC wave file.
- Press DISK (3 on the numeric keypad) while holding down the SHIFT key to enter disk mode and display the following load screen.
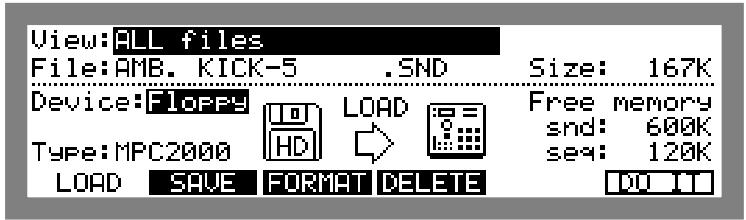
-
Select the disk you want to load to in the Device's field. If you are saving to a floppy disk, select Floppy. If you are saving data to an external SCSI drive, select the appropriate SCSI ID.
-
Type:
Displays the data of the drive selected in Device#.
MPC2000 A MPC2000 formatted disk.
MPC3000 A MPC3000 disk.
S3000 An S3000 disk.
S1000 An S1000 disk
FC An MS-DOS formatted disk.
An unformatted disk or an incompatibly formatted disk.
Size
Displays the data size of the file selected in the F i 1 ∈: field.
Free memory and:
The free sound memory space on the MPC2000.
Free memory san
The free sequence memory space on the MPC2000.
Note: When SCSI is selected in the Device field, the Part field appears on the screen.
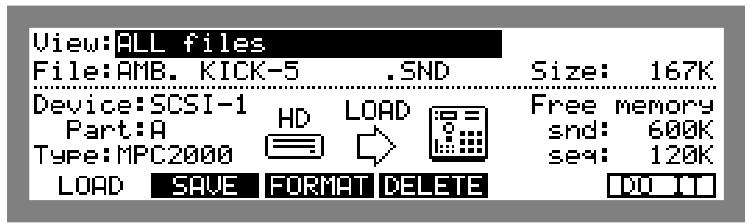
Select the partition you want to load.
If you are using a disk with a large amount of disk space, such as a hard disk, it is easier to manage the files by dividing the disk space. Set the partitions after the disk has been formatted.
If you are loading CD-ROM data used for S1000 or S3000, the field will appear on the right of the field.
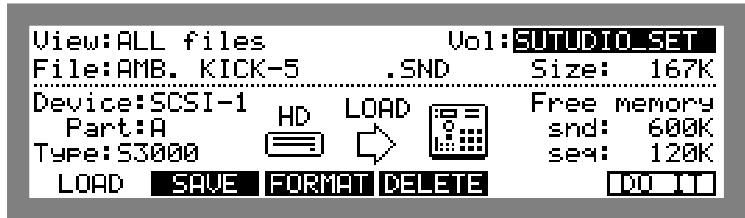
The S1000 or S3000 disk is divided into partitions and then to smaller units called volume. When you are selecting a file to load, select a partition in the Part# field, a volume in the Vol# field, and the sound in the File# field.
It is possible to select the file type you want to display in the File field of View field. It is possible to select a specific extension in the View field. This enables you to display only the files with the extension selected in the View field in the File field. This is convenient to find a file when there are many files on a disk.
- Select the file you want to load in the F i 1 field. The procedures differ slightly depending on the type of file selected.
4-1. Selecting .SND (sound) Files or .WAV (wave) Files
Press D0 IT[F6] to load a sound file. The following window appears when the loading is completed.
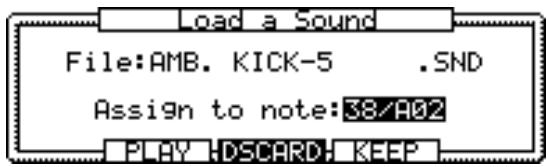
The file name of the loaded sound will appear in the File field.
Press F'LI'F3] to listen to the loaded sound.
Select the note number or drum pad you want to assign the loaded sound to in the Assign to note field. It is possible to rotate the DATA wheel or select directly by playing the pad.
Select --OFF by rotating the DATA wheel if you do not want to assign the sound to a note number.
Press KEEP[F5] to assign the loaded sound to a drum pad.
If you do not wish to keep the loaded sound, press DISCARD[F4] to discard the loaded data.
4-2. Loading .SEQ (sequence) or .MID (standard MIDI) Files
Press DQ IT[F6] to load the file. The following window appears when the loading is completed.
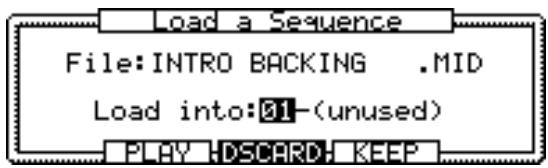
The file name of the loaded file will appear in the F i l e: field. Press F L H Y [F3] to listen to the loaded file.
Select the sequence number to which you want to assign the sequence data to in the Load into: field.
Press KEEP[F5] to assign the loaded file to the sequence number.
If you do not wish to keep the loaded file, press DISCARD[F4] to discard the loaded data.
4-3. Loading .PGM (program) Files
When a program file is loaded, the selected program and the sounds assigned to the program will be loaded.
Press DQ IT[F6] to display the following window.
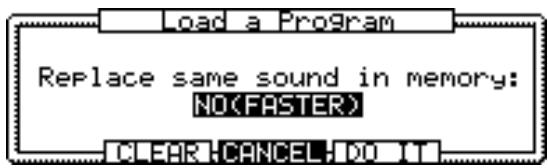
The Replace same sound in memory field sets whether you will replace the same sound on the MPC2000 memory with the sound on the disk if the sound assigned to the loaded program already exists. If this is set to 'YES', all of the data on the disk with the same name will replace the sounds on the MPC2000 memory. If this is set to NO, the sounds with the same name will not be loaded and the sounds on the MPC2000 memory will be used.
Press CLEAR[F3] to erase all the program and sound data within the memory and load.
Press DQ IT[F5] to load the selected program as a new program. When the load is completed, the loaded program will be selected, allowing you to play the drum pads.
CAUTION:The following window will appear when you are loading a program and a sound file assigned to that program cannot be found.
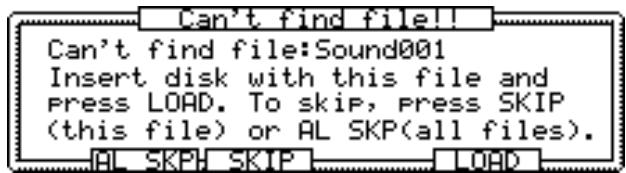
Insert the disk with the sound displayed in the Can't find file: field and press LOAD [F5].
If you have saved across multiple floppy disks, insert the next disk and press LOAD [F5].
If you press SKIP [F3], the sound that cannot be found will be skipped and the next sound file will be loaded. If another sound file is not found, the above window will appear again.
Press AL SKP [F2] to cancel the loading of further sound files.
4-4. .ALL Files
Press DQ IT[F6] to display the following window.
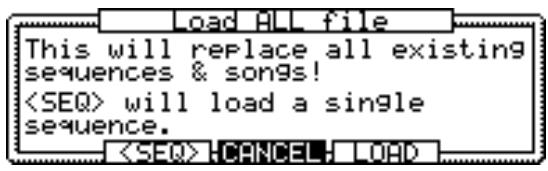
Press LOAD[F5] to load all sequence and song files. Be careful, since all of the sequence and song file data within the memory will be erased.
Press
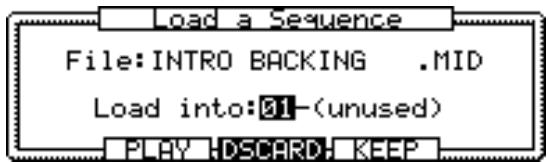
The procedure here is the same as "Loading .SEQ (sequence) or .MID (standard MIDI) Files."
4-5. .APS (all programs) File
The programs and the sounds assigned to the program will be loaded when you are loading an .APS file.
Press DQ IT[F6] to display the following window.
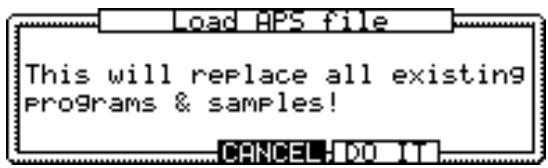
Press LOAD[F5] to load the program and sound files. Be careful, since all of the program and sound data within the memory will be erased.
Deleting a File from the Disk
It is possible to select and delete a file from the disk.
- Press DISK (3 on the numeric keypad) while holding down the SHIFT key to display the Disk mode and press DELETE[F5] to display the Delete mode screen.
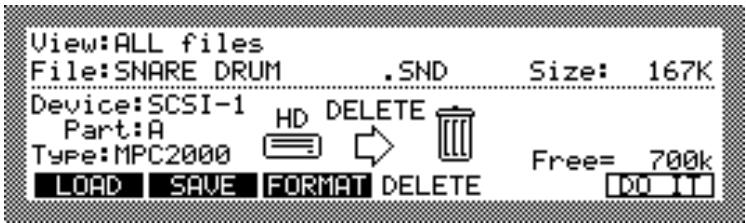
-
Select the disk in which the file you want to delete is in the Devices' field. If you are deleting a file on the floppy disk, select Floppy. If you are deleting a file on an external SCSI drive, select the appropriate SCSI ID.
-
Type:
Displays the data of the drive selected in Device:
MPC2000 A MPC2000 formatted disk.
MPC3000 A MPC3000 disk.
S3000 An S3000 disk.
S1000 An S1000 disk
PC An MS-DOS formatted disk.
An unformatted disk or an incompatibly formatted disk.
Note: If you are saving data to a SCSI drive, the disk must be MPC2000 formatted in order to save data from the MPC2000. You also cannot execute save if the disk selected in the Device's field is a disk that cannot be written to such as the CD-ROM.
·Size:
Displays the file size of the file selected in the i 1 e: field.
It is possible to select the file type you want to display in the File field of View field. It is possible to select a specific extension in the View field. This enables you to display only the files with the extension selected in the View field in the File field. This is convenient to find a file when there are many files on a disk.
File: Select the file you want to delete in the field and press D0 IT[F6] to display the confirmation window. Press D0 IT[F5] to delete.
Chapter 10
MIDI/SYNC Mode
OTHER Mode
MIDI/SYNC Mode
The MPC2000 complies to MIDI CLOCKÅAMIDI TIME CODE ÅAMIDI MACHINE CONTROL synchronous messages. This enables you to synchronize with other sequencers and also by using a MIDI MACHINE CONTROL compliant MTR (Multi Track Recorder) control the MTR from the MPC2000.
If you are only using the MPC2000 or connecting it to a MIDI sound source and using another sequencer or MTR, it is not necessary to set the channel.
Synchronizing the MPC2000 with Other Sequencers
To set another sequencer as a master and synchronize the MPC2000 to it, connect the MIDI OUT of the sequencer and the MIDI IN of the MPC2000.
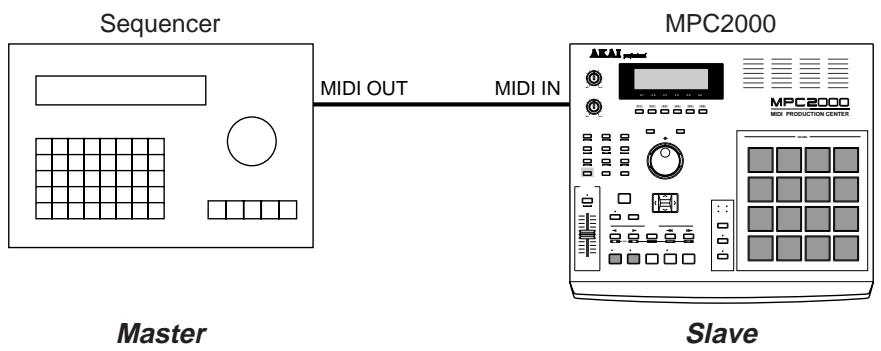
Press MIDI/SYNC (9 on the numeric pad) while holding down the SHIFT key to display the MIDI/SYNC mode screen.
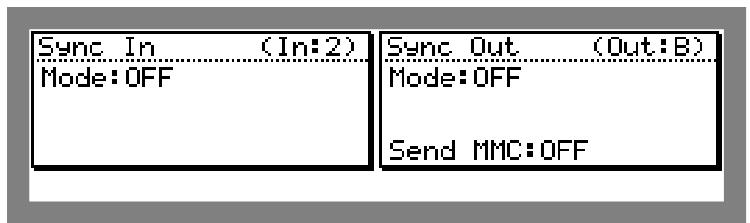
To set the MPC2000 as the slave device and receive MIDI synchronous signals, set the S-irc. Ir window on the left.
In the I r i field, select the MIDI Input which you will be receiving sync-in data.
In the Mode field, select the type of synchronous signal you will be using: the MIDI CLOCK or MIDI TIME CODE.
MIDI CLOCK
MIDI CLOCK is a general synchronization signal which corresponds to most sequencers. When the MIDI CLOCK is used, the tempo of the piece is determined by the settings of the master sequencer.
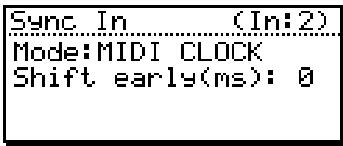
Shift early (me):
When you are playing synchronously, set the offset which slides the timing against the master. Set it normally to 0.
MIDI TIME CODE (MTC)
In contrast to the MIDI CLOCK, the MIDI TIME CODE is a synchronous signal with absolute time. The MTC does not have tempo data and therefore it is necessary to set the tempo change on the master device and the MPC2000.
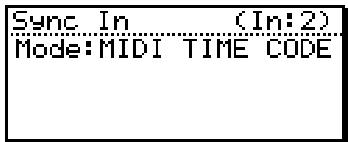
When synchronizing the MTC, it is necessary to set the same frame rate to the master and slave devices. It is also possible to set the start time of the sequence or song when synchronizing the MTC. Set the sequence on the main screen and the song by pressing the OPEN WINDOW key in the Now field of the Song screen and set the window displayed below.

SMPTE start time: The playback starts when the time code set here is received.
SMPTE frame rate: Sets the frame rate of the time code.
OFF
The MIDI synchronous signal is ignored when this is set to Mode: OFF.
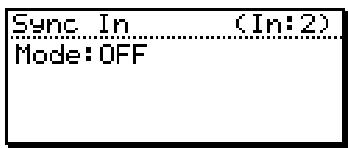
Synchronizing Another Sequencer or MTR to the MPC2000
To set the MPC2000 as a master and synchronize another sequencer to it, connect the MIDI OUT of the sequencer and the MIDI IN of the MPC2000.
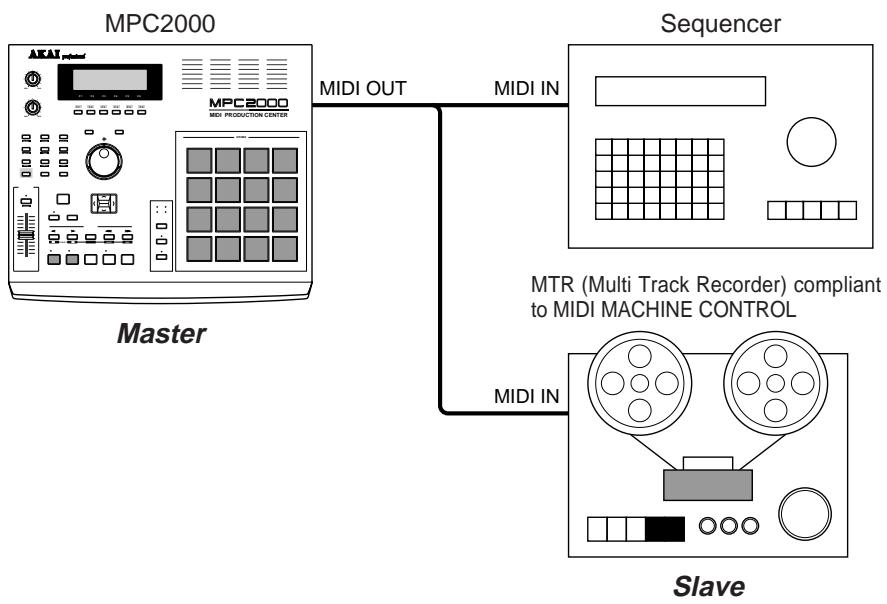
CAUTION: It is necessary to use an MTR (Multi Track Recorder) compliant to MIDI MACHINE CONTROL in order to synchronize it with the MPC2000.
Press MIDI/SYNC (9 on the numeric pad) while holding the SHIFT key to display the MIDI/SYNC mode screen.
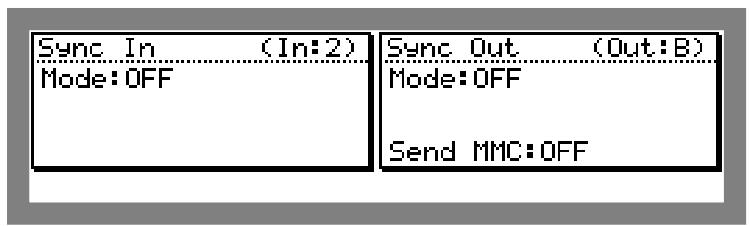
To set the MPC2000 as a master and send synchronous signals to the MIDI, set the Ssync Out window on the right.
First, in the . field, select the MIDI Output channel to which you will output the synchronization data.
In the Mode field, select the type of synchronous signal you will be using the MIDI CLOCK or MIDI TIME CODE.
MIDI CLOCK
MIDI CLOCK is a general synchronization signal which corresponds to most sequencers. When the MIDI CLOCK is used, the tempo in the MPC2000 will control another sequencer.
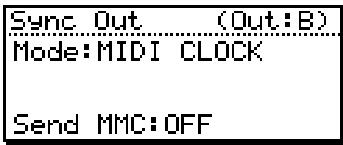
MIDI TIME CODE (MTC)
In contrast to the MIDI CLOCK, the MIDI TIME CODE is a synchronous signal with absolute time. The MTC does not have tempo data and therefore it is necessary to set the tempo change on the master device and the MPC2000.
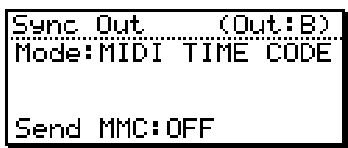
When synchronizing the MTC, it is necessary to set the same frame rate to the master and slave devices. It is also possible to set the start time of the sequence or song when synchronizing the MTC. Set the sequence on the main screen and the song by pressing the OPEN WINDOW key in the How field of the Song screen and set the window displayed below.
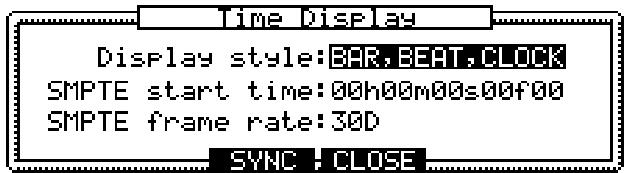
SMPTE start time: The playback starts when the time code set here is received.
SMPTE frame rate: Sets the frame rate of the time code.
Send MNC:
This allows you to send MIDI Machine Control.
OFF
The MIDI synchronous signal is ignored when this is set to Mode: OFF.

OTHER Mode
Set the tempo with the TAP TEMPO key and initialize the data. It is also possible to check the version of the MPC2000 operating system.
OTHERS Screen
Press the OTHER (8 on the numeric pad) while holding down the SHIFT key to display the OTHER mode.
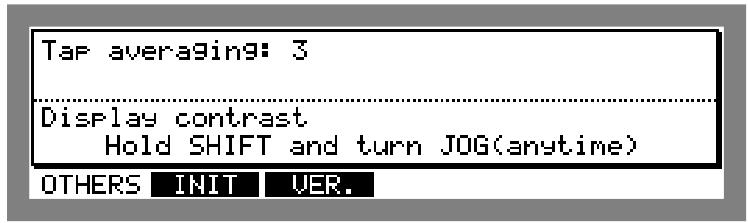
- Tar averaging:
Hit the TAP TEMPO to set the tempo. The MPC2000 sets the tempo to the average of the tempo tapped.
When you determine the tempo with the TAP TEMPO key, set the number of taps used to calculate.
When this is set to a large value, it is possible to get an exact tempo. However, this does not respond to rapid changes in the tempo.
When this is set to a small value, the function will be able to cope with rapid changes in the tempo, but the unevenness of the displayed tempo will increase.
Rotate the DATA wheel while holding down the SHIFT key to set the contrast of the LCD. It is possible to change this regardless of the displayed mode.
INIT Screen
Press OTHER (8 on the numeric pad) while holding down the SHIFT key to display the OTHER mode screen and press INIT[F2] to display the INIT screen.
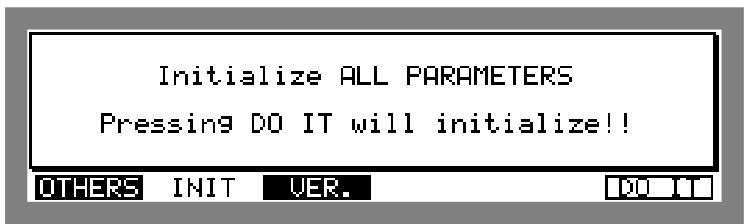
Erase the data on the MPC2000 memory and initialize the parameters.
VER. Screen
Press OTHER (8 on the numeric pad) while holding down the SHIFT key to display the OTHER mode screen and press _# [F3] to display the Version screen.
The version of the operating system currently loaded on the MPC2000 is displayed.
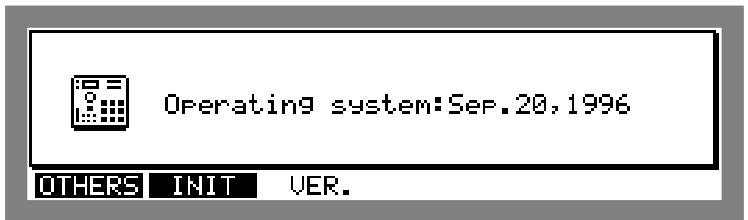
Appendix
Notes on Using SCSI Drives Connecting an External SCSI Drive
SCSI devices (hard disk drives) are connected as follows:
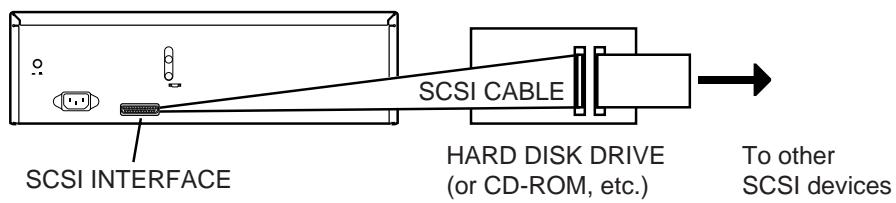
The MPC2000 uses a 25-pin SCSI connector to load or save data to such devices such as the hard disk connected by a SCSI cable. By setting the SCSI ID, it is possible to connect multiple SCSI devices on the same SCSI bus. When multiple SCSI devices are connected to the MPC2000, it is possible to select the disk you want to work with using an ID number.
CAUTION: Although many types of SCSI drives such as hard disks are available, not all can be connected to the MPC2000. Consult the dealer about the types that can be used.
SCSI Cables
Always use high quality SCSI cables. Using cheaper SCSI cables may seem an attractive proposition, especially if you have a tight budget but low quality cables can give rise to data errors.
The SCSI connection requires that every connection is individually grounded. There are two main types of SCSI cable you can buy. One is the 'moulded' type with moulded connectors either end and a round cable. The other type are flat 'ribbon' cables. This type of cable is really intended only for use inside devices.
Some moulded cables only have a single ground for all the connections and so can be unreliable. They are probably fine when used with a computer for loading small documents such as word processor files, etc., but with the large amounts of sample data used on the MPC2000, we have had reports of them causing problems.
The flat ribbon cables, however, have individual grounding for each connection and so are generally more reliable but, because they are intended for use inside devices (where they are separately screened), they sometimes have insufficient screening which may cause data noises to appear in your audio signal path when any disk activity is going on, especially if your audio connections run parallel with the SCSI lead. However, if this is not a problem for you (and in a studio it may not be), these cables are usually very good and usually perform much more reliably. In a live situation, however, they are probably not ideal.
SCSI ID
Make sure the SCSI ID of a SCSI device connected to a SCSI bus is unique. For example, the ID of the MPC2000 is 6 and the ID of the other devices connected should not be set to 6. To set the ID of external SCSI devices connected, check the manual of that device.
Termination
A chain of SCSI devices must be terminated at either end and terminating resistors are fitted to most SCSI devices when you buy them. The MPC2000's SCSI interface is terminated. It is most likely that the MPC2000 will be at one end of the chain and so must be left terminated. Any disks in between the MPC2000 and the last SCSI device in the chain must be un-terminated (this can be done by physically removing the resistors or sometimes via a DIP switch on the back of the unit - please check the unit's documentation). The last device in the chain must be terminated.
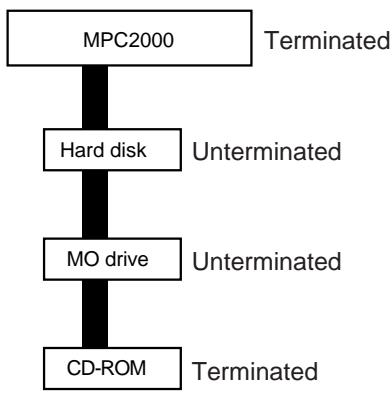
Incorrect termination may give rise to data errors and possibly corrupted data so please ensure it is done correctly. If you have any doubts, please contact your dealer who will be able to help.
Cable Length
The SCSI specification states that the total length of the SCSI chain must not exceed 6 metres. "Total length" means the length of the whole chain between the first and the last device and not the length of the cable between each of devices. SCSI chains that are longer than the specified length may cause data errors and possibly corruption of data.
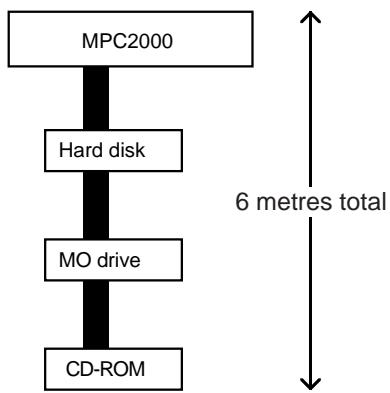
Installing the Options-To Service Technicians
CAUTION: These servicing instructions are for use by qualified personnel only. To reduce the risk of electric shock, do not perform any of servicing other than that contained in the Operating instructions unless you are qualified to do so. Refer all servicing to qualified service personnel.
The MPC2000 can accommodate several options. These are the IBM208P 8 individual outputs digital I/O, the SMPTE I/O, the EB16 multi-effects processor and memory expansion.
Important Note:
Consult your AKAI Professional dealer on installation of any options (including memory) to the MPC2000. Self-serving may cause malfunction of components or the instrument itself. Akai does not guarantee against the unit's malfunction, damage or any loss caused by self-servicing or improper operation.
Location of MPC2000 Option Board
SMPTE Board (IB-M20T), Effect Board (EB16), Flash ROM (FMX008M), 8 PARA out (IB-M208P)
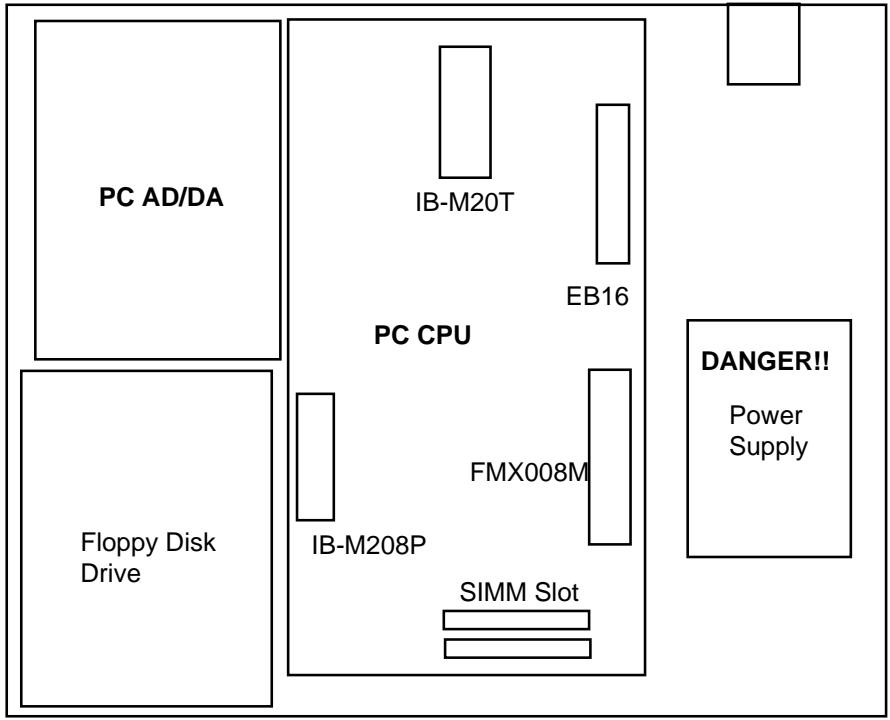
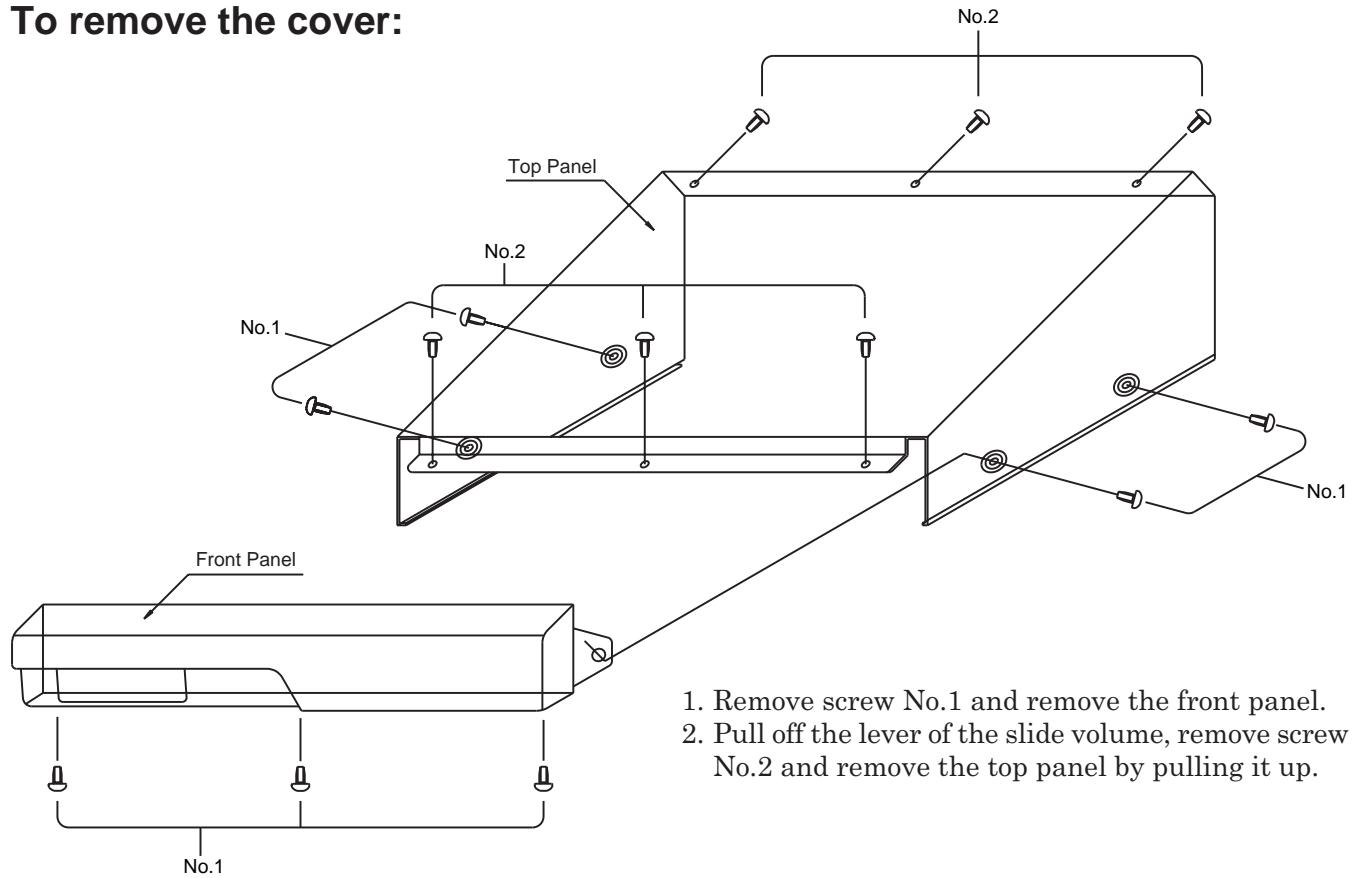
To remove the cover:
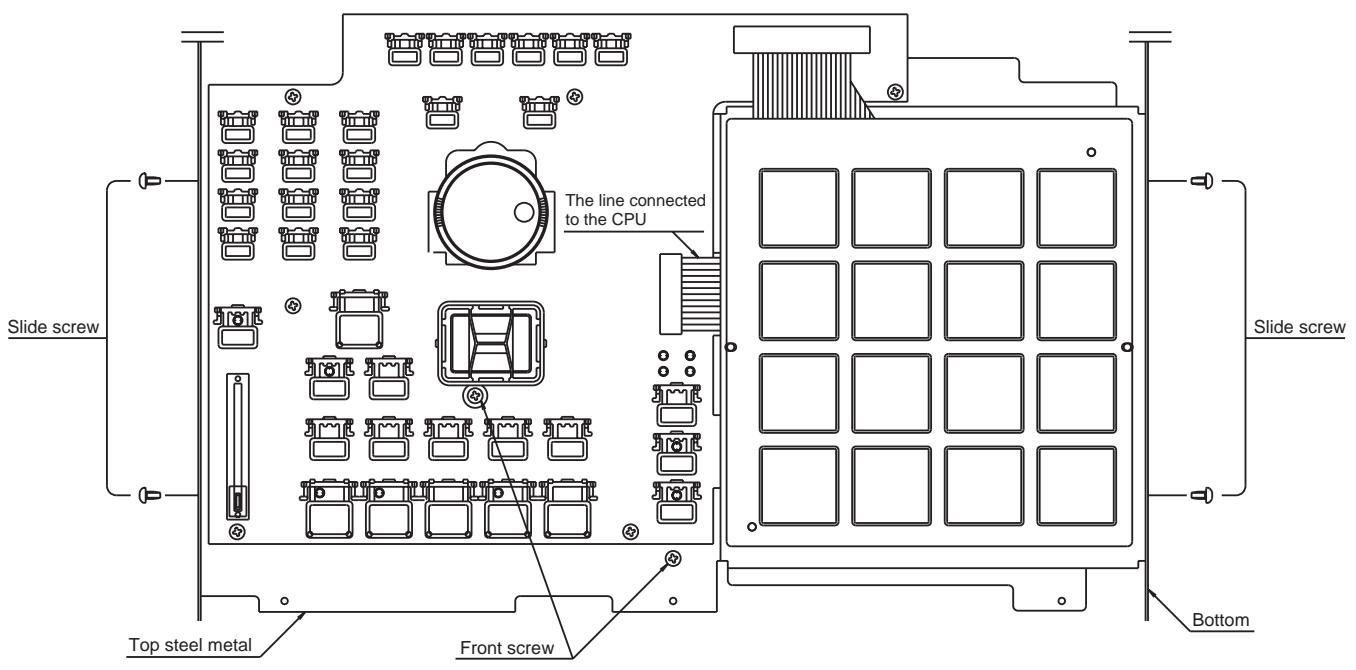
To remove the operation panel:
- Remove the four screws on the MPC2000, the four front screws and pull off the top steel metal leaving the foundation on.
- Do not forget to remove the line connected to the CPU from the foundation of the operation when you are pulling the top steel metal.
Installing Memory Expansion
The MPC2000's internal memory can be expanded to 32Mbytes using SIMMs. The MPC2000 comes with 2Meg of memory 'hardwired' and there are two slots in which you can install SIMMs chips. The SIMMs board is inserted at a slight angle and then pushed back where it clips into place. Because SIMMs boards can differ, it is not possible for us to say "Install them with the components facing the front of the MPC2000" or anything like that because some SIMMs boards have the memory chips mounted on both sides sometimes. However, the boards can only be inserted one way so you shouldn't have any problems but be careful not to force them into place otherwise they may snap.
SIMMs operate a different speeds. SIMMs that operate at at a speed of 70nS (nanoseconds) are recommended.
SIMMs also come in various sizes. Please note the following memory configurations that are possible in the MPC2000.
| Internal | SIMMs Slot 1 | SIMMs Slot 2 | TOTAL |
| 2M | None | None | 2M |
| 2M | 4M | None | 6M |
| 2M | 4M | 4M | 10M |
| 2M | 16M | None | 18M |
| 2M | 16M | 4M | 22M |
| 2M | 16M | 16M | 32M* |
- When 2 x 16M SIMMs are installed, the 2Meg on the CPU board is ignored.
Note: Memory chips are sensitive to static electricity. Please observe the following safety precautions:
- Unplug the MPC2000 before installing the board(s).
- The SIMMs may come with a special wrist strap to discharge static electricity. We suggest you attach the strap to the MPC2000's case. If a wrist strap or any other such accessory is not supplied, try discharging any static by touching an earthed metal object before handling the boards.
- Always handle the memory board by its edges - avoid touching the components on the board.
- To minimise static electricity, avoid carpeted areas and low humidity areas.
Technical Specifications
General
- Display : 248 × 60 dot graphic LCD
- Disk drive : 3.5 inch 2HD/2DD
Dimensions : 405(W) x 126(H) x 328(D) mm
Weight : 6.3 kg
·Power requirements : 100-120 / 220-240 VAC, 50 / 60Hz ,23W (13W without option) - Memory expansion slot : 2 / 72-pin SIMM (70ns)
Sound Generator
- Sampling rate : 44.1kHz (frequency response: 20Hz-20kHz)
- Sampling capacity : 2MB standard (21.9 seconds mono or 10.9 seconds stereo), expandable to 32MB.
·Data format :16-bit linear - Dynamic filtering : 12dB/Octave dynamic resonant lowpass filter per voice
Maximum sounds in memory : 128
Number of sound programs : 24
Sound assignments per program : 64
·Simultaneous voices 32
Sequencer
Maximum events : 100,000 notes (notes equivalent)
- Resolution : 96 parts per 1/4-note (ppq)
- Sequences : 99
Tracks per sequence : 64
- MIDI output channels : 32 (16 channels x 2 output ports)
·Song mode :20 songs,250 steps per song
- Drum pads : 16 (velocity and pressure sensitive)
- Drum pad banks : 4
- Sync modes :MIDI clock and SMPTE* (optional). SMPTE frame rates supported are 24, 25, 29.97 drop and 30.
Rear Panel Inputs/Outputs
- Record input (both L and R): 1/4-inch stereo phone x 2, balanced -40dBu, input imp. 39k ; Max. input level +10dBu
Digital sampling input : RCA-pin x 1, S/PDIF (optional)
Digital master output : RCA-pin x 1, S/PDIF (optional) - Stereo output : 1/4-inch phone x 2, unbalanced +11dBu, output imp. 100Ω; Max. out-put level +17dBu
- 8 individual outputs : 1/4-inch phone x 8, unbalanced +11dBu, output imp. 100 (optional); Max. output level +17dBu
· Headphone output : 1/4-inch stereo phone x 1, 200mW/32Ω
·MIDI inputs :5-pin DIN x 2
·MIDI outputs :5-pin DIN x 2 (independent)
·SCSI port :Apple25-pinD-typeSCSI connector x1
Options
EB16 : Multi-effect processor board
- FMX008M : 8Mb Flash ROM board
- IB-M208P : 8 parallel output and digital In/Out board
- IB-M20T : SMPTE board*
Standard accessory
·Power cable : 1
· Floppy disk : 4 / OS disk x 1, Sound library disk x 3
Operator's manual : 1
- Not supported by V1.0 version software. It requires the OS software version upgrade in future.
0dBu = 0.775Vrms
The MIDI Implementation Charts
This section contains the MIDI implementation charts for the MPC2000. There are two charts—one for the sequencer section, and one for the pad and sound generator section. These charts are useful to determine if any incompatibilities exist between the MPC2000 and your other MIDI instruments.
Model: MPC2000 (sound generator section)
MIDI Implementation Chart
Version: 1.0
| Function | **** | Transmitted | Recognized | Remarks | |
| Basic Channel | Default Changed | 16 1 - 16 | 16 1 - 16 | ||
| Mode | Default Messages Altered | 3 X X | 3 X X | ||
| Note Number | True Voice | 35 - 98 35 - 98 | 35 - 98 35 - 98 | ||
| Velocity | Note ON Note OFF | O O (Always = 64) | O X | ||
| After Touch | Key's Ch's | X X | X O | Used in Note Repeat feature | |
| Pitch Bender | X | X | |||
| Control Change | 7 | X | O Volume | Can be assigned to Note Variation Slider | |
| Prog Change | X | 0 - 127 | |||
| System Exclusive | X | X | |||
| System : Song Pos | X | X | |||
| Common : Song Sel | X | X | |||
| X | X | ||||
| System : Clock | X | X | |||
| Real Time : Commands | X | X | |||
| Aux Messages : Local ON/OFF | X | X | |||
| X | O | ||||
| X | X | ||||
| X | X | ||||
Mode 1: OMNI ON, POLY
Mode 2: OMNI ON, MONO
O:YES
Mode 3:OMNI OFF,POLY
Mode 4:OMNI OFF,MONO
X:NO
Model: MPC2000 (sequencer section)
MIDI Implementation Chart Version: 1.0
| Function | **** | Transmitted | Recognized | Remarks |
| Basic Channel | Default Changed | 1 - 16 | 1 - 16 | |
| 1 - 16 | 1 - 16 | |||
| Mode | Default Messages Altered | 3 X X | 1 X X | |
| Note Number | True Voice | 0 - 127 | 0 - 127 | |
| 0 - 127 | 0 - 127 | |||
| Velocity | Note ON Note OFF | O O | O O | |
| After Touch | Key's Ch's | O O | O O | |
| Pitch Bender | O | O | ||
| Control Change | 0 - 127 | O | O | See note below |
| Prog Change | True# | O 0 - 127 | O 0 - 127 | |
| System Exclusive | O | O | ||
| System : Song Pos : Song Sel Common : Tune | O X X | O X X | ||
| System : Clock Real Time | : Commands | O O | O O | |
| Aux Messages : Local ON/OFF : All Notes Off : Active Sense : Reset | X O X X X X | X X X X | ||
| Note : If the Convert Sustain Pedal To Duration field (accessed by pressing the MIDI key and selecting option 2) is set to ON, then incoming controller 64 messages (sustain pedal) will not be recorded into sequences. Instead, any notes that are currently pressed when a Sustain On message is received are internally held on, even after they are released, until a Sustain Off message is received. The result is that the individual durations of notes are length-ened. This is explained further in the “MIDI Receive Channel, Local Mode, Soft Thru, Note Variation Controller Assign and Sustain Pedal Processing” section of the manual, earlier in this chapter. | ||||
Mode 1: OMNI ON, POLY
Mode 2:OMNI ON, MONO
O:YES
Mode 3: OMNI OFF, POLY
Mode 4: OMNI OFF, MONO
X:NO
- WARNING!!
- WARNING
- PROTECTING YOURSELF AND THE MPC2000
- THIS APPARATUS MUST BE EARTHED
- IMPORTANT
- VENTILATION
- FCC WARNING
- COPYRIGHT NOTICE
- WARRANTY
- IMPORTANT NOTE: This warranty becomes void if the product or its software is electronically modified, altered or tampered with in any way.
- Table of Contents
- Chapter 1: Introduction 1
- Chapter 2: The Basics 11
- Chapter 3: Recording Sequences 25
- Chapter 4: Editing Sequences 61
- Chapter 5: Song Mode 77
- Chapter 6: Creating and Editing Programs 89
- Chapter 7: Mixer Functions 107
- Chapter 8: Creating and Editing Sounds 115
- Chapter 9: Disk Operation 135
- Chapter 10: MIDI/SYNC Mode,OTHER Mode 153
- Appendix 161
- Chapter 1
- Introduction
- Features
- General
- Sampler
- Sequencer
- Panel Descriptions
- Front Panel
- MAIN VOLUME knob
- REC GAIN knob
- LCD
- Function key
- Numeric Pad / Mode key
- MAIN SCREEN key
- OPEN WINDOW key
- DATA wheel
- DIGIT wheel
- AFTER key
- NOTE VARIATION slider
- TAP TEMPO / NOTE REPEAT key
- UNDO SEQ key
- ERASE key
- CURSOR key
- STEP < /> key
- GO TO key
- BAR << / >> key
- REC key
- OVER DUB key
- STOP key
- PLAY key
- PLAY START key
- PAD BANK key
- FULL LEVEL key
- 16 LEVELS key
- DRUMS PAD
- FLOPPY DISK DRIVE
- Rear Panel
- POWER
- AC in
- SCSI
- SMPTE IN/OUT (option)
- ASSIGNABLE MIX OUT (option)
- DIGITAL IN/OUT (option)
- MIDIN
- MIDI OUT
- RECORD IN
- STEREO OUT PHONES
- Handling Floppy Disks
- The Disk Drive
- Taking care of your Disks
- Chapter 2
- The Basics
- Hooking Up Your System
- The Terms Used in MPC2000
- Sequence
- One sequence as a whole piece.
- A multiple sequence piece (setting short sequences with the Song function).
- Track
- Song
- Sound
- Drum Pads
- Note Number
- Program
- Operating the Front Panel and Screen
- The Cursor, Cursor Keys, Data Fields
- The Numeric Keypad and DATA Wheel
- The Function Keys
- Basic Functions
- Loading the Operating System
- Loading and Playing Programs
- Playing the Drum Pads, the PAD BANK, & FULL LEVEL Keys
- Selecting Programs
- The NOTE VARIATION Slider, ASSIGN and AFTER keys
- The ASSIGN Key
- Low range: and High range:
- The AFTER key
- The 16 LEVELS key
- Note:
- Faram
- - Type:
- Chapter 3
- Recording Sequences
- How Sequences are Organized
- Bar.Beat Tick
- Bar Beat Tick
- Examples of Sequence Recordings
- Example 1: Recording a Drum Pad Performance
- Example 2: Recording a Loop
- Example 3: Multi-track Recording
- The MAIN SCREEN
- Selecting a Sequence
- Next sequence function
- Renaming a Sequence
- Deleting a Sequence
- Copying a Sequence
- Setting the Tempo
- Tempo Change Window
- Entering and Modifying a Tempo Change
- Selecting a Tempo Source
- ·(SEQ)
- ·(MAS)
- Setting the Time Correct (Quantization)
- Setting the Beat
- Setting the Number of Bars
- Setting the Loop
- Setting the Count
- Selecting a Track
- Renaming a Track
- Deleting a Track
- Copying a Track
- Turning the Track ON or OFF
- Setting the Track Type
- Setting the Track's MIDI Channel
- Settings for MIDI Reception
- Receive ch:
- Sustain Pedal to Duration:
- MIDI Filter Function
- Sending the All Note Off
- Multiple Track Real-time Recording
- Editing the Velocity
- Setting the Program Change Transfer
- Locating with the DATA Wheel
- Units Used to Locate a Point
- The Main Screen Function Keys
- STEP
- EDIT
- 5010
- Tr- Tr+
- The Play/Record Keys and the Locate Keys
- The AUTO PUNCH Function
- Chapter 4
- Editing Sequences
- Overview
- Erasing Data with the ERASE Key
- Erasing a Note in Real Time
- Using the ERASE Page to Erase Data
- Step Editing Screen
- The Event Display
- Drum track
- MIDI Track
- Bend
- Control Change
- Program Change
- Channel Pressure
- Polyphonic Pressure
- Operating the List Display
- Selecting and Editing Multiple Events
- Copying an Event
- Deleting an Event
- Pasting an Event
- Inserting an Event
- Step Recording
- The Editing Screen
- Copying by Bar
- Rearranging the tracks
- Transposing a Track
- Sequence Preferences
- Chapter 5
- Song Mode
- Selecting a Song
- Renaming a Song
- Deleting a Song
- Copying a Song
- - TEMPO:
- #
- Creating a Song
- Selecting a Step and Changing a Sequence
- Repeating a Sequence
- Deleting a Step
- Inserting a Step
- Setting the Locate Point
- Converting a Song to a Sequence
- Chapter 6
- Creating and Editing Programs
- What Are Programs?
- Creating a program
- Selecting a Program and Assigning a Sound
- Renaming Programs
- Deleting a Program
- Newly Creating Programs
- Copying Programs
- Assigning Notes to DRUMS PAD
- The Pad Assign Mode and Initialize
- Assigning Sounds to Notes
- The Program Sound Generation Mode
- SIMULT
- VEL SW
- DCY SW
- Editing Note Parameters
- Selecting Notes
- Copying the Note Parameter
- Setting the Envelope
- Setting the Filter
- Setting the Pitch
- Setting the Voice Overlap
- The MIDI Settings of the Sampler
- Chapter 7
- Mixer Functions
- Stereo Output Mixer
- Setting the Volume
- Setting the Pan
- Setting the Volume or Pan Together
- Setting the Para Out and Effect Send (Option)
- Assigning Para Out
- Setting the Send Level
- Setting the Para Out and Send Level Together
- Setting the Volume or Pan for Each Note
- Setting Up the Mixer
- Setting the Effects
- Chapter 8
- Creating and Editing Sounds
- Sampling a New Sound
- LEVEL METER
- - Assign to note:
- Editing a Sound
- Selecting a Sound
- Renaming or Displaying the Specification of the Sound
- Deleting a Sound
- Copying a Sound
- TRIM Mode
- ·5t.
- End:
- Uieo
- Deleting Unnecessary Samples
- Finely Adjusting the Start Point
- Finely Adjusting the End Point
- LOOP Mode
- Finely Adjusting the Loop Point
- ·To:
- Length:
- - Loop Inirth:
- znEDIT Mode
- ·St.
- ZONE->NEW SAMPLE
- INSERT Sound->ZONE START
- DELETE ZONE
- SILENCE ZONE
- REVERSE ZONE
- Finely Adjusting the Start Point of a Zone
- Setting the Sound Parameters
- Beat Loop Function
- - Beat:
- Sample tempo:
- New tempo:
- Chapter 9
- Disk Operation
- The Device: Field
- The Device Icons
- Floppy
- SCSI
- Before Proceeding to Use a Floppy Disk
- Formatting a Disk
- Formatting a Floppy Disk
- Formatting a SCSI Drive
- Saving the Data
- MIDI FILE TYPE 0
- MIDI FILE TYPE 1
- 4-3. Save All Program & Sounds
- 4-4. Save a Program & Sounds
- 4-5. Save a Sound
- Saving Across Multiple Floppy Disks
- Copying a System Disk
- Starting the MPC2000 from a SCSI Drive
- The Auto-load Functions of the .APS and .ALL Files
- Loading Files
- 4-1. Selecting .SND (sound) Files or .WAV (wave) Files
- 4-2. Loading .SEQ (sequence) or .MID (standard MIDI) Files
- 4-3. Loading .PGM (program) Files
- 4-4. .ALL Files
- 4-5. .APS (all programs) File
- Deleting a File from the Disk
- Chapter 10
- MIDI/SYNC Mode
- OTHER Mode
- Synchronizing the MPC2000 with Other Sequencers
- MIDI CLOCK
- Shift early (me):
- MIDI TIME CODE (MTC)
- OFF
- Synchronizing Another Sequencer or MTR to the MPC2000
- Send MNC:
- OTHERS Screen
- INIT Screen
- Screen
- Appendix
- Notes on Using SCSI Drives Connecting an External SCSI Drive
- SCSI Cables
- SCSI ID
- Termination
- Cable Length
- Installing the Options-To Service Technicians
- Important Note:
- Location of MPC2000 Option Board
- Installing Memory Expansion
- Technical Specifications
- Sound Generator
- Rear Panel Inputs/Outputs
- Options
- Standard accessory
- The MIDI Implementation Charts
Brand : AKAI
Model : MPC2000
Category : Sampler