RAMADA VERTICAL - Electric heater DELTACALOR - Free user manual and instructions
Find the device manual for free RAMADA VERTICAL DELTACALOR in PDF.


| Product type | Vertical electric radiator |
| Brand | DeltaCalor |
| Model | RAMADA VERTICAL |
| Dimensions (H x W x D) | 150 cm x 60 cm x 10 cm |
| Weight | 18 kg |
| Electrical supply | 230 V, 50 Hz |
| Maximum power | 2000 W |
| Heating type | Natural convection |
| Built-in thermostat | Yes, adjustable |
| Weekly programming | Yes |
| Anti-frost function | Yes |
| Protection rating | IP24 |
| Energy class | Class C (electric heating) |
| Material | Steel and aluminum |
| Color | White |
| Installation | Wall-mounted, fixings provided |
| Maintenance and cleaning | Dust with a soft, dry cloth. Do not use abrasive products. |
| Safety | Safety cut-off in case of overheating |
| Spare parts and repairability | Available on request from customer service |
Frequently Asked Questions - RAMADA VERTICAL DELTACALOR
User questions about RAMADA VERTICAL DELTACALOR
0 question about this device. Answer the ones you know or ask your own.
Ask a new question about this device
Download the instructions for your Electric heater in PDF format for free! Find your manual RAMADA VERTICAL - DELTACALOR and take your electronic device back in hand. On this page are published all the documents necessary for the use of your device. RAMADA VERTICAL by DELTACALOR.
USER MANUAL RAMADA VERTICAL DELTACALOR

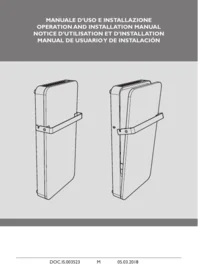
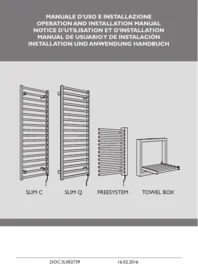
VERTICAL ELECTRIC RADIATOR

INSTALLATION MANUAL
These instructions should be reading carefully for your safety and for ensuring the product operates properly.
Therefore, it is strongly recommend reading this instruction before starting on installation and keep them as future reference.
Contact a qualified personnel for assistance if you have any doubts about the product installation
Deltacalor cares about the planet.
The complete version of the instruction, use and maintenance manual is always available on the website:
www.deltacalor.com/en/download/
or, if prefer, you can scan the QR code here at the side with your mobile phone


RADIATORE ELETTRICO
VERTICALE


RADIADOR ELECTRICO VERTICAL

FRANÇAIS......[4]
ENGLISH....[9]
ITALIANO......[14]
ESPAÑOL ....[19]

CONSIGNES DE SÉCURITÉ

UTILISATION CORRECTE



SAFETY INSTRUCTIONS

- Should damages be caused from breach of these regulations, the manufacturer's guarantee shall be invalidated.
- Do not use the appliance outdoors.
- Your appliance is intended for domestic use. It may not be used for other purposes.
- If the appliance has been dropped, has been damaged or does not function correctly, do not use it and ensure that the appliance power supply has been disconnected (fuse or switch).
- Do not dismantle the appliance. A poorly-repaired appliance can cause risks for the user. Contact your retailer for any problem.
- If the power lead has been damaged, it must be replaced by the manufacturer, after-sales service or another professional to avoid all danger.
- Warning: the power lead must not touch the heating body.
- Warning: to avoid a risk of overheating, do not cover the unit.
- If you do, the rise in temperature will activate the built-in protection device.
- The heater must be installed in such a way that the switches and other control devices can not be affected by a person in the bathtub or under the shower (ref.: NF C15-100 standard).
- The heater must not be installed below a plug.
- The power supply circuit of this device must have a device omnipolar cutoff (ref: NF C15-100 standard).

- Warning: In order to avoid overheating, do not cover the device. If the device is covered, the rise in erature will activate the built-in protection device.
Do not cover.

WARNINGS FOR PEOPLE WITH DISABILITIES AND CHILDREN

- This equipment may not be used by people with reduced physical, sensory, or mental capacity, those without any knowledge of the equipment, or children over 8 years of age, unless supervised and instructed on safe use of the equipment, and aware of all the risks.
• Children must not play with the equipment. - Cleaning and maintenance tasks must not be done by children without supervision.
- We recommend keeping the device out of reach of children below 3 years of age, unless under constant adult supervision.
- Children between 3 and 8 may only switch the device on and off, providing it is installed regularly in the stipulated position, that the children are under constant adult supervision or have been instructed in the safe use of the equipment, and that they fully understand potential dangers.
- Children between 3 and 8 must not set up, regulate or clean the device, nor undertake maintenance on it.
ATTENTION
Some parts of this product may overheat and cause burns. Be especially careful in the presence of children and vulnerable adults.
INSTALLING THE DEVICE
Before connecting the heater, turn off the electricity at the general circuit breaker.
- The heater is a class II appliance, so it can be installed in all rooms of the house including in volumes protection 2 and 3 of a bathroom (IP24). You should check the protection grade (IPXX) of your own appliance.
- The heater must be installed 15 cm minimum of any obstacle (shelves, curtains, furniture etc.).

POWER SUPPLY AND ELECTRICAL CONNECTIONS
- The power supply to the heater must be protected, according to the standards in force, by a 30 mA differential switch and a protection device against overcurrents adapted to the characteristics of the connecting line.
- Before the first use, check that the voltage used corresponds to to the one indicated on the device.
- This heater is a Class II appliance (double electrical insulation).
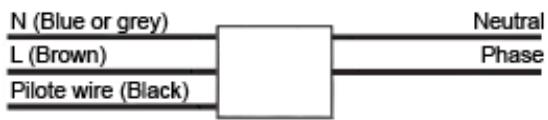
• The connection to earth is prohibited. - The three wires must be connected in one electrical connection box complies with the standards in force.
- For security issues, you must isolate the pilot wire if it is not used.
- Single phase power supply 230 V \~ ± 10% 50 Hz.
• Blue / gray thread: Neutral - Brown Wire: Phase
- Black wire: Pilot wire
DIAGRAMM FOR THE CORRECT USE OF THE PILOT WIRE
Configuration in which the pilot wire is used.


Configuration in which the pilot wire is not used.
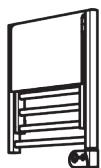
CORRECT USE

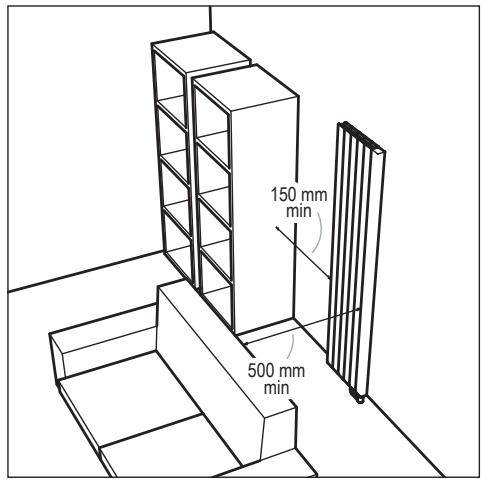

Do not cover.
IMAGES ARE PROVIDED FOR ILLUSTRATIVE PURPOSES ONLY. PRODUCTS MAY BE DIFFERENT.


UTILIZZO CORRETTO


REGLAS DE SEGURIDAD

USO CORRECTO


MODE CONFORT ET NUIT 4
MODE CONFORT 5
MODE NUIT 5
MODE ANTIGEL 5
MODE BOOST 5
MODE FIL PILOTE 5
MODE AUTOMATIQUE 6
FONCTIONS SPÉCIALES 7
FONCTION DE VERROUILLAGE DU CLAVIER 7
FONCTION DE DÉTECTION DE FENÊTRE OUVERTE 7
CARACTÉRISTIQUES TECHNIQUES 8
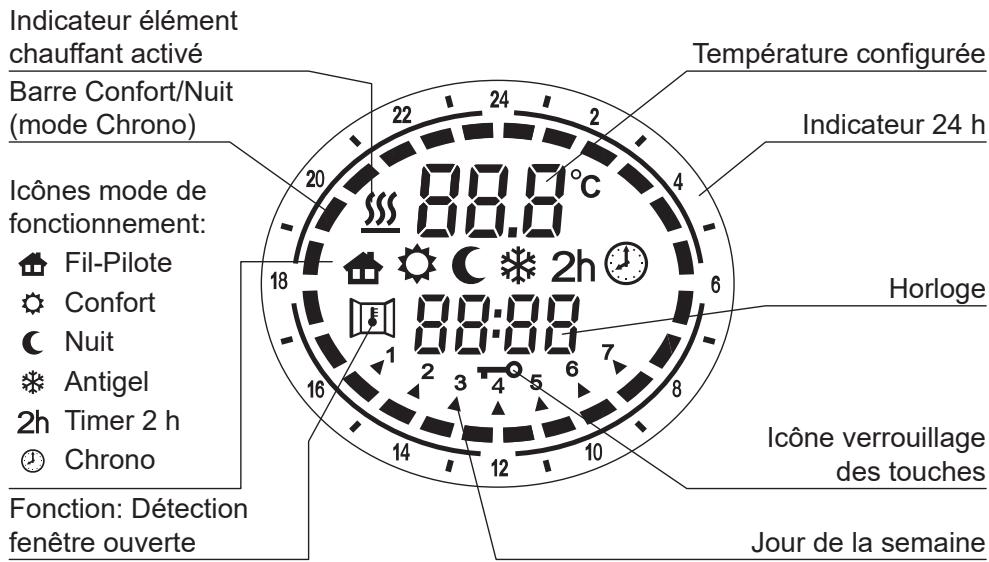
ICÔNES ET BOUTONS DE L'ÉCRAN LCD

MODES CONFORT ET NUIT
LCD DISPLAY ICONS AND BUTTONS


ICONS AND MODES OF THE THERMOSTAT
| 2h | |||||
| Fil-Pilote | Confort | Night | Anti-freeze | Timer 2 h | Automatic |
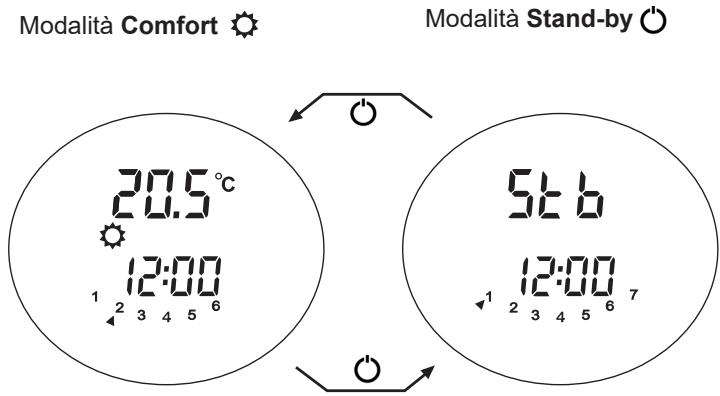
ON/STAND-BY
Press the ⏻ ON/STAND-BY key to turn on the device or to enter the Stand-by mode. When activated, the bottom part of the display shows the current time, while the configured operative mode and the temperature are shown in the upper part. When in Stand-by mode current time, day of the week and the message: Stb are displayed.
NOTE - When the device goes into Stand-by mode it beeps twice for 0.5s.
When the device is activated it beeps once for 1s.
COMFORT AND NIGHT MODES
Two different levels of temperature can be set:
- COMFORT TEMPERATURE: it is the temperature used for Auto ⏻, Fil-Pilote and Comfort ⚙ modes.
- NIGHT TEMPERATURE: it is the temperature used for the Night and Auto modes. The range of configurable temperature is 7 ÷ 32° C .
IMPORTANT - The temperature of Night mode C must be below to the Comfort ⚙mode temperature. For this reason the Night mode temperature can be set to a value between 7°C and the (configured Comfort mode temperature - 0.5°C). The temperature of Comfort mode can be configured in the whole (Night temperature + 0.5°C) ÷ 32°C range.
COMFORT MODE
The Comfort stably maintains the room temperature to a selected value. To set this operativemode:
- Press the ⬇ PROG button until the display shows the ⚙ Comfort icon.
- Set the desired temperature through + and - buttons and wait until the displayed temperature stops blinking.
NIGHT MODE C
The Night mode sets a value of temperature below the Comfort temperature value.
It is suggested to set this operating mode during the night or when the room is not occupied for 2 or more hours.
- Press the ⬇ PROG button until the display shows the C Night icon.
- Set the desired temperature through + and - buttons and wait until the displayed temperature stops blinking.
ANTIFREEZE MODE ✱
In Antifreeze mode the temperature is fixed to 7° C. The device activates the heating element when the room temperature falls below 7° C. It is suggested to set this operating mode when the room is not occupied for several days.
- Press the ⏻ PROG button until the display shows the ✧ Antifreeze icon.
TIMER-2H MODE 2h
The Timer 2h mode can be used to quickly warm up the room or to speed up towel drying.
- Press the ⬇ PROG button until the display shows the 2h icon.
The device is activated at the maximum power for 2 hours, up to a maximum room temperature of 32° C. The Timer-2h mode is automatically deactivated after a period of 2 hours and the device returns to the operative mode previously set. The user can switch to another operative mode at any time by simply pressing the ✉ PROG button.
FIL-PILOTE MODE
(Only for product versions equipped with "Fil-Pilote")
In Fil-Pilote mode the device is managed by a central control system that sets the operating mode for all the connected devices. The device operates with the most advanced Fil-Pilote system with six commands, which allows the following functions:
| Standby | Power off the heating element, the device remains active. |
| Comfort | Maintains the Comfort temperature set by the user. |
| Eco | Maintains the room temperature 3,5°C below the Comfort temperature. |
| Anti-freeze | Maintains the room temperature at 7°C. |
| Eco-1 | Maintains the room temperature 1°C below the Comfort temperature. |
| Eco-2 | Maintains the room temperature 2°C below the Comfort temperature. |
The user can set the desired temperature on the device:
- Press the ◇ PROG button until the Fil-Pilote icon is displayed.
- Set the desired temperature through the + and - buttons and wait until the displayed temperature stops blinking.
AUTOMATIC MODE
This operating mode allows the user to configure different temperature values for each hour of each day of the week. The Comfort / Night temperatures and the related time intervals can be thus programmed.
-To activate this function, press the ⏻ PROG button until the ⏻ Chrono icon is displayed.
Programming the Automatic mode
a) Setting the current day of the week and time
- Enter into Stand-by mode and press the — button at least 3 seconds.
- On the upper part of the display the message Set will be displayed.
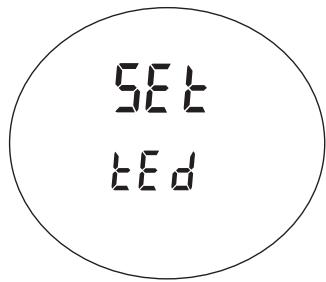
- To set the day and time press the + button until the bottom part of the display the message TED is displayed (see picture on the right).
- Press the ⬇ PROG button to enter the editing mode.
- The blinking arrow indicates the currently selected day: Pressing the + and - buttons the desired day can then be set.
- Press again the ⬇ PROG button to confirm the selected day. After that, the procedure for entering the time starts and the display shows the currently selected time.
- Hours: Use the + and - buttons to set the correct hour and confirm the selected value pressing the button.
- Minutes: Same procedure as for the hours. Confirm the selected value by pressing the button.
- At the end of the procedure, the thermostat returns into Stand-by mode.
b) Setting the program for the Automatic mode
- Enter into Stand-by mode and press the — button at least 3 seconds.
- On the upper part of the display the message Set will be displayed
- To set the day and time press the + button until the bottom part of the display the message Prog is displayed (see picture on the right).
- Press the ⬇ PROG button to enter the editing mode.
- Now a time sequence can be defined for each day of the week. The procedure starts with day 1, and the

desired sequence can be configured with the + and - buttons: for each hour of the day, it is then possible to assign either the Comfort temperature (full bar indication displayed) by pressing the button or the Night temperature (empty bar) by pressing the button (see picture below).
- Press ⬇ PROG to confirm the entered configuration for day 1, and repeat the same procedure for the remaining 6 days of the week.

SPECIAL FUNCTIONS
KEY LOCK
It is possible to lock the buttons of the device to avoid inadvertent modifications of the settings.
- Press together the ⏻ PROG buttons for 3 seconds to lock all the buttons except the ⏻ ON/STAND-BY button.
The ➞ Key lock icon is activated on the display.
- To unlock the buttons press again together the
PROG buttons for 3 seconds. The ➕ Key lock icon disappears on the display.

OPEN WINDOW DETECTION FUNCTION
The Open Window Detection function enables detecting of an open window by sensing a sudden decrease of the temperature in the room. In such a case, the device deactivates the heating element for a maximum of 30 minutes or until an increase of the room temperature reveals that the window has been closed.
To activate this function:
- Enter into Stand-by mode.
- Press the button for 3 seconds.
- Press the button to activate / deactivate the function
- Press the button to commit and return into Stand-by mode.
When this function is enabled, the ☑ Open Window icon on the display is lit.
When the device detects that the window is potentially opened, the 📄 Open Window icon starts blinking.
When the function is disabled the Open Window icon is not shown on the display.

NOTE - The device could fail in detecting an opened window e.g. if the thermostat is located on an isolated area of the room and far from air currents or if the thermostat is placed close to an external heating source, or if the temperature variation in the room is too slow.
NOTE - When the symbol }} is on, the heating element is active.
TECHNICAL SPECIFICATIONS
| IP Level | IP44 |
| Room temperature setting | Digital through buttons |
| Display | Temperature, date/time, mode/functions, indication of heating activity, key lock |
| Function | Comfort, Night, Antifreeze, Stand-by, Fil-Pilote, Timer-2h, Chrono-thermostat, Open Window Detection |
| Selectable temperature range | 7°C ÷ 32°C |
| Operational temperature | -10°C ÷ +40°C |
| Maximal power | 2000 W |
| Supply voltage | 230 VAC 50 Hz - 60 Hz |
| Size (H×L×l) | 113×73×42 mm |
| Connection to the heating element | Faston 6.3×0.8mm Phase, neutral, tEarth (Class I) |
| Temperature sensor | 10 kΩ at 25°C, type NTC |
| Warranty | 2 years |
| Standard | EN 62233:2008EN 55014-1:2006 + A1:2009 + A2:2011EN 55014-2:1997 + A1:2001 + IS1:2007 + A2:2008EN 61000-3-2:2014EN 61000-3-3:201 |
| Approval mark | CE |
| Environmental directive | WEEE, RoHS |
INDICE
ICONE SCHERMO LCD E PULSANTI 17
ICONE E MODALITÀ DEL TERMOSTATO 18
ON/STAND-BY 18
MODALITÀ COMFORT E NOTTE 18
MODALITÀ COMFORT 19
MODALITÀ NOTTE 19
MODALITÀ ANTIGELO 19
MODALITÀ BOOST 19
MODALITÀ FILO PILOTA 19
MODALITÀ AUTOMATICA 20
ICONE SCHERMO LCD E PULSANTI



- VERTICAL ELECTRIC RADIATOR
- INSTALLATION MANUAL
- RADIATORE ELETTRICO
- VERTICALE
- RADIADOR ELECTRICO VERTICAL
- CONSIGNES DE SÉCURITÉ
- UTILISATION CORRECTE
- SAFETY INSTRUCTIONS
- WARNINGS FOR PEOPLE WITH DISABILITIES AND CHILDREN
- ATTENTION
- INSTALLING THE DEVICE
- BEFORE CONNECTING THE HEATER, TURN OFF THE ELECTRICITY AT THE GENERAL CIRCUIT BREAKER
- POWER SUPPLY AND ELECTRICAL CONNECTIONS
- DIAGRAMM FOR THE CORRECT USE OF THE PILOT WIRE
- CORRECT USE
- UTILIZZO CORRETTO
- REGLAS DE SEGURIDAD
- USO CORRECTO
- FONCTIONS SPÉCIALES 7
- CARACTÉRISTIQUES TECHNIQUES 8
- ICÔNES ET BOUTONS DE L'ÉCRAN LCD
- MODES CONFORT ET NUIT
- LCD DISPLAY ICONS AND BUTTONS
- ICONS AND MODES OF THE THERMOSTAT
- ON/STAND-BY
- COMFORT AND NIGHT MODES
- COMFORT MODE
- NIGHT MODE C
- ANTIFREEZE MODE ✱
- TIMER-2H MODE 2H
- FIL-PILOTE MODE
- AUTOMATIC MODE
- PROGRAMMING THE AUTOMATIC MODE
- SETTING THE CURRENT DAY OF THE WEEK AND TIME
- SETTING THE PROGRAM FOR THE AUTOMATIC MODE
- SPECIAL FUNCTIONS
- KEY LOCK
- OPEN WINDOW DETECTION FUNCTION
- INDICE
- ICONE SCHERMO LCD E PULSANTI 17
- ICONE E MODALITÀ DEL TERMOSTATO 18
- ICONE SCHERMO LCD E PULSANTI
Brand : DELTACALOR
Model : RAMADA VERTICAL
Category : Electric heater